Efficient Event Management
Think of the Event platform as your personal meeting conductor—organizing every note, keeping everyone in sync, and making sure no one misses the beat. Whether it’s a quick online catch-up or a full-blown offline gathering, this is where all your events come together.
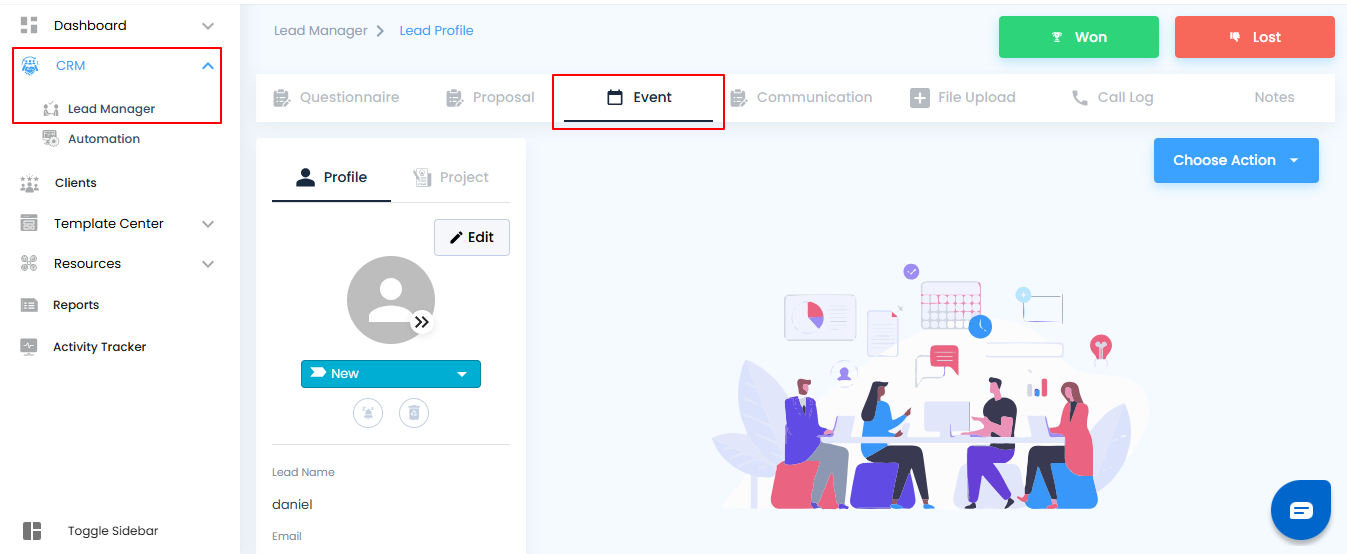
How to Get There
- Open the Side Menu – Your command panel.
- Head to Lead Manager – Pick the lead you’re working on.
- Click Event – You’re inside the Event.
Before scheduling an online meeting, Google Meet must be configured.
Step 1: Configure Google Meet:
If Google Meet is not yet configured, click Configure to set it up. This is a one-time setup and only takes a few seconds.
Step 2: Choose Your Action
Once Google Meet is configured, click Choose Action and decide your next step:
Send Architect Availability Link – Share available time slots with clients.
Once Google Meet is configured, click "Choose Action" and select whether to send the architect availability link or schedule the online meeting
Pro Tip: Configure once, and you’ll never have to worry about meeting setup again—your virtual meeting room will always be ready.
where I can access Scheduling Online Meetings:
Scheduling an online meeting is simple and quick, ensuring everyone stays aligned and connected.
How to Access
- Go to Choose Action.
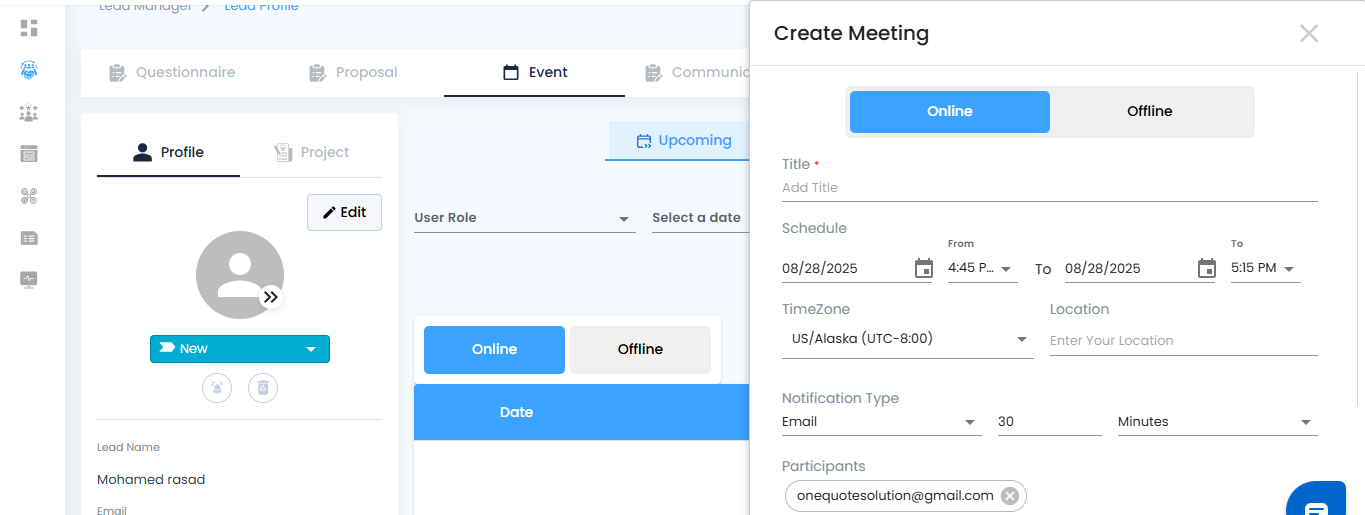
- Select Create Meeting.
- Choose Online.
What to Provide
When creating the meeting, fill in the key details:
- Title – Name of the meeting.
- Meeting Link – Automatically generated and copyable.
- Schedule – Date and time of the meeting.
- Time Zone – Ensure correct timing across locations.
- Location – Virtual location (Google Meet link).
- Notification Settings – Reminders to keep participants on track.
- Participants – Add attendees for the meeting.
- Agenda – Outline discussion points for clarity.
Finalize
Click Create Meeting, and your online meeting is instantly scheduled.
Pro Tip: Always include an agenda—this keeps meetings focused, efficient, and time-saving.
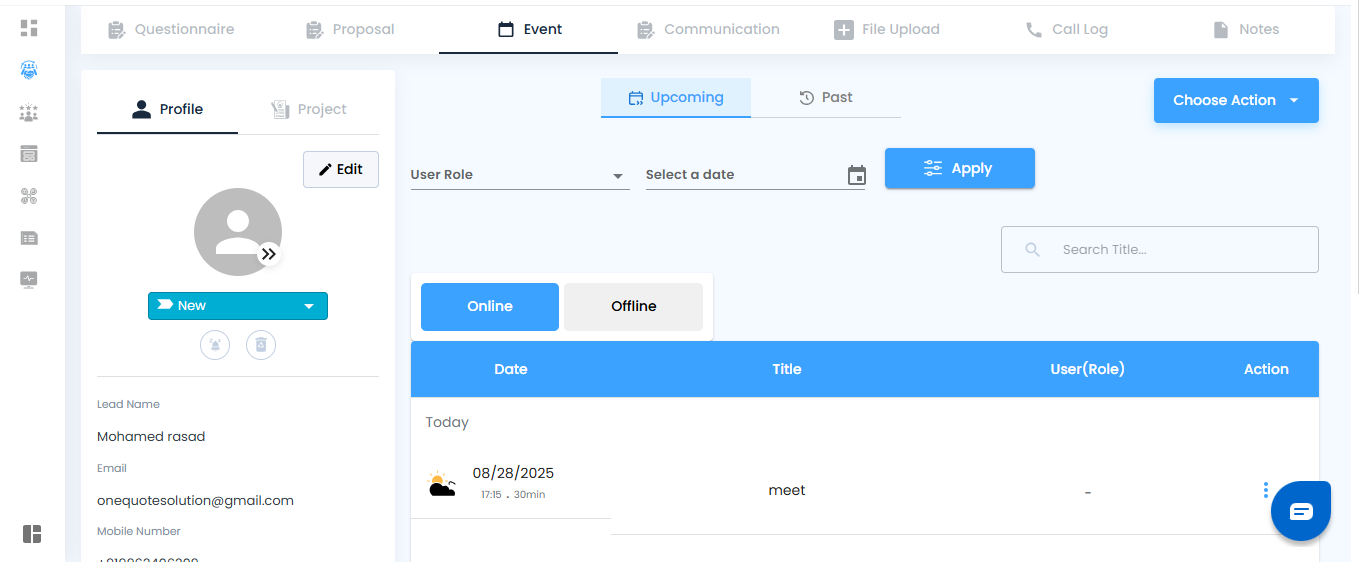
Managing Online Meetings:
Upcoming meetings are displayed by default.
Past meetings can be viewed by clicking here.
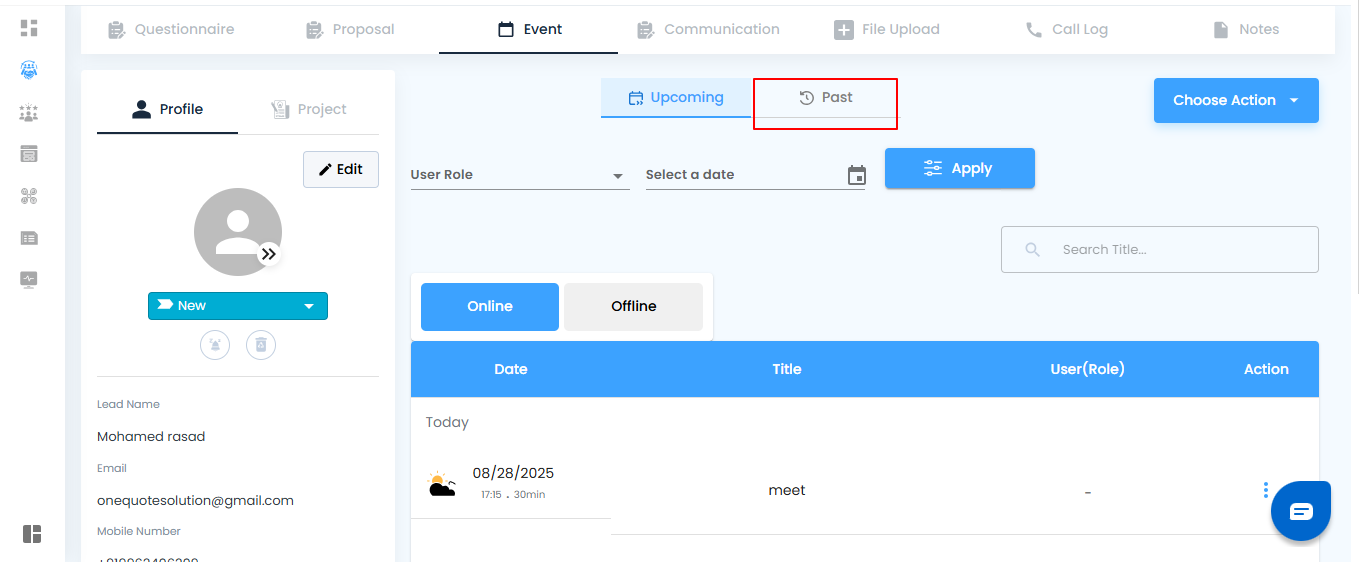
In the table, you can view the Date, Title, and User, and take actions:
Action can be performed:
Start: Begin the meeting.
Edit: Make changes and click "Save Meeting" to update the invitation.
View Invitation: Preview the meeting details.
Delete: Remove the scheduled meeting.
The lead will receive an email notification If they selected "Yes".
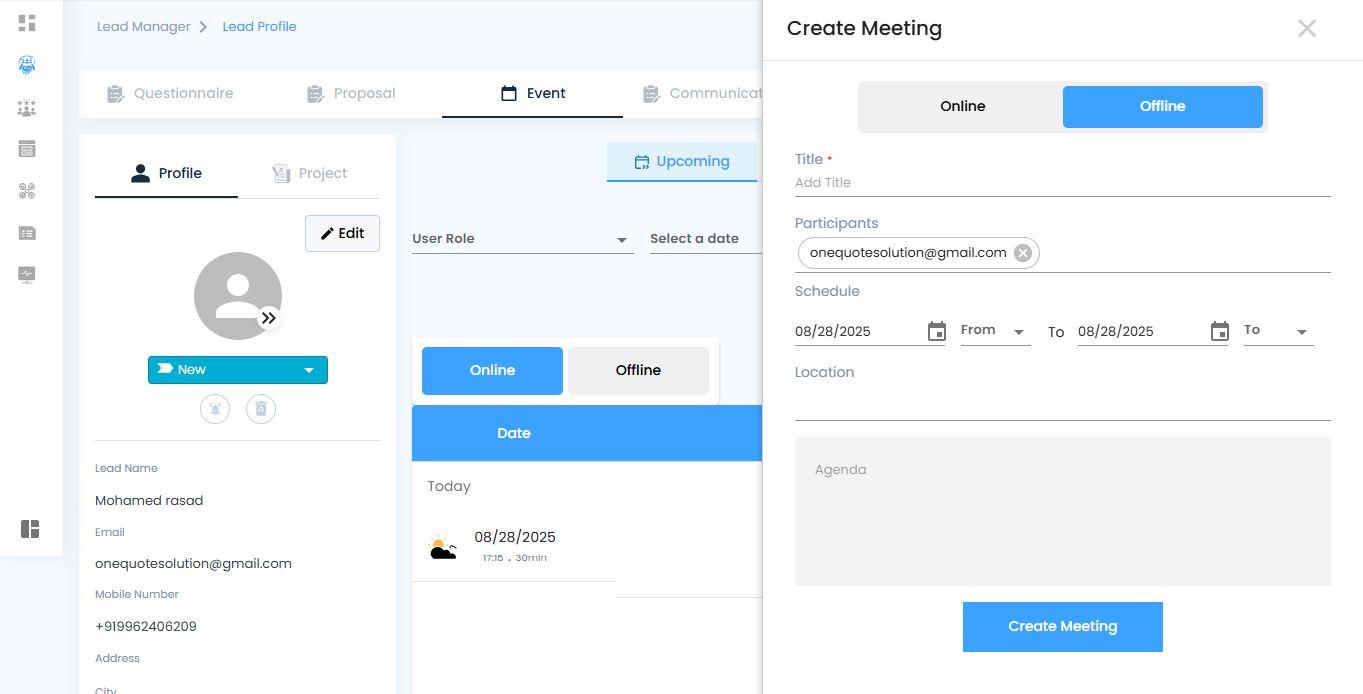
Where can I access Scheduling Offline Meetings?
Offline meetings are your team’s chance to collaborate face-to-face and keep projects moving smoothly. With just a few clicks, you can schedule and share meeting details so everyone stays aligned
How to Access It
Click Choose Action from the event options.
Select Schedule Offline Meeting.
Choose Offline as the meeting type.
What You’ll Need to Provide
- Title – Give your meeting a clear name.
- Schedule – Set the date and time.
- Location – Define where the meeting will take place.
- Participants – Add the people who should attend.
- Agenda – Outline the key topics for discussion.
Finalizing the Meeting
Once all details are filled in, click Create Meeting to confirm. Your offline meeting is now scheduled, and participants will have everything they need to prepare.
Pro tip: Always share the agenda in advance—it helps keep the meeting focused and efficient.
Managing Scheduled Offline Meetings:
Once your offline meetings are scheduled, managing them is simple and intuitive. You can keep track of what’s coming up, revisit past discussions, and take quick actions when needed.
Viewing Meetings:
Upcoming Meetings – Displayed by default,so you never miss what’s next.
Past Meetings – Access them easily by switching to the past view.

The meeting list is shown in a table where you can see:
- Date – When the meeting is scheduled.
- Title – The meeting’s name for quick recognition.
- User – The person associated with the meeting.
Action can be performed:
1. Edit – Modify the meeting invitation if details change.
2. Delete – Remove a meeting that’s no longer needed.
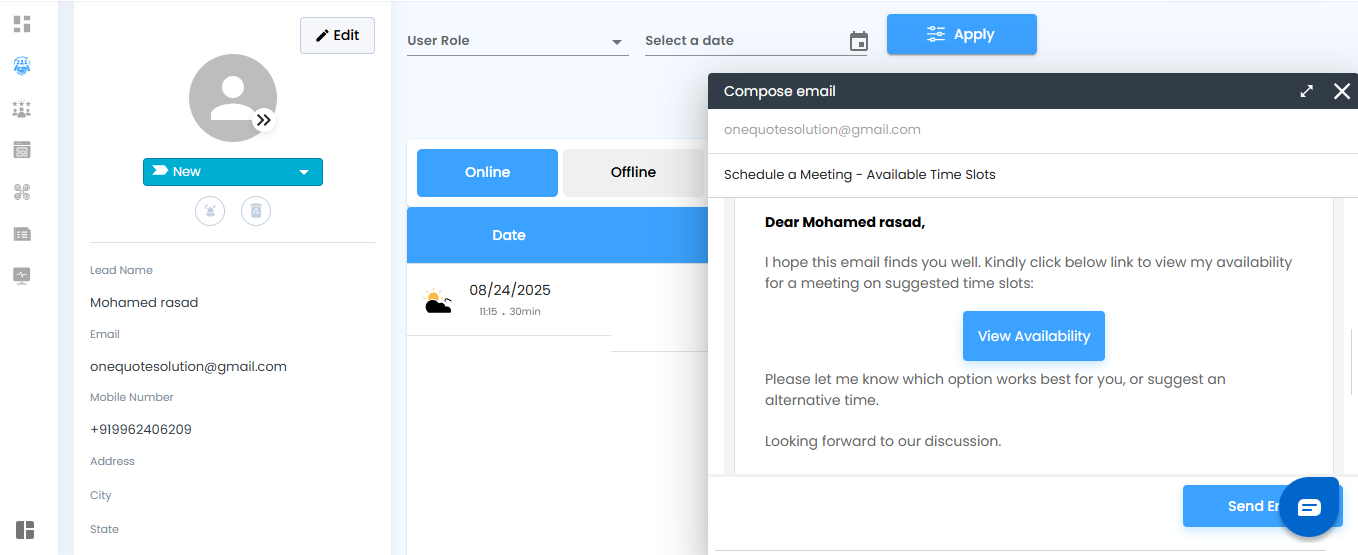
3. Send Availability – Compose and send an email to check participant availability.
Was this article helpful?
That’s Great!
Thank you for your feedback
Sorry! We couldn't be helpful
Thank you for your feedback
Feedback sent
We appreciate your effort and will try to fix the article