Upload and Manage Documents
The Document section allows you to upload, organize, view, and manage project documents in one place. You can store files under Organization or Client, create folders, search and filter documents, control customer access, add annotations and comments, create tasks, and manage different file versions.
Access Documents
From the side navigation menu, open the project.
Under Others, select Document.
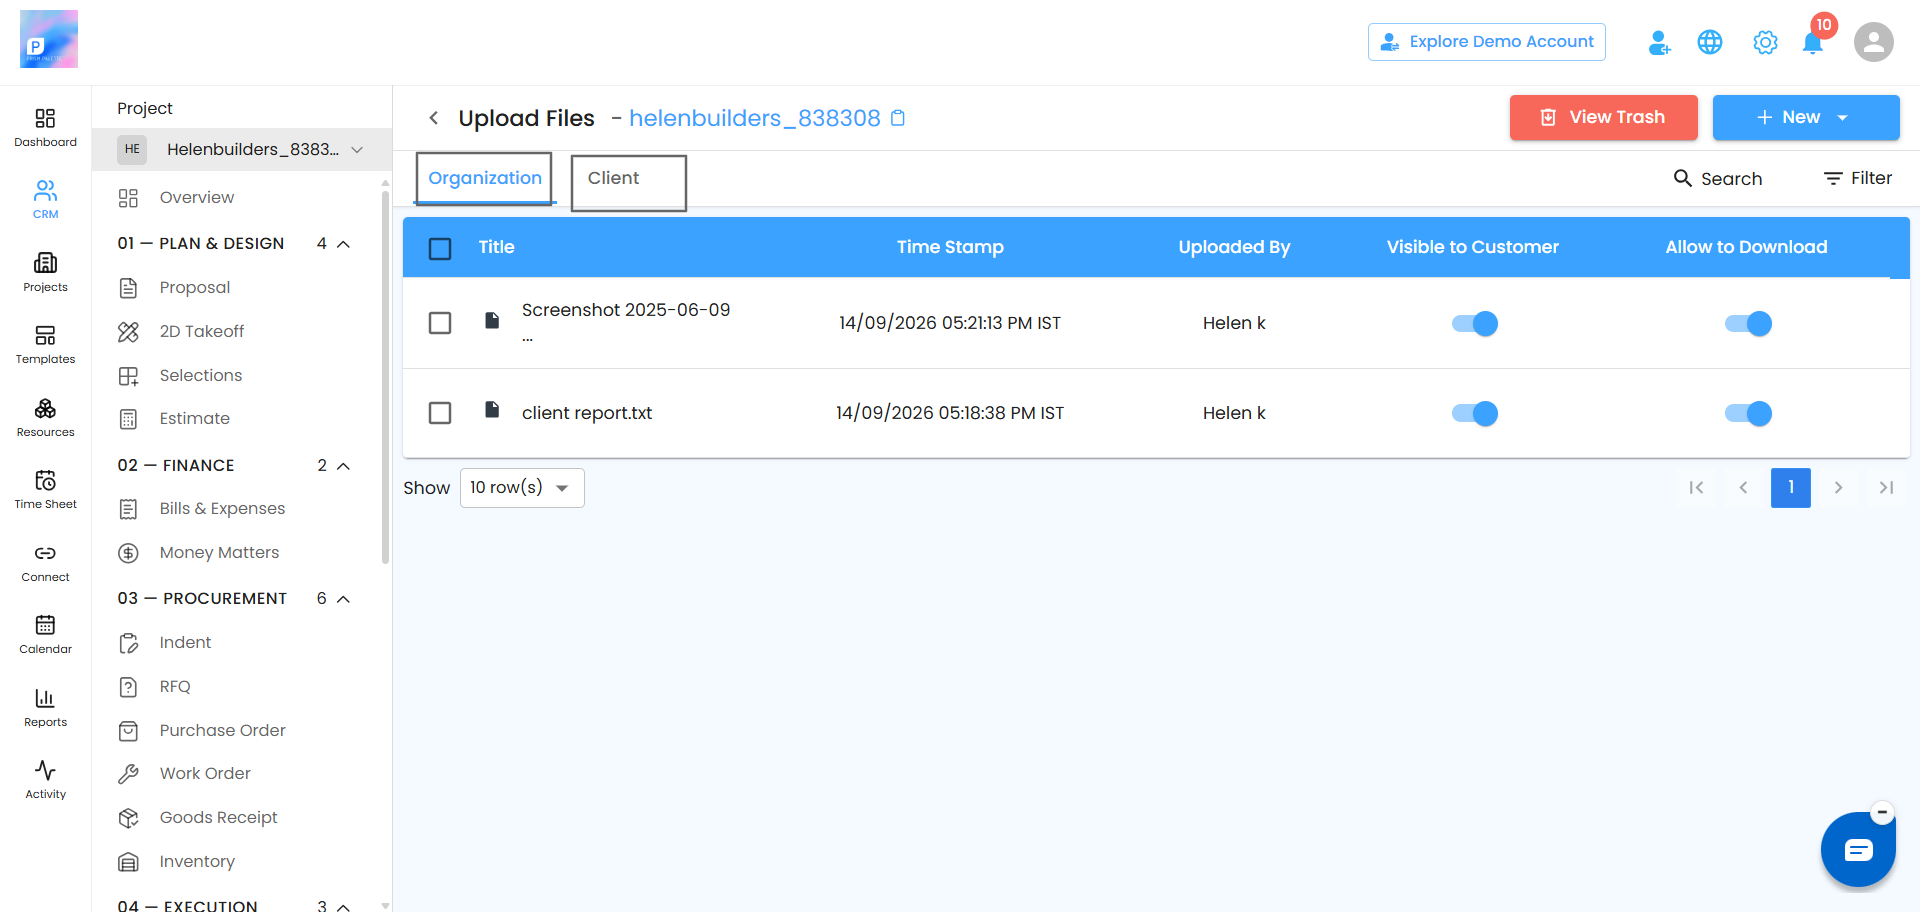
The Document page opens with two tabs:
Organization – Displays documents uploaded by your organization.
Client – Displays documents uploaded by customers through the customer portal.
Use the appropriate tab to view the documents you need.
Upload a Document
You can upload supported files such as PNG, JPEG, PDF, and other available file types.
Open Document.
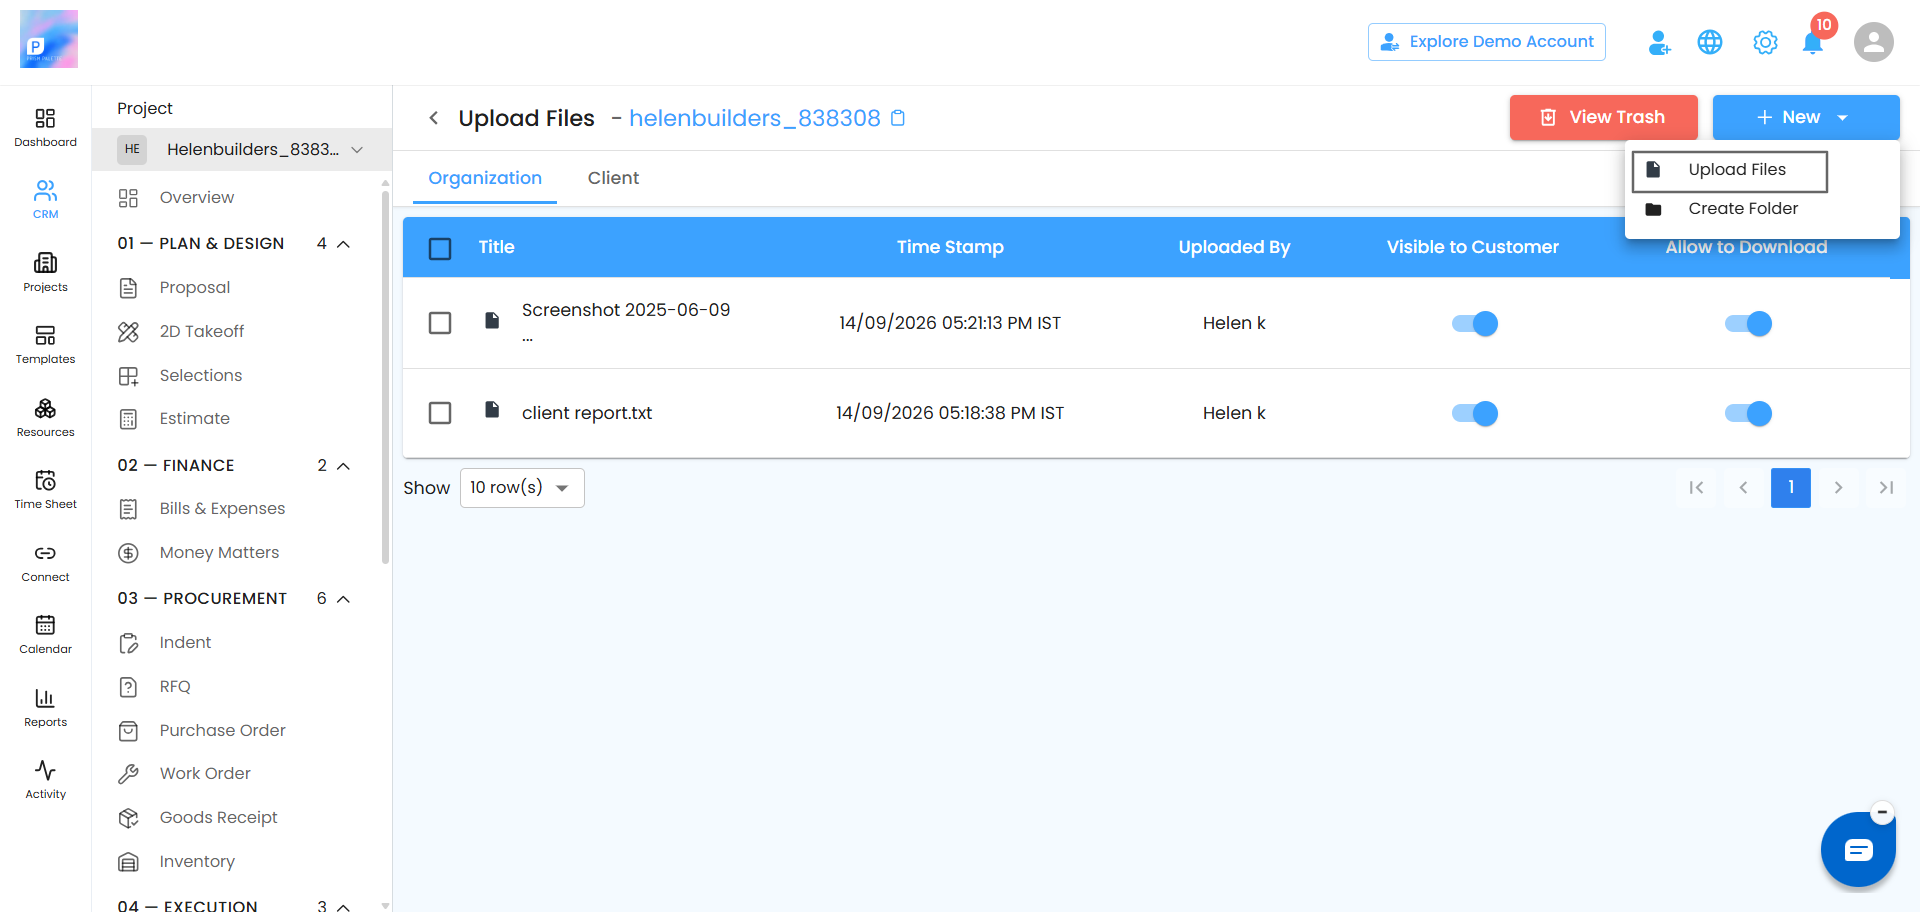
Click New.
Select Upload File.
The Upload File popup opens in the center of the screen.
Select the file you want to upload.
Click Upload.
Once the upload is complete, the document appears in the document list.
Create a Folder
Use folders to organize related documents.
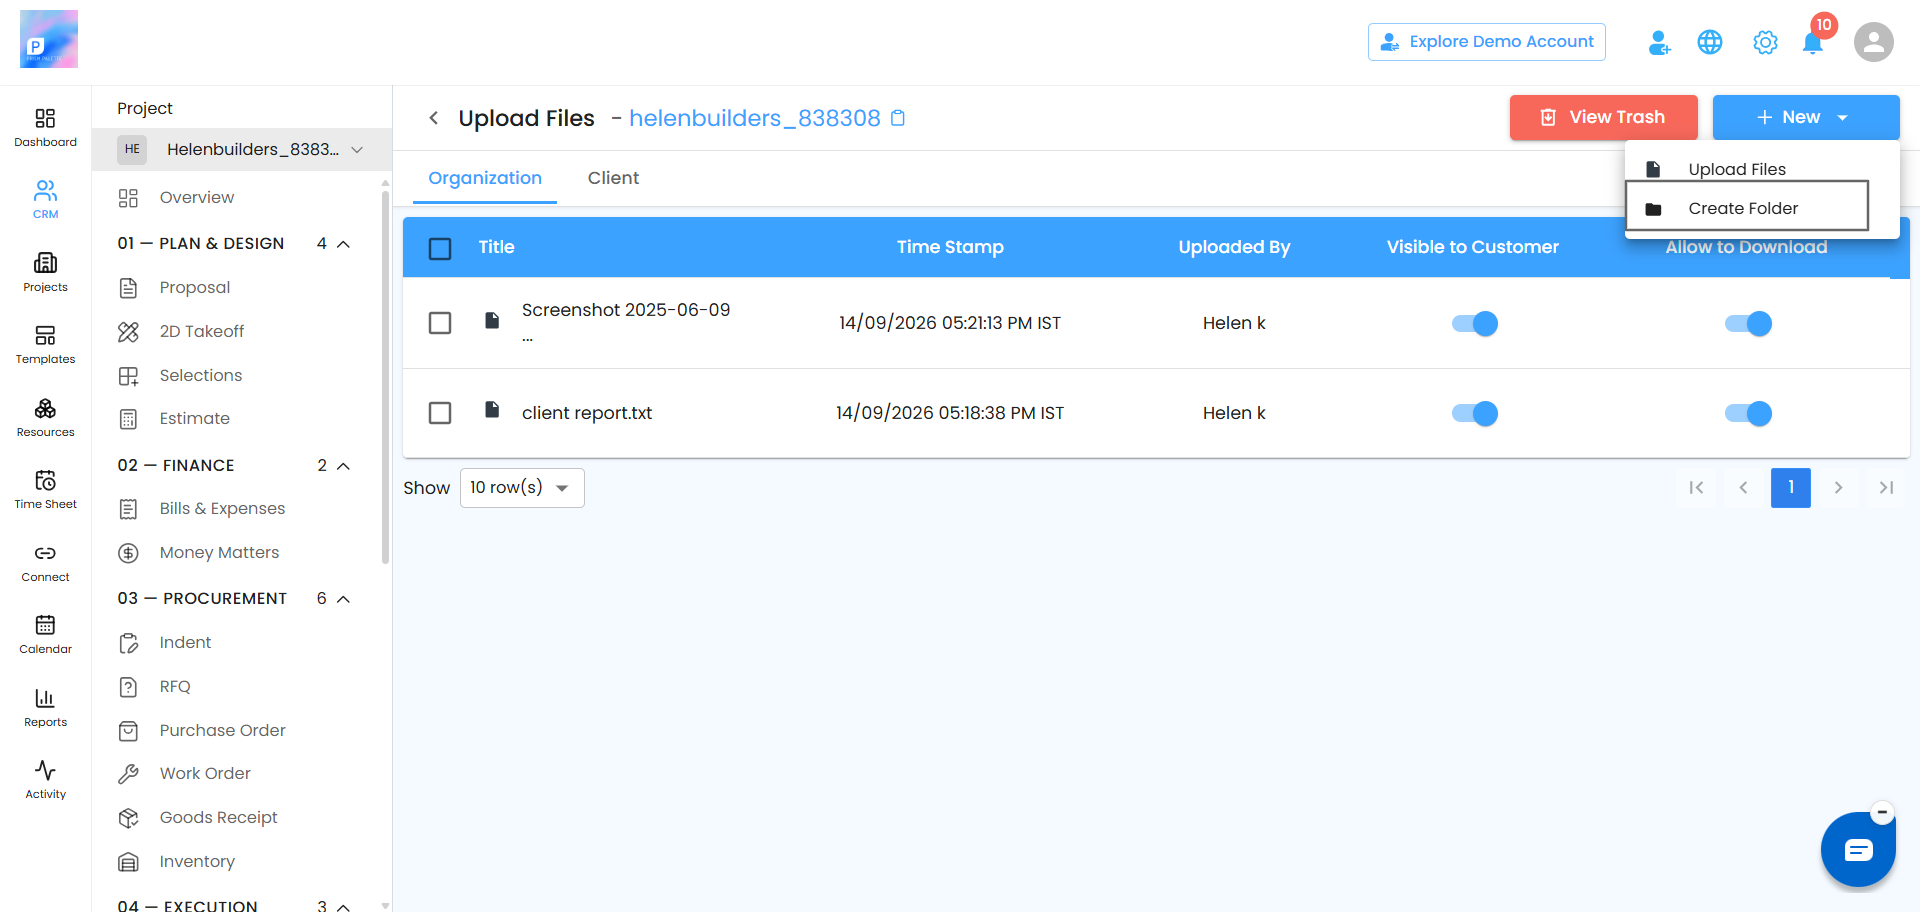
Click New.
Select Create Folder.
Enter a name in the Folder Name field.
Click Create.
The new folder is added to the document list and can be used to organize files.
Search and Filter Documents
You can quickly find documents using Search and Filter.
Search Documents
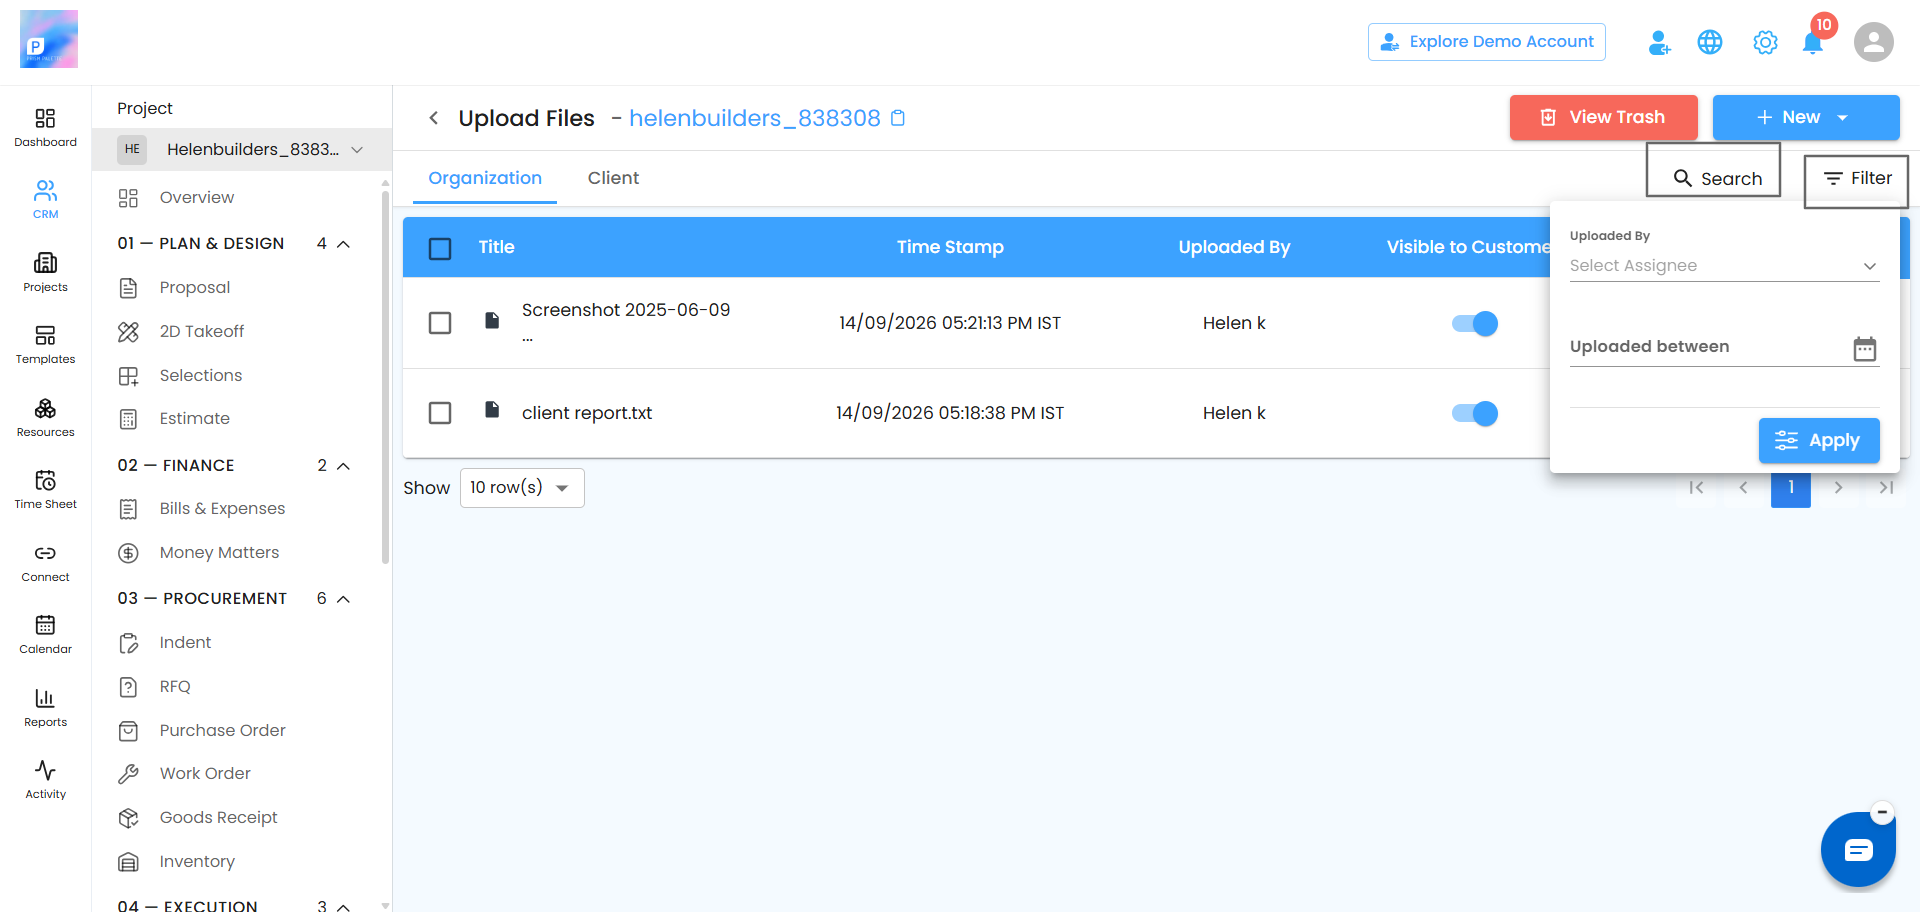
Use the Search option at the top of the Document page to search for a specific file or folder.
Filter Documents
Click Filter to narrow the document list using the available filters, such as:
Uploaded By – Filter documents based on who uploaded them.
Uploaded On – Filter documents based on the upload date.
Click Apply to display the filtered results. Click Clear to remove the filters and view all documents.
View Document Details
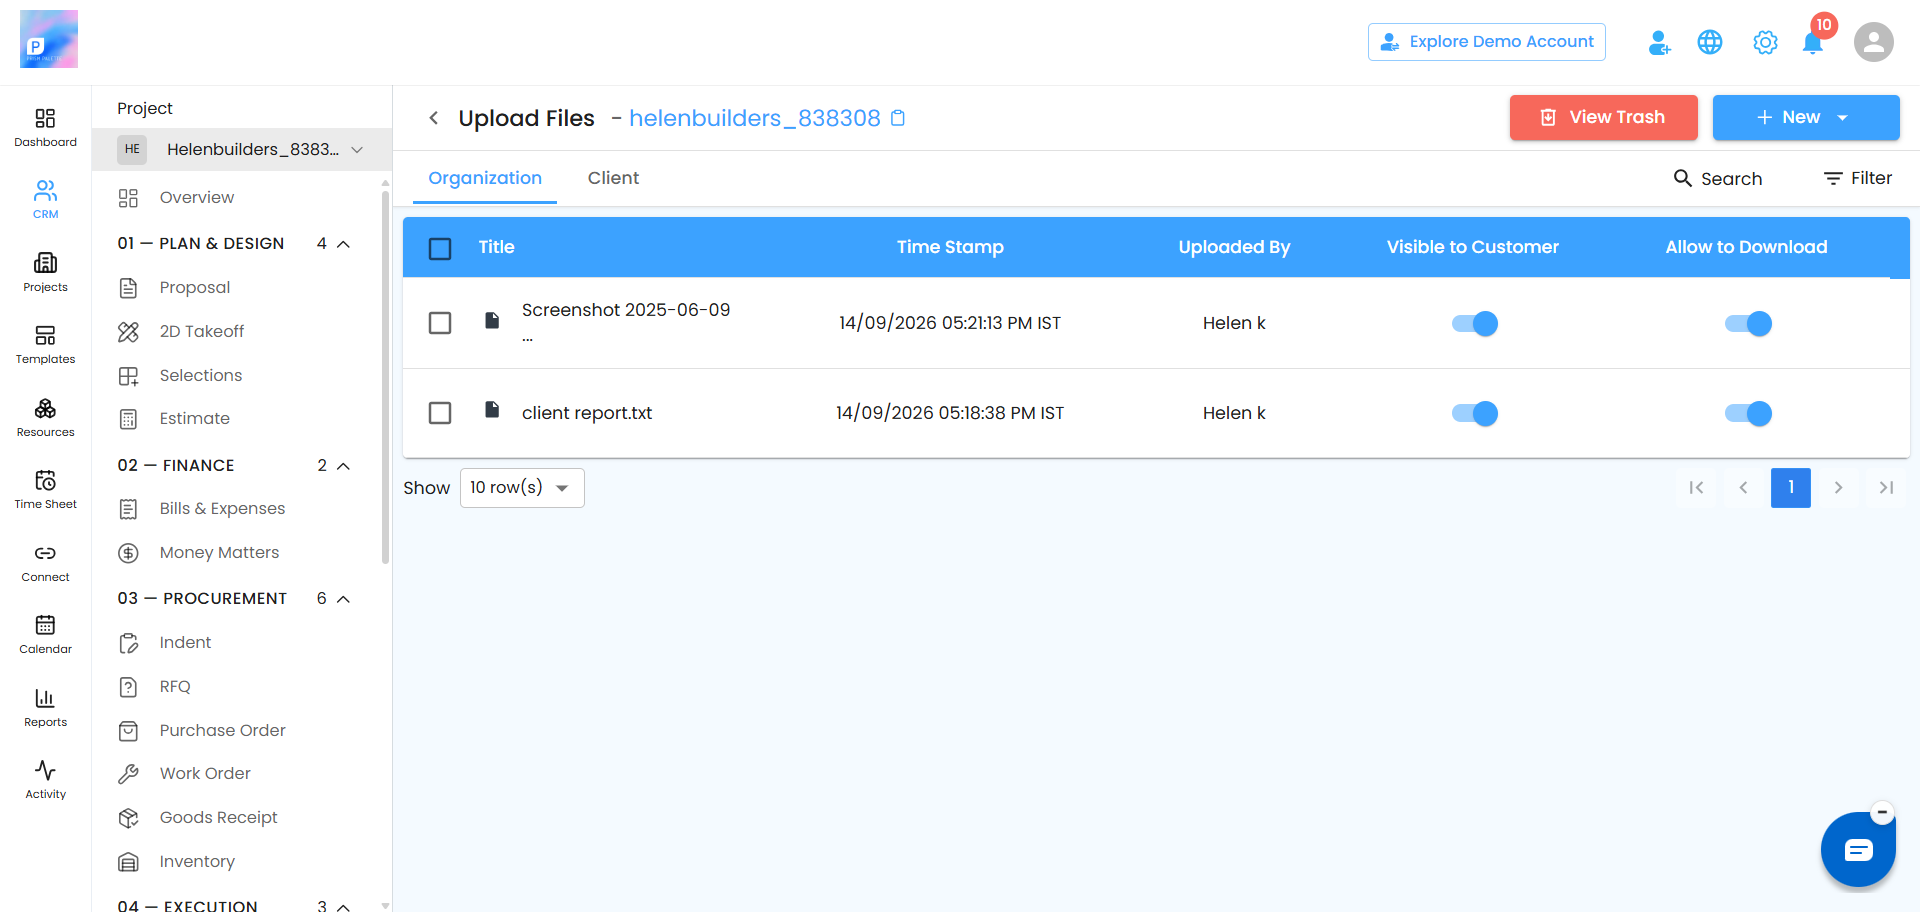
Uploaded files and folders are displayed in a table. The table includes details such as:
Title – Name of the file or folder.
Time Stamp – Date and time the document was uploaded.
Uploaded By – User who uploaded the document.
Visible to Customer – Indicates whether the document is available to customers.
Allow to Download – Indicates whether the document can be downloaded.
Manage Document Access
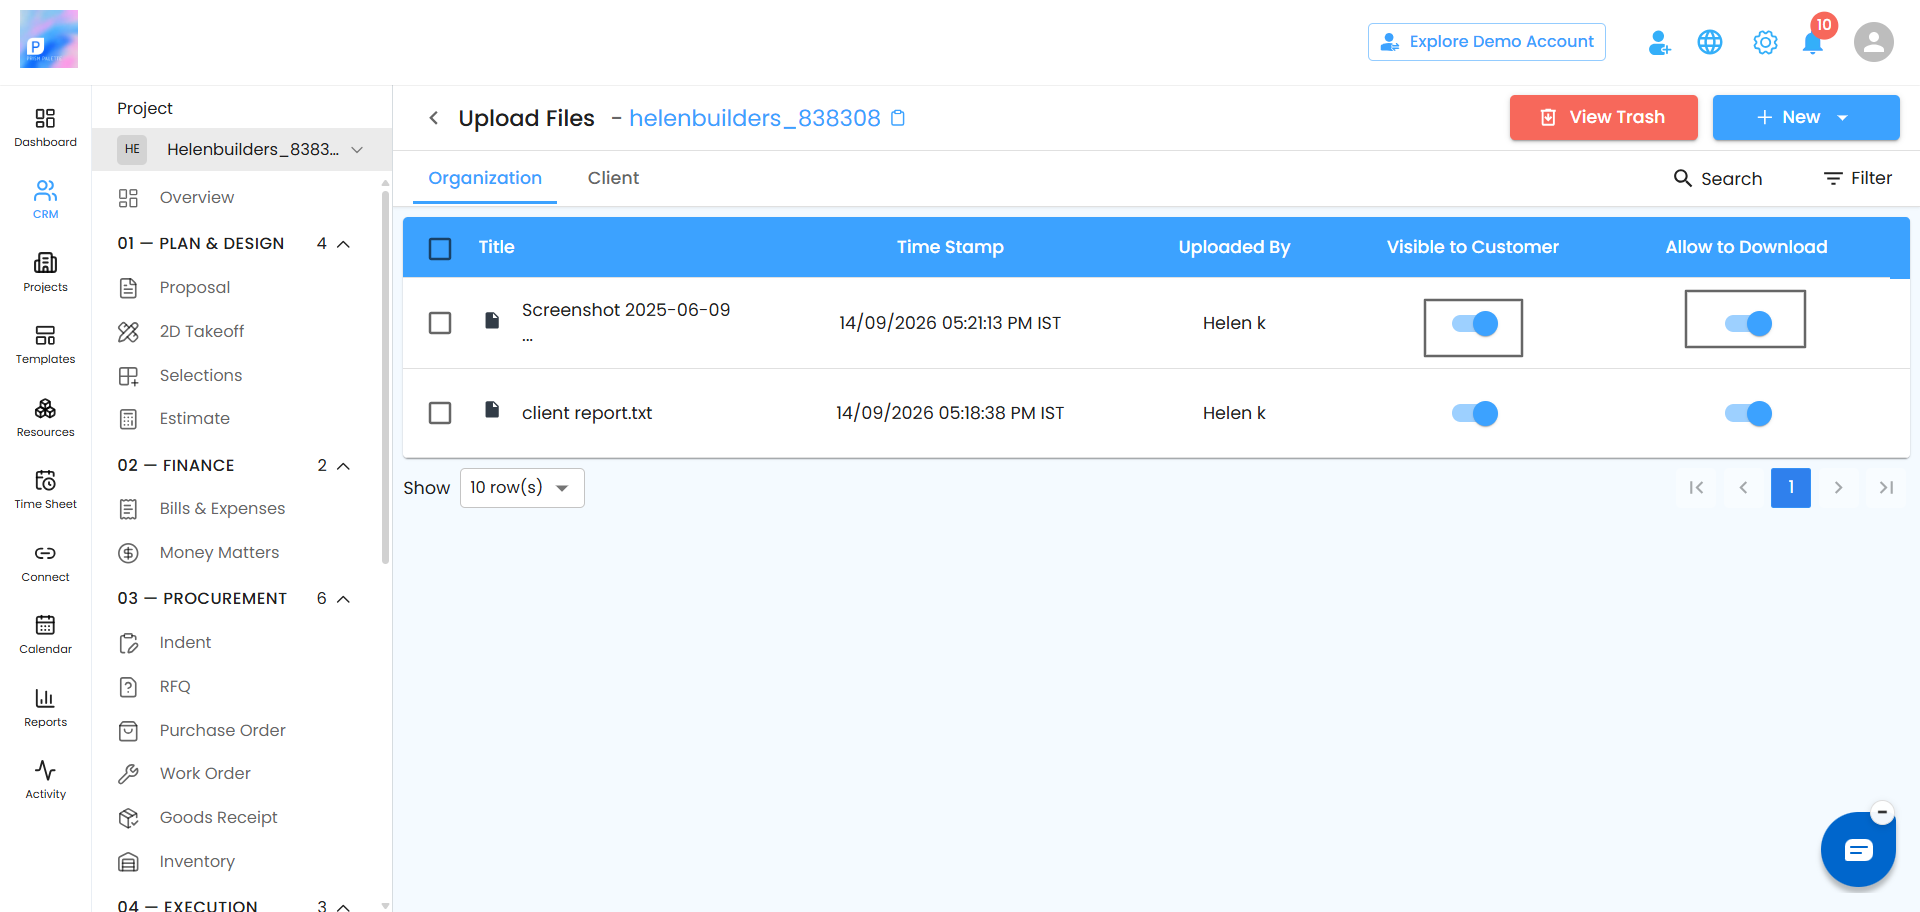
You can control how a document is shared with customers using the available toggles.
Visible to Customer
Turn Visible to Customer on to make the document available to the customer.
Allow to Download
Turn Allow to Download on to allow the customer to download the document.
These options can be managed directly from the document list.
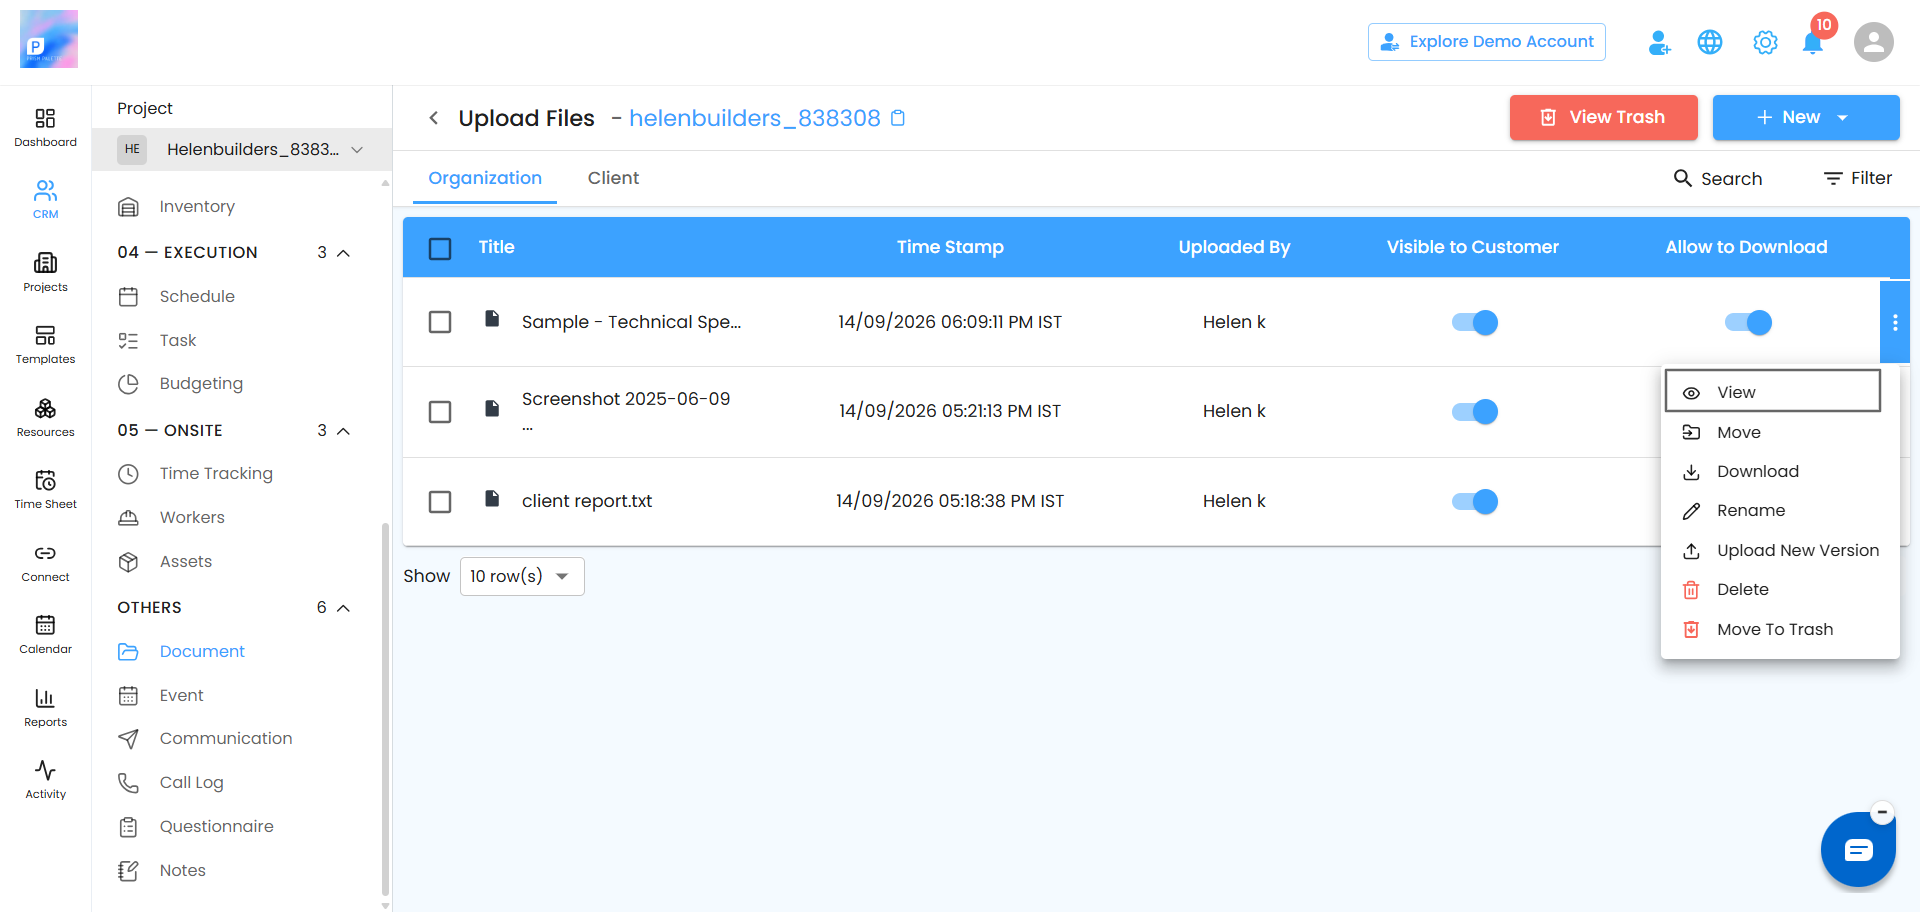
View a Document
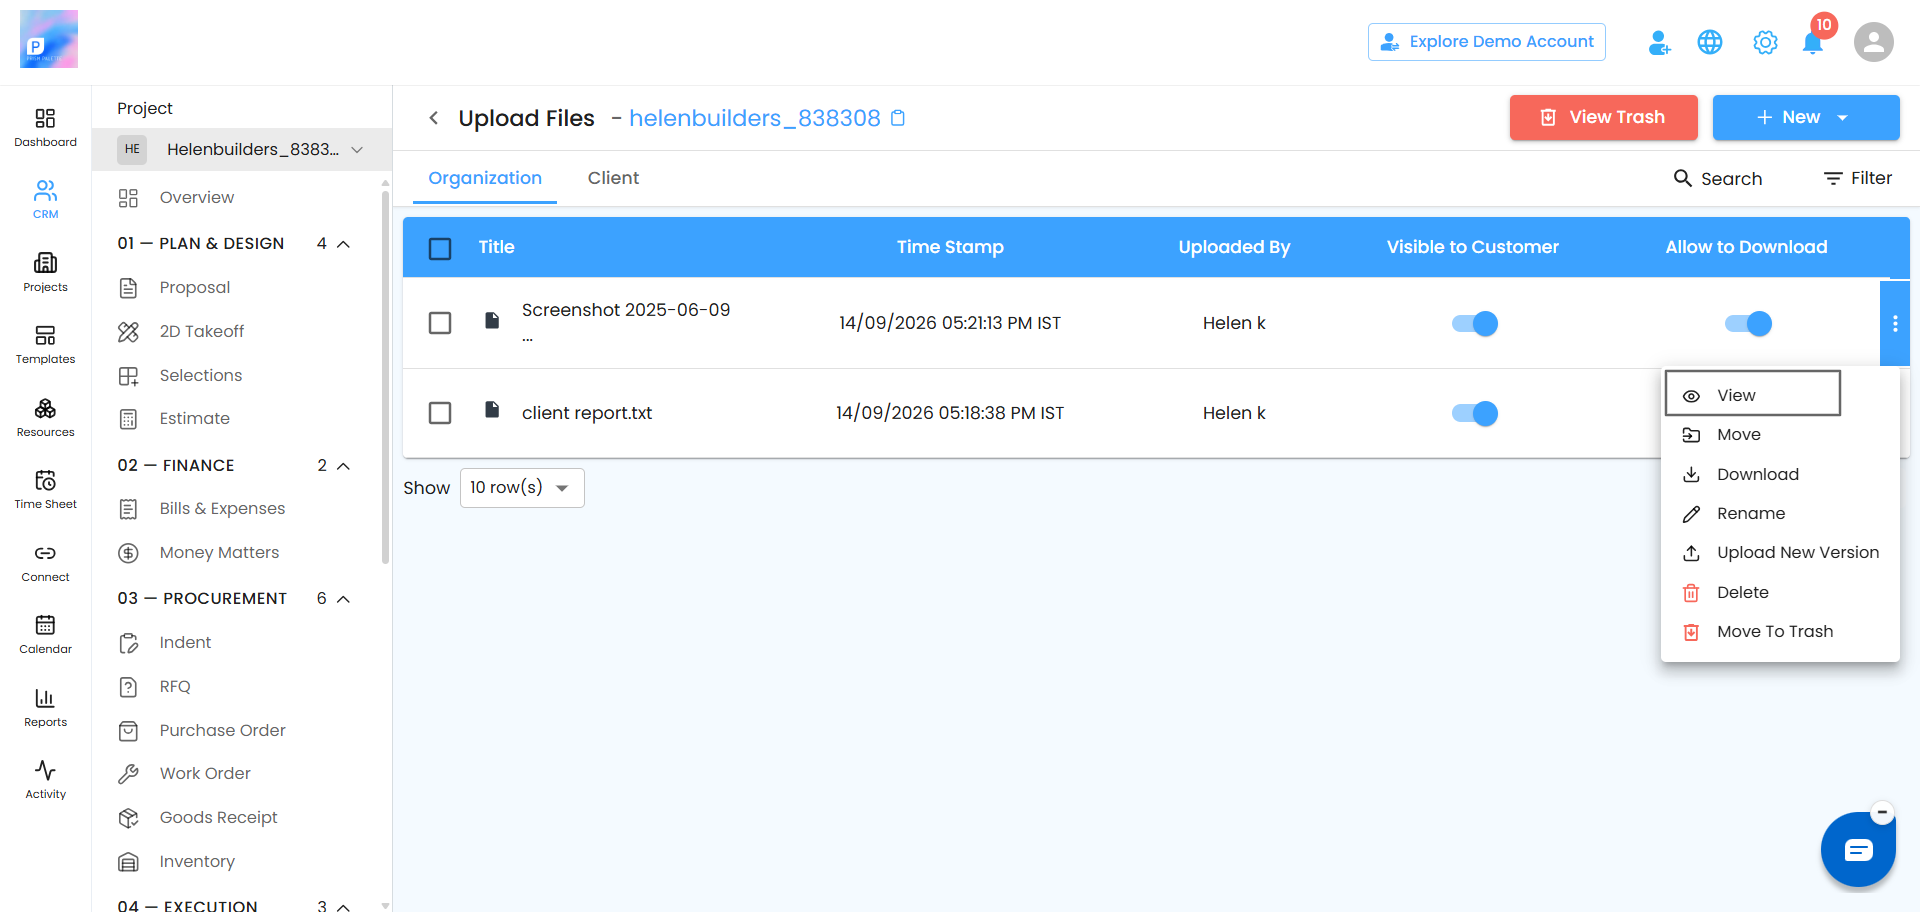
After uploading a document, you can open it using the View option.
Click the three-dot menu next to the document.
Select View.
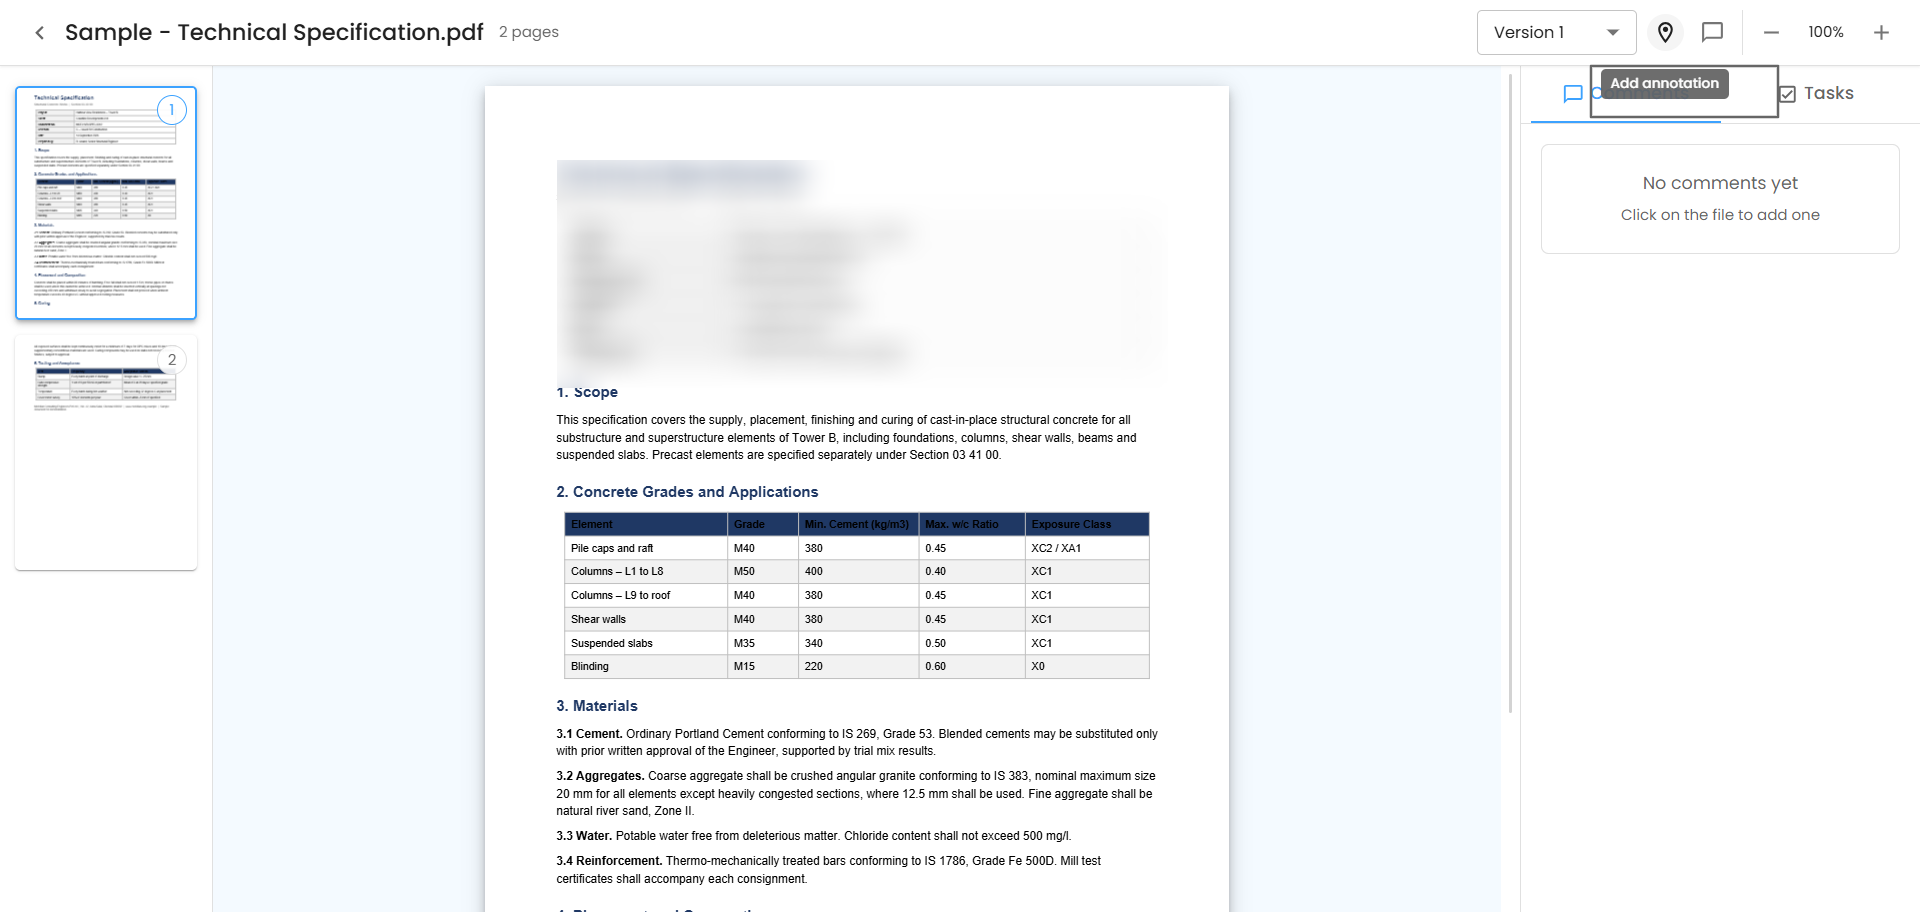
The document opens in the document viewer.
The viewer allows you to review the uploaded file and work with its available versions, comments, and annotations.
Document Versions
The document viewer keeps track of the different versions of an uploaded document.
When you upload a new version, the existing version is not removed. The new version is added to the document's version history.
If a document has multiple versions, you can view the available versions and identify the current version.
For example, if you upload four versions, the version list can contain:
Version 1
Version 2
Version 3
Version 4
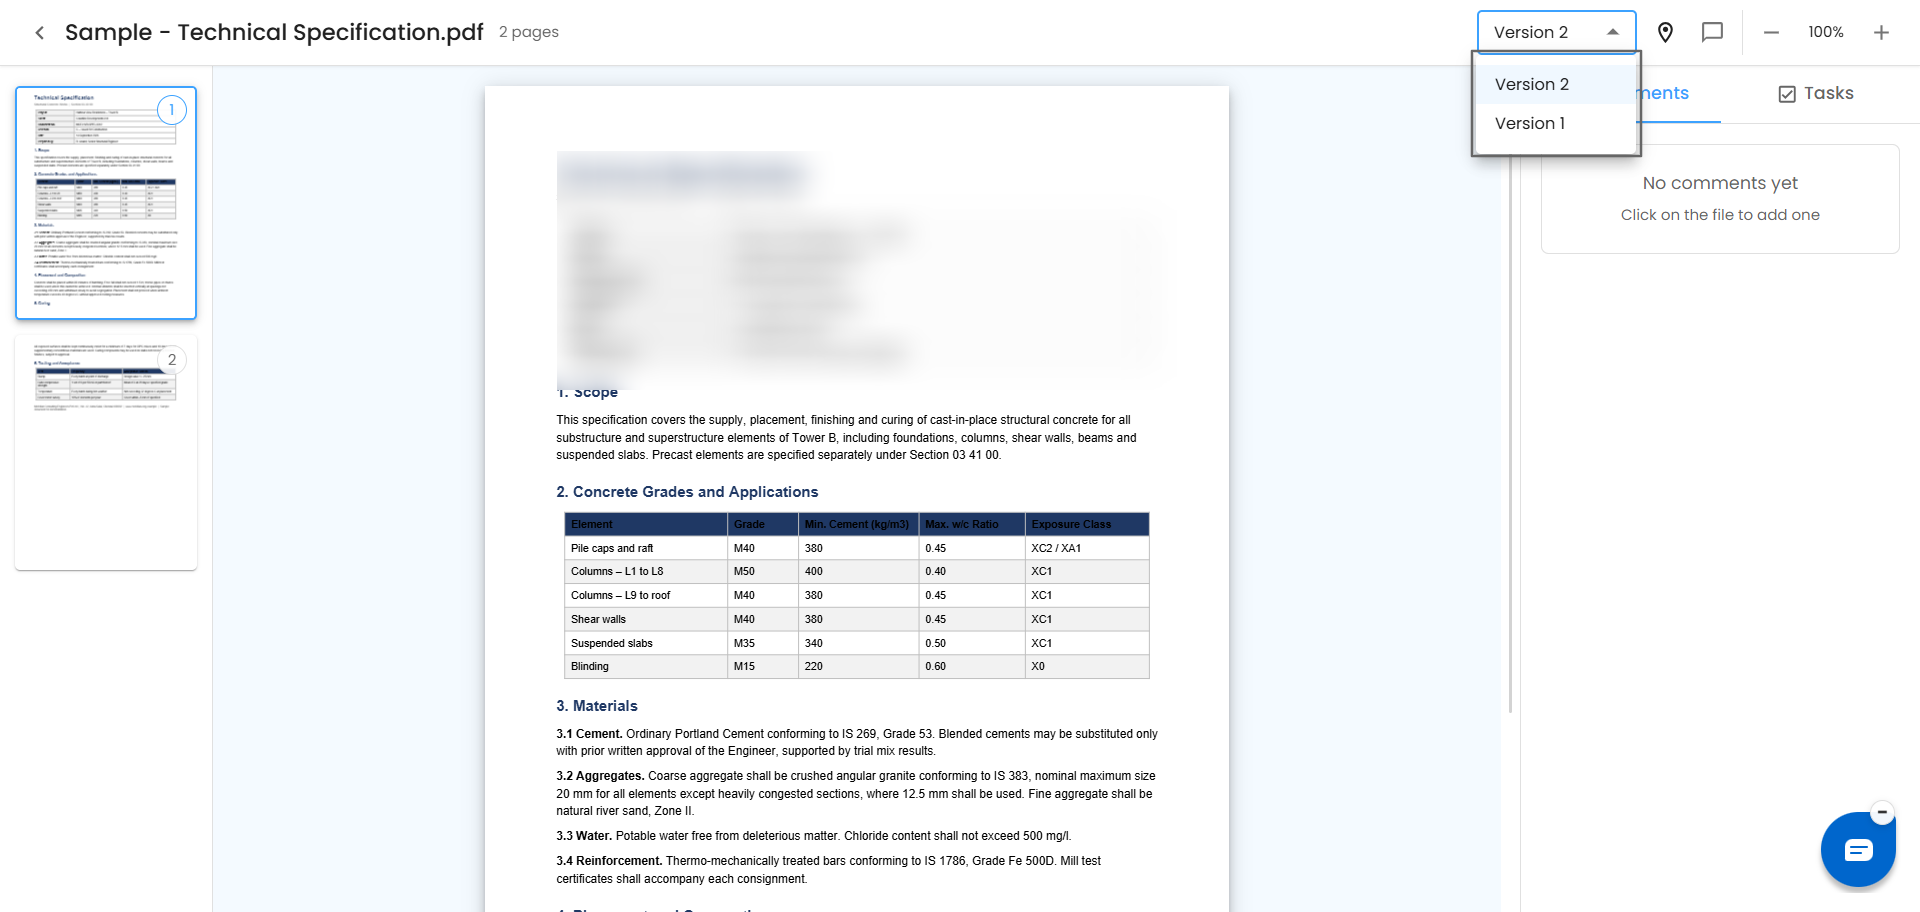
The latest uploaded version is shown as the current version.
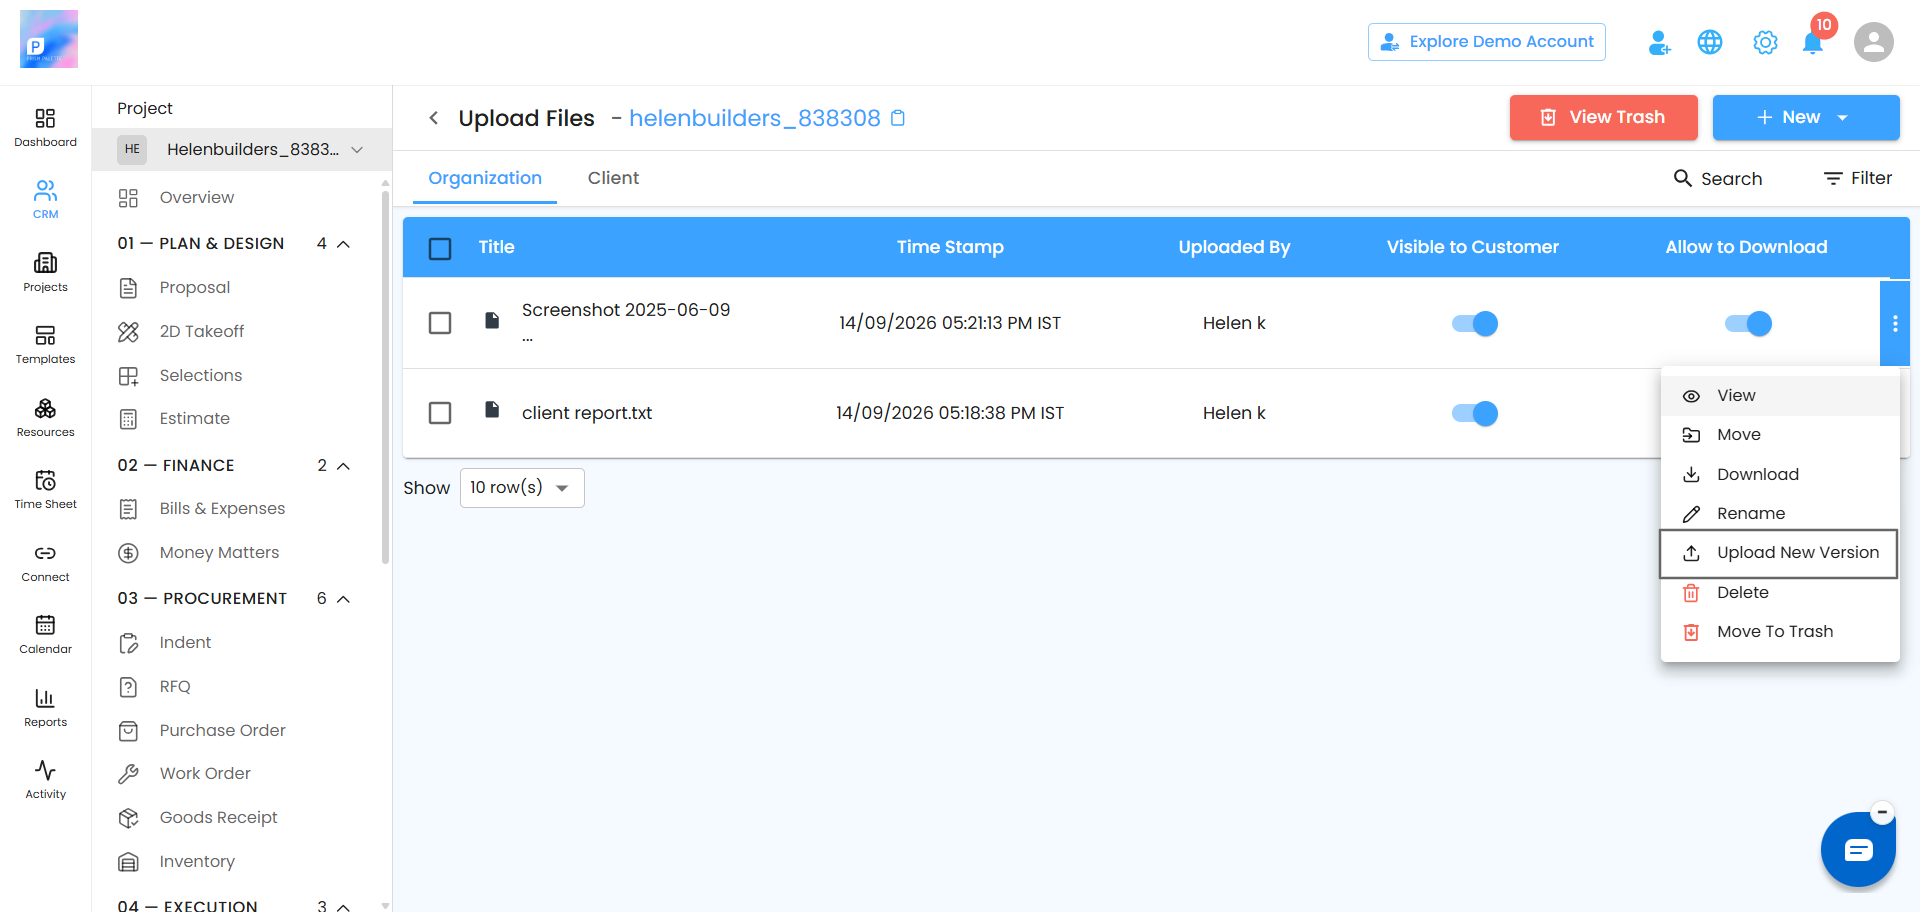
Upload a New Version
Use Upload New Version when you want to update an existing document without removing its previous versions.
Click the three-dot menu next to the document.
Select Upload New Version.
Choose the updated file.
Upload the file.
The new file is added as the latest version, while the previous versions remain available in the document's version history.
Add Comments and Annotations
You can add comments to a document directly from the document viewer. You can also add an annotation to a specific location in the document.
Add a General Comment
You can add a comment directly from the Comments tab.
Enter your comment and save it. Saved comments can be viewed from the document's comments section.
Add an Annotated Comment
Use the Add Annotation Pin option when you want to attach a comment to a specific part of the document.
Open the document using View.
Select Add Annotation Pin.
Place the pin on the required area of the document.
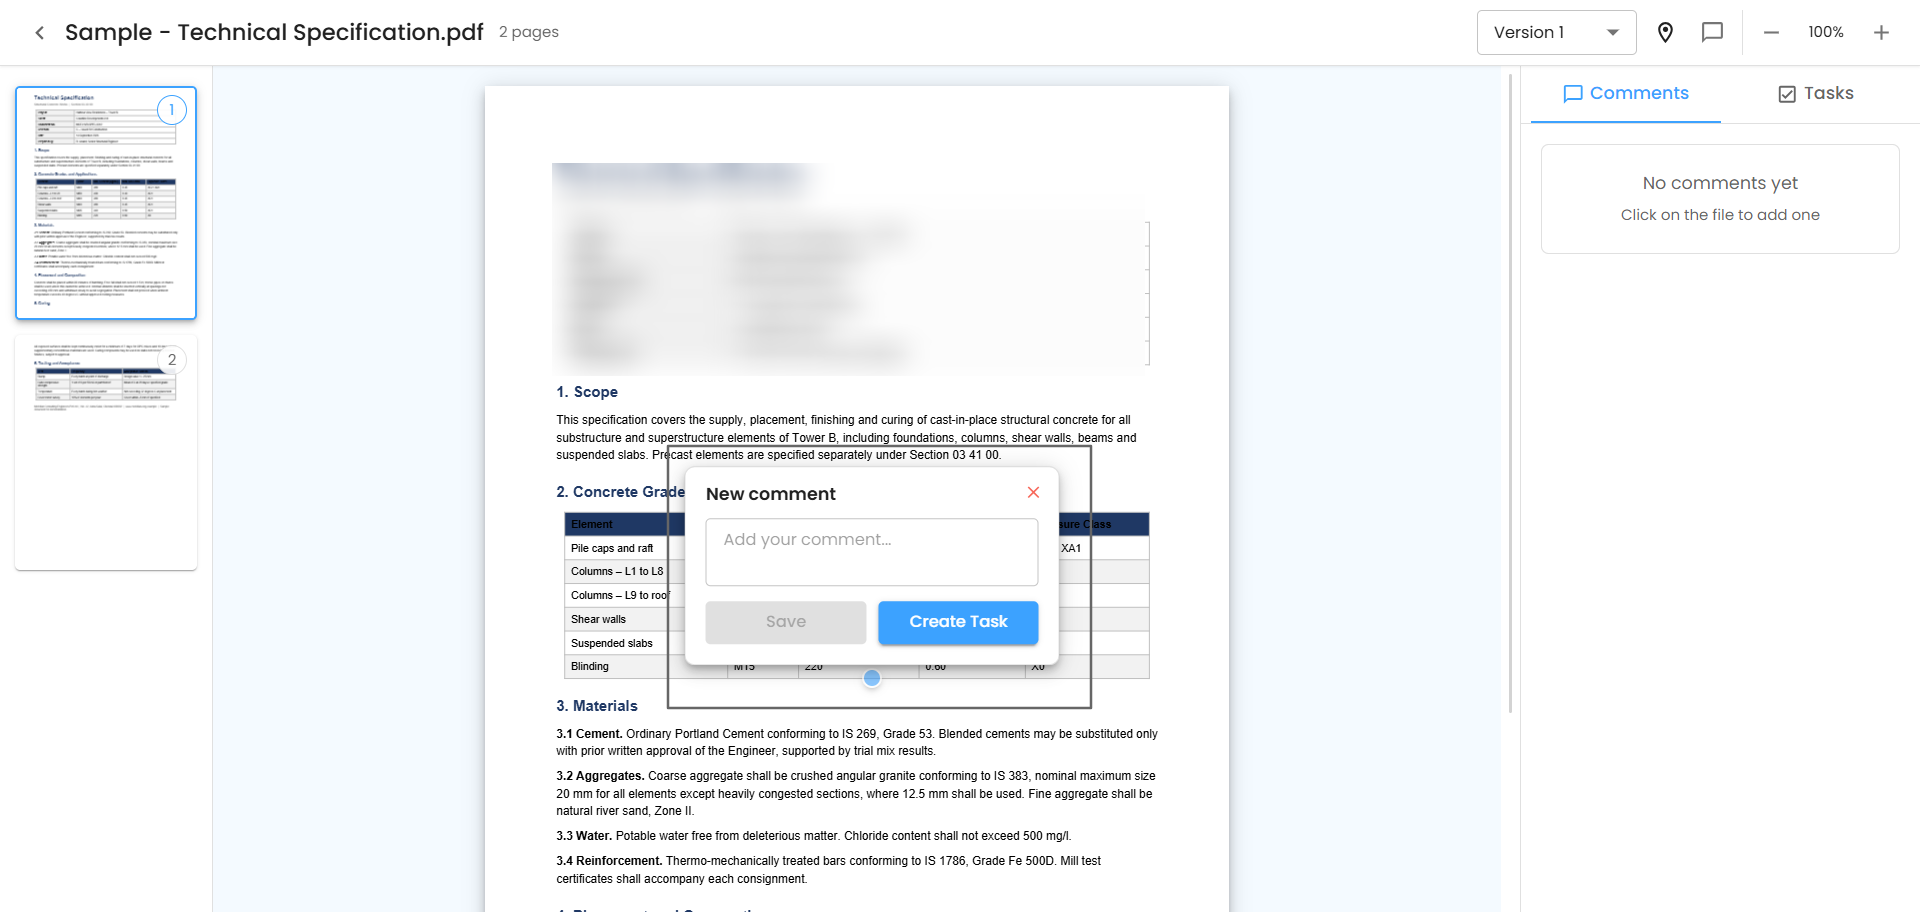
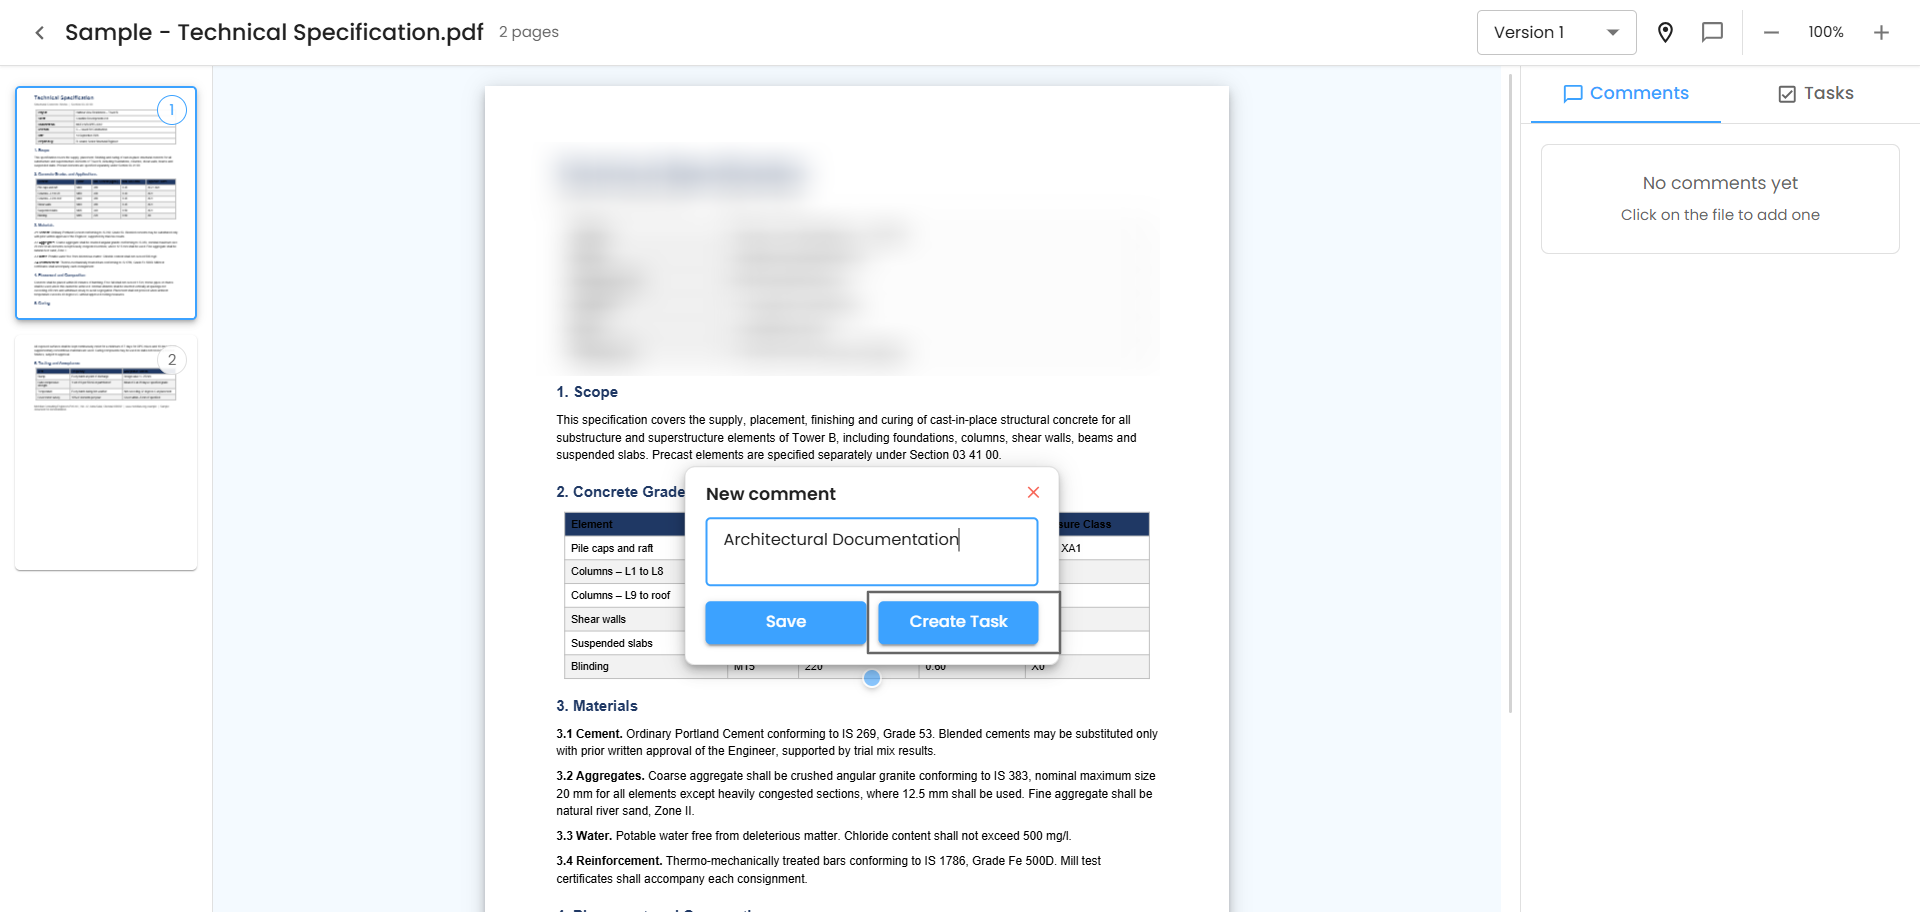
Add your comment in the comment popup.
Click Save.
The annotation identifies the specific location associated with the comment.
Create a Task from an Annotation
You can also create a task directly from an annotated comment.
Add an annotation pin to the required location.
Select the option to Create Task.
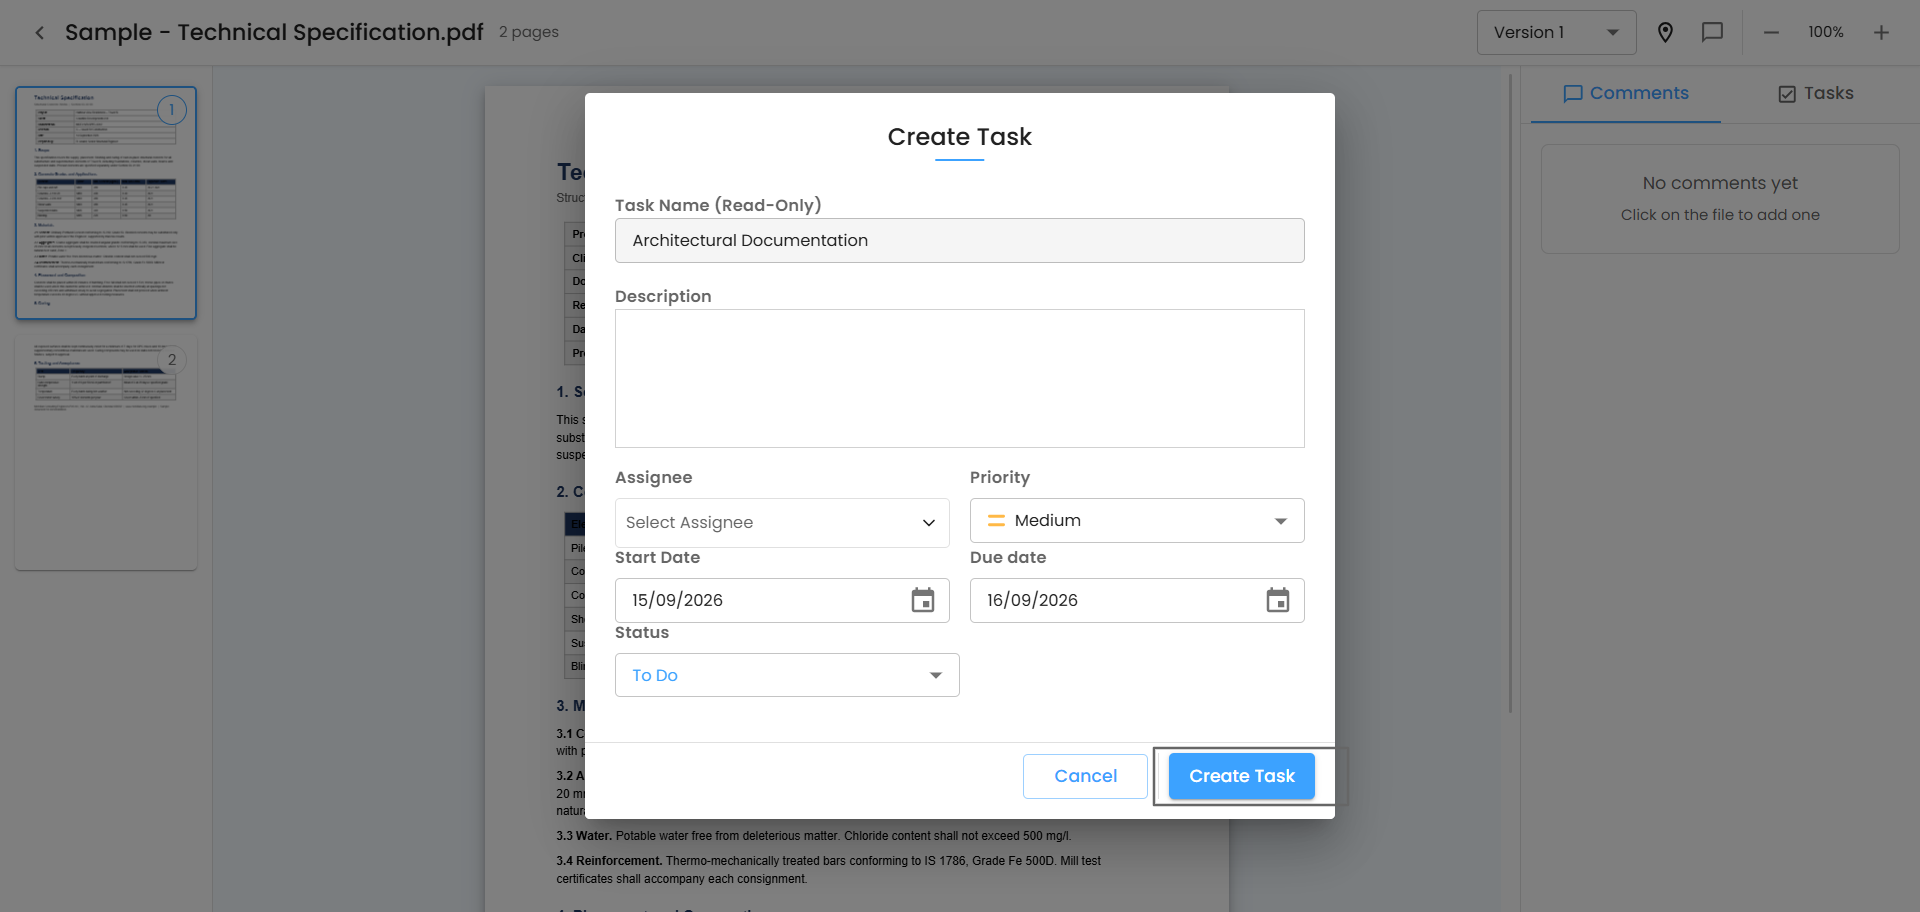
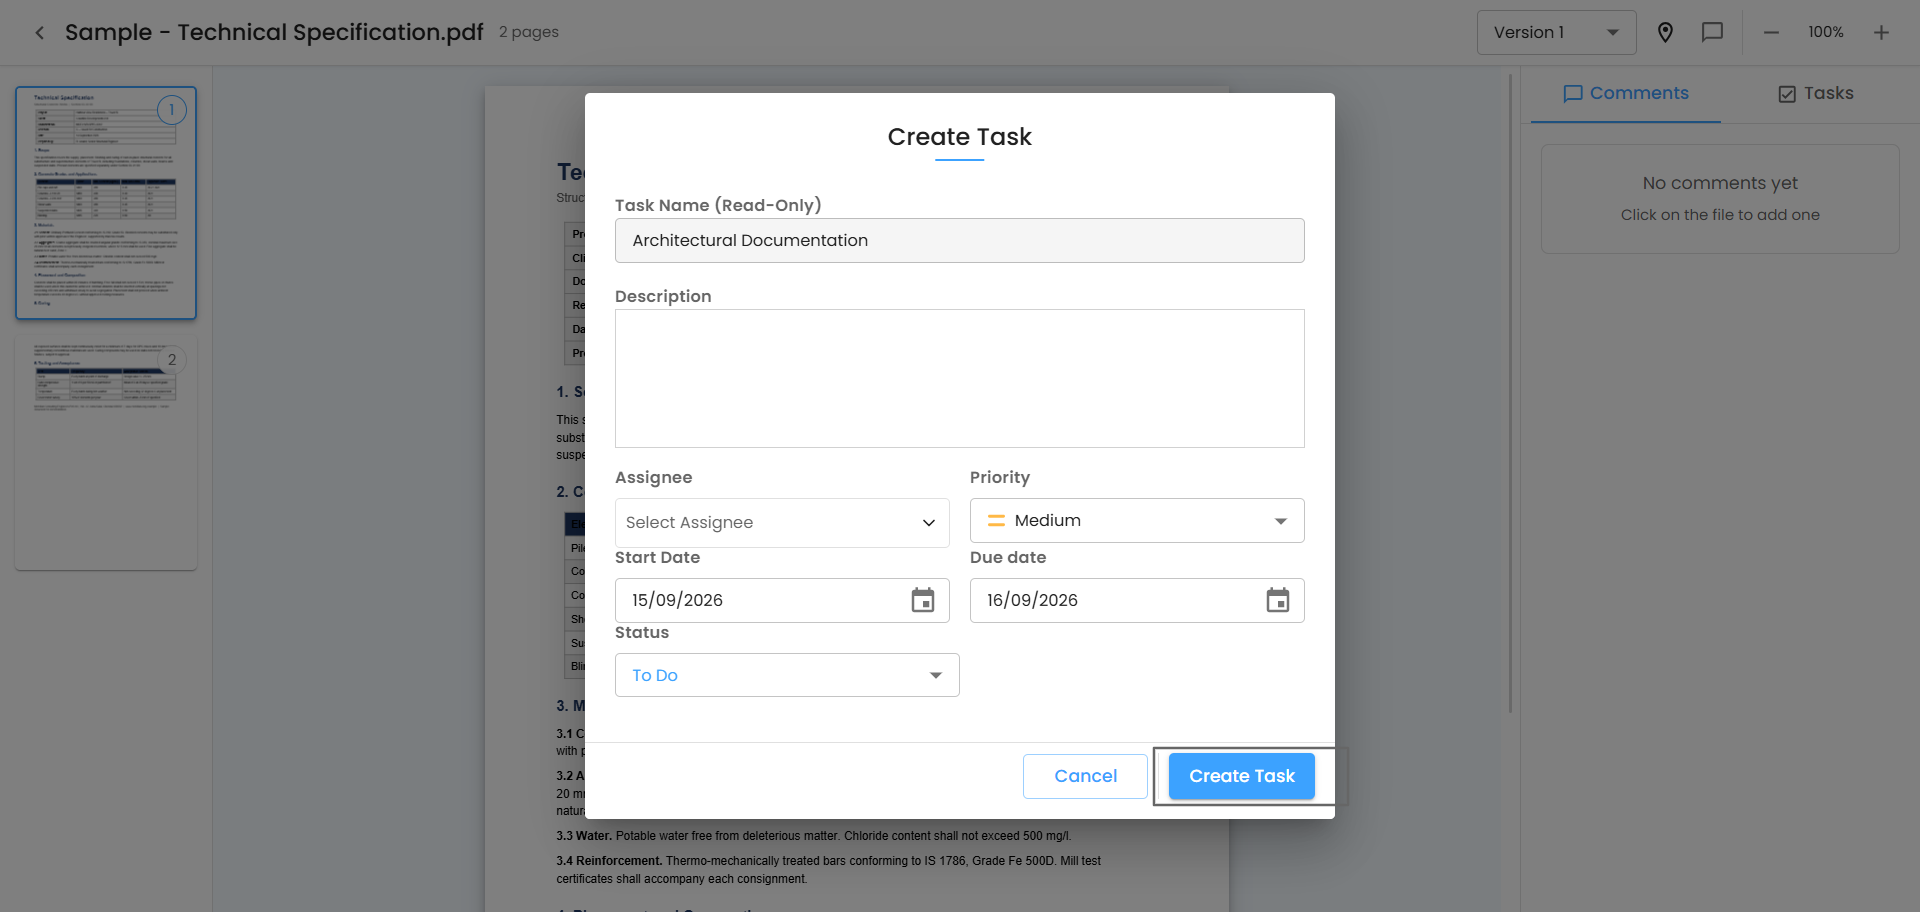
The Create Task popup opens.
Enter or review the task name.
Add a description if required.
Select the Assignee.
Set the Start Date and Due Date.
Select the Priority.
Select the task status, such as To Do, In Progress, or Completed.
Click Create Task.
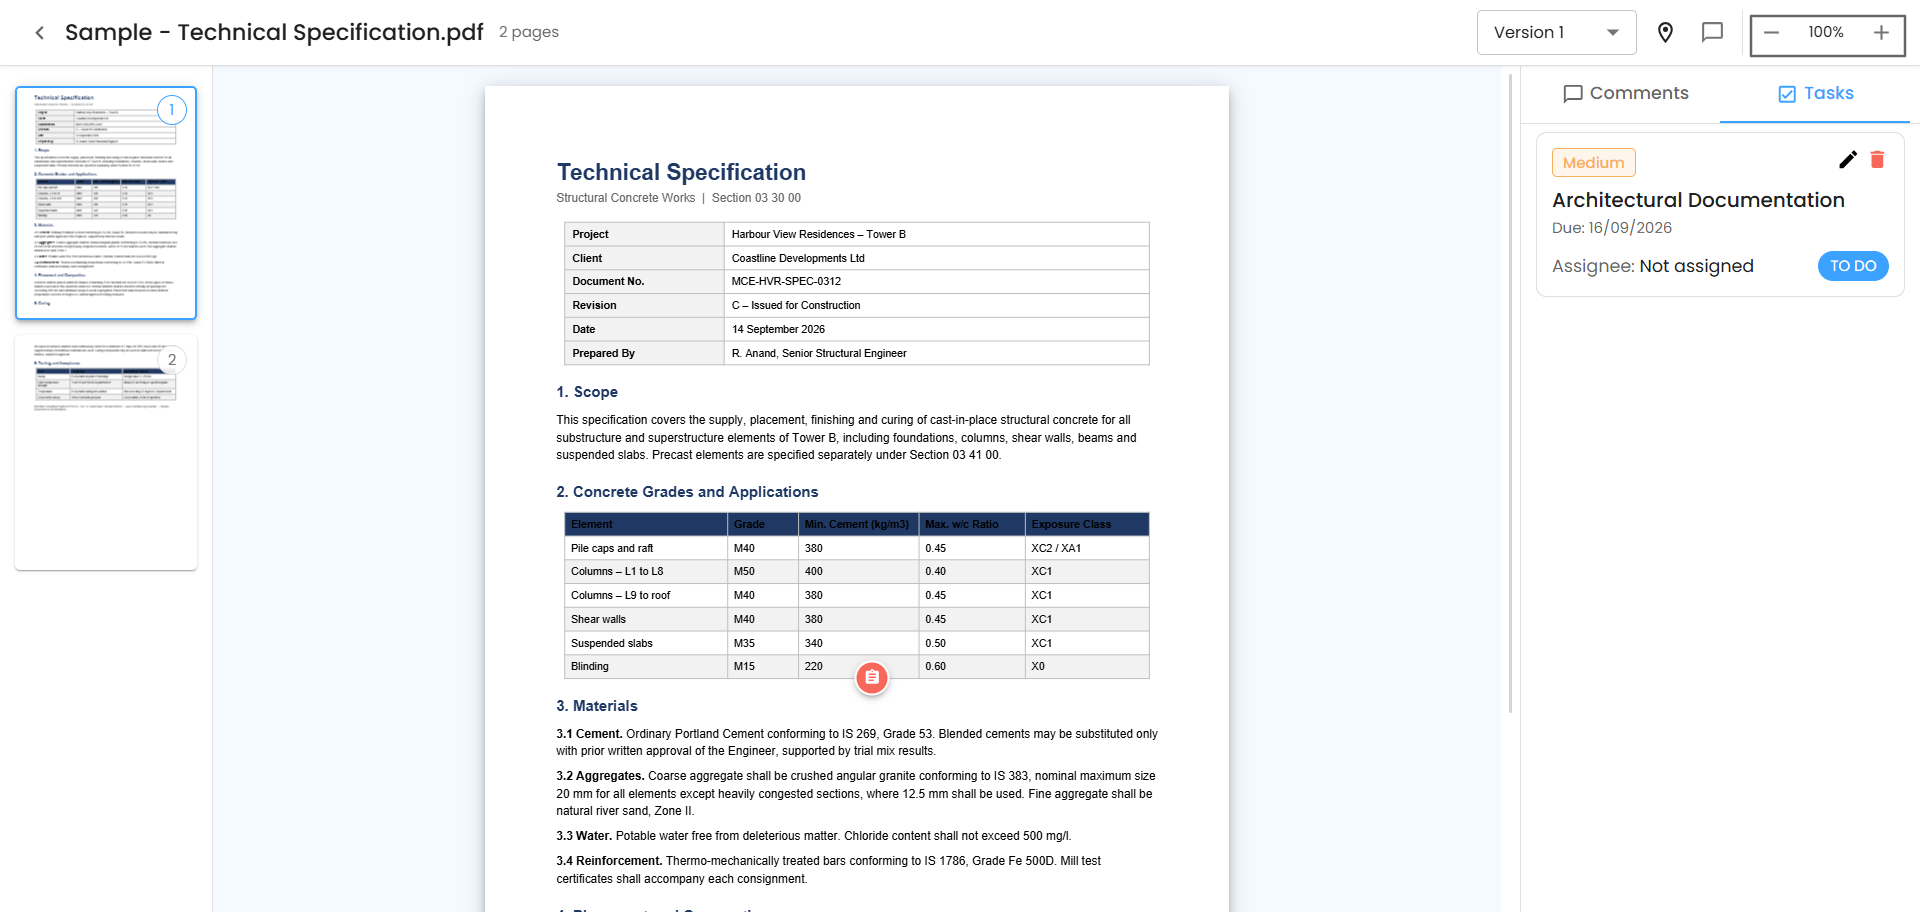
The task is created and can be viewed from the Task section.
View Comments and Tasks
Comments and tasks created from the document can be accessed from their respective tabs.
Comments – View comments added to the document.
Tasks – View tasks created from the document.
When an annotation is linked to a comment or task, selecting it highlights the related location in the document.
Zoom the Document
The document viewer allows you to zoom in and out when reviewing an uploaded file.
Use the zoom controls to adjust the document view and inspect details more closely.
Manage Documents from the Three-Dot Menu
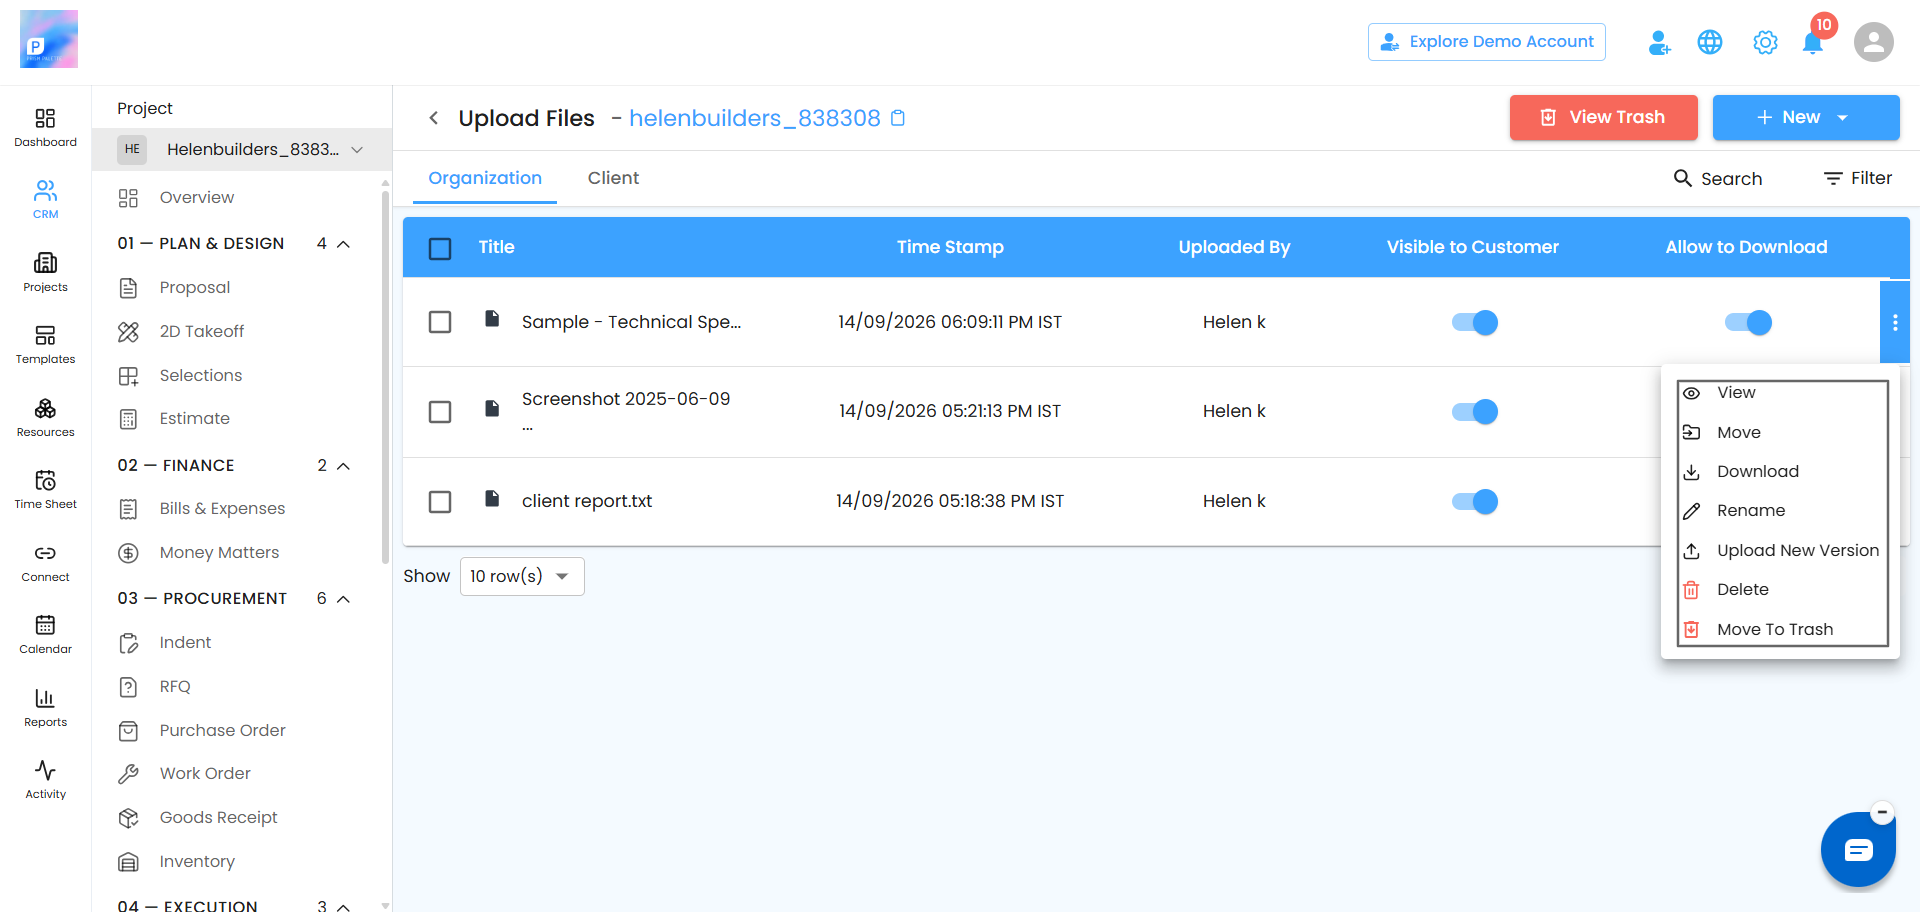
The three-dot menu next to each document provides the following actions:
View – Open the document and review its content, versions, comments, and annotations.
Move – Move the document to another folder.
Download – Download a copy of the document.
Rename – Change the document name.
Upload New Version – Upload an updated version while keeping the previous versions.
Delete – Delete the document.
Move To Trash – Move the document to the Trash section.
Move a Document
To move a document to another folder:
Click the three-dot menu next to the document.
Select Move.
Select the destination folder.
Confirm the move.
The document is moved to the selected folder.
Rename a Document
Click the three-dot menu next to the document.
Select Rename.
Enter the new name.
Click Save.
The document is updated with the new name.
Download a Document
Click the three-dot menu next to the document.
Select Download.
The document is downloaded to your computer.
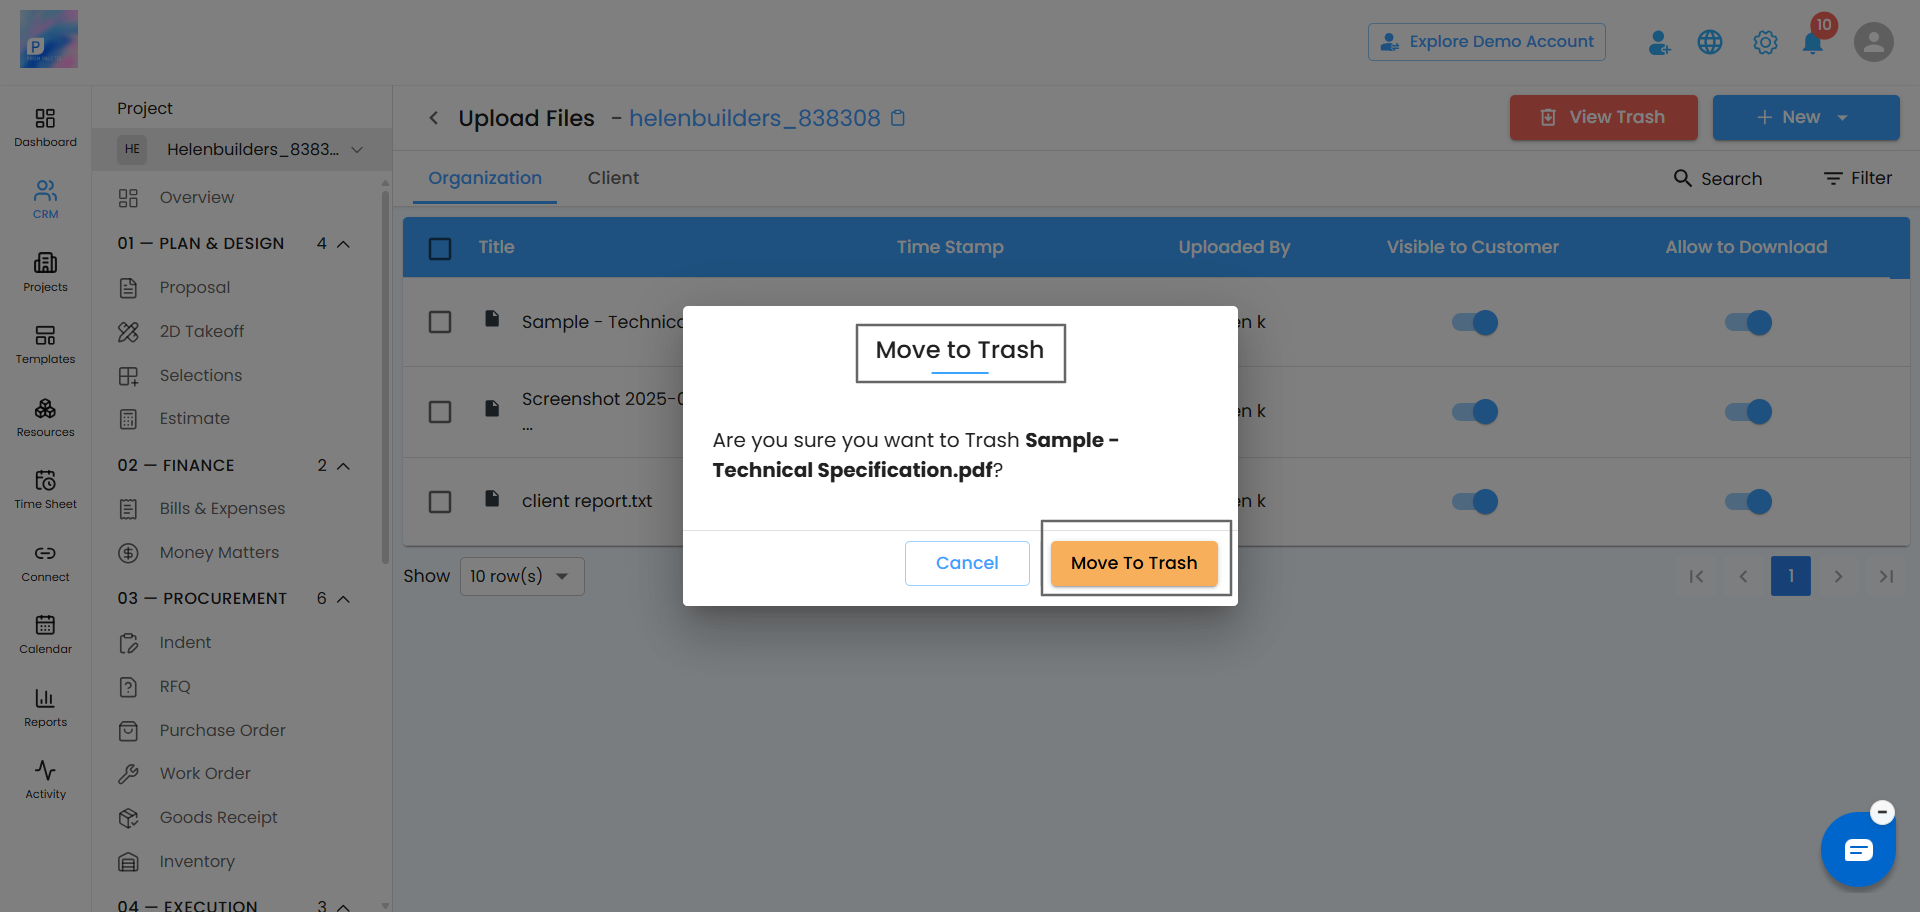
Move a Document to Trash
If you no longer need a document but may want to recover it later, move it to Trash.
Click the three-dot menu next to the document.
Select Move To Trash.
Confirm the action.
The document is moved to the Trash section.
Manage Folders
Folders can also be managed from their three-dot menu. Available actions include:
Rename – Change the folder name.
Delete – Delete the folder and its contents.
Move To Trash – Move the folder to Trash.
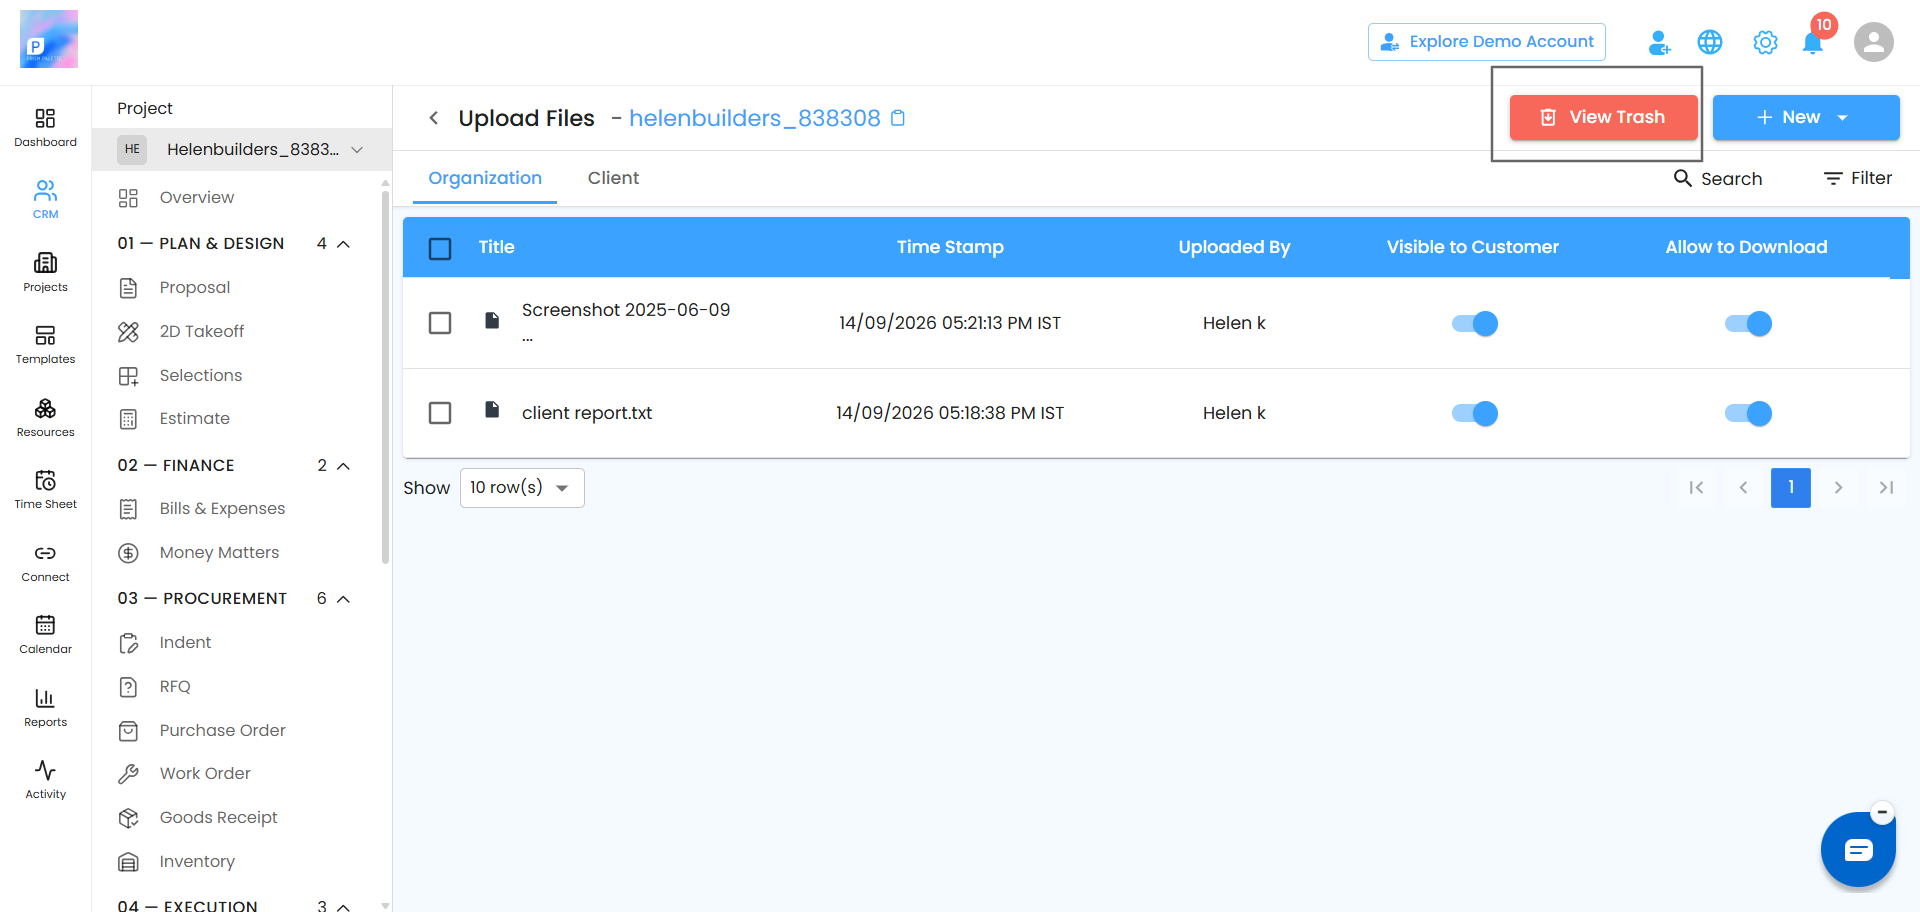
View Trash
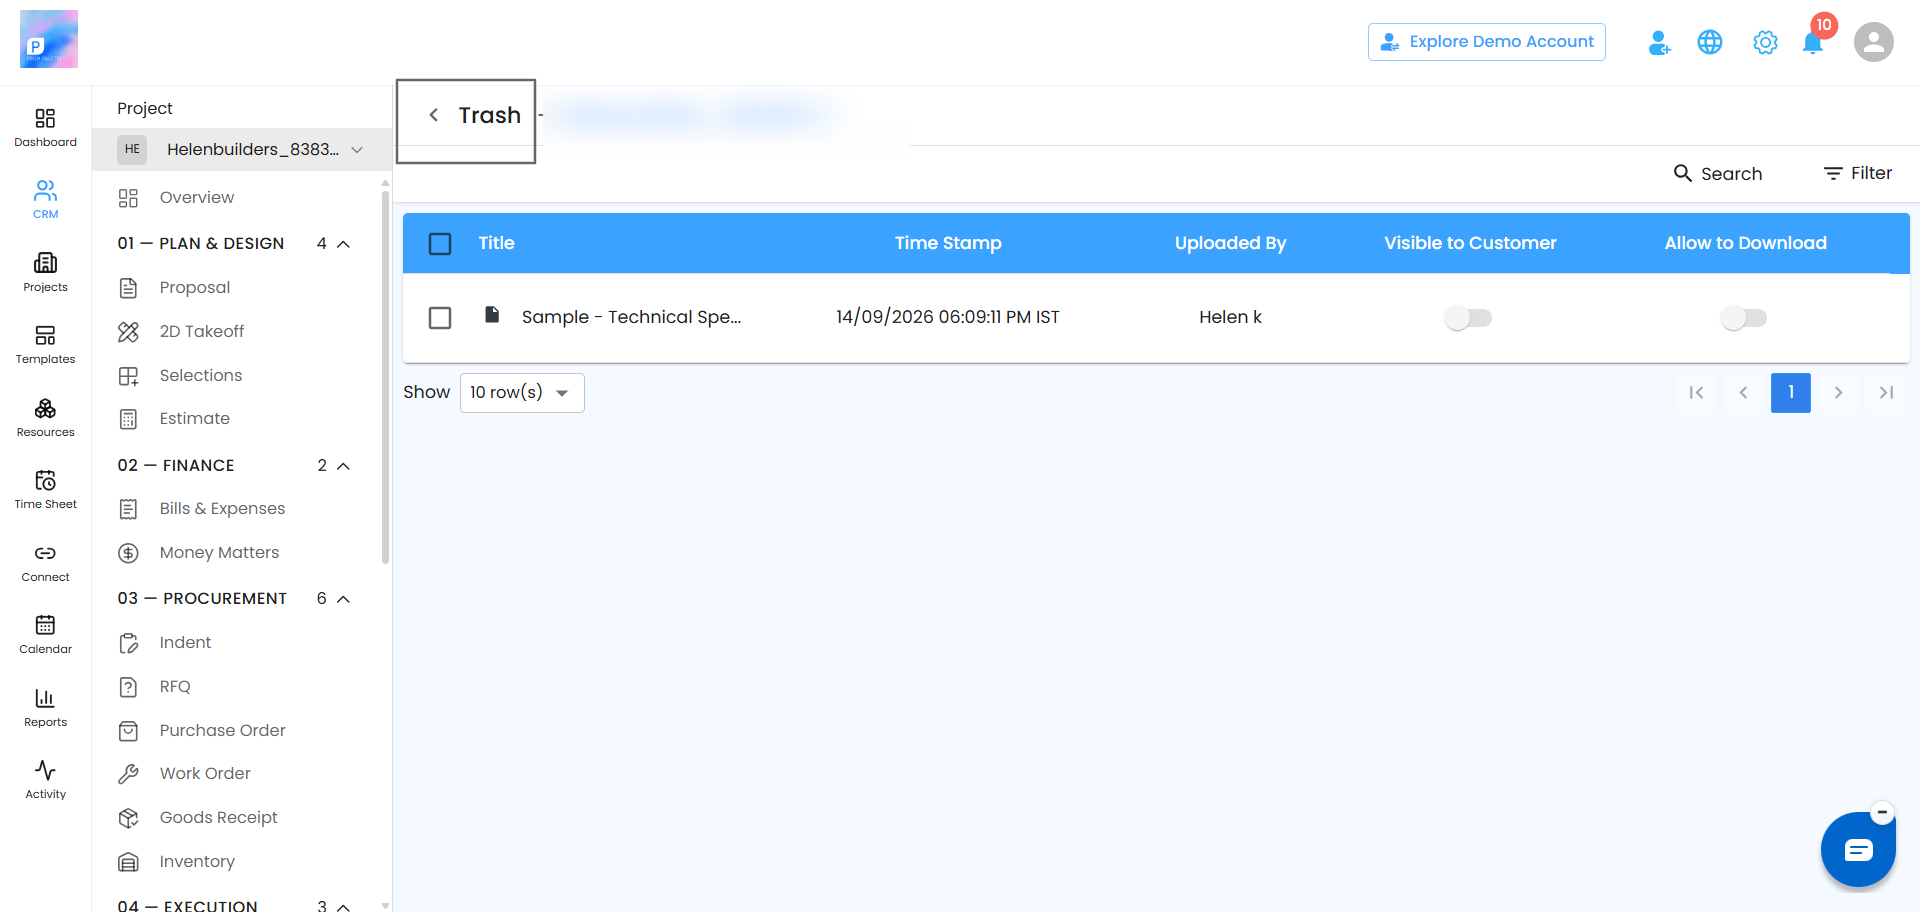
Click View Trash at the top of the Document page to view files and folders that have been moved to Trash.
From the Trash section, you can review removed items and either restore them or delete them permanently.
Restore a Document
To restore a document:
Open View Trash.
Locate the document or folder.
Select Restore.
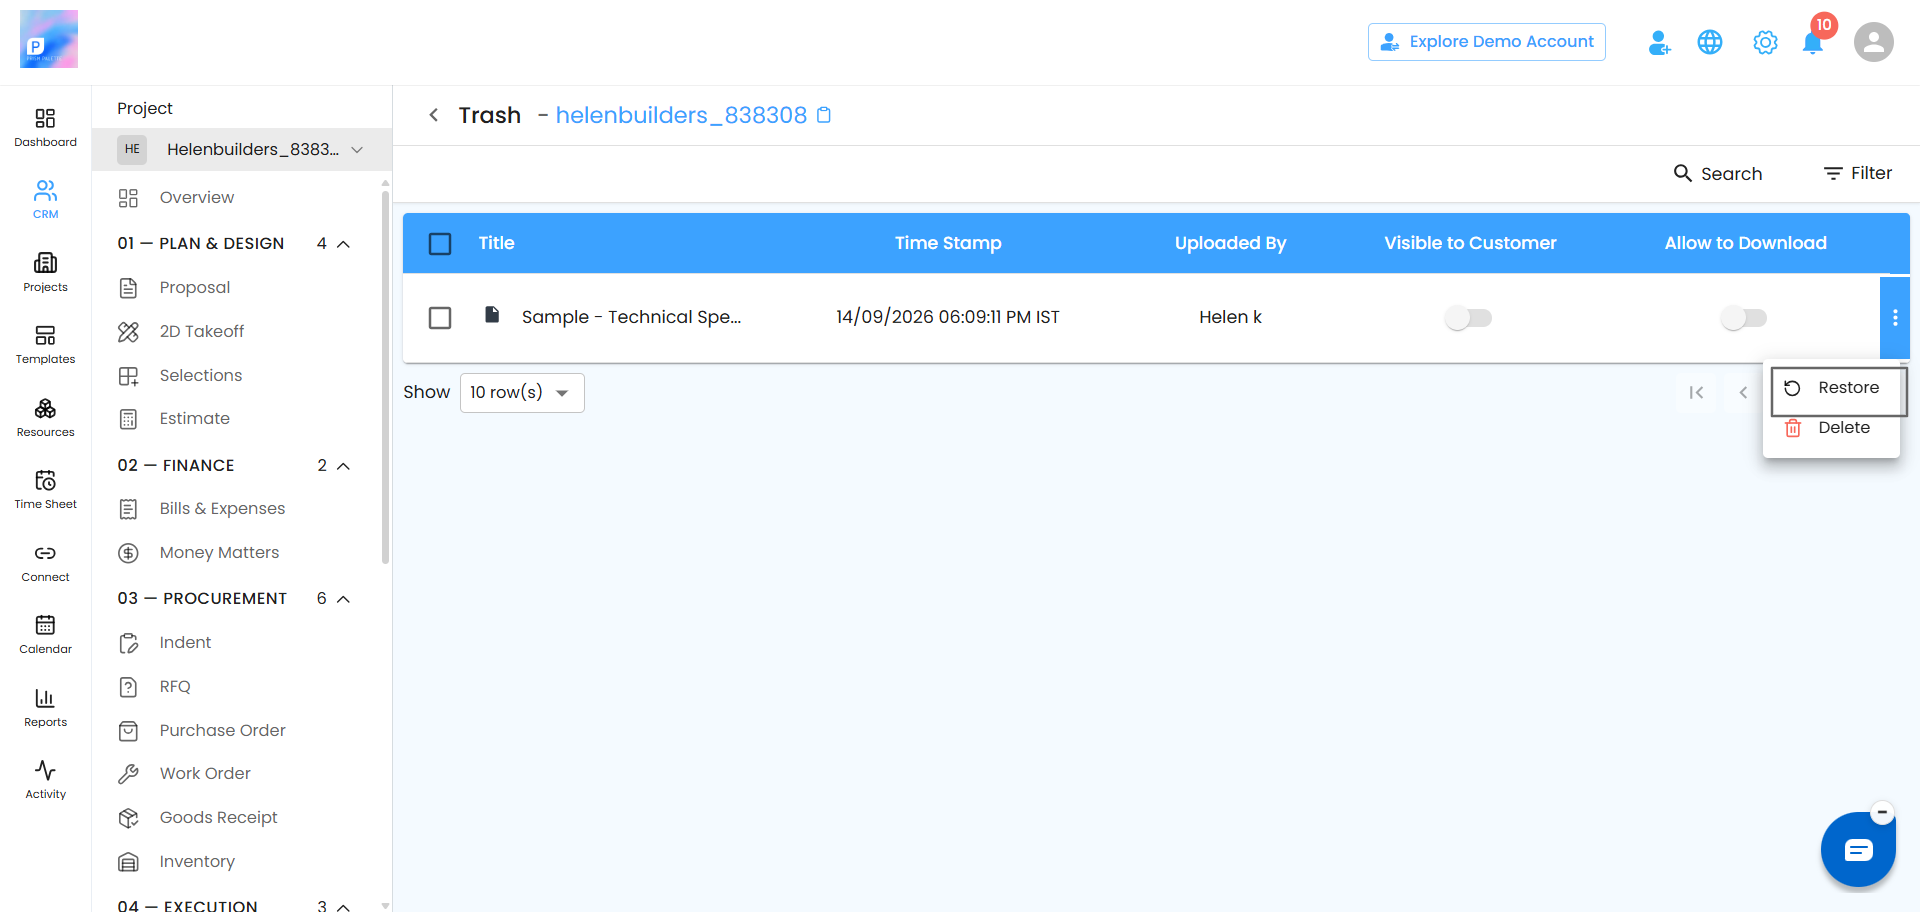
The item is returned to its original location.
Permanently Delete a Document
If you no longer need an item in Trash, you can permanently delete it.
Open View Trash.
Click the three-dot menu next to the item.
Select Delete.
Confirm the deletion.
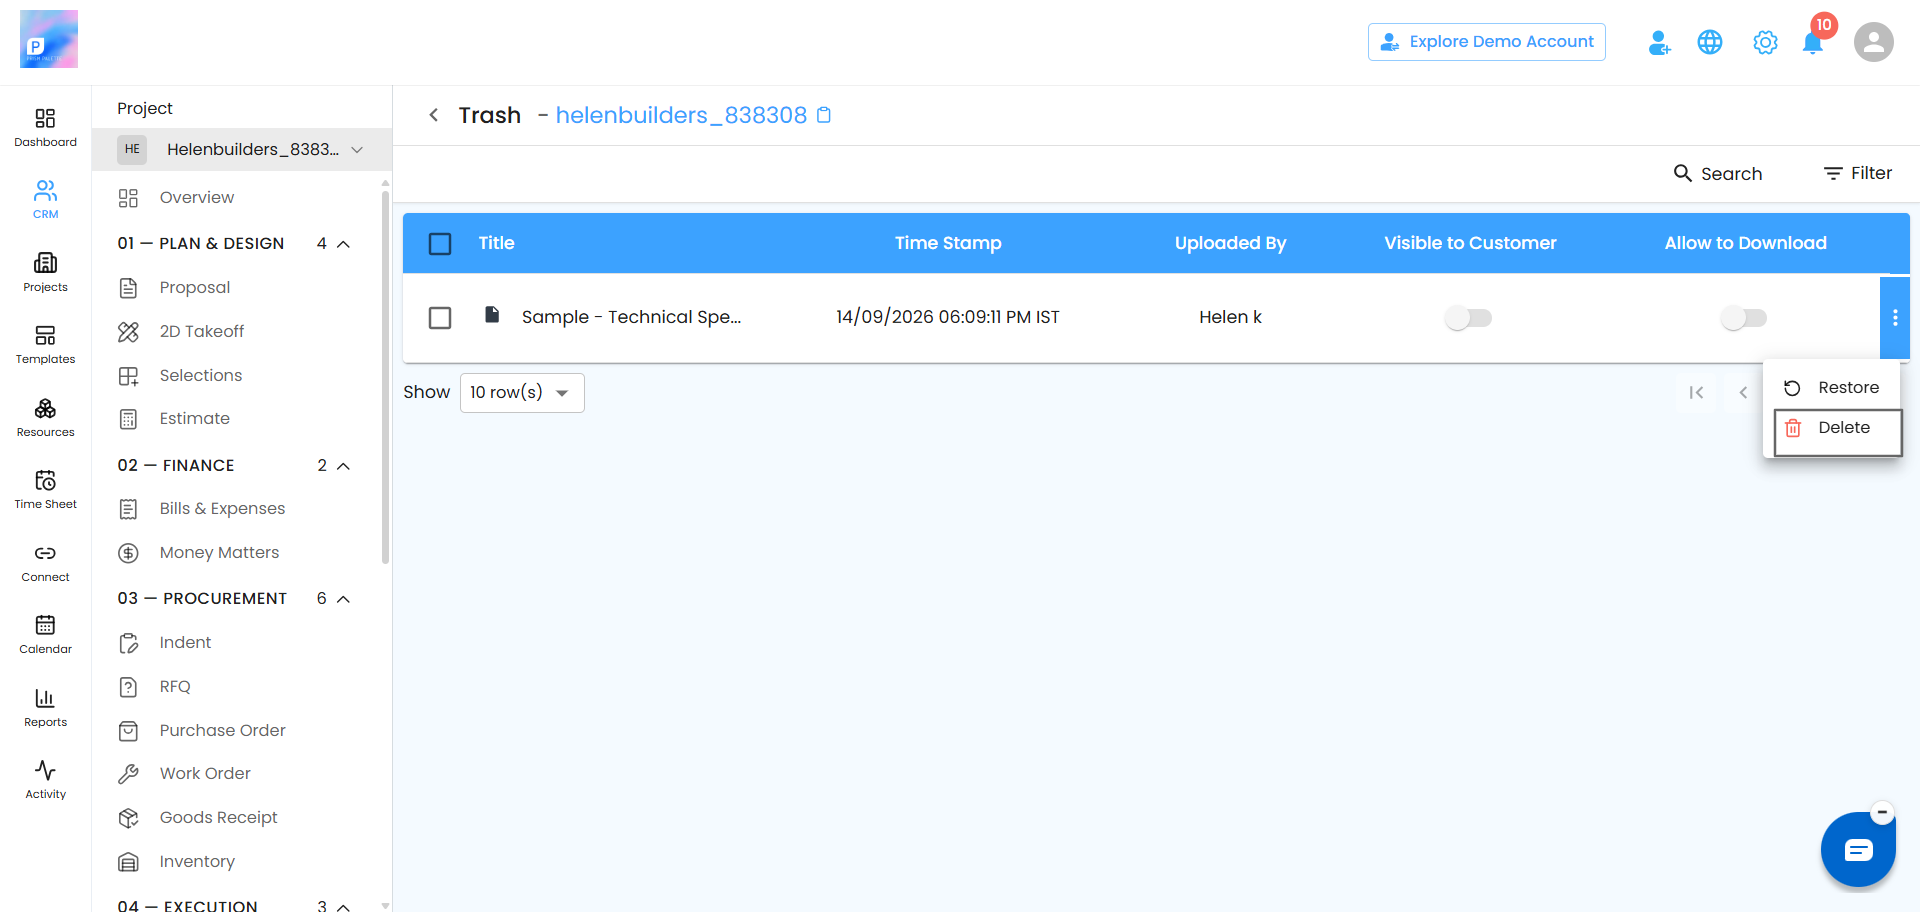
Note: Permanently deleted documents cannot be recovered.
Was this article helpful?
That’s Great!
Thank you for your feedback
Sorry! We couldn't be helpful
Thank you for your feedback
Feedback sent
We appreciate your effort and will try to fix the article