Managing Project Documents:
IntoAEC’s Document Management feature helps teams organize, store, manage, and access all project-related files from a centralized location. From drawings and estimates to videos, reports, invoices, and supporting documents, everything can be securely maintained within the project workspace for easy collaboration and retrieval.
The document module is designed to support structured file organization through folders and subfolders while also providing quick upload, file preview, visibility controls, and trash recovery options.
Accessing the Document Module
Opening a Project
To access project documents:
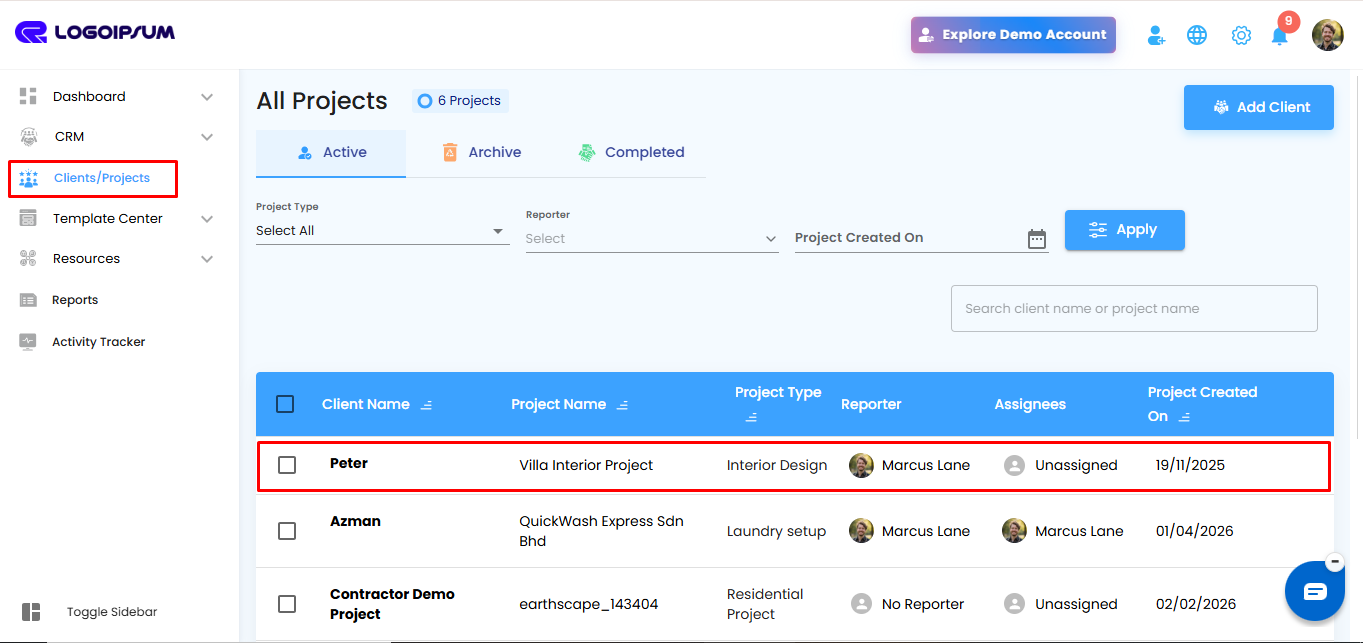
- Navigate to the left-side menu.
- Click Clients/Projects.
- The Projects screen will display all created projects.
- Select the required project from the project list.
If no project exists, create a new project before proceeding.
Opening the Document Feature
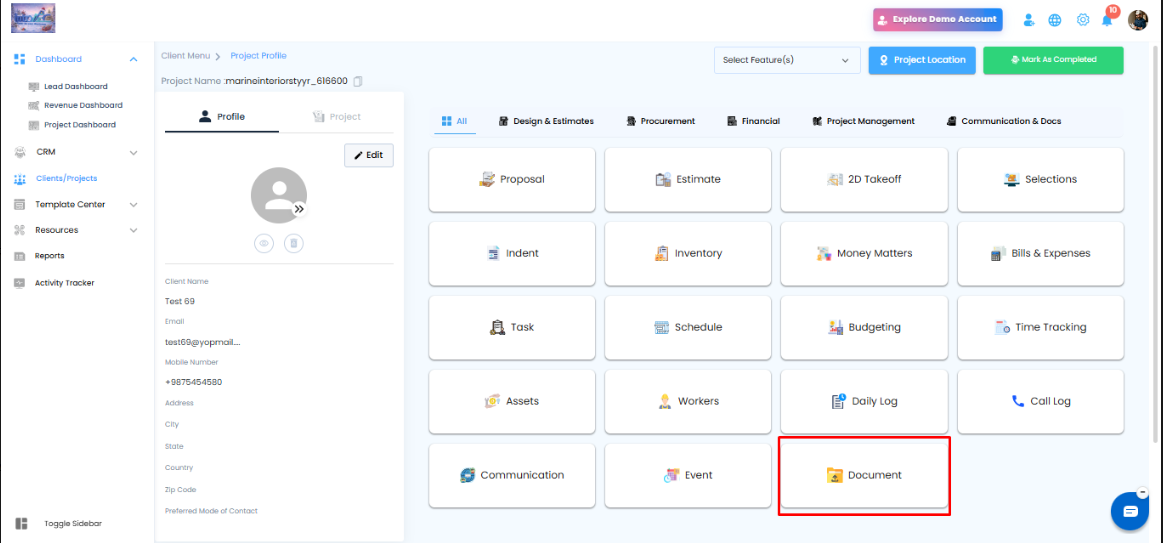
Once the project dashboard opens:
- Navigate to the project features section.
- Click the Document module.
This opens the centralized document management workspace for the selected project.
Creating Folders & Subfolders
Create a Folder
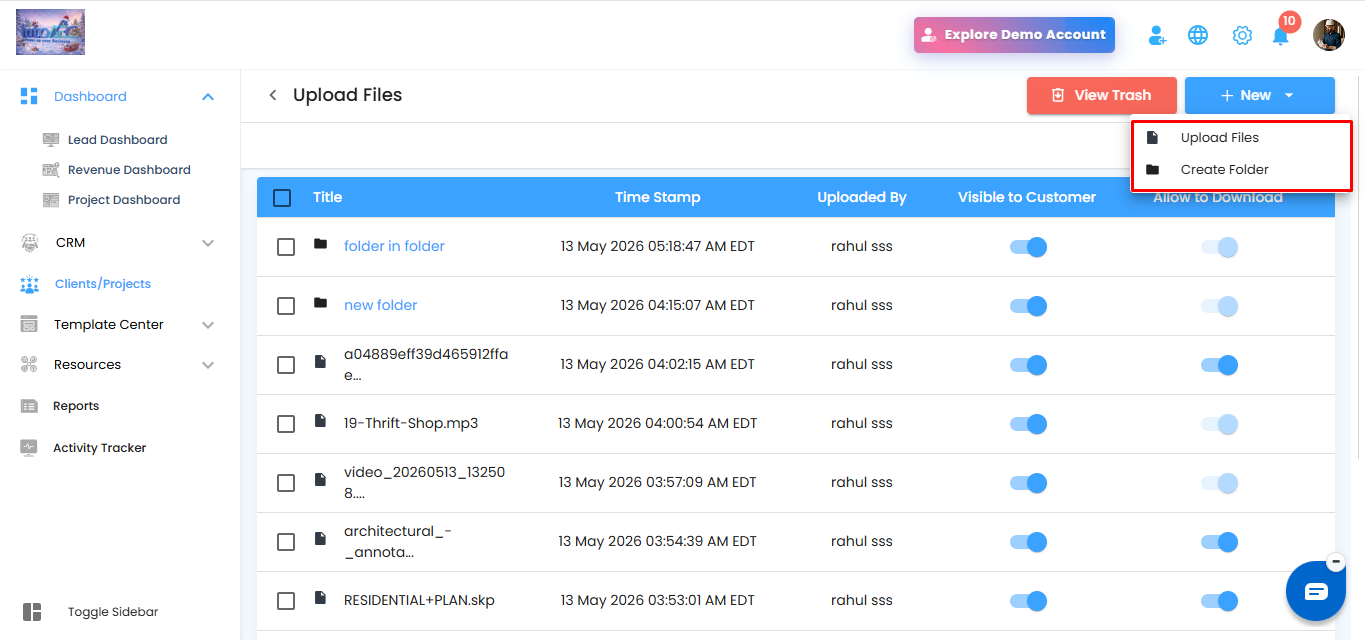
To create a new folder:
- Click the + New button at the top-right corner.
- Select Create Folder.
- Enter the folder name.
- Save the folder.
The newly created folder will appear in the document list.
Creating Nested Subfolders
IntoAEC supports multiple levels of folder hierarchy.
To create a subfolder:
- Open an existing folder.
- Click + New.
- Select Create Folder again.
- Enter the subfolder name.
You can continue creating additional nested folders as required for better document organization.
Example Structure:
- Project Documents
- Drawings
- Architectural
- Structural
- Estimates
- Invoices
- Site Photos
- Drawings
Pro Tip:
Use folder structures based on departments, phases, or document types to make file management easier for teams.
Uploading Files
Upload Files to a Folder
Files can be uploaded directly inside any folder or subfolder.
To upload files:
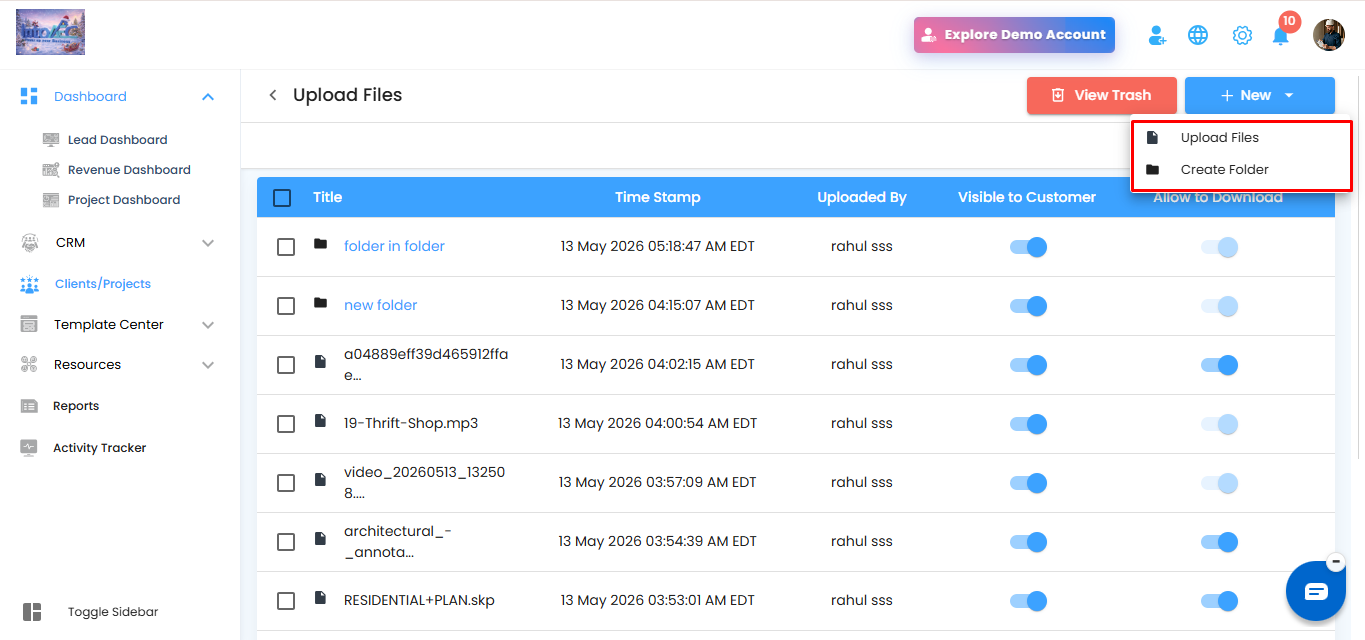
- Open the required folder location.
- Click + New.
- Select Upload Files.
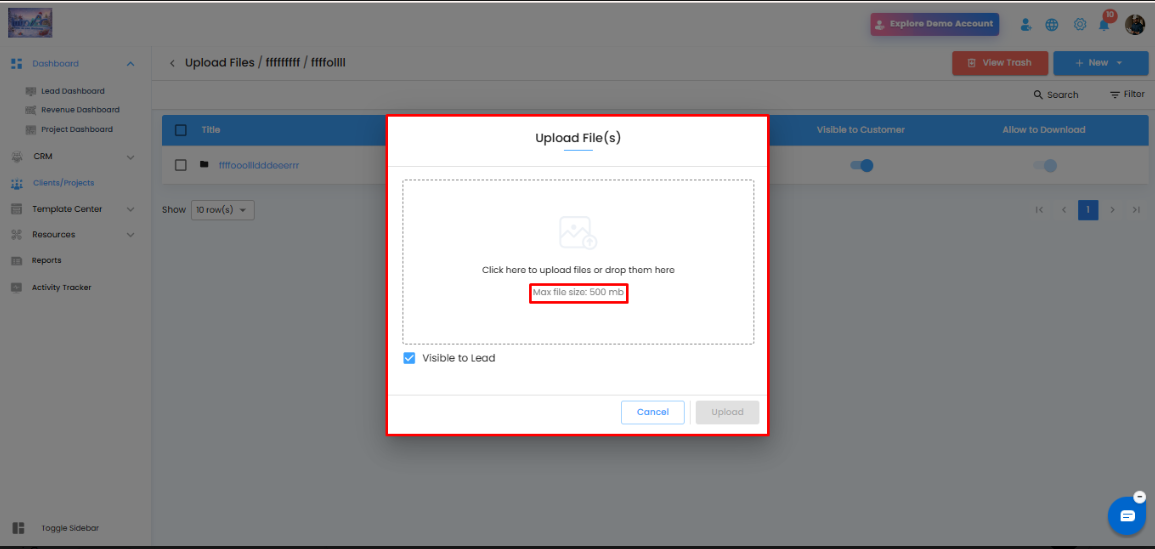
A file upload popup window will appear.
Upload Popup Window
The upload popup allows users to:
- Click to browse files
- Drag and drop files directly
- Upload multiple files simultaneously
- Configure visibility settings before upload
File Upload Limits
- Maximum File Size per File: 500 MB
- Multiple files can be uploaded at once
- Supports various file formats including:
- Excel
- Images
- Videos
- Audio Files
- Drawings
- Documents
Visibility Option
Before uploading, users can enable or disable:
- Visible to Lead/Customer
This controls whether the uploaded file is visible to the customer portal or restricted internally.
Pro Tip:
Organize files into folders before bulk uploading to avoid document clutter in large projects.
Viewing Uploaded Files
After upload, all files and folders are displayed in the document list with detailed information including:
- File Name
- Upload Timestamp
- Uploaded By
- Customer Visibility
- Download Permissions
The document list provides a centralized overview of all uploaded project files.
File Preview & Viewing
Opening Files
To preview a file:
- Click on the required file from the document list.
- The file opens directly within IntoAEC’s viewer.
Supported documents such as Excel sheets, PDFs, images, and other compatible formats can be previewed without downloading.
The viewer also supports:
- File version viewing
- Comment sections
- Sheet navigation (for spreadsheets)
This helps teams review documents collaboratively within the platform.
File Management Options
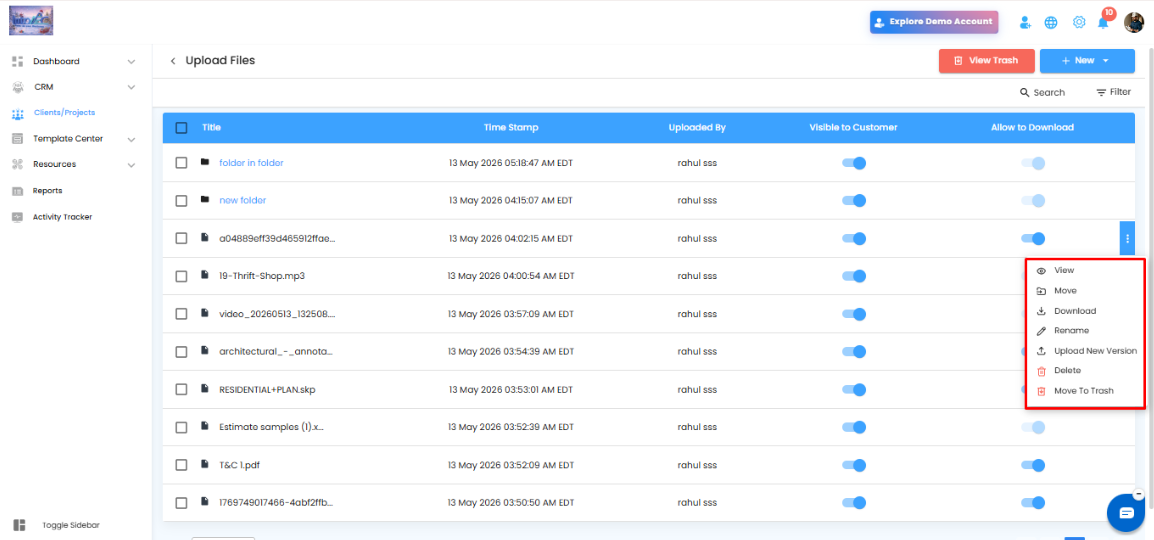
Each uploaded file includes a three-dot menu (⋮) that provides quick access to file management actions. These options help users organize, update, and manage project documents efficiently without leaving the document workspace.
Available File Actions:
View
Open and preview the selected document directly within IntoAEC without downloading the file.
Move
Transfer the selected file to another folder or subfolder within the document management structure for better organization.
Download
Download the file to your local system for offline access or sharing.
Rename
Modify the file name without affecting the actual document content.
Upload New Version
Replace or update the existing document with a newer version while maintaining document continuity and version tracking.
Pro Tip:
Use the “Upload New Version” option instead of creating duplicate files to maintain a clean and organized document history.
Trash Management
Accessing Trash
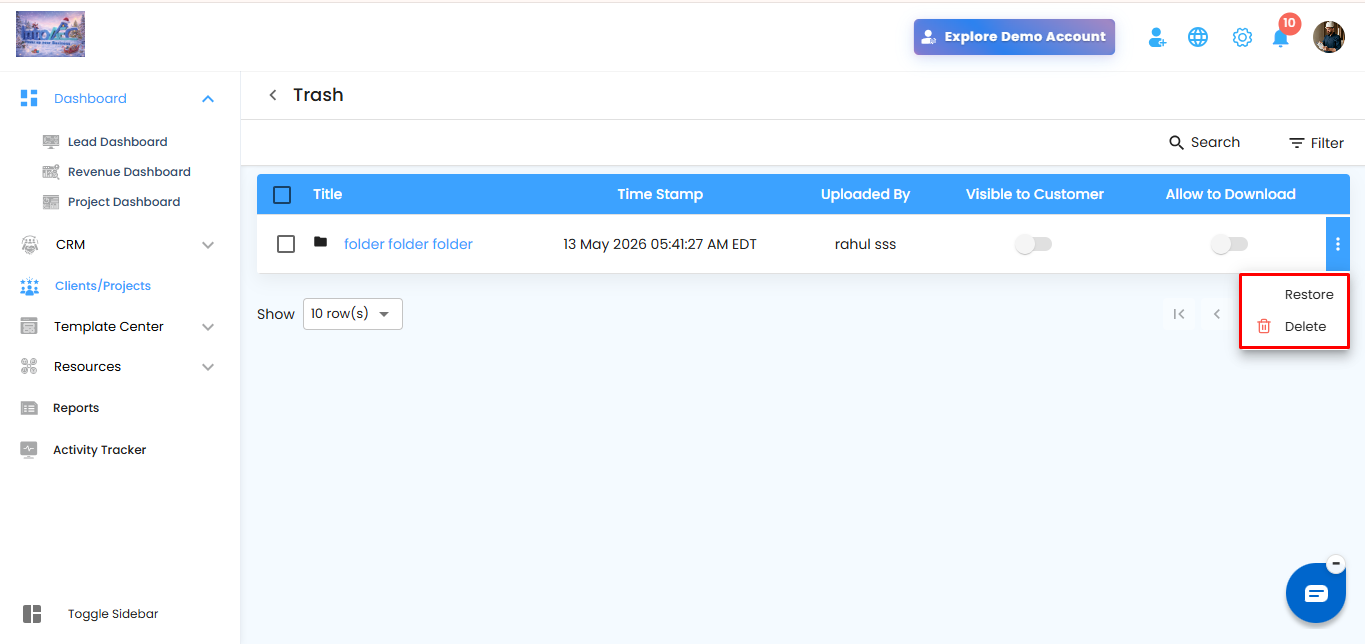
Click the View Trash button to access files and folders moved to trash
The Trash module stores temporarily removed items until they are either restored or permanently deleted.
Restore Deleted Files
Files or folders moved to trash can be restored easily.
To restore:
- Open the Trash section.
- Click the three-dot menu next to the required item.
- Select Restore.
The file or folder will return to its original location.
Permanent Deletion
Items inside Trash can also be permanently deleted if they are no longer required.
Once permanently deleted, the file cannot be recovered.
Was this article helpful?
That’s Great!
Thank you for your feedback
Sorry! We couldn't be helpful
Thank you for your feedback
Feedback sent
We appreciate your effort and will try to fix the article