Crafting a Timesheet Like a Pro – IntoAEC Application
Think of a Timesheet in IntoAEC as your digital time diary — not only does it capture work hours, but it also:
Tracks productivity
Calculates costs automatically
Converts time into expenses
Even marks attendance (when linked with shifts!)
No more juggling between spreadsheets, attendance registers, and calculators. IntoAEC’s Timesheet is built to work smarter, not harder.
Kickstart Your Timesheet
On the Time Tracking dashboard, spot the Create Timesheet button shining at the top-right.
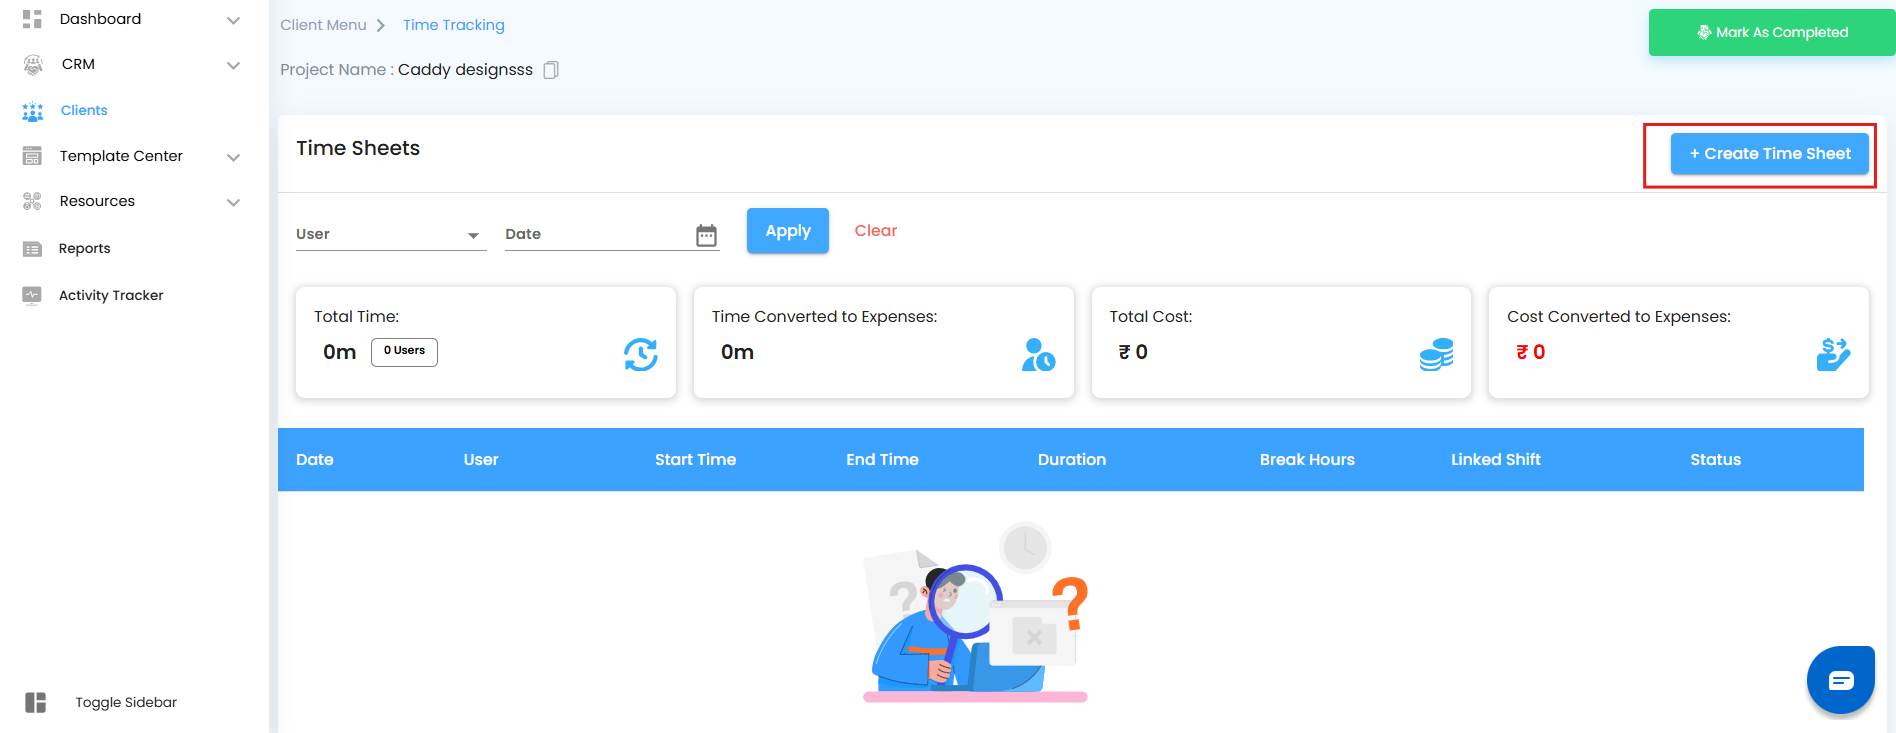
Click it, and a sleek half-canvas titled “Create Timesheet” glides in from the side.
It’s like opening a workspace designed just for you.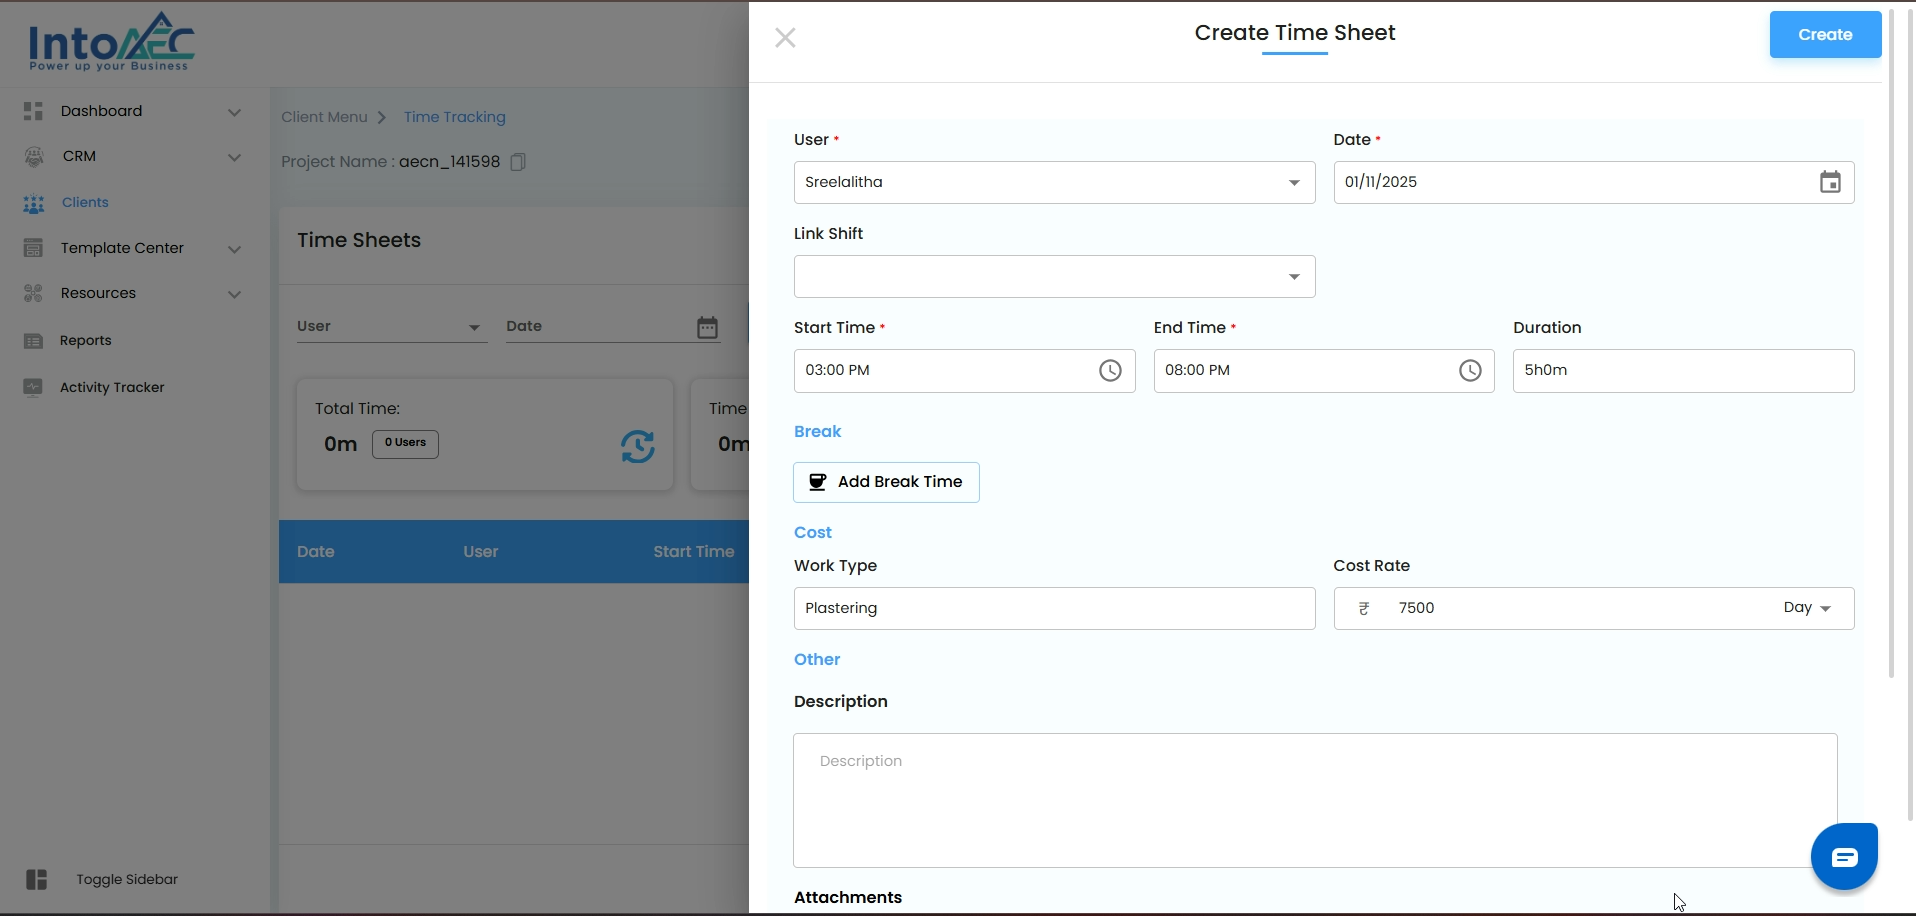
Choose Your Hero (User)
From the User dropdown, pick the team member you’re logging hours for.
The dropdown already knows who’s part of the project — no hunting required.
Why it’s cool: You can log your own hours or manage your team’s time from one place.
Set the Date in Stone
Use the calendar picker to select when the magic happened — today’s work, yesterday’s hustle, or even a past project day.
The date anchors your timesheet in the project timeline.
Link Shift = Smart Attendance
Here’s where IntoAEC gets futuristic:
If a shift is already created and assigned to this user → just link it here.
Once linked:
Work hours flow directly into the timesheet.
Attendance is auto-marked in one click.
No double entry. No “Did I mark attendance?” doubts.
Just seamless time + attendance sync.
Log the Work Hours
Start Time & End Time → Pick the exact range when the work was done.
Duration → Auto-calculated for you. (Yes, no mental math required. IntoAEC’s got your back.)
It’s precise, effortless, and ensures no minute goes unaccounted for.
Define the Value of Time
Every hour has weight — and IntoAEC makes sure it’s counted right.
Work Type: Tag it as Designing, Site Visit, Drafting, Documentation, etc.
Cost Rate: Input the rate linked with that type of work.
Rate Unit: Decide whether this rate applies per hour, per day, or per week.
This way, timesheets don’t just track time, they translate it into measurable cost insights.
Add Extra Details
Description: Provide context — task updates, progress highlights, client notes, or milestones.
Attachments: Upload up to 4 files (25 MB each, images or PDFs).
Examples: signed work logs, site photos, client approvals, or reference documents.
These extras ensure your timesheet isn’t just numbers — it’s well-documented evidence of effort.
Save Your Timesheet
Once all fields are filled → hit Create.
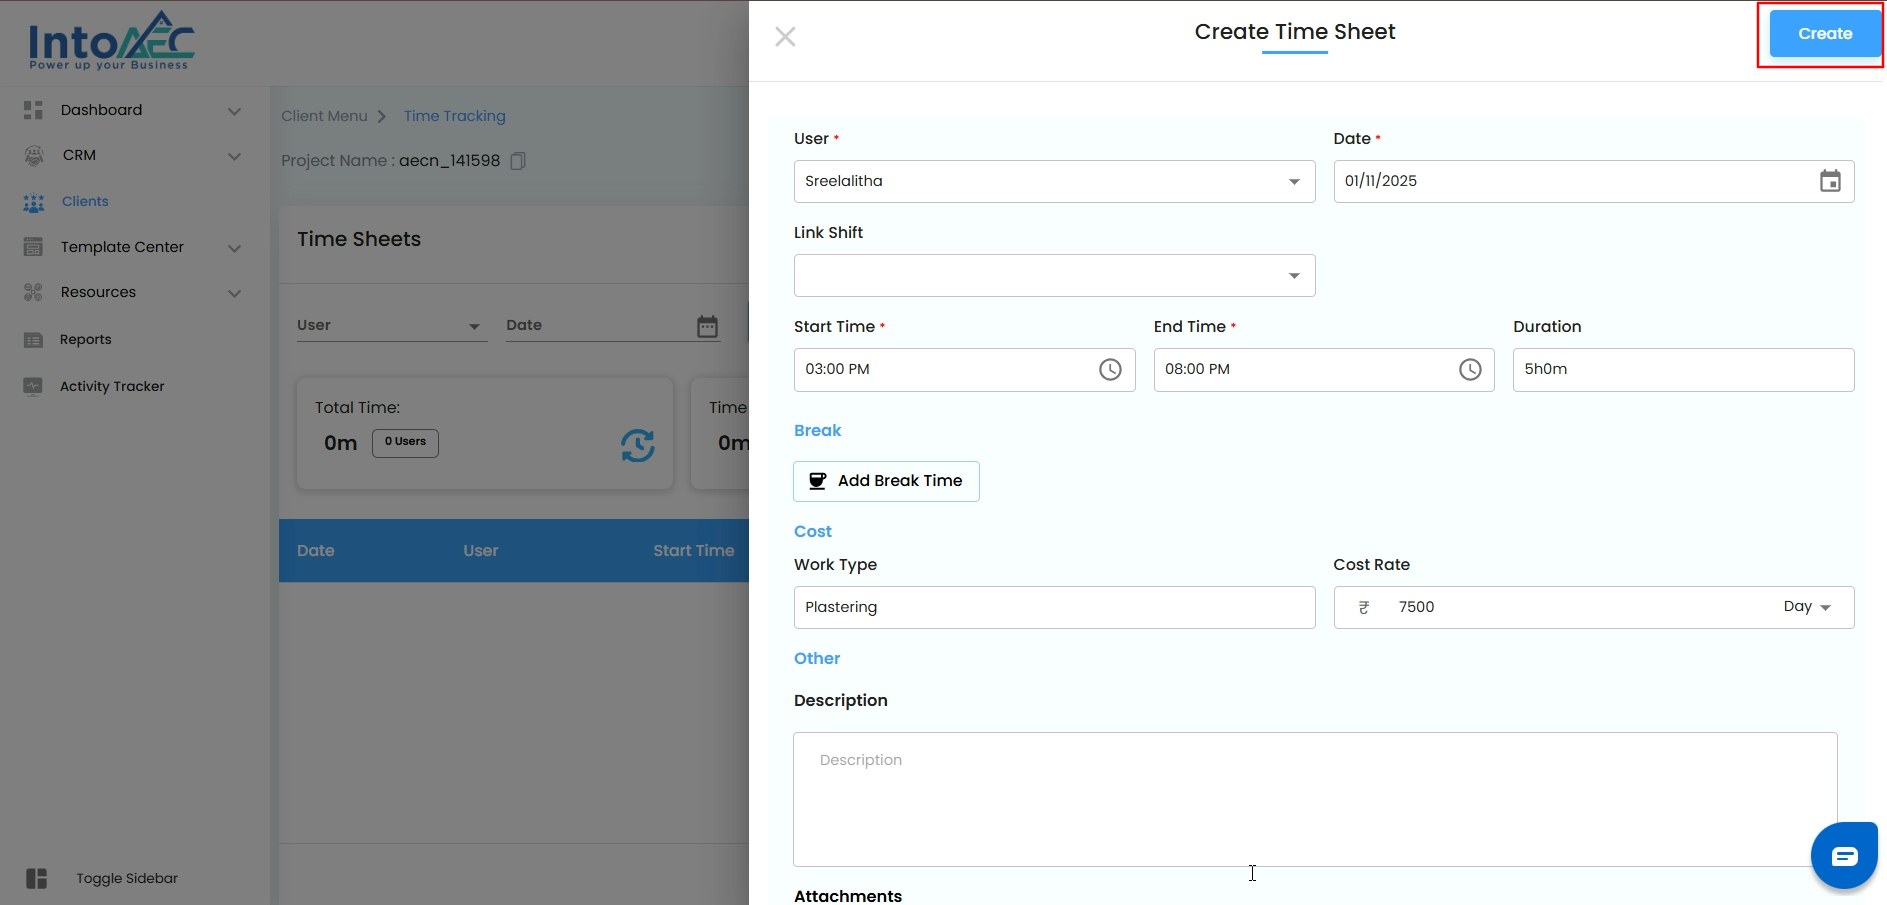
Your timesheet entry will appear instantly in the timesheet table.Timesheet Table – What You’ll See
 Every entry in the timesheet table comes with key details like user, date, time, duration and linked shift.
New Addition → Status Column:Manually Created → if the entry was added directly from the “Create Timesheet” form.
Manually Edited → if the entry was later modified.
Clocked Out → if the entry came from a user clocking in & out via the mobile app.
Clocked Out (Outside Location) → if the user clocked out away from the designated project site.

This status column gives instant clarity on how and where the entry originated.
From here, you can view, edit, or manage the entry anytime.
Upload Timesheet (Using Excel):
Managing multiple entries at once? You can upload timesheets in bulk using an Excel template instead of creating them manually.

Overview:
IntoAEC allows you to upload multiple timesheet records in one go through a structured Excel file. This is useful when handling large volumes of time entries.
Download and Prepare the File:
Click Upload Template to download the Excel file
The file contains three sheets:
Template → Enter your actual data
Example → Sample data for reference
Instruction → Guidelines to follow
Enter data only in the Template sheet as per the instructions
Upload and Map Users:
Upload the completed Excel file
A User Mapping popup will appear
Select the correct user from the dropdown for each name
Click Map & Upload to complete the process
Final Step:
Once uploaded, all timesheet entries will be automatically added and displayed on the main timesheet page
Important Notes:
Do not modify column headers in the template
Follow the instruction sheet carefully
Ensure correct user mapping to avoid errors
Why This Matters:
Creating a timesheet in IntoAEC transforms raw hours into actionable data — empowering you with insights for planning, billing, and project success.
Was this article helpful?
That’s Great!
Thank you for your feedback
Sorry! We couldn't be helpful
Thank you for your feedback
Feedback sent
We appreciate your effort and will try to fix the article