Global Timesheet – Manage Time Tracking Across All Projects
The Global Timesheet in IntoAEC allows you to view and manage timesheet records across all projects from one common place. Instead of opening each project separately, users can access the complete timesheet list directly from the side menu, create new timesheet entries, upload timesheets in bulk, and track working hours through the global clock-in and clock-out feature.
With Global Timesheet, you can manage working hours, break time, wages, chargeability, project allocation, schedules, shifts, and approval details in one place.
Overview
Using the Global Timesheet, you can:
View timesheet entries from all projects.
Check user-wise working hours.
Track start time, end time, duration, and break hours.
View regular wages, overtime, and total wages.
Check timesheet status and approval status.
Create a new timesheet manually.
Upload multiple timesheet entries using an Excel template.
Map uploaded timesheet entries to specific projects.
Clock in and clock out for organisation users.
Track working hours and break hours automatically.
Split working time across multiple projects.
Link project time entries to schedules and shifts.
Mark time as Chargeable or Non-Chargeable.
View clocked-in and clocked-out entries in the Global Timesheet and the relevant project’s Time Tracking page.
How to Open Global Timesheet
Go to the left-side menu.
Click Time Sheet.
The Global Timesheet page will open.
This page displays timesheet records across all projects in one place.
Global Timesheet Dashboard
The Global Timesheet page provides a consolidated view of working hours and wage-related information across the organisation.
Summary Cards
The summary cards display the consolidated values from the available timesheet records.
Total Time – Displays the total working time recorded in the timesheet entries.
No. of Users – Shows the number of users included in the timesheet records.
Time Converted to Expenses – Displays the time value converted into expenses.
Total Wage – Shows the total wages calculated from the available timesheet entries.
Wage Converted to Invoice – Displays the wage amount converted into invoices.
These cards help you review the overall working time, user participation, wage values, and converted amounts across projects.
Filter Timesheet Records
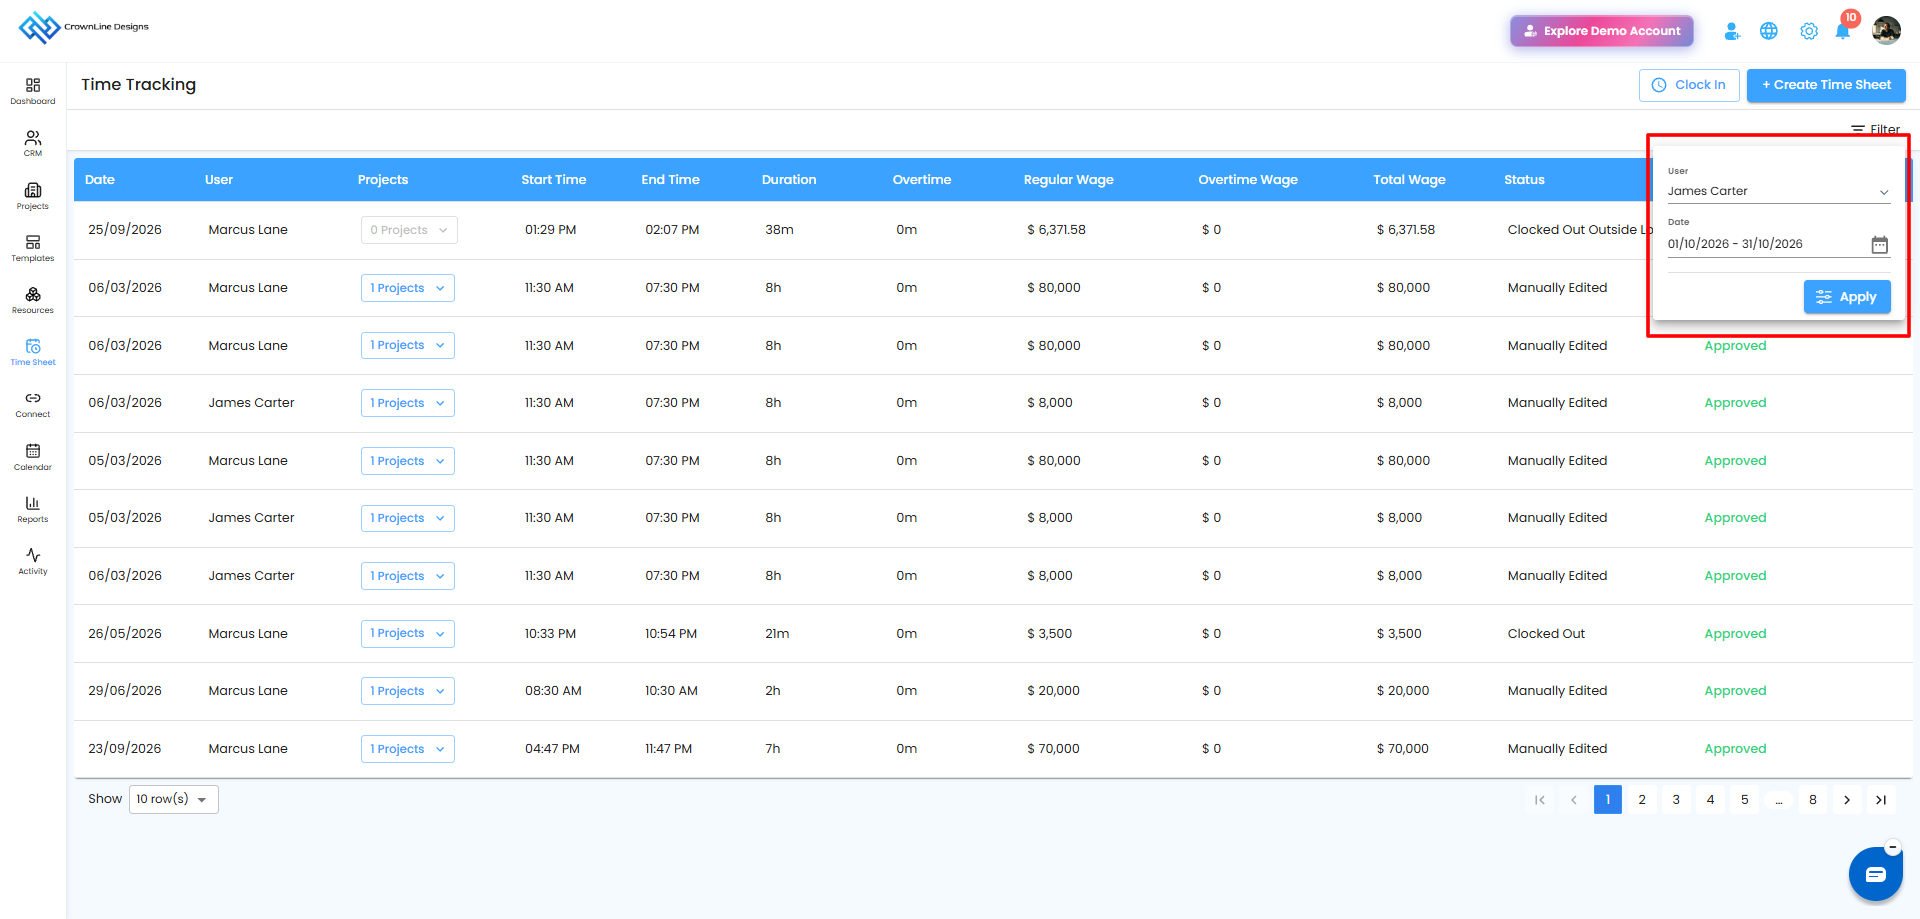
You can use the Filter option to find specific timesheet records.
The available filters include:
User – View timesheet entries for a specific user.
Date – View entries for a selected date or date range.
These filters help you review user activity, analyse chargeable working hours, and track time entries for a particular period.
Timesheet List Page
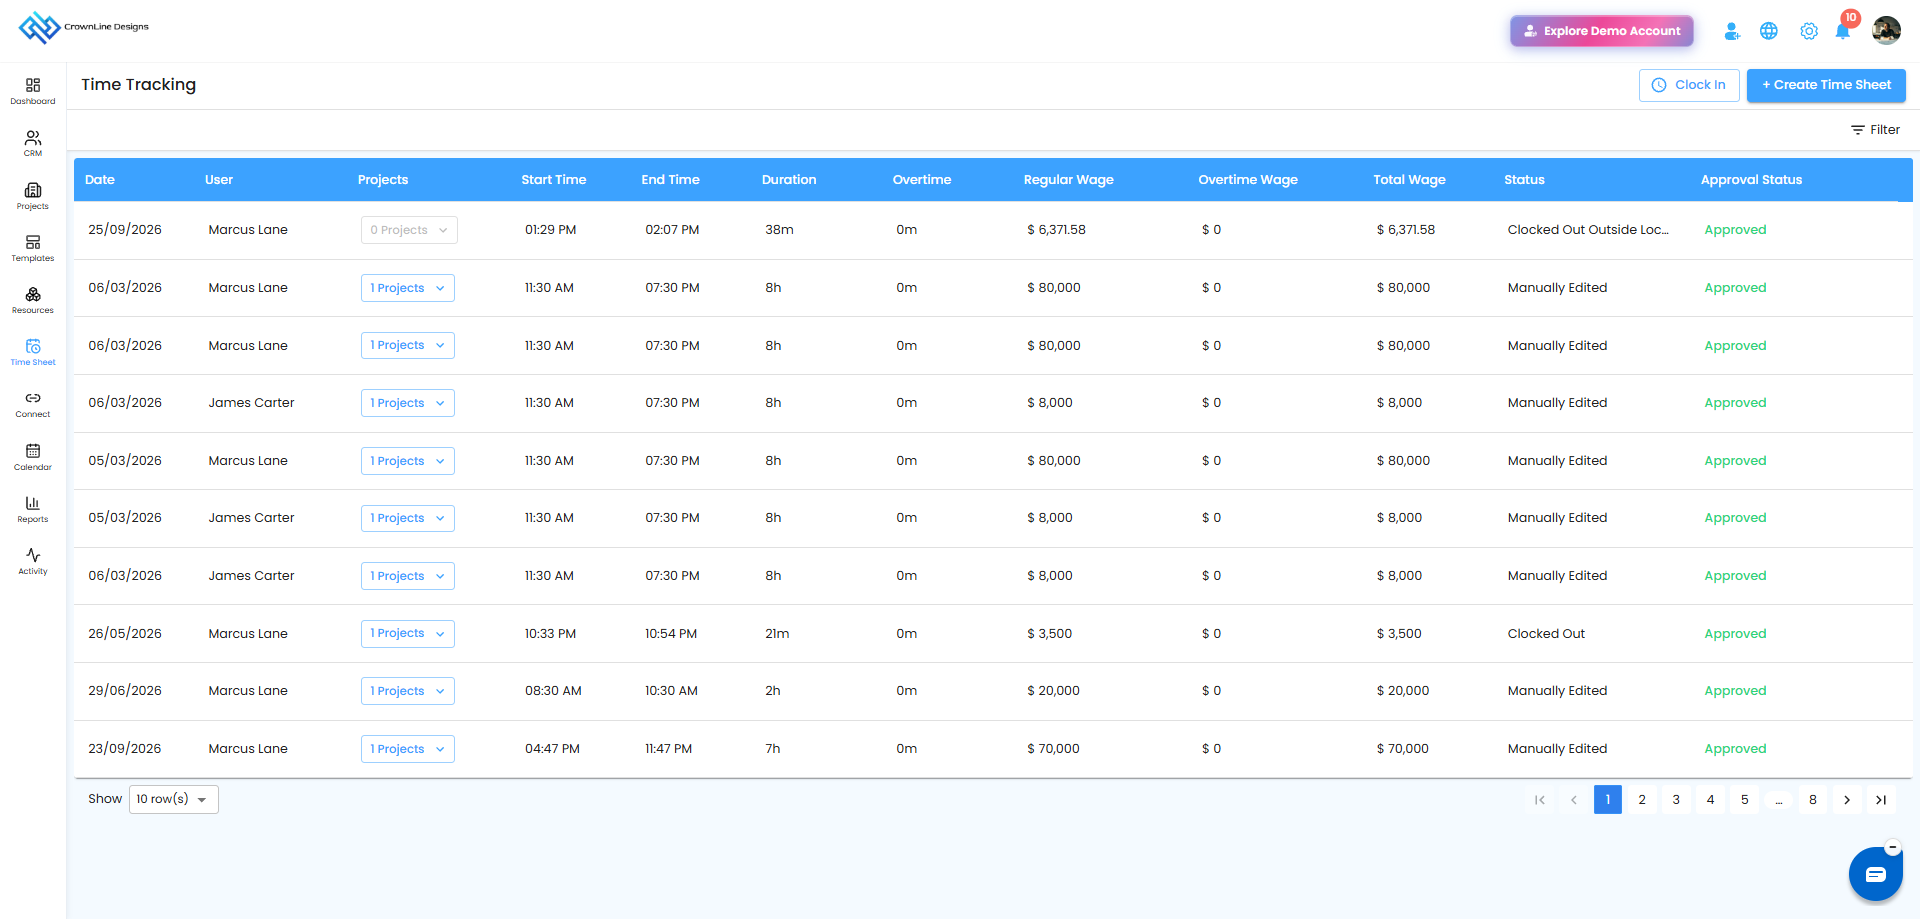
The Global Timesheet displays all available timesheet records in a table format.
The timesheet list includes details such as:
Field | Description |
|---|---|
Date | Shows the date of the timesheet entry. |
User | Displays the user associated with the timesheet. |
Project Name | Shows the project linked to the timesheet entry. |
Start Time | Displays when the work started. |
End Time | Displays when the work ended. |
Duration | Shows the total working duration. |
Break Hours | Displays the break duration recorded in the timesheet. |
Regular Wages | Shows the wages calculated for regular working hours. |
Overtime | Displays the wages calculated for overtime hours. |
Total Wages | Shows the total wage amount calculated for the entry. |
Chargeability | Indicates whether the time is Chargeable or Non-Chargeable. |
Status | Shows how the entry was created or recorded. |
Approval Status | Displays the approval status of the timesheet. |
Linked Schedule | Displays the schedule linked to the timesheet, when applicable. |
Linked Shift | Displays the shift linked to the timesheet, when applicable. |
How to Create a Timesheet
Open Time Sheet from the side menu.
Click + Create Time Sheet in the top-right corner.
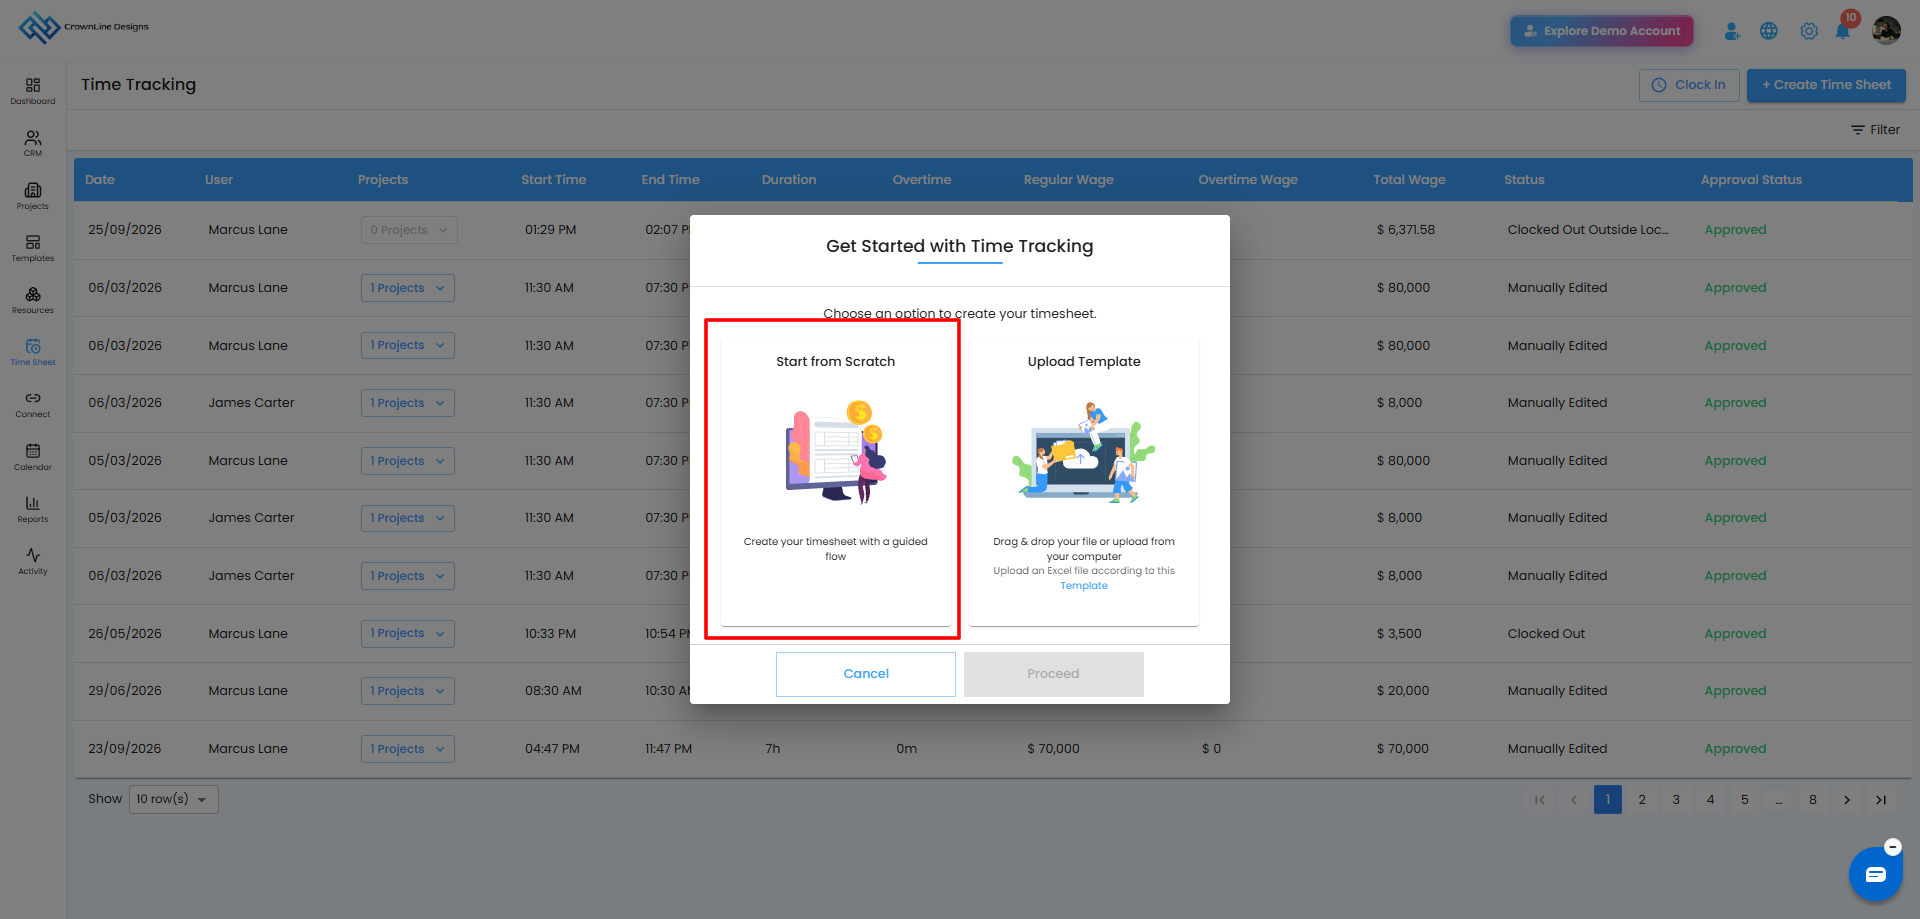
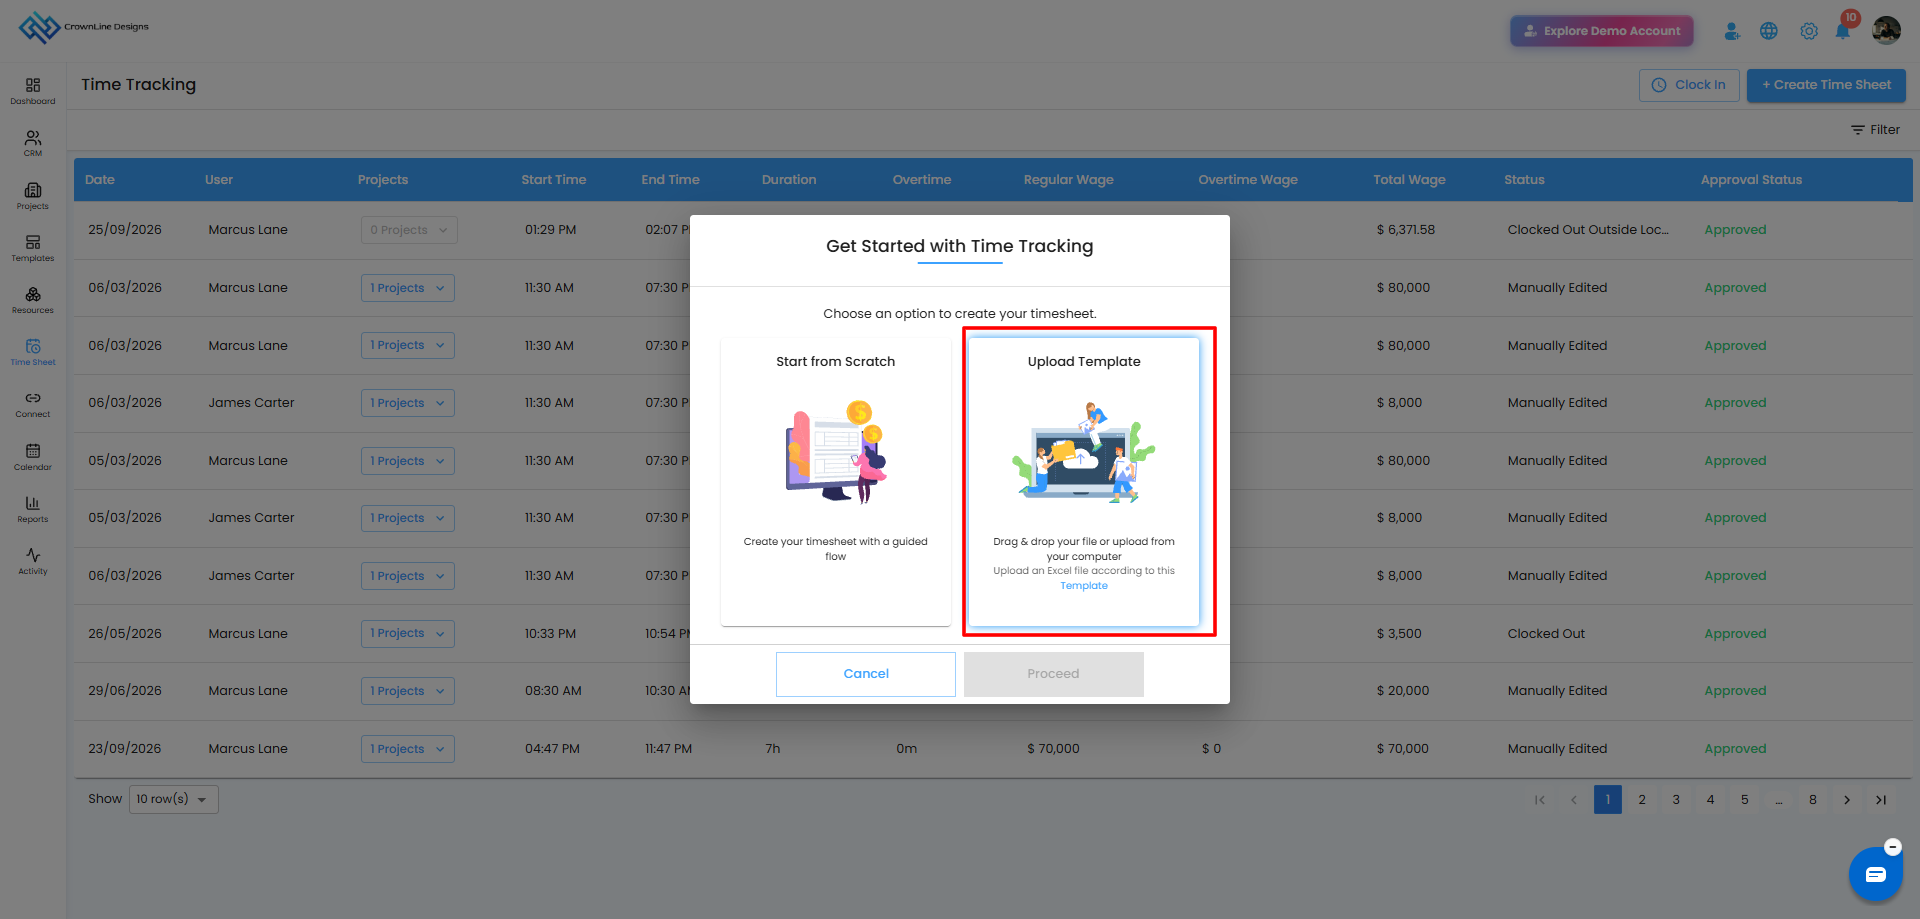
A popup will appear with two options:
Start from Scratch
Upload Template
Select the option based on how you want to create the timesheet records.
Start from Scratch
Select Start from Scratch when you want to create a timesheet manually using the guided form.
Select Start from Scratch.
Click Proceed.
The Create Time Sheet form will open.
Enter the required timesheet details.
Click Create to save the entry.
Upload Template
Select Upload Template when you want to upload multiple timesheet entries using an Excel file.
The Excel upload process allows you to add timesheet records in bulk instead of entering each record manually.
The global upload process also includes Project Mapping, which allows each uploaded timesheet entry to be assigned to the correct project.
Create Time Sheet Form
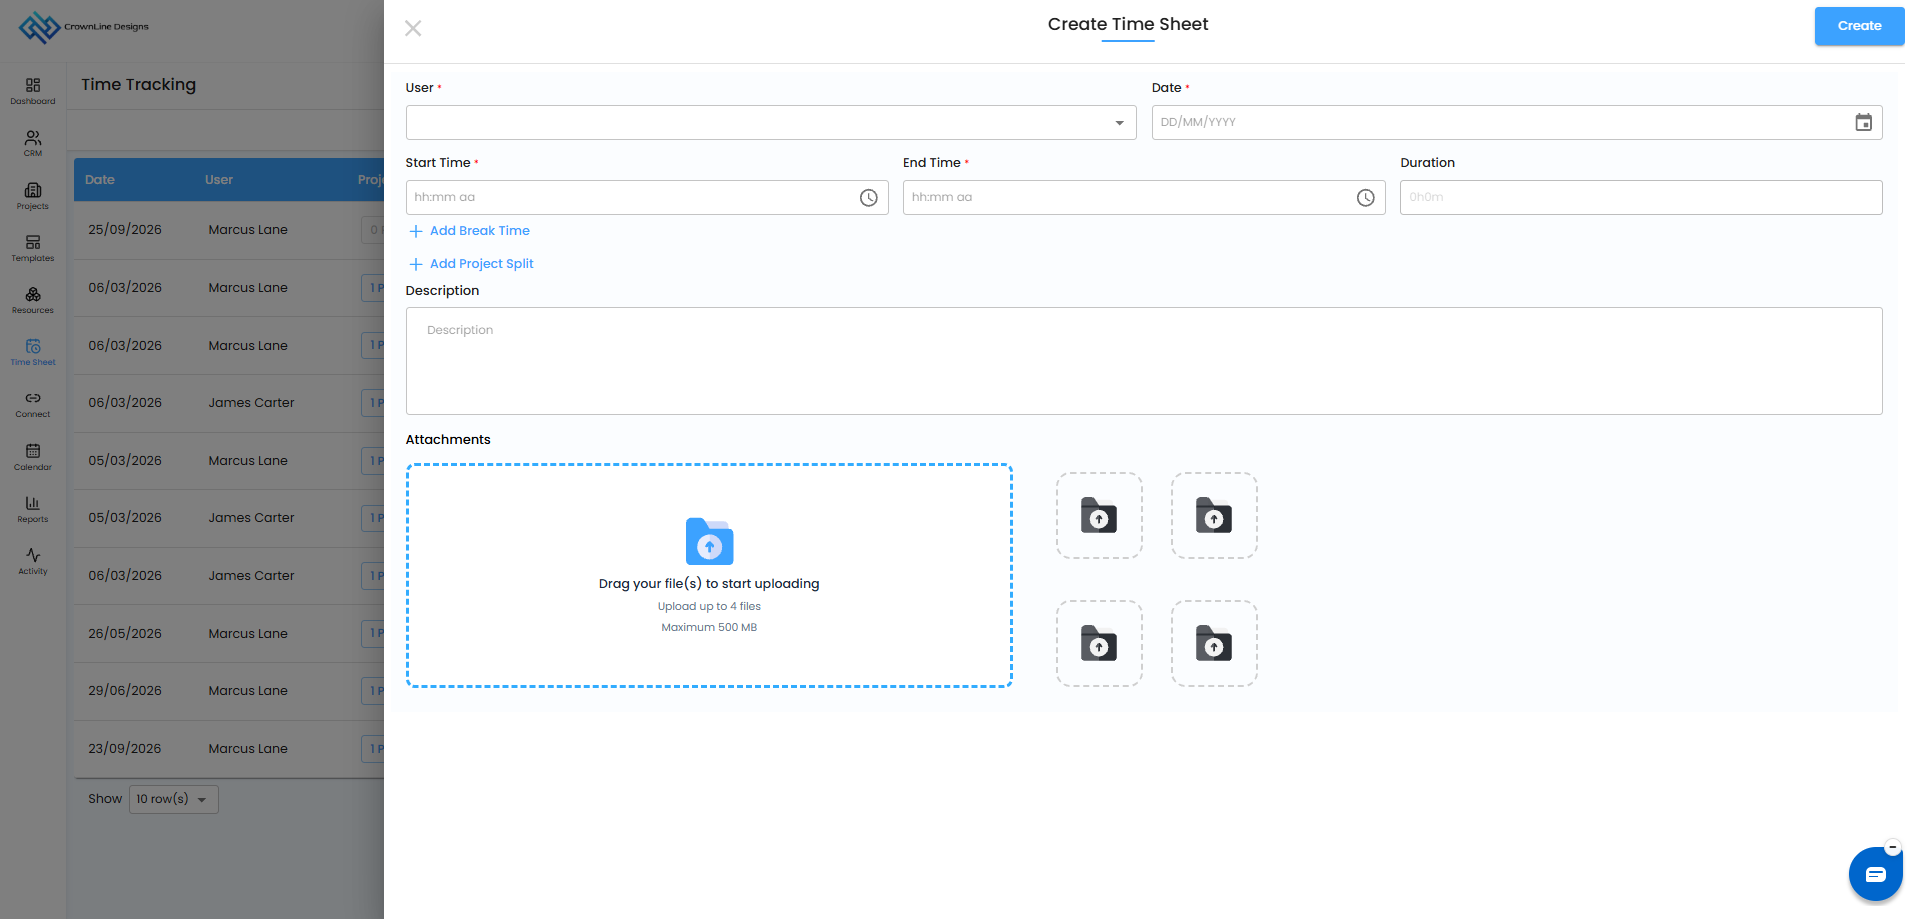
After selecting Start from Scratch and clicking Proceed, the Create Time Sheet form will open.
Fill in the required details.
Field | Description |
|---|---|
User | Select the user for whom the timesheet is being created. |
Date | Select the date of the timesheet entry. |
Start Time | Enter the time when the work started. |
End Time | Enter the time when the work ended. |
Duration | Displays the working duration based on the entered time details. |
Chargeability | Select Chargeable or Non-Chargeable. |
Link Schedule | Link the timesheet to a relevant schedule, when applicable. |
Link Shift | Link the timesheet to a relevant shift, when applicable. |
Description | Add work details, progress updates, or notes. |
Attachments | Upload supporting files or documents. |
The timesheet can be linked to a schedule or shift to connect the recorded time with the relevant project activity or working period.
Add Break Time
Use Add Break Time when the user takes a break during the working period.
Recording break time helps calculate the actual working duration more accurately by separating break hours from working hours.
The recorded break duration is reflected in the timesheet and can also be included when calculating the user’s working hours and wages.
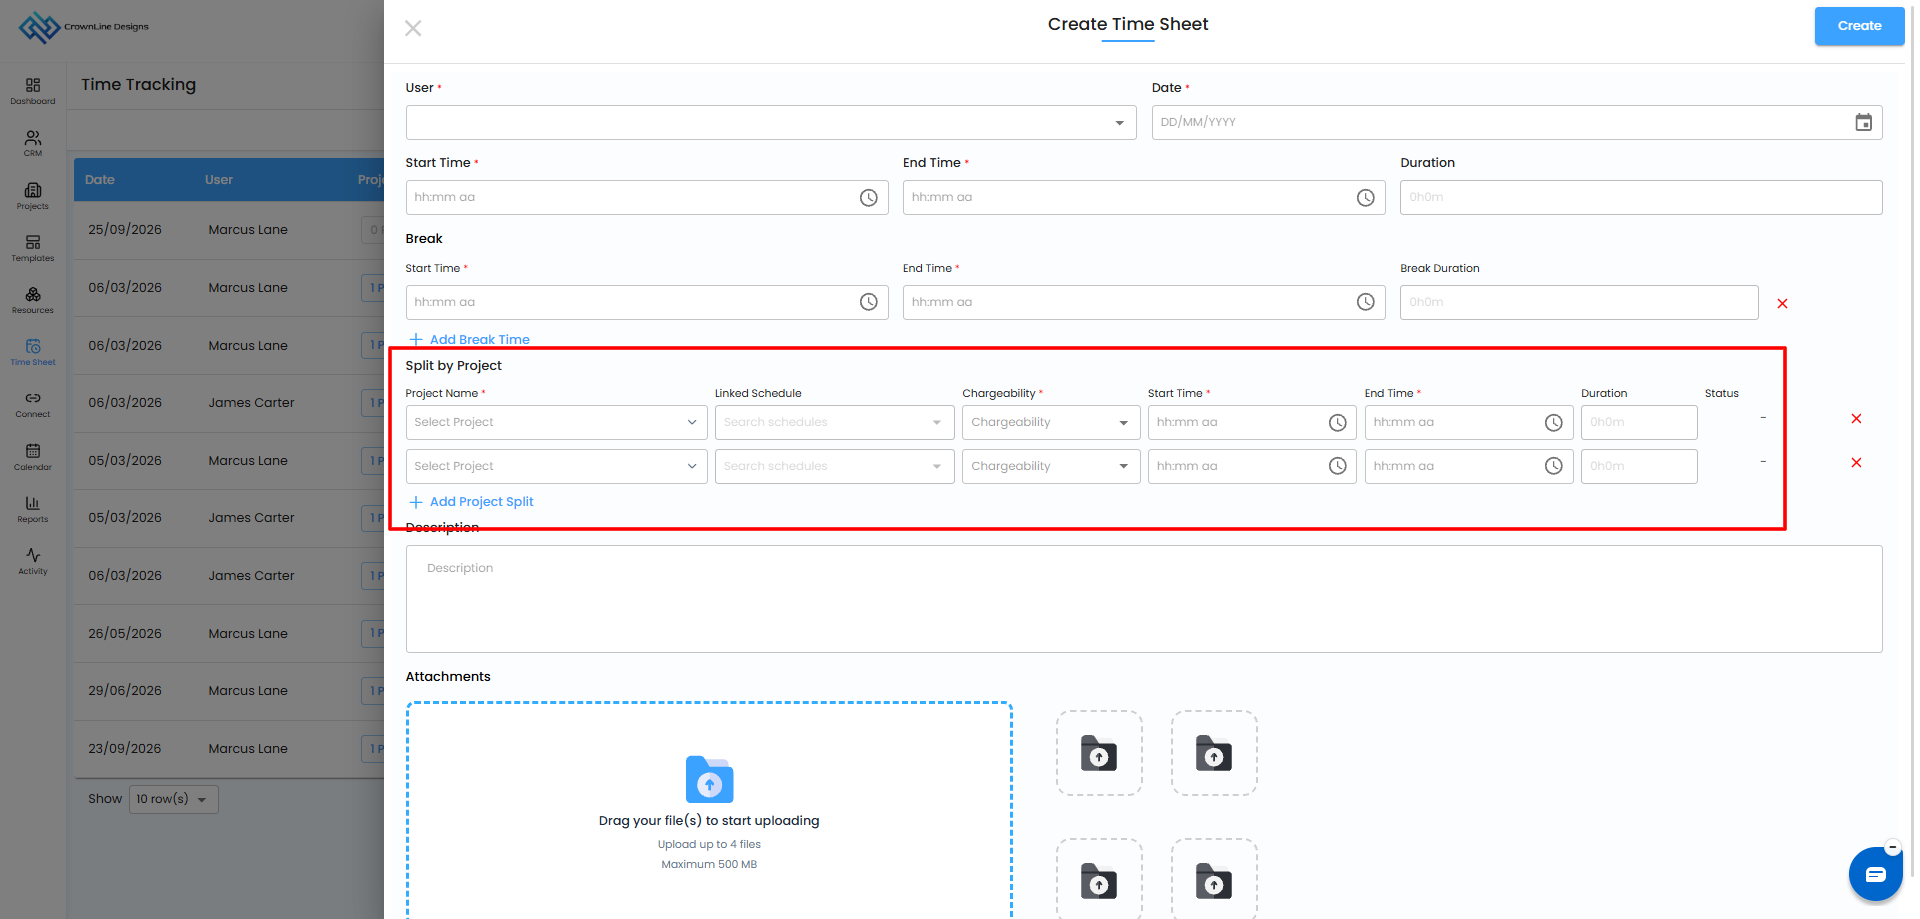
Add Project Split
Use Add Project Split when the user’s working time needs to be divided between multiple projects.
This is useful when a user works on more than one project during the same working period.
Each project split can include the following details:
Field | Description |
|---|---|
Project Name | Select the project where the work was performed. |
Link Schedule | Link the project time to a relevant schedule. |
Link Shift | Link the project time to a relevant shift. |
Start Time | Enter the start time for the project split. |
End Time | Enter the end time for the project split. |
Duration | Displays the duration allocated to the project. |
Chargeability | Select Chargeable or Non-Chargeable for the project time. |
Adding project splits helps distribute the user’s working hours across the appropriate projects and ensures that the time is reflected in the relevant project’s Time Tracking page.
Add Attachments
In the Attachments section, you can upload supporting files related to the timesheet.
These files can include:
Attachment Type | Example |
|---|---|
Work Proof | Site images or activity proof. |
Documents | Approval or supporting documents. |
Notes | Additional reference files. |
Attachments help maintain supporting evidence for the recorded working hours and project-related activities.
Create the Timesheet
After entering all required details:
Review the user, date, working hours, break time, and project split details.
Check the chargeability and linked schedule or shift, where applicable.
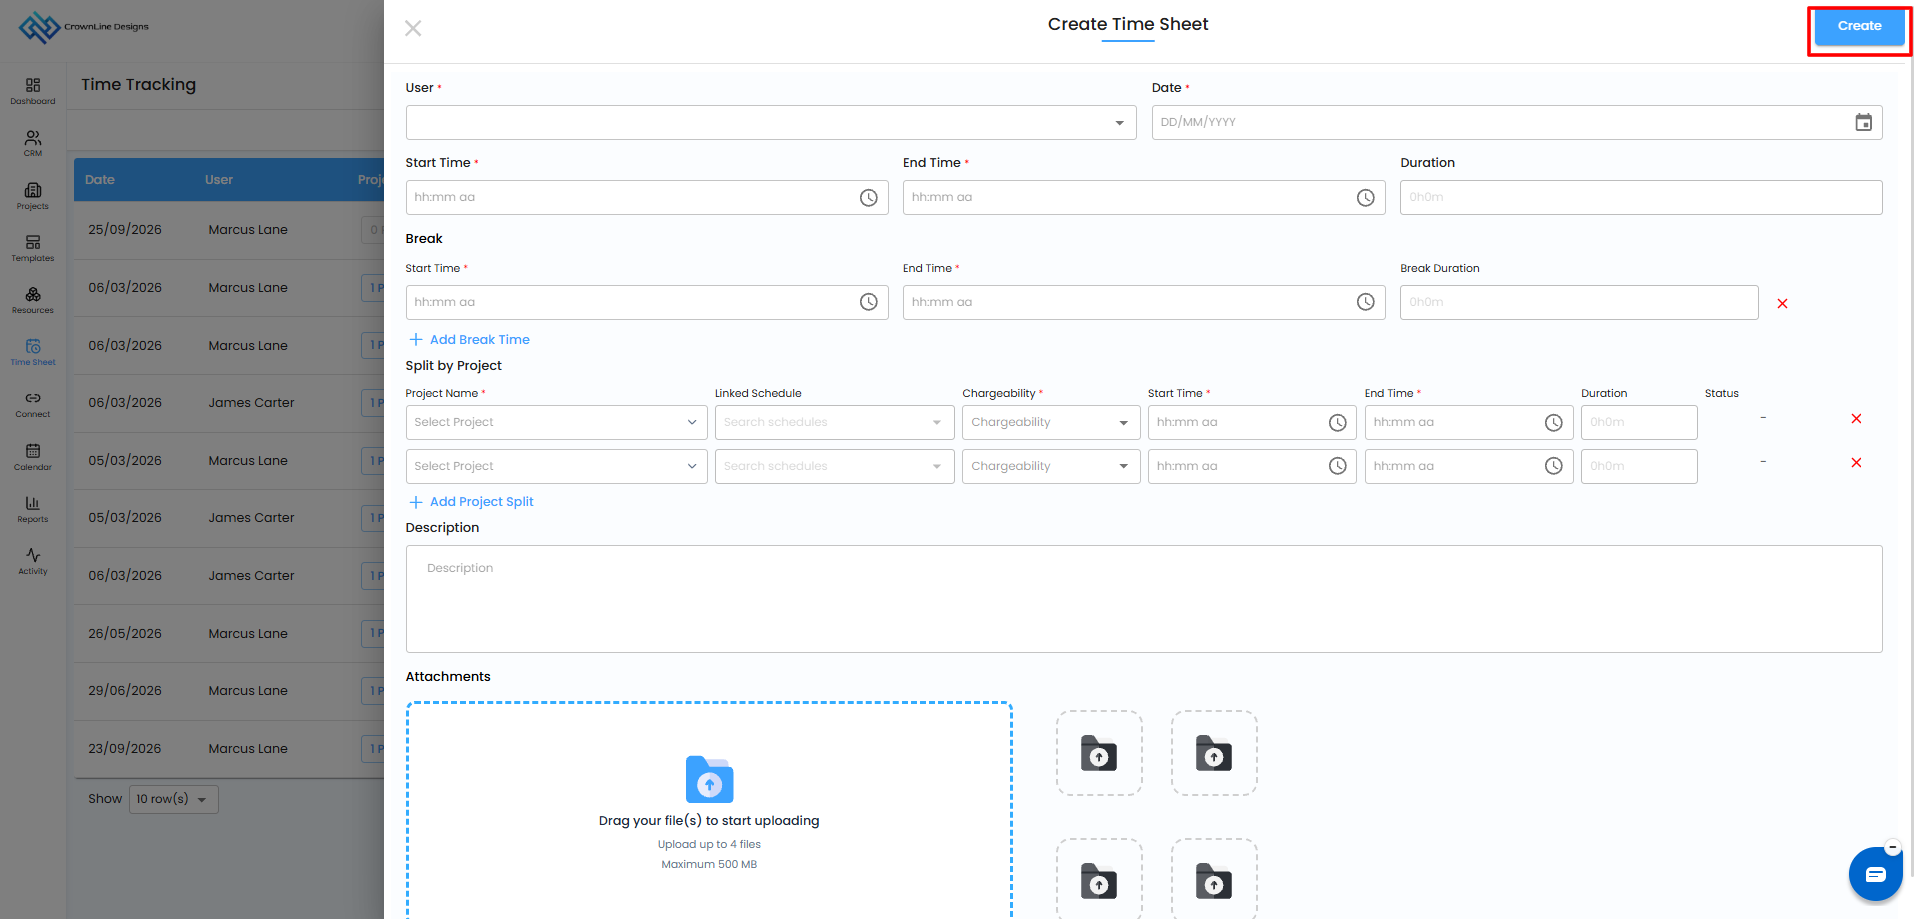
Click Create in the top-right corner.
The new timesheet entry will be added to the Global Timesheet list.
If a project is linked, the relevant time entry will also be available in that project’s Time Tracking page.
Global Timesheet – Upload Timesheet Using Excel
The Global Timesheet allows you to upload multiple timesheet records using an Excel template.
This feature is useful when you need to add a large number of timesheet entries across different users and projects.
Download and Prepare the Template
Open Time Sheet from the side menu.
Click + Create Time Sheet.
Select Upload Template.
Download the provided Excel template.
The template contains three sheets:
Template – Enter the actual timesheet data.
Example – Provides sample data for reference.
Instruction – Includes guidelines for completing the template.
Enter the required data only in the Template sheet.
Follow the instructions provided in the Excel file.
Important: Do not modify the column headers in the template unless the instructions specifically allow it.
Upload the Completed Excel File
Upload the completed Excel file.
The system will process the uploaded records.
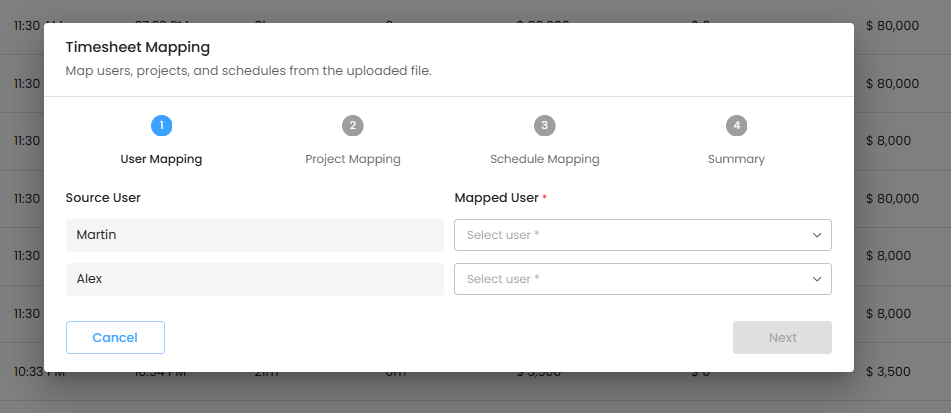
A User Mapping popup will appear.
Map each user name in the uploaded file to the correct user in IntoAEC.
After completing the user mapping, proceed to the project mapping step.
Project Mapping for Global Timesheet Upload
When uploading timesheet records through the Global Timesheet, you must map each record to the relevant project.
The Project Mapping option allows you to assign uploaded timesheet entries to specific projects in IntoAEC.
Review the project information in the uploaded timesheet records.
Select the appropriate project for each entry using the project mapping option.
Map the timesheet record to the relevant project.
Complete the mapping process.
Upload the mapped records.
Once the project mapping is completed, the timesheet entries are added to the Global Timesheet and reflected in the selected project’s Time Tracking page.
This ensures that timesheet records uploaded from the global module are available both in the organisation-wide timesheet list and within the relevant project.
Complete the Upload
After mapping the users and projects:
Verify that each user is mapped correctly.
Verify that each timesheet entry is assigned to the correct project.
Click Map & Upload to complete the upload process.
The uploaded timesheet records will be added to the Global Timesheet.
The entries will also appear in the Time Tracking page of their respective projects.
Important Notes
Ensure that the correct user is mapped for every timesheet entry.
Assign each timesheet entry to the correct project.
Follow the Excel template instructions carefully.
Do not modify the required column headers.
Review the uploaded entries after completion.
Verify the relevant project’s Time Tracking page to confirm that the entries were added correctly.
Global Timesheet – Clock In and Clock Out
The Global Timesheet also allows organisation users to record their working hours through the Clock In and Clock Out options.
This feature tracks the user’s working time, break hours, and project allocation. Once the user clocks out, the recorded time is added to the Global Timesheet and the relevant project’s Time Tracking page.
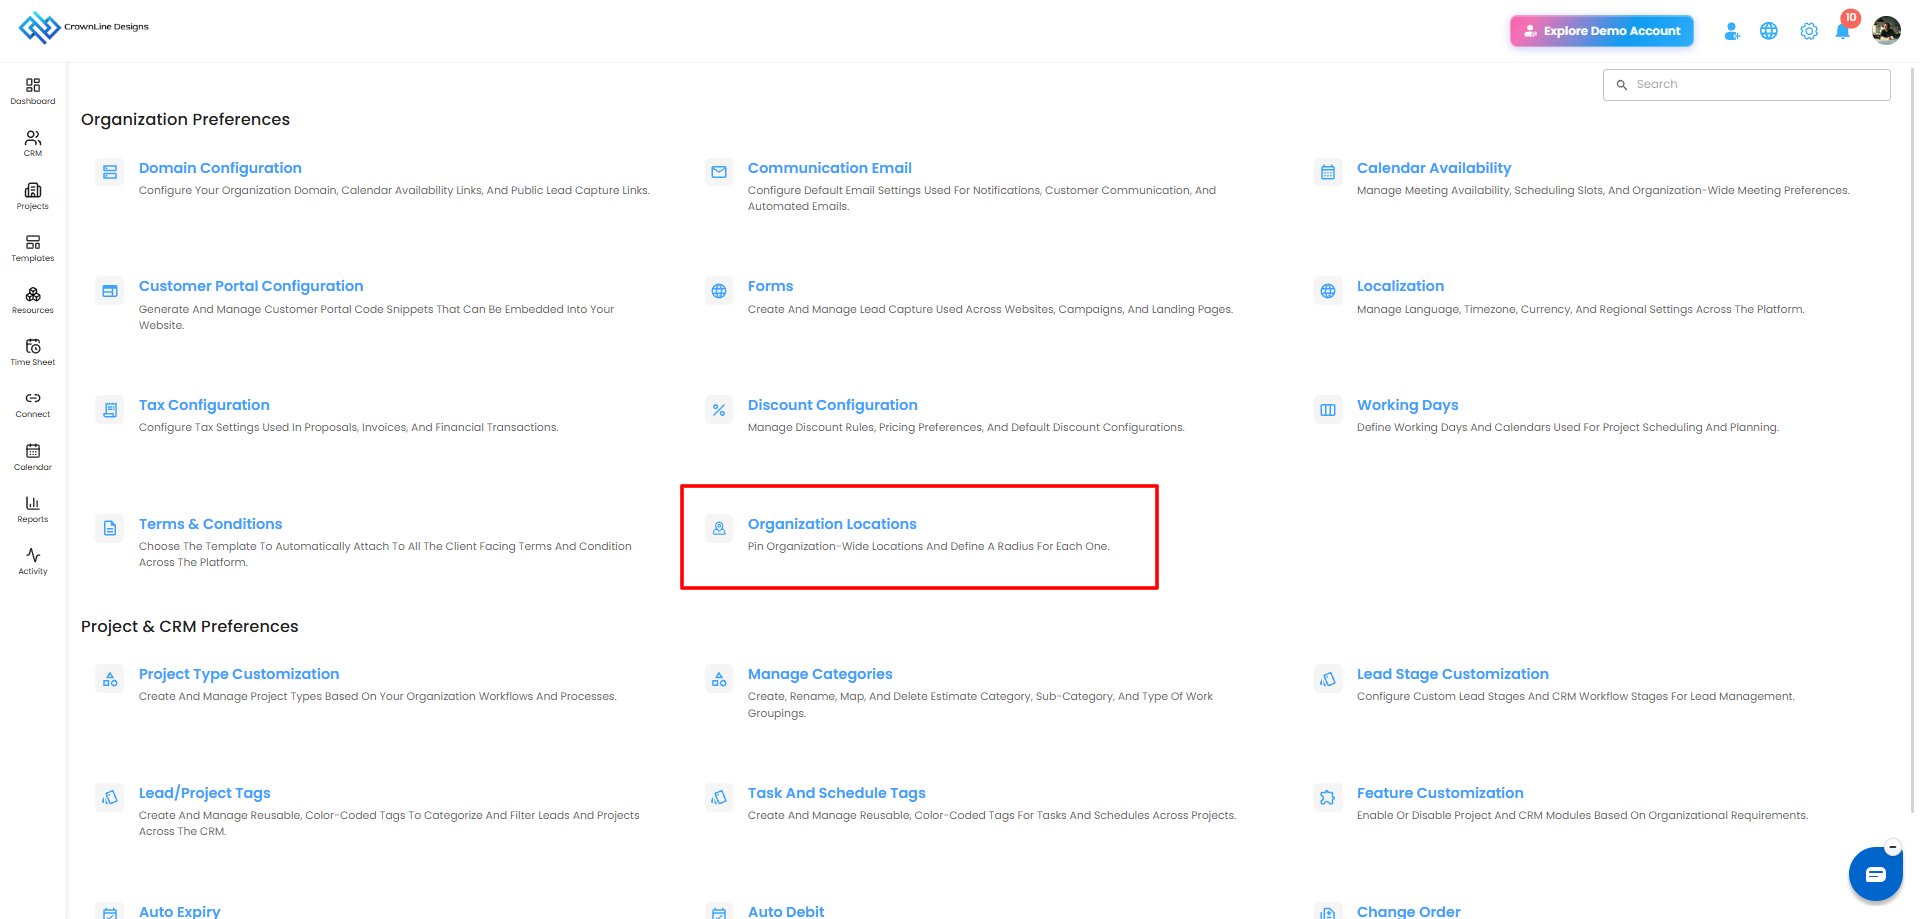
Configure Organisation Location
Before users can clock in, the organisation location must be configured in the settings.
To configure the organisation location:
Open Settings.
Navigate to Preferences.
Open Org Location.
Set the organisation’s location.
Configure the location details and applicable radius.
The configured location and radius determine the area from which organisation users can clock in.
Location-Based Clock In
Once the organisation location is configured, users can clock in from the allowed location radius.
The location-based clock-in feature helps ensure that the user is within the configured organisation location when recording their working time.
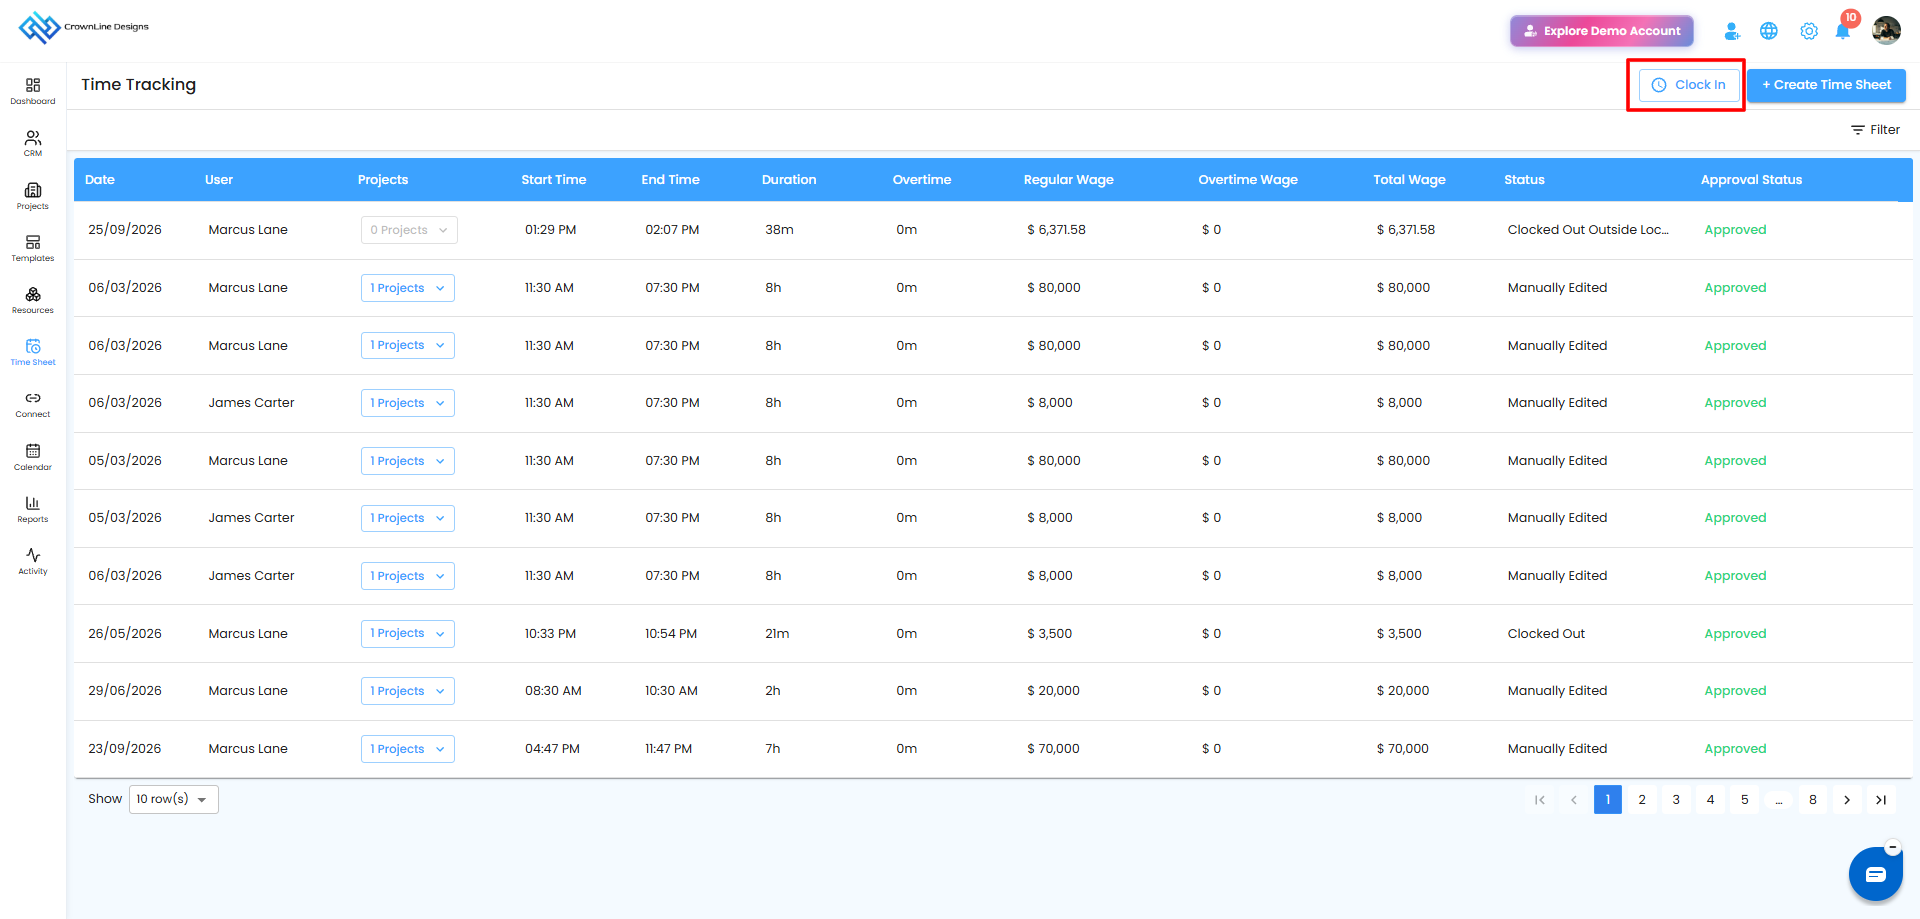
Clock In
To start recording working hours:
Open the Global Timesheet.
Select the Clock In option.
Confirm the clock-in action, if prompted.
The system starts recording the user’s working time.
The clock-in time is used to calculate the working duration until the user clocks out.
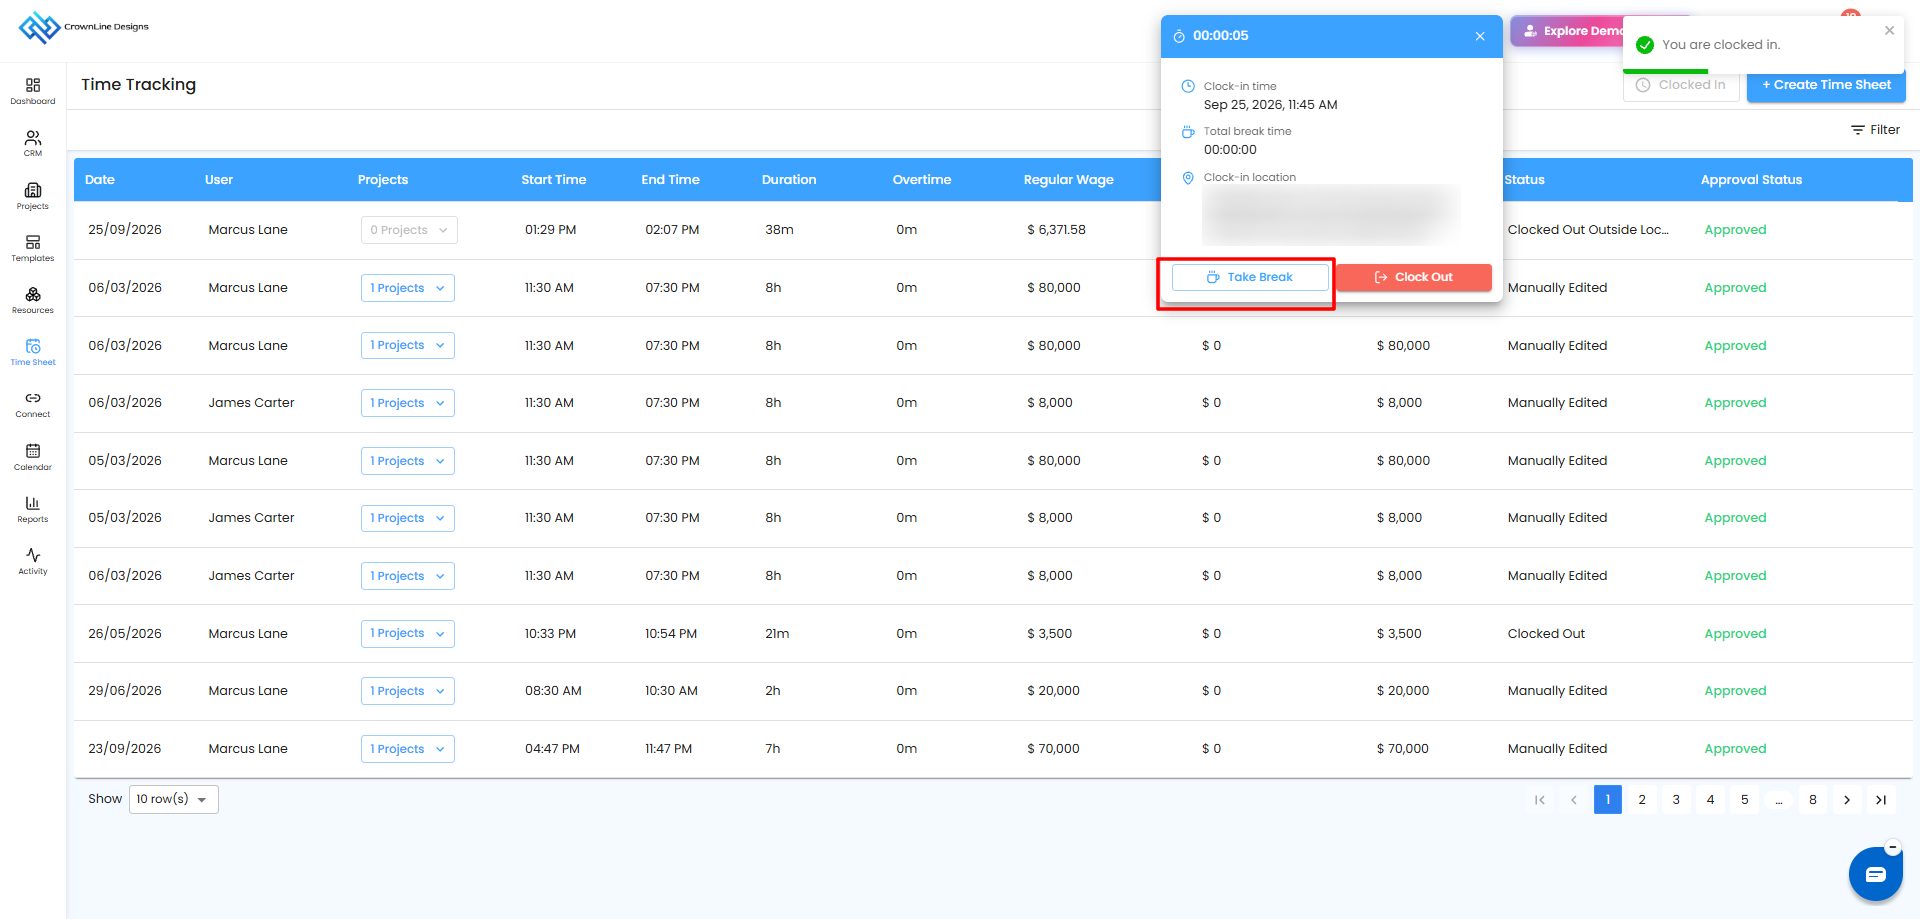
Stop for a Break
When the user needs to take a break, they can use the break option available during the active working session.
Start the working session using Clock In.
Select the option to stop or start a break.
The system records the break duration.
Resume work after the break, where applicable.
The break duration is tracked separately from the working time and is included in the final time summary when the user clocks out.
Clock Out
When the user finishes working:
Open the active clock-in session.
Click Clock Out.
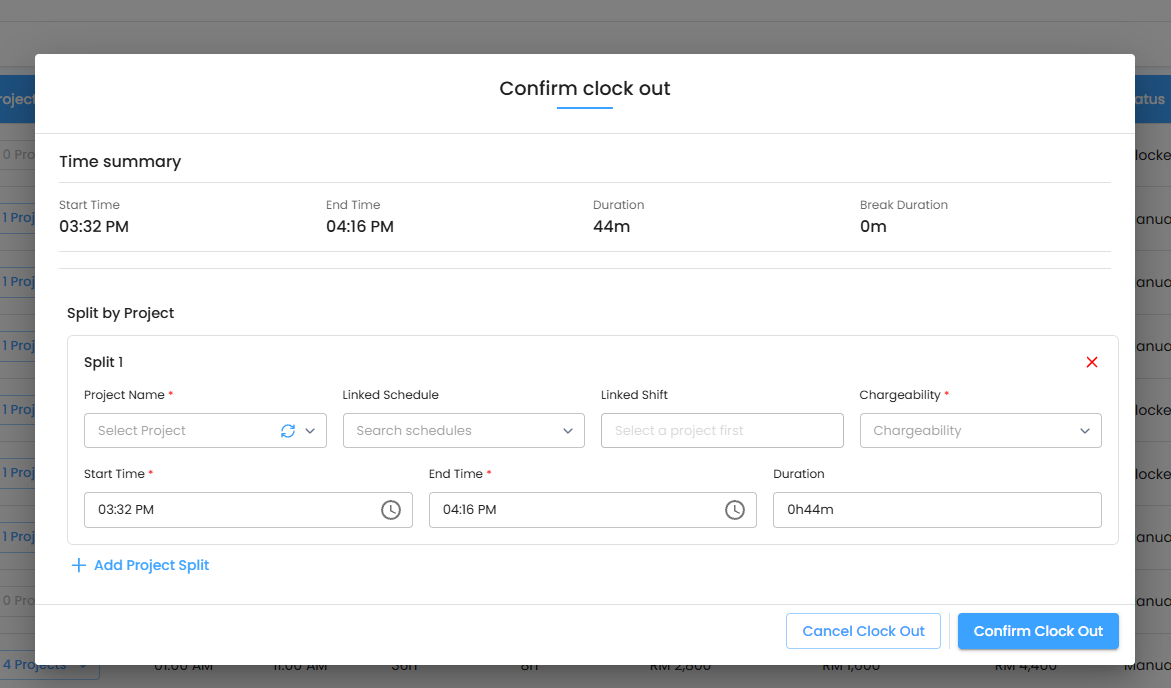
The Confirm Clock Out popup will appear.
Review the time summary and project split details.
Confirm the clock-out action.
The system calculates the working hours and break hours and adds the recorded information to the timesheet.
Confirm Clock Out – Time Summary
The Confirm Clock Out popup displays a summary of the user’s recorded working session.
Time Summary
The time summary includes:
Start Time – The time when the user clocked in.
End Time – The time when the user clocks out.
Duration – The total working duration.
Break Hours – The break duration recorded during the session.
Review these details before confirming the clock-out action.
Project Split-Up During Clock Out
The Confirm Clock Out popup includes a Project Split-Up section. This allows users to allocate their recorded working time to the relevant projects and activities.
The project split-up includes:
Field | Description |
|---|---|
Project Name | Select the project where the work was performed. |
Link Schedule | Link the project time to a relevant schedule. |
Link Shift | Link the project time to a relevant shift. |
Start Time | Enter the start time for the project split. |
End Time | Enter the end time for the project split. |
Duration | Displays the time allocated to the project. |
Chargeability | Select Chargeable or Non-Chargeable. |
You can add the relevant project details and link the working time to a schedule or shift when required.
Once the project split-up is completed, the time is allocated to the selected projects and reflected in the relevant project Time Tracking pages.
Complete the Clock-Out Process
After reviewing the time summary and project split-up:
Confirm the start time and end time.
Review the total duration and break hours.
Verify the project name for each project split.
Check the linked schedule and shift, where applicable.
Review the chargeability selection.
Confirm the clock-out action.
After clock-out confirmation:
The working hours are added to the Global Timesheet.
Break hours are recorded in the timesheet.
Project split-up details are added to the relevant projects.
Linked schedule and shift details are retained with the time entry.
The recorded time is available in the relevant project’s Time Tracking page.
View Clocked Time in the Project
When a user clocks in and clocks out through the Global Timesheet, the recorded time can also be viewed within the relevant project.
To view the project-specific time entry:
Open the relevant project.
Navigate to Time Tracking.
Review the timesheet entry created through the global clock-in and clock-out process.
The project’s Time Tracking page displays the time allocated to that project, including the applicable project split, linked schedule, shift, duration, and chargeability details.
View Clocked Time in a Linked Schedule
If a project split is linked to a schedule, the timesheet entry can also be reviewed from the schedule.
To view the linked timesheet:
Open the relevant project.
Navigate to the schedule associated with the timesheet.
Open the schedule’s Edit page.
Navigate to the Timesheet section.
Review the time entry linked to the schedule.
This helps users track the time spent on a specific scheduled activity.
Wage Calculation for Clocked Time
The recorded working hours and break hours are used in the timesheet wage calculation.
The wage-related information is based on the user’s configured details in UserHub, including:
Working Hours.
Wages per Hour.
Overtime.
These values can be configured when inviting the user and edited later when required.
The recorded time is used to calculate applicable regular wages, overtime, and total wages in the timesheet records.
Why Global Timesheet Matters
The Global Timesheet brings organisation-wide time tracking into one place.
With manual timesheet creation, Excel uploads, project mapping, location-based clock-in and clock-out, break tracking, project split-up, schedule linking, shift linking, and chargeability tracking, IntoAEC helps teams manage working hours and project-related time records more efficiently.
It connects organisation-level time tracking with individual project records, ensuring that time entries are available both in the Global Timesheet and in the relevant project’s Time Tracking page.
Was this article helpful?
That’s Great!
Thank you for your feedback
Sorry! We couldn't be helpful
Thank you for your feedback
Feedback sent
We appreciate your effort and will try to fix the article