Adding Assets in Manage Assets
Assets are the backbone of any project — whether it’s safety gear, heavy machinery, or specialized tools. IntoAEC makes asset management simple by letting you create, upload, and track assets in one place. This guide will take you through the complete process of adding assets in Manage Assets.
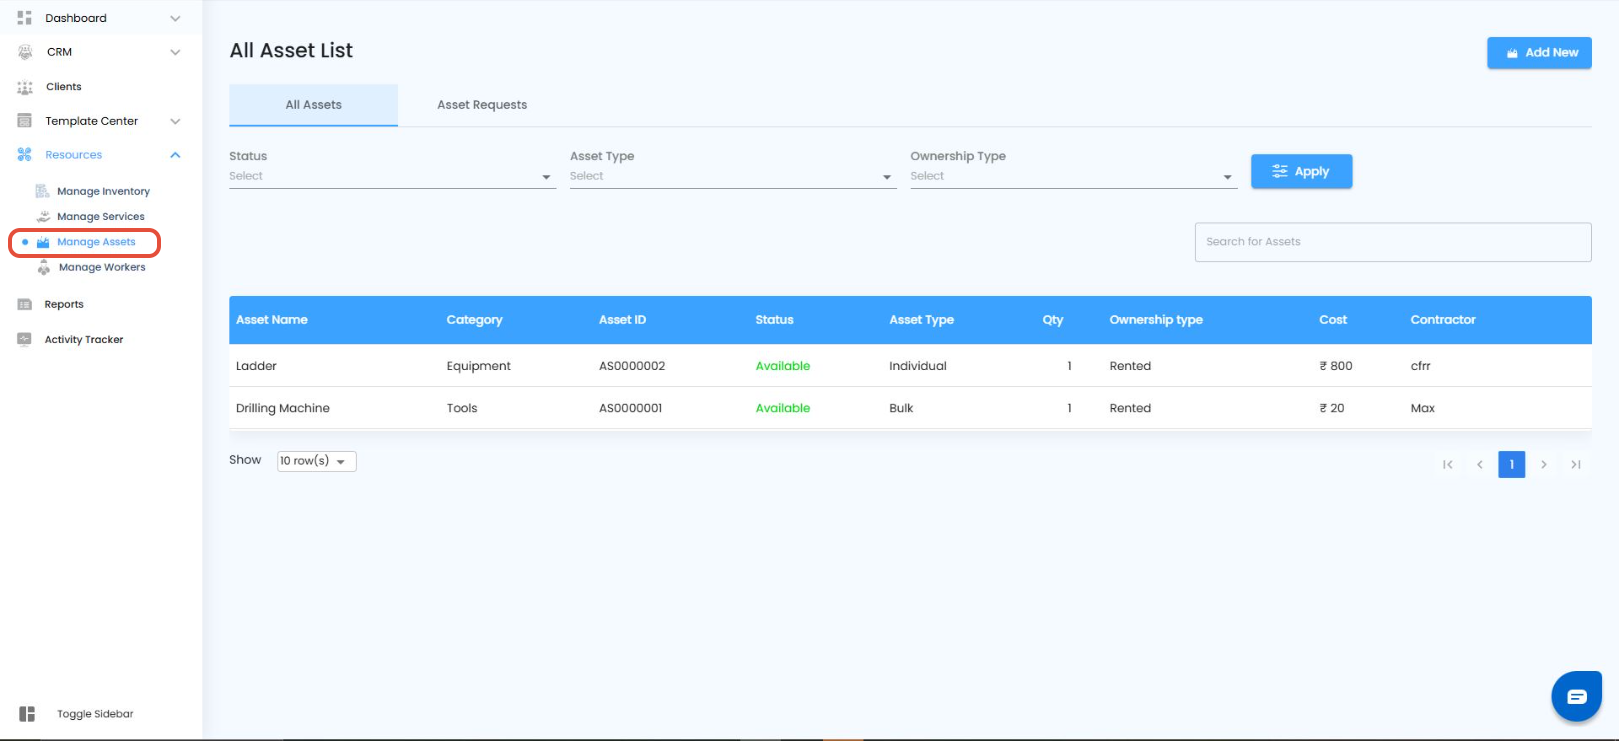
Step 1: Navigate to Manage Assets
From the top menu bar, click on Resources.
Select Manage Assets.
You’ll land on the All Assets List Page, which displays:
All existing assets
Filters for searching
A button to add new assets
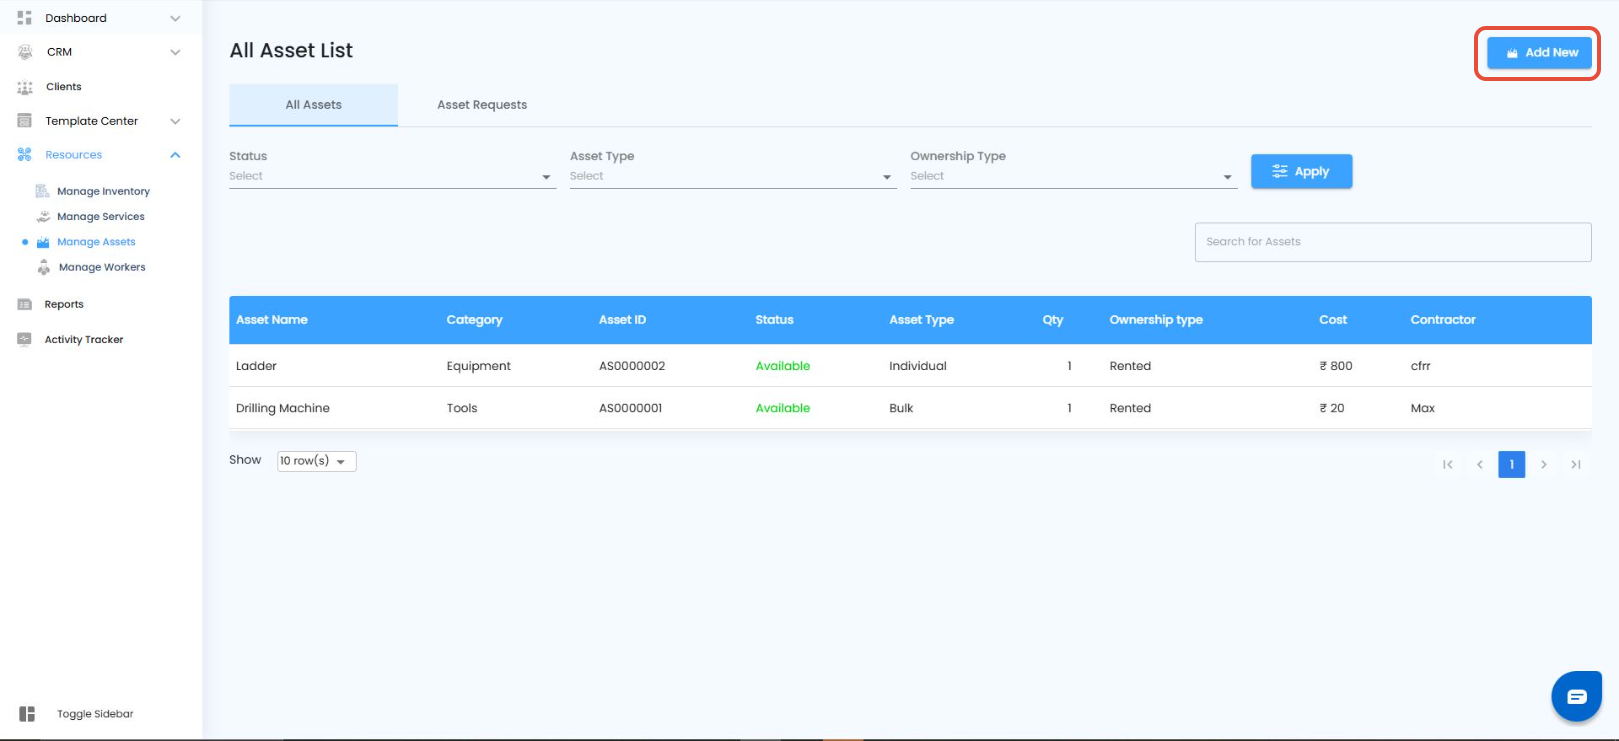
Step 2: Add a New Asset
On the All Assets page, click the Add New button.
An All Assets pop-up will appear, giving you two ways to add assets:
Manual Creation → Add one asset at a time with complete details.
Bulk Upload → Upload multiple assets at once using a supported file format.
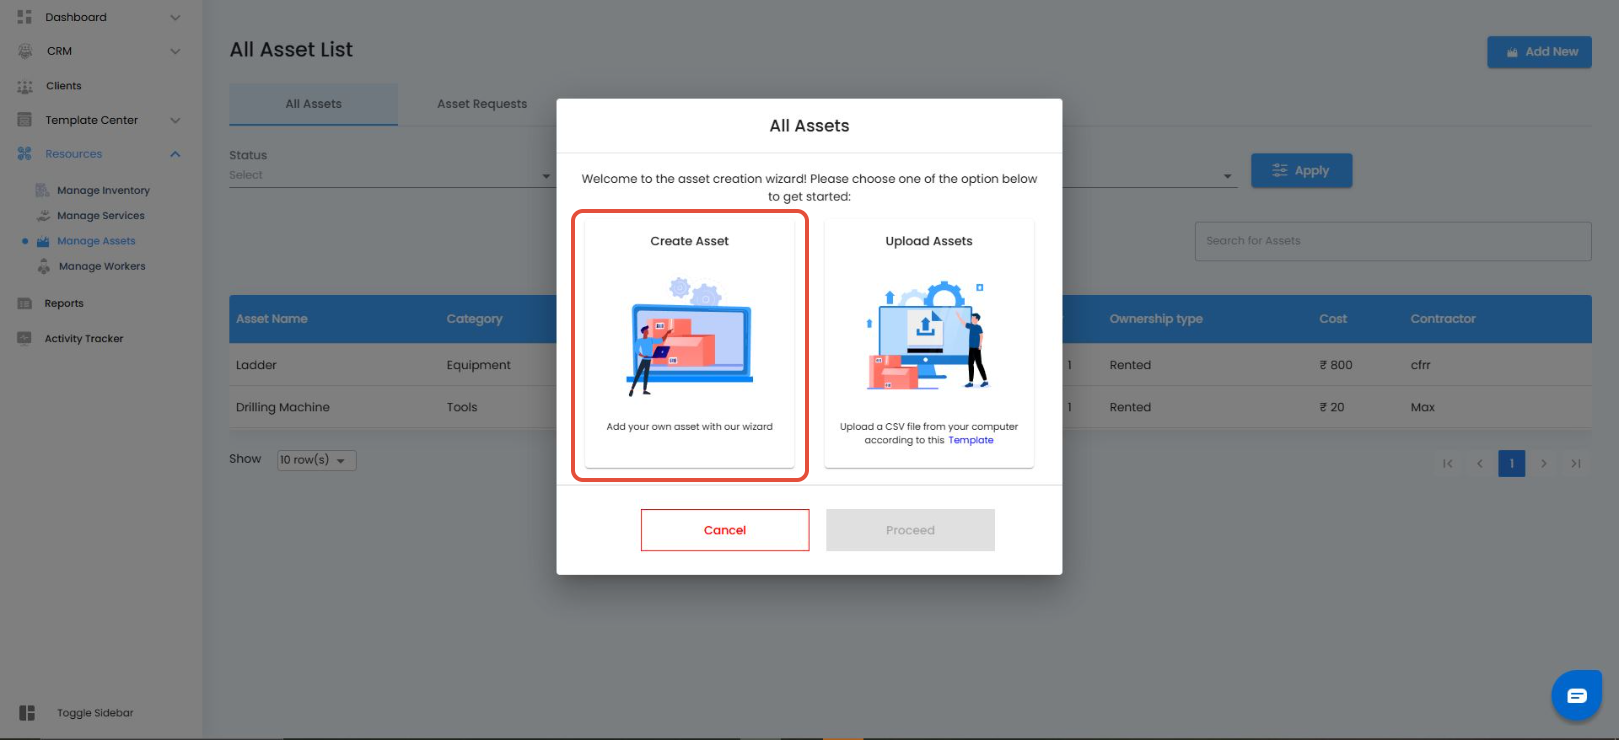
Once you’ve selected your preferred option, click the Proceed button.
Choose manual creation for unique or custom assets; choose bulk upload when setting up many assets at once.
Step 3: Fill in Asset Details
Here’s what you’ll see and need to enter:
Asset ID-Automatically generated by the system for unique identification.
Asset Name-A clear and descriptive name for the asset (e.g., Excavator Model X120).
Category-Group the asset under categories like PPE, Tools, Heavy Machinery, etc.
Description-Add key details (e.g., Protective helmet with face shield, ISI certified).

Asset Type - Choose whether it’s an Individual asset (tracked separately) or a Bulk asset (tracked by quantity).
If Bulk → You must enter the Quantity to define how many units are available.
Ownership Type
Define if the asset is Owned or Rented.
If Rented → You must enter the Contractor Name to identify who provides the asset.
Unit Cost-Cost of using/owning the asset, set by Hour, Week, or Month.
Inception Date-The start date of asset ownership or contract validity.
Attachments-Upload files such as purchase invoices, warranties, safety certificates, or manuals.
Notes-add custom remarks like “Used only for Project A” or “Requires safety inspection quarterly.”
QR Code- QR code is automatically generated for quick tracking and scanning.
Step 4: Create the Asset
Once all fields are completed, click Create.
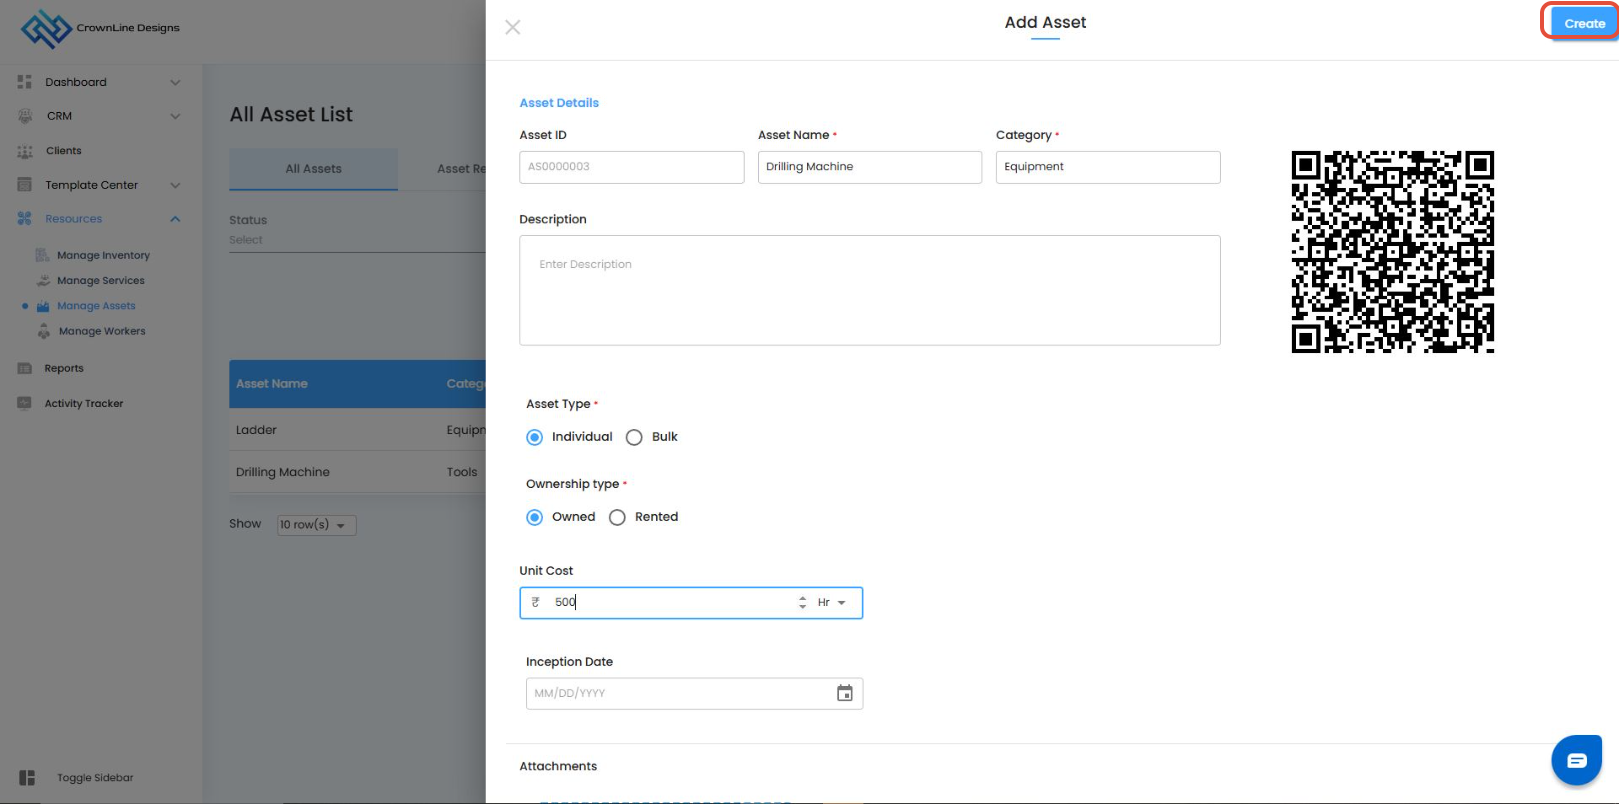
A confirmation will appear, and your asset will be successfully added.
Your new asset will now appear in the All Assets List Page
With these steps, you’ve added an asset that’s not just a record but a fully trackable, cost-controlled, and assignable resource in your project.
Asset Visibility & Requests
All assets created in this section will be visible to site engineers, enabling them to easily view available assets and raise requests directly from the list. This ensures clear visibility of asset availability, streamlines communication between teams, and helps maintain efficient asset allocation across sites.
Was this article helpful?
That’s Great!
Thank you for your feedback
Sorry! We couldn't be helpful
Thank you for your feedback
Feedback sent
We appreciate your effort and will try to fix the article