Quick Stock Transfer – Adding Items from Warehouse
Think of your central Warehouse as a well-organized warehouse, ready to supply whatever your project needs. With Add from Warehouse in INTOAEC, you can quickly move existing stock into a client’s group no duplicate entries, no wasted time, just seamless stock management.
Here’s how you can do it, step by step.
Open the Add Items Menu
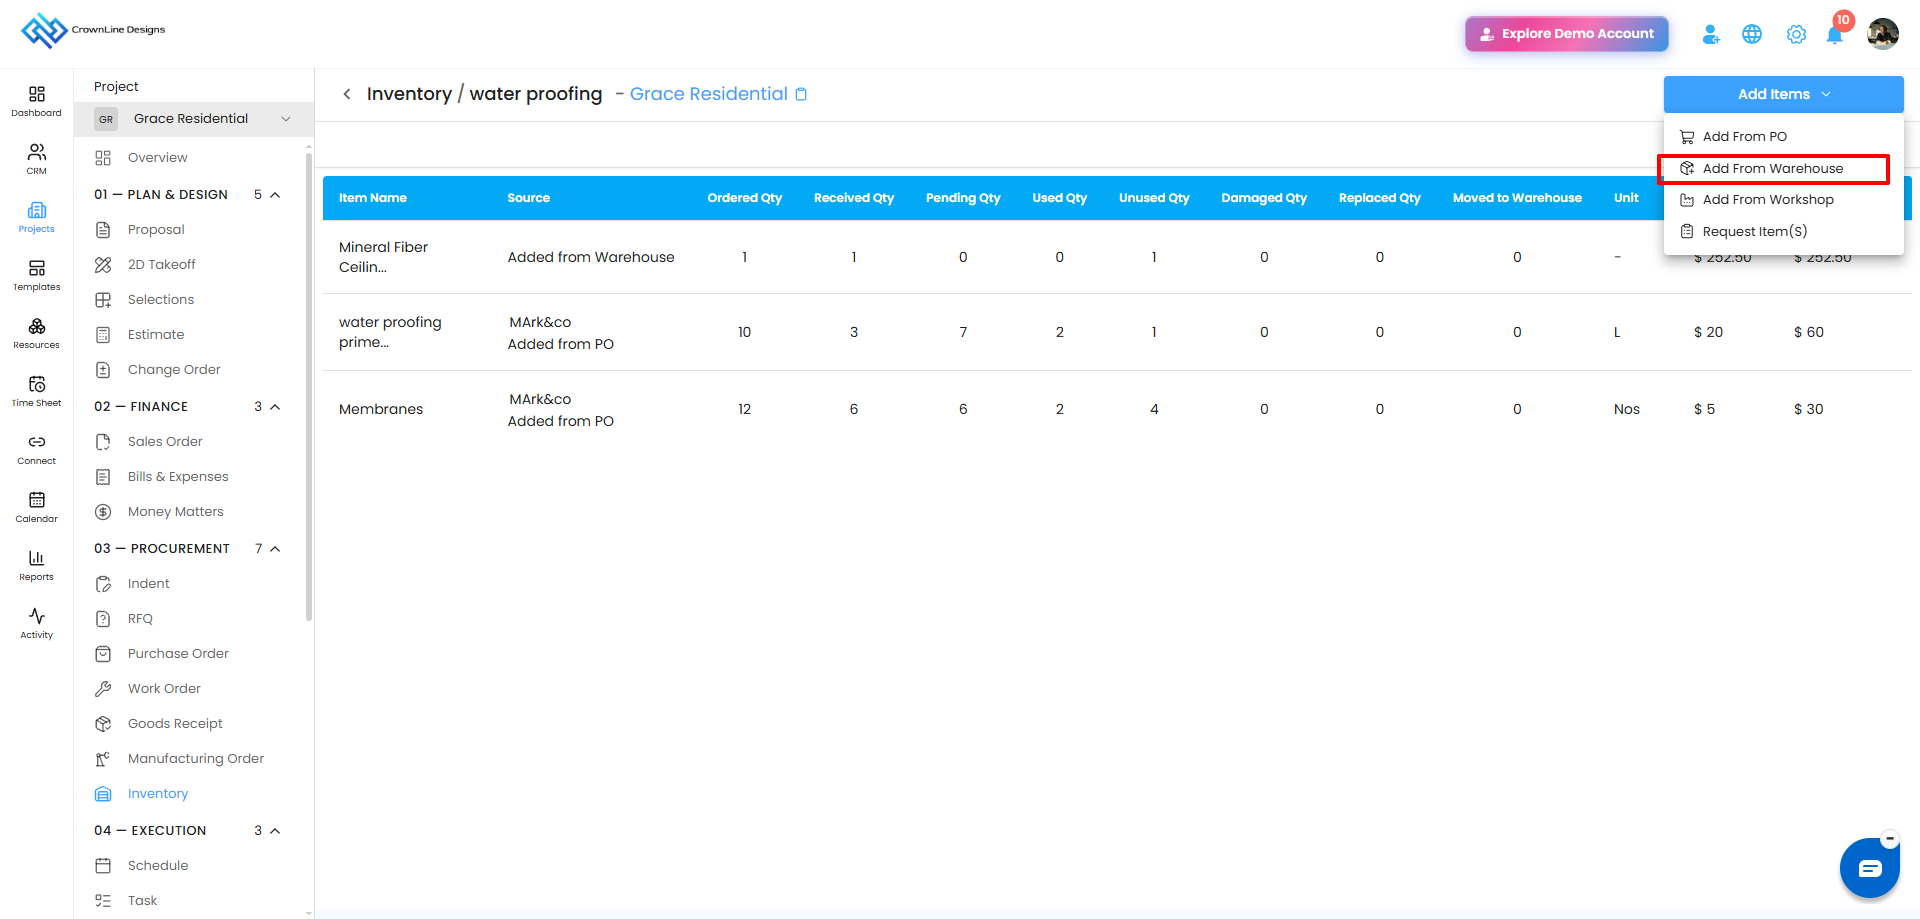
- On the group’s Items Page, click the Add Items button.
- From the menu that appears, choose Add from Warehouse .
This opens a side panel with your available warehouse stock, allowing you to browse, search, and select products to add to the group.
Browse and Add Products from Warehouse
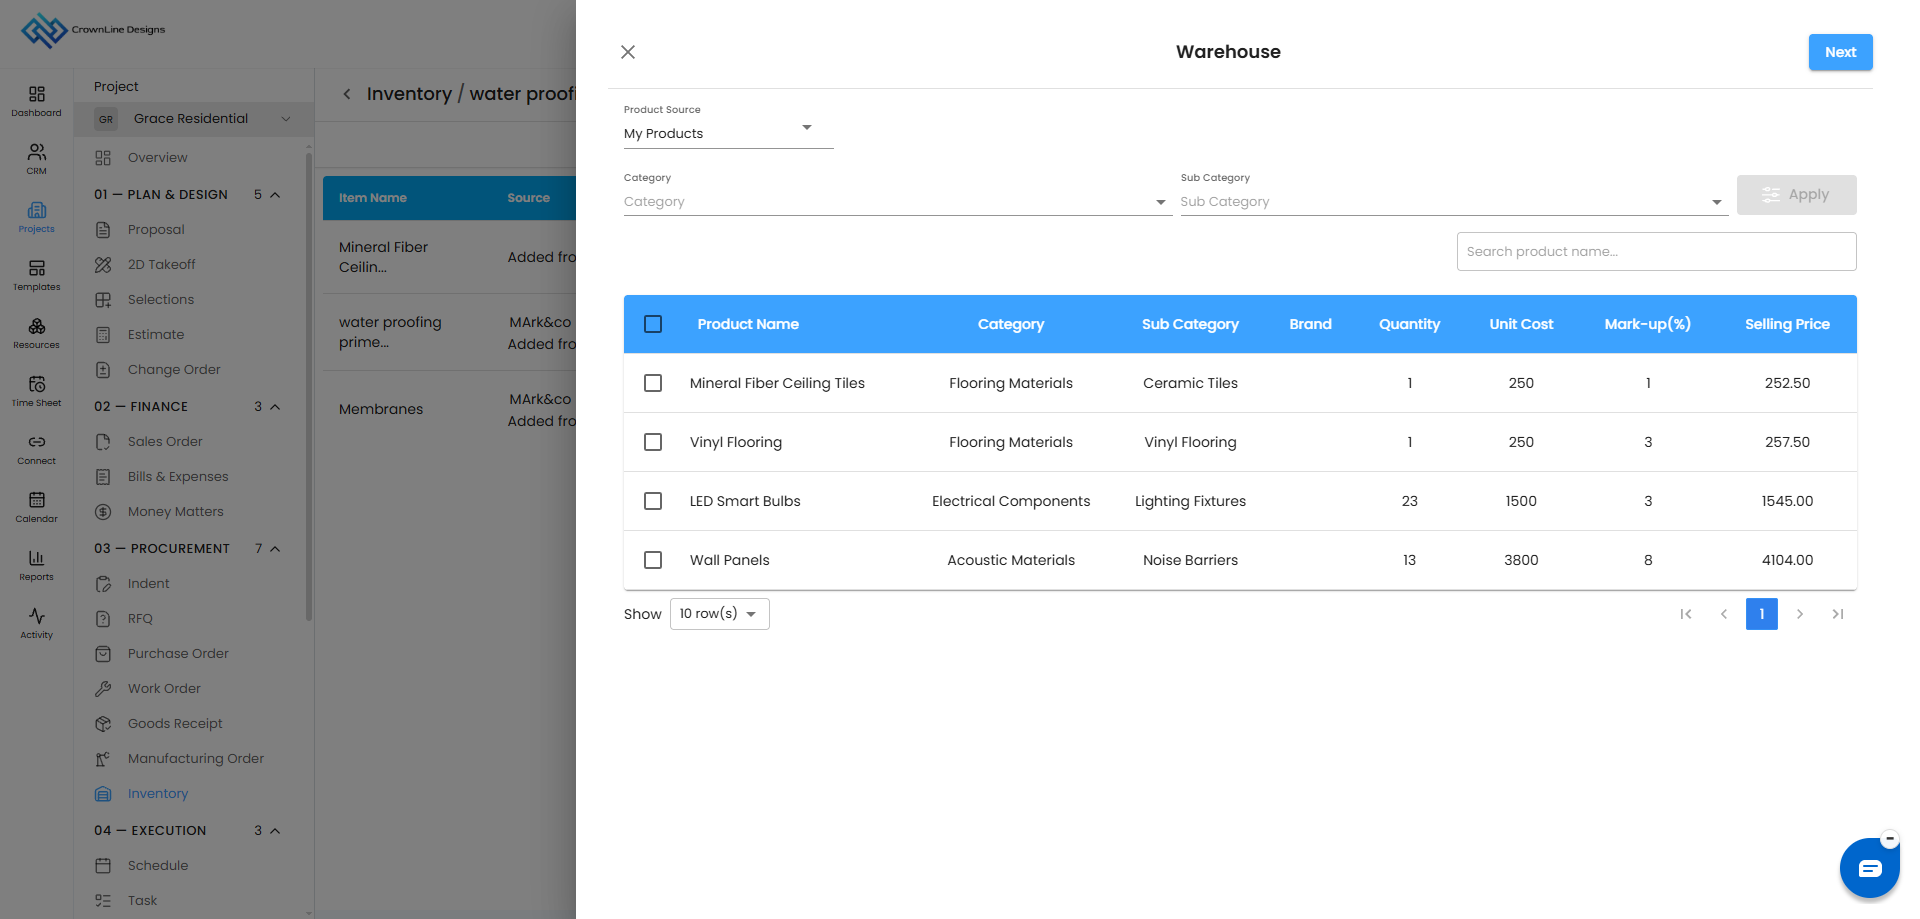
Once you select Add from Warehouse, the Warehouse Off-Canvas Page slides in from the right side of the screen.
This panel displays the available products in your central warehouse, giving you a clear view of the stock that can be added to the group.
Choose the Product Source
Decide where to fetch the products from:
- My Products – Items you directly manage in the warehouse.
- Clipped Products – Items you saved or bookmarked earlier for quick access.
Filter and Search for Products
Use the available filters and search options to quickly locate the required product:
- Category & Subcategory – Narrow down products by type or classification.
- Search Bar – Search by product name, brand, or keyword.
- Apply – Apply the selected filters.
- Clear – Reset all filters and start fresh.
Note: Products that are out of stock or do not have a price will not appear in the list.
Review Product Details
Each product in the warehouse list displays key information:
- Product Name – The name of the item.
- Category & Subcategory – Classification of the product.
- Brand – Manufacturer or brand.
- Quantity Available – The quantity currently available in the warehouse.
- Unit Cost – Price per unit.
- Markup – The percentage added to the base price.
- Selling Price – The selling price of the product.
Select Products to Add
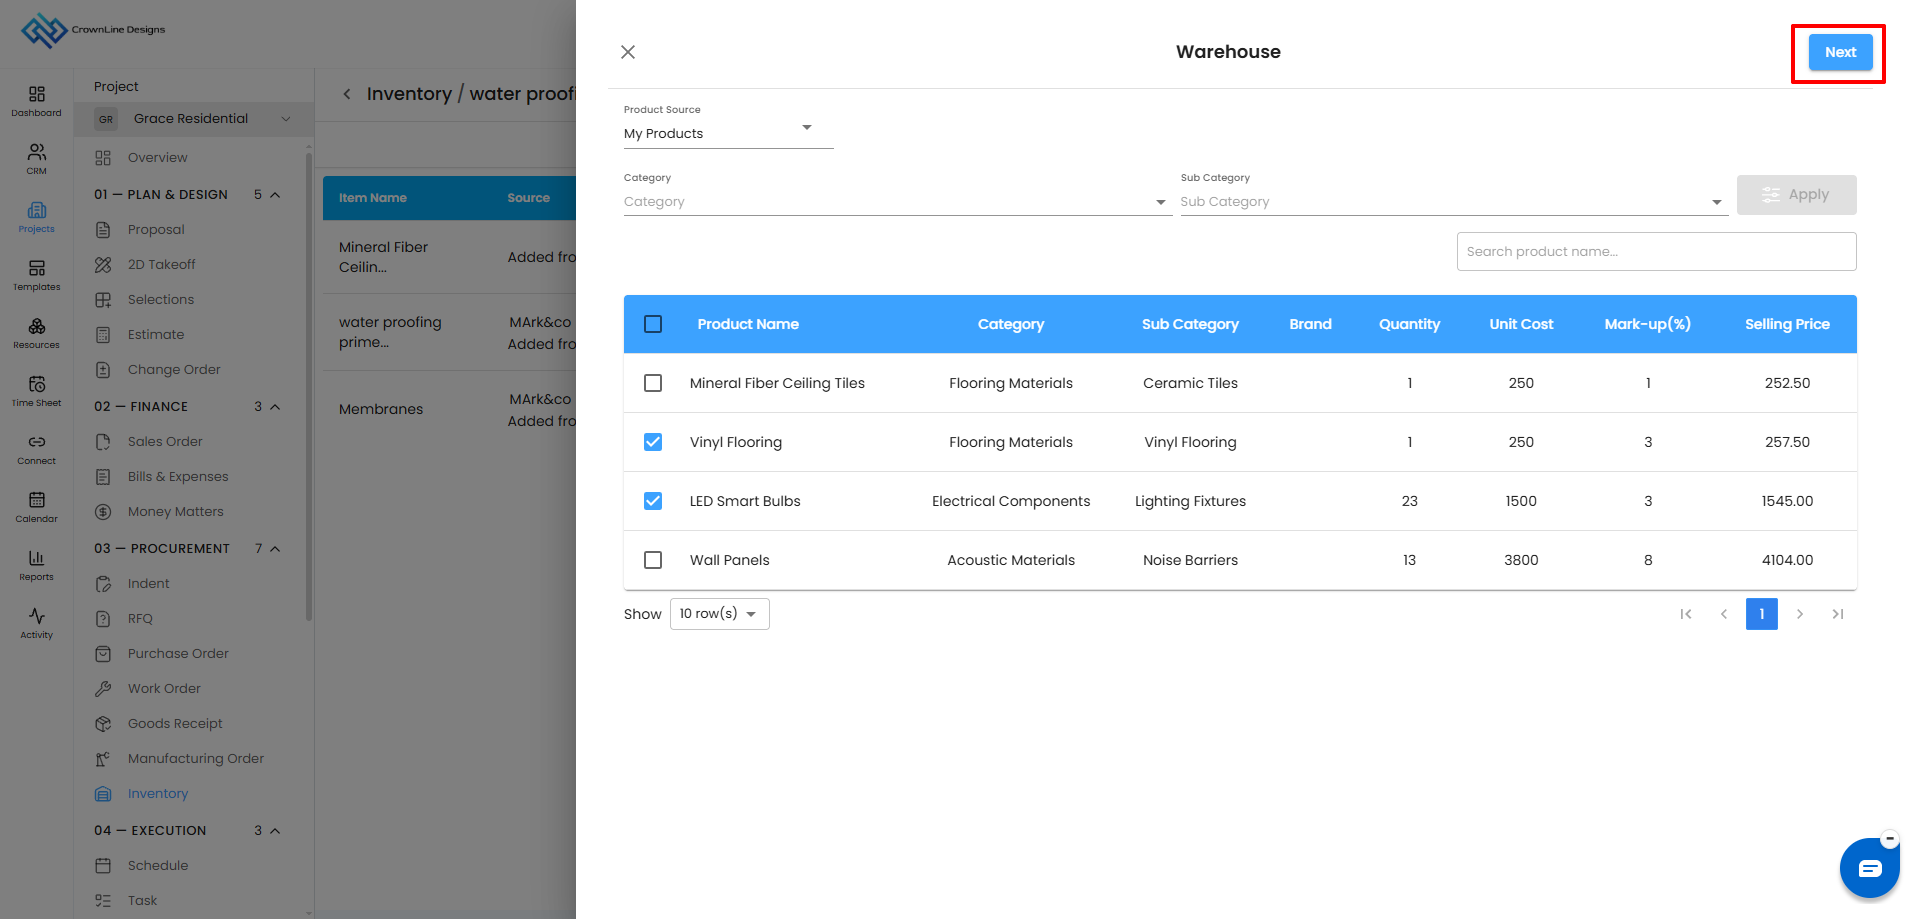
- Select the checkbox next to each product you want to add.
- You can select multiple products at once.
- Click Next to review the selected products and confirm the required quantities.
Review Selected Products
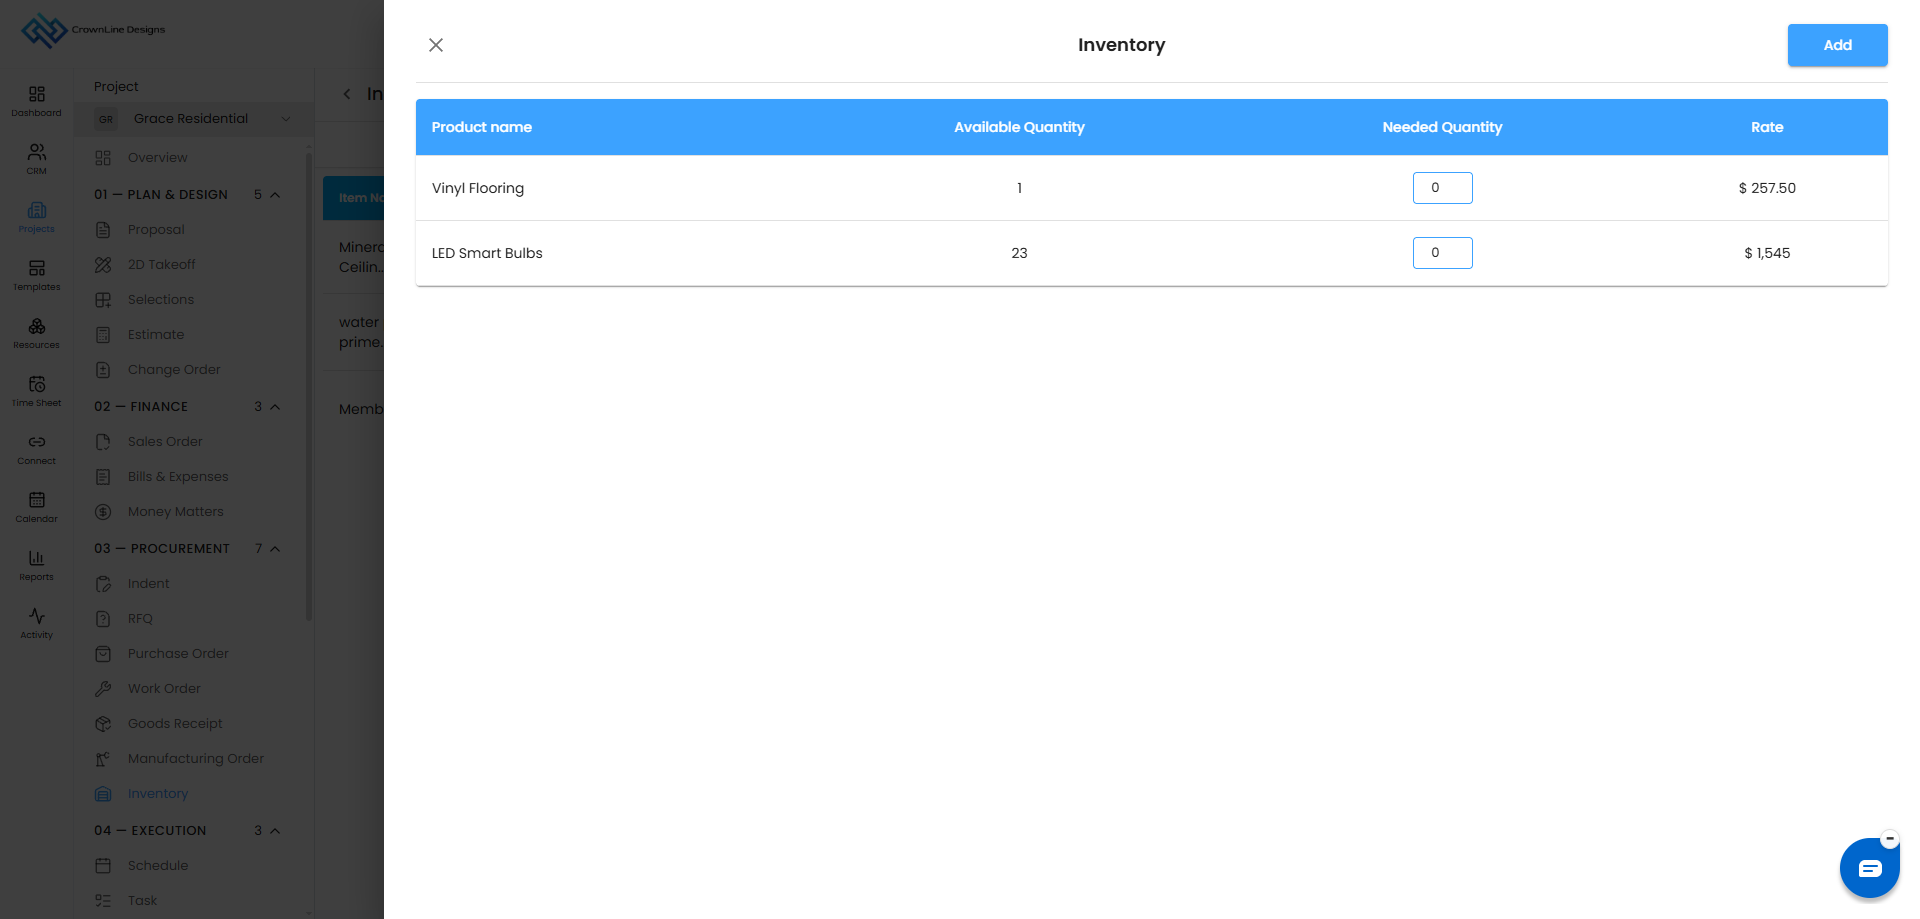
After selecting the products, click Next to open the review screen.
For each selected product, you can review and enter the required quantity:
- Product Name – The name of the product.
- Available Quantity – The quantity currently available in the warehouse.
- Needed Quantity – An editable field where you can enter the quantity required for the group.
- Rate – The cost per unit of the product.
Ensure that the Needed Quantity does not exceed the Available Quantity.
Confirm and Add the Items
Once you’ve reviewed the selected products and entered the required quantities:
- Click the Add button.
- The items will be added to the Items Table of the selected group.
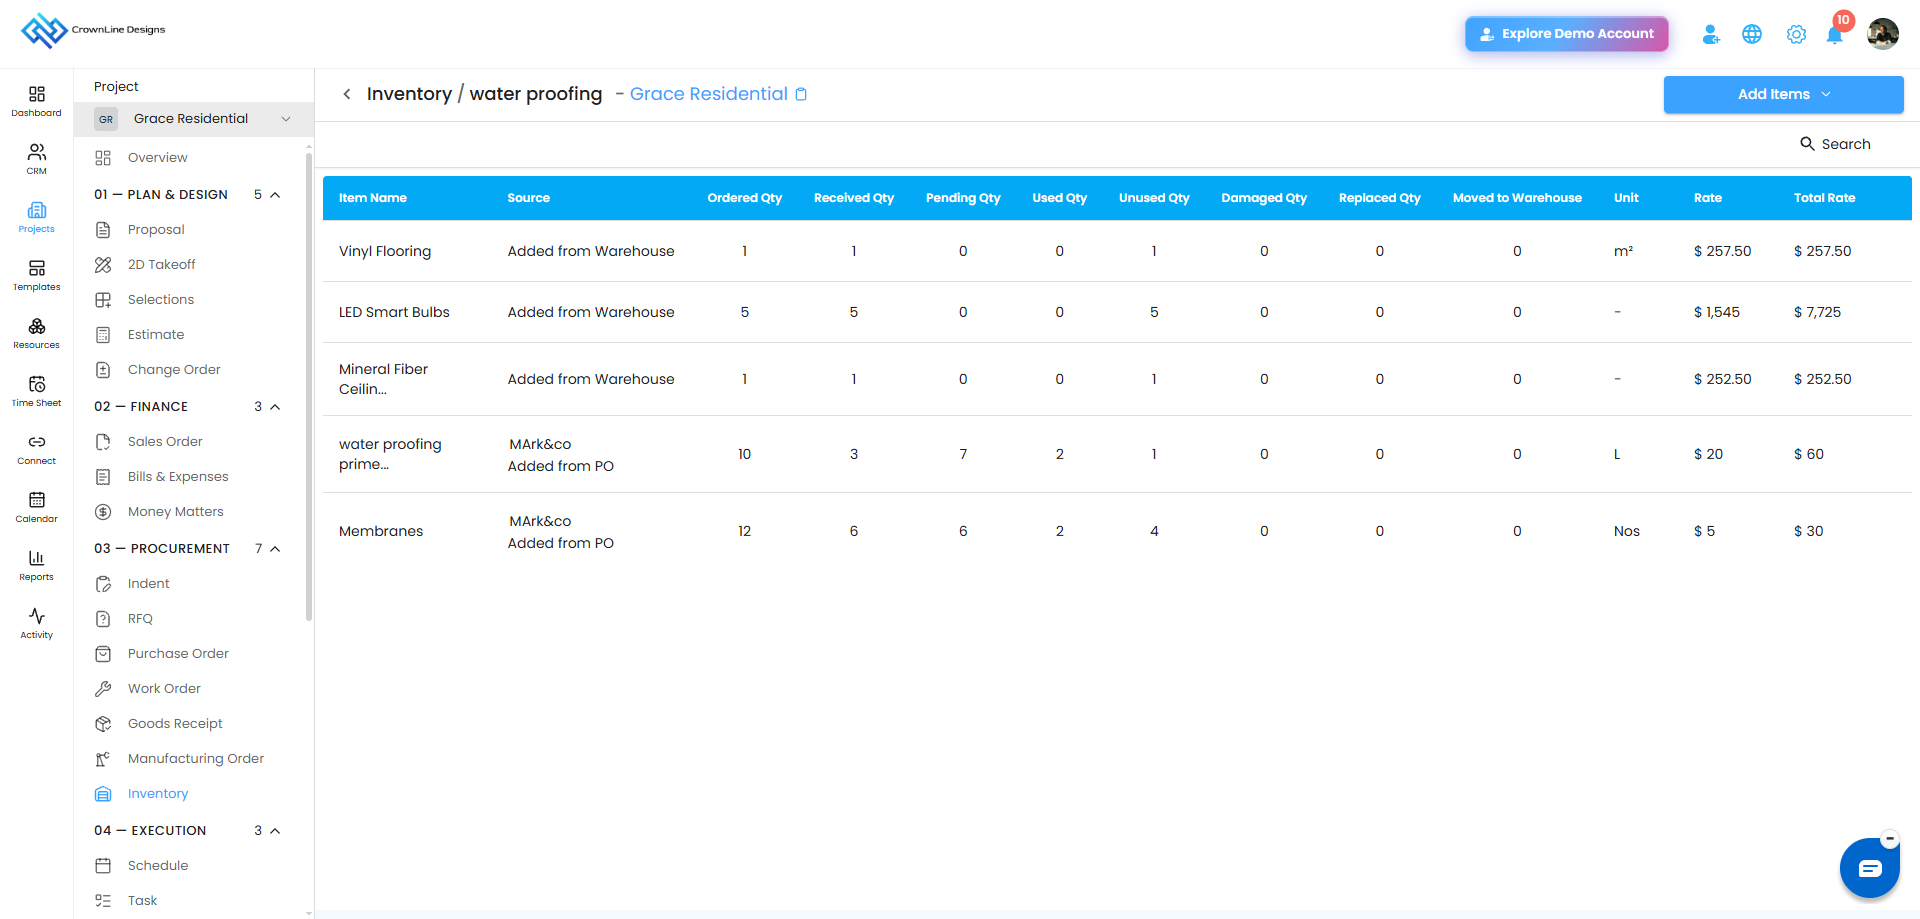
What You’ll See in the Items Table
The added items will appear in the group's Items Table, which provides visibility into the item's movement and usage:
- Item Name – The name of the product added.
- Source – The product source will be listed as “Added from Warehouse”.
- Ordered Quantity – The quantity of items added for the group.
- Received Quantity – Editable field to track the quantity received.
- Pending Quantity – Auto-calculated based on ordered and received quantities.
- Used Quantity – Editable field to track the quantity used.
- Damaged Quantity – Editable field to track damaged items.
- Replaced Quantity – Editable field to track replaced items.
- Moved to Warehouse – Tracks the quantity moved back to or between warehouse stock.
- Unit – The unit of measurement for the item.
- Rate – The rate associated with the item.
- Total Rate – The total value based on the applicable quantity and rate.
Managing Items After Adding
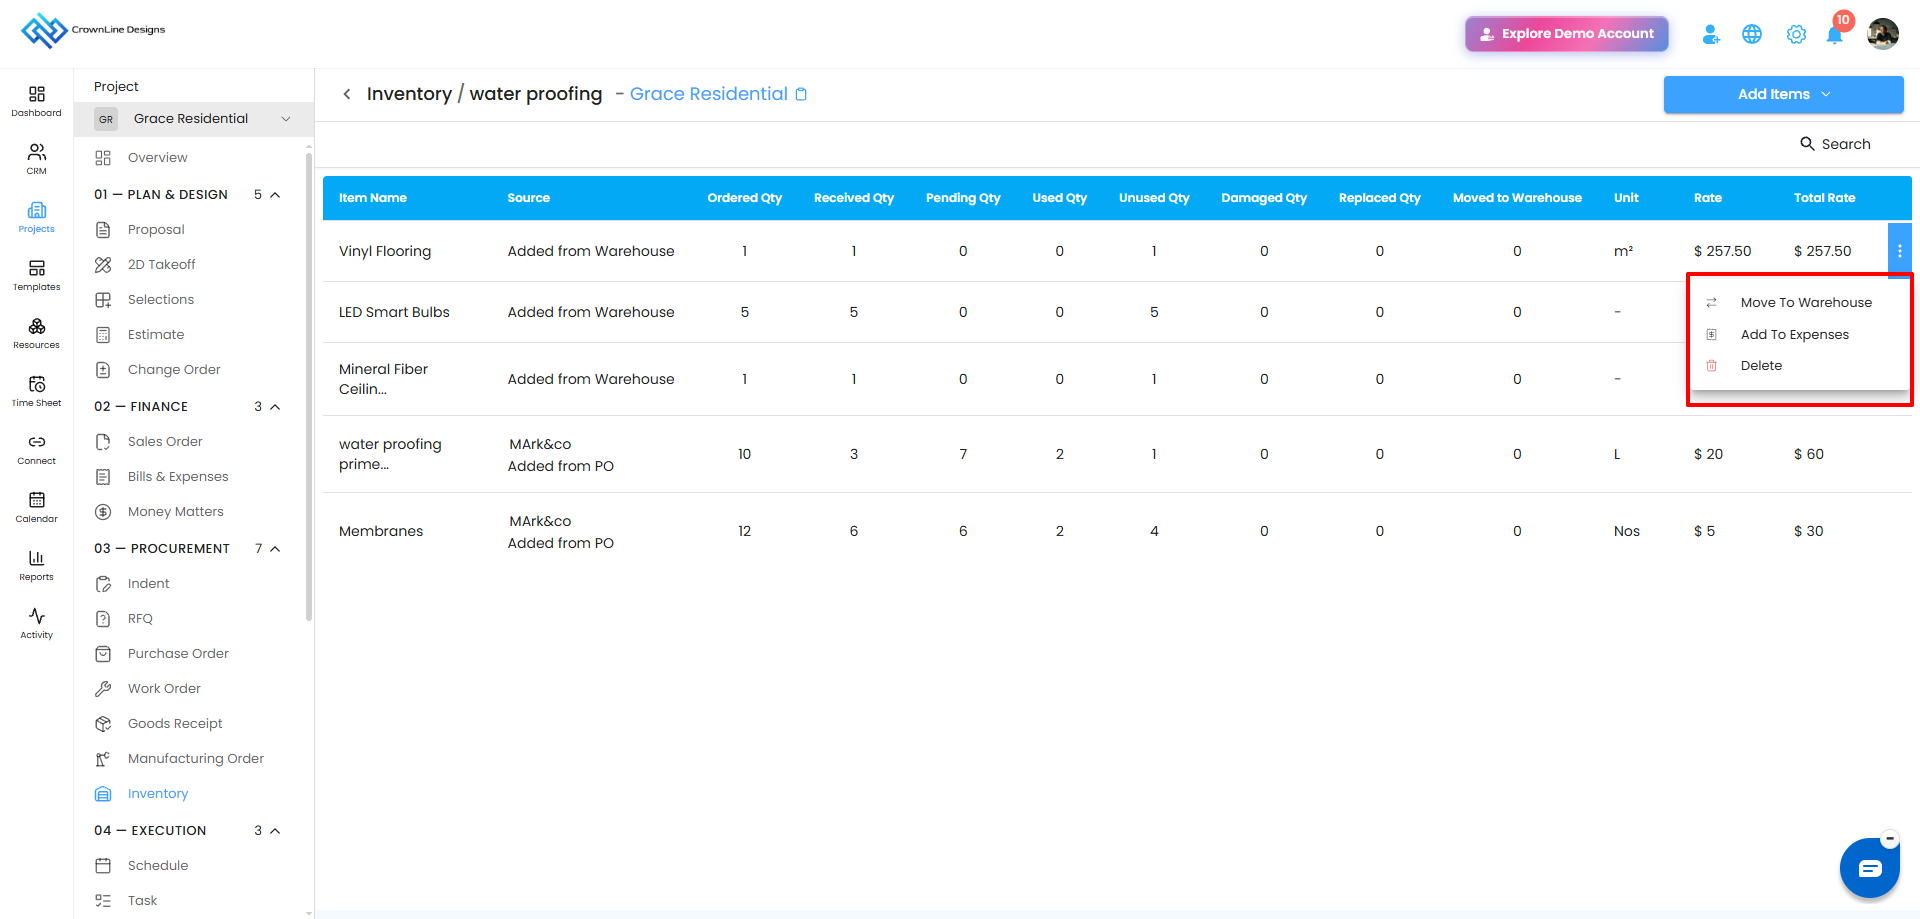
Once the items are added to the group, you can manage them using the three-dot menu (⋮) that appears when you hover over an item.
Available actions include:
- Move to Warehouse
- Add to Expense
- Delete
Move to Warehouse
If an item is no longer needed in the group and should be returned to the central warehouse:
- Hover over the item and click the three-dot menu (⋮).
- Select Move to Warehouse.
A popup will appear showing the Available Quantity, which represents the quantity currently available in the group.
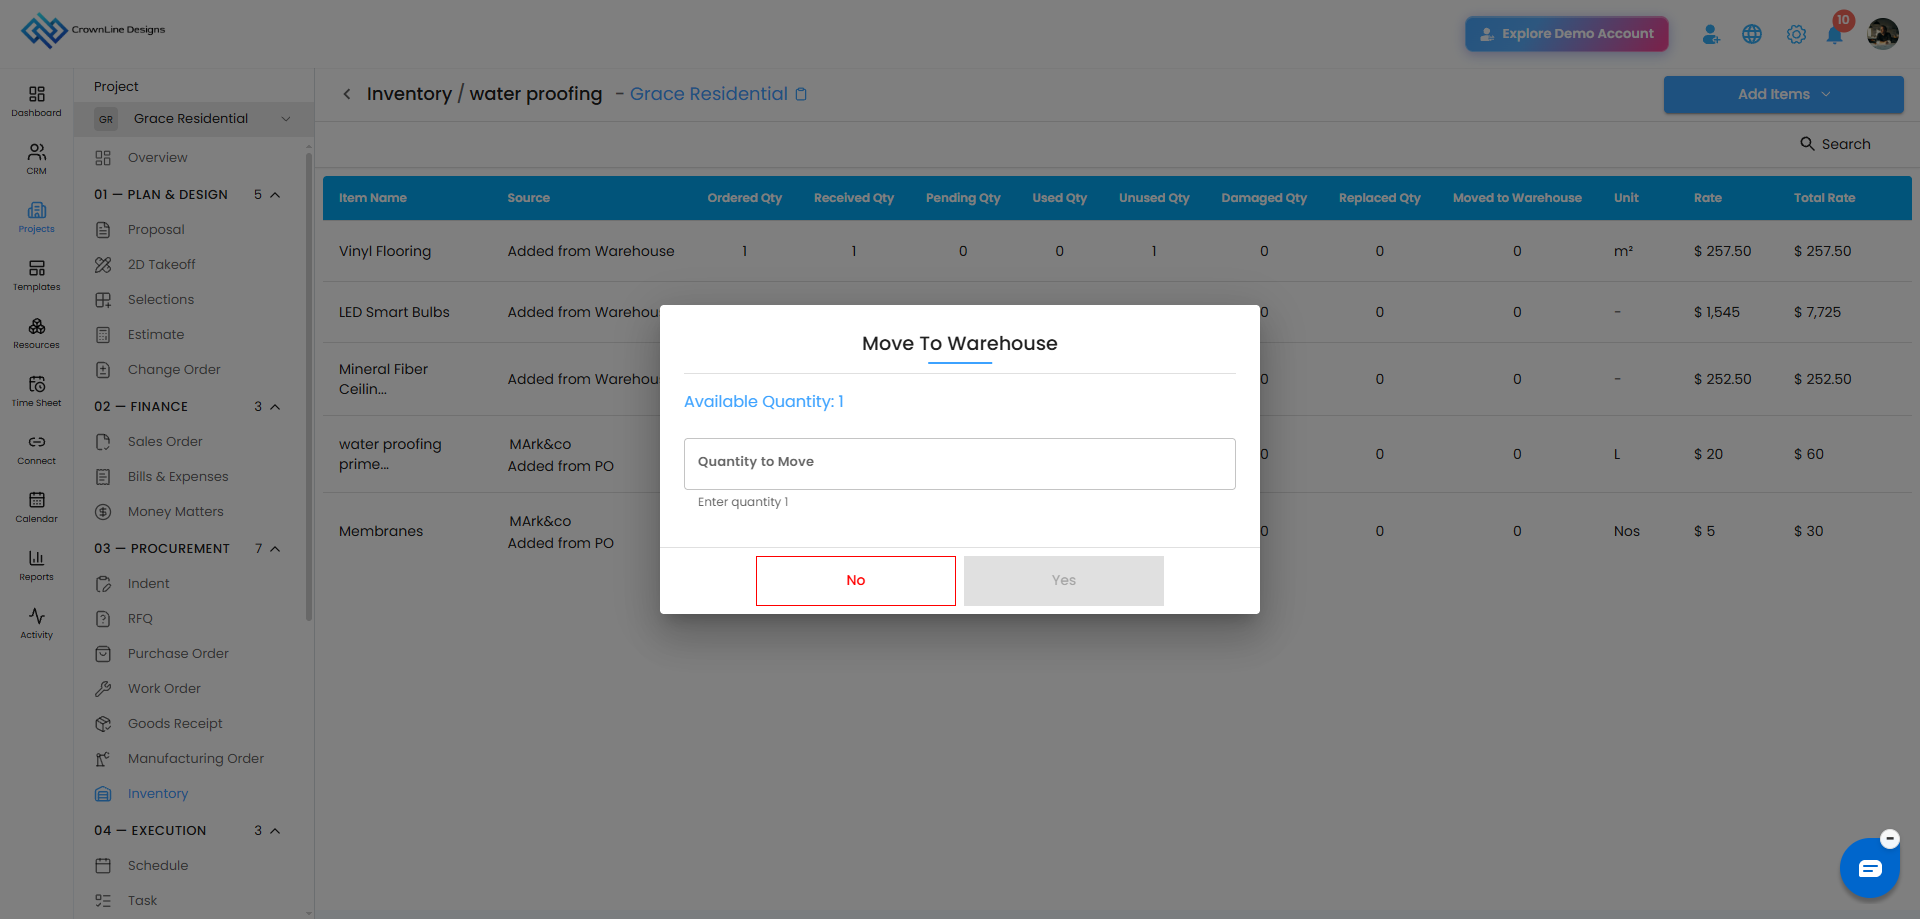
- Enter the quantity you want to return.
- You can specify any quantity up to the available quantity.
- Click Yes to complete the transfer.
This transfers the selected quantity back to the warehouse while keeping the group and warehouse stock records updated.
Convert to Expenses
If an item in the group needs to be recorded as a project expense, you can convert it directly from the Items Table.
- Click the three-dot menu (⋮) next to the item.
- Select Convert to Expenses.
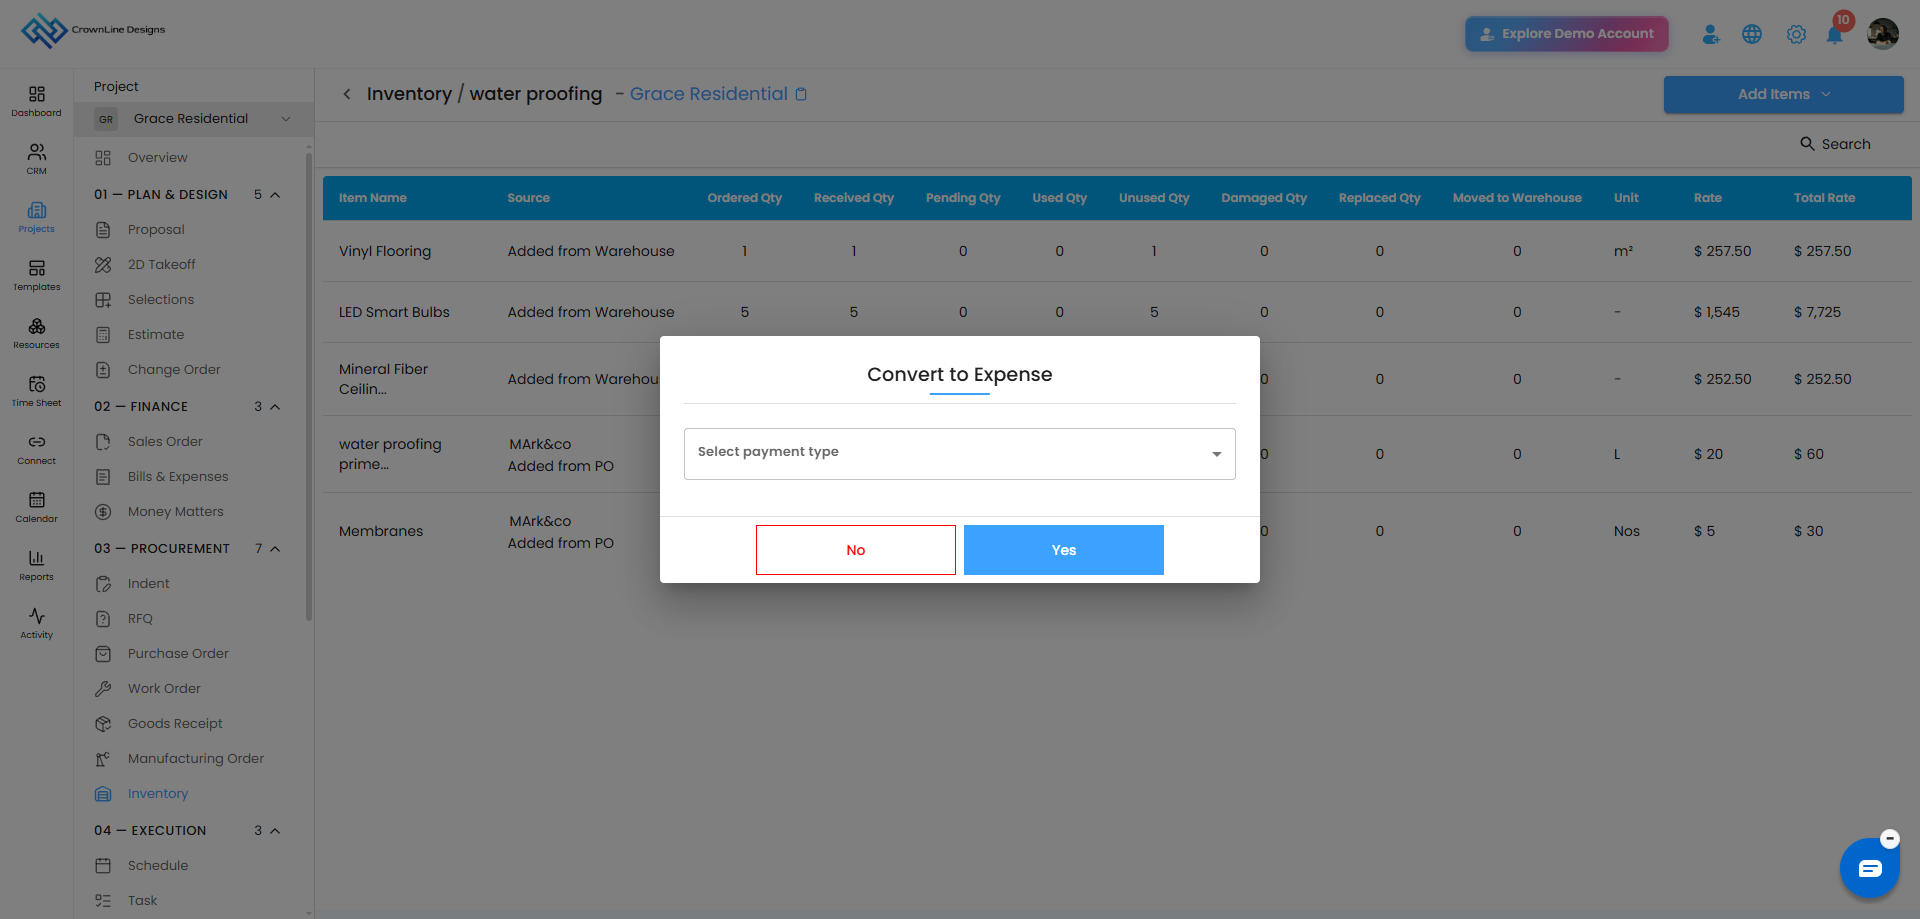
A Convert to Expense popup will appear.
- Choose the required payment type from the dropdown.
- Click Yes to confirm.
The item will then be allocated as a project expense, keeping the inventory and project expense records updated.
Update Expense
If an item has already been converted to an expense and the Received Quantity or Used Quantity is later changed, the expense amount may need to be updated accordingly.
- When the quantity or item price changes, the Update Expense option will be available from the three-dot menu (⋮).
- Click the three-dot menu (⋮) next to the item.
- Select Update Expense.
- The expense details will be updated based on the latest quantity and price.
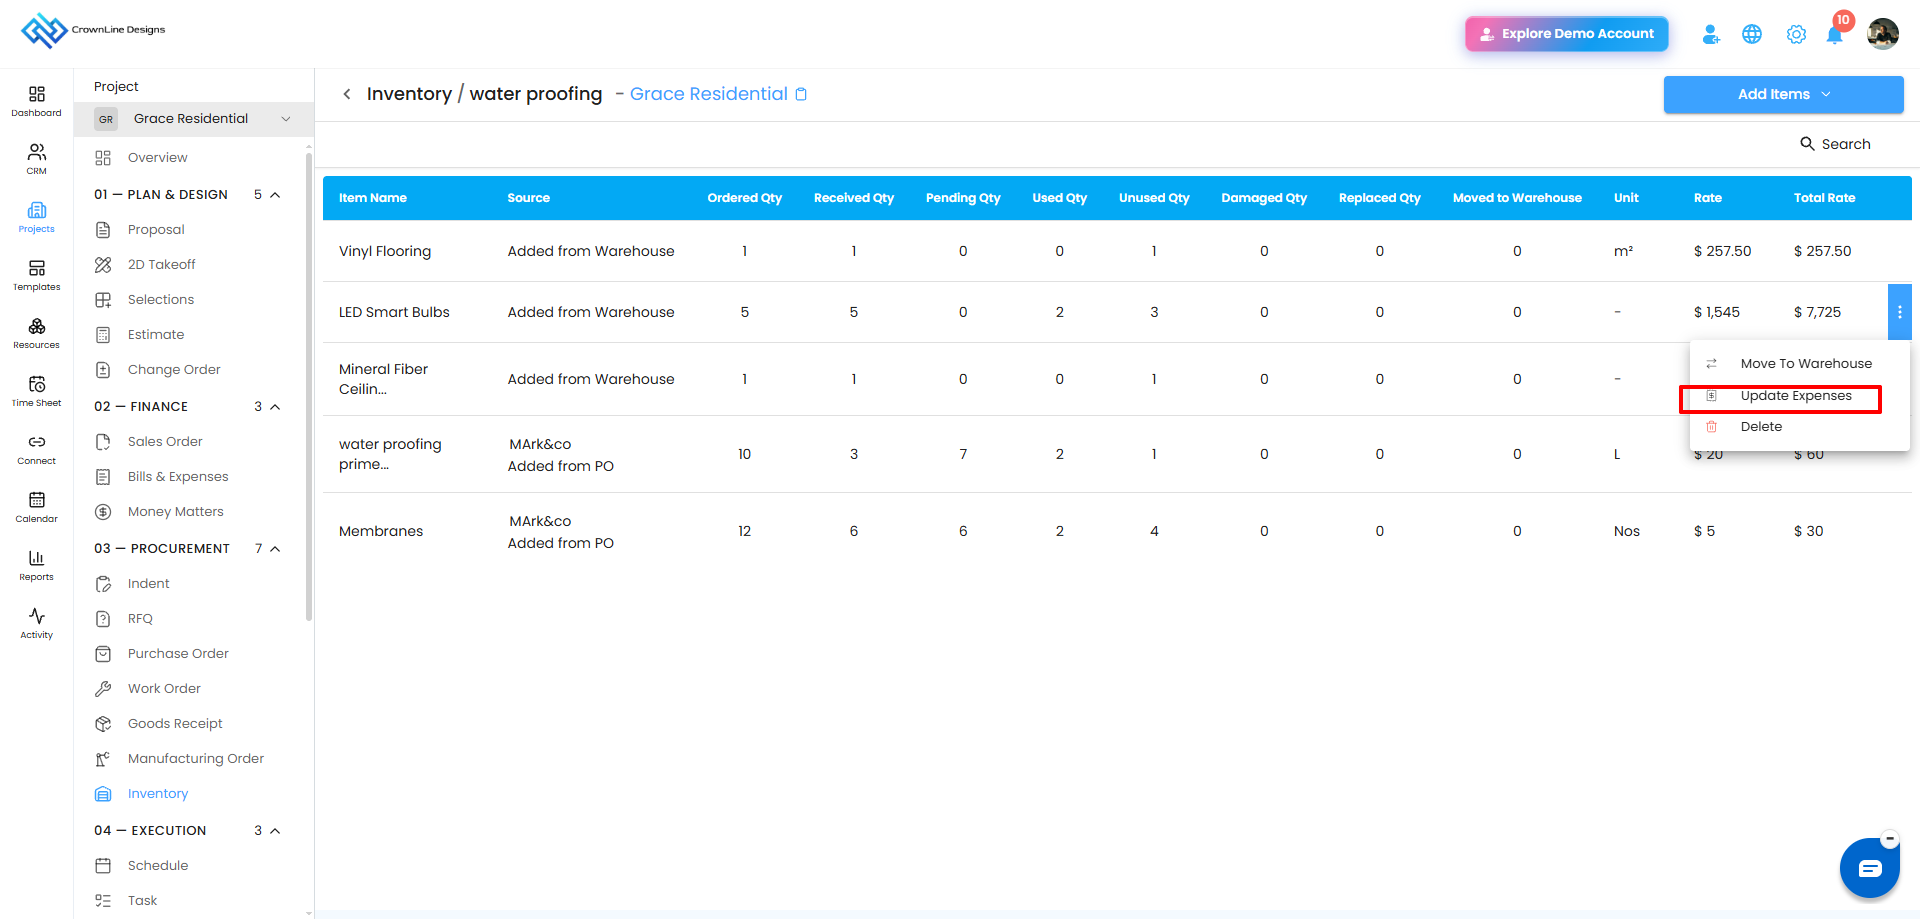
Note: The Update Expense option is shown when the expense-related value changes, such as when the Received Quantity, Used Quantity, or Price is changed after the item has already been converted to an expense.
Delete Item
If you need to remove an item from the group:
- Click the three-dot menu (⋮) next to the item.
- Select Delete.
- A confirmation popup will appear asking you to confirm the deletion.
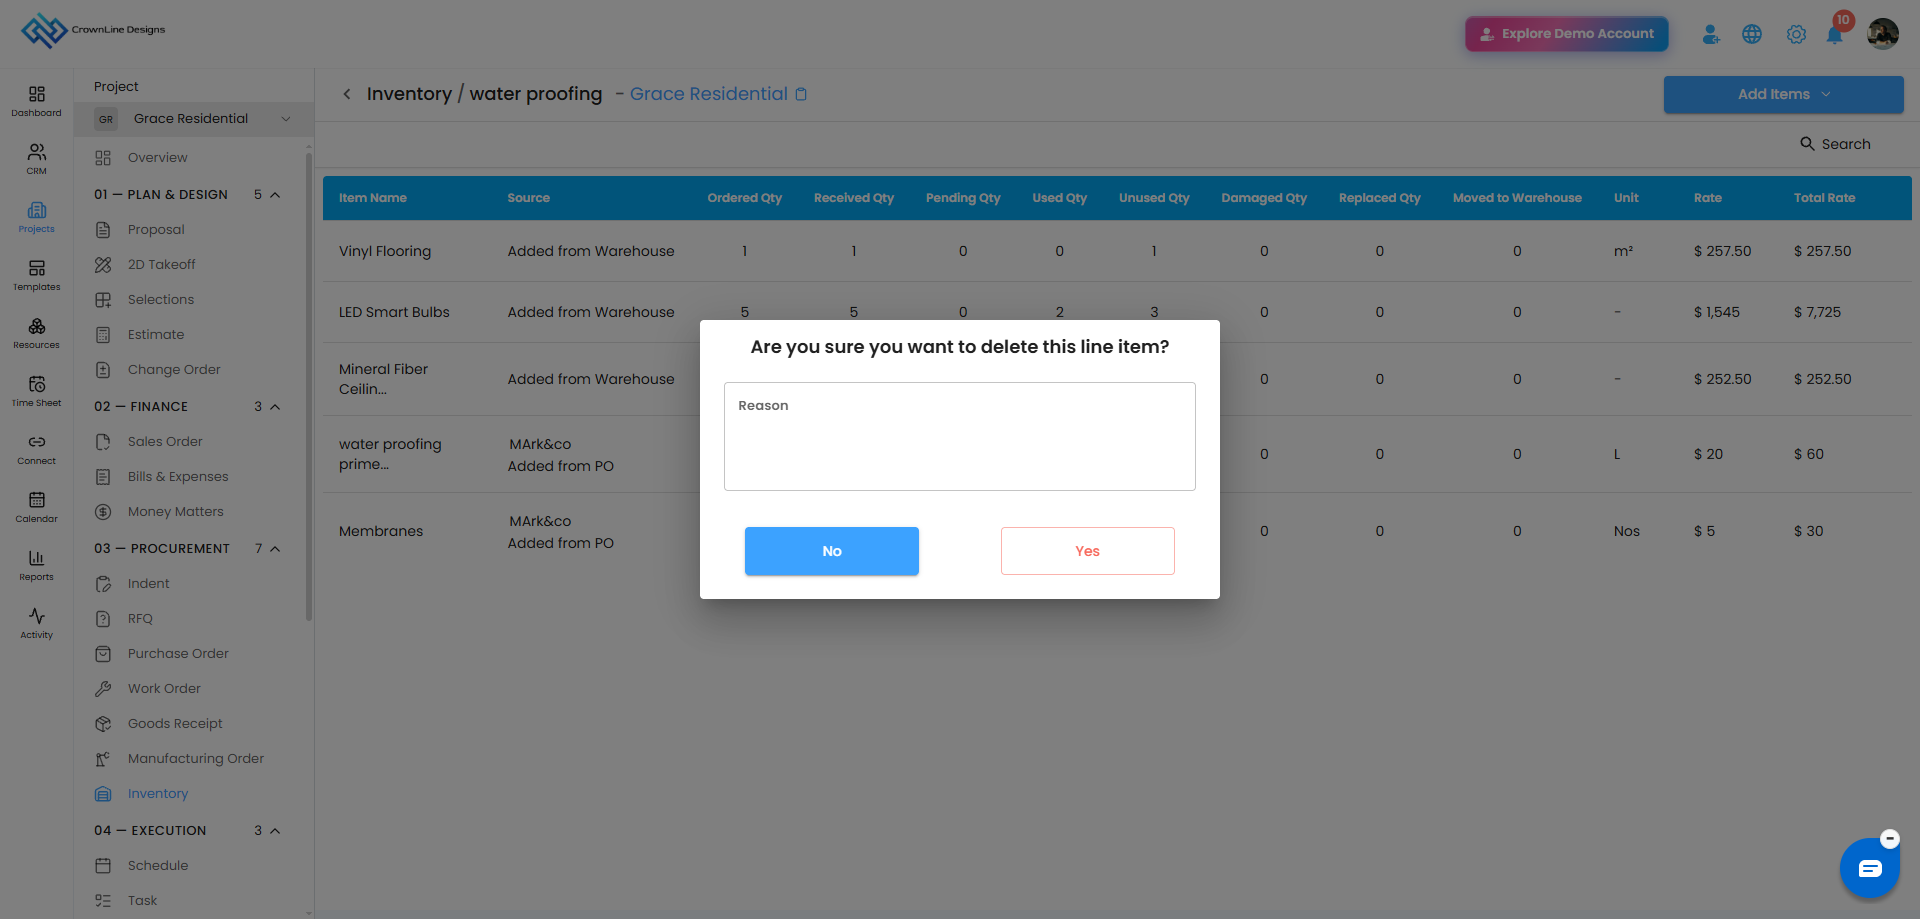
- Click Yes to confirm the deletion.
- Click Cancel if you decide not to delete the item.
Pro Tip
Use Move to Warehouse when stock is no longer required in the group instead of deleting the item. This keeps the stock movement between the group and warehouse properly tracked.
Was this article helpful?
That’s Great!
Thank you for your feedback
Sorry! We couldn't be helpful
Thank you for your feedback
Feedback sent
We appreciate your effort and will try to fix the article