Mastering Your Inventory with Purchase Orders
A Purchase Order (PO) isn’t just paperwork—it’s the blueprint for smooth and accurate inventory management. With IntoAEC, you can bring accepted POs straight into your inventory groups, ensuring every item is tracked, accounted for, and ready when you need it.
What You Can Do Here:
- Add items directly from a Purchase Order into your groups.
- Track ordered, received, and pending quantities with precision.
- Attach supporting delivery details for complete records.
- Manage items dynamically-update, replace, or even delete when required.
How to Add Items from a Purchase Order (PO)
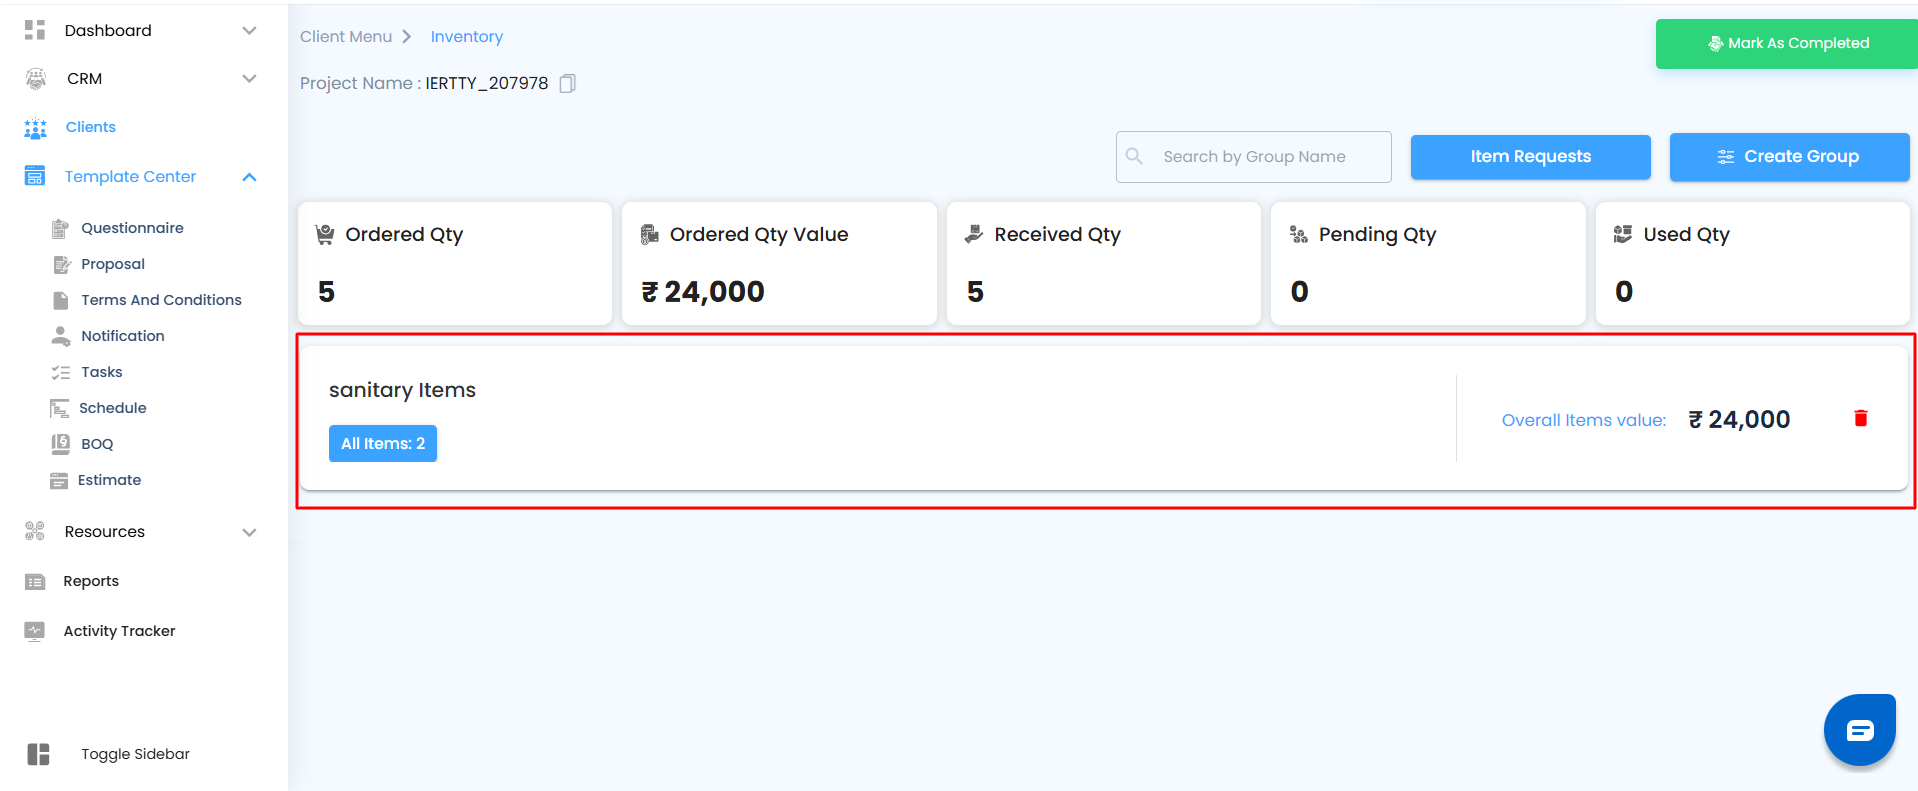
- Select the Group
- Open the group where you want to add items.
- Click the group card to enter the Items Page.
- If no items exist yet, you’ll see a message: “No Inventory Items have been Added.
Viewing an Empty Group
If you’re stepping into a group for the very first time and no items exist yet, you won’t see a cluttered table. Instead, you’ll be greeted with a simple illustration and the message “No Inventory Items Added.”
It’s your blank slate—clear, organized, and ready for you to add the very first item.

Click the “Add Items” Button
- On the Items Page, select Add Items to reveal available options

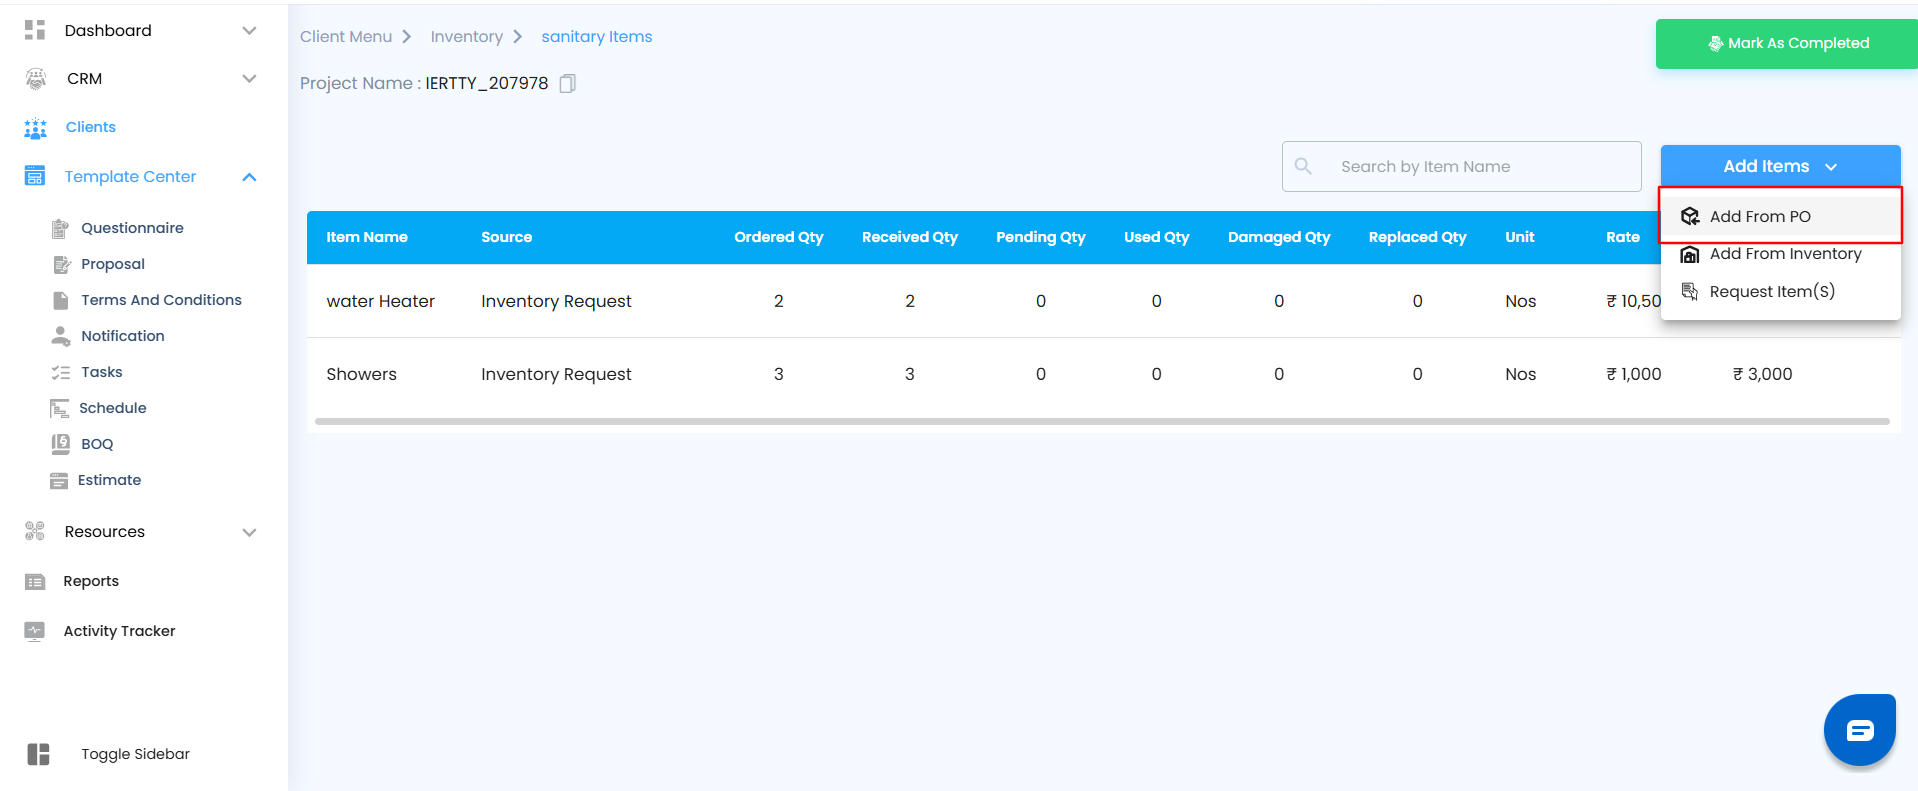
Choose “Add from PO”
- From the list, click Add from PO.
- A side panel will appear, displaying available Purchase Orders.

Filter and Search POs
- Use filters and search to quickly locate the PO you need:
- Vendor Name Filter – narrow by vendor organization.
- Search Bar – type a PO number.
- Apply – confirm filters.
- Clear – reset filters to see all POs.
Viewing the List of Available POs
- When you open the PO selection panel, you’ll see a neatly organized list of all available and accepted Purchase Orders.
- Browse through the list and locate the PO that contains the items you want to add.
- Click the arrow ( > ) icon next to that PO.

Once selected, a side panel will smoothly slide in, revealing the full details of the chosen Purchase Order—clear, structured, and ready for action.
Select a Purchase Order
- Browse through accepted POs.
- Click the arrow ( > ) beside the PO you want.
- A detailed panel will open with item details:
- Item Name
- Ordered Quantity
- Editable Received Quantity
- Auto-calculated Pending Quantity
- Unit Rate

Add Delivery Details (Optional)
- Enter supporting information to complete the record:
- Vehicle Number
- Bill Number
- Notes
- Attachments (e.g., delivery slips, receipts).

Finalize and Add Items
After verifying all details, click the “Add” button.
The items will be added to the group and displayed in the Items Table.

Viewing Added PO Items in the Items Table
Once items are pulled in from a Purchase Order, they’ll be listed in the Items Table of your selected group. Each row gives you complete visibility into the item’s journey:
- Item Name – The name of the inventory item.
- Source – Whether it was added from Inventory or directly from a PO.
- Ordered Quantity – The total units originally ordered.
- Received Quantity – Editable field to capture what has arrived so far.
- Pending Quantity – Auto-calculated balance yet to be received.
- Used Quantity – Units consumed from the received stock.
- Damaged Quantity – Editable field to record any unusable items.
- Replaced Quantity – Editable field to track substitutions or swaps.
- Unit Rate – Price per unit.
Total Rate – Calculated automatically as Unit Rate × Ordered Quantity.
Goods Receipt Note (GRN) – Convert from Purchase Order (PO)
GRN can be created from an Accepted Purchase Order (PO) through the Inventory module. This process is used when materials ordered through a PO are received at the site.
How to Convert PO to GRN
Step 1: Open Inventory
Go to the required Project.
Open the Inventory module.
Create an Inventory Group
- Navigate to the Inventory tab and click on Create Group.

- A popup titled Create Inventory Item Group will appear.
- Enter the required Group Name and click Create.

- Once the group is created, it will be displayed on the main Inventory page.

Open the Created Group
Click on the created Group Name to open the inventory group. Inside the group, click on the Add Item button.
A dropdown menu will appear showing the available options such as:
Add from PO
Add from Inventory
Request Item

Step 2: Select Added from PO
From the dropdown, click Added from PO.

The system will display only Accepted Purchase Orders.
Step 3: Select Purchase Order
Select the required PO from the list.

The Purchase Order off-canvas will open.
PO Item Details
The following columns will be displayed:
Item Name
Order Quantity
Received Quantity
Pending Quantity
Rate
Update the received quantity based on delivered materials.
Additional Details
Click Additional Details to enter GRN information:
Goods Receipt No
Vehicle Number
Bill Number
Received By
Received On
Amount

Notes
Enter delivery remarks if required.
Attachments
Up to 4 files can be uploaded.
Supported formats: PDF, Excel, Images, and other documents.

Save GRN
Click Add.

A Confirm Item Addition popup will appear.
No – Closes popup and keeps entered data.
Yes – Saves GRN and redirects to the GRN page.
Result
GRN is created successfully.
Received items are recorded against the selected PO.
GRN details are available in the GRN module.
Managing Your Table:
- Hover over any row to reveal the three-dot menu (⋮).
- Select Delete if you need to remove a PO item.
- A confirmation pop-up will appear, giving you the choice to proceed or cancel.


Delete Confirmation
When you attempt to delete an item from the Items Table, the system won’t remove it right away. Instead, a confirmation pop-up will appear with the message:
“Are you sure you want to delete this line item?”
This extra step is designed to prevent accidental deletions and gives you the chance to review your choice before making changes to the group’s inventory.
- If you click Yes – The selected item will be permanently removed from the group’s Items Table. Once deleted, the entry will no longer appear in your inventory records for that group.
- If you click Cancel – the pop-up will close immediately, and no changes will be made. The item will remain exactly as it is in the table.
Think of this as a safeguard: it ensures that you only delete items intentionally, keeping your inventory accurate and avoiding mistakes.

Was this article helpful?
That’s Great!
Thank you for your feedback
Sorry! We couldn't be helpful
Thank you for your feedback
Feedback sent
We appreciate your effort and will try to fix the article