Creating Shifts in IntoAEC – Your Complete Playbook
Think of a shift as the engine that keeps your project site running. Creating one in IntoAEC isn’t just about filling a form — it’s about placing the right people, at the right time, in the right spot so your project runs like clockwork.
Let’s walk through the journey of building a shift step by step
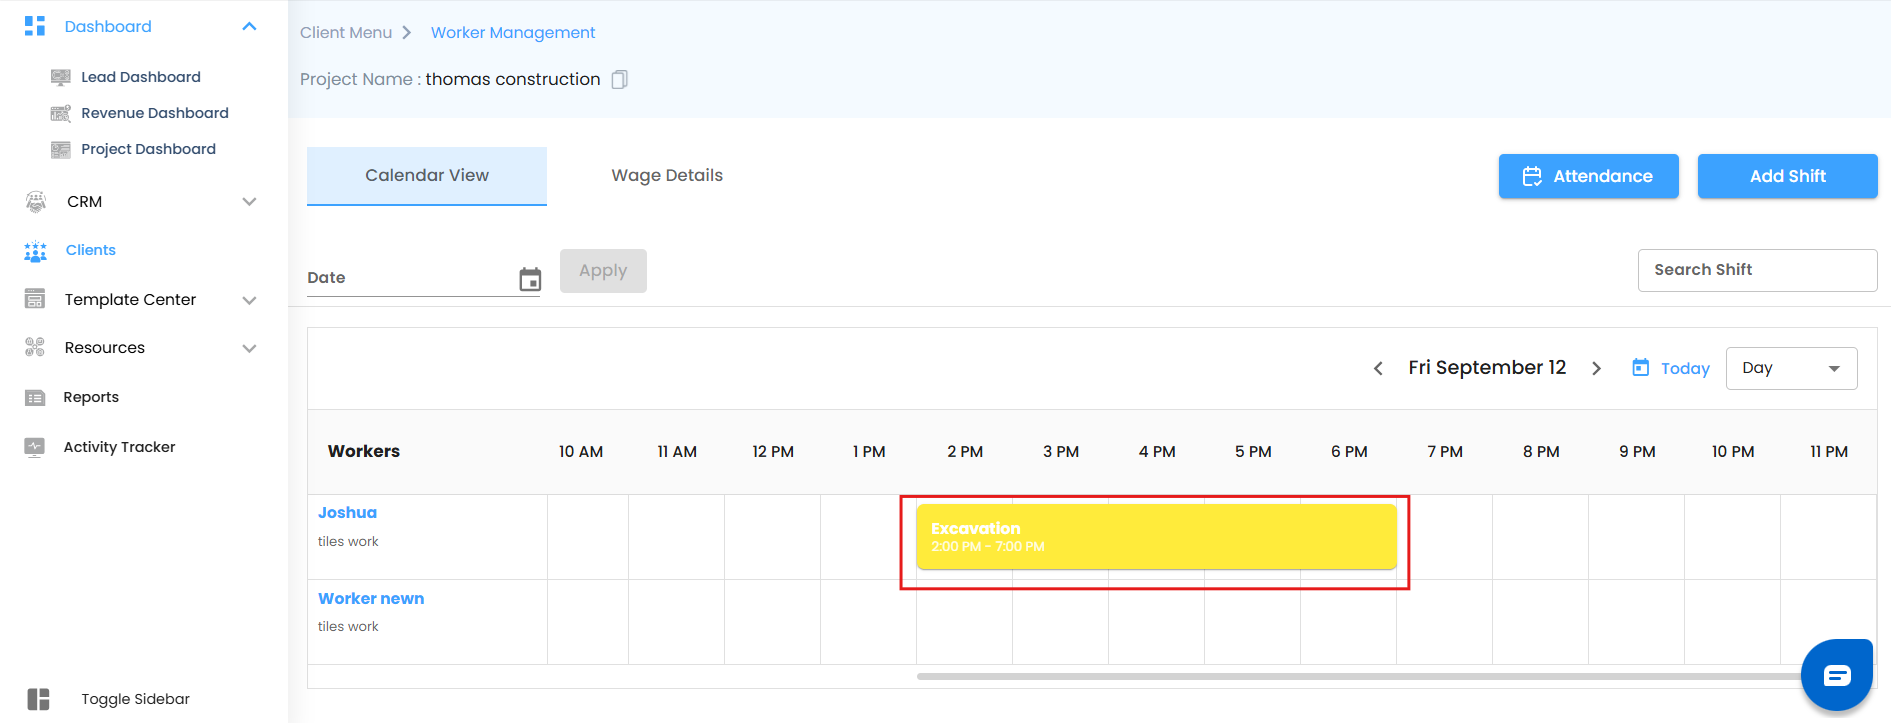
Open the Shift Builder
Head over to your Calendar View.
Hit the big Add Shift button.
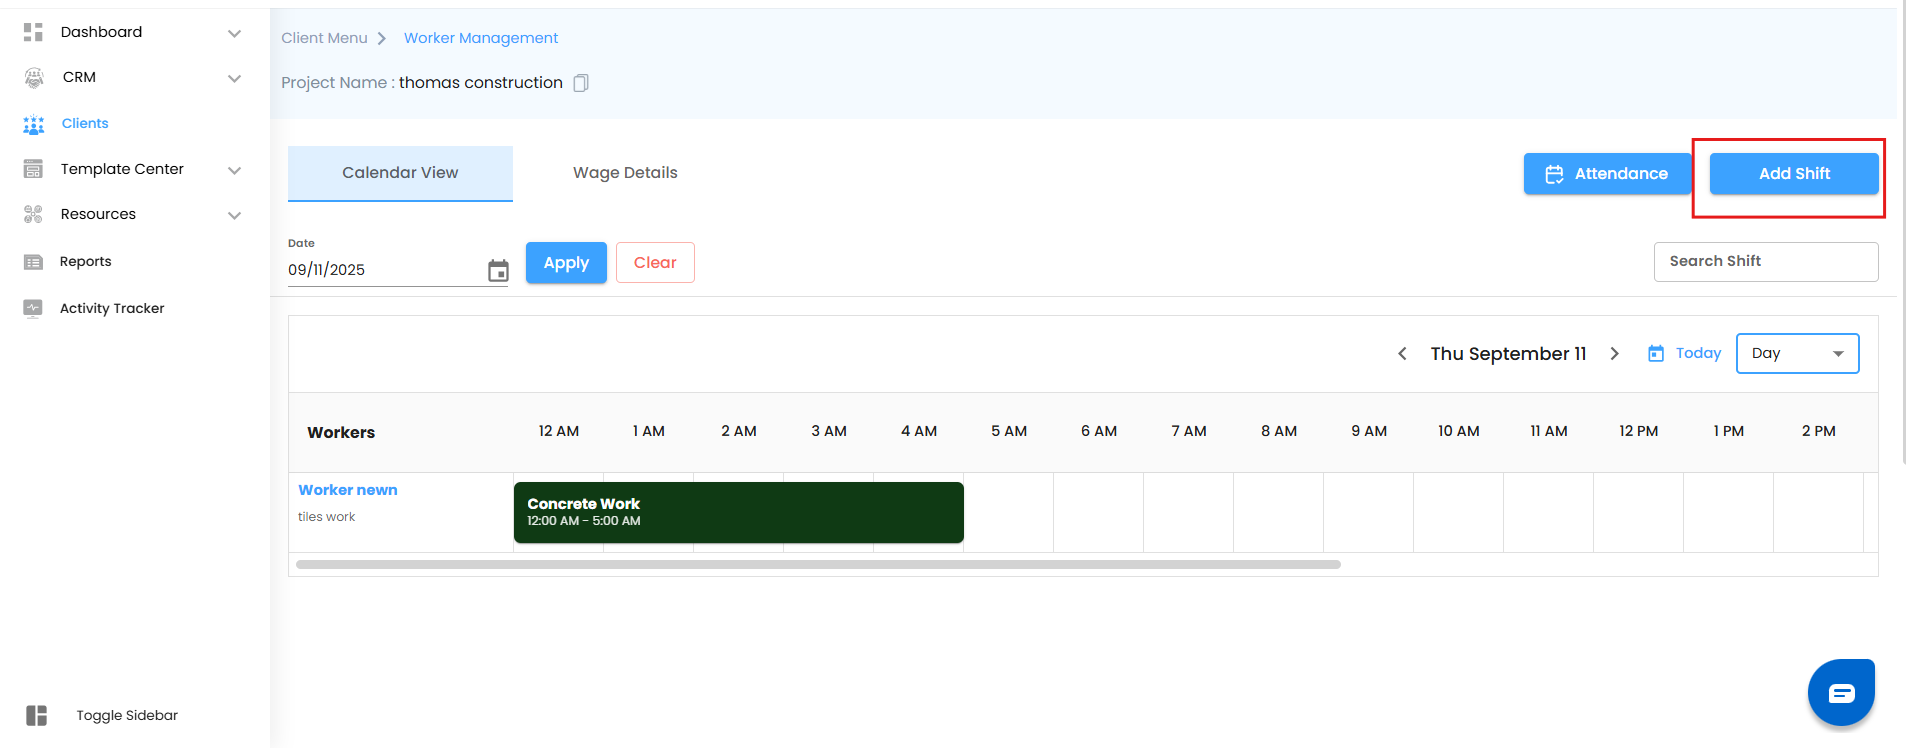
A Create Shift panel slides in — your digital workspace for shift planning.
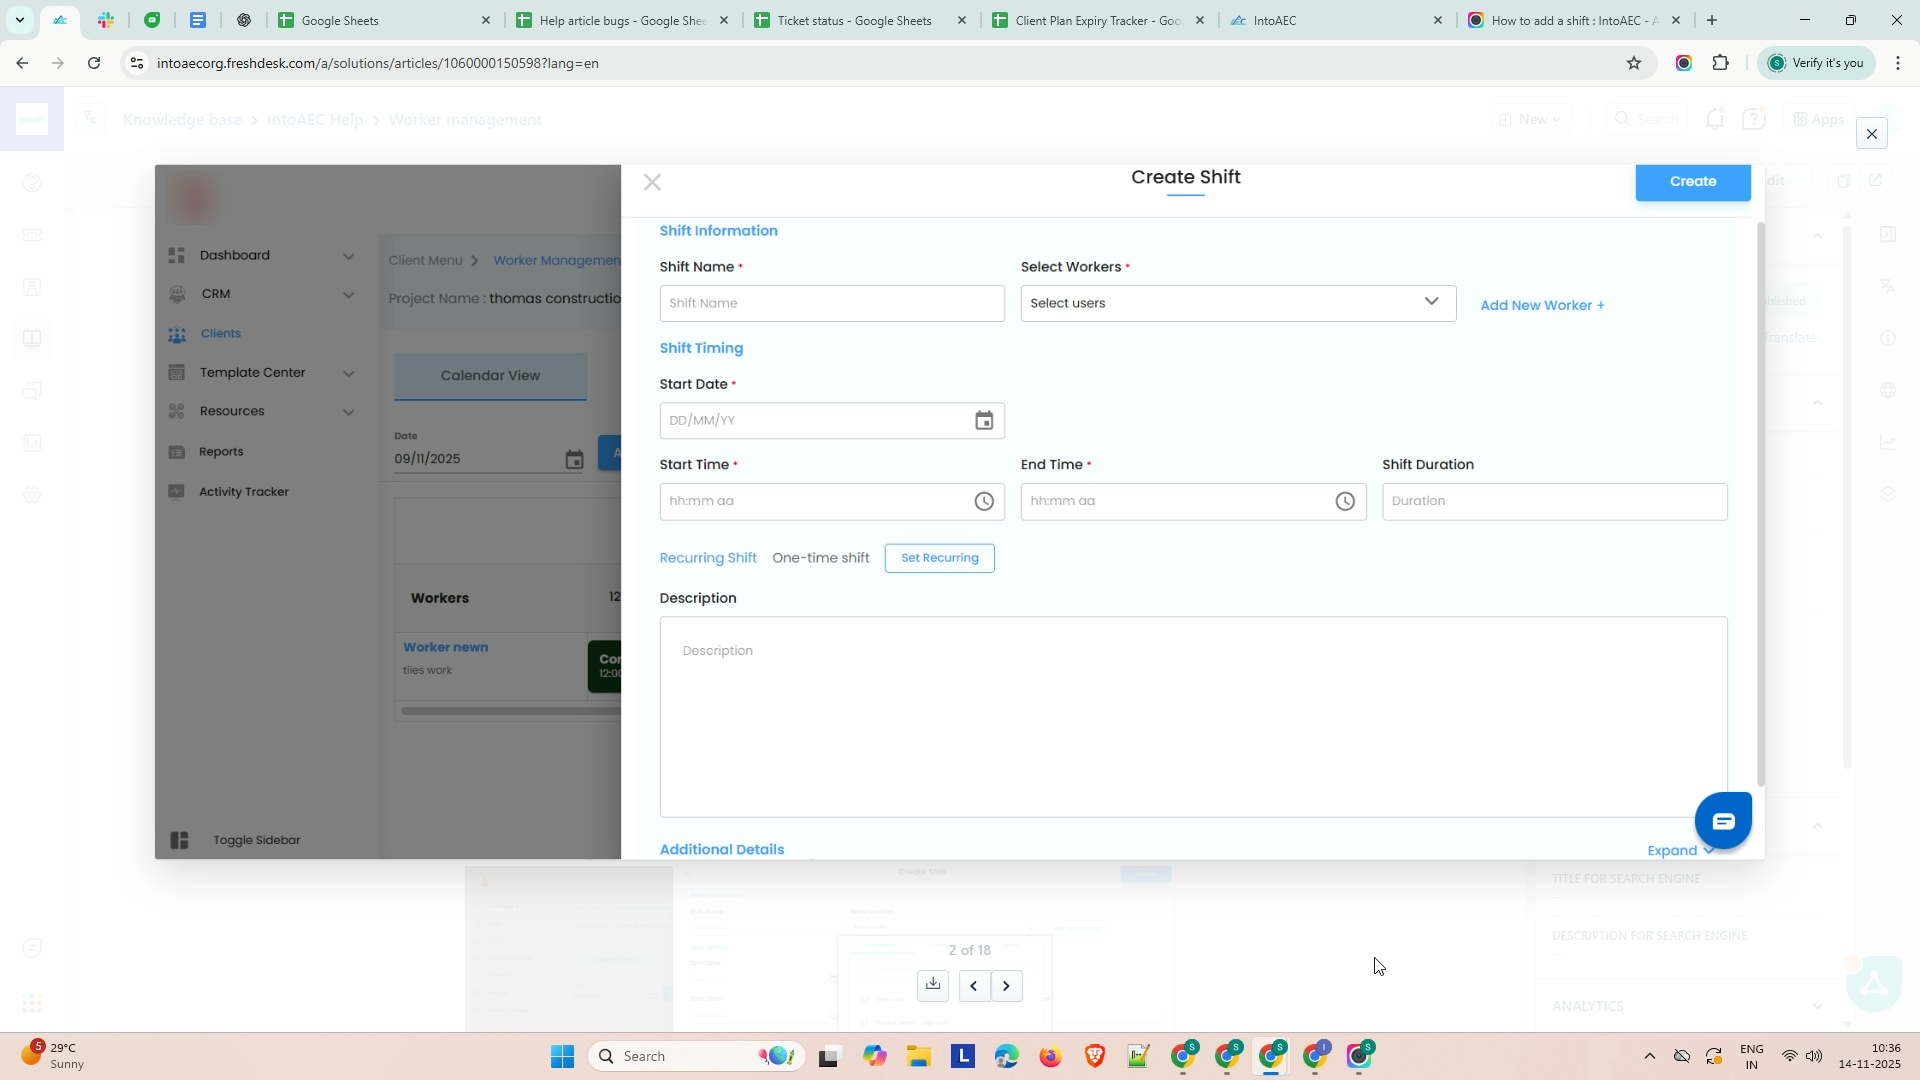
Give Your Shift an Identity
Shift Name → Make it clear and recognizable.
(Examples: “Morning Concrete Pour”, “Night Security”, “Masonry – Zone A”)A well-named shift helps you (and everyone else) know what’s happening at a glance.
Assemble Your Crew
Workers are the core of your shift. The Select Workers dropdown (with built-in search) lets you:
Pick from existing workers created in the Manage Workers feature.

You can assign:
Individual Workers
Contractors
Organization Users (Users as Workers)
Or add new workers on the fly without leaving the shift creation page.
Adding New Workers
Click Add New Worker → choose the type of worker you want to add:
Add Individual Worker
Opens an Add Individual Worker off-canvas with fields:
Worker Name* → Required field to identify the worker.
Worker Type* → Choose from predefined worker types (e.g., Mason, Carpenter, Helper, Driver).
Worker Rate → Define the payment rate (per hour/day/week).
Working Hours → Standard hours expected in a day.
Overtime Rate → Extra rate applicable if the worker exceeds working hours.
After filling details, click Add.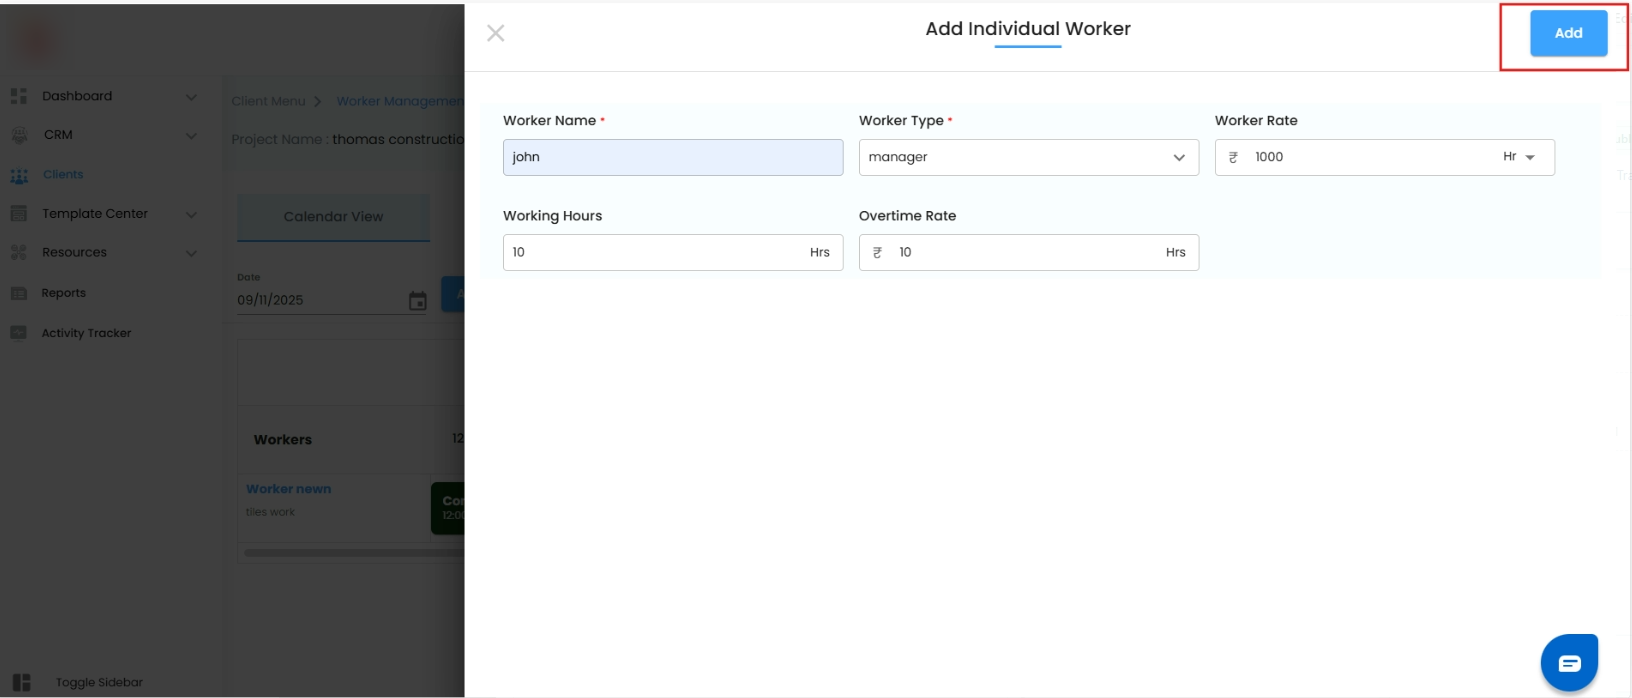
Add Contractor & Workers
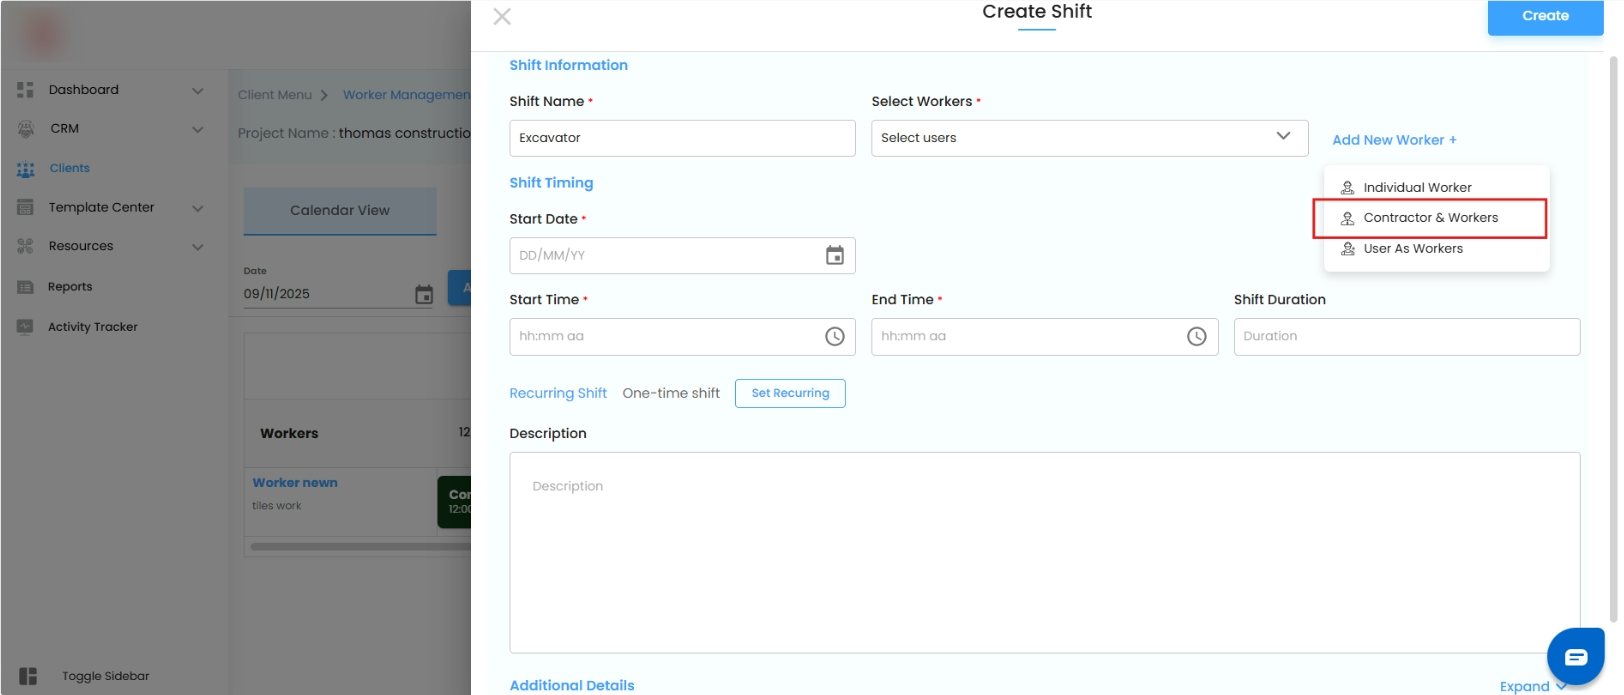
Opens an Add Contractor & Workers off-canvas where you can add an entire contractor group with multiple workers.
Contractor Name → Name of the contractor organization or firm.
Add Worker Section → Here you can add multiple workers under the contractor by filling in:
Worker Name*
Worker Type*
Worker Rate
Working Hours
Overtime Rate
Use the Add Worker button to keep adding more workers under the same contractor.
Once complete, click Add. The contractor and all linked workers are now part of your shift pool.
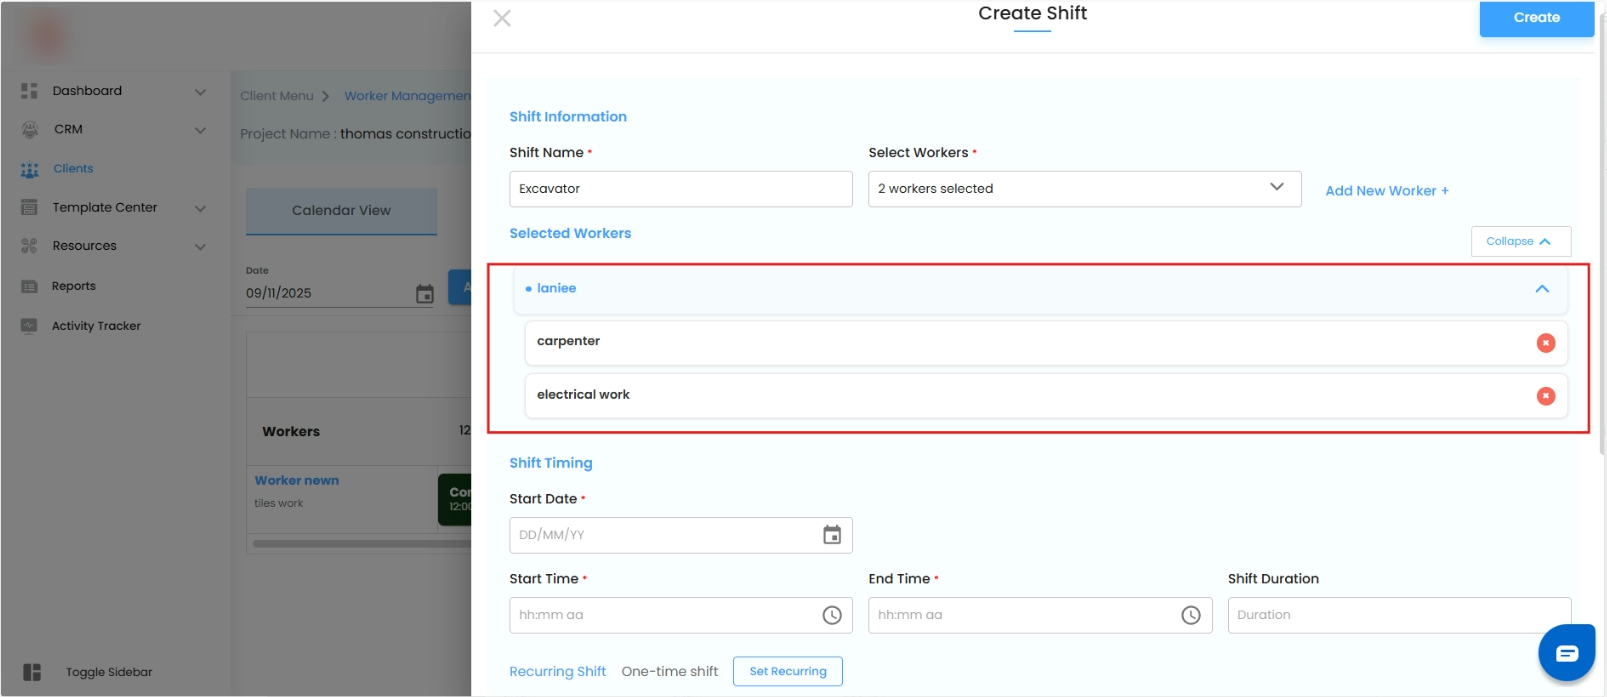
Add User as Worker
Sometimes organizational users (like engineers or site supervisors) need to be scheduled as workers.
Opens an Add User as Worker off-canvas with:
Select User Dropdown → Lists all organization users available.
Worker Type* → Define the role they’ll perform during the shift.
Worker Rate → Cost associated with their work.
Working Hours → Number of hours assigned.
Overtime Rate → Cost for extra hours.
After filling in details, click Add. The selected user is now available as a worker for this shift.
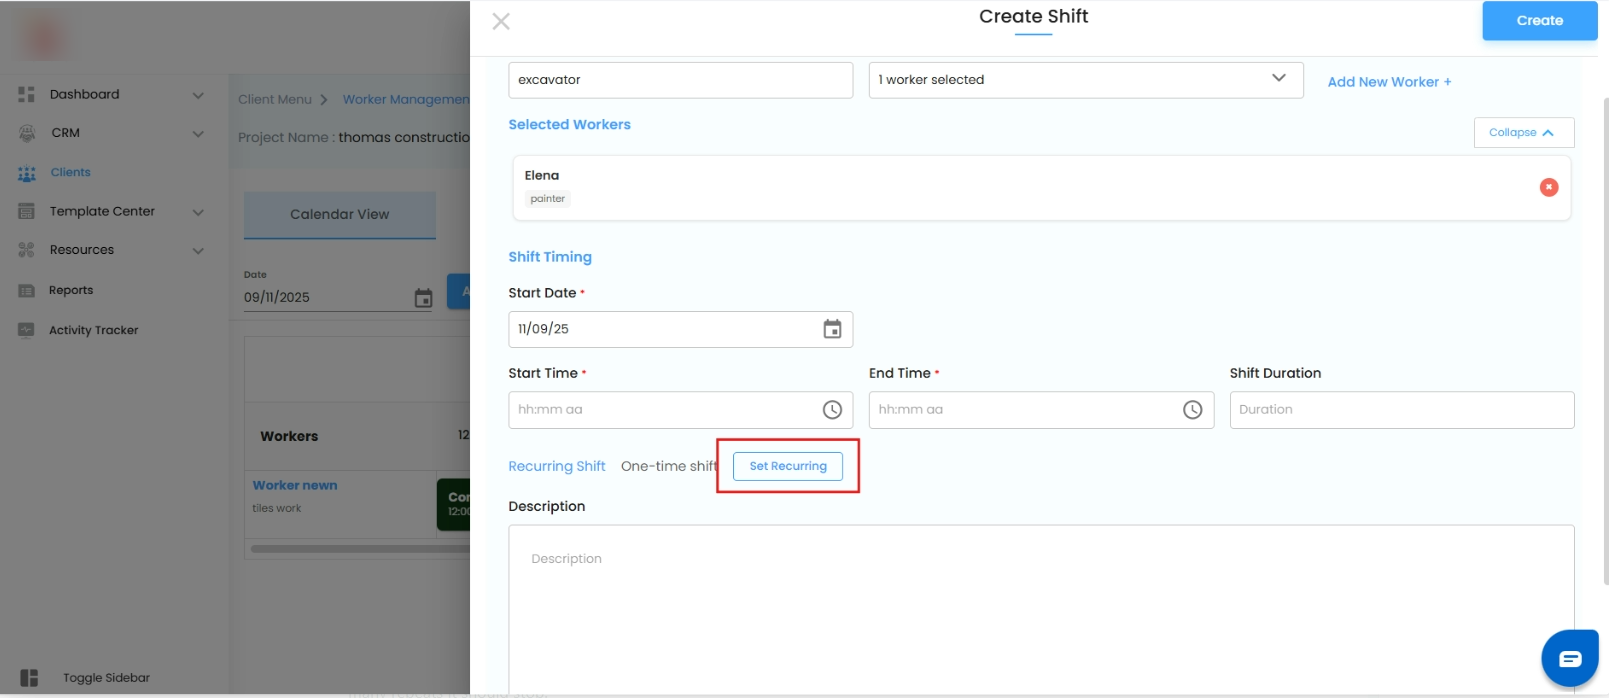
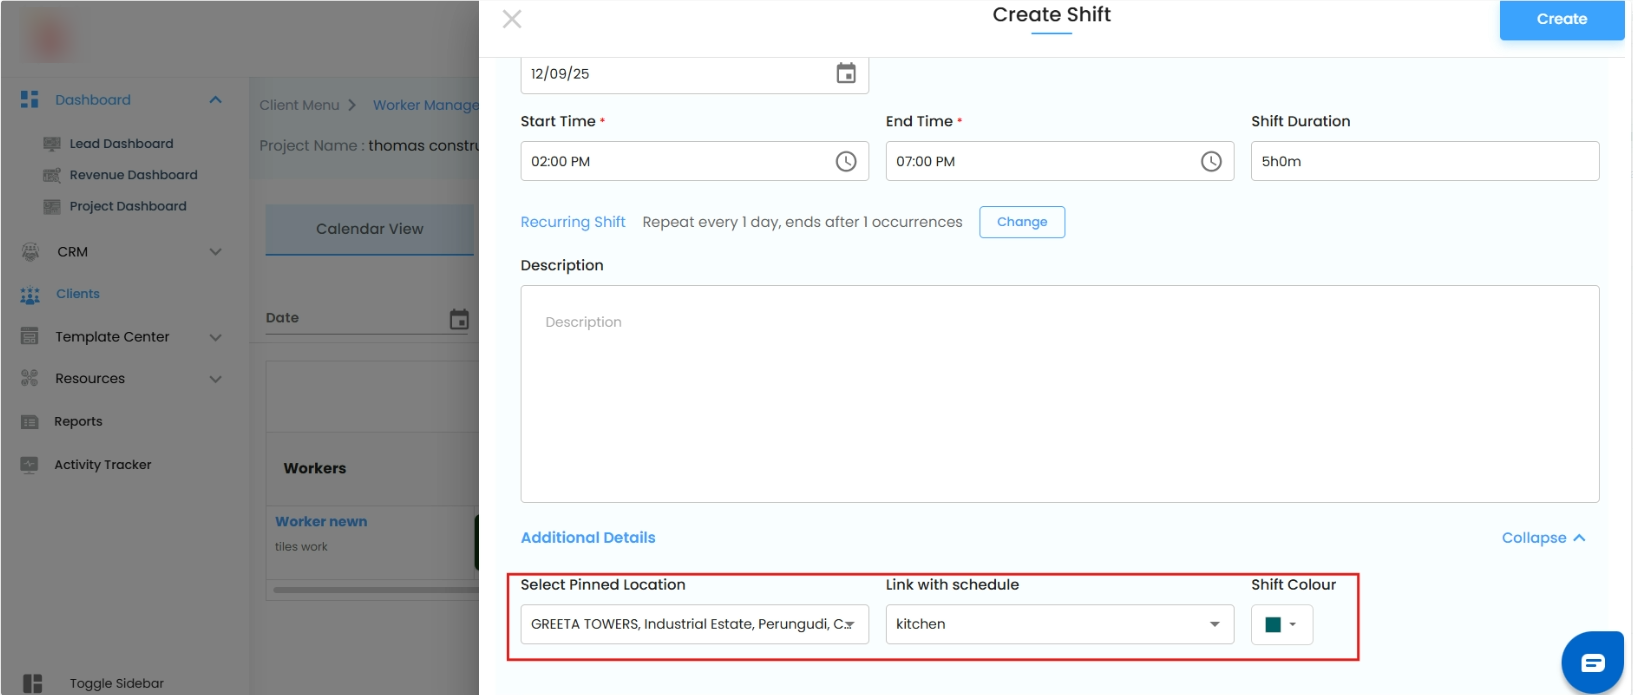
Set the Shift Clock
Start Date & Time → When the shift kicks off.
End Time → When it finishes.
Duration → Auto-calculated (so no math headaches).
Make It Recurring
Why create the same shift over and over when you can automate it?
Click Set Recurring.
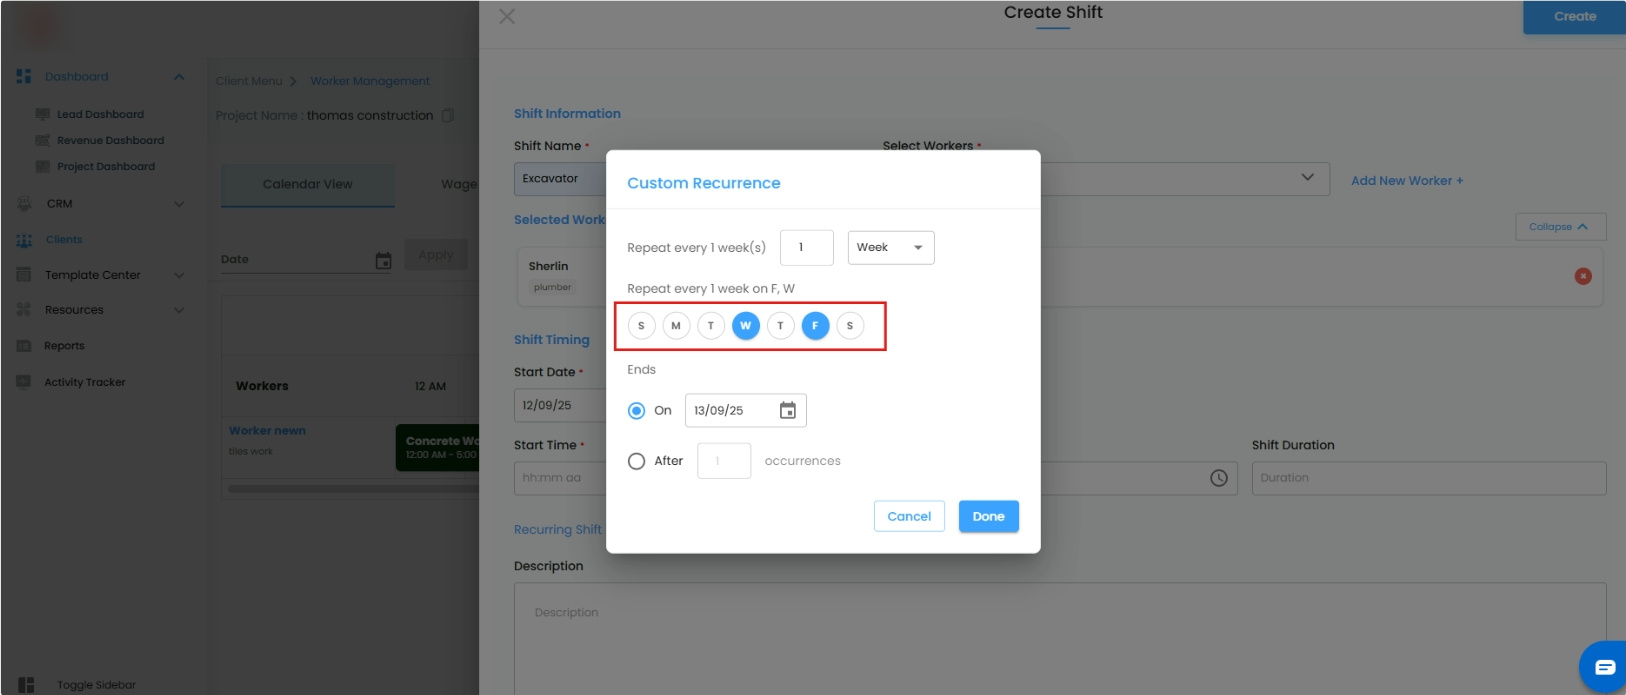
A Custom Recurrence popup will appear.
Choose from:
Repeat Every [X] → Enter a number and choose Day / Week / Month.
End On Date → Select when recurrence ends/End After [X Occurrences] → Define after how many repeats it should stop.

Weekly Recurrence
Select the days (S, M, T, W, T, F, S) the shift should repeat.
Monthly Recurrence
Based on the start date, options like:
Monthly on Day 11
Monthly on the 2nd Thursday
Click Done to confirm.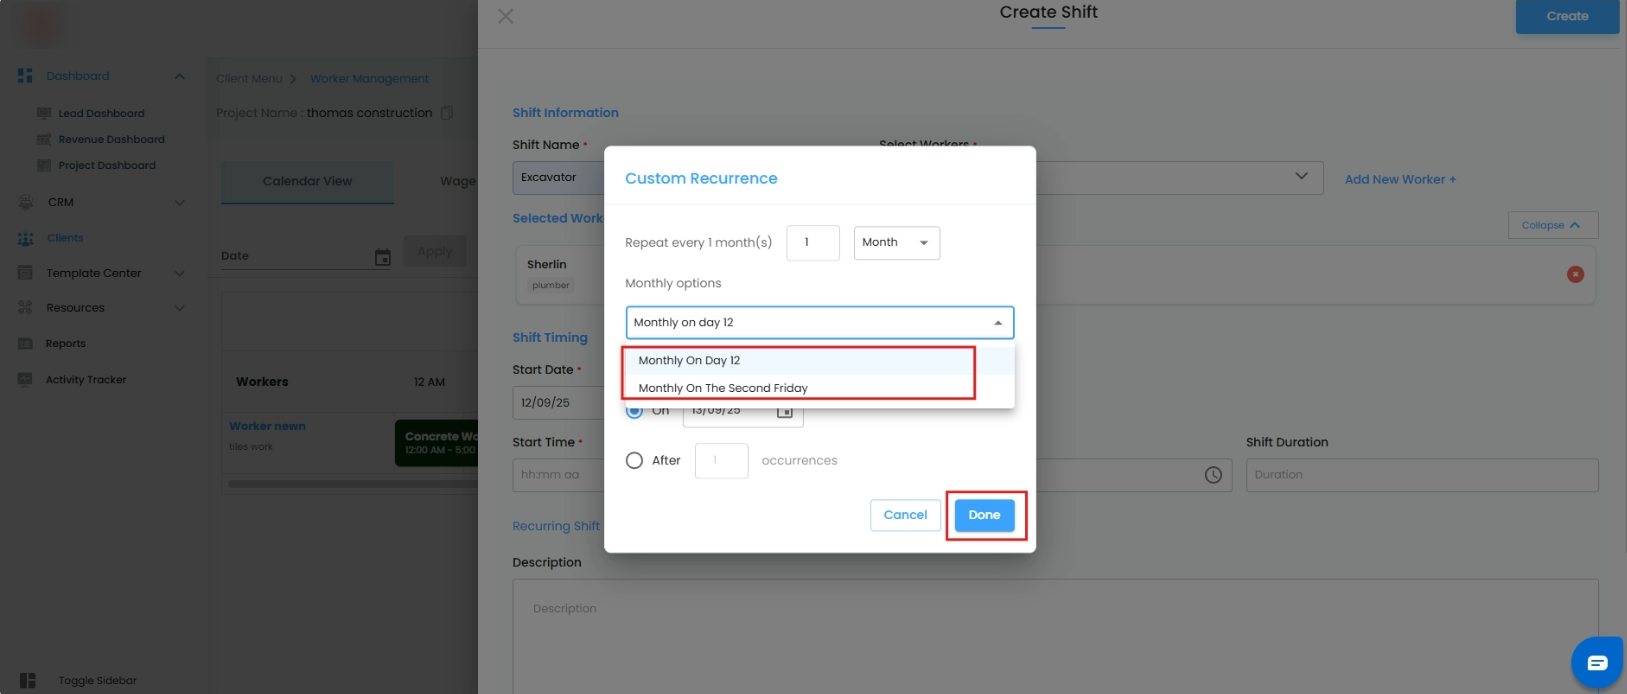
A Recurrence Card pops up under your shift. Messed up? Just click it to change . 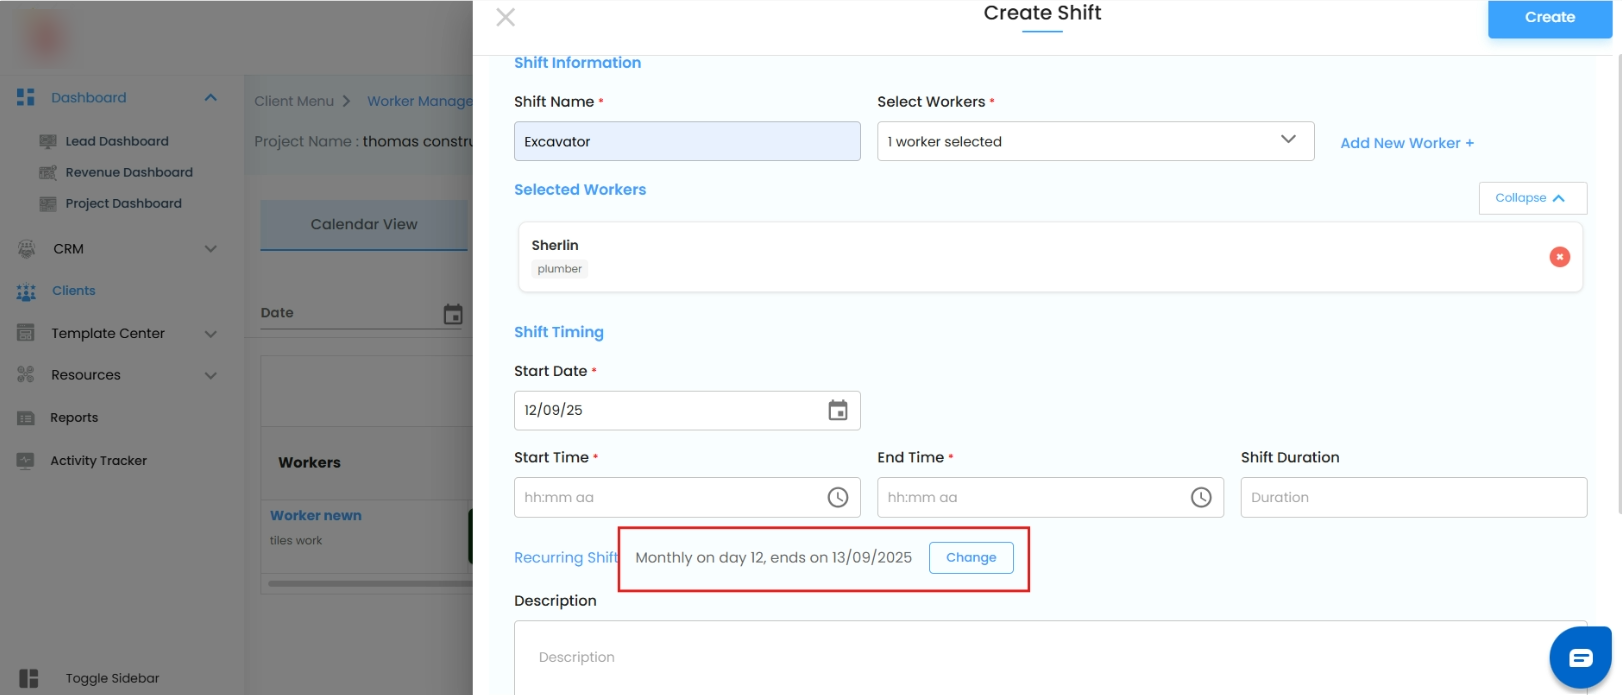
Extra Details
Description → Add notes (tasks, site instructions, safety alerts).
Additional Details (Expandable):
Pinned Location → Select a project location (if available).
Link with Schedule → Connect the shift to a schedule for better integration.
Shift Colour → Assign a colour for quick identification in the calendar view.
Lock It In
Double-check the details.
Click Create.
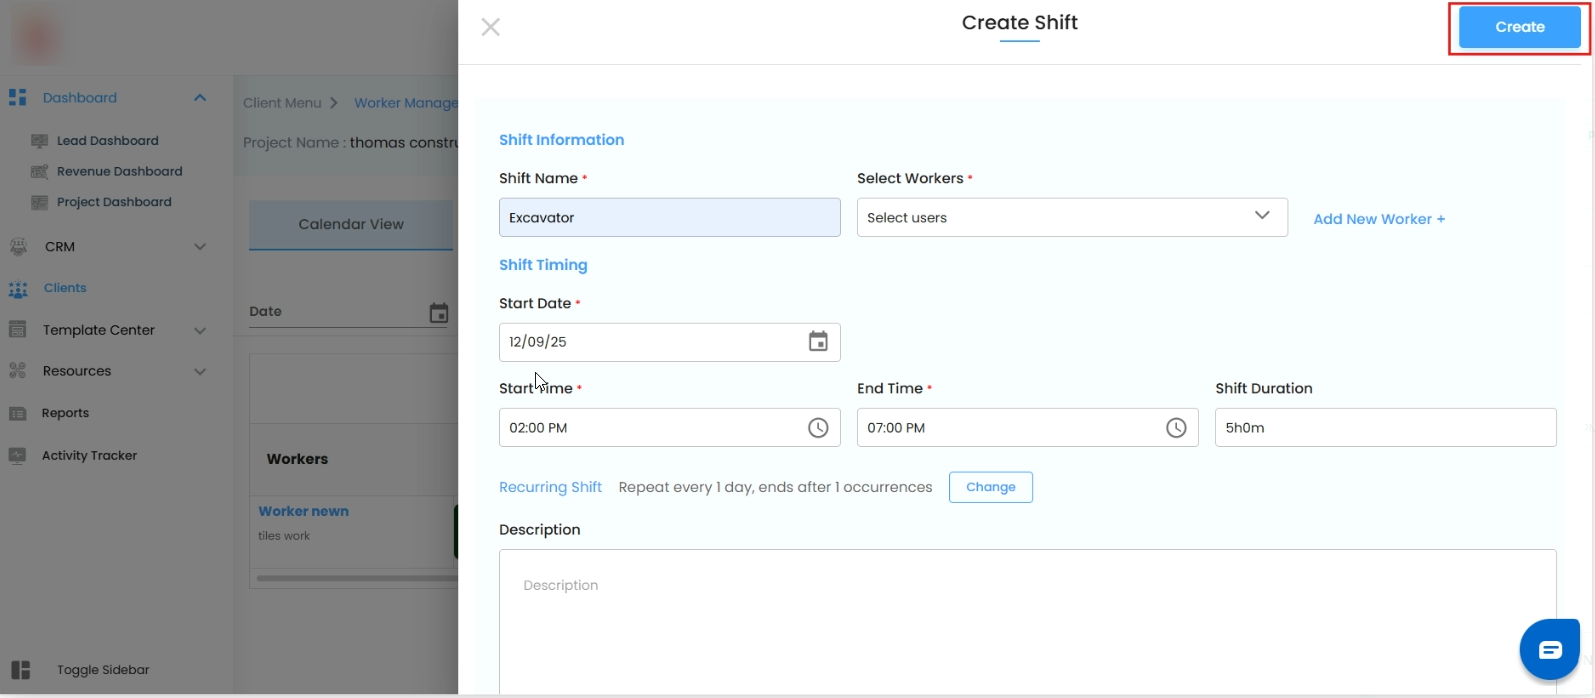
Your new Shift Card instantly appears in the Calendar View — fully coloured, fully staffed, and ready to go.
Was this article helpful?
That’s Great!
Thank you for your feedback
Sorry! We couldn't be helpful
Thank you for your feedback
Feedback sent
We appreciate your effort and will try to fix the article