Daily Reports (also called Daily Logs) let you capture what happened on a project each day — work completed, weather conditions, time logged, schedule progress, task progress, notes, and attachments — all in one place. They give your team and clients a clear, dated record of on-site activity.
1. Opening the Daily Report
1. Go to Clients/Projects from the left sidebar and open the project you want to work on.
2. On the Project Profile page, switch to the Project Management tab on the right.
3. Click the Daily report card.
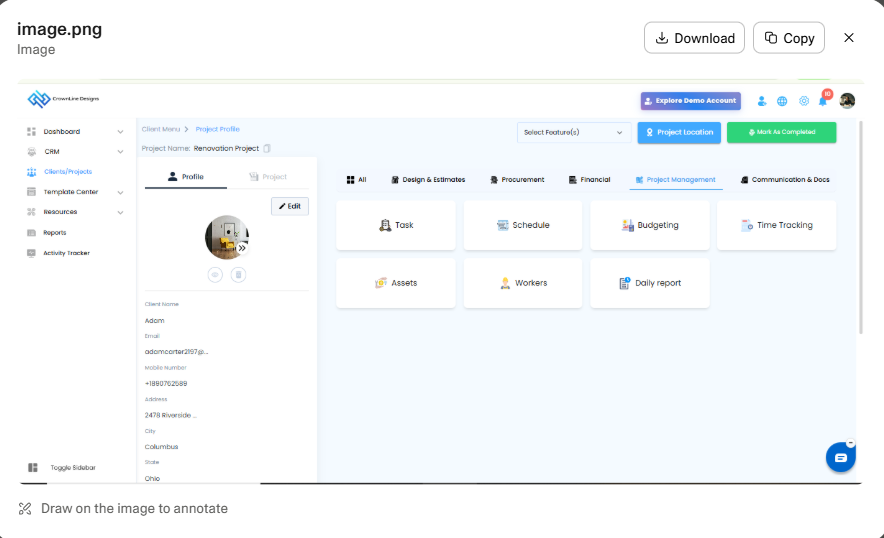
> Tip: A small red badge on the Daily report card shows the number of logs created for that project.
2. The Daily Report Dashboard
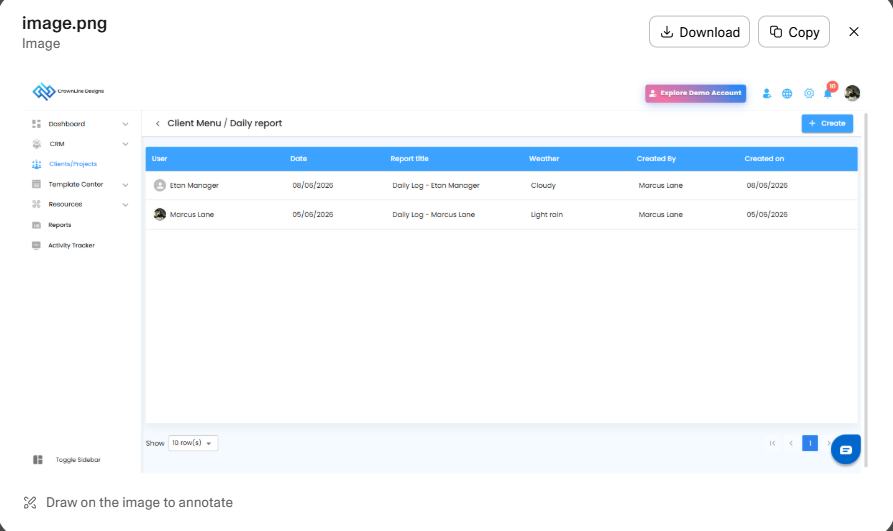
Once opened, you'll land on the Client Menu / Daily report screen. This is the list view of every daily log created for the project.
The table shows:
- User – team member the log belongs to
- Date – the day the log covers
- Report title – e.g. Daily Log – Marcus Lane
- Weather – weather condition recorded that day
- Created By – the person who created the log
- Created on – the date the log was created
Use the Show rows dropdown and pagination controls at the bottom to navigate through larger lists. Click any row to open and review that day's log.
3. Creating a Daily Report
1. On the Daily report dashboard, click the + Create button in the top-right.
2. A Daily report dialog appears.
3. Under Choose the user whose daily log you want to create, select the team member from the User dropdown.
4. Click Create to open the new log, or Cancel to go back.
> Only one daily log per user per day is needed — pick the right person before continuing.

4. Filling in the Daily Report
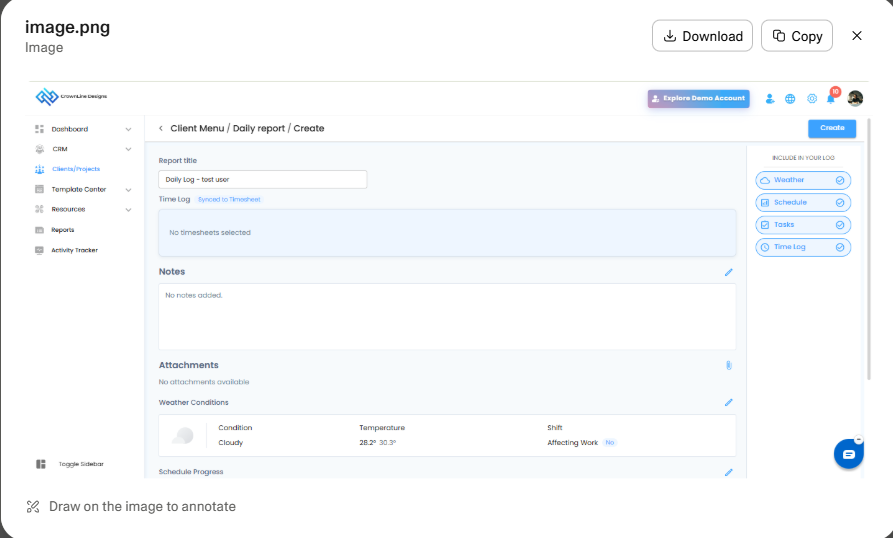
After creating, you'll land on Client Menu / Daily report / Create. This is the full daily log editor.
Main Sections (left side)
- Report title – auto-filled as Daily Log – {user name}. Edit if needed.
- Time Log – shows timesheets synced for the day. Click Synced to Timesheet to pull in entries. If none are linked, it shows No timesheets selected.
- Notes – click the pencil icon to add observations, updates, or issues from the day.
- Attachments – click the paperclip icon to upload photos, documents, or any supporting files from the site.
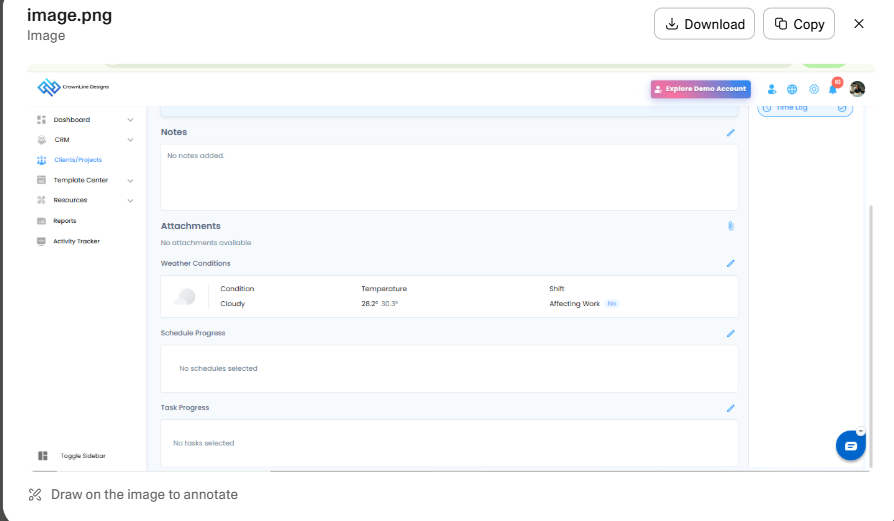
- Weather Conditions – auto-populated with Condition, Temperature (low/high), and Shift / Affecting Work status. Edit using the pencil icon if needed.
- Schedule Progress – select the schedule items worked on that day. Shows No schedules selected until you add them.
- Task Progress – select tasks updated or completed that day. Shows No tasks selected until you add them.
Include In Your Log (right side)
Quick toggles let you choose what to include in this log:
- Weather
- Schedule
- Tasks
- Time Log
Each toggle has a check icon — click to include or exclude that section from the final report.
Saving
Once you've filled in everything, click the blue Create button in the top-right to save the daily log. It will appear in the Daily report list view immediately.
Best Practices
- Log daily, not weekly – the value of a daily report comes from a fresh, accurate record. Encourage on-site users to log before leaving the site.
- Attach photos – site photos make daily logs far more useful for clients and stakeholders reviewing progress remotely.
- Use Notes for blockers – record delays, missing materials, or weather impact so they're easy to reference later.
- Sync Time Log and Tasks – linking timesheets and tasks keeps reporting consistent with billing and project progress.
- Mark weather impact – if rain or heat affected the shift, set Affecting Work to Yes so it's visible in reports.
Was this article helpful?
That’s Great!
Thank you for your feedback
Sorry! We couldn't be helpful
Thank you for your feedback
Feedback sent
We appreciate your effort and will try to fix the article