Adding Expenses – Keeping Every Detail Accounted.
Think of the Expenses section as your financial diary—every bill, every payment, every little detail neatly logged. It’s the place where you turn day-to-day spending into clear, trackable records.
No more scattered receipts or forgotten entries. Here, every expense is captured in real time—organized, accurate, and easy to revisit whenever you need.
How to Add an Expense
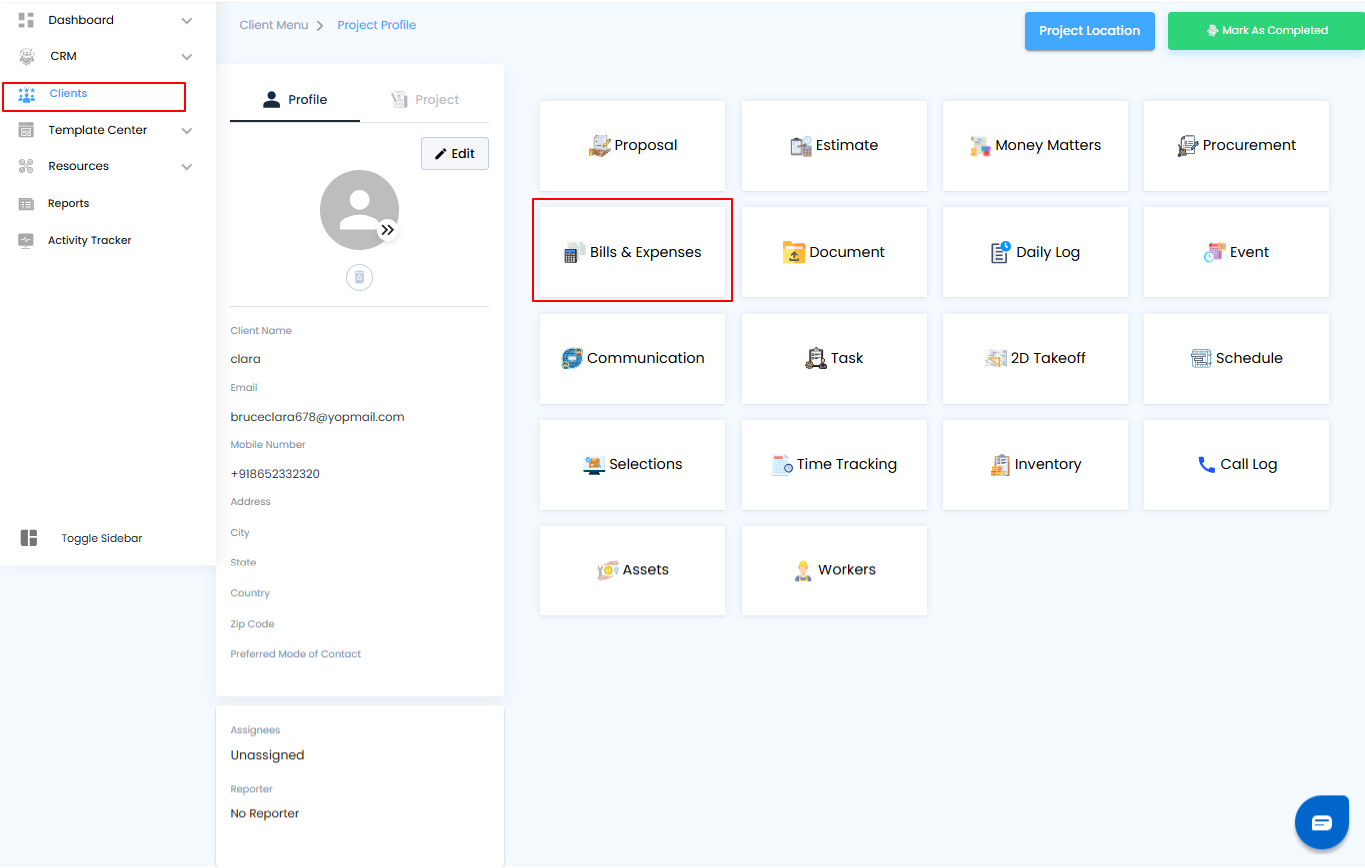
Navigate to Bills and Expenses
From the sidebar, click Client and select the project you want to manage.
Choose the Client
Open the workspace for that client and head straight to Bills and Expenses.
Add Expense
Enter the details—amount, category, date, and any notes—then save. Done in seconds.
Pro tip: Add expenses as soon as they occur. The sooner they’re logged, the clearer your project’s financial picture will be.
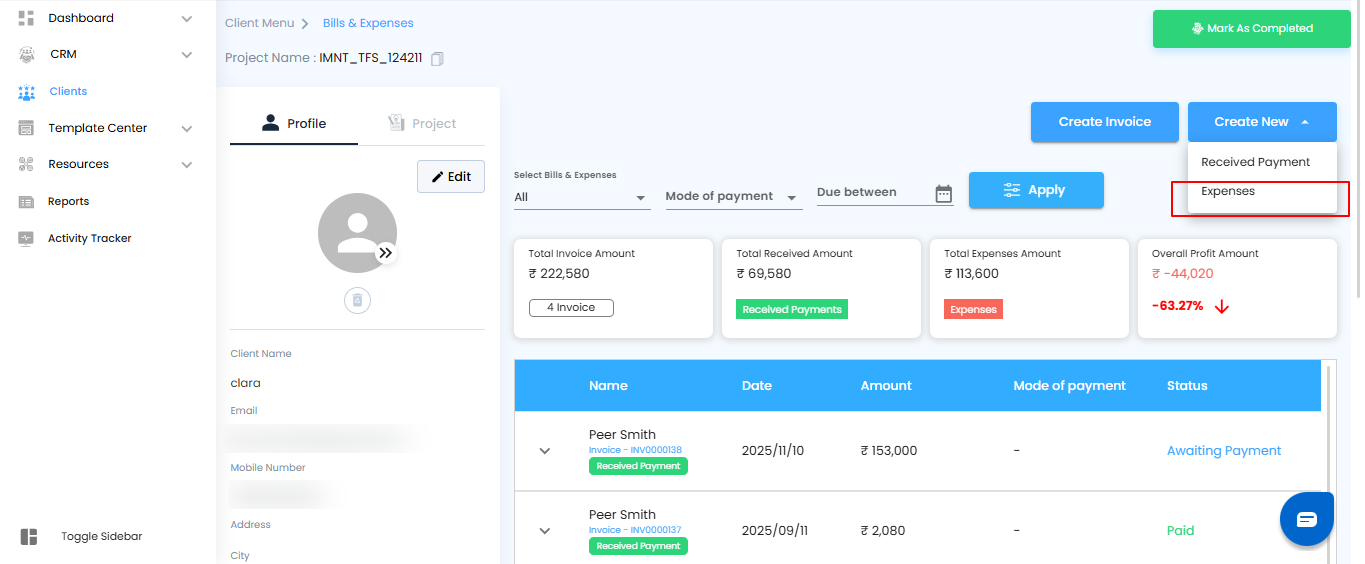
Create a New Expense – Quick and Simple
- When it’s time to log a new cost, just hit Create New and choose Expenses from the menu. In a few clicks, your expense is ready to be recorded, keeping your financial records clean and up to date.
Pro tip: Use the Create New shortcut whenever possible—it saves time and ensures no expense slips through the cracks.
Enter Expense Details – Capture Every Number
Once you select Expenses, an off-canvas form slides into view—your workspace to log every detail. Fill in the essentials: amount, category, date, and any notes that keep things clear.
Save the Expense – And You’re Done
- Hit Save and your expense is instantly recorded. It appears right under Bills and Expenses for that client—organized, visible, and ready whenever you need to review it.
Pro tip: Add notes or tags while saving an expense. Those small details make tracking and reporting effortless later on.
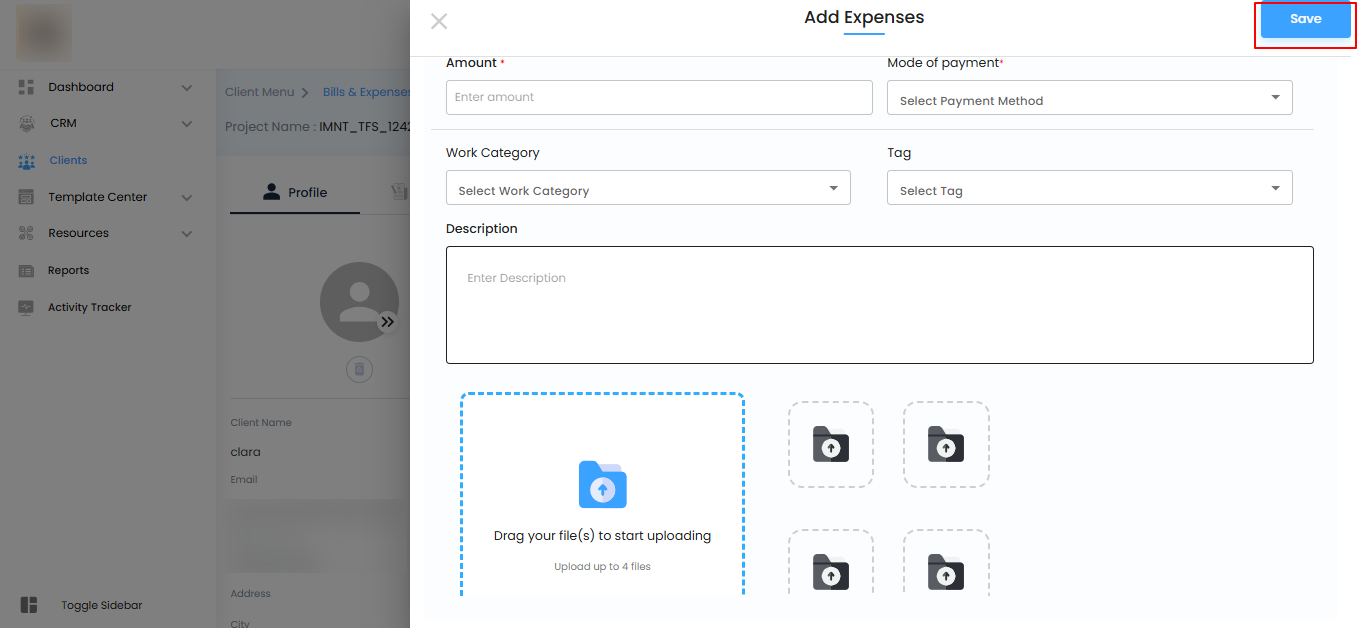
Expenses Form – Capture Every Detail That Counts
The off-canvas form is your checklist for accurate, transparent financial records. Each field ensures nothing slips through the cracks—whether it’s the basics or the finer details.
What You’ll Fill In
- Name – Enter the name linked to the expense (required).
- Date – Pick the date the expense was incurred using the calendar (required).
- Amount – Record the exact financial value (required).
- Payment Mode – Select how it was paid (card, cash, etc.).
- Work Category – Assign the expense to the right category of work.
- Tag – Add tags for smarter organization and easier filtering later.
- Description – Note down any extra details or context.
- File Upload – Attach up to 4 files (images or PDFs) as proof or supporting documents.
Pro tip: Always upload receipts or bills when possible—having documents attached makes reviews and audits effortless.
Action Buttons – Complete Your Entry
Save – Finalize the expense and record it instantly under Bills and Expenses. One click, and your entry is secure and ready to track.
Pro tip: Double-check details before hitting Save. A few extra seconds here ensures clean, error-free records later.
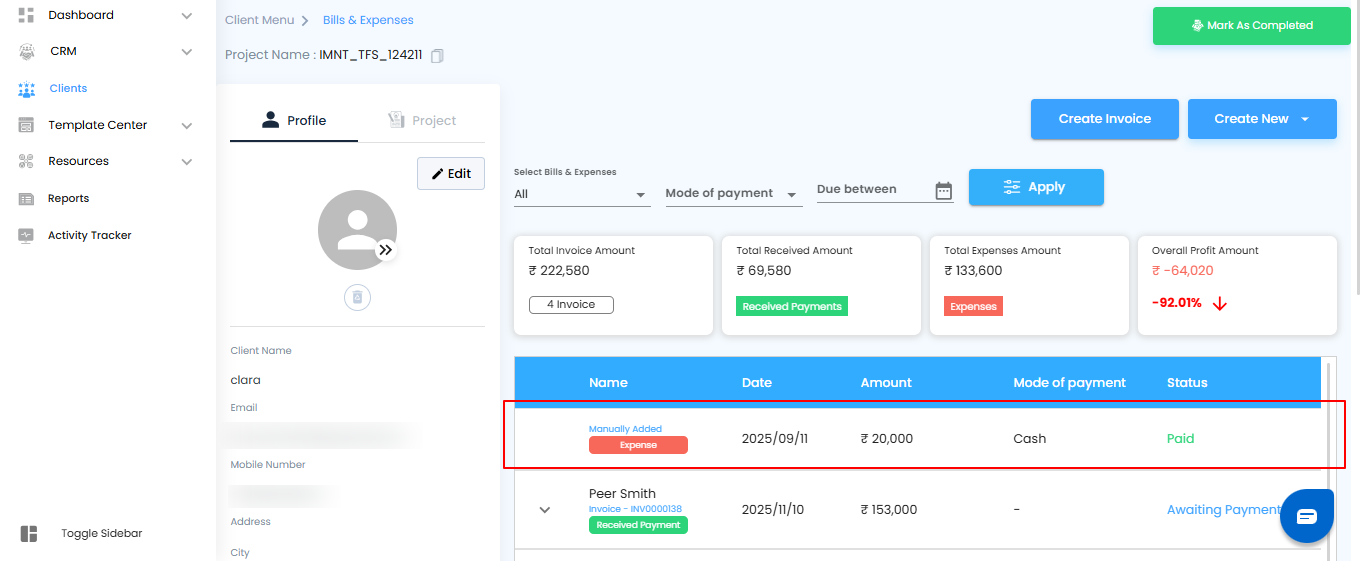
Seamless Integration
The moment you save, the expense is automatically added to the Bills and Expenses section—keeping every financial detail organized, accessible, and ready whenever you need it.
Pro tip: Review your expense list regularly. A quick glance ensures nothing is missed and your records stay perfectly up to date.
Was this article helpful?
That’s Great!
Thank you for your feedback
Sorry! We couldn't be helpful
Thank you for your feedback
Feedback sent
We appreciate your effort and will try to fix the article