Expense Report – Your Project’s Spending Dashboard
Think of the Expense Report as your project’s financial watchdog—keeping a close eye on every rupee spent. From payment methods to invoice details, this report gives you a clear picture of your expenditures, helping you stay on budget and make smarter financial decisions.
What You Can Do Here
- Track Expenses – View all payments, amounts spent, and invoice-related costs in one place.
- Analyze Trends – Spot patterns in spending across projects or time periods.
- Filter & Refine – Narrow down data by project, date, payment method, or status.
- Export Reports – Download records for audits, reviews, or sharing with your team.
- Accessing the Expense Report
- Go to Reports – From the IntoAEC dashboard, navigate to the Reports section.
- Select Expenses – Click to open a detailed view of all recorded expenditures.
Pro tip: Treat the Expense Report like a budget checkpoint—regularly review it to catch overspending early and plan more effectively.
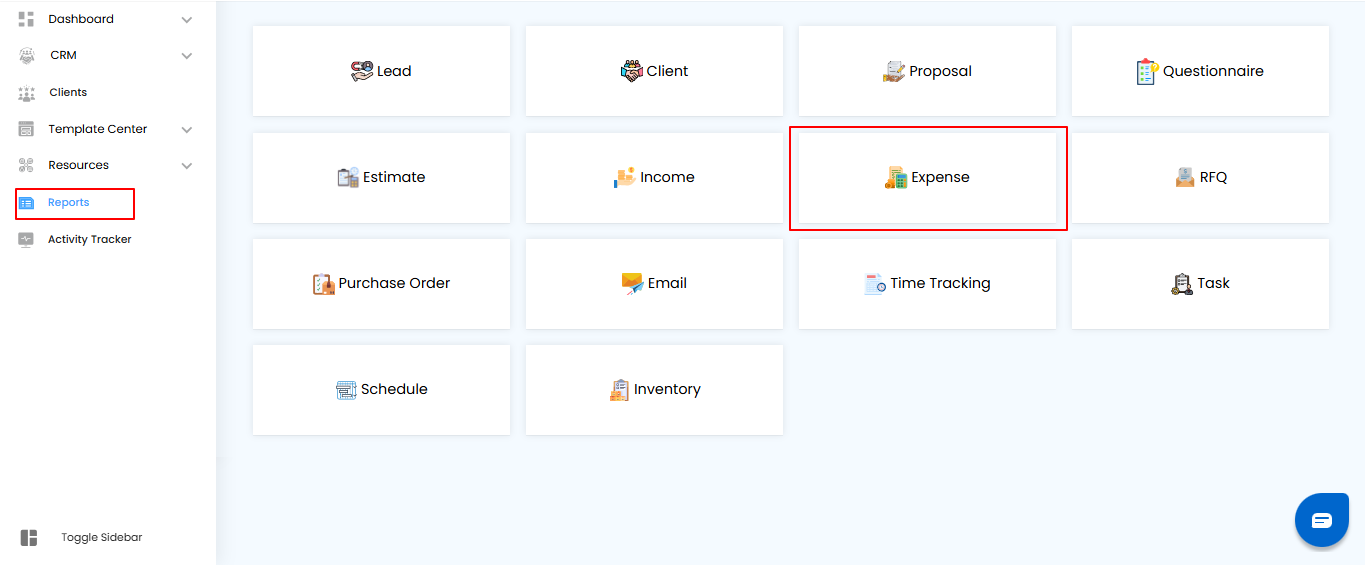
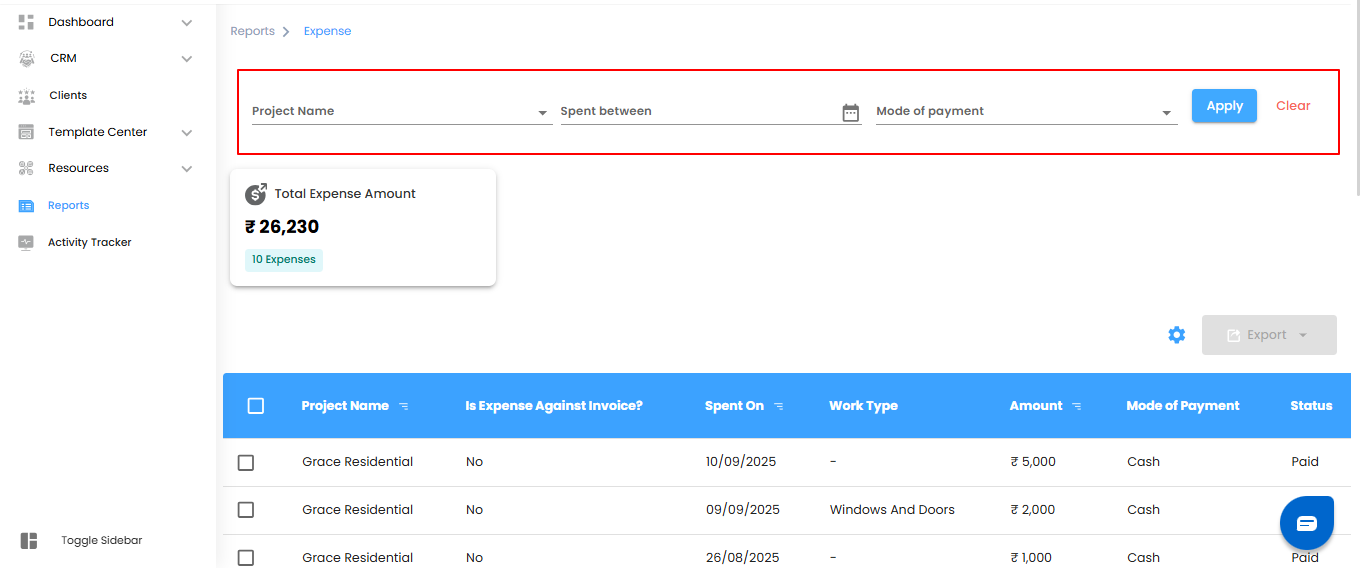
Filtering Expense Records – Zoom In on What Matters
Think of filters as your project’s magnifying glass for expenses—quickly find exactly what you need without scrolling through everything.
How to Refine Your Expense Records:
- Project Name – Select a specific project to see only its expenses.
- Spent Between – Narrow down expenses within a specific date range.
- Mode of Payment – Choose from All, Cash, Bank Transfer, or Cheque.
- Once your filters are set, click Apply to update the report or Clear to reset and view all records again.
Pro tip: Combine multiple filters to spot trends, track project spending, or audit specific payments efficiently.
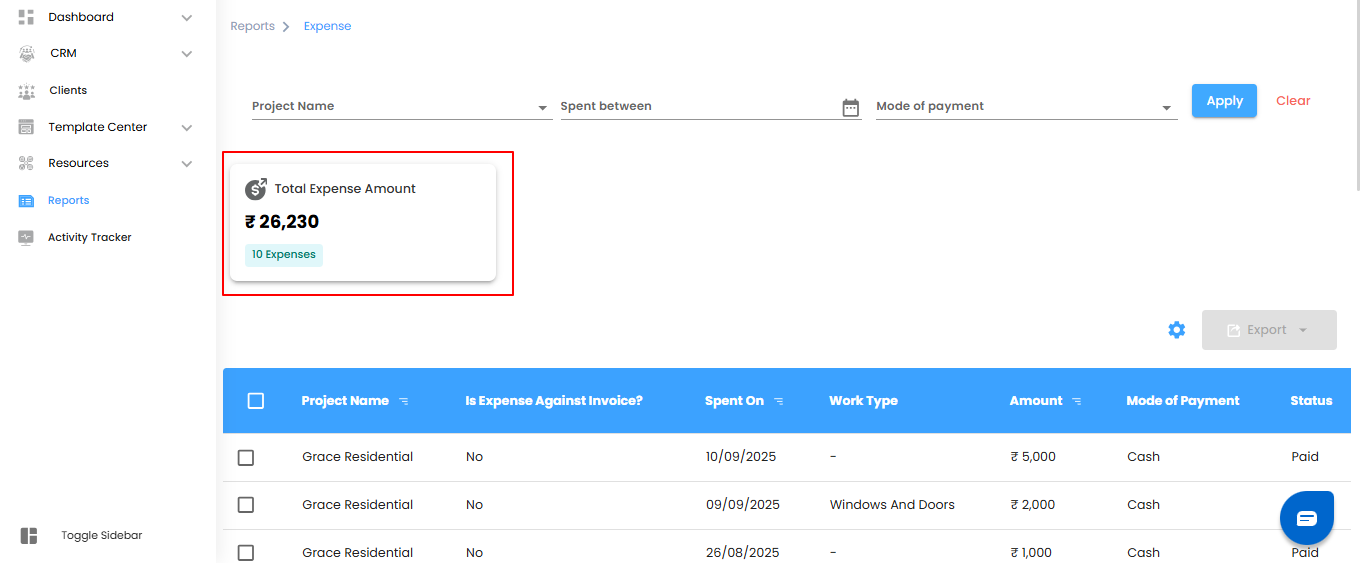
Expense Summary Dashboard – Your Spending at a Glance
Think of the dashboard as your project’s quick-view financial cockpit—giving you instant insight into how much is being spent.
Key Metric:
- Total Expense Amount – The sum of all recorded expenses across projects.
Pro tip: Keep an eye on this number regularly—it’s a quick way to monitor overall spending and catch any budget surprises early.
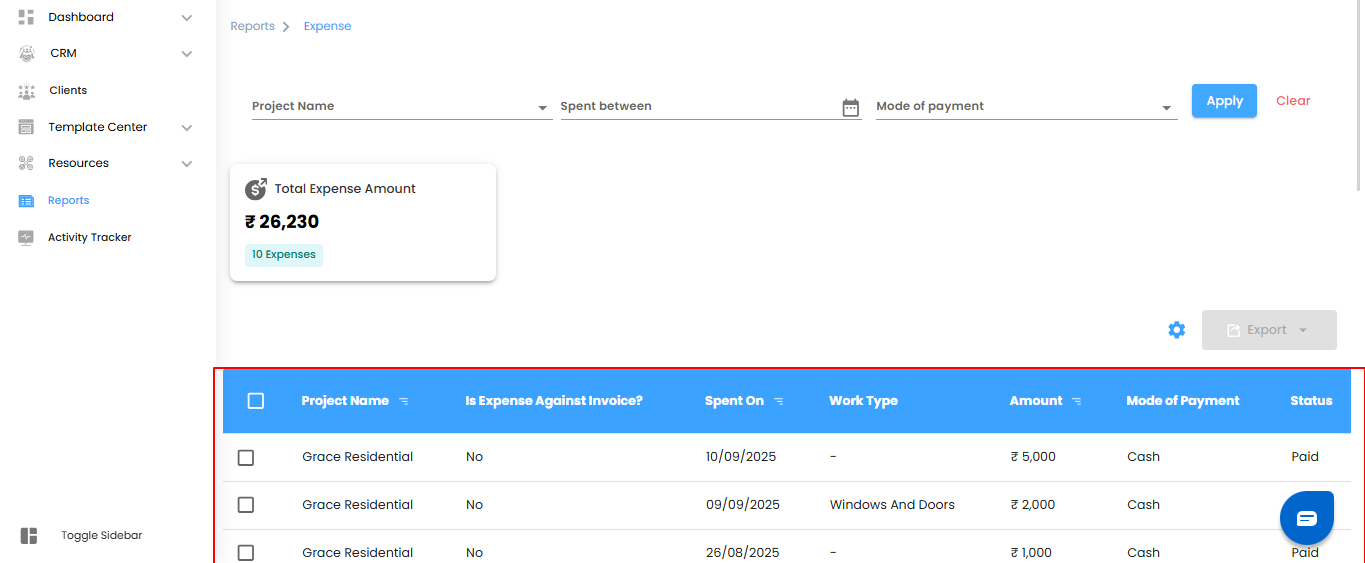
Expense Report Table – See Every Detail at a Glance
Think of the Expense Report table as your project’s detailed spending ledger—every expense, every payment, all in one place. It’s where you get the full story behind your project’s costs.
Key Details You’ll Find:
- Project – Which project does this expense belong to?.
- Invoice Association – Indicates if the expense is linked to an invoice.
- Date Spent – When the expense was recorded.
- Work Duration – Time spent on the associated work.
- Expense Amount – The total cost of the expense.
- Payment Method – Mode of payment: Cash, Bank Transfer, or Cheque.
- Payment Status – Whether the expense is Paid, Partially Paid, or Awaiting Payment.
Pro tip: Use this table as your financial control center—quickly track payments, audit spending, and ensure nothing slips through the cracks.
Managing Expenses – Bulk Actions & Exporting Made Simple
Think of this as your project’s multitool for spending—handle multiple expense records at once or take your data wherever you need it.
Bulk Actions – Work Smarter
- Select multiple expense entries to perform updates or actions together.
- Modify, categorize, or analyze several records simultaneously—no repetitive clicks.
- Exporting Expense Reports – Take Control of Your Data
- Download your Expense Report in Excel format for offline review.
- Use the exported data for audits, detailed analysis, or record-keeping.
Pro tip: Combine filters with bulk actions—narrow down the expenses first, select multiple records, and export. It’s fast, organized, and keeps your project finances under control.
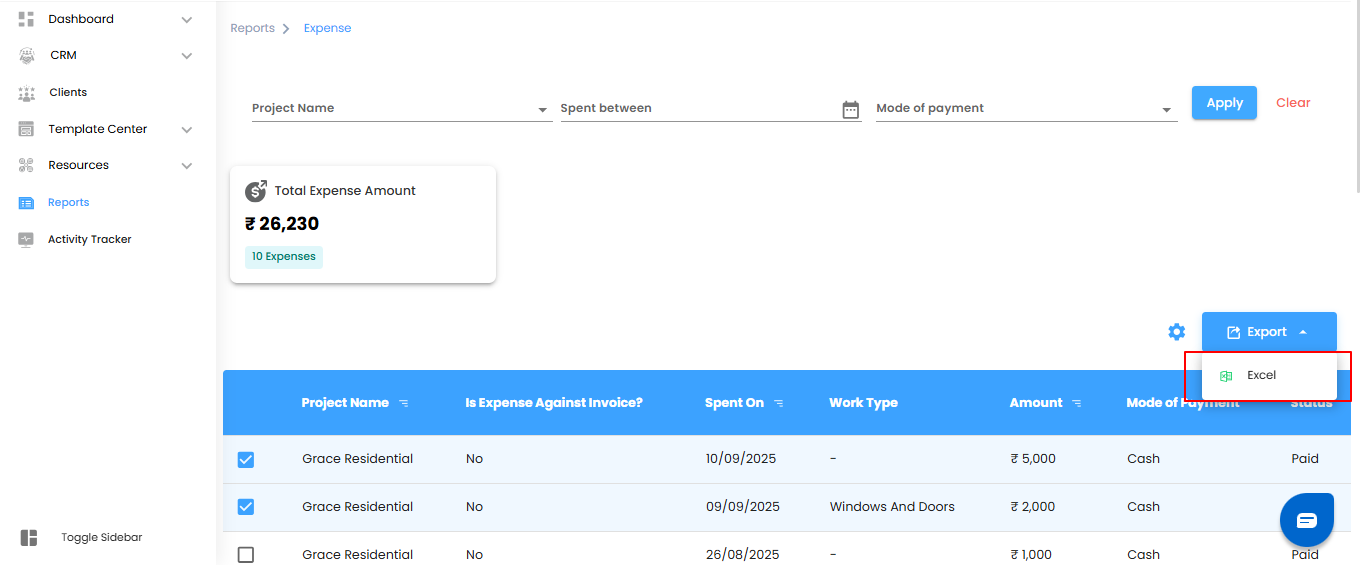
Configure Expense Report Automation
Why manually check expenses when your reports can come to you automatically? Set it up once, and let the system deliver your expense insights on schedule—reliably and hands-free.
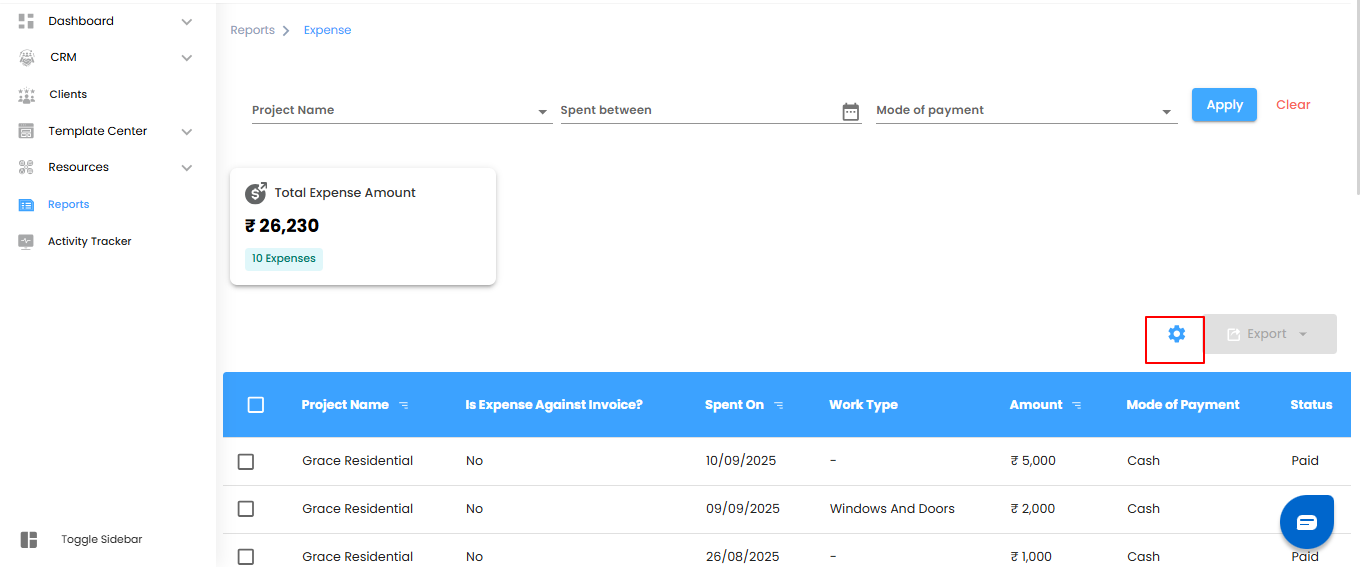
Step 1: Open the Automation Popup
Click the Configure Report Automation icon to open the Expense Report Automation popup. Think of it as unlocking your project’s personal financial assistant for expenses.
Pro tip: Treat this popup as your control center—everything you need to schedule, manage, and automate expense reports is right here.

Choose the Recipients – Send Expense Insights to the Right People
Think of this as directing your project’s expense updates straight to the inboxes that matter. Use the Send To dropdown to select the users who should receive your automated expense reports
simple, precise, and hassle-free.
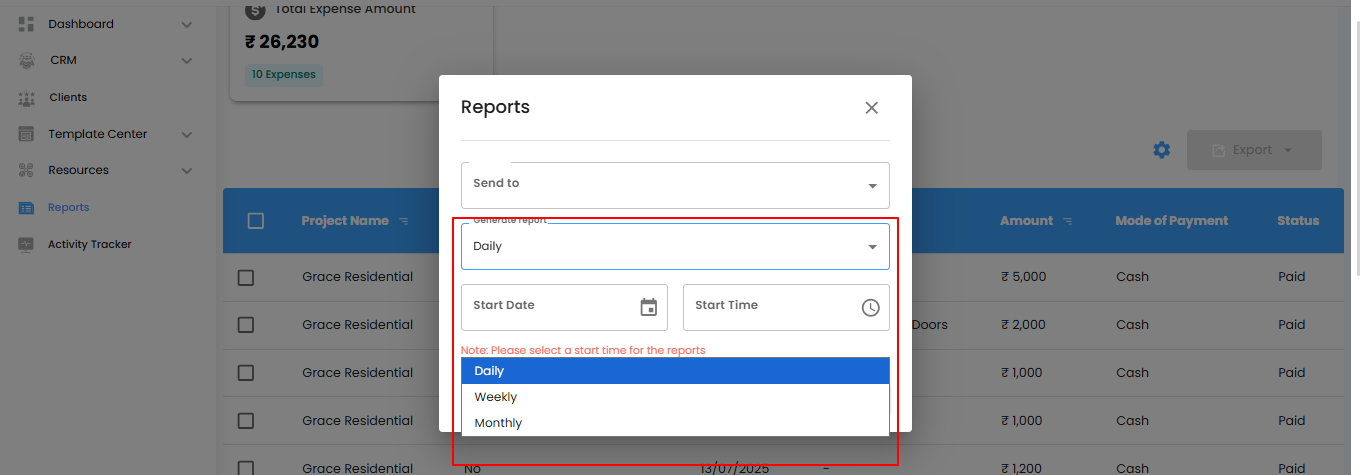
Set Report Frequency – Pick the Perfect Rhythm
- Under the Generate Report dropdown, decide how often your reports should arrive:
- Daily (Default) – Fresh expense reports every day, generated within one hour of your chosen time.
Example: Set for 6:00 PM, and the report will appear between 6:00 PM and 6:59 PM. - Weekly – Receive a summary of the week’s expenses at the same day and time next week—ideal for tracking weekly spending.
- Monthly – Get a monthly overview delivered on the same day and time next month—perfect for big-picture financial
- planning.
Pro tip: Treat the delivery schedule like the heartbeat of your project—consistent timing keeps everyone informed and aligned.
Set the Start Date & Time – Schedule Your Automation Like Clockwork
- Pick the Start Date and Start Time to tell the automation exactly when to begin. Once set, your expense reports will be delivered automatically according to your chosen schedule.
- Note: Don’t forget the Start Time—without it, the reports won’t be triggered.
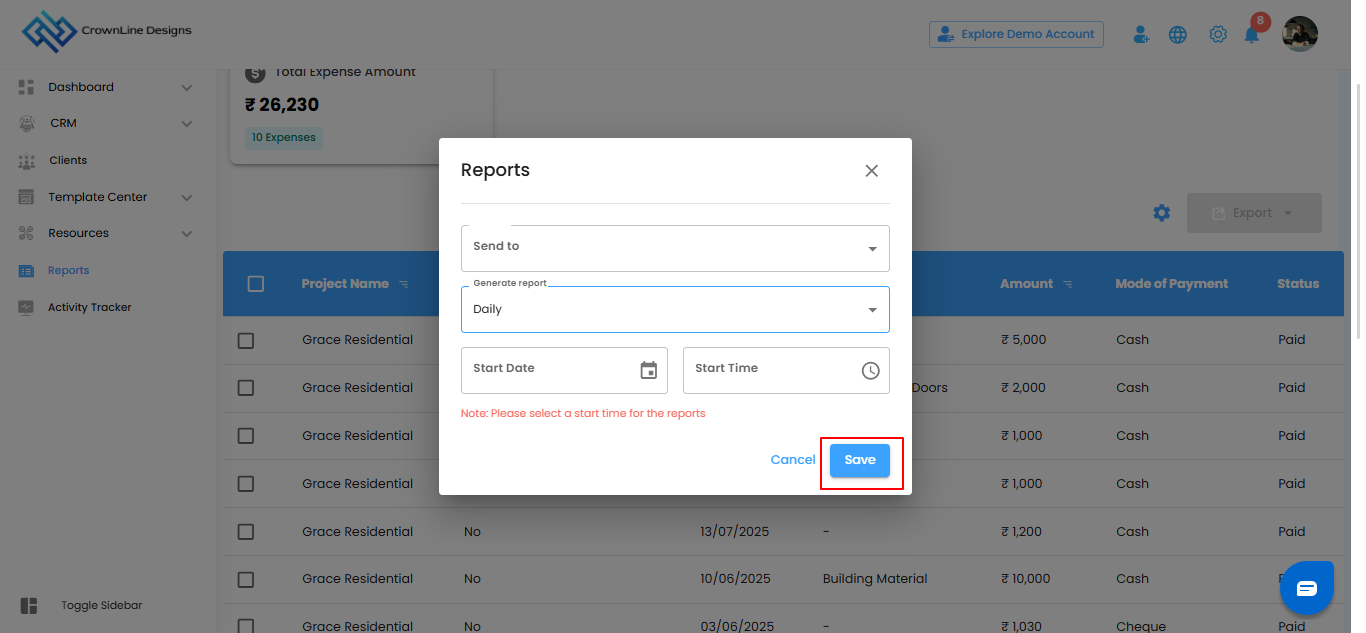
Save or Cancel – Lock It In or Start Fresh
- Save – Activate your automation and let it run on autopilot.
- Cancel – Exit without saving if you need to adjust your setup.
Pro tip: Think of the start time as the first beat of a drum—everything else flows smoothly once it’s set.
Expense Report – Your Project’s Spending Dashboard
Think of the Expense Report as your project’s financial control center—tracking every expenditure, monitoring payment statuses, and keeping your budgets in check. With filters, bulk actions, and export options, managing project finances becomes effortless and precise.
What You Can Do Here
- Track Expenditures – See all recorded payments, amounts spent, and invoice-related costs.
- Monitor Payment Status – Quickly check which expenses are Paid, Partially Paid, or Awaiting Payment.
- Analyze Spending – Understand trends, spot overspending, and make informed budget decisions.
- Filter, Bulk Actions & Export – Find, manage, and share expense data efficiently.
Pro tip: Treat this report like your project’s financial radar—check it regularly to stay on top of spending and keep your budgets on track.
Was this article helpful?
That’s Great!
Thank you for your feedback
Sorry! We couldn't be helpful
Thank you for your feedback
Feedback sent
We appreciate your effort and will try to fix the article