Bring your team into IntoAEC with the right access from day one. From User Hub, you can invite a user, set their working hours and rates, and decide exactly what they can see and do.
User types
| Type | How it's assigned | Access |
|---|---|---|
| Super Admin | Automatically, at registration | Full access to every module and the admin portal |
| User | Invited by a Super Admin or anyone with User Hub permission | Only what their role and permissions allow |
Step 1: Open User Hub
- Go to IntoAEC.ai and select your organization, if you belong to more than one.
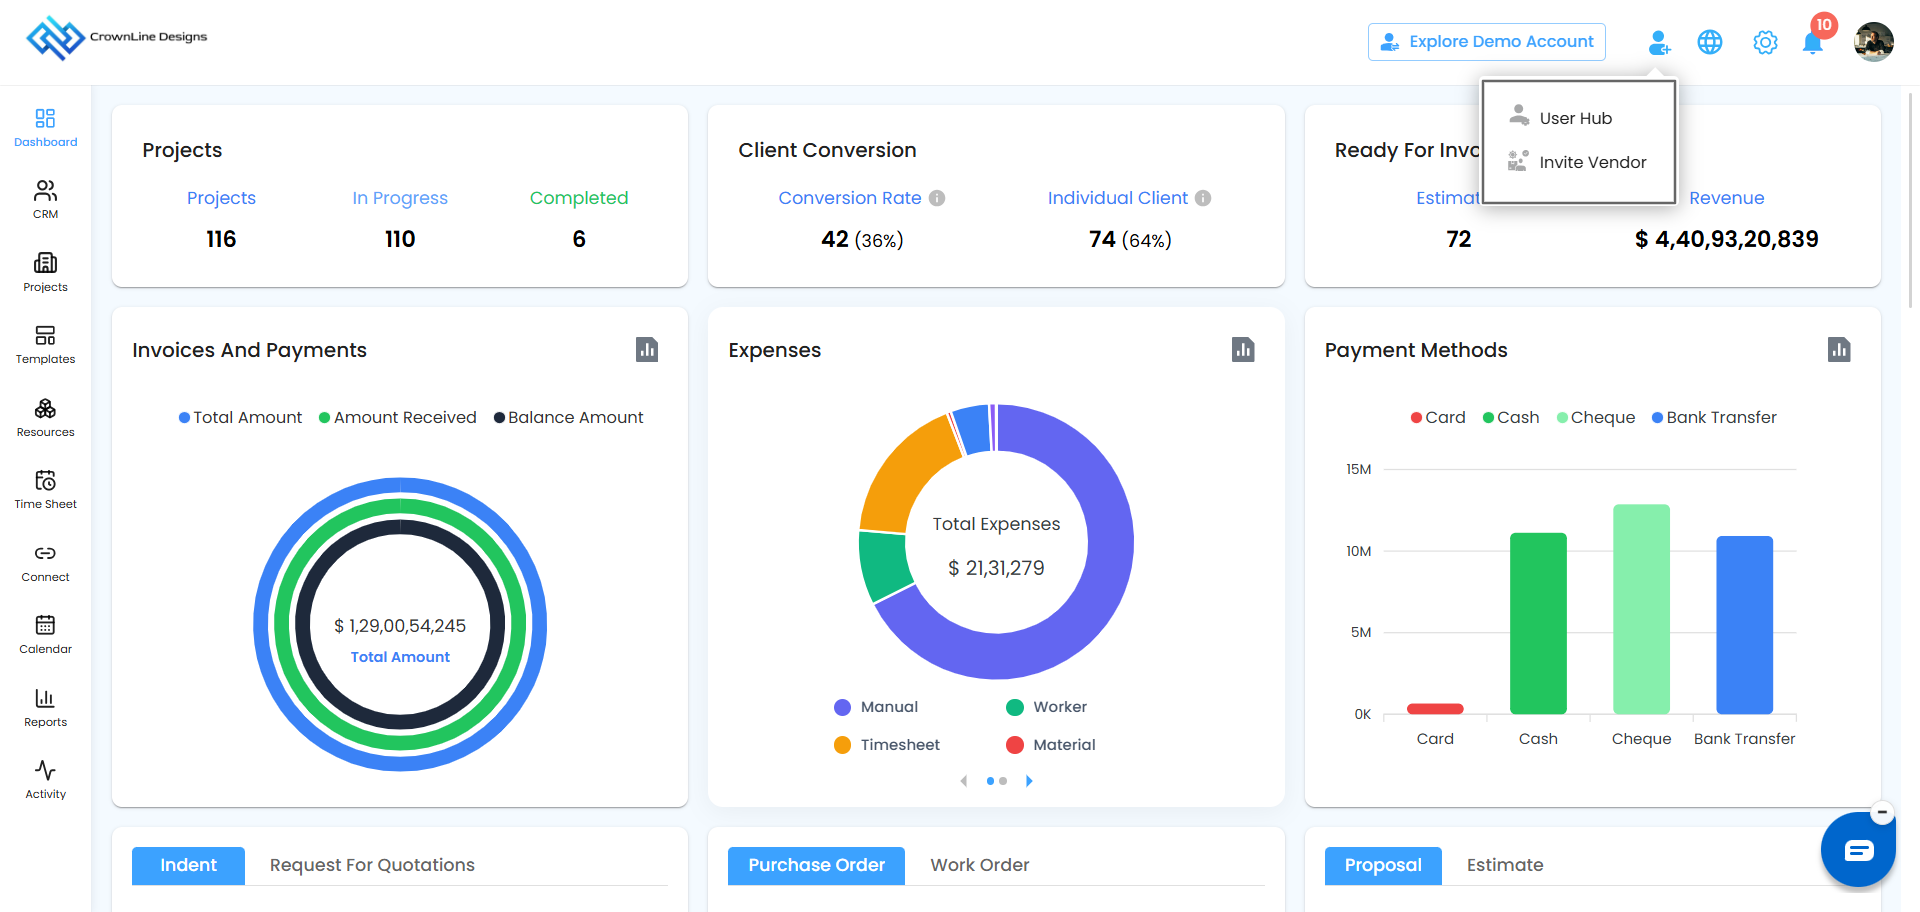
- Click the Invite Users/Vendors icon in the top-right corner.
- Select User Hub from the dropdown.
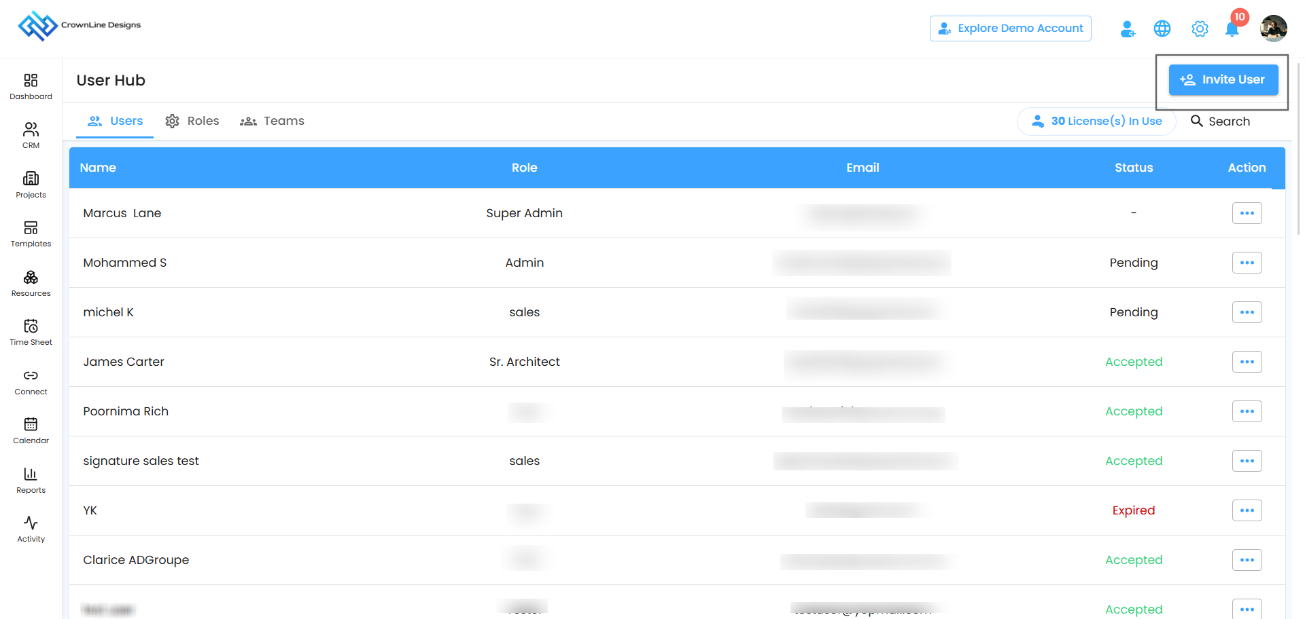
- Click Invite User.
Step 2: Add the user's details
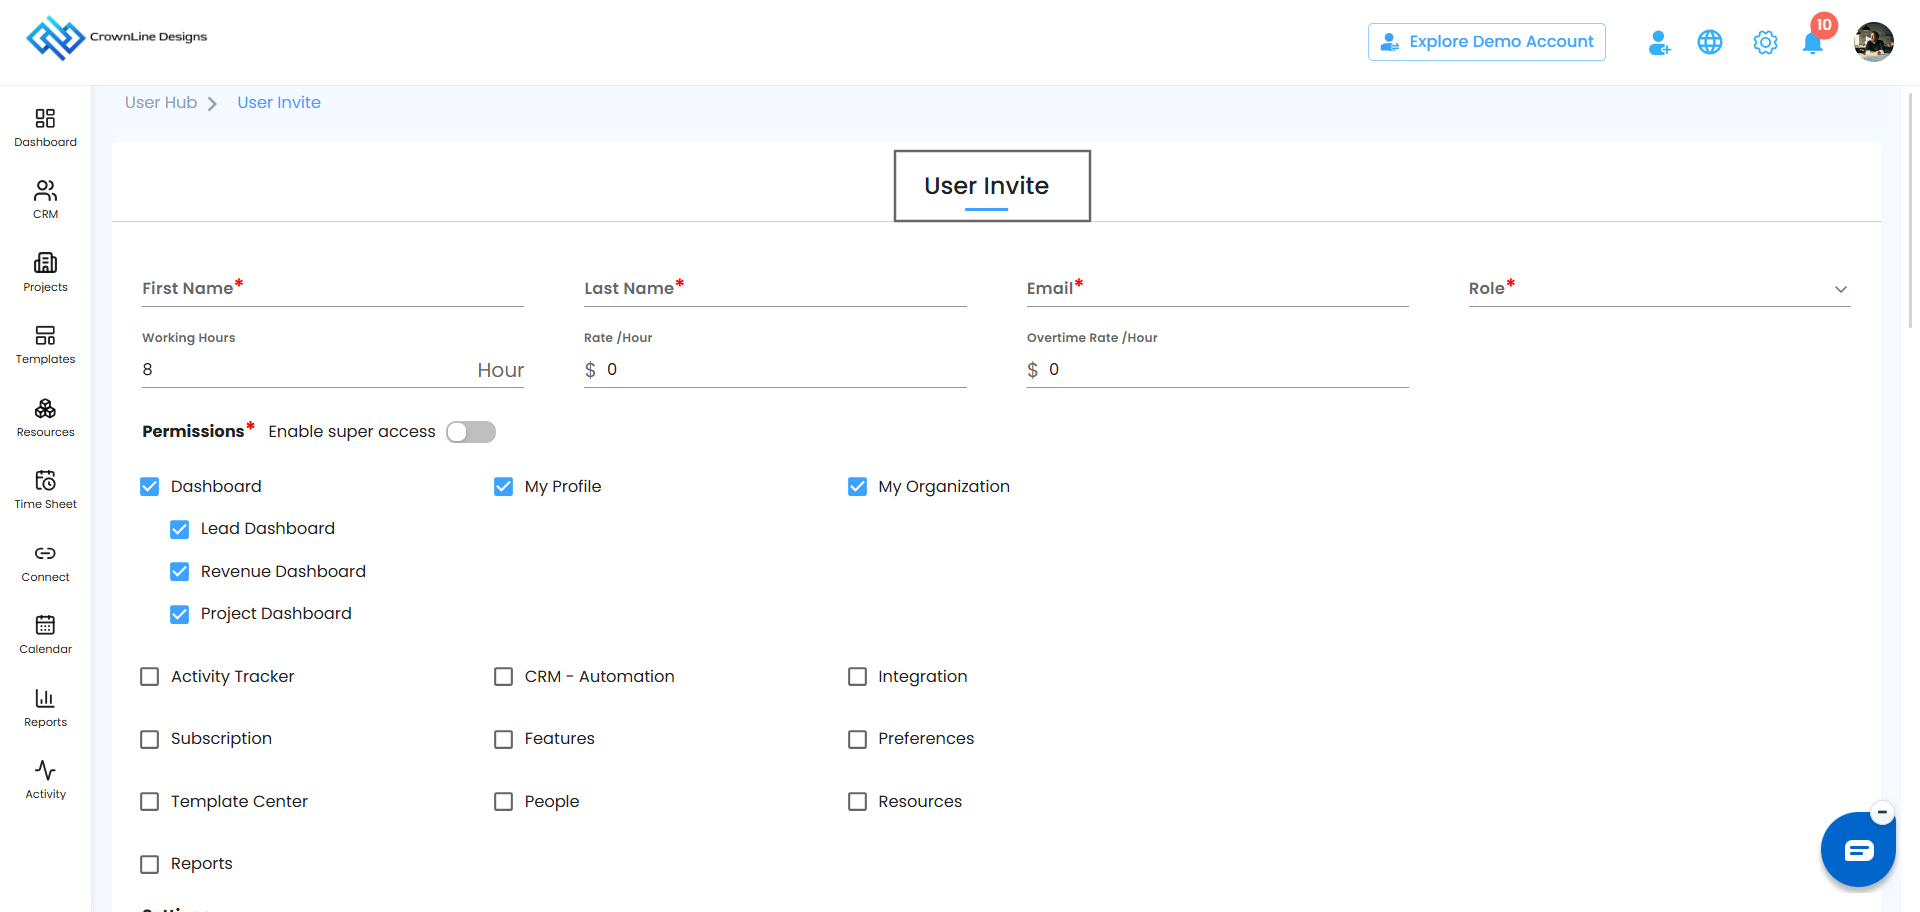
| Field | Required | What it's for |
|---|---|---|
| First Name / Last Name | Yes | The user's display name |
| Yes | Where the invite is sent; this becomes their login | |
| Role | Yes | Sets their default permissions (see Roles and Teams) |
| Working Hours | No | Standard hours per day |
| Rate / Hour | No | Regular hourly cost |
| Overtime Rate / Hour | No | Hourly cost beyond working hours |
Pro tip: Double-check the email before sending. Once a user accepts, their email can't be changed.
Step 3: Set module permissions
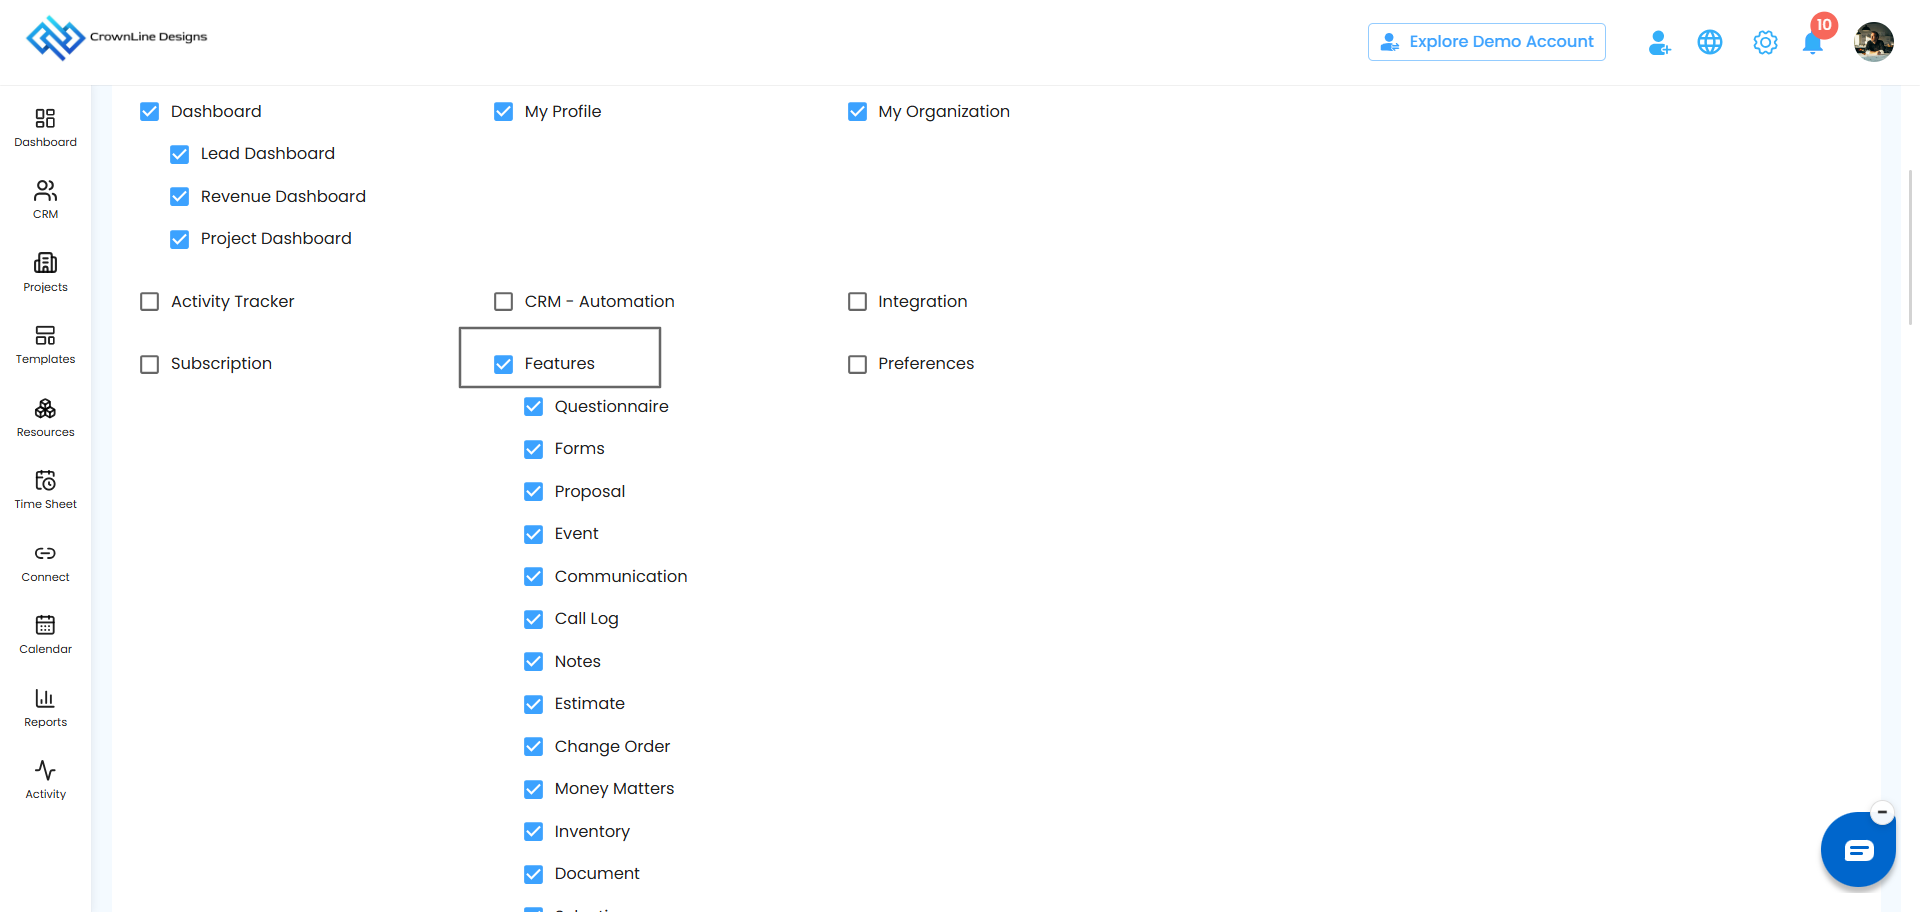
Tick a module to give access, or untick sub-items to fine-tune. Switch on Enable super access to grant every permission at once.
| Permission group | Covers |
|---|---|
| Dashboard | Lead, Revenue and Project dashboards |
| My Profile / My Organization | Personal and organization settings |
| Activity Tracker, CRM – Automation, Integration, Subscription | Admin areas |
| Features | Project modules such as Estimate, Proposal, Schedule, Budgeting, Purchase Order, Inventory, Time Tracking and more |
| Preferences | Organization and Project & CRM preferences |
| Template Center | All template types, BOQ and Estimate templates |
| People | Users and Vendors |
| Resources | Warehouse, Services, Assets, Workers, Cost Catalog, Factory Management |
| Reports | All reports |
Step 4: Choose access settings
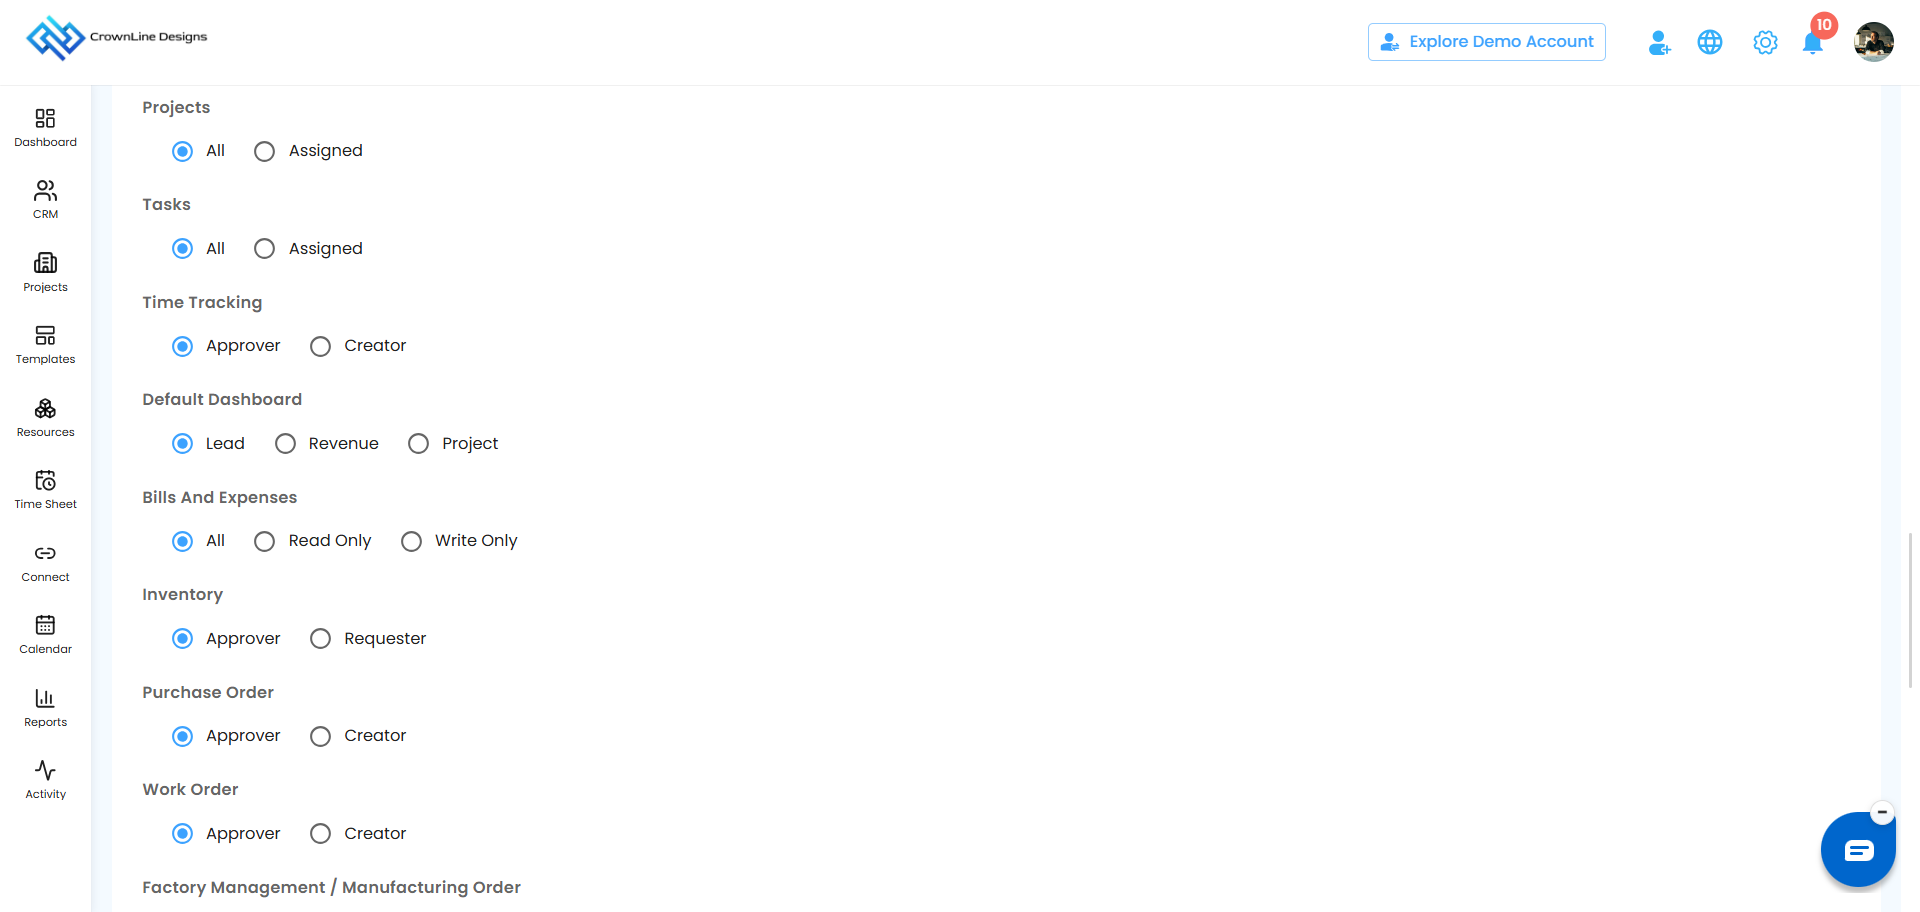
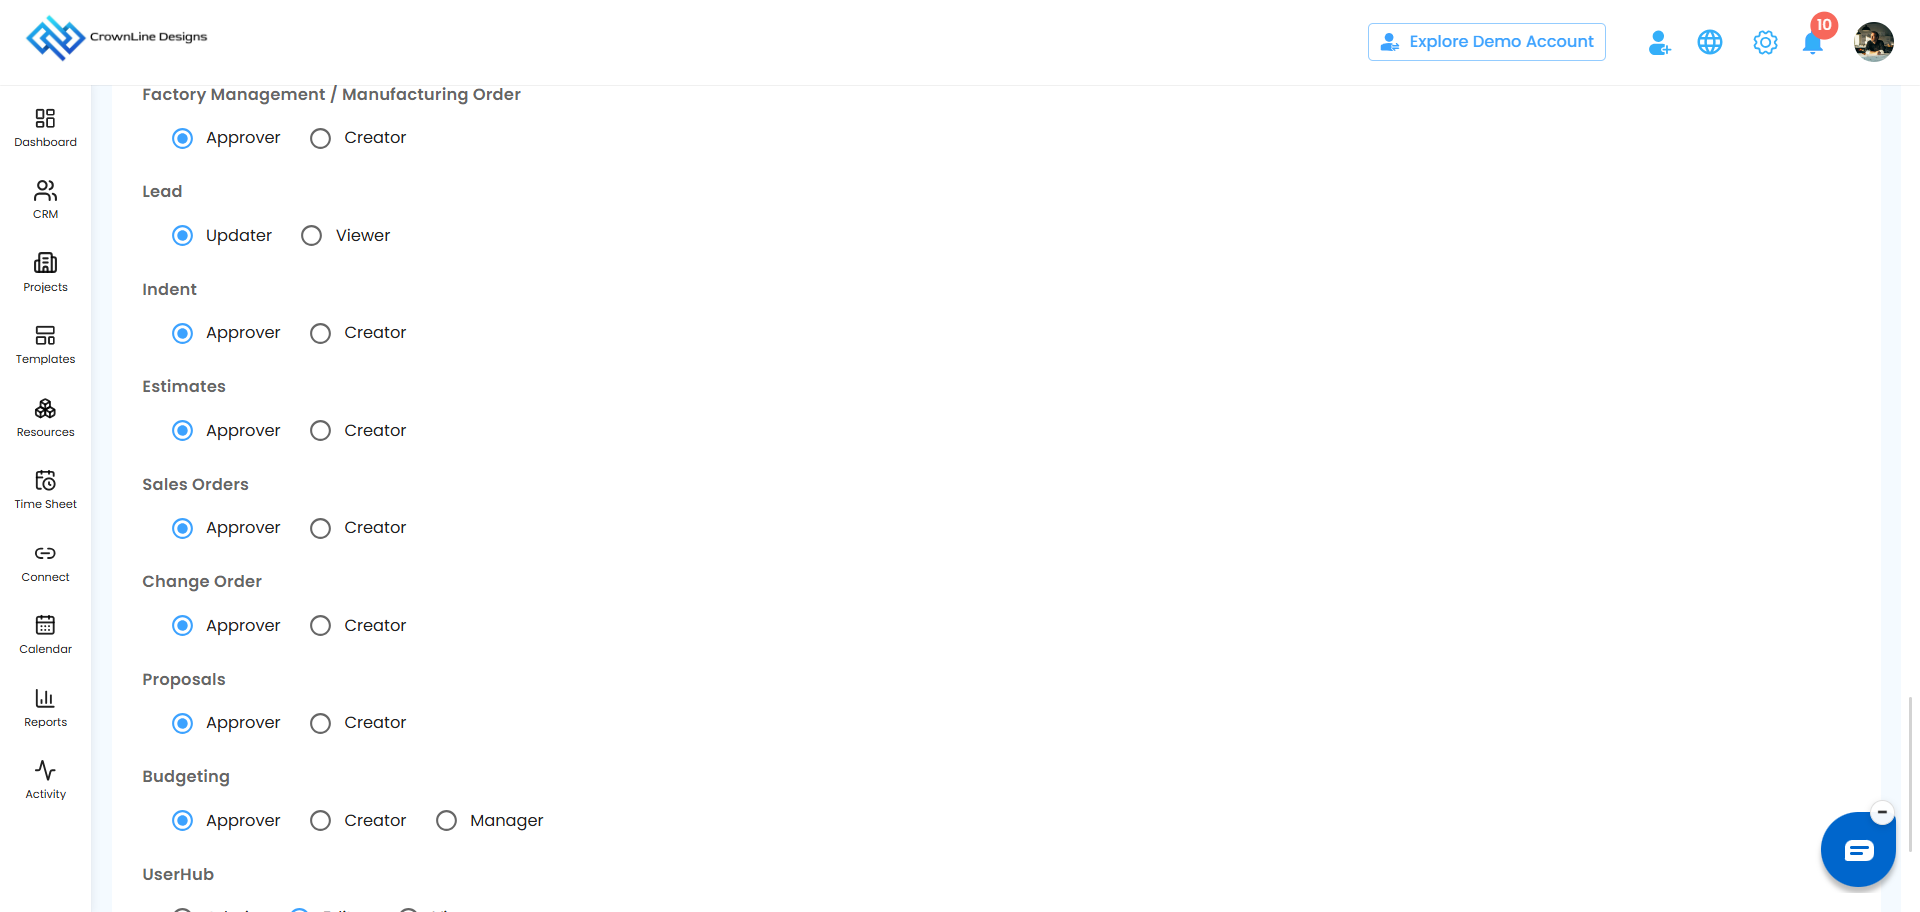
Permissions decide where a user can go. Settings decide what they can do there.
| Setting | Options |
|---|---|
| Projects | All projects, or only Assigned ones |
| Tasks | All tasks, or only Assigned ones |
| Default Dashboard | Lead, Revenue or Project: the screen they see first after login |
| Bills and Expenses | All (full access), Read Only (view only) or Write Only (add entries, can't see others') |
| Inventory | Approver (approves material requests) or Requester (raises them) |
| Lead | Updater (edits leads) or Viewer (view only) |
| UserHub | Admin, Editor or Viewer |
| Template Center | View Only or Edit |
| Budgeting | Approver, Creator or Manager |
| Time Tracking, Purchase Order, Work Order, Manufacturing Order, Indent, Estimates, Sales Orders, Change Order, Proposals | Approver (reviews and approves) or Creator (creates and submits) |
Pro tip: Start new users on Assigned projects and tasks. You can widen access as their responsibilities grow.
Step 5: Send the invite
Click Send Invite. The user appears in User Hub as Pending until they accept.
How the user accepts
- The user opens the invitation email and clicks Accept Invite.
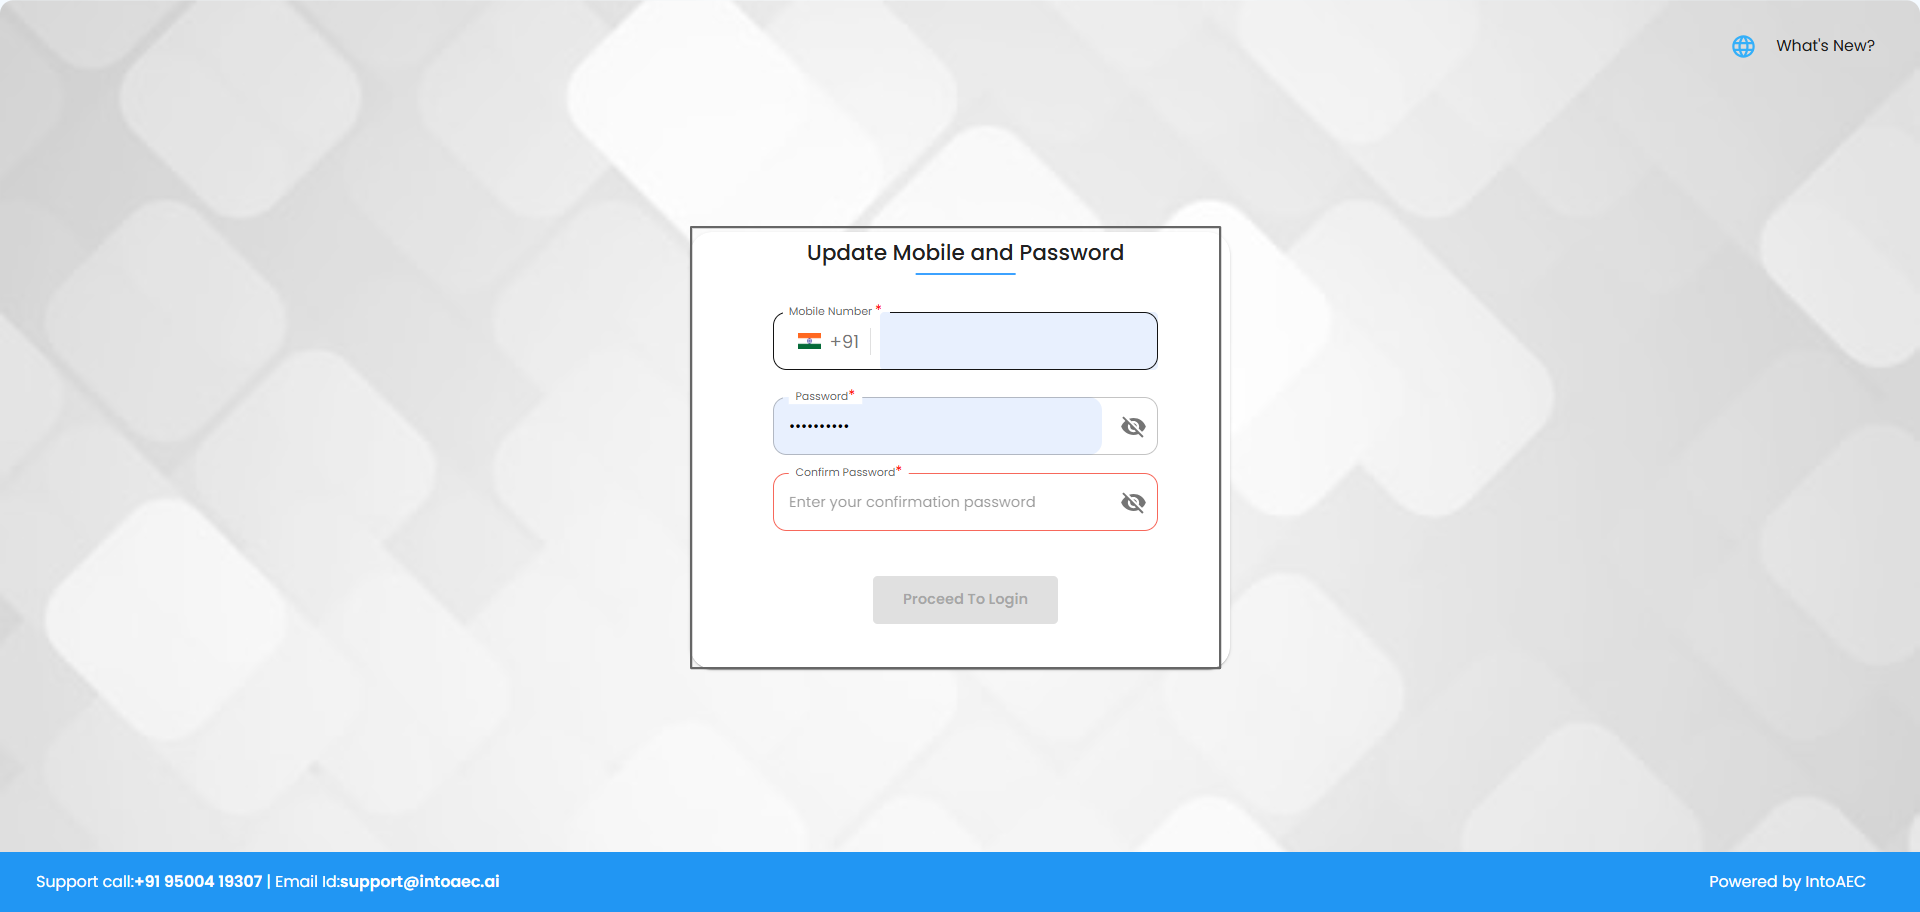
- They enter their mobile number and verify it with an OTP.
- They set a password and click Proceed to Login.
- They log in with their email and password and land on their default dashboard.
Pro tip: Ask new users to check their spam folder if the invite doesn't arrive.
Was this article helpful?
That’s Great!
Thank you for your feedback
Sorry! We couldn't be helpful
Thank you for your feedback
Feedback sent
We appreciate your effort and will try to fix the article