Overview
On a busy project, a lot happens in a day: project details are updated, integrations are connected, invoices are raised, and people log in and out. The Activity Tracker is your portal's logbook. It quietly records every action, so you can answer "who changed this, and when?" in seconds instead of asking around.
Use it to keep operations transparent, support audits and compliance, and make sure everyone on the team stays accountable, whether you are checking project updates, financial actions, or team logins.
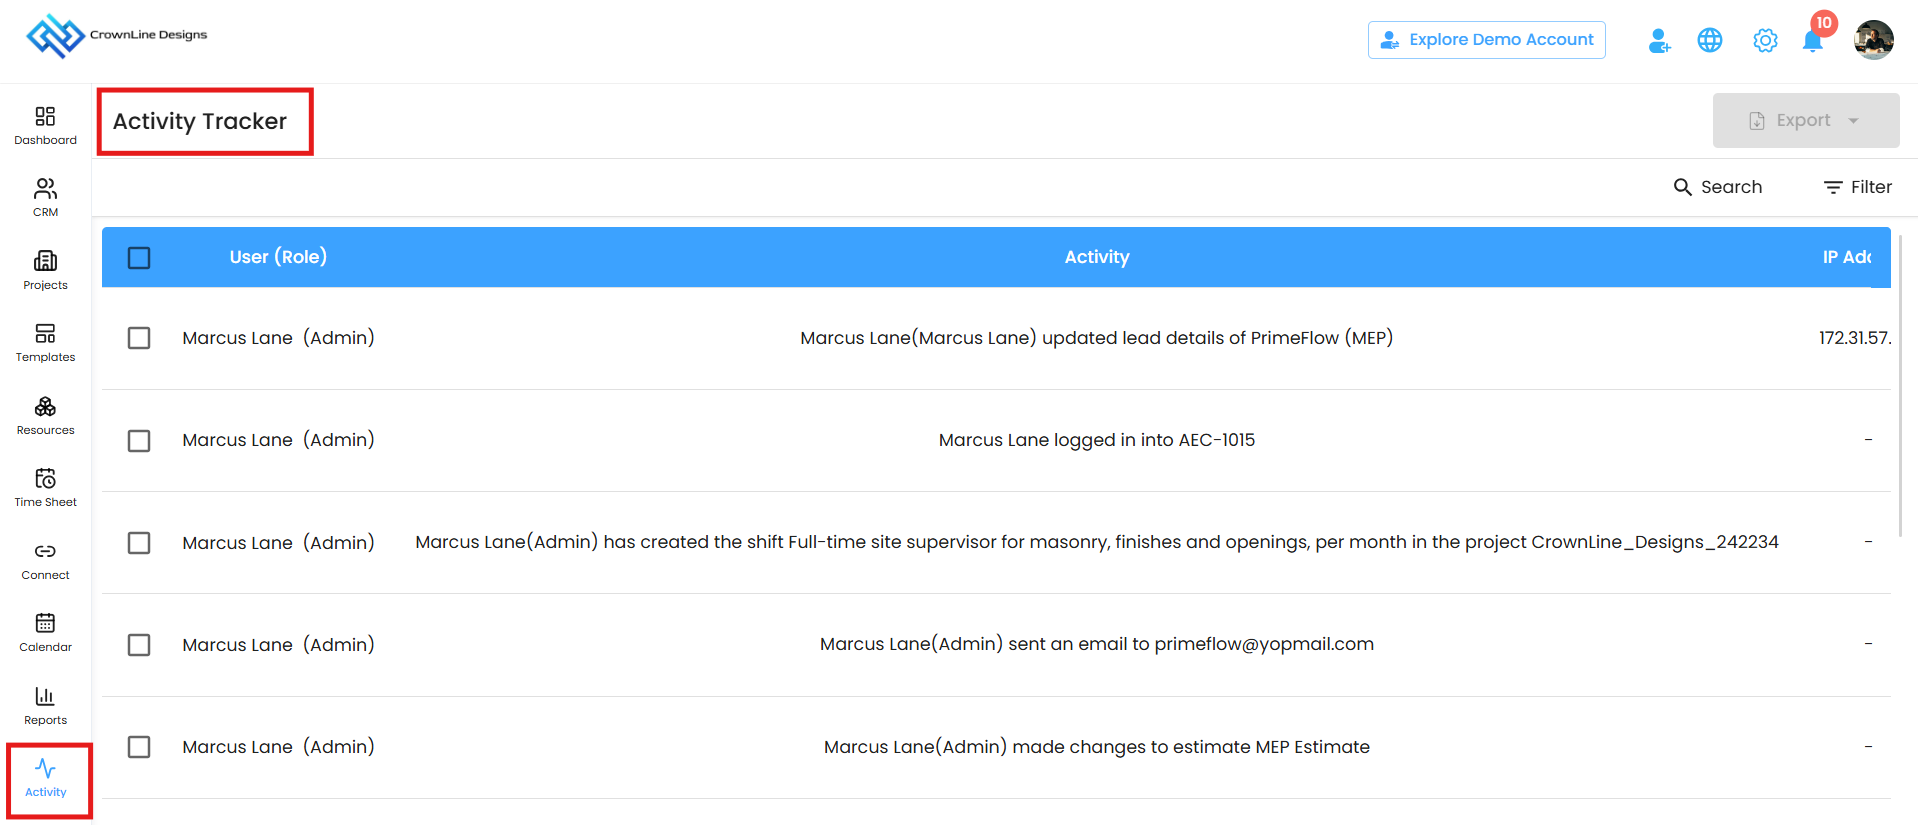
Opening the Activity Tracker
- Click Activity in the left sidebar.
- The Activity Tracker page opens with a list of activities, newest first, easy to scan from top to bottom.
- Each row tells you who did what, when, and from where, so nothing slips through the cracks.
Finding What You Need with Search and Filter
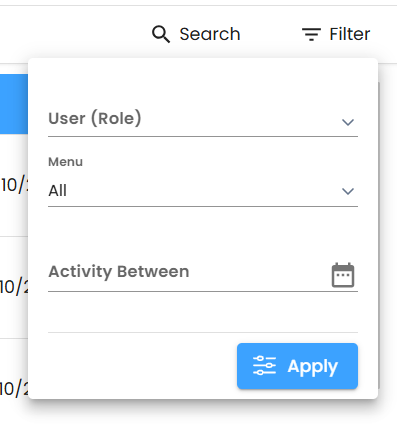
Looking for one specific action among hundreds? You have two ways to narrow the list, both at the top right of the table.
- Search - type a keyword to find matching activities quickly.
- Filter - click Filterto refine the list by:
- Role User - see only what a particular user, or everyone in a particular role, has done.
- Menu - jump to a single module, such as Invoices, Clients, or Inventory.
- Date Range - choose a from and to date to see exactly what happened in that window.
Reading the Activity Table
Every row is a digital footprint of one action. Here is what each column tells you:
- User (Role) - who performed the action, along with their assigned role, for example "Admin".
- Activity - a clear, plain-language description of what was done, such as "updated project details", "integrated Xero account", or "logged in".
- IP Address - where the action came from.
- Time Stamp - the exact date, time, and time zone it happened.
- Reason - notes or explanations for actions such as deletions or updates.
If no details were recorded for an action, the column shows a dash (–).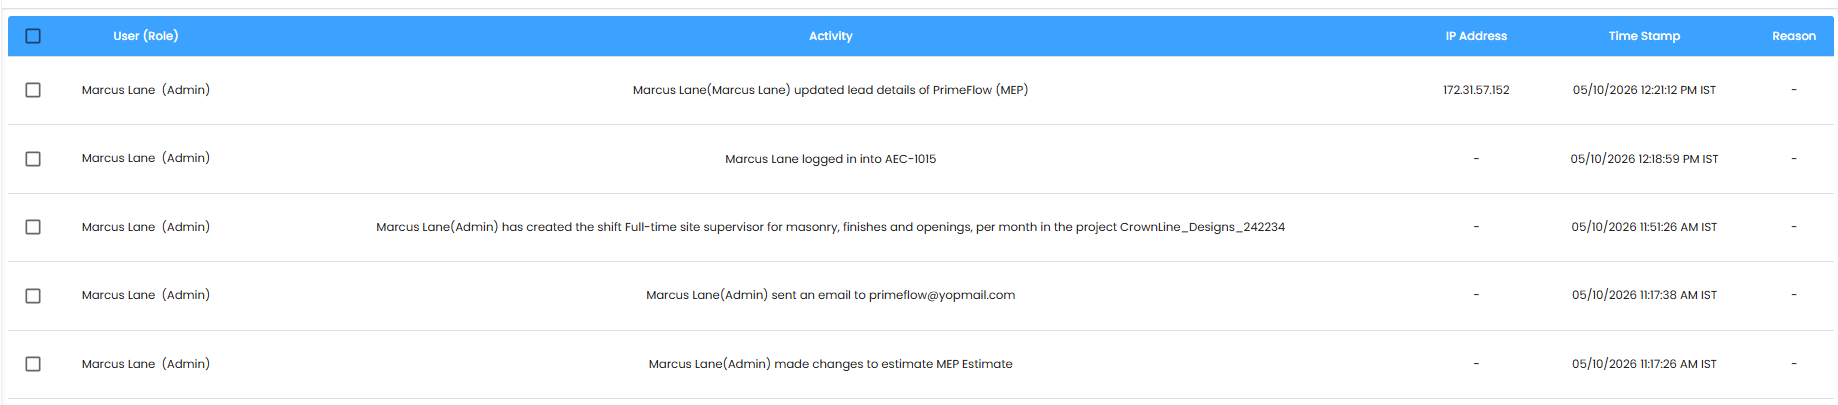
Browsing Through Pages
At the bottom of the table, use the Show dropdown to choose how many rows appear on each page, and use the page numbers to move through the full history.
Exporting Only What Matters
You do not have to share the whole log. IntoAEC lets you pick exactly which activities to export:
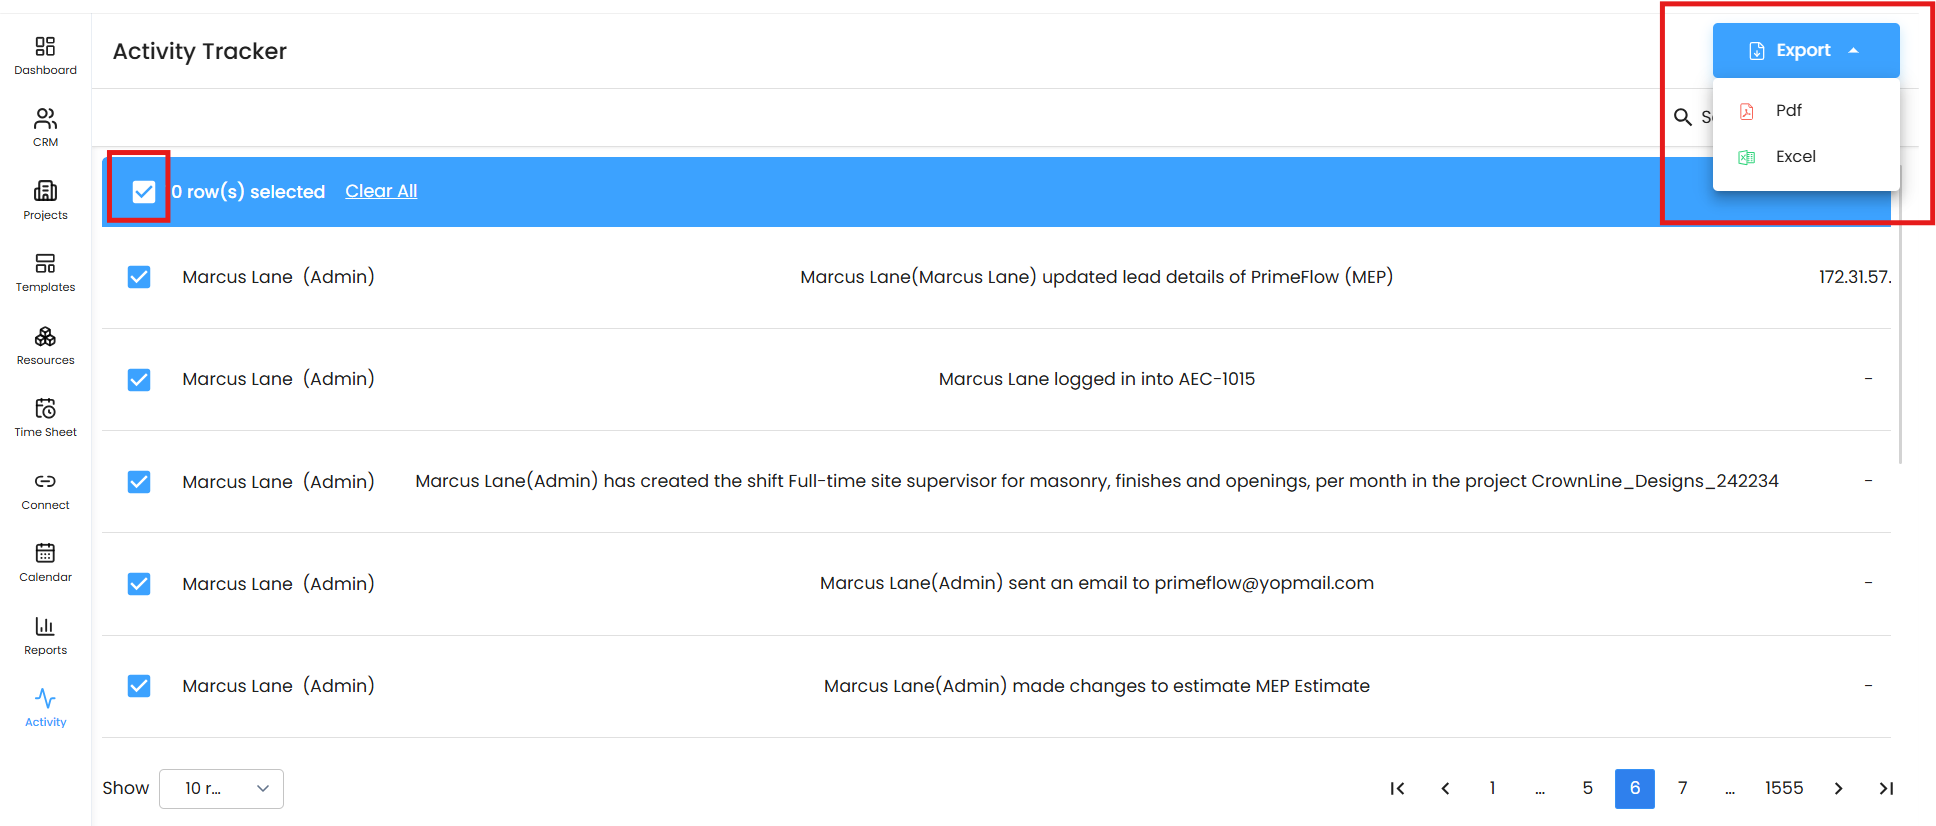
- Tick the checkbox next to each activity you want to download. To select every activity on the page, tick the checkbox in the table header.
- The Export button at the top right stays greyed out until you have selected at least one activity. Once you do, it becomes active.
- Click Export and choose your format: PDF for a clean, ready-to-read report, or Excel for detailed analysis.
- Your file downloads instantly, ready to store, share, or attach to your compliance documents.
Need Help?
If you cannot find an activity you are looking for or have trouble exporting, please contact the IntoAEC Support Team and we will be happy to help.
Was this article helpful?
That’s Great!
Thank you for your feedback
Sorry! We couldn't be helpful
Thank you for your feedback
Feedback sent
We appreciate your effort and will try to fix the article