Project Location & QR Check-In – Ground Your Work, Streamline Entry
A project runs best when its location is defined and access is seamless. By setting up a project location and enabling QR check-in, you give your team clarity on where work happens and an effortless way to register their presence on-site.
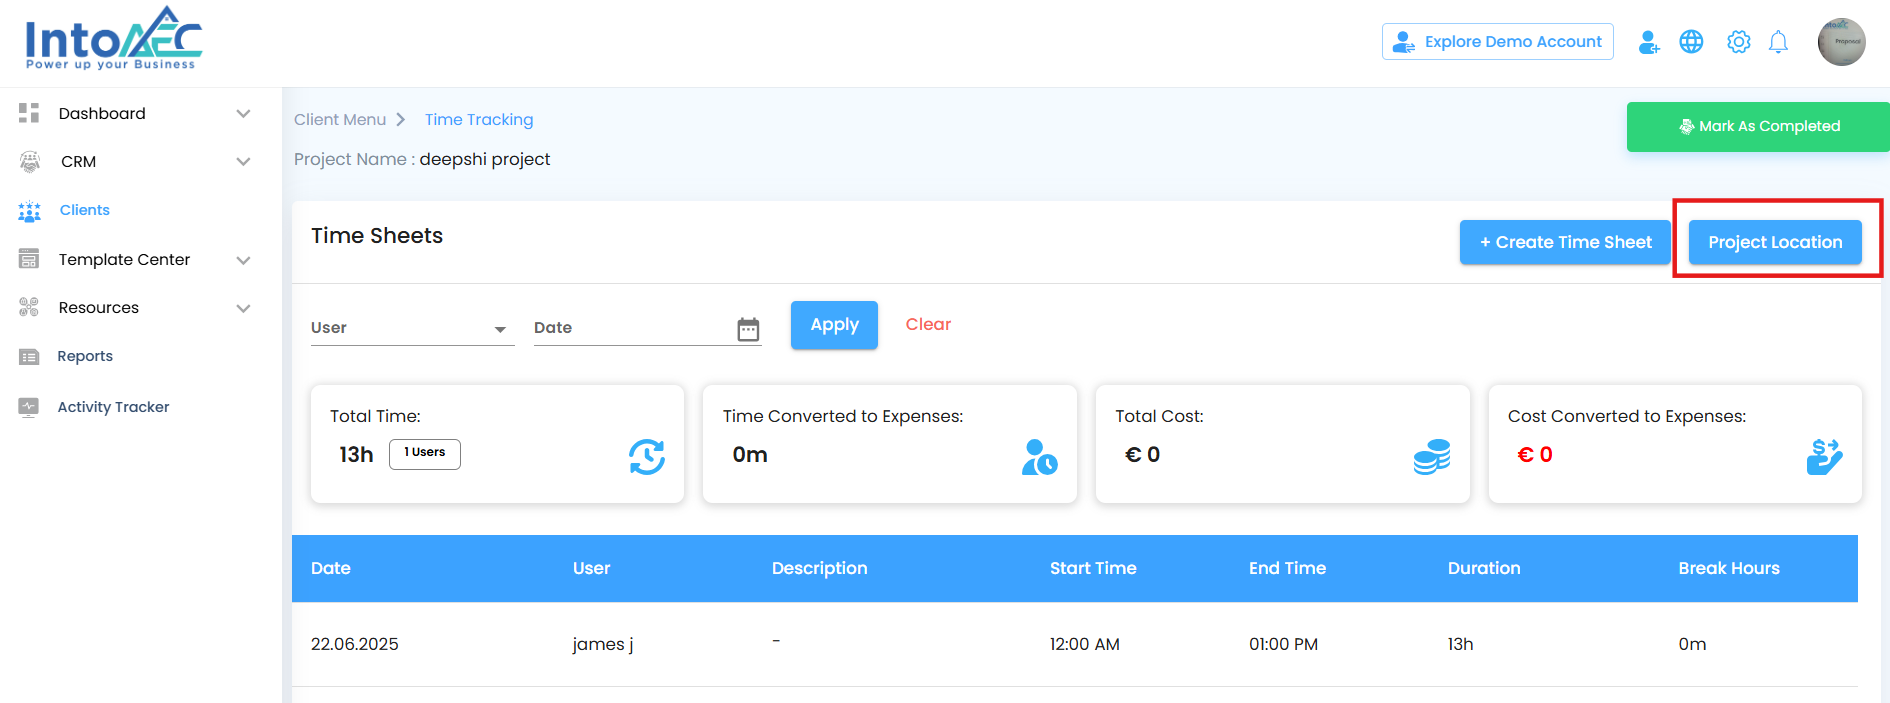
What You Can Do Here
- Click the Project Location button to open and manage location settings.
- View existing project locations already tied to your work.
- Add new project locations with just a few clicks for instant clarity.
- Generate a unique QR code linked to each pinned project location.
- Enable QR check-in so users can scan the code through the mobile app.
- Automatically log check-in times the moment a QR is scanned on-site.
Pro tip: Keep project locations updated and pair them with QR check-in. Together, they ensure your team always knows where to be and provide accurate proof of on-site presence.
Project Location & QR Check-In – Define and Secure Your Site
Managing project sites is more than just dropping a pin—it’s about clarity, accuracy, and smooth on-site access. The Location Table gives you a clear overview, while QR integration makes check-ins effortless and reliable.
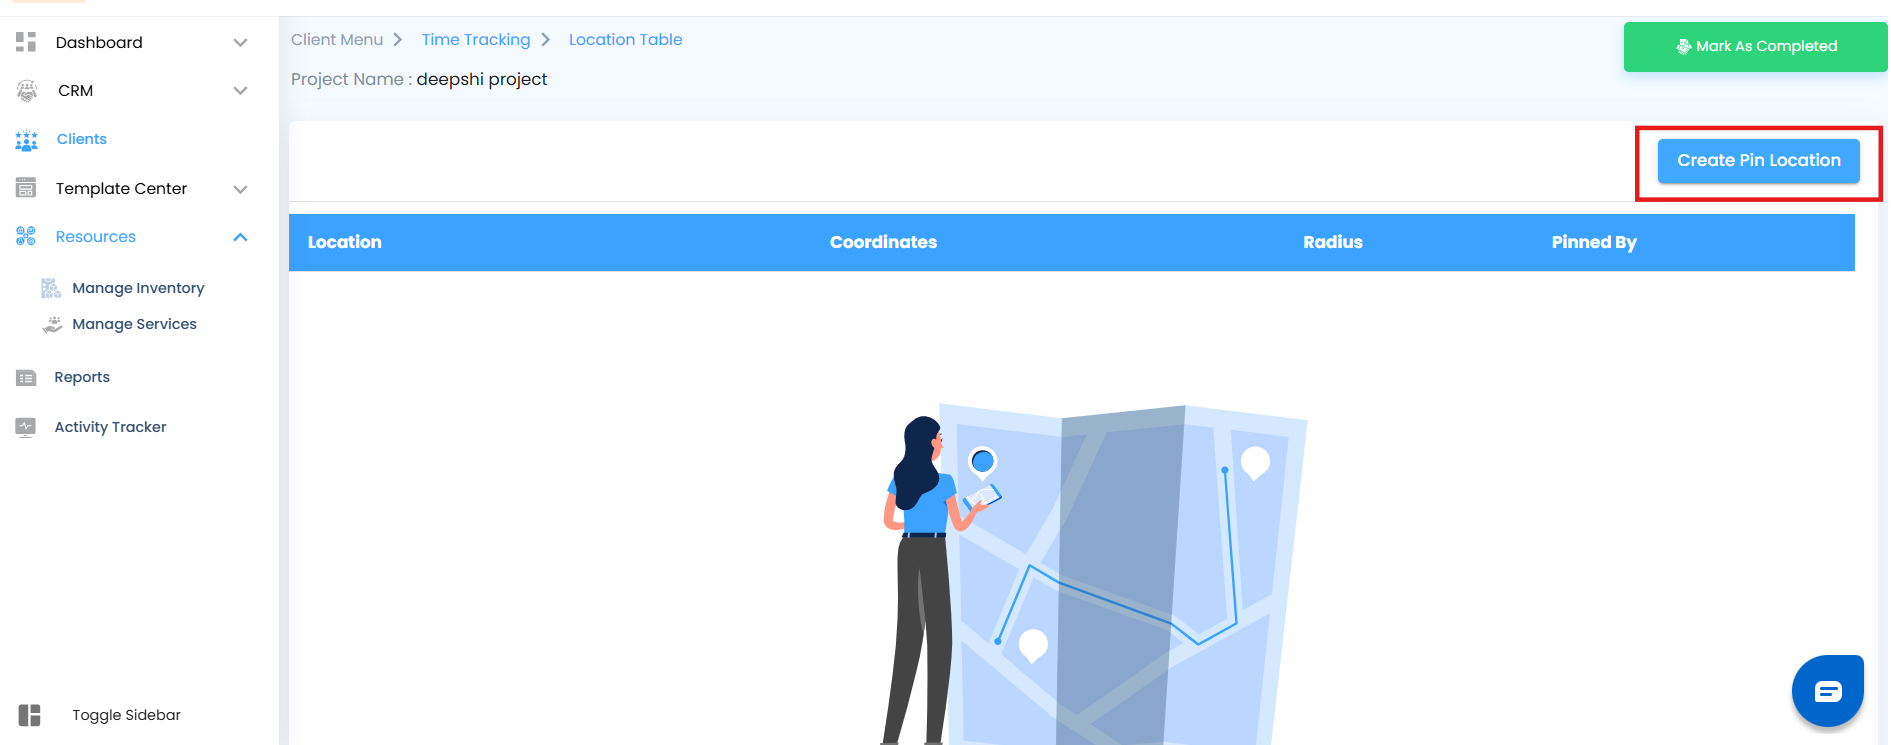
What You Can Do Here
Open the Location Table page linked to the selected project.
View columns showing Location, Coordinates, Radius, and Pinned By.
See a “No Data Found” message if no location exists yet.
Click the Create Pin Location button to open the Pin Location Site.
Use the interactive map to define the exact project location and coverage radius.
Enable QR check-in for the project—the QR code is generated automatically for the pinned location.
Allow users to scan the QR code on-site through the mobile app for instant time-stamped check-ins.
Pro tip: Always enable QR check-in after pinning a location. It ensures all on-site check-ins are accurate and verified without extra steps.
.
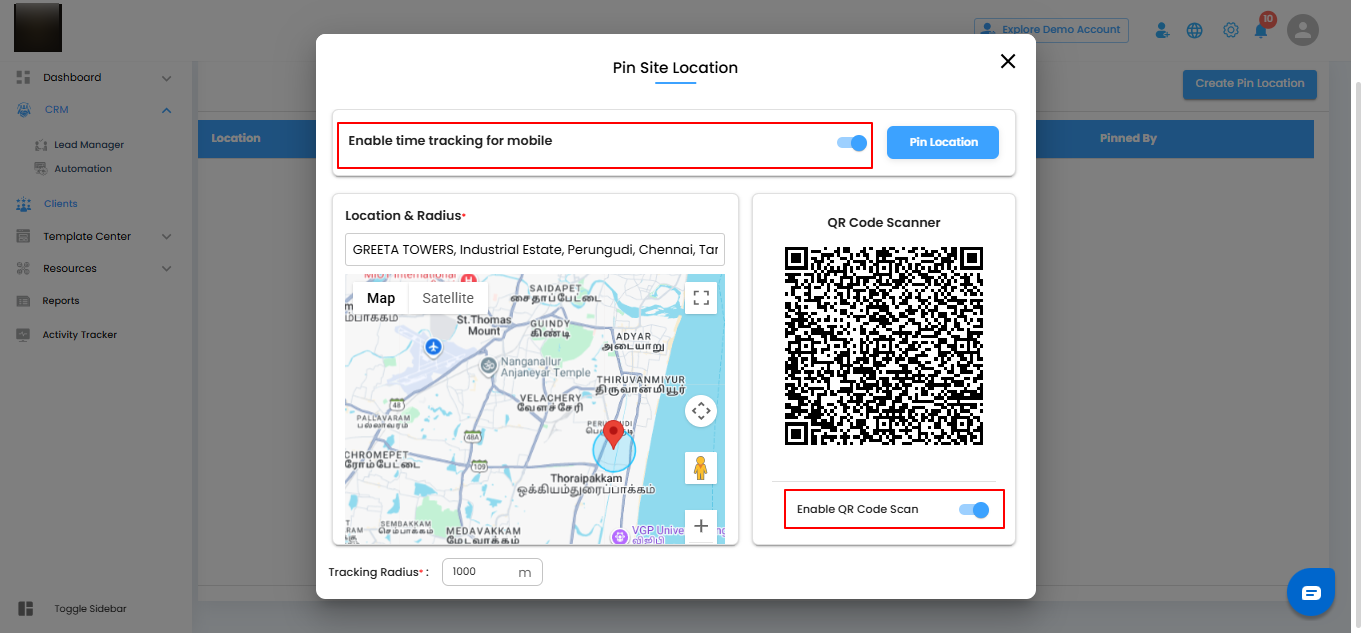
Enable Time Tracking & QR Check-In for Mobile – Keep Site Activity Transparent
Tracking site activity and check-ins has never been easier. By enabling time tracking and QR check-in, you ensure every user’s presence and activity at the project site is recorded accurately and effortlessly.
What You Can Do Here
Toggle the Enable Time Tracking for Mobile switch to track check-ins and site activity based on this location.
Enable QR code scanner for the project—the QR code is generated automatically for the project.
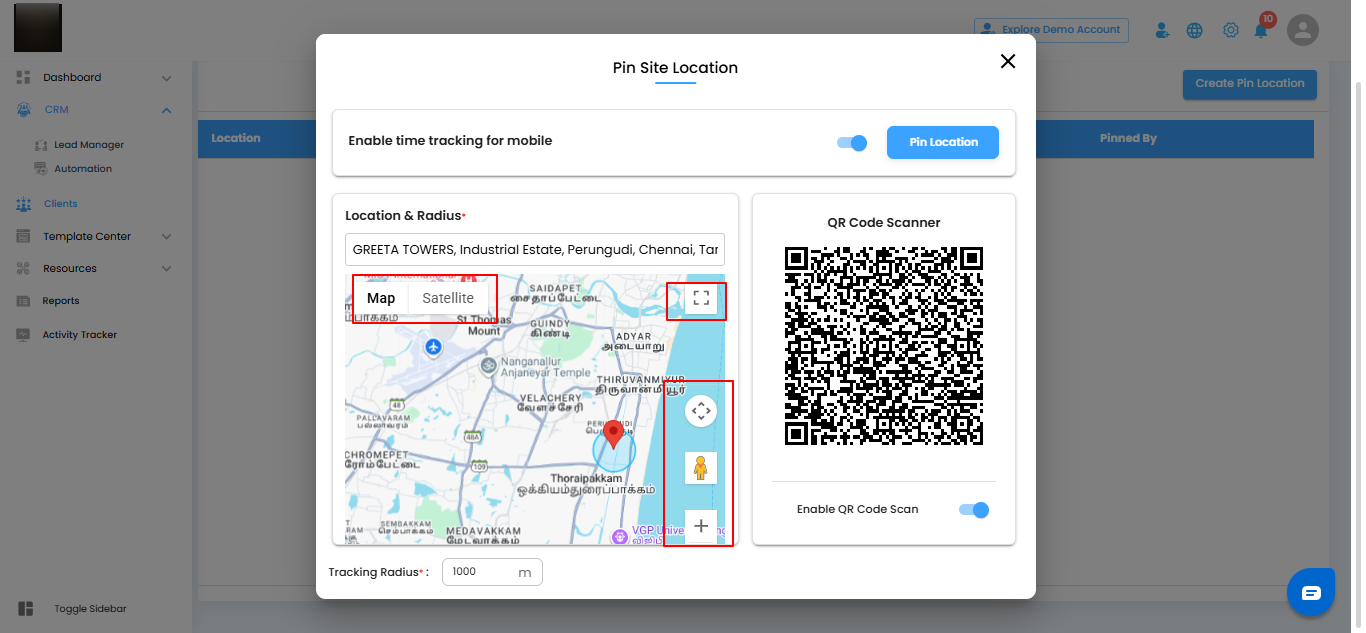
Interactive Map Tools – Navigate Your Project with Precision
The interactive map gives you complete control over how you view and manage project locations. Explore every detail with intuitive tools that make navigation easy and precise.
What You Can Do Here
Zoom In/Out – Use the scroll wheel or map controls to focus on a specific area.
Full Screen View – Expand the map to full screen for better visibility.
Map Camera Controls – Adjust angles and navigation views to suit your perspective.
Street View – Click the street view icon to explore the surrounding area in detail.
Map / Satellite View – Switch between standard map and satellite imagery for better orientation.
Pro tip: Use a combination of zoom, street view, and satellite mode to get the most accurate understanding of your project site before pinning locations or enabling QR check-ins.
Manually Enter Location – Pinpoint with Accuracy
Sometimes you know the exact address or coordinates of your project site. The manual entry option lets you set the location precisely, giving your team clear guidance on where work takes place.
What You Can Do Here
Type in the exact address or coordinates for the project location.
Select a point directly on the interactive map to place the pin.
Combine manual entry with QR check-in for accurate on-site tracking.
Pro tip: Use manual entry for locations that are hard to find or not easily visible on the map. It ensures every project site is accurately recorded for check-ins and site activity tracking.

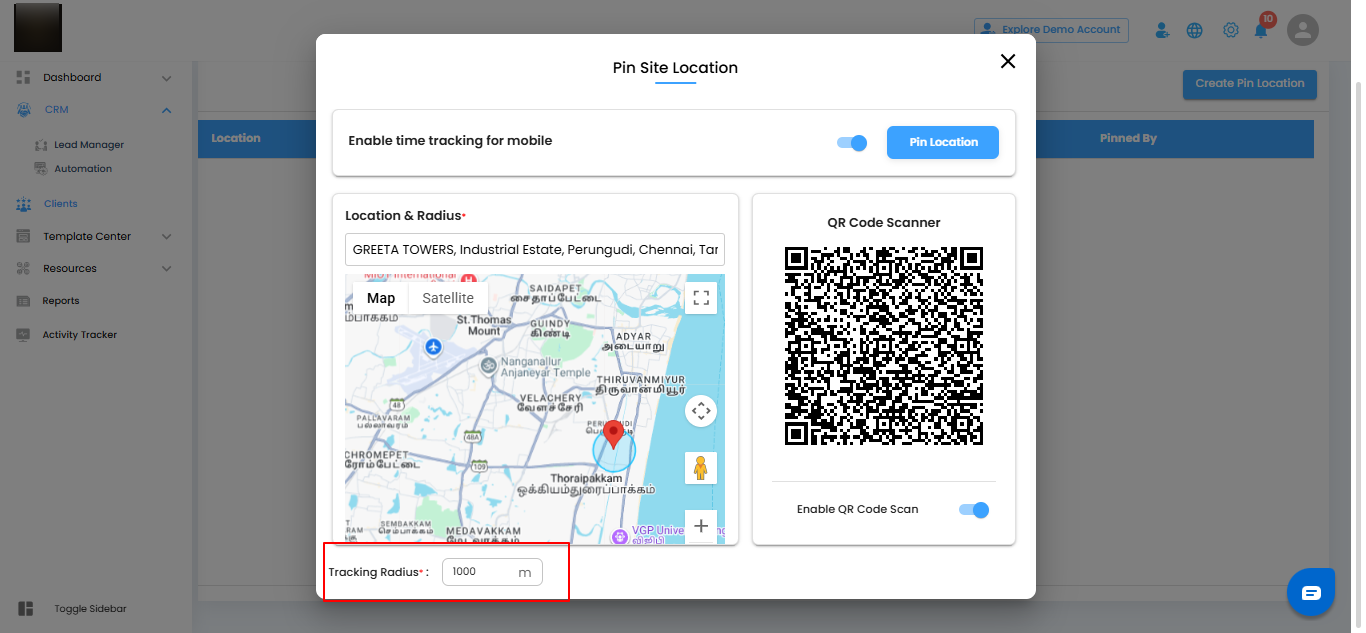
Set Tracking Radius – Define Your Geofence
The radius sets a geofenced area around your project location, ensuring check-ins and site activity are recorded only within the designated zone.
What You Can Do Here
Specify the radius in meters around the pinned location.
Use the geofenced area to validate on-site check-ins.
Ensure QR check-ins or time tracking are only allowed within this radius.
Pro tip: Set an appropriate radius that balances accuracy and convenience. Too small may block legitimate check-ins, too large may reduce location validation precision
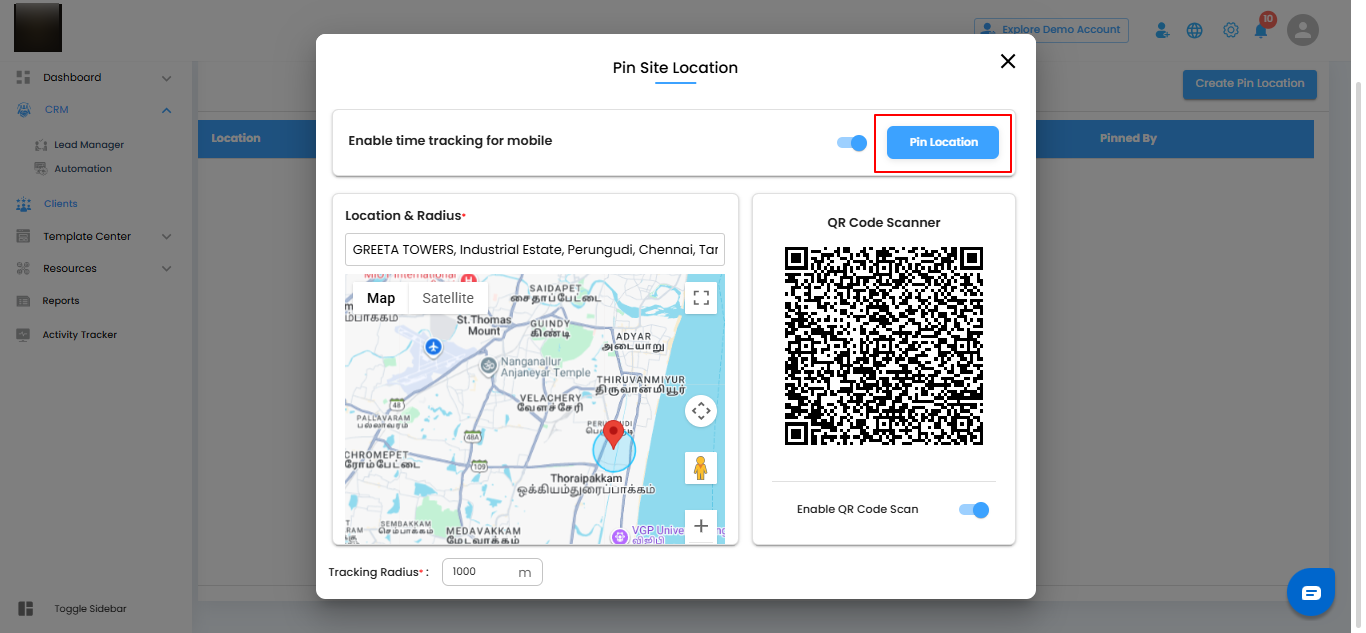
Place the Pin – Secure Your Project Location
After defining all location details, placing the pin finalizes the project site setup. This ensures accurate tracking and seamless QR check-ins.
What You Can Do Here
Review all location details including address, coordinates, and radius.
Click the Pin Location button to drop the location pin on the map.
Save the configuration so the location is linked to the project and ready for QR check-ins or time tracking.
Pro tip: Double-check all details before placing the pin. A correctly placed pin guarantees accurate geofencing and smooth on-site operations.
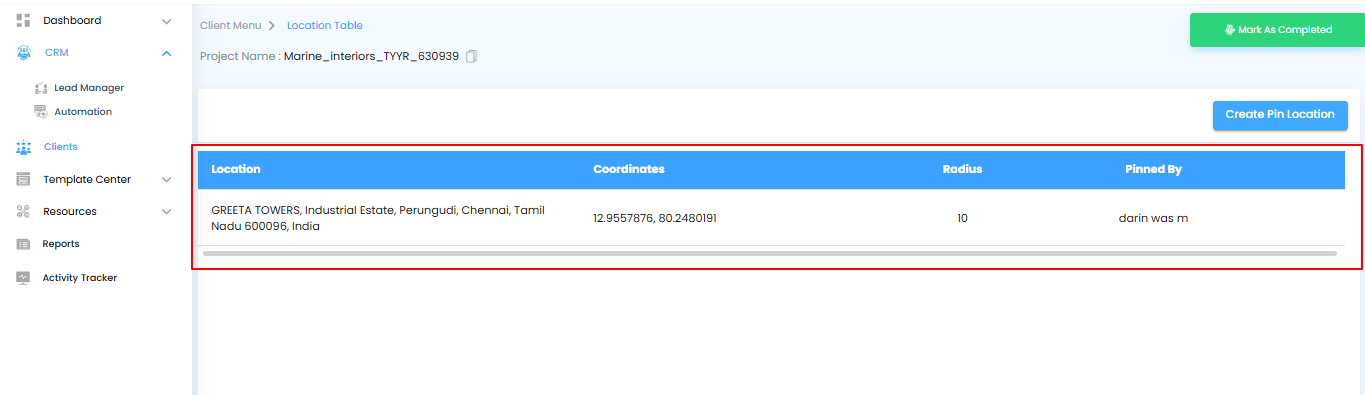
View Saved Locations – Keep Track of Every Pin
Once a project location is saved, it appears in the Location Table, giving you a clear record of all pinned sites and their key details.
What You Can Do Here
See the saved location listed in the table.
View important details including Location Name, Coordinates, Radius, and Pinned By.
Use the table to manage, update, or reference project locations easily.
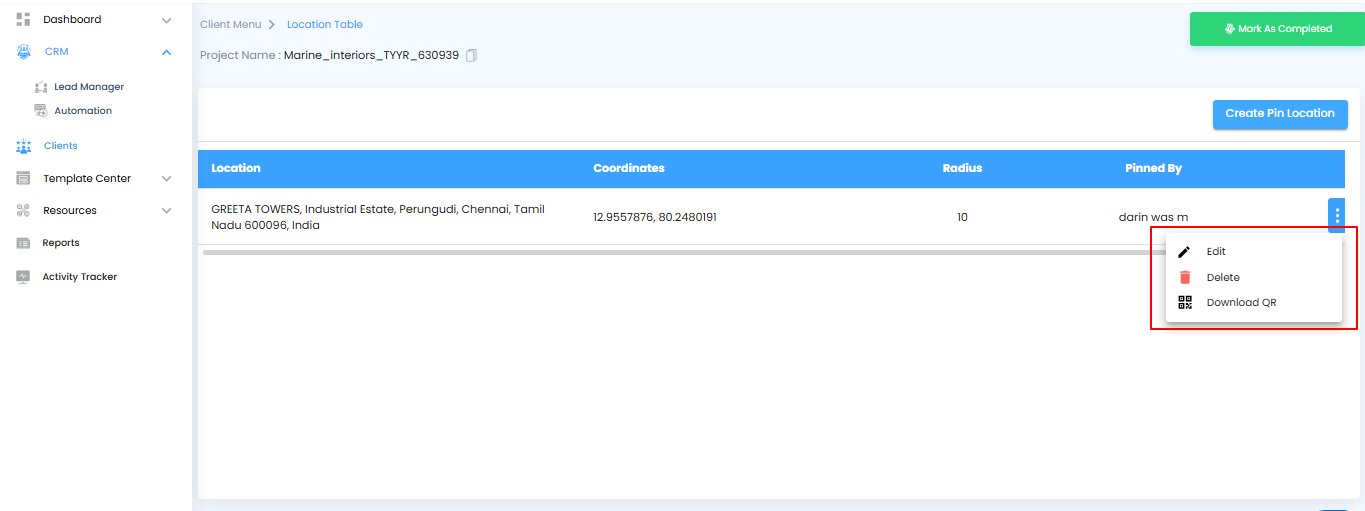
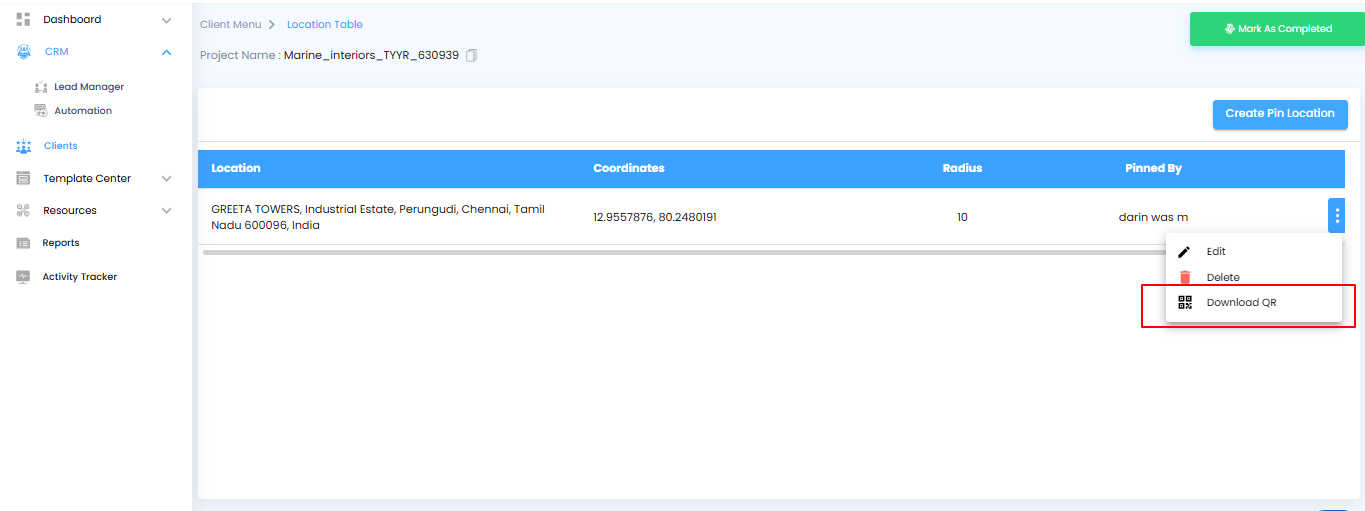
Editing, Deleting, or Downloading QR for a Location – Keep Your Pins Accurate
Sometimes project details change, or you need the QR code for check-ins offline. The system lets you update, remove, or download QR codes for any saved location, keeping your project data and on-site access smooth and reliable.
What You Can Do Here
Go to the Location Table page where all pinned locations are listed.
Click the three dots (⋮) button next to the location you want to manage.
Select Edit to modify the location name, coordinates, or radius.
Select Delete to remove the location completely from the project.
Select Download QR to save the QR code for offline use or sharing.
Pro tip: Keep pinned locations up to date, and always download the QR codes for backup or offline scanning. It ensures smooth check-ins and accurate tracking even without internet access.
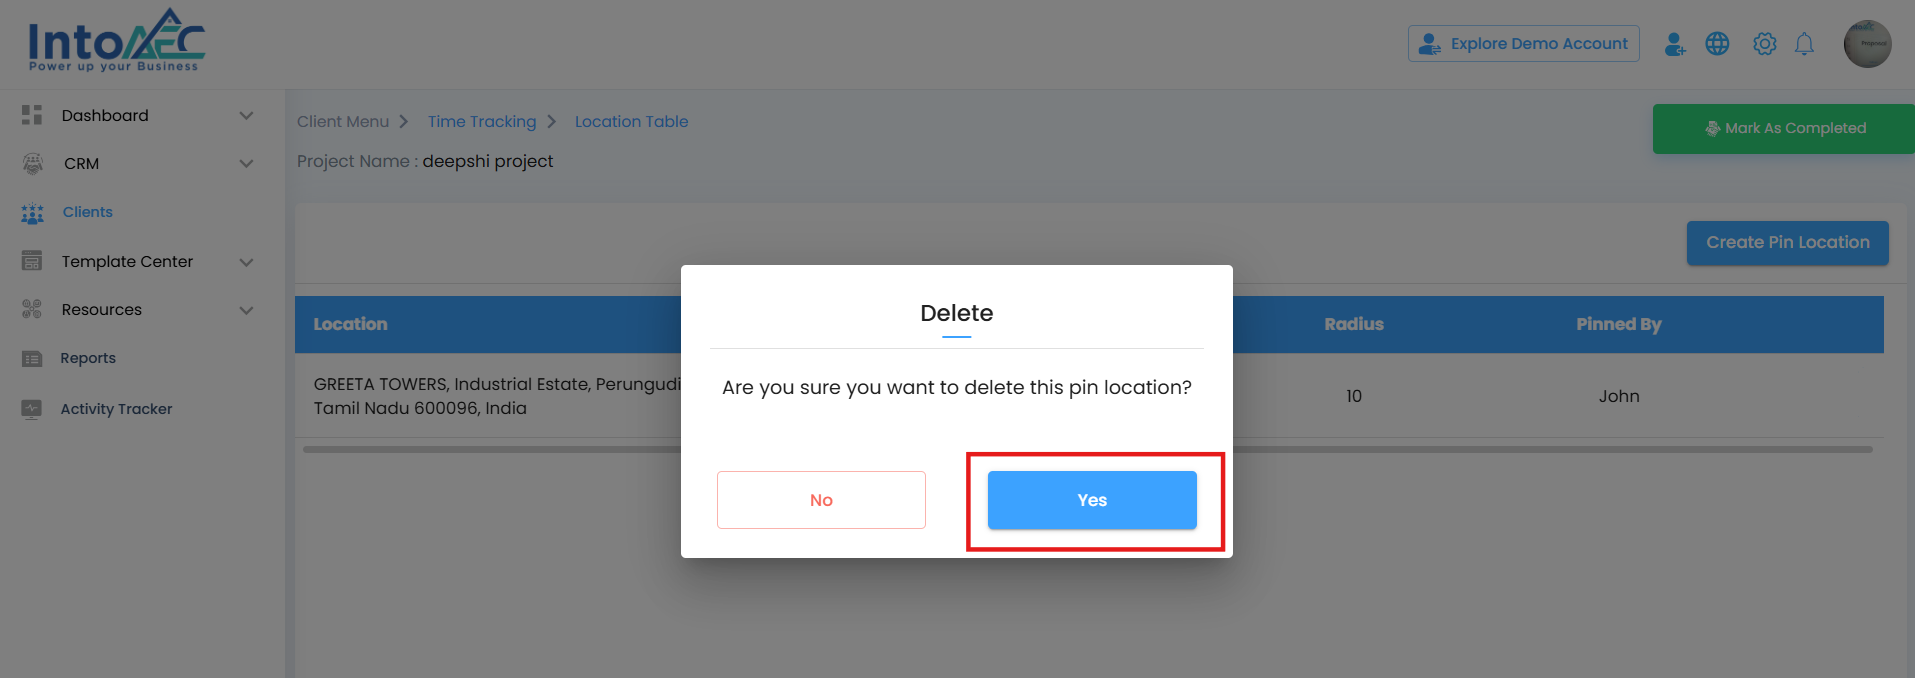
Deleting a Location – Remove Pins Safely
When a project location is no longer needed, you can permanently remove it. The system provides a confirmation step to prevent accidental deletions, keeping your data safe.
What You Can Do Here
Select Delete from the three dots menu next to the location.
A confirmation popup will appear with the message:
"Are you sure you want to delete this pin location?"Click Yes to proceed and permanently remove the location.
Click No or close the popup to cancel the action.
Downloading a QR Code – Access On-Site Check-Ins Anywhere
You can download the QR code for a pinned location to use offline or share with team members. This ensures smooth check-ins even when internet access is limited.
What You Can Do Here
Go to the Location Table page where the pinned location is listed.
Click the three dots button next to the location.
Select Download QR from the dropdown menu.
The QR code will be saved to your device for offline scanning or sharing.
Pro tip: Always keep a backup of downloaded QR codes. It ensures uninterrupted check-ins even in areas with poor connectivity or for team members who need physical access.
Was this article helpful?
That’s Great!
Thank you for your feedback
Sorry! We couldn't be helpful
Thank you for your feedback
Feedback sent
We appreciate your effort and will try to fix the article