The QuickBooks integration allows you to connect your QuickBooks accounting account with IntoAEC. Once connected, IntoAEC can securely access the approved accounting workspace and use it for future invoice, payment, and ledger-related sync.
Overview
Using the QuickBooks integration, you can:
- Connect your QuickBooks account with IntoAEC
- Authorize IntoAEC to access your accounting workspace
- Save the approved access details securely
- Enable future sync for invoices, payments, and ledger details
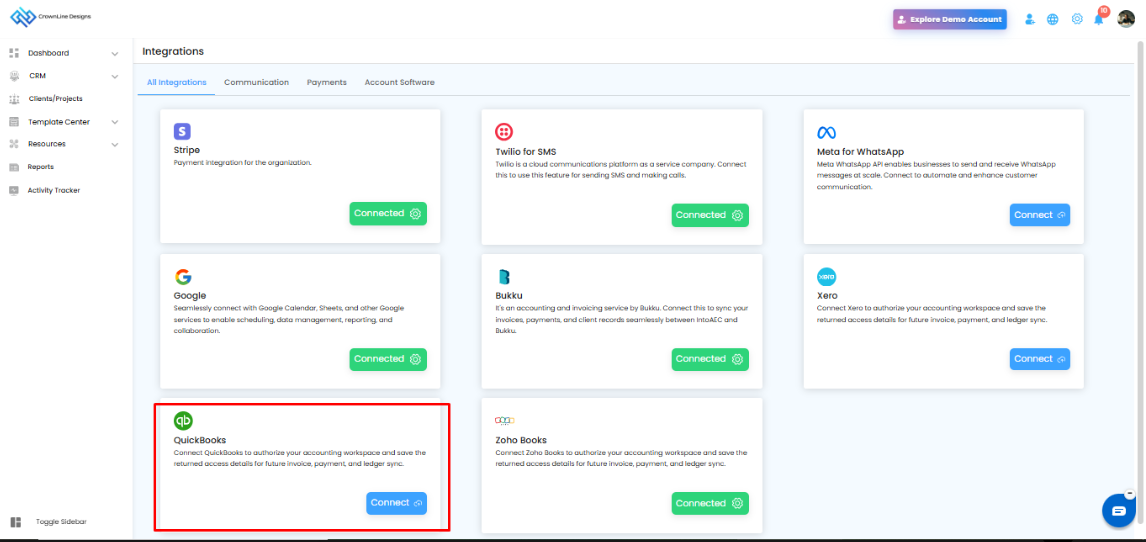
How to Open QuickBooks Integration
- Go to Dashboard.
- Open Integrations from the left-side menu.
- Under All Integrations or Account Software, locate QuickBooks.
- Click Connect on the QuickBooks integration card.
This will open the Configure QuickBooks page.
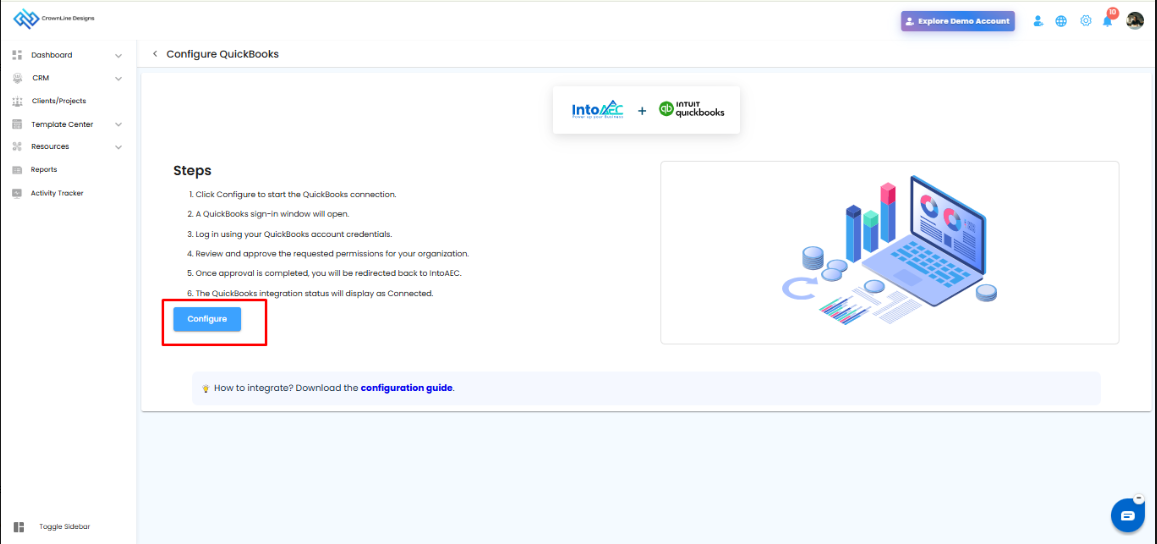
Configure QuickBooks
After clicking Connect, the Configure QuickBooks screen will be displayed.
This page shows the steps required to start and complete the QuickBooks connection.
Steps to Configure
- Click Configure to start the QuickBooks connection.
- A QuickBooks sign-in window will open.
- Log in using your QuickBooks account credentials.
- Review and approve the requested permissions for your organization.
- Once approval is completed, you will be redirected back to IntoAEC.
- The QuickBooks integration status will display as Connected.
Sign in to QuickBooks
After clicking Configure, the QuickBooks login window will open.
You can sign in using:
| Option | Description |
|---|---|
| Email or User ID | Enter your registered QuickBooks email address or user ID |
| Phone | Use your registered phone number to sign in |
After entering the required details, click Sign in.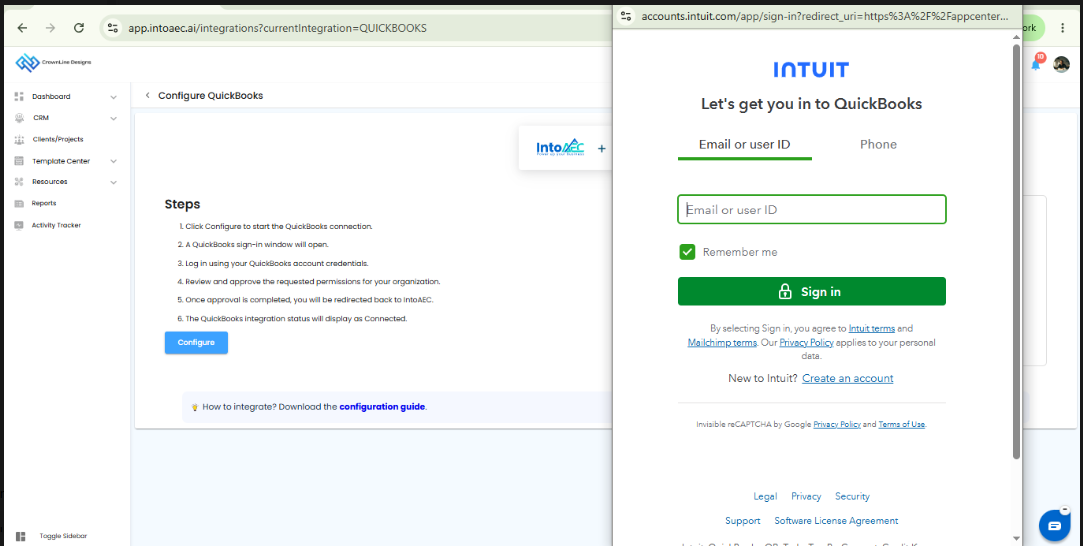
Authorization and Approval
Once you sign in successfully, QuickBooks may ask you to approve the connection with IntoAEC.
Review the permission details carefully and approve the request to continue.
This authorization allows IntoAEC to connect with your QuickBooks accounting workspace and save the returned access details for future invoice, payment, and ledger sync.
After Successful Connection
Once the authorization is completed:
- You will be redirected back to IntoAEC
- The QuickBooks integration status will be shown as Connected
- IntoAEC can use the approved access to sync accounting data
- You can manage the integration from the QuickBooks integration card
Important Notes
- Use the correct QuickBooks account that has access to your organization’s accounting workspace.
- Make sure pop-ups are allowed in your browser, as the QuickBooks sign-in opens in a separate window.
- If the sign-in window does not open, refresh the page and click Configure again.
- If the connection is not completed, check your QuickBooks credentials and try again.
Was this article helpful?
That’s Great!
Thank you for your feedback
Sorry! We couldn't be helpful
Thank you for your feedback
Feedback sent
We appreciate your effort and will try to fix the article