Overview
A Purchase Order (PO) is your official order to a vendor - the final step once pricing and items are confirmed. You can build one from scratch, or upload an existing PO as a PDF and let the system pull the details in for you.
Getting There
- Click Client in the sidebar and select the client you're creating the PO for.
- Go to Procurement > Purchase Order.
- Click Create PO.
Choosing How to Start
In the Get Started window, pick the format:
- Start From Scratch - build a new PO by adding line items manually.
- Upload PDF - upload an existing PO as a PDF, and the system automatically extracts items, quantities, units, rates, and amounts into a structured PO for you.
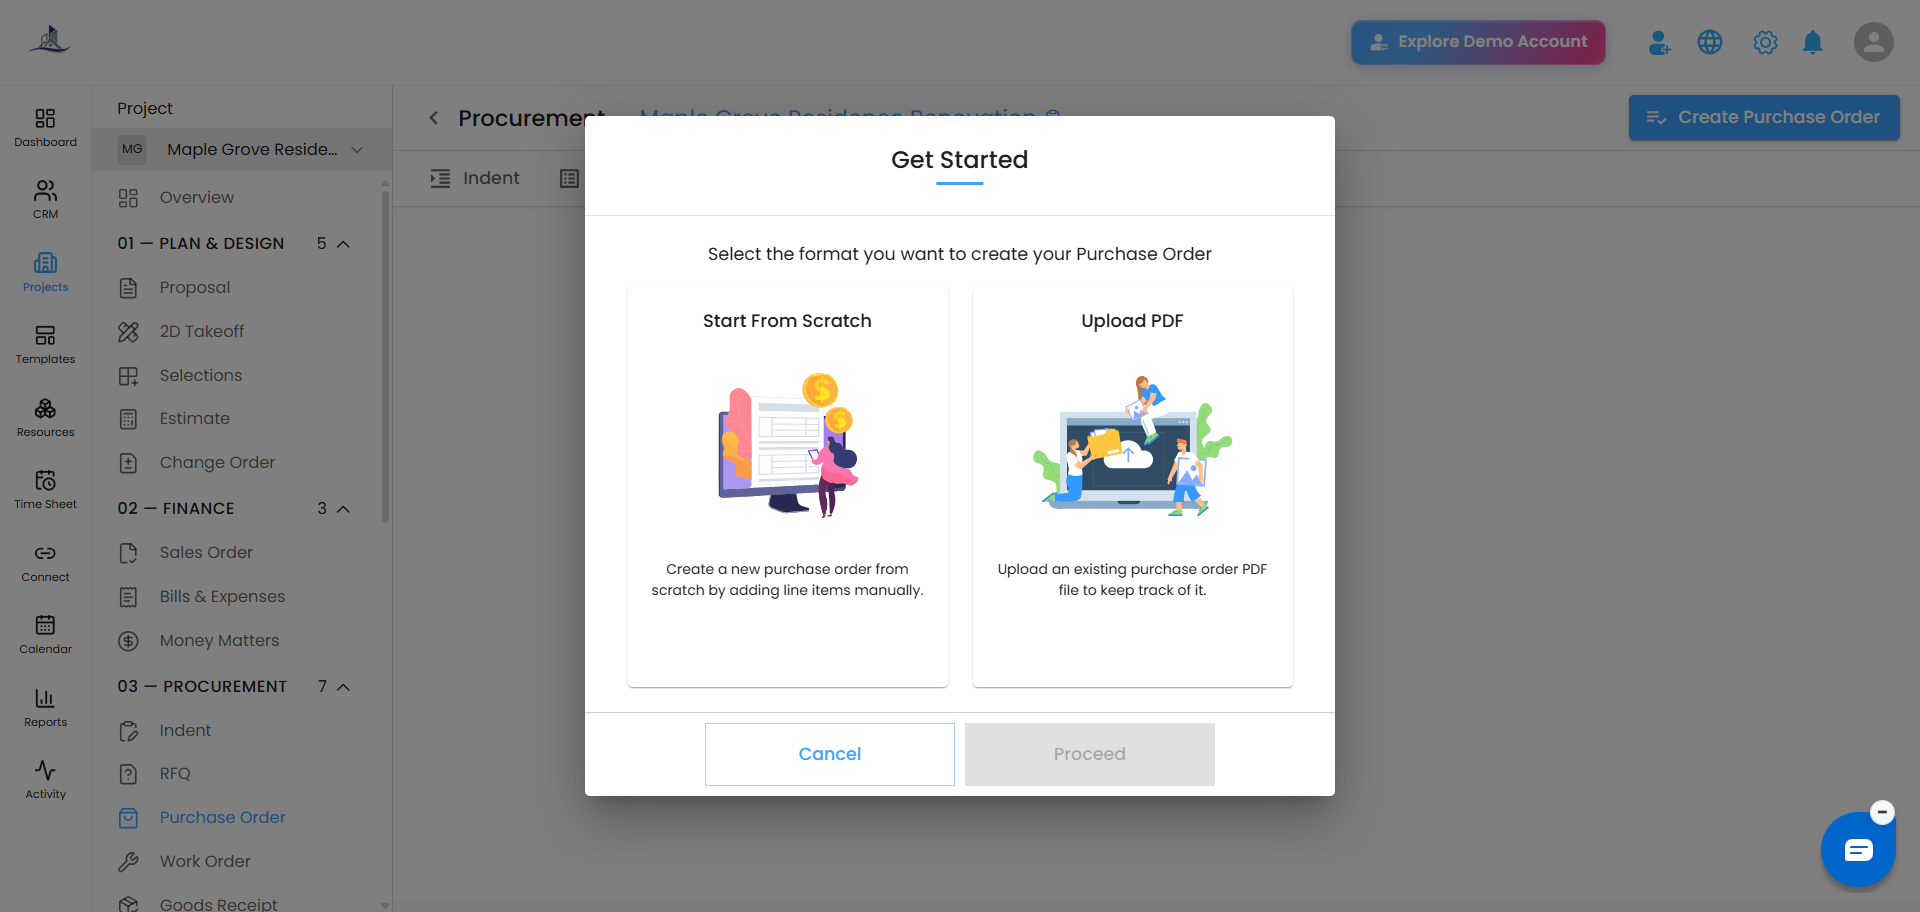
Click Proceed once you've chosen.
Filling in PO Details
At the top of the form, enter:
- Title
- S.No - auto-generated, no action needed
- Issue date
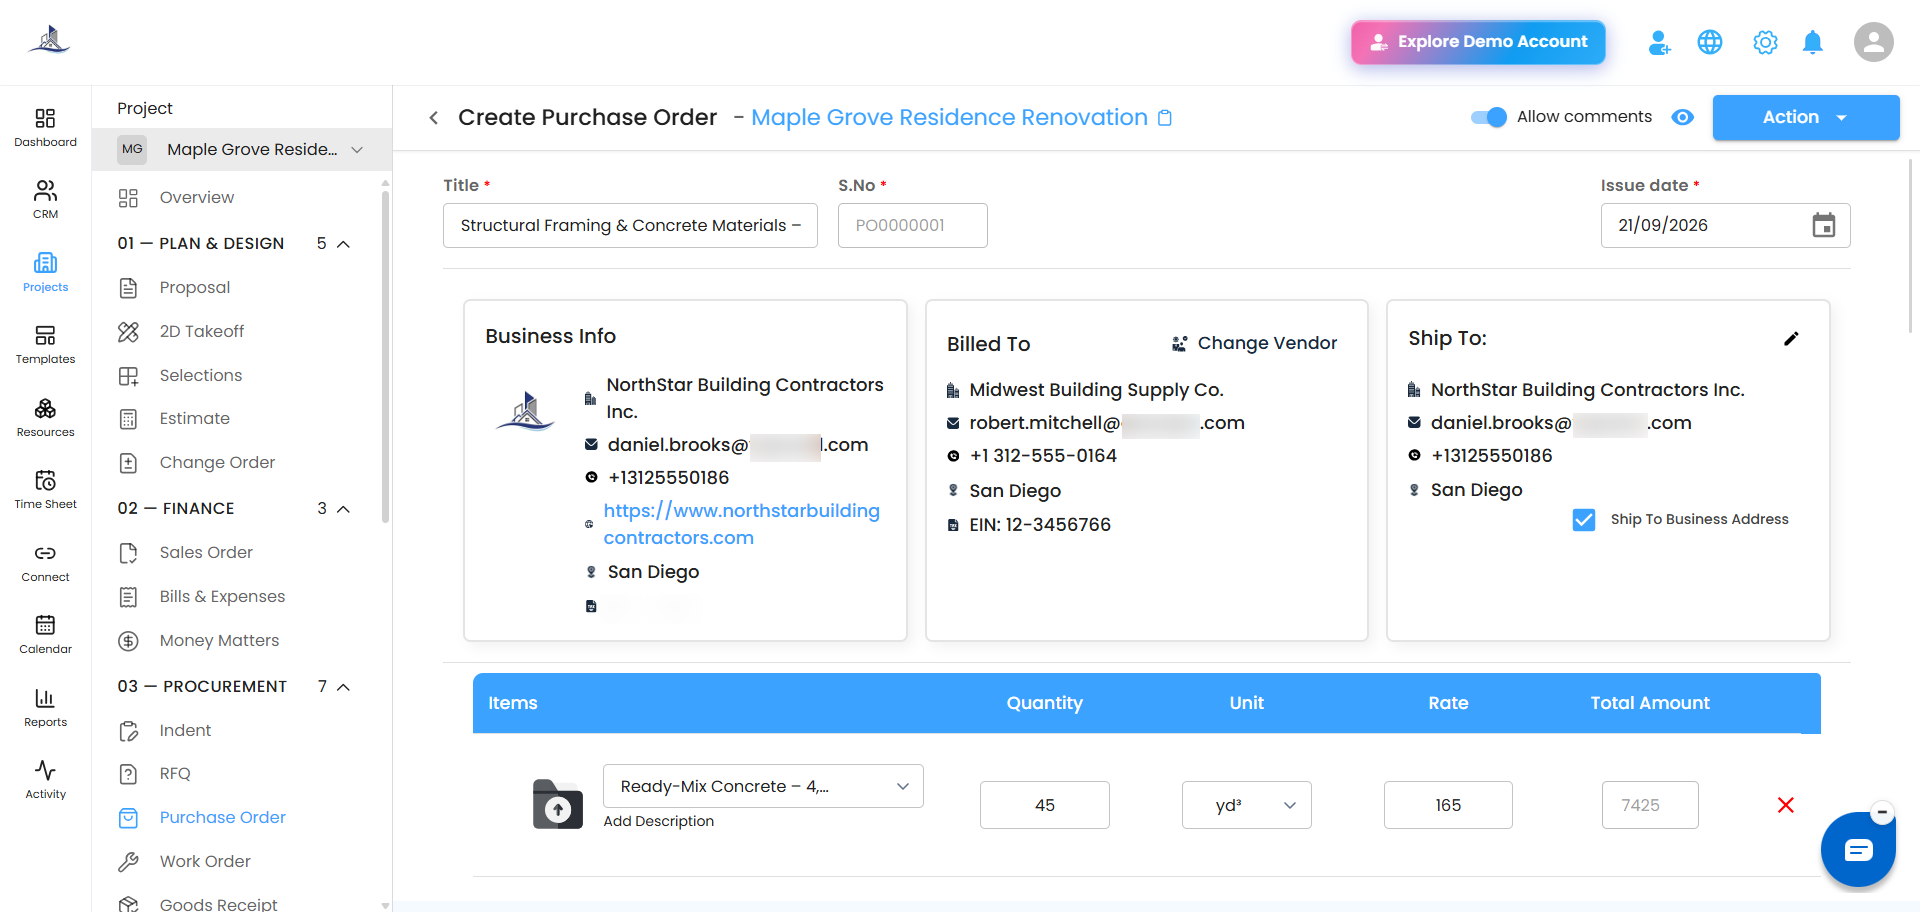
Below that, you'll see three info cards:
- Business Info - your organization's details, filled in automatically
- Billed To - click Add Vendor Details, select the vendor from the list, then click Add
- Ship To - check Ship To Business Address if items should go there, or leave it unchecked to enter a different delivery address
Adding Items
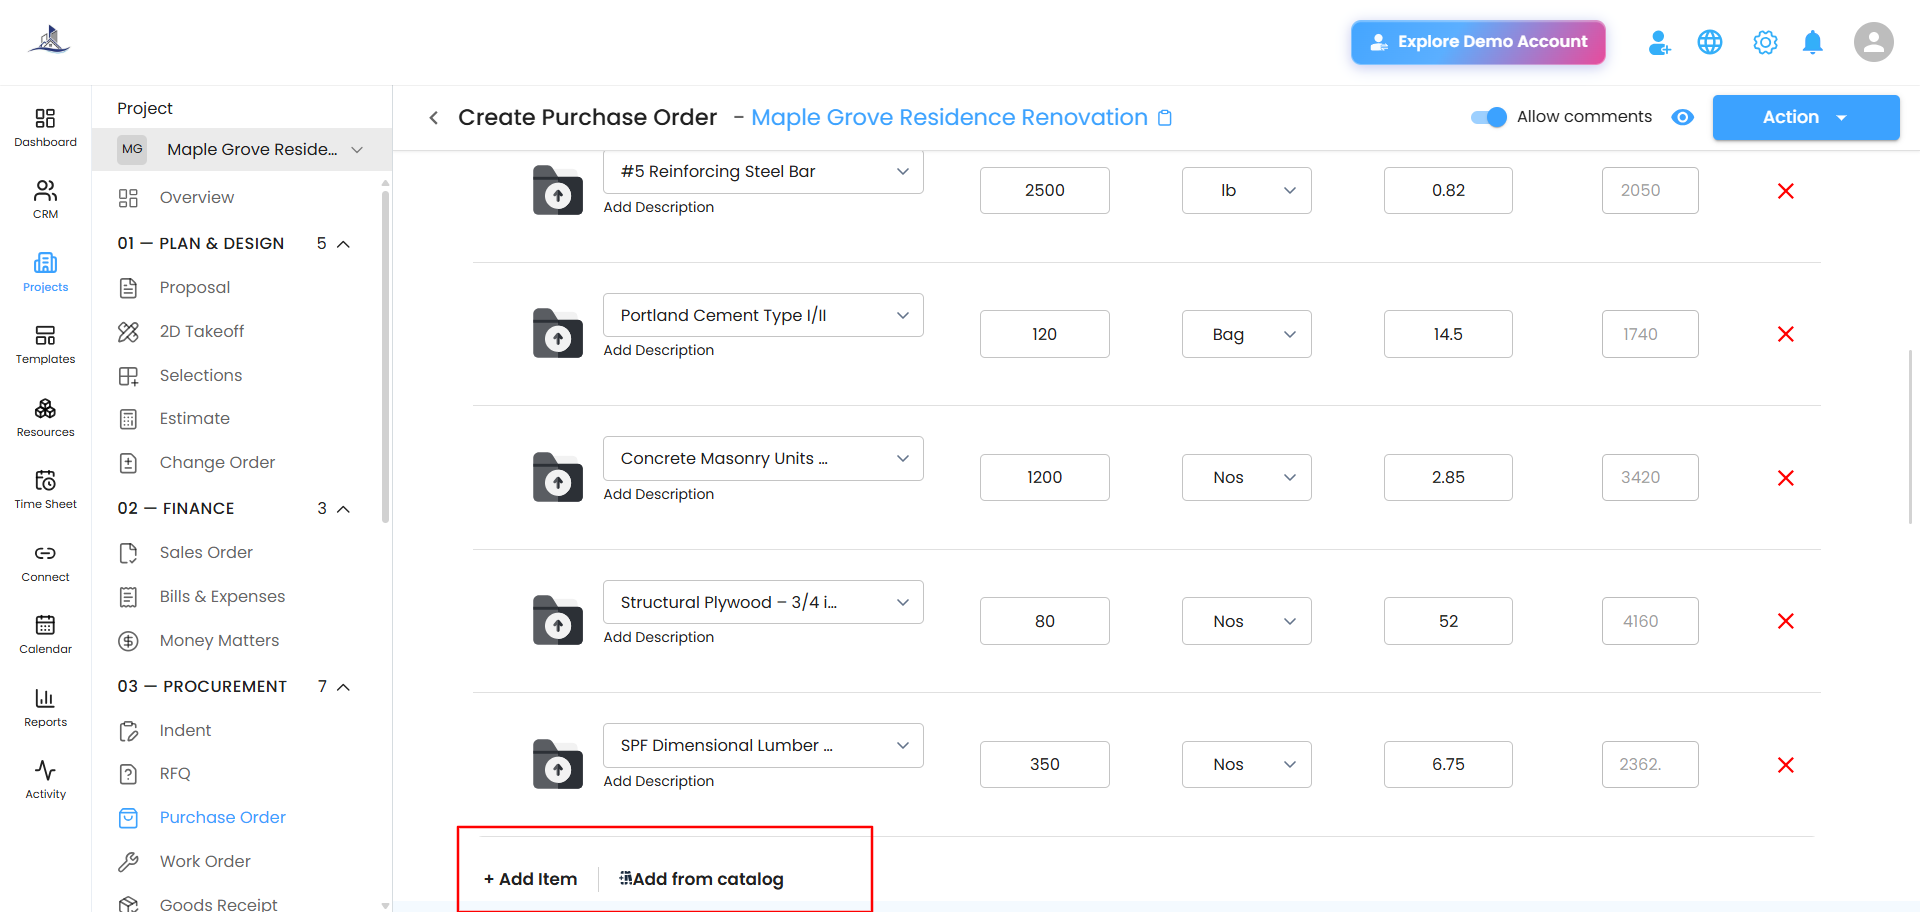
In the Items table, add what you need using either method:
- Add Item - enter the item name, quantity, unit, and rate manually.
- Add from catalog - opens the Cost Catalog, where you can pick saved items from the Materials, Services, Equipments, and Assemblies tabs. Search by item code or name, check the items you want, and click Add.
As you add items, the Sub total and Total Amount update automatically at the bottom of the table.
 Terms & Conditions
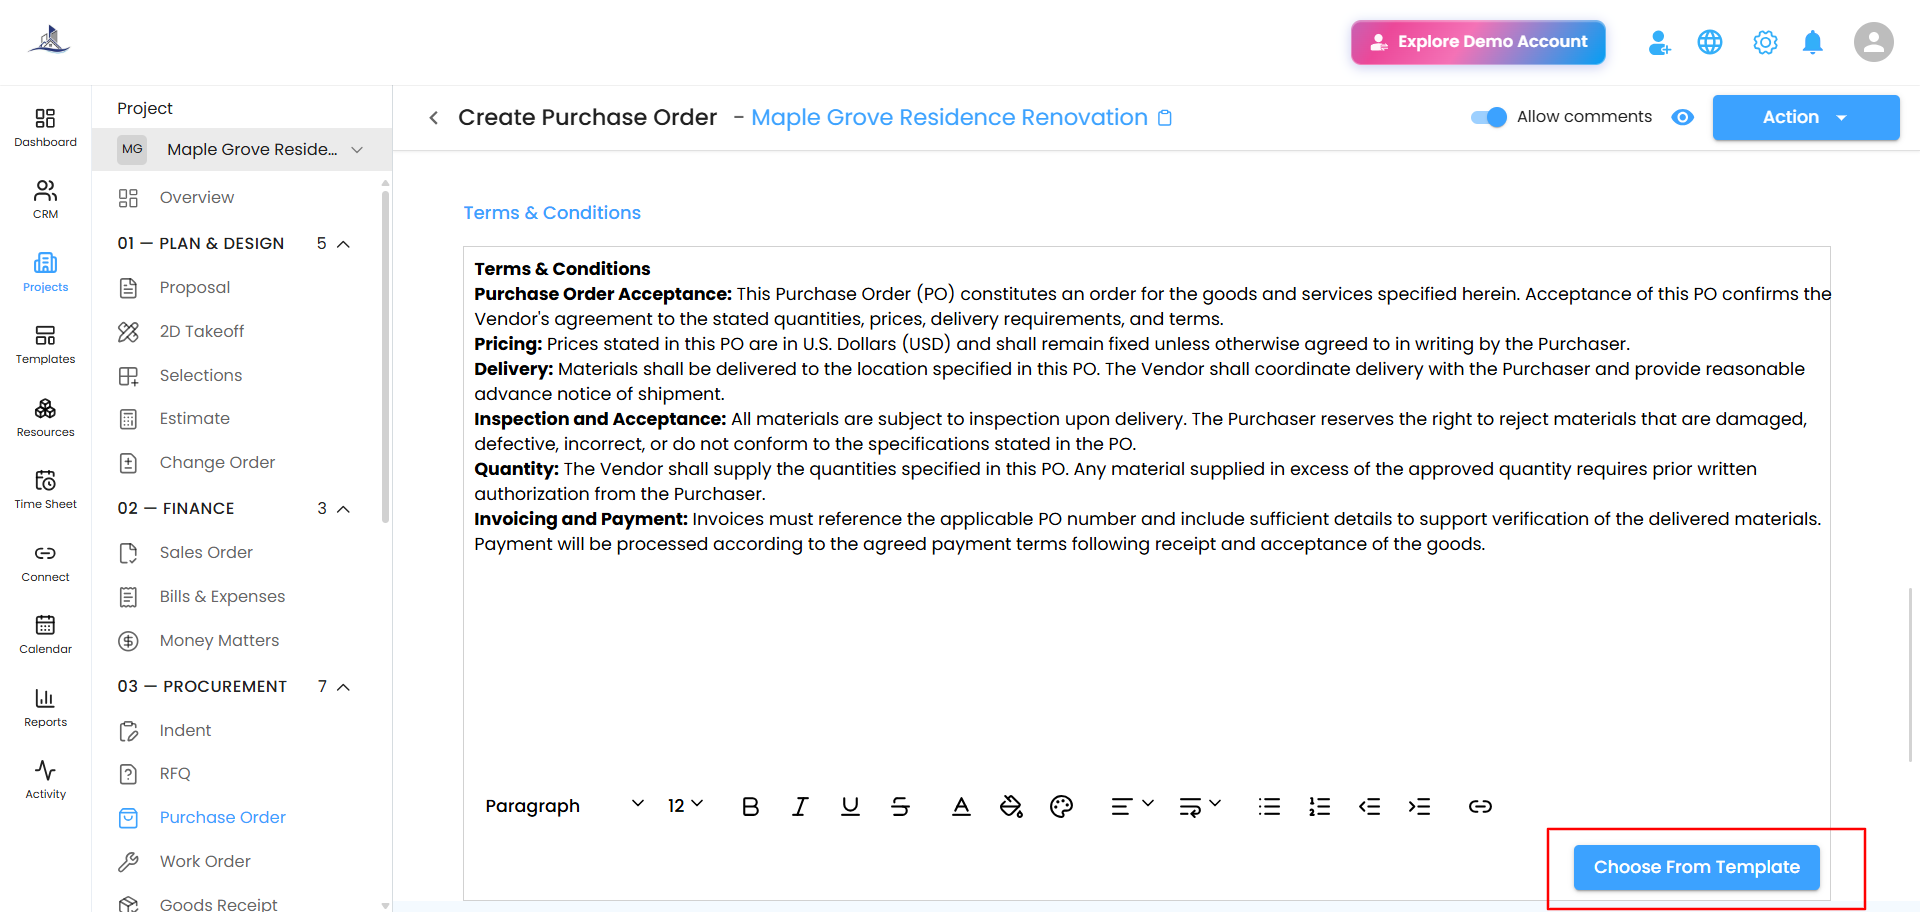
Use the editor to write your terms and conditions directly, or click Choose From Template to apply a saved template instead.
Attachments and Comments
Add any relevant attachments to the PO if needed. Toggle Allow comments at the top if you want the vendor to be able to comment on the PO.
Creating or Sending the PO
Review everything, then click Action in the top right:
- Create - saves the PO without sending it. It appears on the main Purchase Order page as a card with Approved status, ready to act on later.
- Compose Email - opens the email editor so you can write a note to the vendor, then click Send Email to send the PO directly.
Checking Received Status
Once the PO is sent, you can view it in your Purchase Order section. On the vendor's end, they'll see it in their Vendor Portal's Purchase Order section, where you can confirm they've received and acknowledged it.
Was this article helpful?
That’s Great!
Thank you for your feedback
Sorry! We couldn't be helpful
Thank you for your feedback
Feedback sent
We appreciate your effort and will try to fix the article