Create RFQ Manually
An accepted estimate can be converted into a Request for Quotation (RFQ).
This formalizes the estimate and makes it ready for vendor bidding or procurement.
How to create an RFQ from scratch?
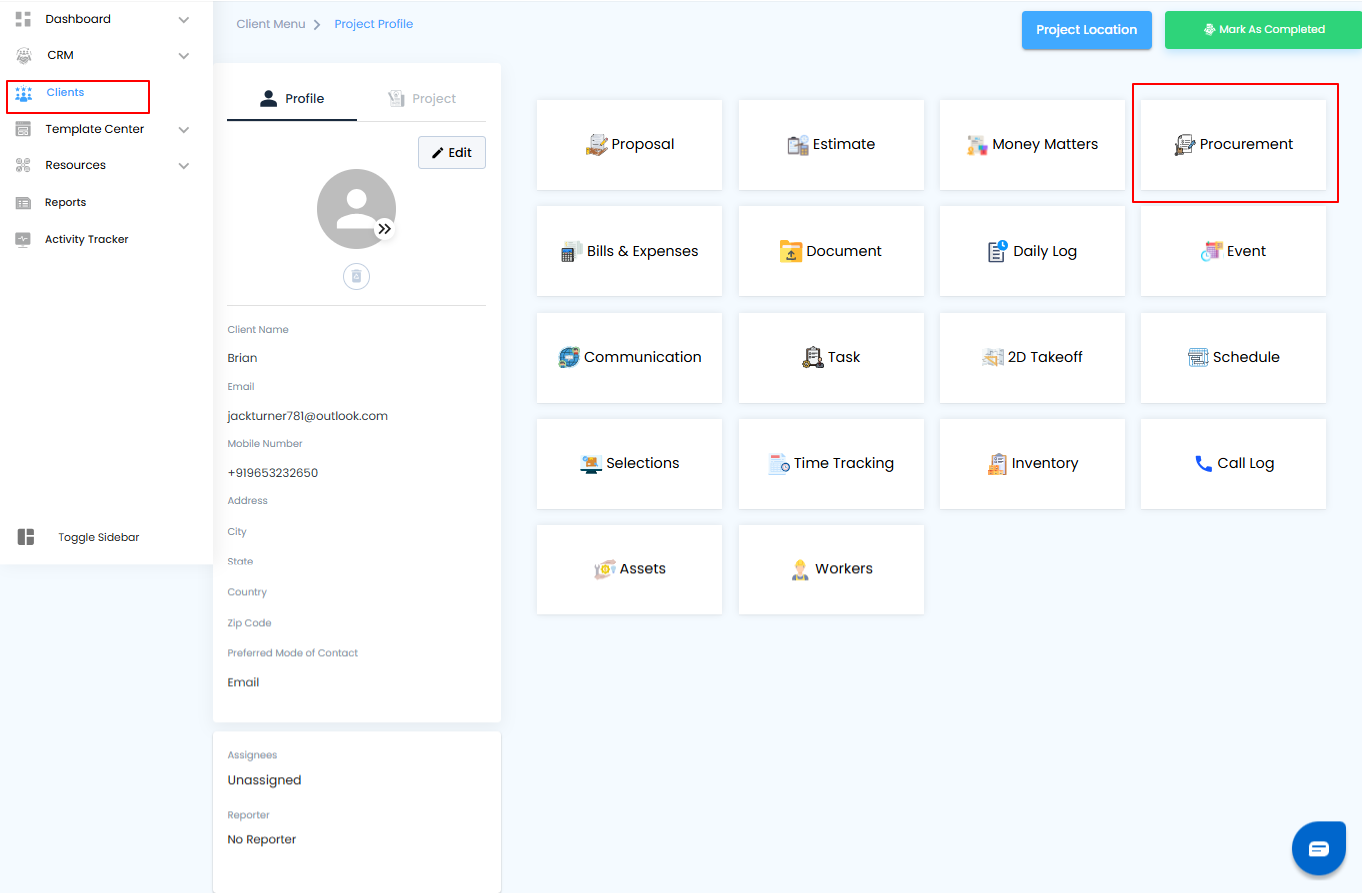
Step 1: Navigate to Procurement
- Open the Clients module from the side menu.
- From the client list, choose the specific client you want to create the RFQ for.
- Inside the client’s workspace, go to the Procurement section.
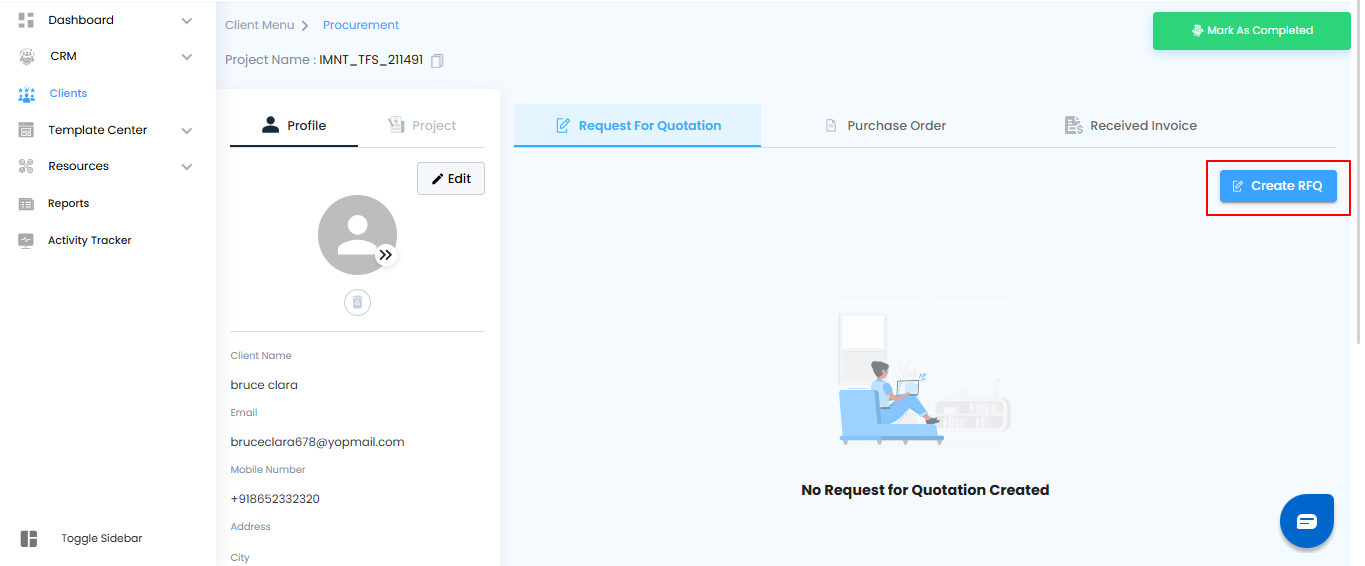
Step 2: Click on Create RFQ
- In the Procurement section, locate the Create RFQ button.
- Click this button to start drafting a new Request for Quotation.
- A form will open where you can enter all the necessary details for your RFQ.
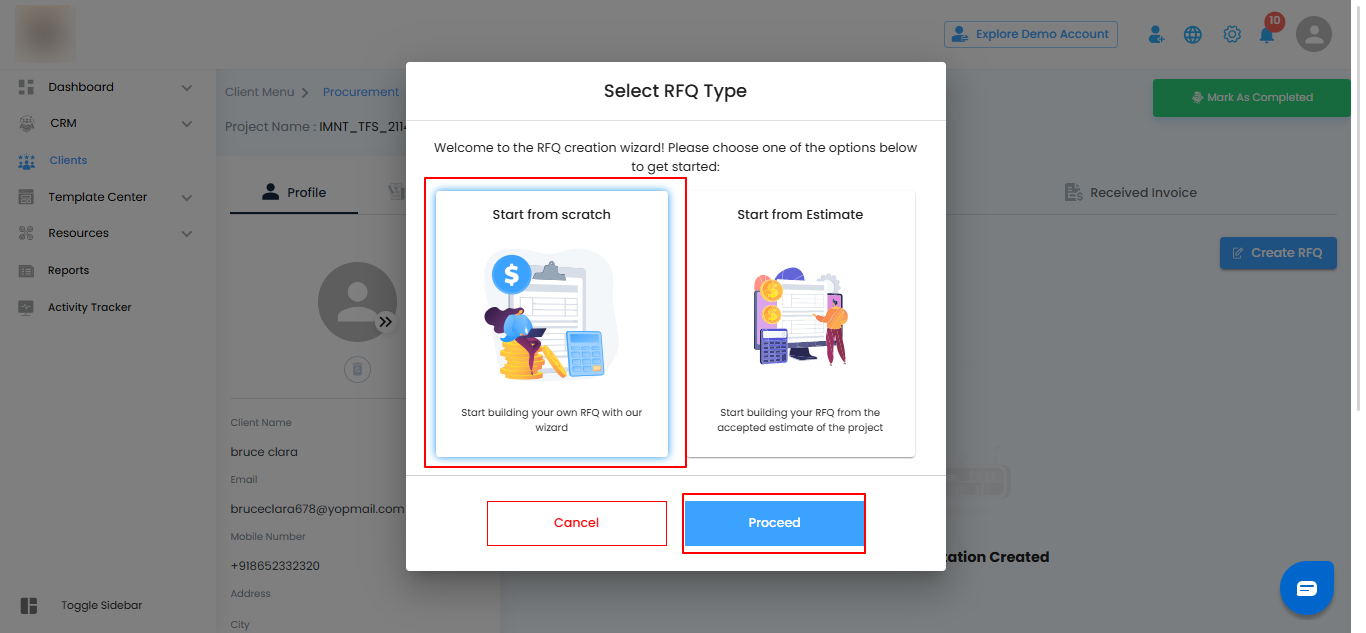
Step 3: Select RFQ Type
- From the options provided, choose Start from Scratch if you want to create a brand-new RFQ without using a template or existing data.
- Once selected, click on the “Proceed” button to continue.
- This will take you to the RFQ creation form, where you can begin entering vendor and item details.
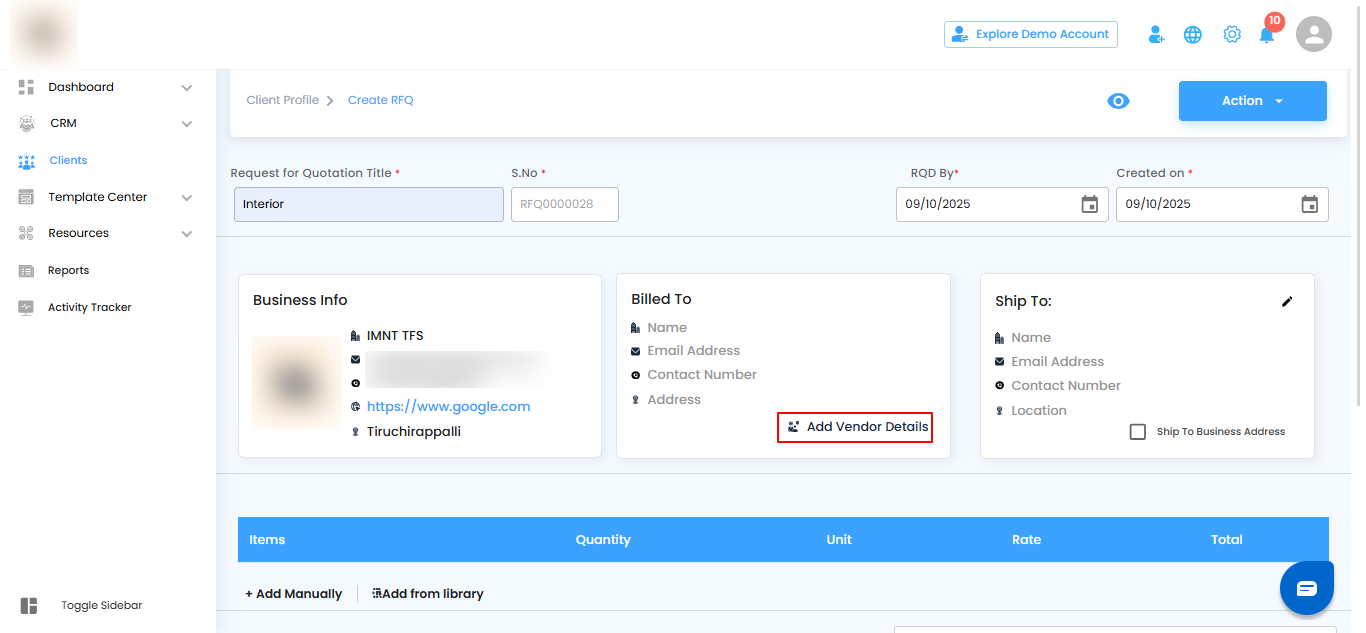
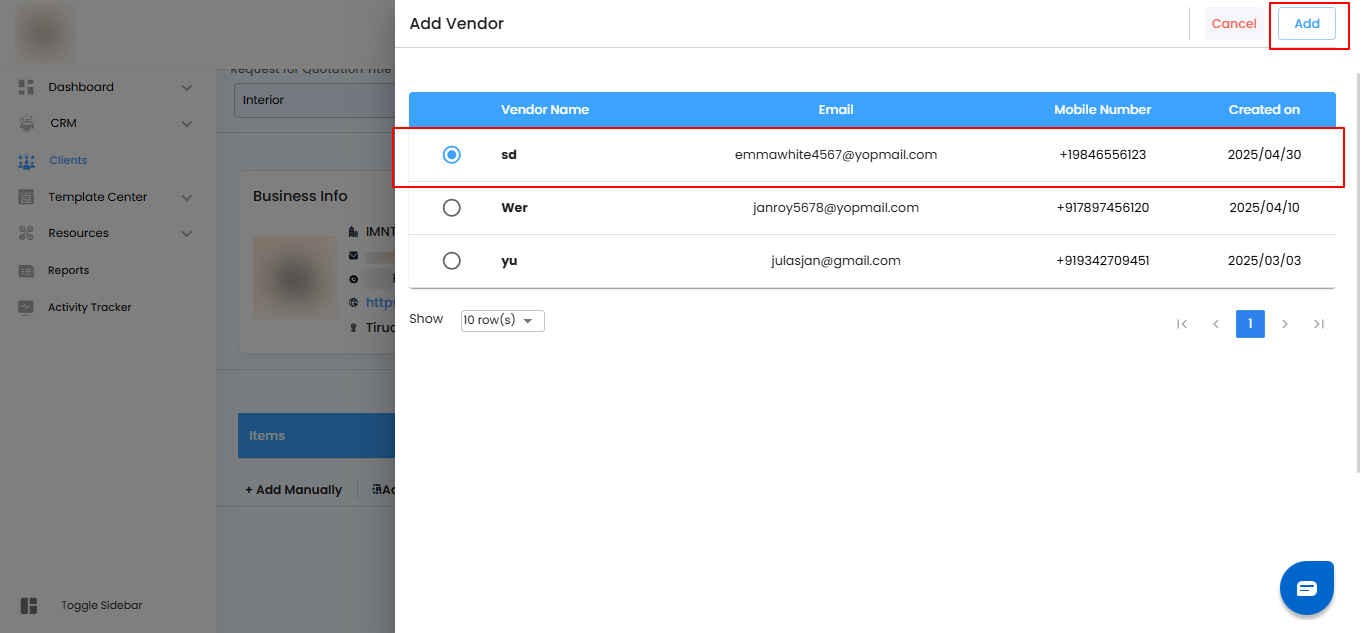
Step 4: Add Vendor Details
- In the Create RFQ window, click on the “Add Vendor Details” button.
- A list of available vendors will appear.
- From this list, select the vendor you want to include in the RFQ.
- Once selected, click the “Add” button to attach the vendor to your RFQ.
Pro Tip: You can add multiple vendors to the same RFQ, making it easier to compare quotations later.
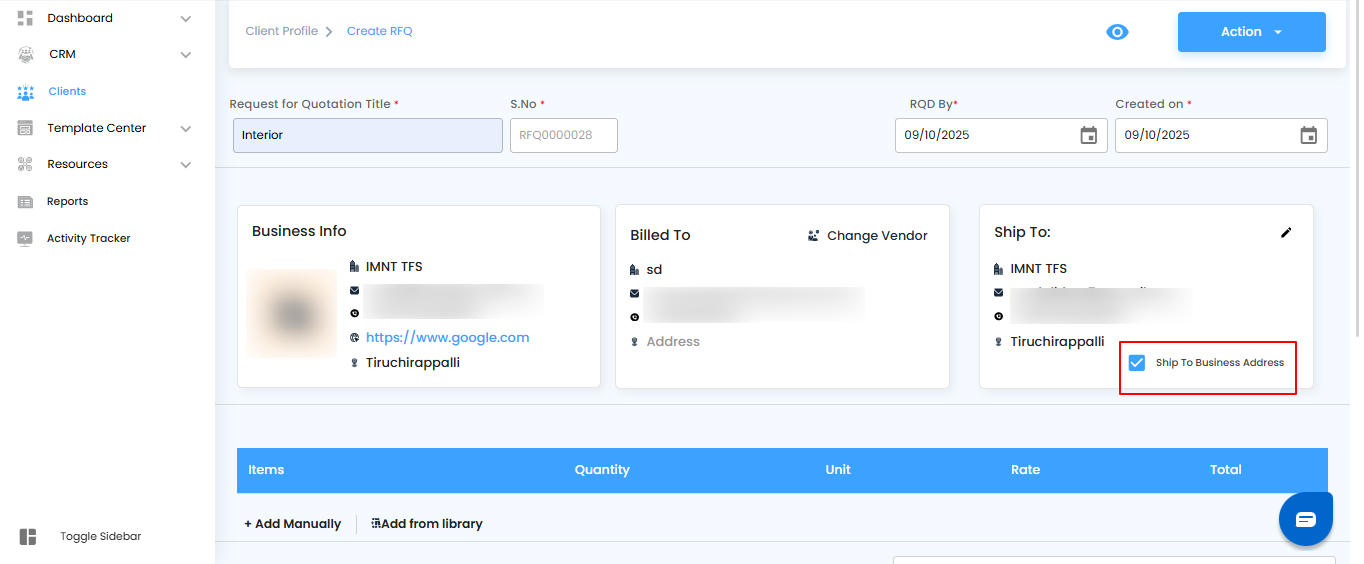
Shipping Address Option
- If you want the items to be shipped directly to your business address, select the checkbox “Ship to Business Address.”
- If left unchecked, you’ll be able to provide a different delivery address later.
Pro Tip: Use this option if most of your orders are delivered to the same location—it saves time and reduces errors.
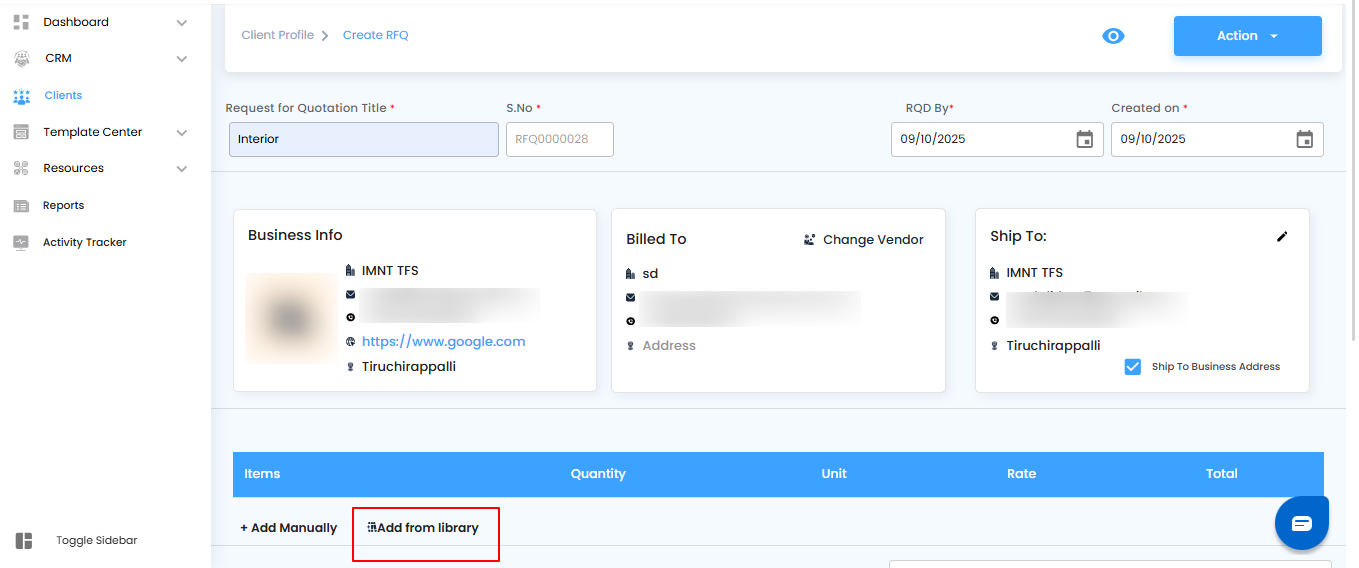
Step 6: Add Items to the RFQ
You now need to include the items that will be part of the RFQ.
You can either:
- Add Manually – Enter product details such as name, quantity, unit type, and cost.
- Select from Library – Pick items that already exist in your system for faster entry.
Pro Tip: Use the library whenever possible to maintain consistency in product names, units, and costs. Manual entry is best reserved for new or custom items.
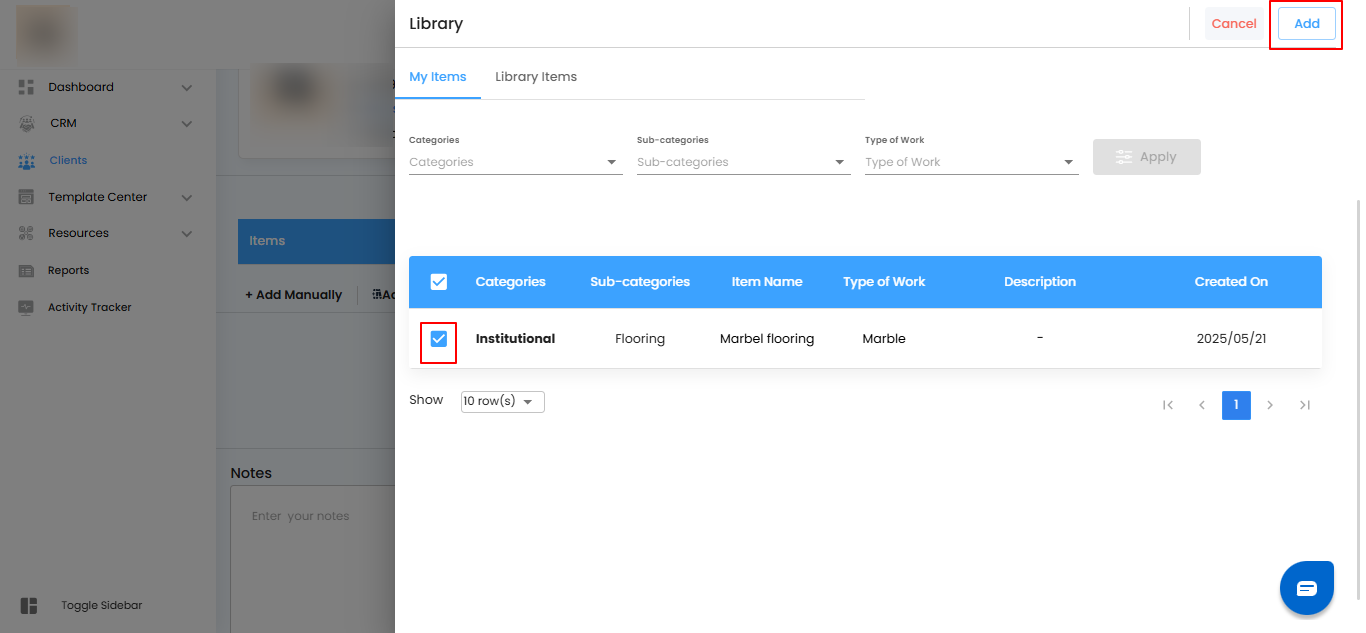
Step 7: Select Items Using Filters
- Use the available filters (such as category, product type, or name) to quickly locate the specific item you need.
- Once you’ve found the correct item, click on the “Add” button to include it in your RFQ.
Pro Tip: Applying filters saves time and reduces errors, especially when working with a large item library.
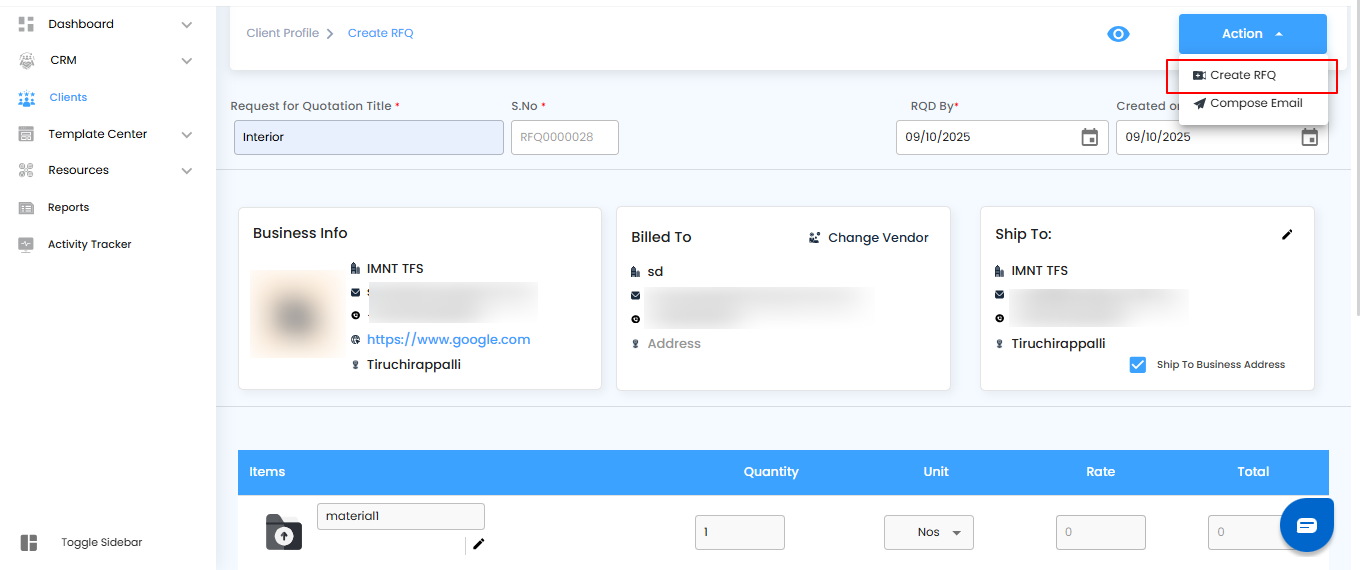
Step 8: Finalize the RFQ
- Once you’ve added all vendor details and items, click on the “Action” button.
- From the dropdown, select “Create RFQ” to generate the Request for Quotation.
Pro Tip: Double-check the vendor and item details before creating the RFQ to avoid revisions later.
Step 9: View Your RFQ
- After creation, the RFQ will automatically appear under the RFQ section.
- You can open it anytime to review details, share with vendors, or make necessary updates.
Pro Tip: Keep track of all active RFQs in the RFQ section to streamline vendor communication and procurement decisions.
Was this article helpful?
That’s Great!
Thank you for your feedback
Sorry! We couldn't be helpful
Thank you for your feedback
Feedback sent
We appreciate your effort and will try to fix the article