Turning a Request for Quotation (RFQ) into a Purchase Order (PO) is like moving from planning to action everything you’ve prepared is now ready to be officially ordered.
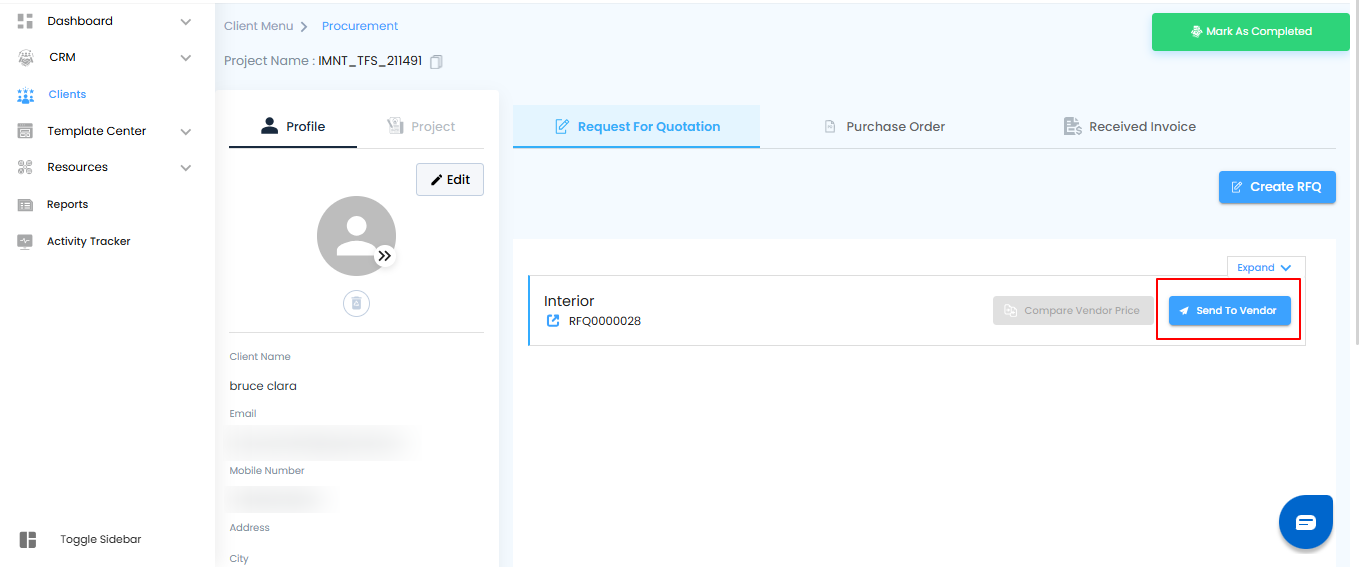
Step 1: Share the RFQ with Your Vendor
Think of this step as sending your shopping list to the supplier so they know exactly what you need.
What You Can Do Here
- Select the Client – From the sidebar, navigate to Client and choose the specific client whose RFQ you want to share.
- Go to Procurement – Open the Procurement section to access all RFQs related to that client.
- Send the RFQ – Find the RFQ you want to share and click the “Send to Vendor” button. This sends a direct link to the vendor so they can review and respond.
Pro Tip: Before sending, double-check the RFQ details—item quantities, specifications, and deadlines to make sure the vendor receives accurate information.
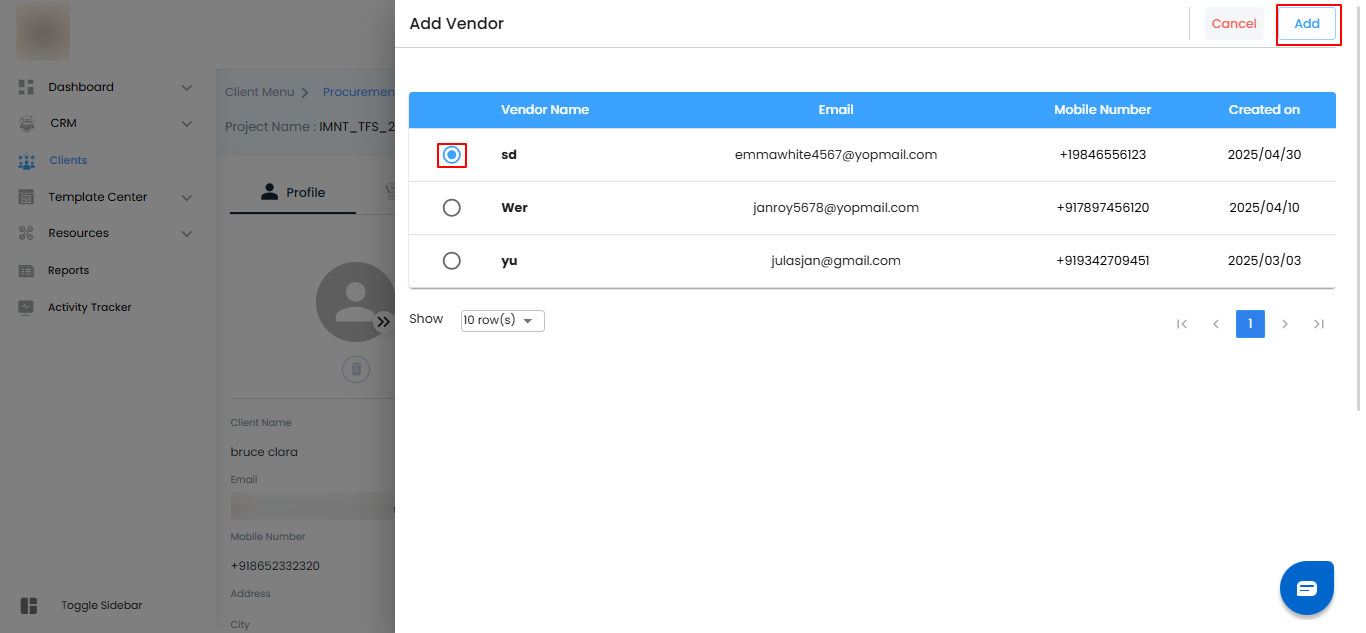
Step 2: Select the Vendor
This step is like picking the right supplier for your shopping list—making sure your RFQ reaches the right hands.
What You Can Do Here
- Choose the Vendor – From the list, select the vendor you want to share the RFQ with.
- Click “Add” – Once selected, hit the “Add” button to confirm your choice and include the vendor in the RFQ sharing process.
Pro Tip:
If you work with multiple vendors, double-check you’ve selected the correct one to avoid sending the RFQ to the wrong recipient.
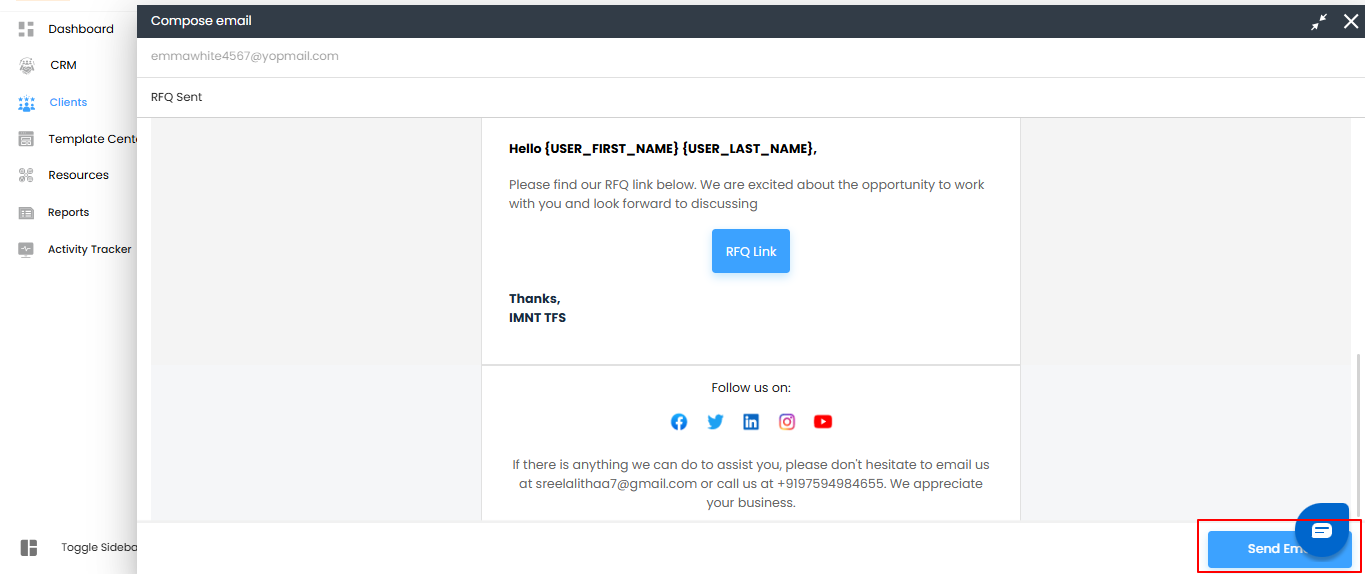
Step 3: Compose and Send the Email
Think of this step as putting together a quick note to your vendor—clear, concise, and ready to go.
What You Can Do Here
- Compose the Email – Write a message to accompany the RFQ link. Include any important instructions or details the vendor should know.
- Click “Send Email” – Once your message is ready, hit the “Send Email” button to share the RFQ with the selected vendor.
Pro Tip:
Keep the email clear and to the point. Highlight deadlines or special instructions so the vendor can respond promptly and accurately.
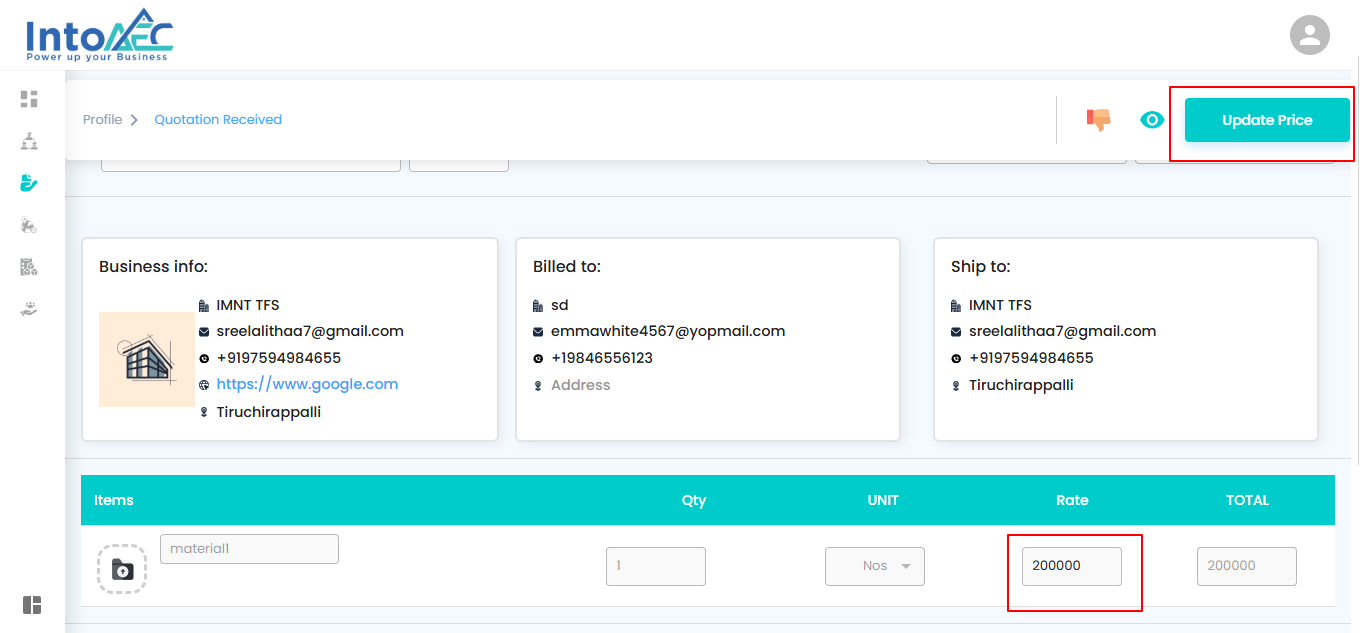
Step 4: Vendor Updates the Price
This step is like filling in the price tags on your shopping list—vendors provide the exact rates for the items you requested.
What You Can Do Here
- Open the RFQ Link – As a vendor, go to your inbox, click the RFQ link, and then select the “RFQ Link” button.
- Update the Quotation – On the Quotation Received page, enter the updated rates for each item.
- Click “Update Price” – Once all rates are entered, click the “Update Price” button to submit your quotation.
Pro Tip:
Double-check all rates and quantities before updating to ensure accuracy and avoid revisions later.
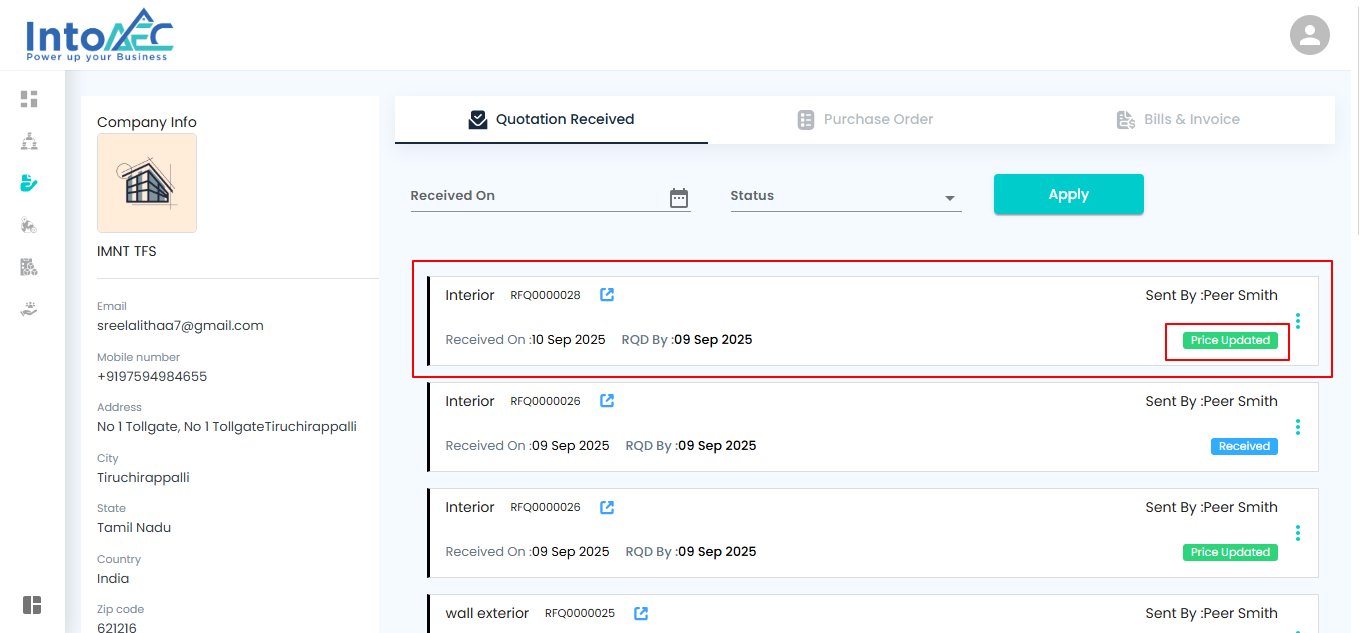
Step 5: Verify Updated Prices in the RFQ
Think of this step as checking your shopping list to make sure all the price tags are correctly filled in.
What You Can Do Here
- Open the RFQ – Navigate to the RFQ section for the relevant request.
- Check Price Updates – Confirm that the prices updated by the vendor are correctly displayed in the RFQ.
Pro Tip:
Review the updated prices carefully before proceeding to create a Purchase Order to avoid any discrepancies.
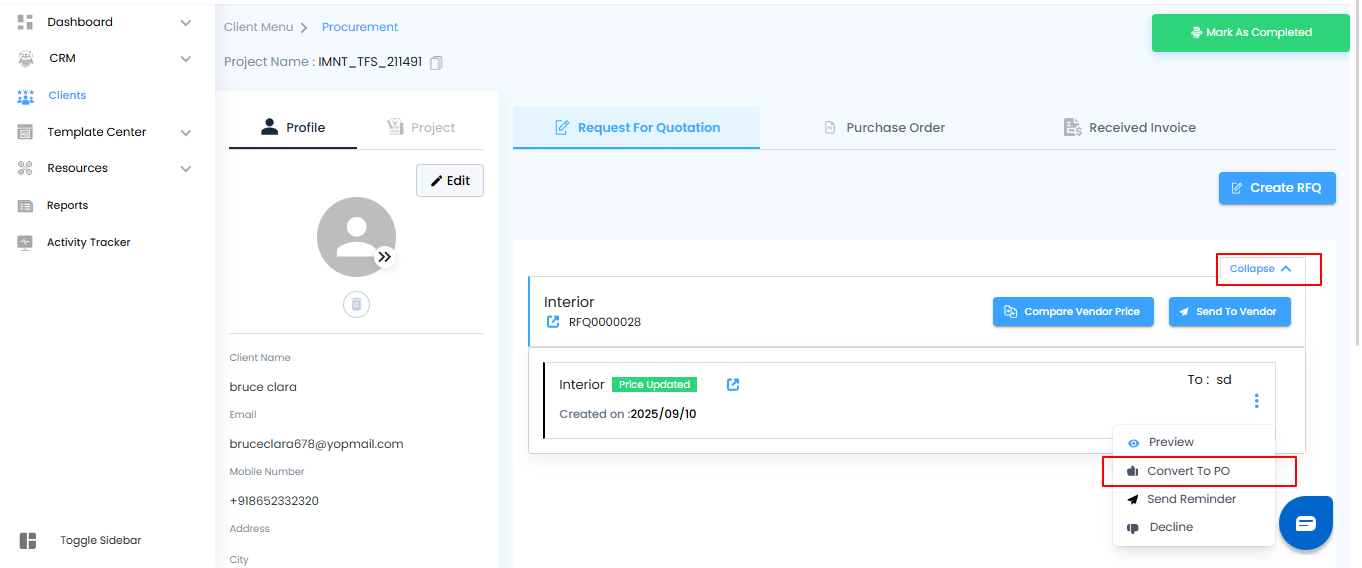
Step 6: Convert the RFQ into a PO
This step is like finalizing your order—everything is confirmed, and it’s ready to become an official Purchase Order.
What You Can Do Here
- Select the Client – From the sidebar, go to Client and choose the specific client for whom you’re processing the RFQ.
- Go to Procurement – Open the Procurement section to view all RFQs.
- Convert to PO – Find the RFQ with updated prices, click on it, and then select the “Convert to PO” button to finalize the Purchase Order.
Pro Tip:
Before converting, quickly verify that all prices and quantities are correct to ensure a smooth transition from RFQ to PO.
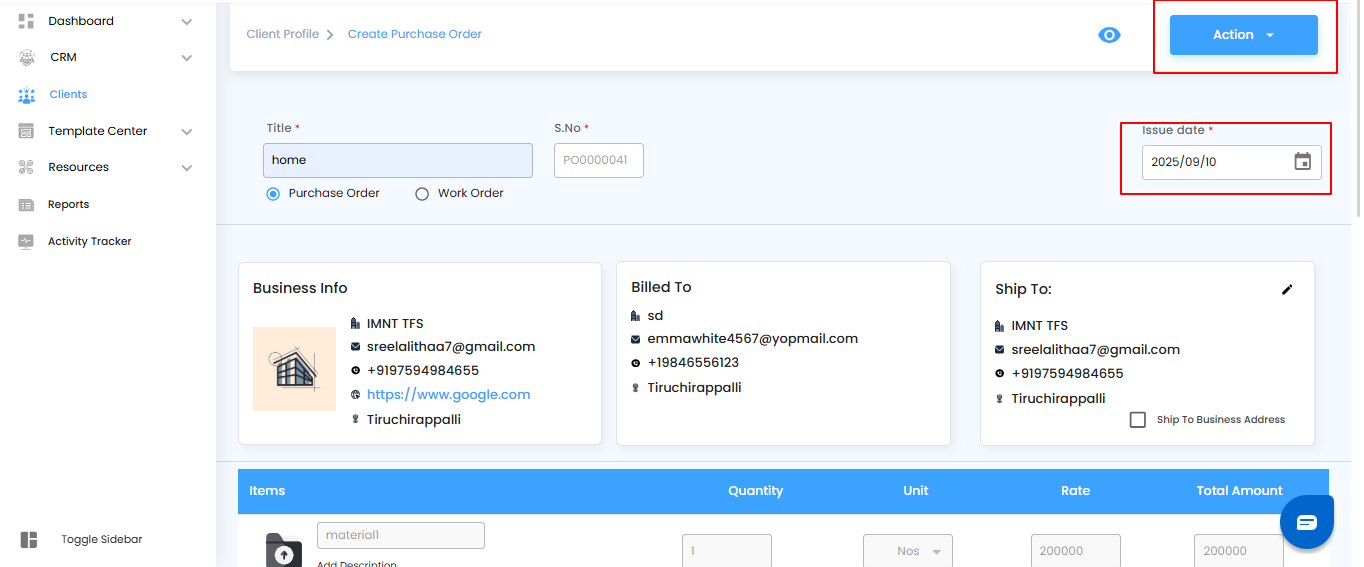
Step 7: Add Details in the Purchase Order
Think of this step as filling in the final details before confirming your order—simple, yet important for proper tracking.
What You Can Do Here
- Add “Issued On” Date – In the Create Purchase Order page, enter the date when the PO is officially issued.
- Click the “Action” Button – After entering the date, click “Action” to proceed.
- Optional Fields – You can also add a Work Order or Terms and Conditions if needed, but these are not mandatory.
Pro Tip:
Accurate “Issued On” dates help track timelines and ensure clarity between your team and the vendor
.
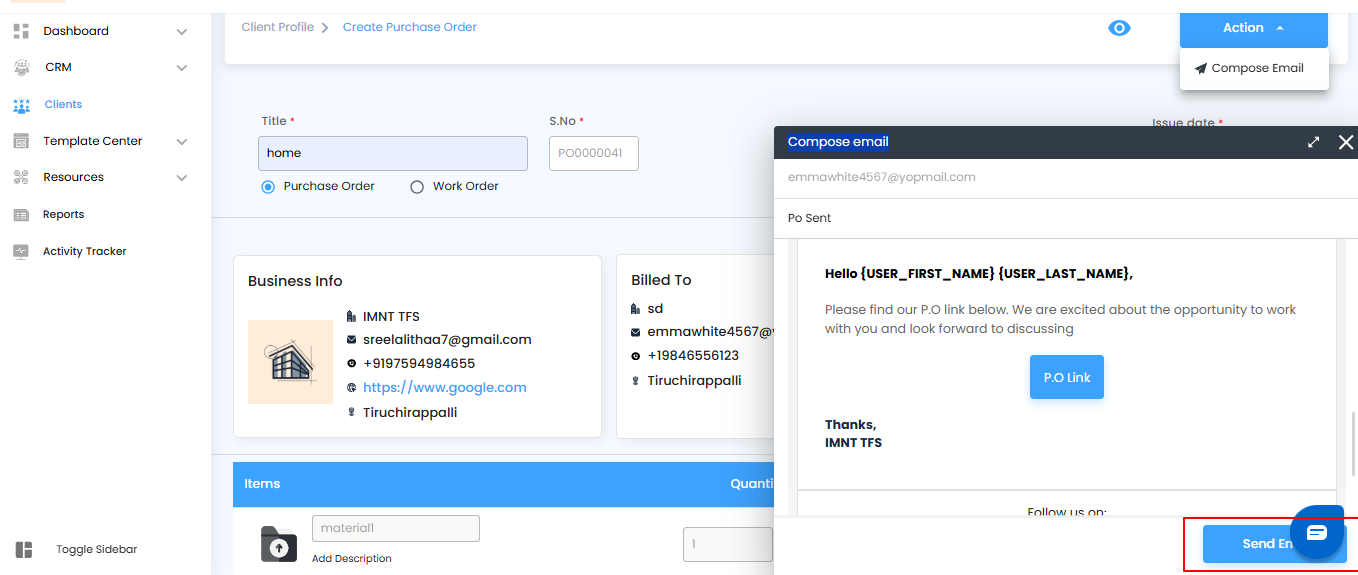
- Click on "compose email"
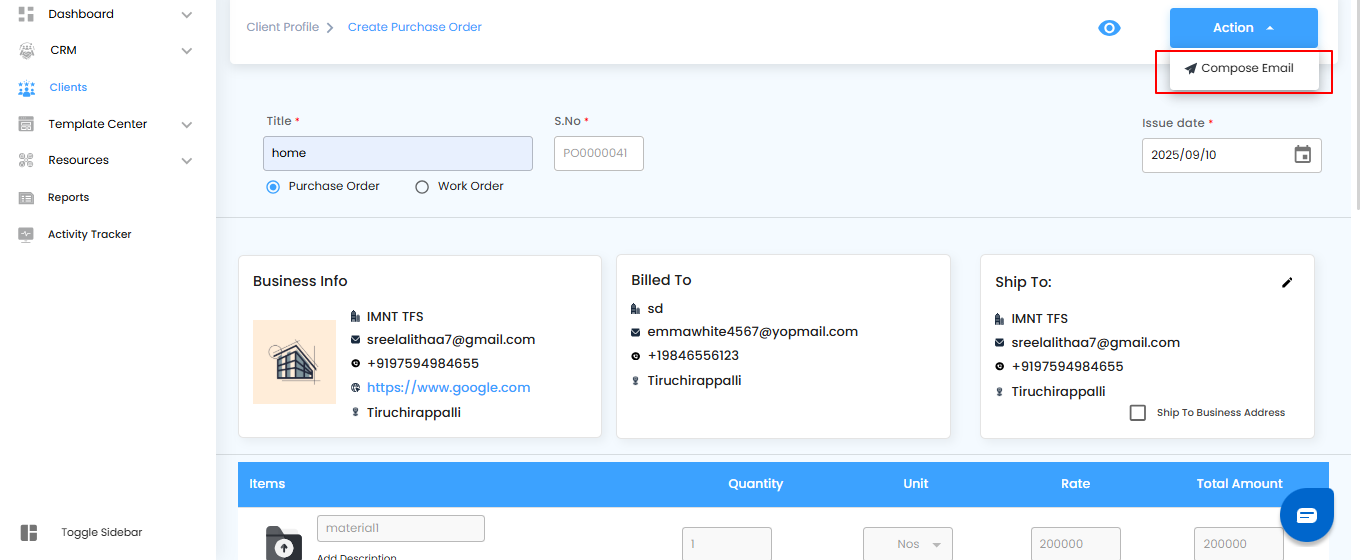
Step 8: Send the Purchase Order Email
This step is like officially handing over your order to the vendor—making sure they have everything they need to proceed.
What You Can Do Here
- Click “Send Email” – Once your PO details are complete, hit the “Send Email” button to share the Purchase Order with the vendor.
Pro Tip:
Quickly review the PO one last time before sending to ensure all details, including items, quantities, and dates, are accurate.


Was this article helpful?
That’s Great!
Thank you for your feedback
Sorry! We couldn't be helpful
Thank you for your feedback
Feedback sent
We appreciate your effort and will try to fix the article