How to Create a Selection in IntoAEC
Think of Selections in IntoAEC as your project’s smart folders — curated spaces where you can neatly organize items, client data, or elements for faster access and smoother management.
Whether you’re planning materials, capturing client choices, or preparing reports, Selections give you the structure and clarity you need to keep projects on track.
Click Create Selection
Head over to the Selections page.
Spot the glowing Create Selection button and click it.
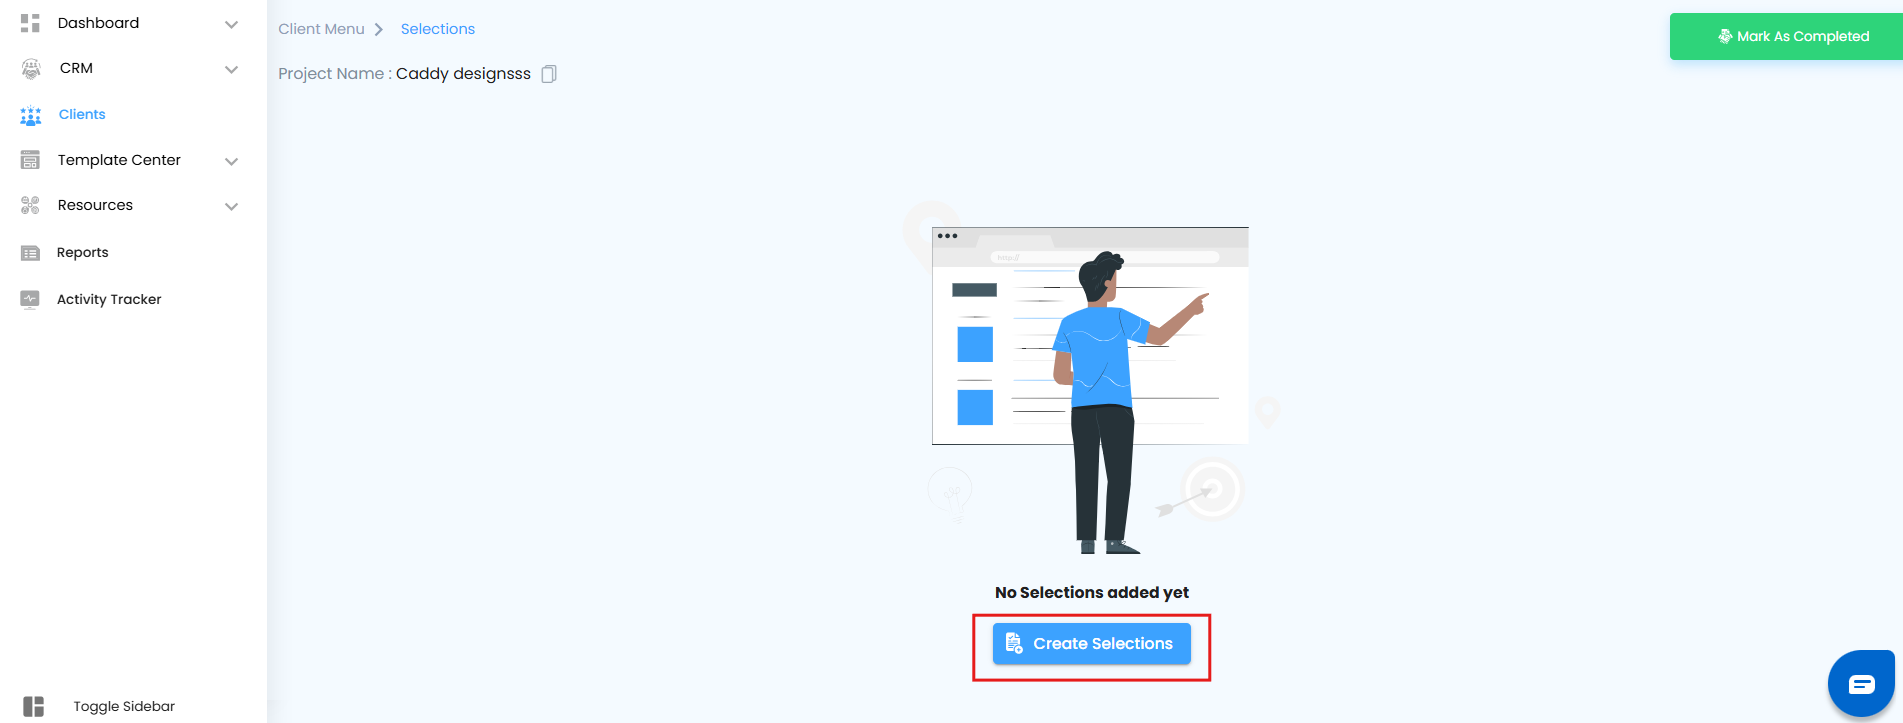
A sleek Create Selection popup slides in — ready for you to bring your new Selection to life.
Enter the Selection Details
In the popup, type in a Selection Name that instantly tells you what’s inside.
Examples: Lobby Flooring Options, Lighting Package A, Paint Choices – Client X.Hit the Create button to save.
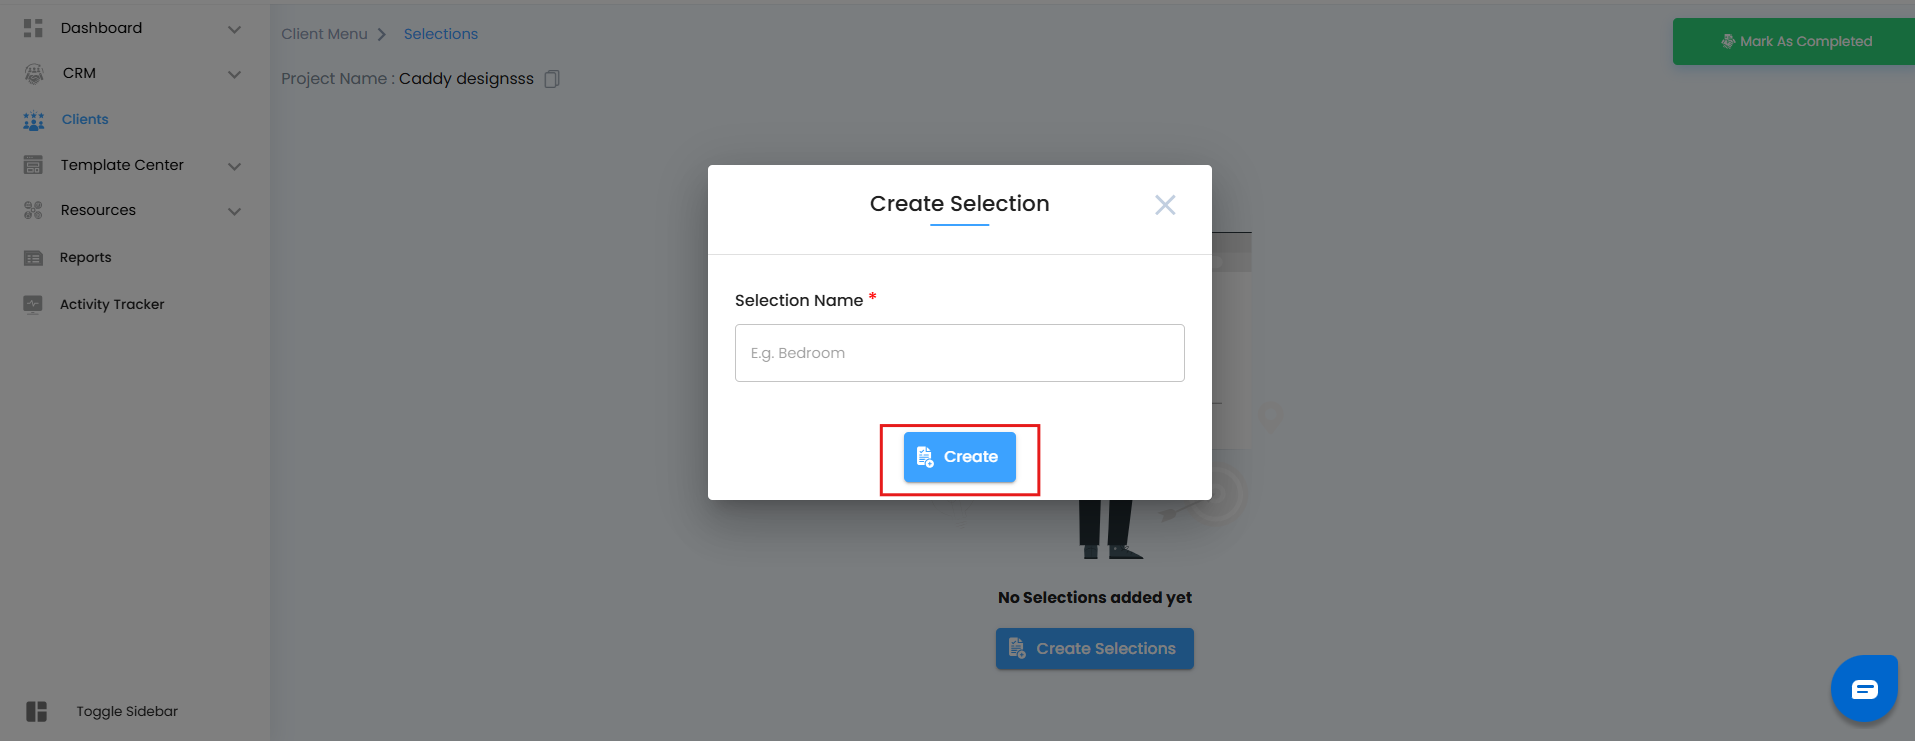
Like magic, your new Selection Card appears — ready to be managed!
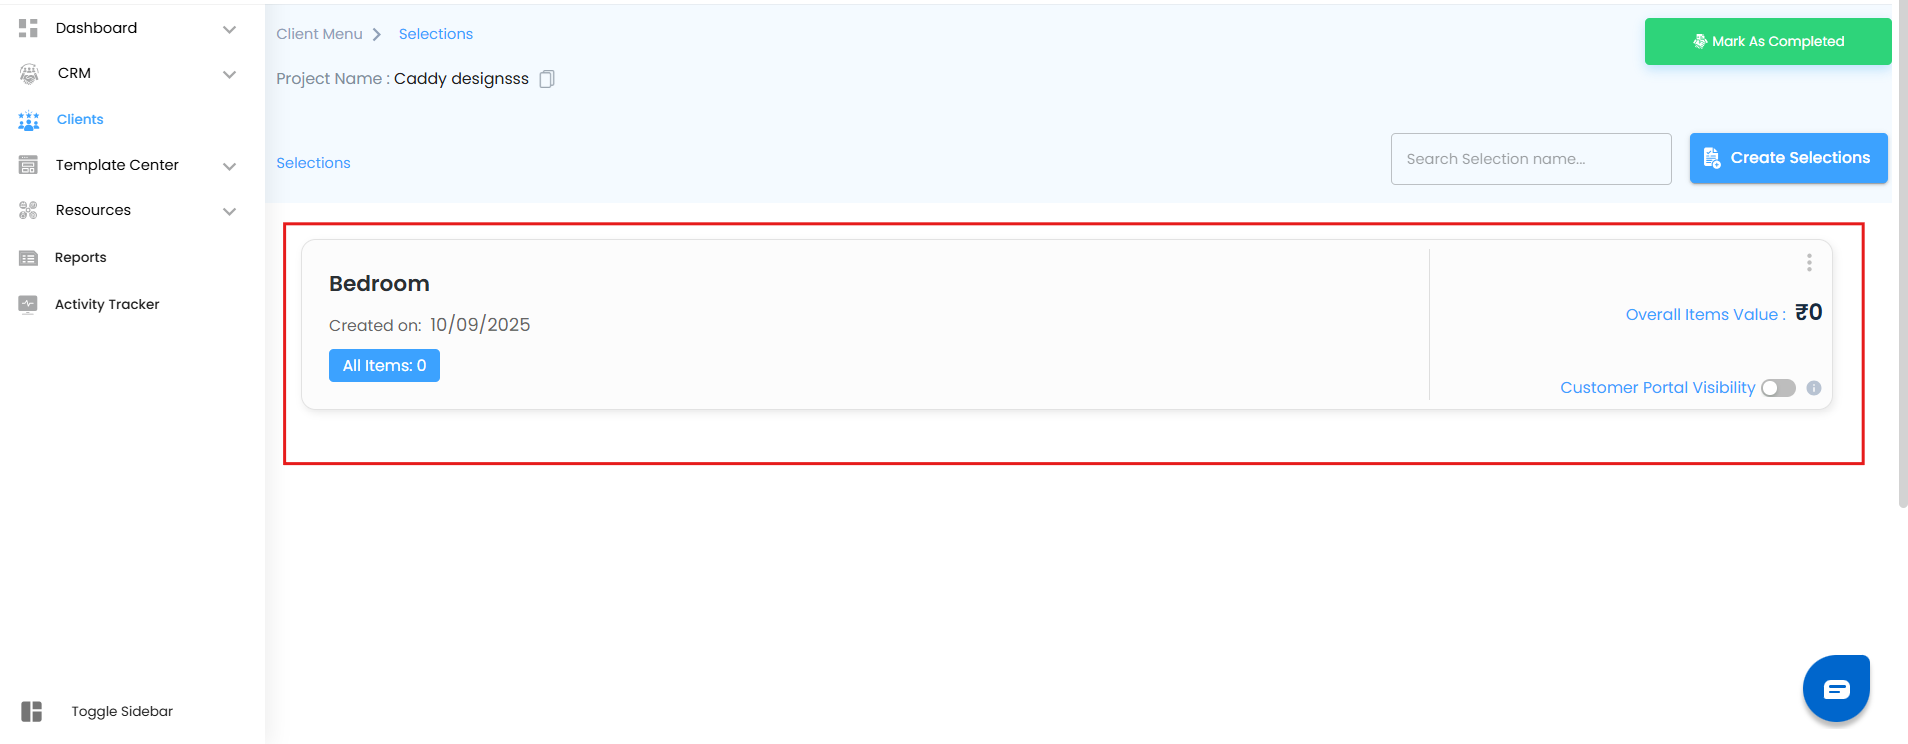
Explore Your Selection Card
Your Selection Card isn’t just a label — it’s your mini control panel. Here’s what it holds:
Selection Name – The title you set.
Created On – When it was born.
All Items – Tracks the total items (starts at 0 until you add something).
Overall Items Value – Calculates the total worth of all items in the selection.
Customer Portal Visibility Toggle – Decide whether your client sees this selection in their portal.
Action Menu (⋮) – Your toolbox for renaming or deleting the selection.
Manage Your Selection
Take control of your selection anytime:
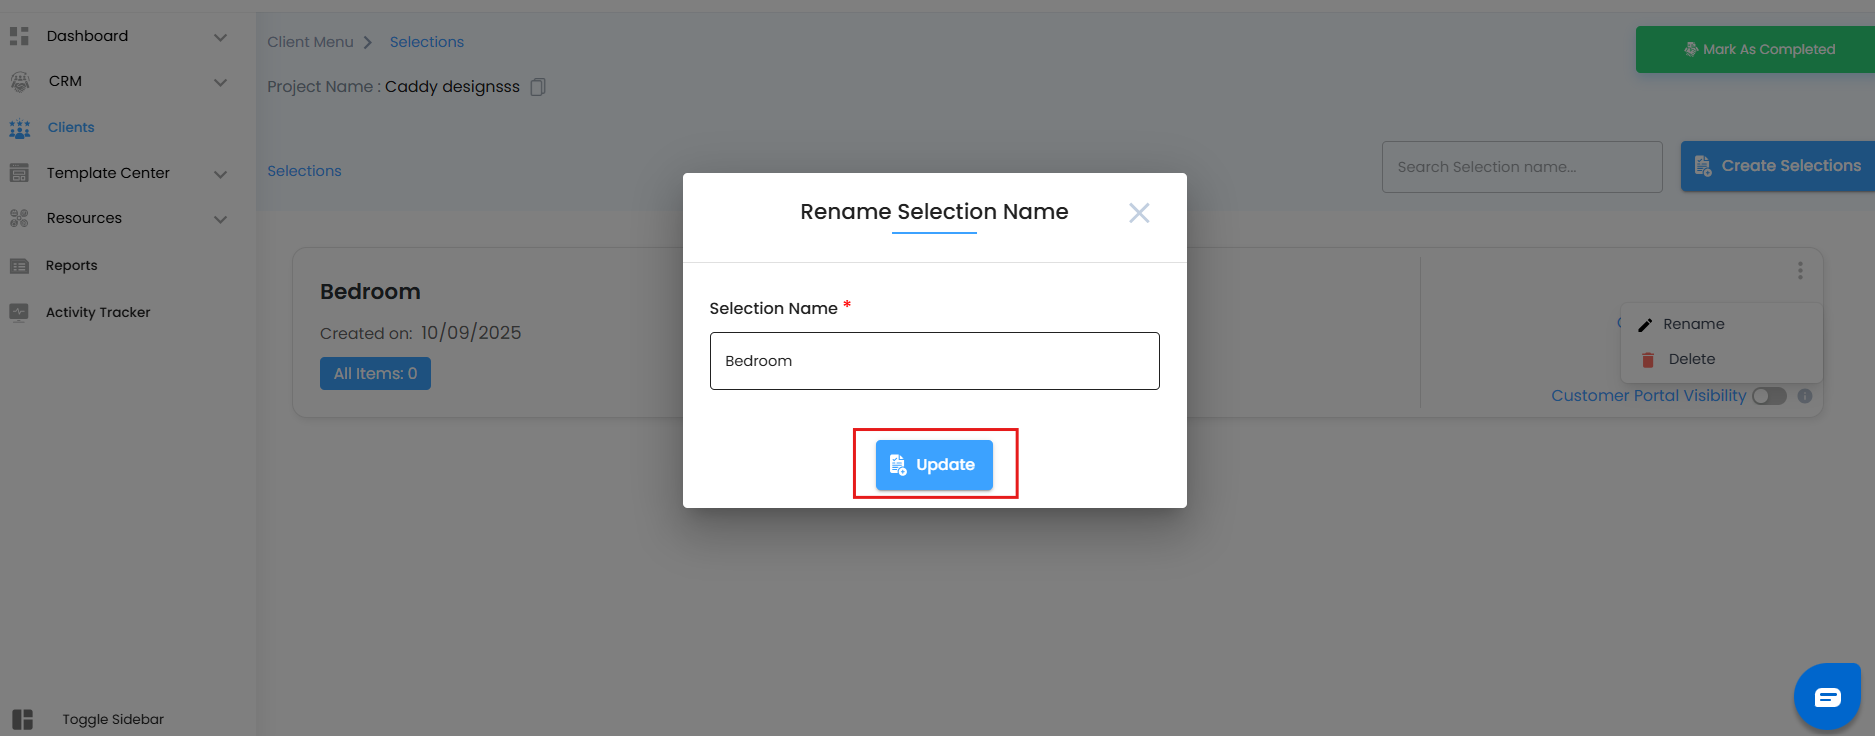
Rename Selection
Click Rename from the action menu.
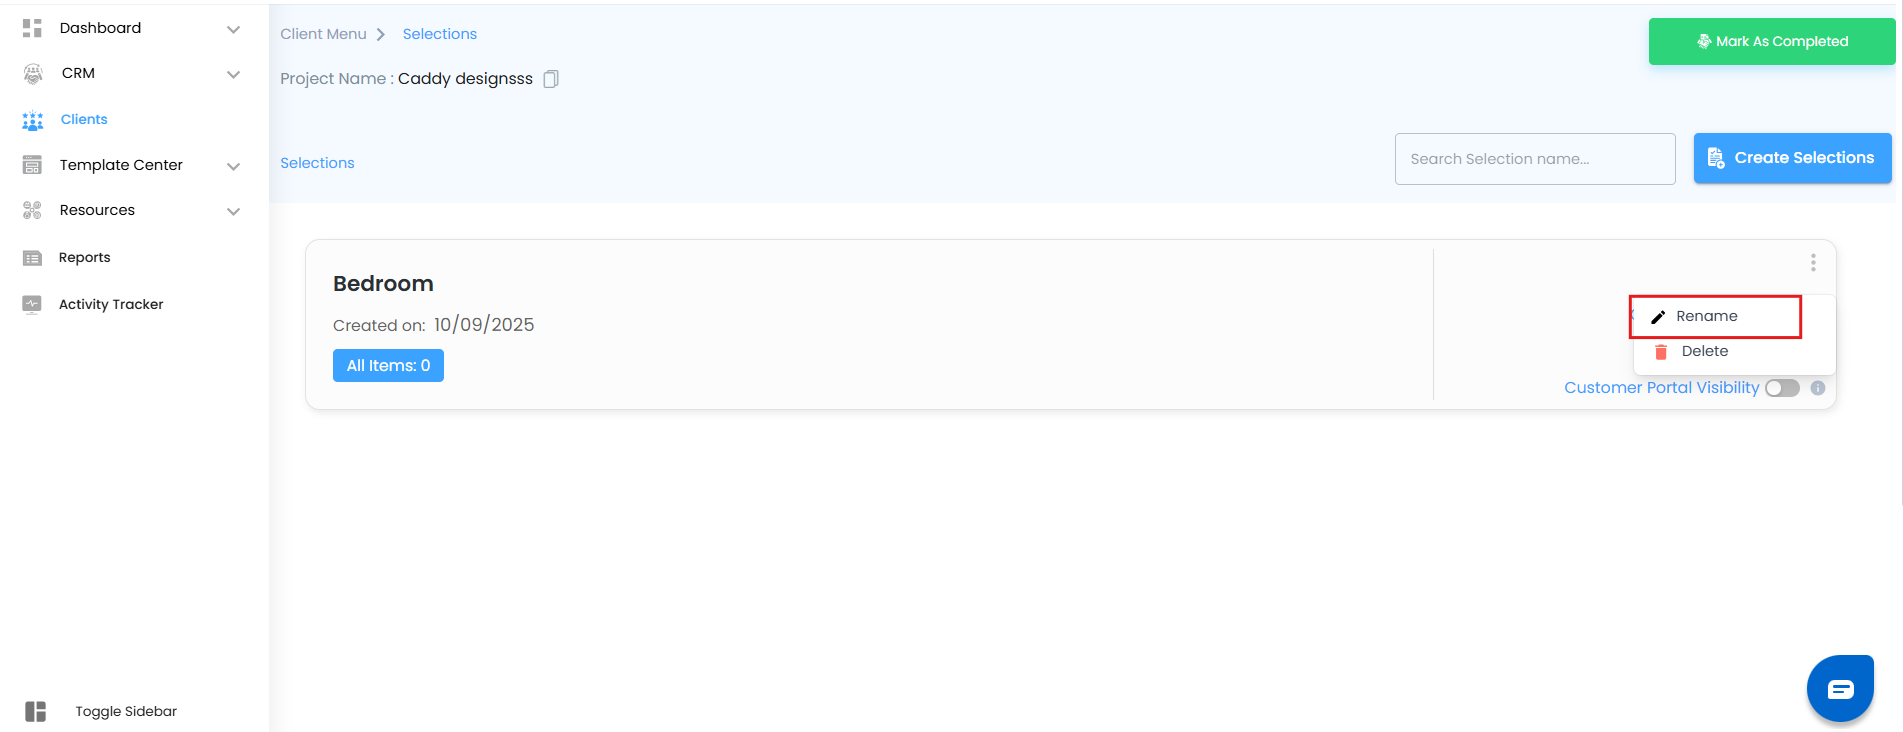
A Rename Selection popup opens — update the name and hit Update.
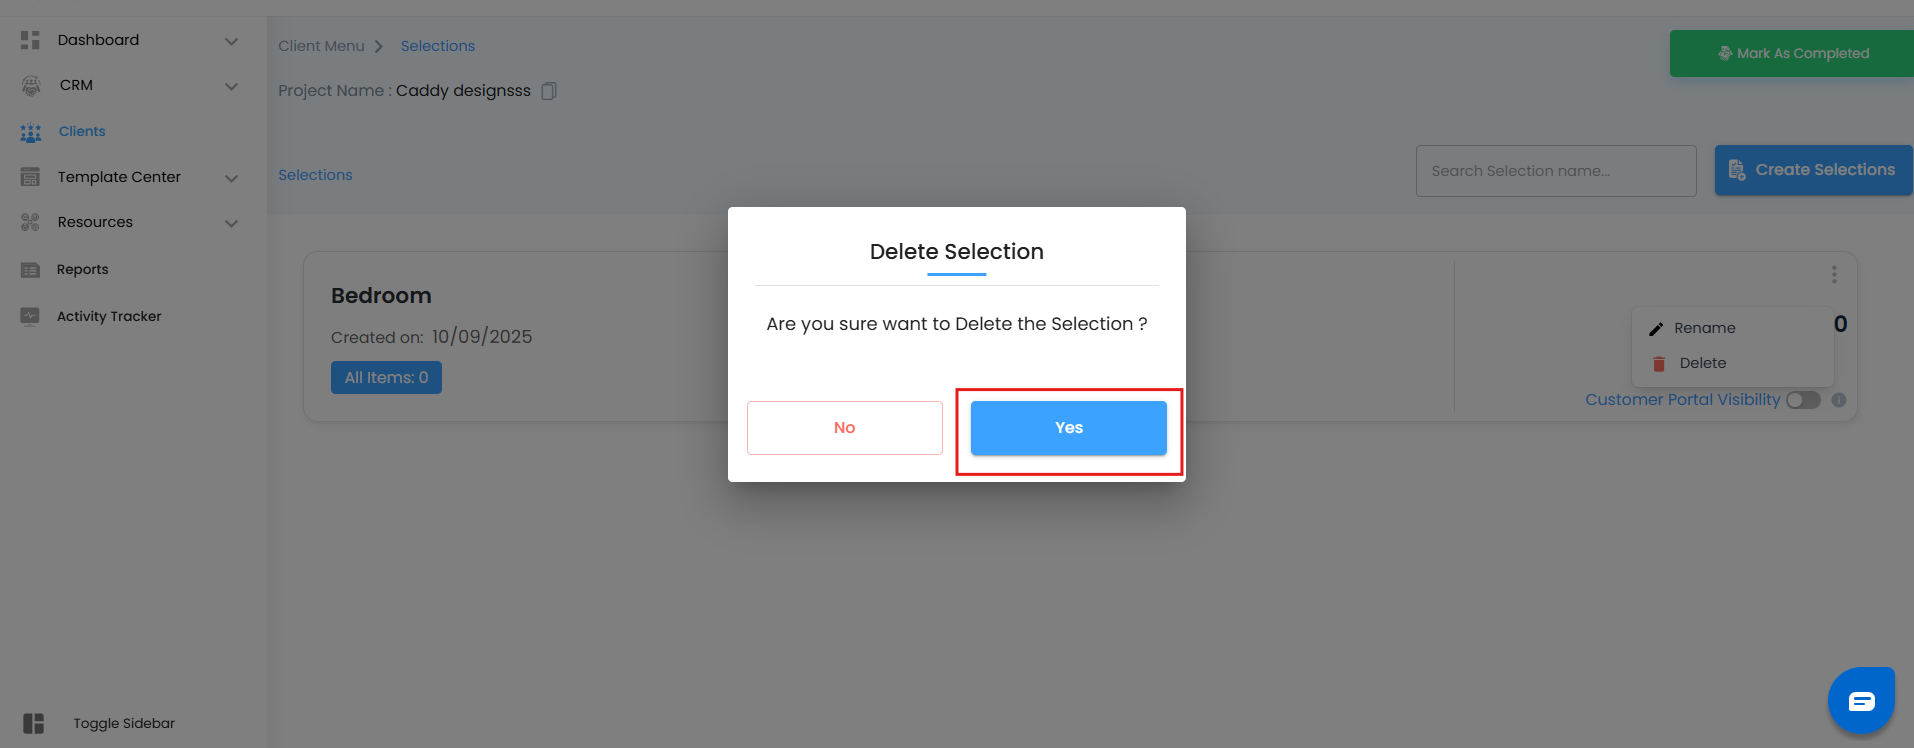
Delete Selection
Click Delete from the action menu.

A confirmation popup appears with the message:
“Are you sure you want to delete this selection?”
Yes → Permanently removes it (no undo).
No → Cancels and keeps it safe.
Search Your Selections Effortlessly
Use the Search Selection Name field to locate any selection in seconds.
Just type part of the name or a keyword — and boom, the correct card appears instantly.
Always double-check before renaming or deleting. These changes directly affect how your team organizes and tracks project data — so a little caution goes a long way.
With these steps, your Selections become structured, searchable, and client-ready. From estimation to planning to decision-making — everything becomes smoother, faster, and error-free.
Selections aren’t just lists… they’re your project’s decision hubs .
Was this article helpful?
That’s Great!
Thank you for your feedback
Sorry! We couldn't be helpful
Thank you for your feedback
Feedback sent
We appreciate your effort and will try to fix the article