Managing Payments in the Payments Tab
The Payments Tab under Money Matters allows you to record and track all payments related to your invoices. From registering payments to requesting them or reviewing payment history, everything is centralized in one place.
No Payments Yet?
If no payments have been recorded for an invoice, a "No Data Found" vector will be displayed to indicate that no payment entries exist yet.
Using the Action Dropdown
Next to each invoice entry, there is an Action Dropdown. Clicking this will show the following options:
Register Payment – To record a payment received from the client.
Request Payment – To send a payment request notification.
View Payment Details – To see the history and breakdown of payments made.
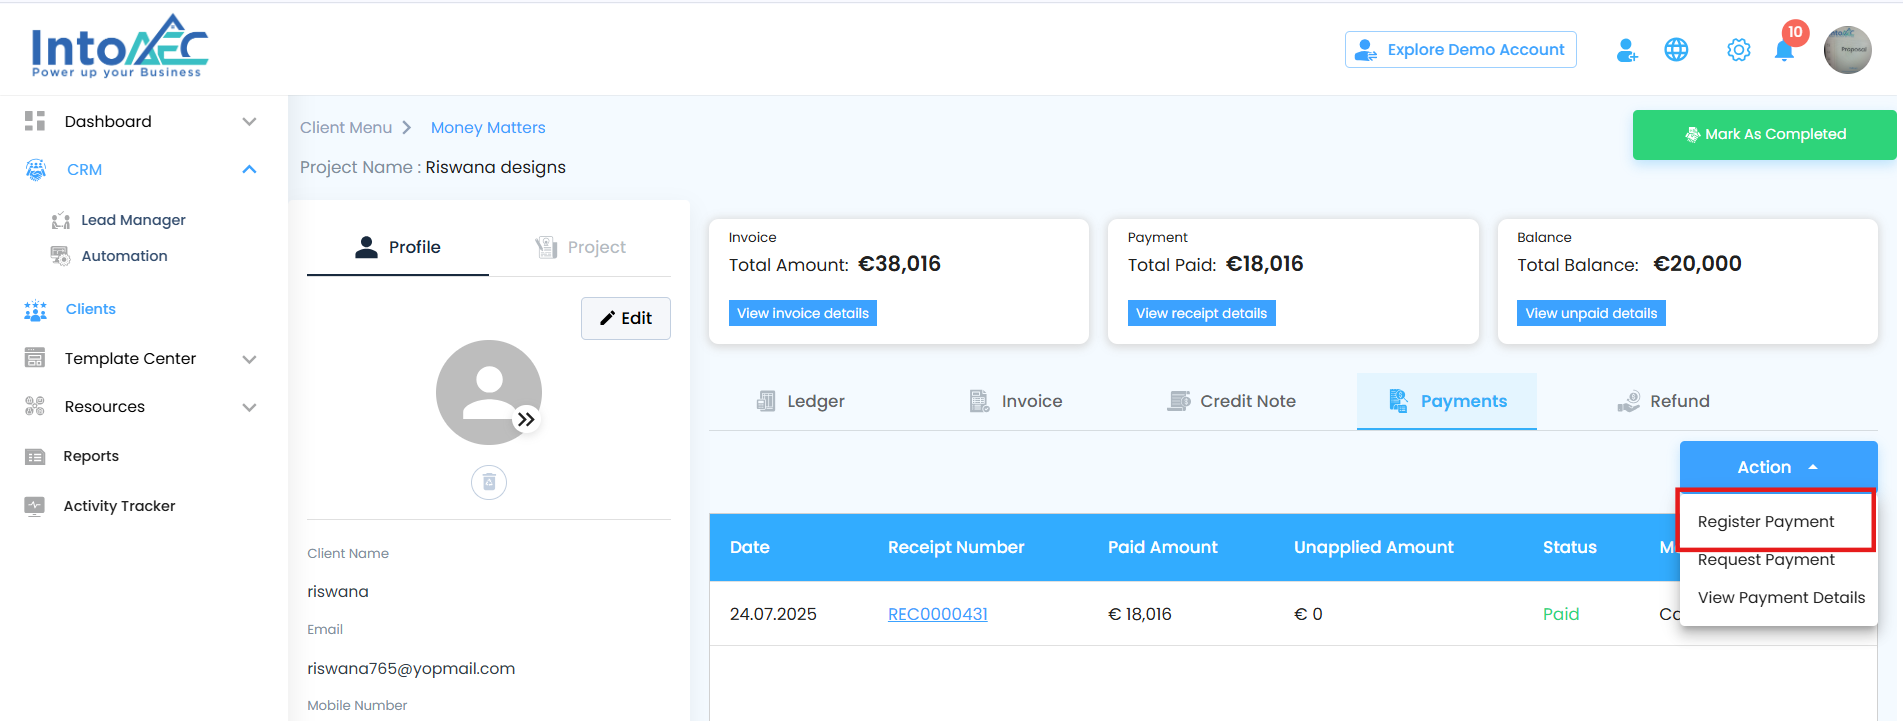
Registering a Payment
To record a payment manually:
Click on the Action Dropdown and select Register Payment.
This opens the Register Payment page.
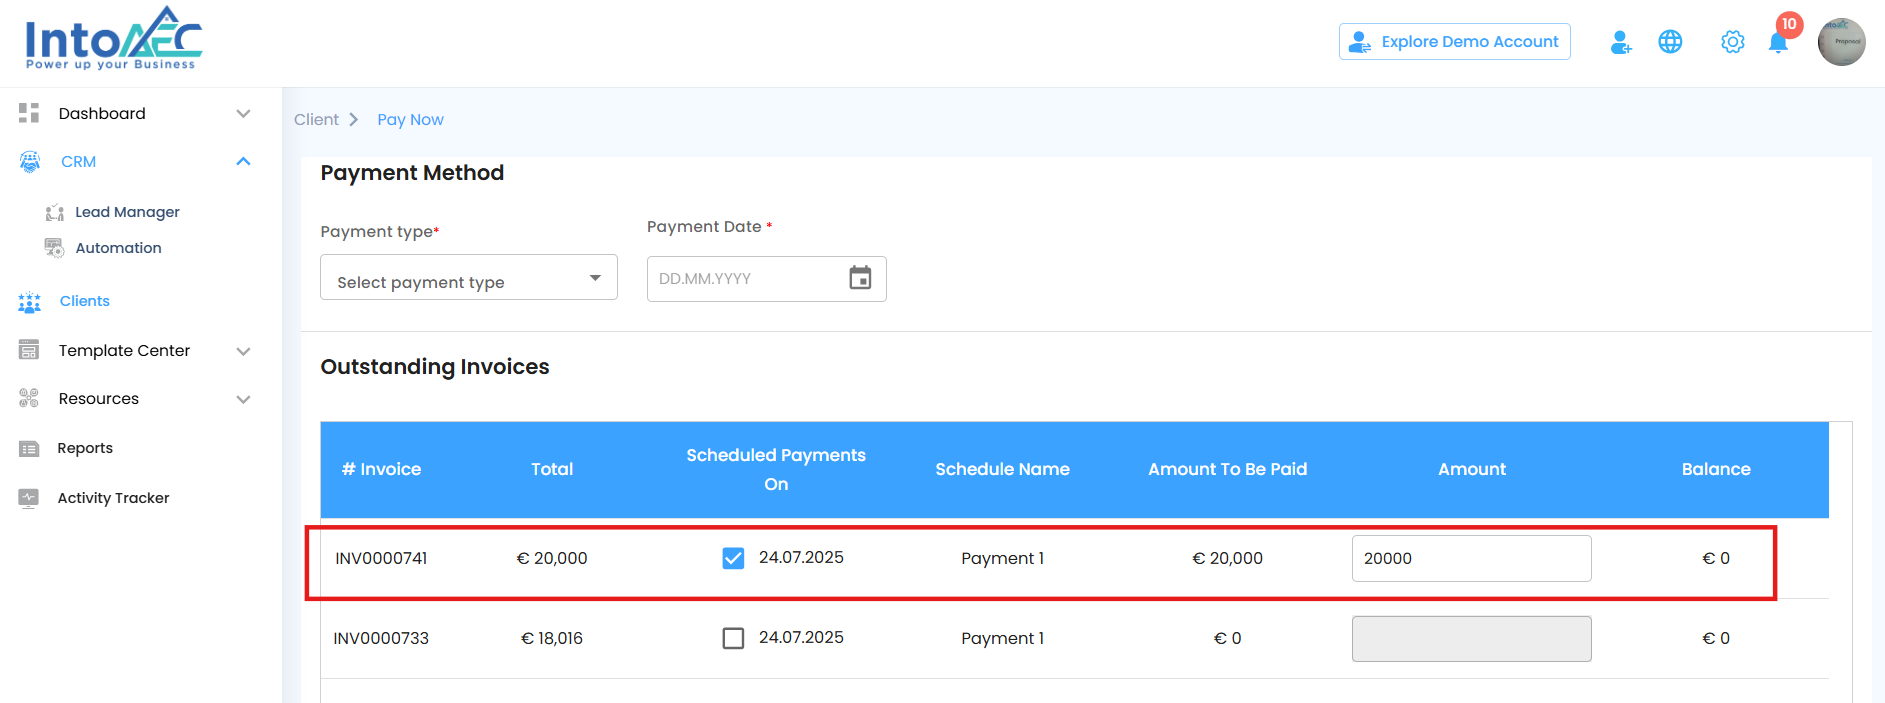
You’ll see the following fields and sections:
Payment Type
Choose the mode of payment received from the client
Payment Date
Select the date on which the payment was received. This helps maintain accurate transaction history.
Outstanding Invoices Table
This table lists all the unpaid or scheduled invoice items, allowing you to make full or partial payments. Here's what each column represents:
Invoice No-The unique number identifying the invoice being paid.
Total-The total amount billed in the invoice.
Scheduled Payments On-Indicates if scheduled (milestone-based) payments are enabled for this invoice.
Schedule Name-The label for each scheduled payment or milestone (e.g., “Advance”, “Final Installment”).
Amount to Be Paid-Displays the pending amount that is due for the respective schedule or invoice.
Amount-This is the field where you enter the amount you are currently paying for the selected schedule or invoice.
Balance-Automatically calculates and displays the remaining balance after the entered payment amount is applied.
For example, if ₹10,000 is due and you enter ₹6,000 in the "Amount" column, the Balance will automatically update to ₹4,000
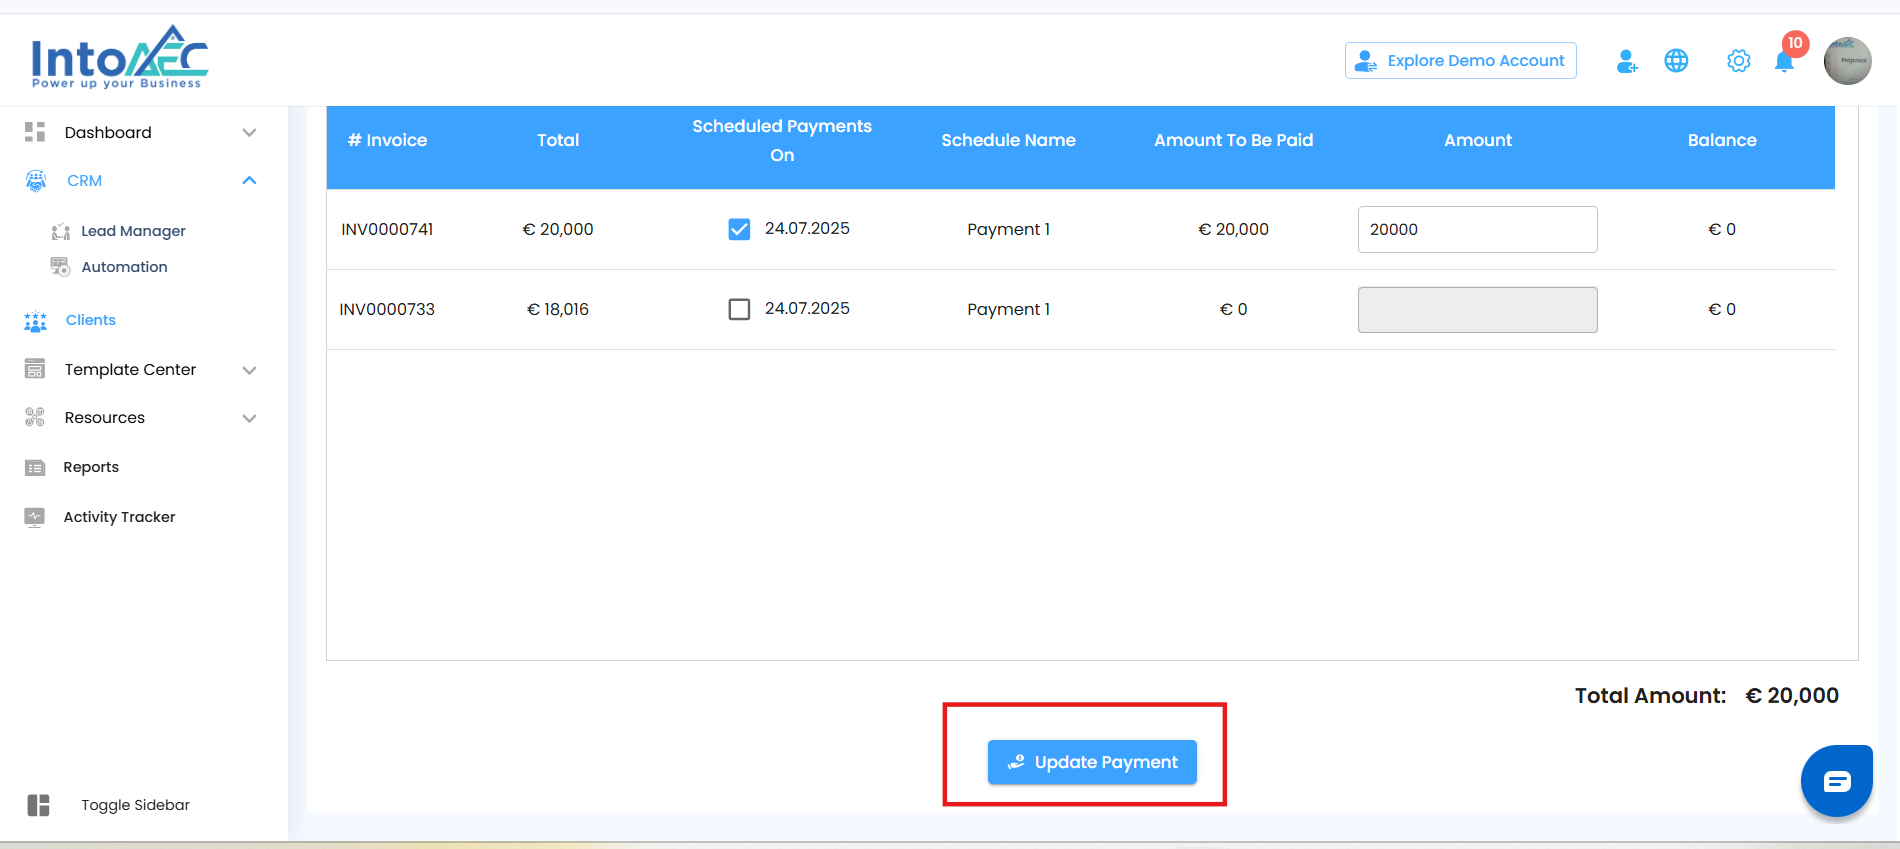
Making the Payment
Check the checkbox next to the schedule(s) you want to make a payment for.
Enter the Amount to Be Paid for each selected schedule.
After confirming all entries, click the Update Payment button.
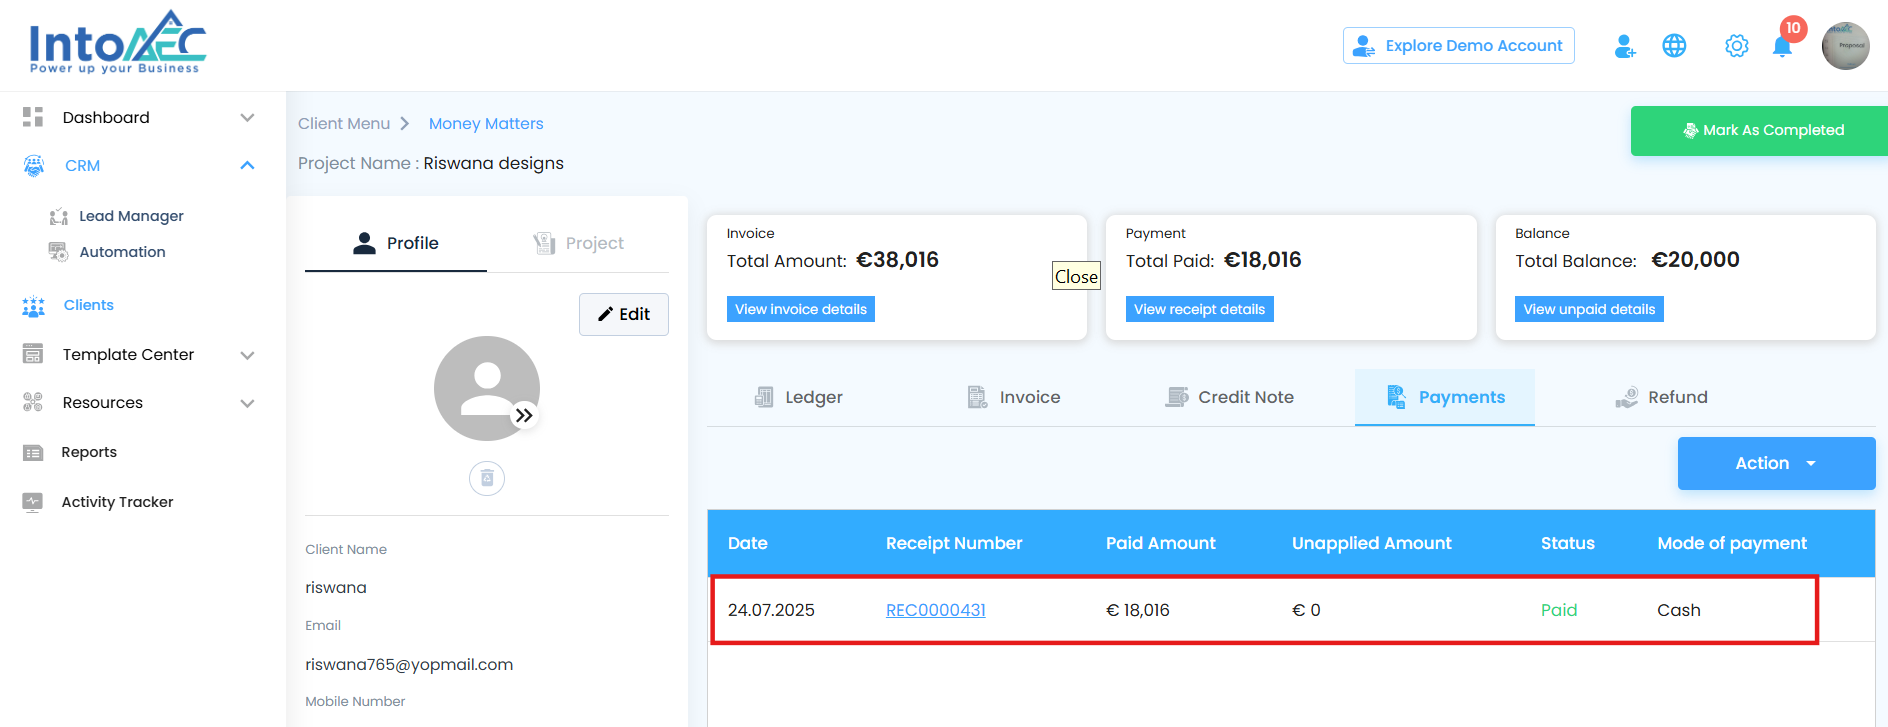
After Saving the Payment
A payment receipt is generated and automatically added to the Payments Tab.
The invoice balance is updated, and the ledger reflects the new transaction.
Request Payment – Send a Custom Payment Email
If you’d like to notify the client and formally request a payment, you can use the Request Payment feature.
How it works:
Click on the Action Dropdown next to the invoice.
Select Request Payment.
A Compose Email popup will appear on the screen.
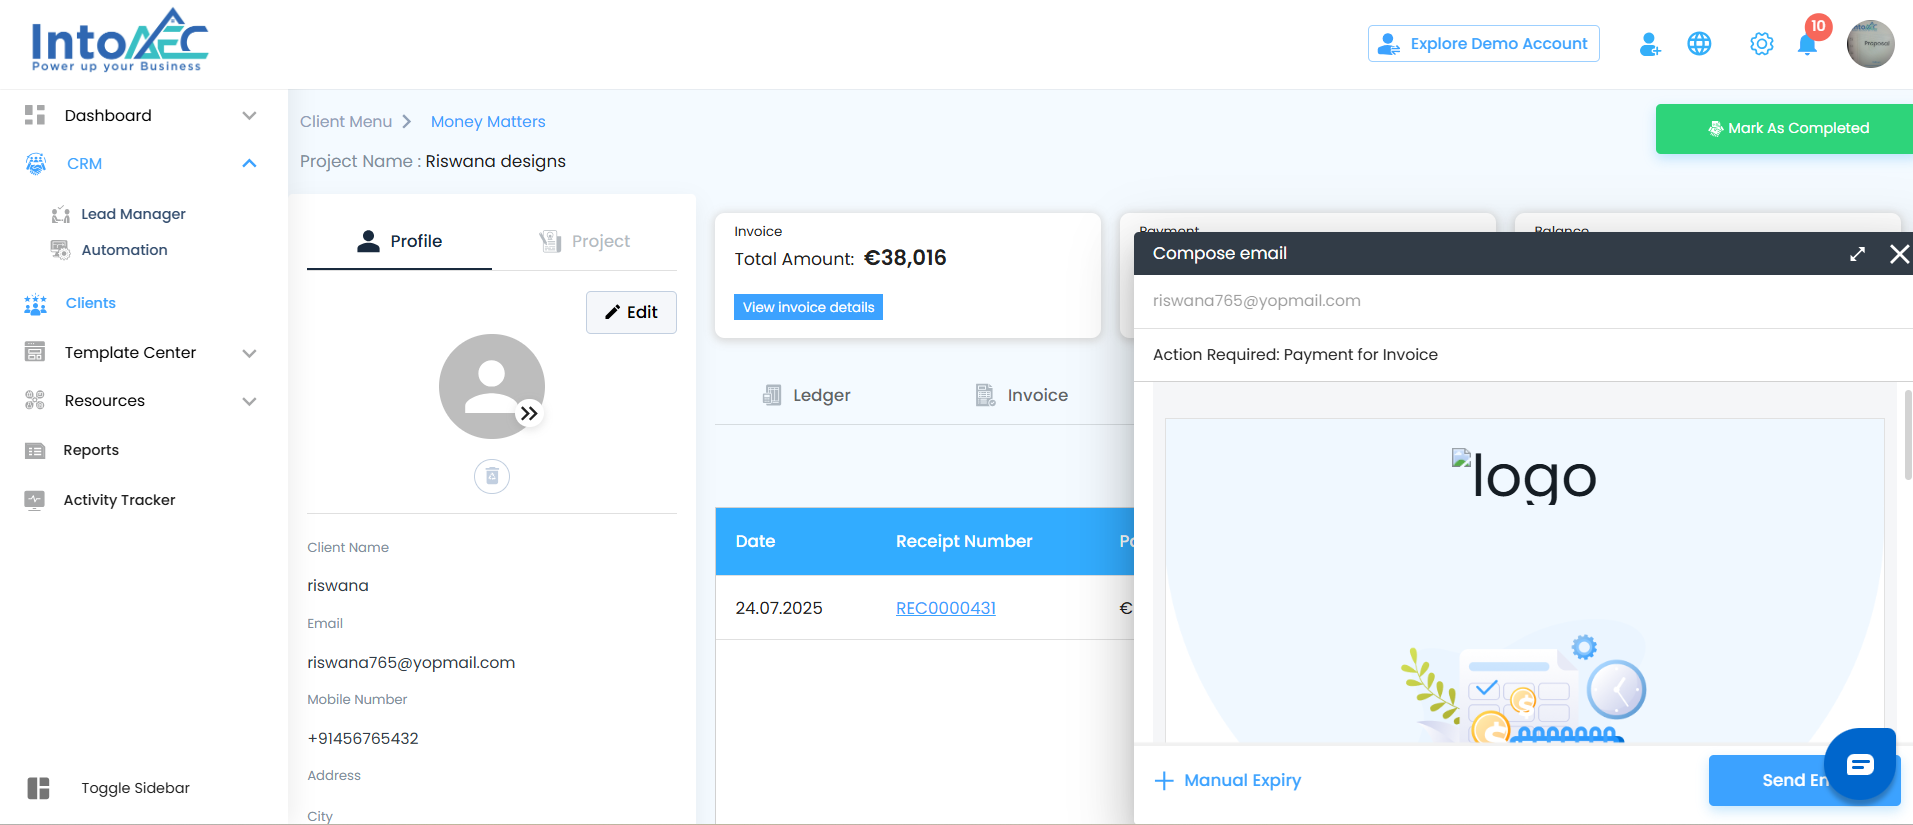
Inside the popup:
You can customize the email content before sending.
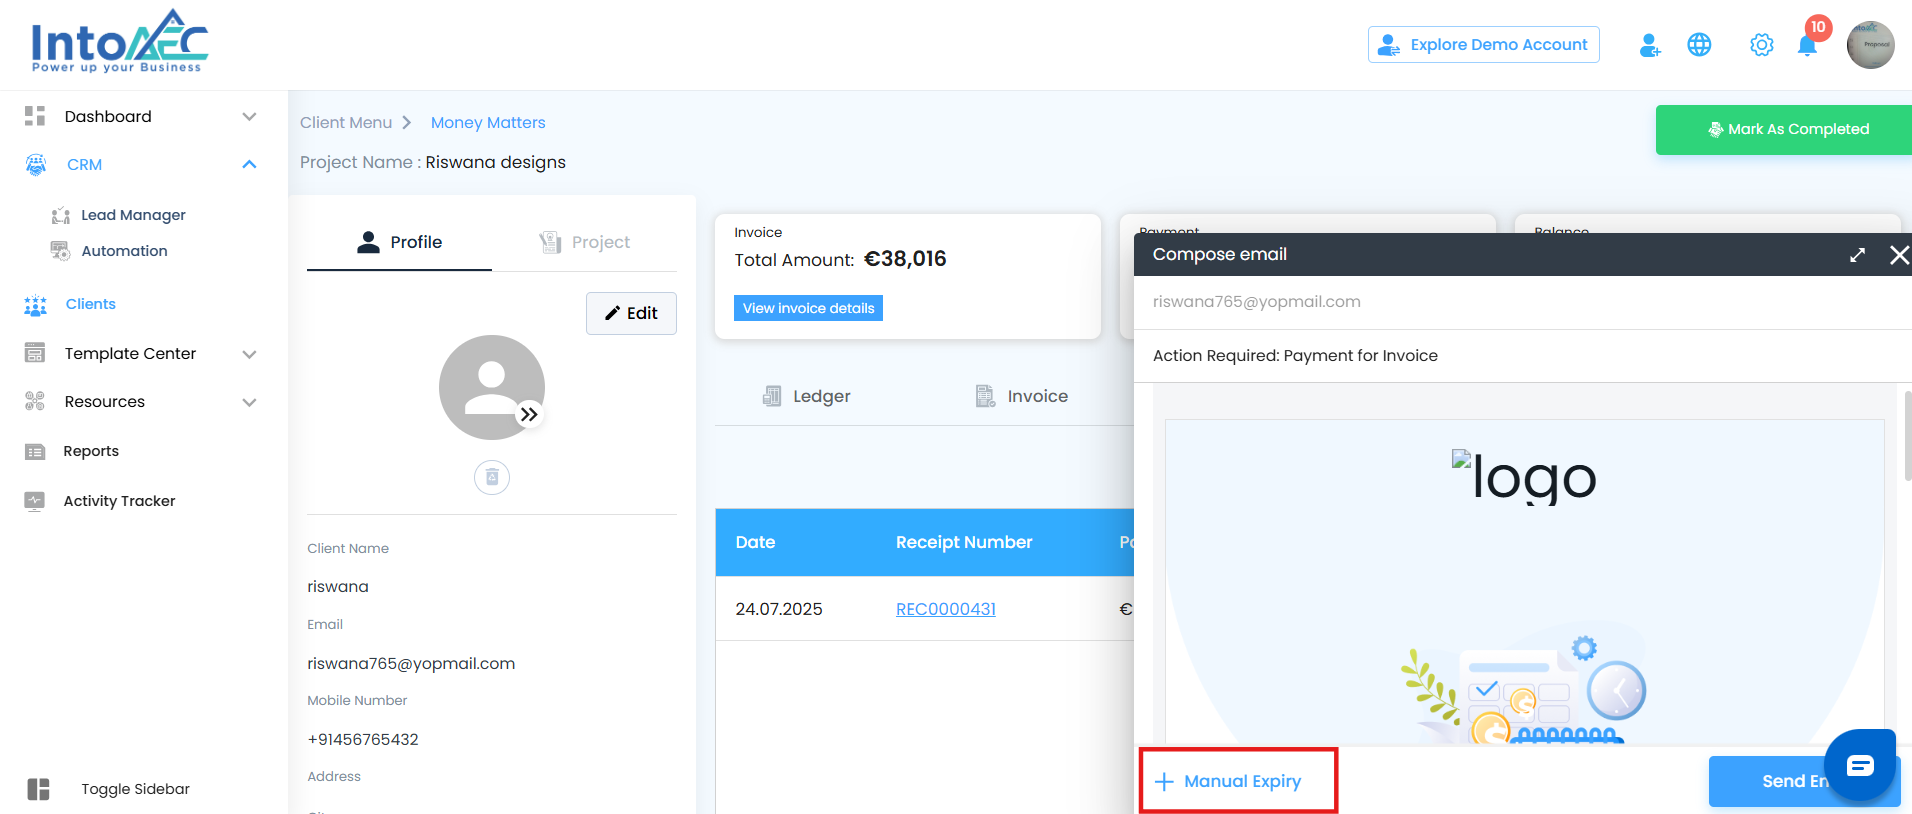
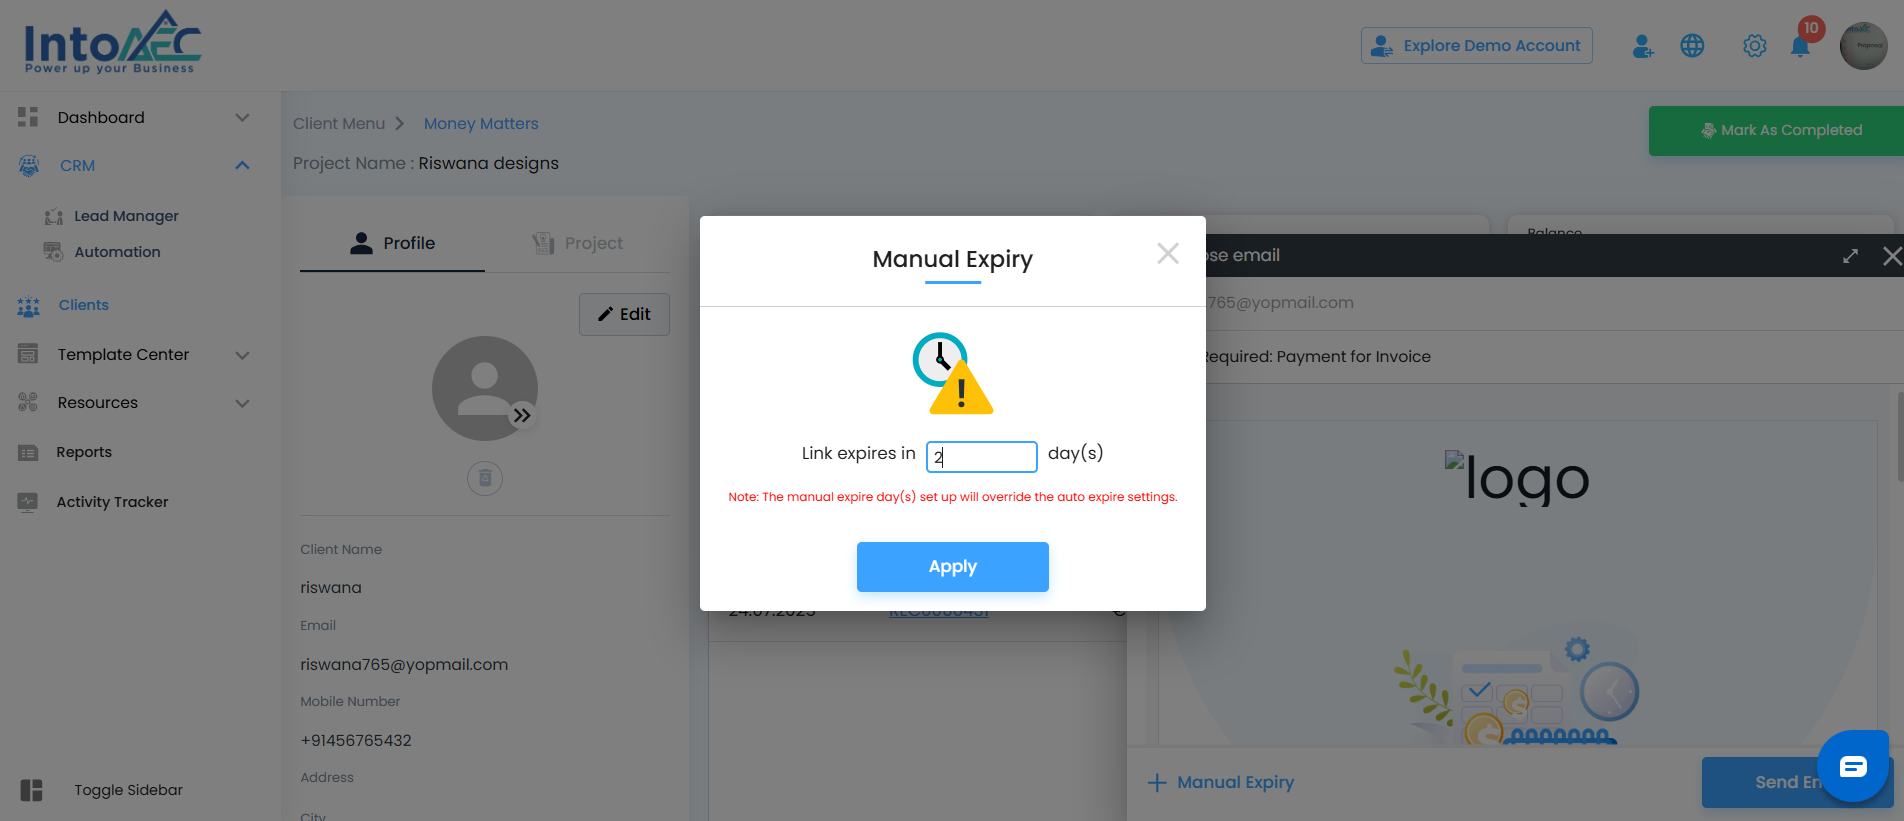
Set a Manual Expiry Date for the payment link or request—this defines how long the link will remain valid.
Review or edit the subject and message content if needed.
Click the Send email button to email the payment request to the client.
Once sent, the recipient will receive an email with the invoice details and a link (if configured) to complete the payment before the expiry date.
Was this article helpful?
That’s Great!
Thank you for your feedback
Sorry! We couldn't be helpful
Thank you for your feedback
Feedback sent
We appreciate your effort and will try to fix the article