Inventory Request – Getting Items Approved in No Time
Fast, organized, and effortless—your inventory requests are just a few clicks away. The Inventory Request feature lets you create and submit item requests instantly, keeping every project stocked and moving without delays. Whether it’s a new tool, spare part, or everyday supply, this is where requests turn into approvals—quickly and clearly.
How to Get There
- Open the Inventory Page
Head to your project workspace and navigate to the Inventory section. - Open the Add Items Menu
Go to the group’s inventory page.
Click on Items Requests to reveal the available options.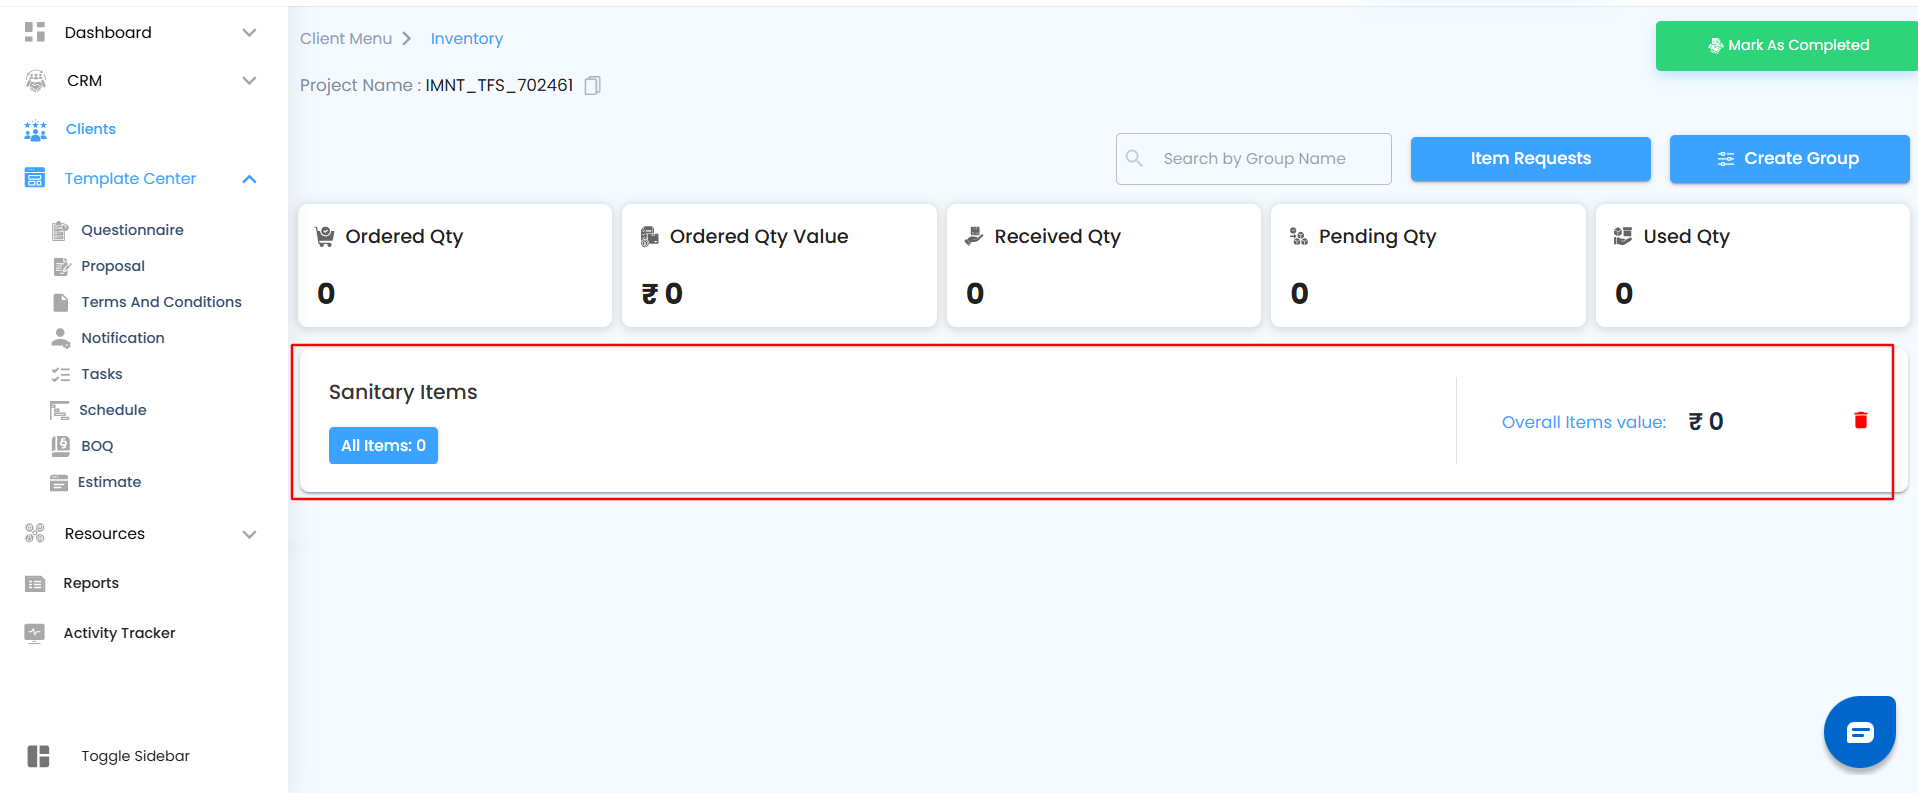
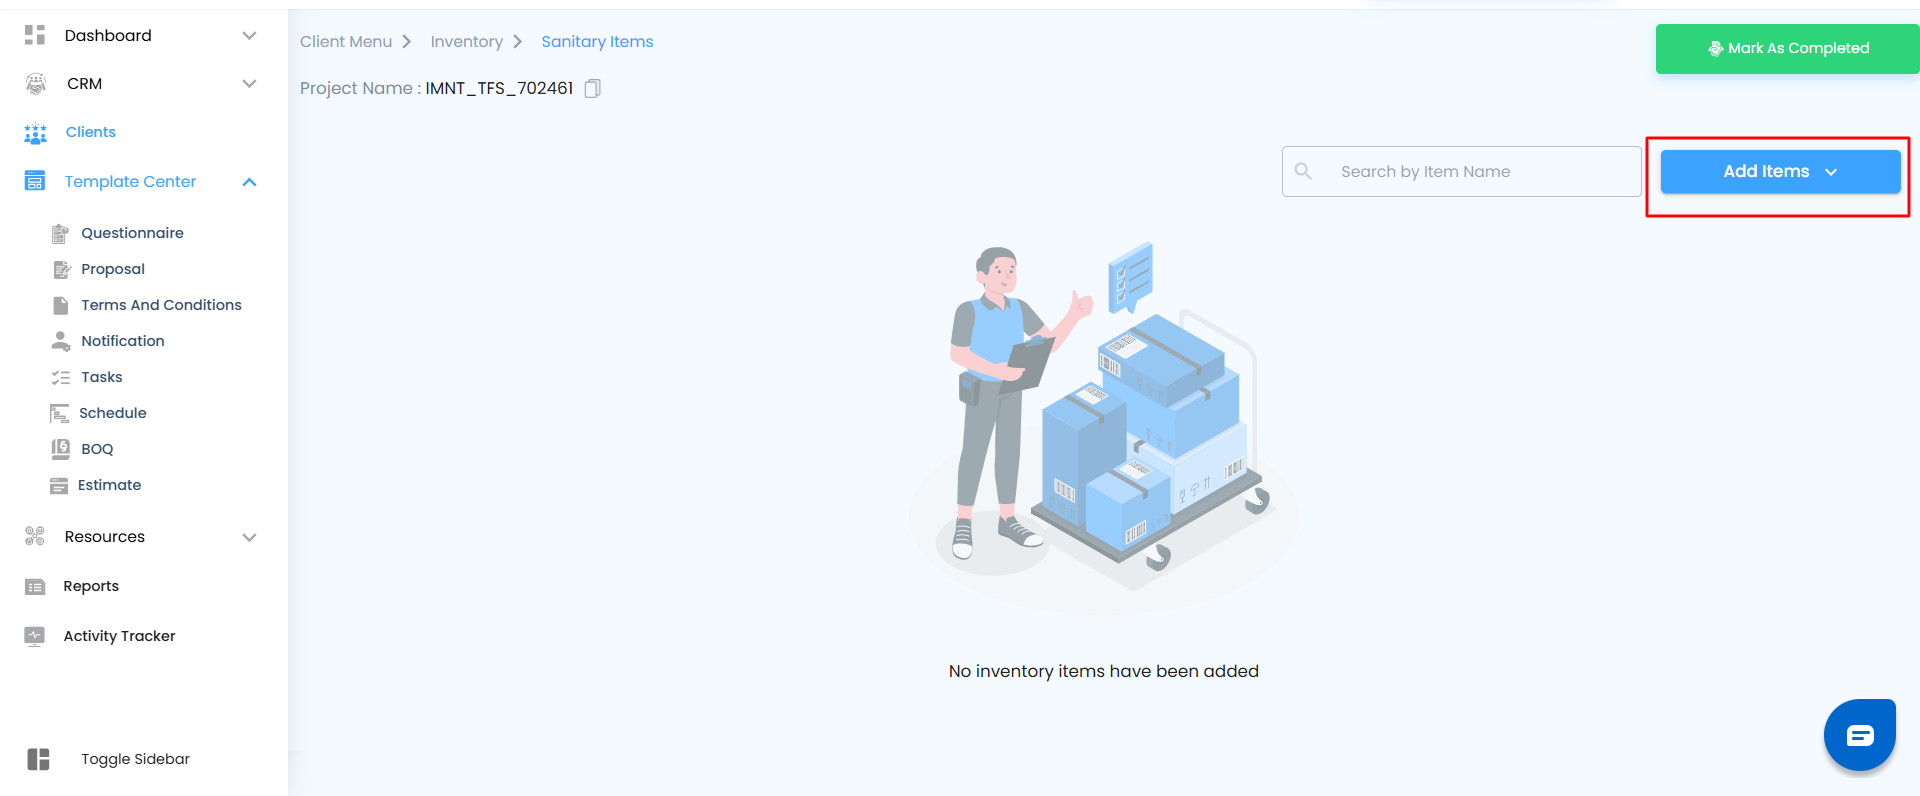
- Select Request Item(s)
From the dropdown, choose Request Item(s)—this opens your request panel, your workspace for creating precise and trackable item requests.
What You Can Do Here
Create complete, detailed item requests with all the information approvers need—item name, quantity, measurement type, and cost details—all in one smooth flow.
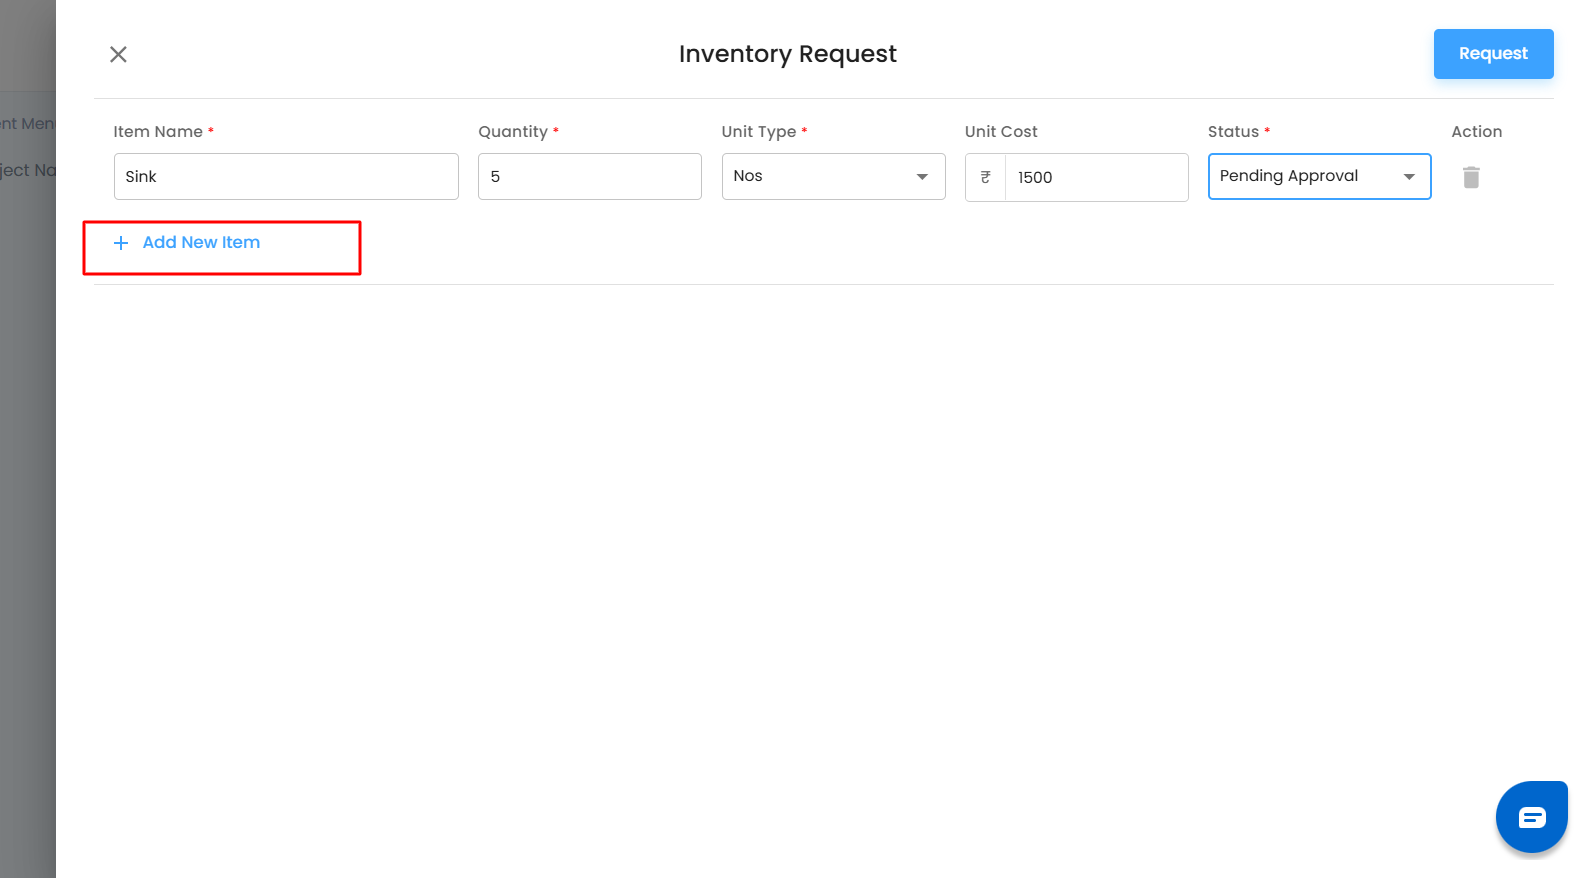
Inside the Request Panel
Every field is designed to make your entry quick and accurate:
- Item Name: Enter the item you need.
- Quantity & Unit Type: Specify how much and in what form (Cm, Kg, sets, etc.).
- Unit Cost: Add cost details for clearer tracking.
- Status: Choose whether the request is Pending Approval or Approved, based on your workflow stage.

- Need more than one item? Click Add New Item to include multiple requests in a single submission.
Once everything’s set,
click Request—and your submission moves straight into the approval process.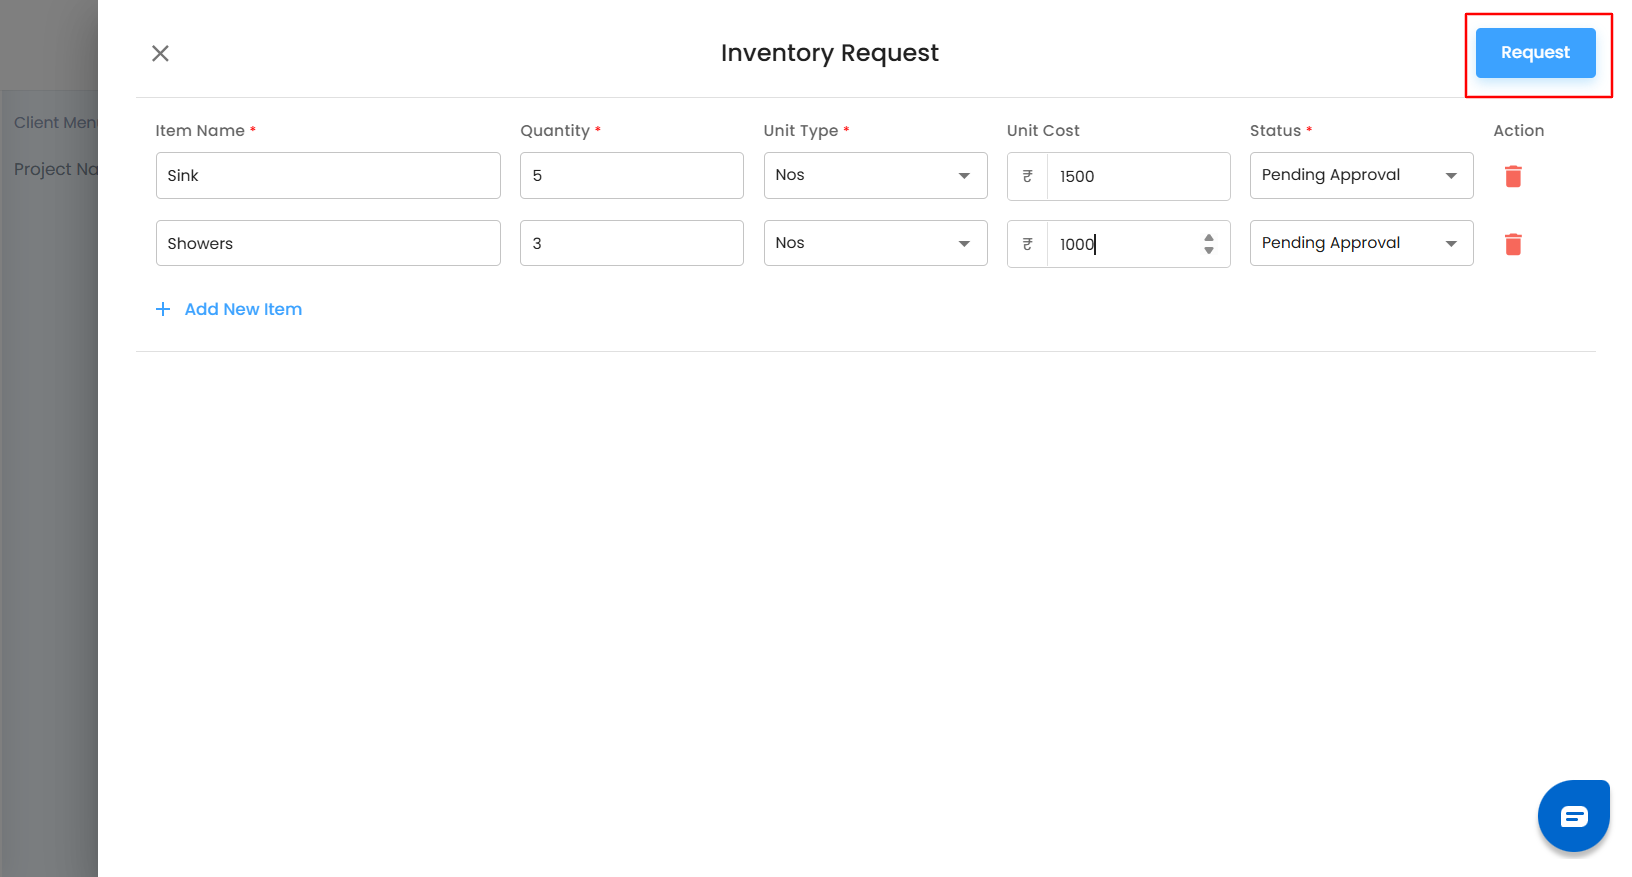
Pro Tip
Clear and precise when adding items. Well-detailed requests get approved faster, keeping your inventory organized and your project running seamlessly.
Managing Item Requests – From Pending to Approved
Inside the Item Requests page, every request you’ve made is neatly categorized, making it easy to monitor progress and take quick action when needed. Whether an item is awaiting approval, already cleared, or moved to another stage, everything stays organized in one place.
What You Can Do Here
View, track, and manage every inventory request—see where each one stands and update its status whenever required.
Inside the Item Requests Page
- Pending Approval – Lists all items waiting for approval.
- Approved – Displays the requests that have been approved and are ready for the next step.
- Rejected, Converted to PO, and Cancelled – These tabs hold items that have been rejected, converted into purchase orders, or cancelled, giving you complete visibility into every request outcome.
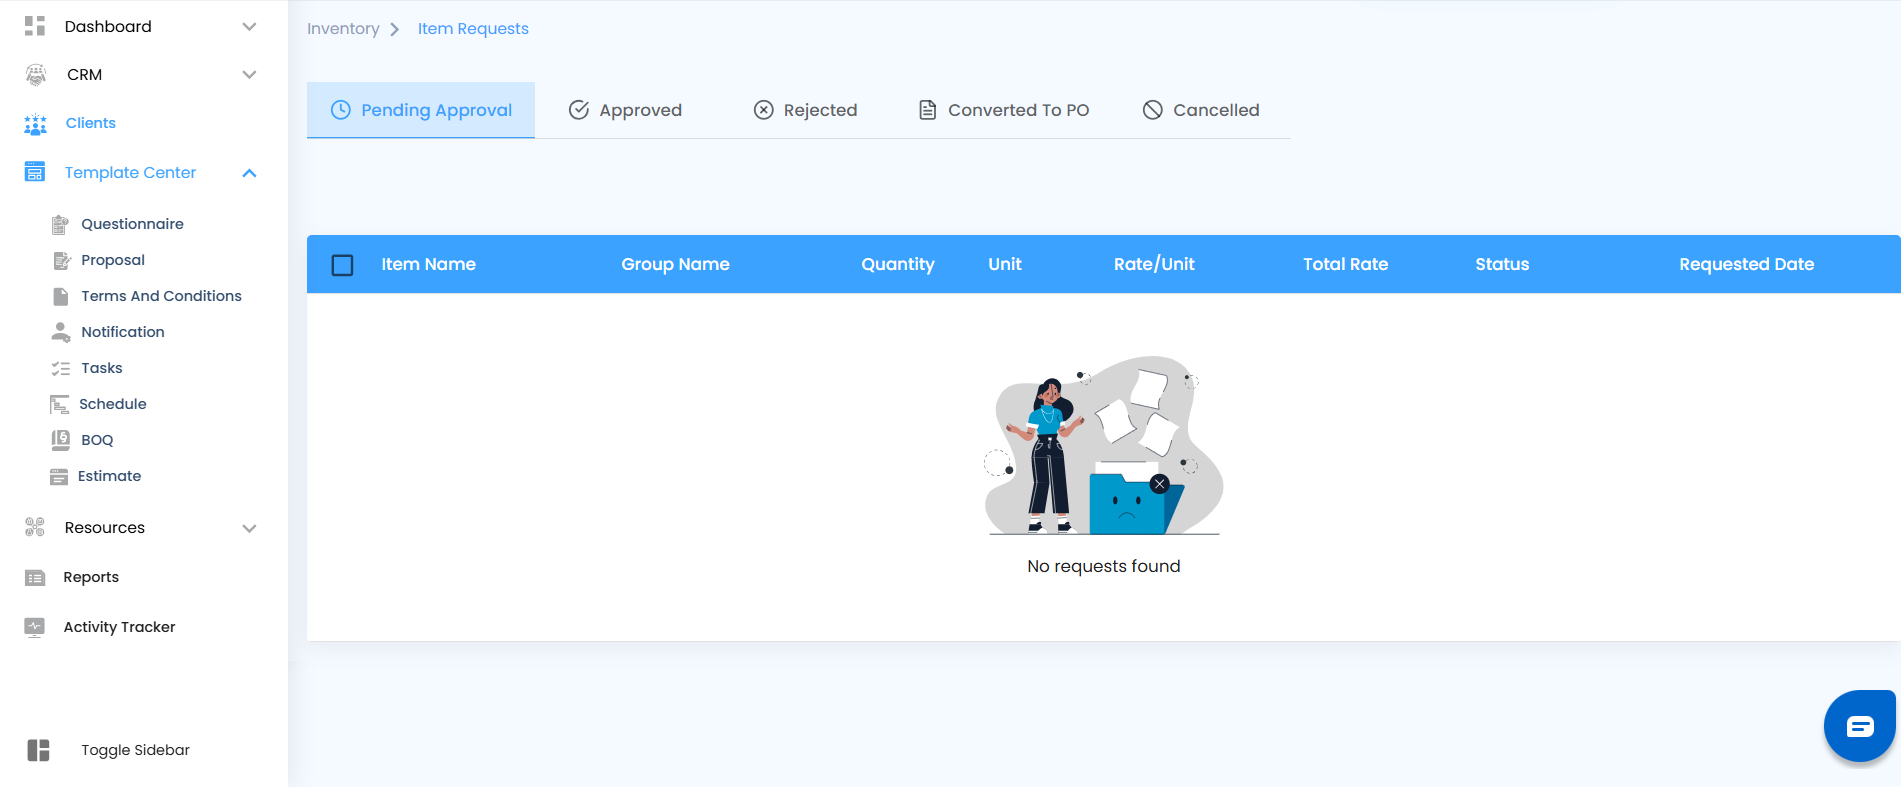
Each request includes key details—Item Name, Group Name, Quantity, Rate per Unit, Total Rate, Status, and Requested Date—so you always know what’s happening at a glance.
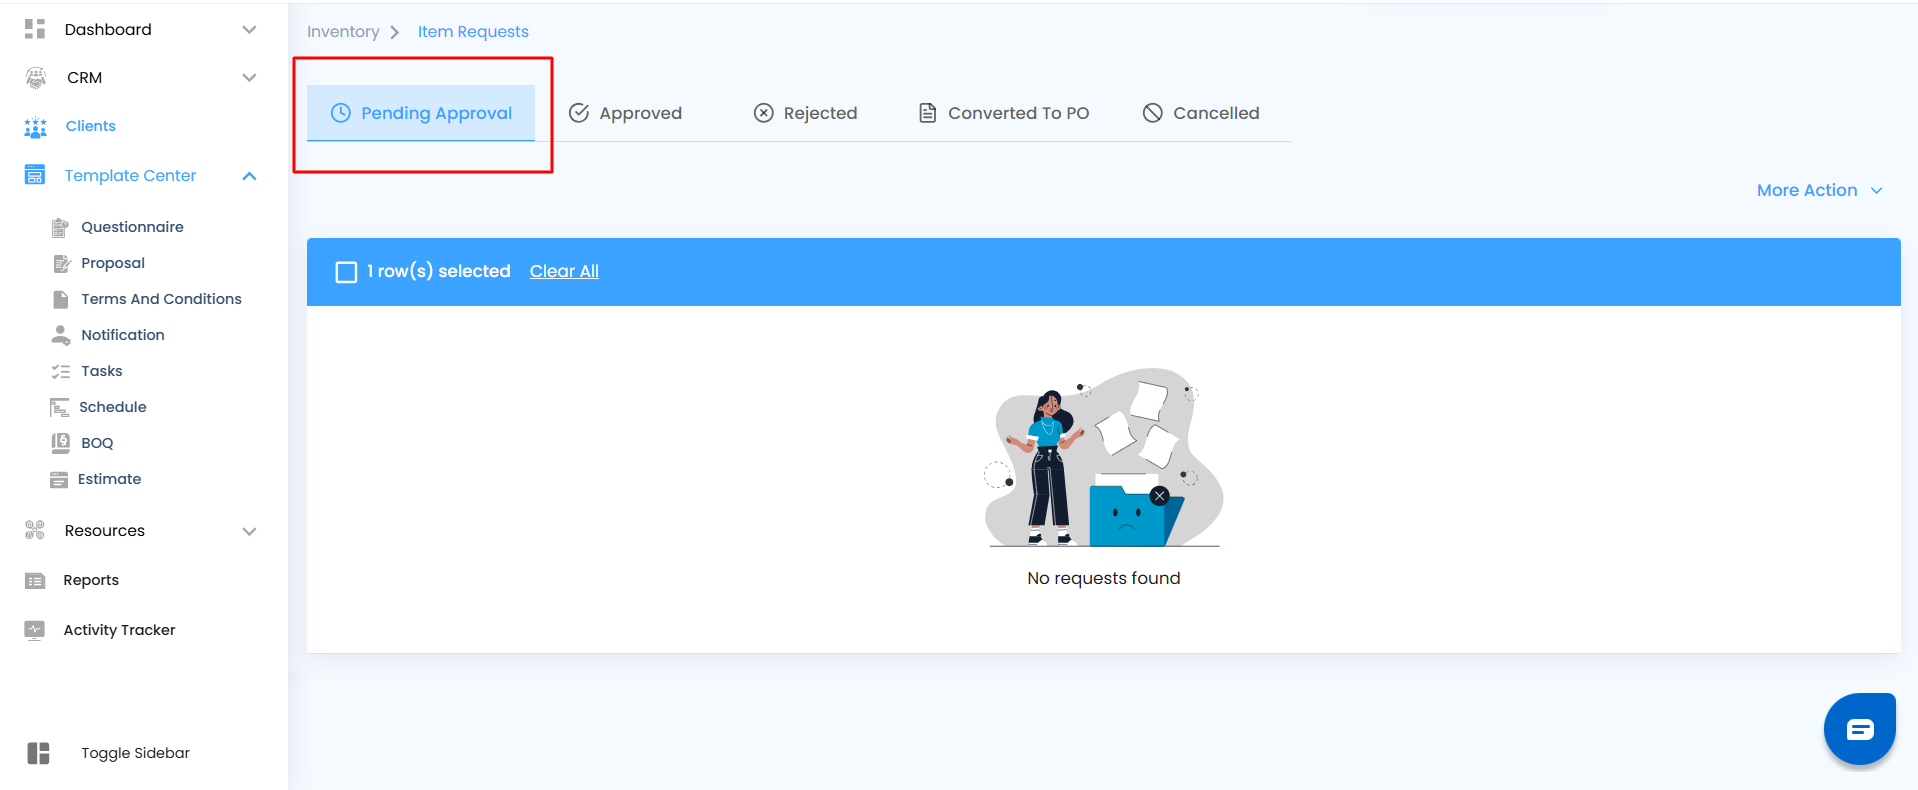
Pending Approval
Once an item request is created and submitted from the Add Item or Item Requisition section, it automatically appears under Inventory → Item Requests → Pending Approval.
This section lists all requests awaiting approval. Each entry displays essential details including:
- Item Name
- Group Name
- Quantity
- Unit Type
- Rate per Unit
- Total Rate
- Requested Date
- Current Status (Pending Approval)
How to Review and Take Action
- Navigate to Inventory → Item Requests → Pending Approval.
- Locate the item you want to review.
- Click the three-dot menu (⋮) next to the item.
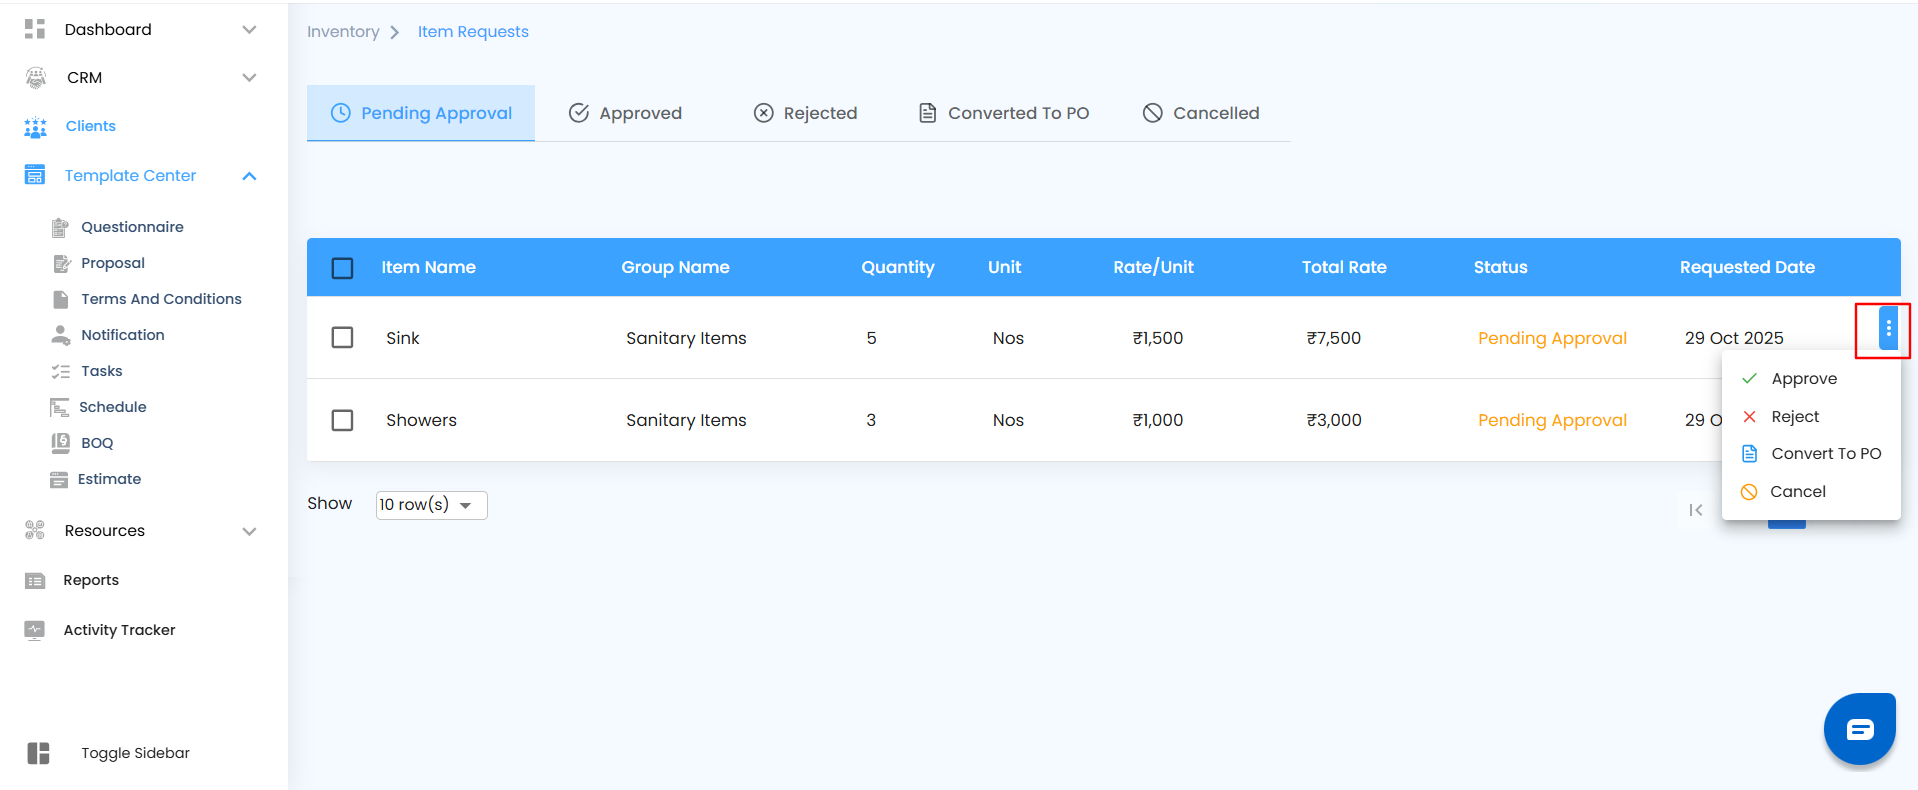
- Select one of the available actions:
- Approve – Moves the item to the Approved tab.
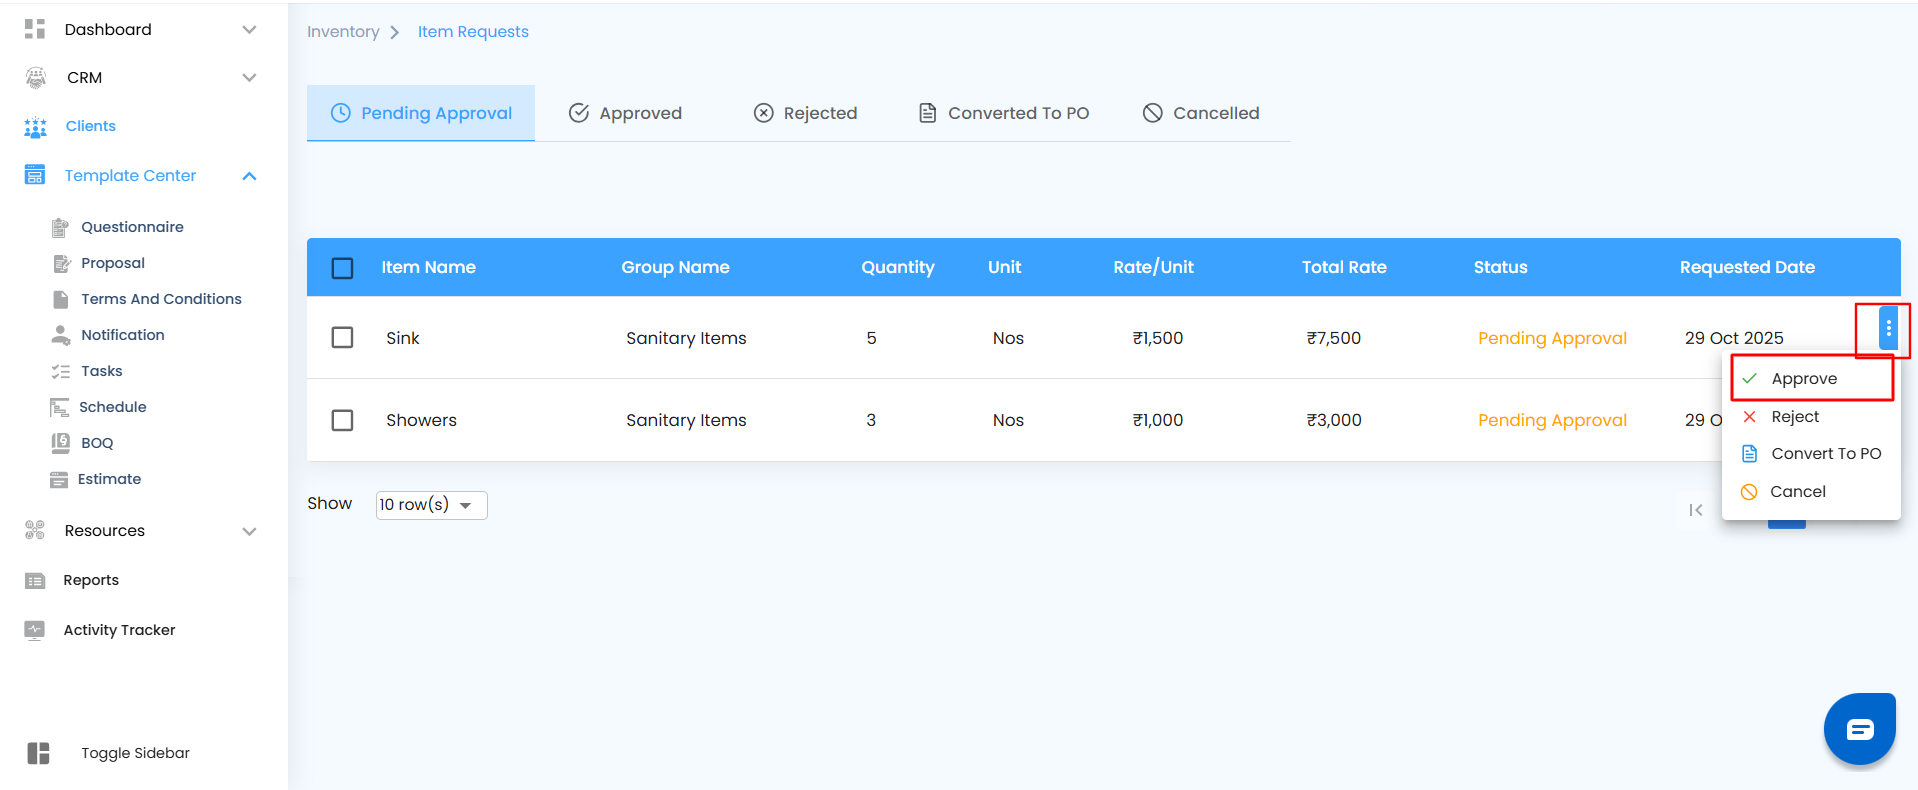
- Reject – Sends the item to the Rejected tab.
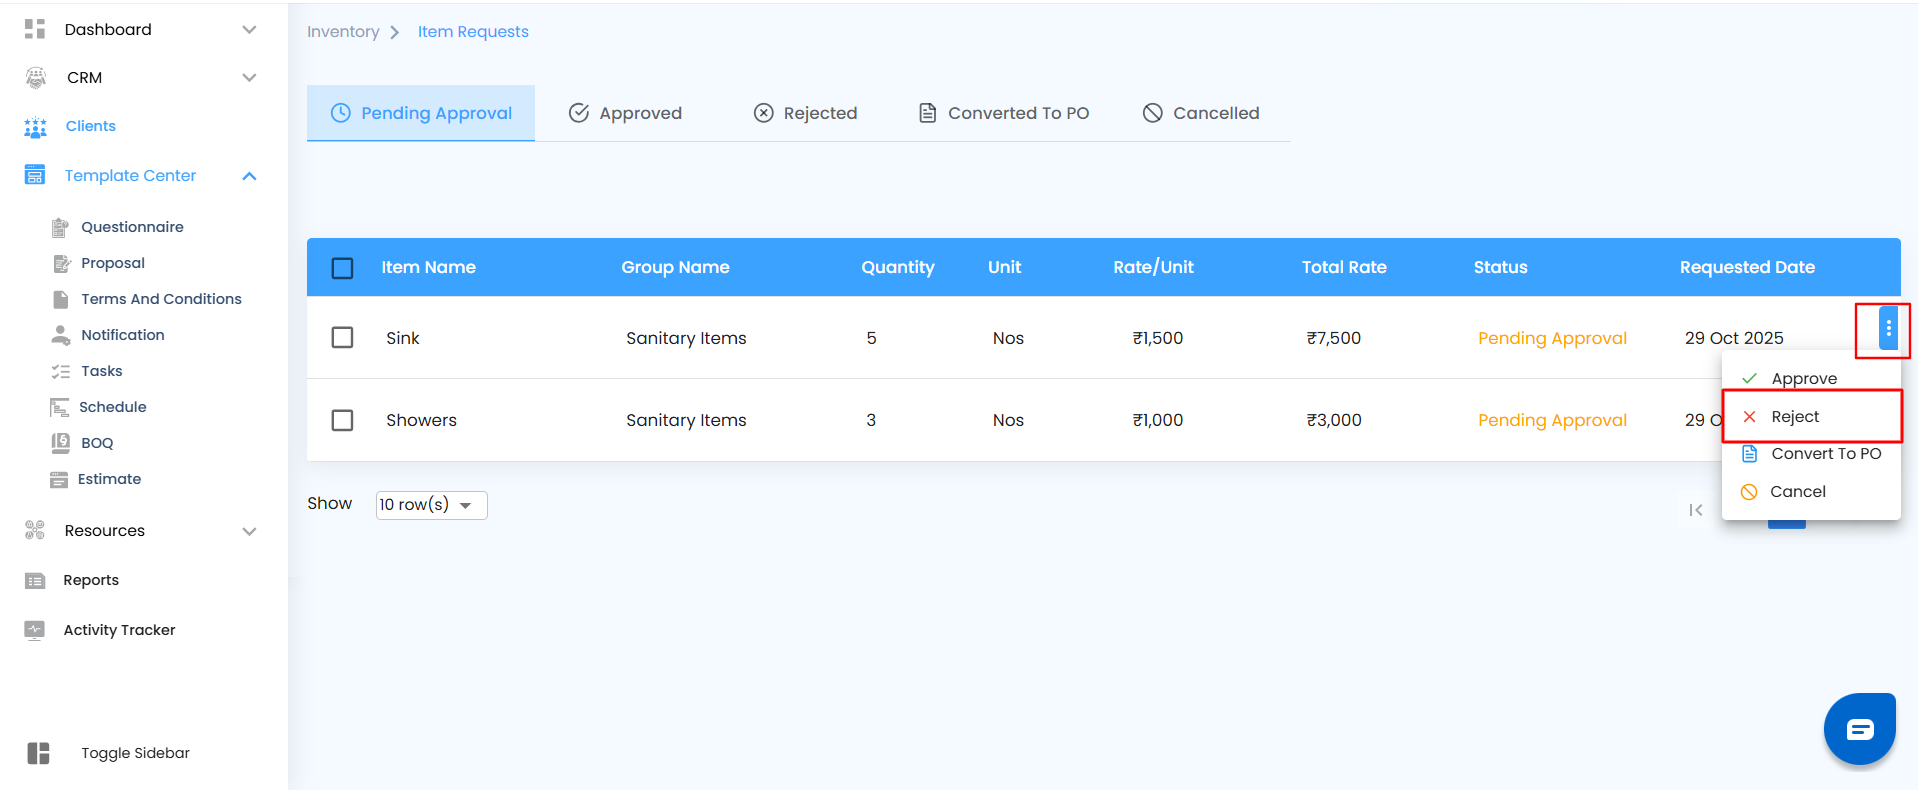
- Convert to PO – Converts the request into a Purchase Order.
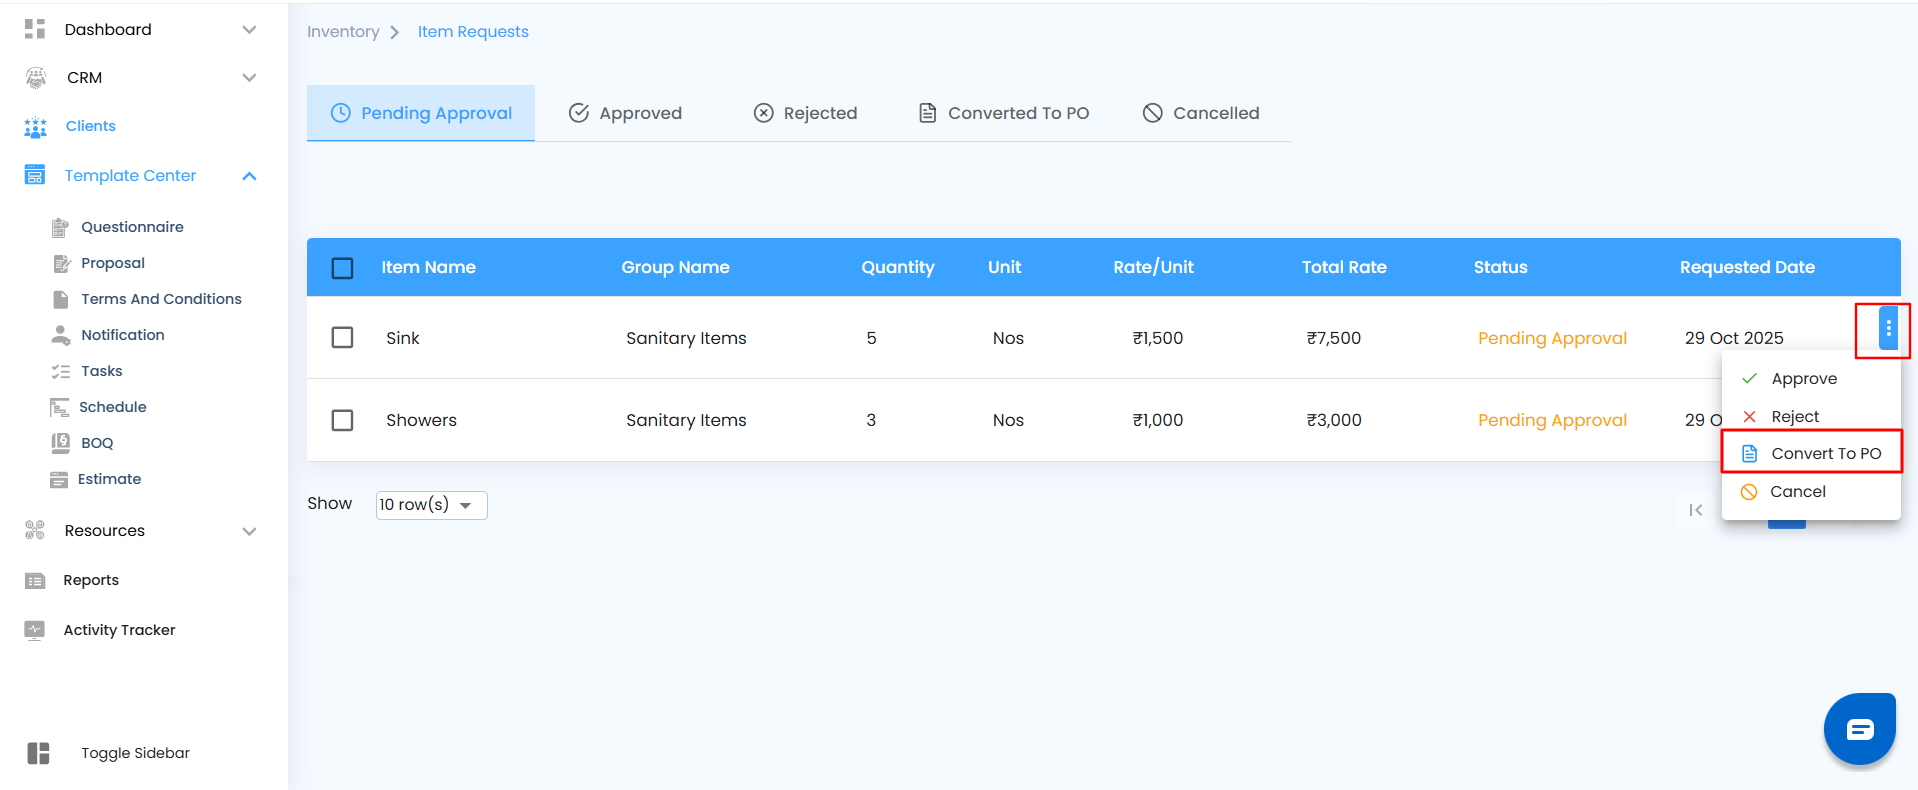
- Cancel – Cancels the item and moves it to the Cancelled tab.

Pro Tip
Review pending requests frequently to ensure materials are approved or updated on time. Keeping this section up to date helps maintain a smooth workflow across your project’s inventory cycle."
Approved
All item requests that clear the approval stage move straight into the Approved tab. This is where every green-lighted request is ready for the next step—either grouped for organization or converted into a purchase order for procurement.
Once approved, each item is neatly displayed with complete details—its group, quantity, rate, total cost, and approval date—giving you instant visibility into what’s been cleared and what’s next in line.
How to Get There
- From the sidebar, open Inventory.
- Click Item Requests.
- Select the Approved tab to view all approved items.
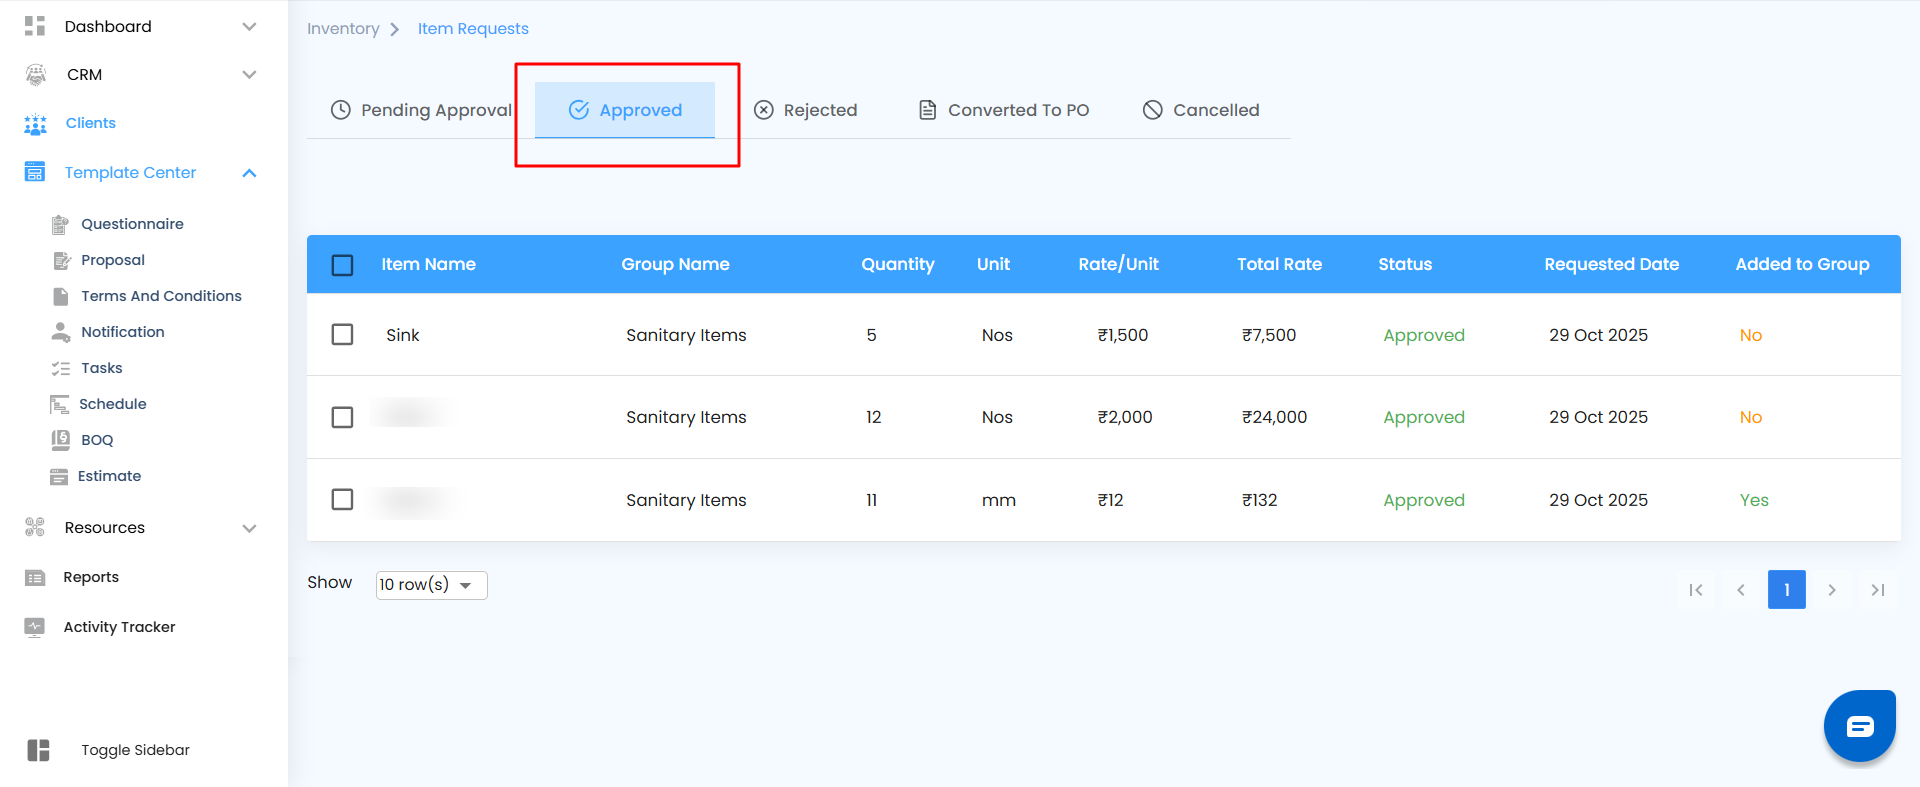
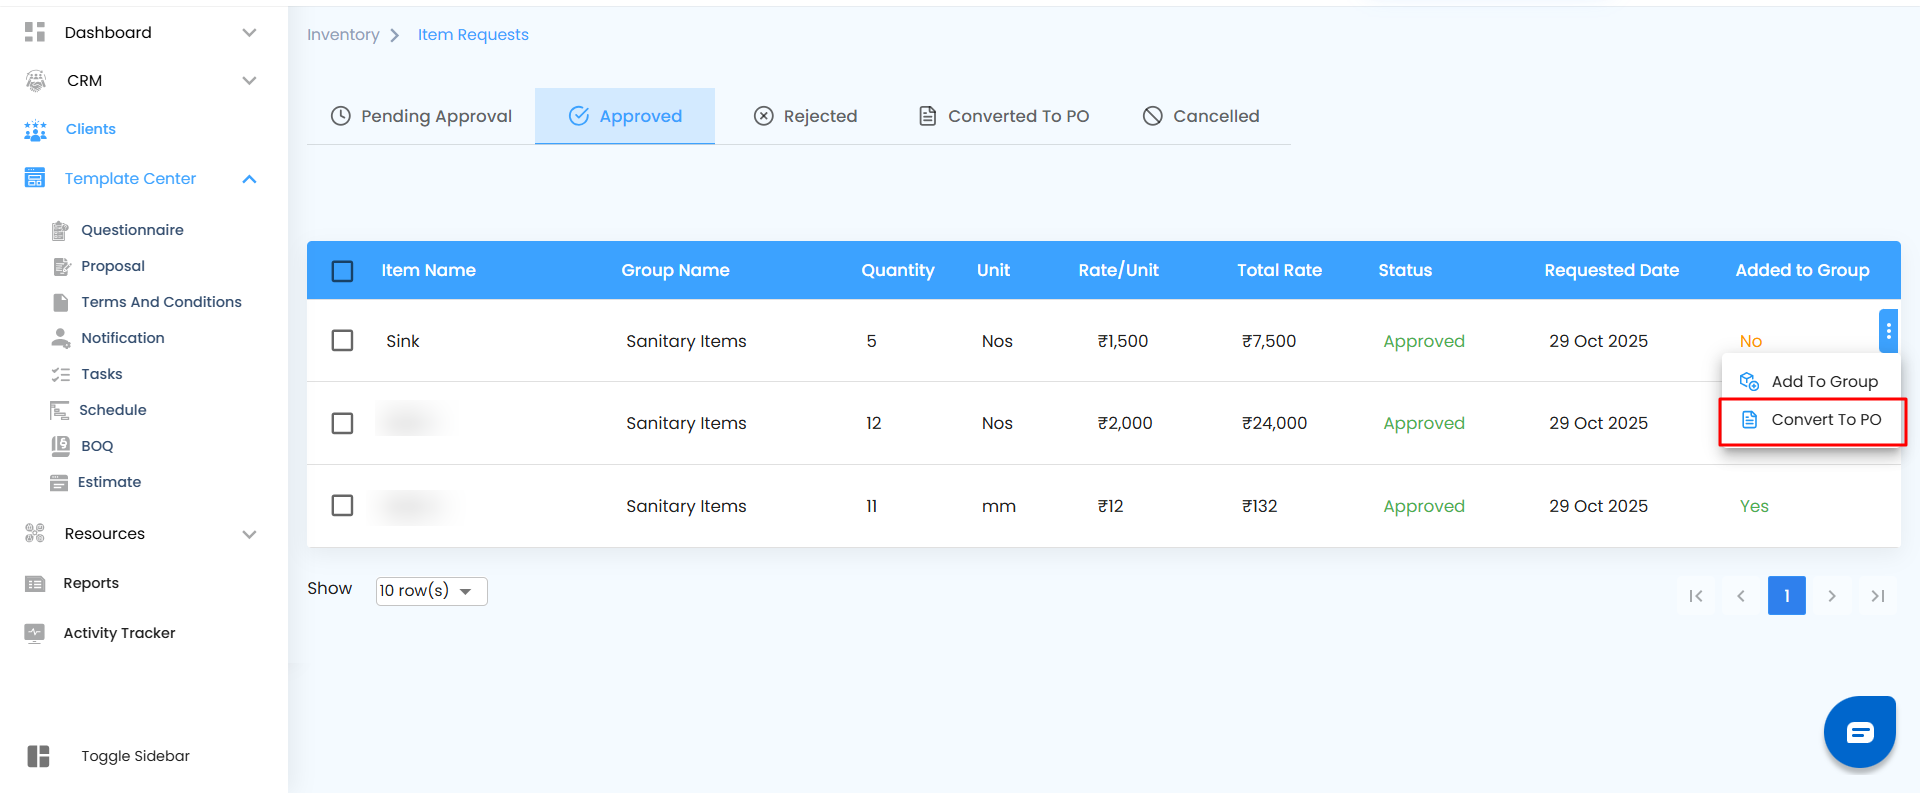
What You Can Do Here
You’re in control of the next phase of approved requests. Using the three-dot menu beside each item, you can:
- Add to Group – Include the approved item in a group for better tracking and management. Once grouped, the “Added to Group” status automatically updates from No to Yes, confirming that it’s successfully assigned.
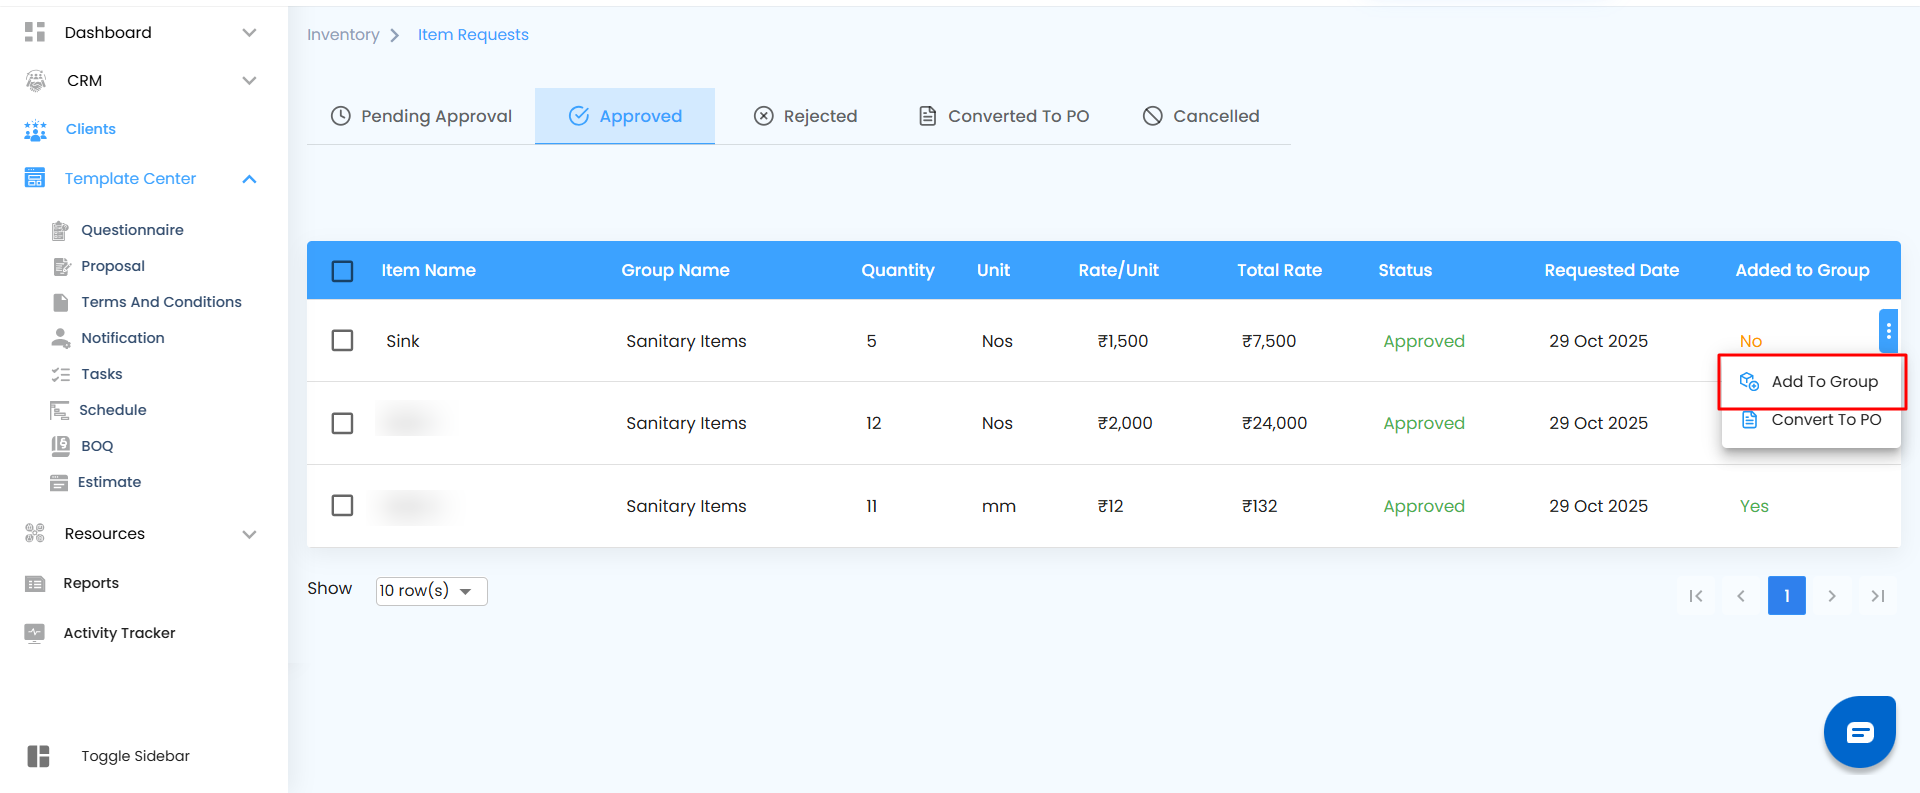
- Convert to PO – Instantly transform the approved request into a Purchase Order and move it forward in the procurement process.
Pro Tip
Regularly check the Approved tab to make sure every cleared request moves into the right stage—grouped or converted—so nothing stalls between approval and purchase.
Rejected
Requests that don’t pass approval appear under the Rejected tab. This section helps maintain transparency and record-keeping for all declined requests, ensuring every decision is documented and traceable.
Each entry shows the same key details—item, group, rate, and requested date—so approvers and requesters can easily review what was rejected and why.
How to Get There
- Go to Inventory.
- Open Item Requests.
- Select the Rejected tab.
What You Can Do Here
This page is view-only. Rejected requests stay listed for reference and auditing purposes, giving teams a clear understanding of past actions or approvals that didn’t move forward.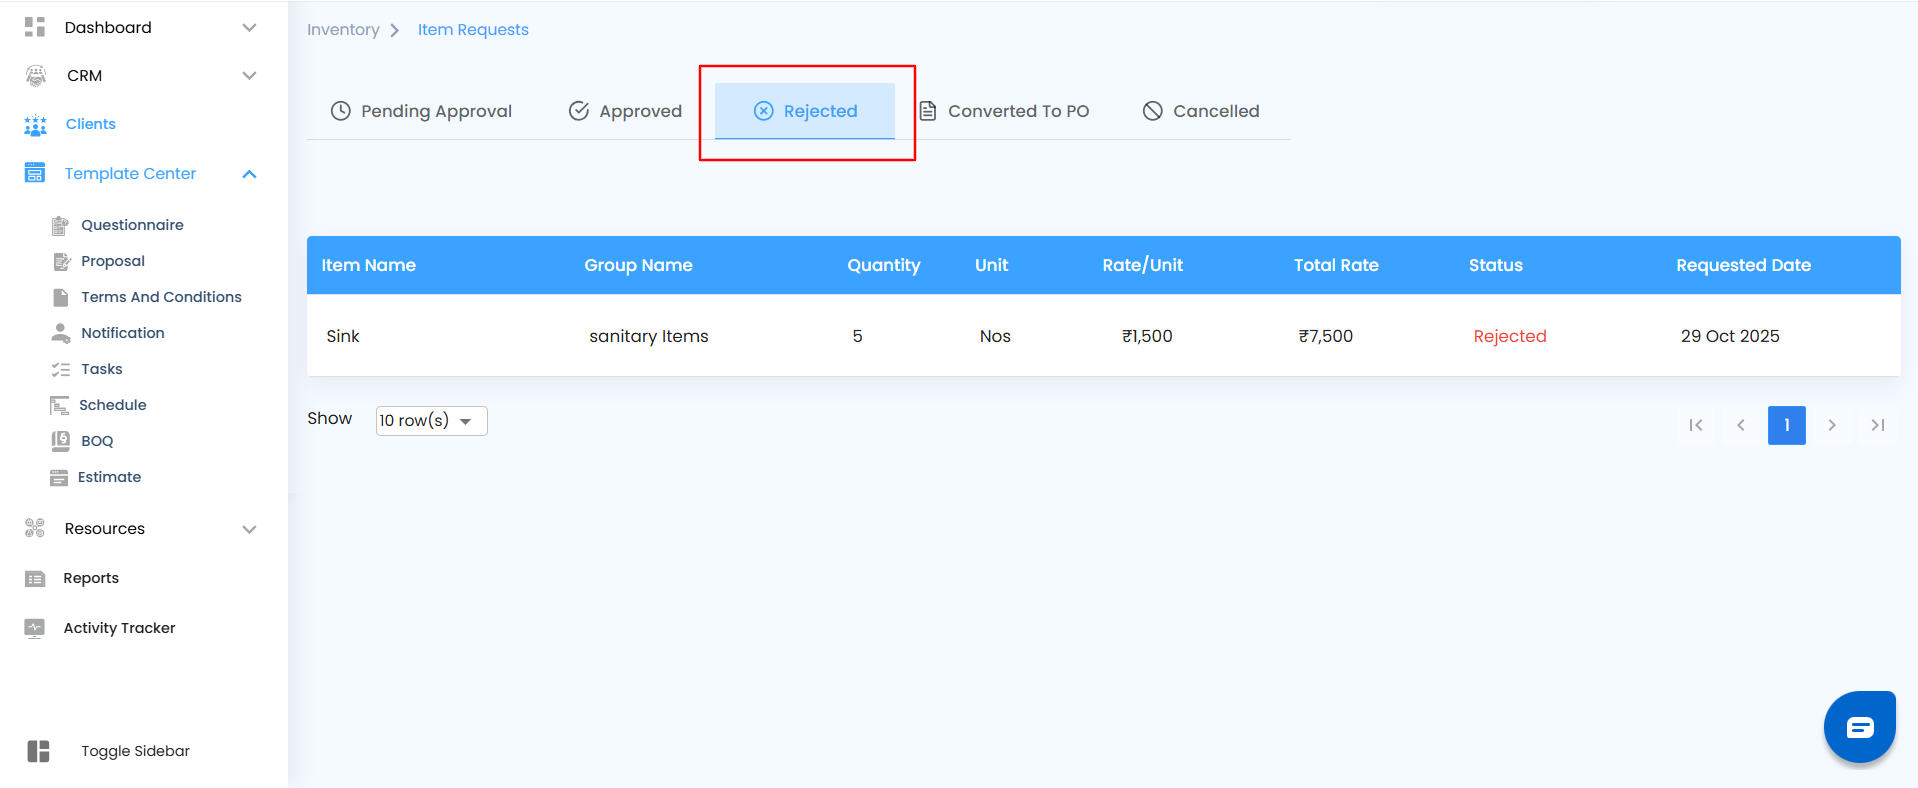
Pro Tip
Regularly review this section to identify patterns or recurring issues in requests—this helps improve accuracy and approval success in future submissions.
Converted to PO
The Converted to PO tab lists all item requests that have been successfully turned into Purchase Orders. Once a request is converted, it automatically moves here from the Approved stage.
This section serves as a tracking hub, helping you monitor which items are already in the procurement process and ensuring nothing is duplicated.
How to Get There
- Navigate to Inventory.
- Open Item Requests.
- Click on Converted to PO.
What You Can Do Here
Here, users can view all converted purchase orders along with essential details such as rate, quantity, and status. This section is primarily for tracking and verification.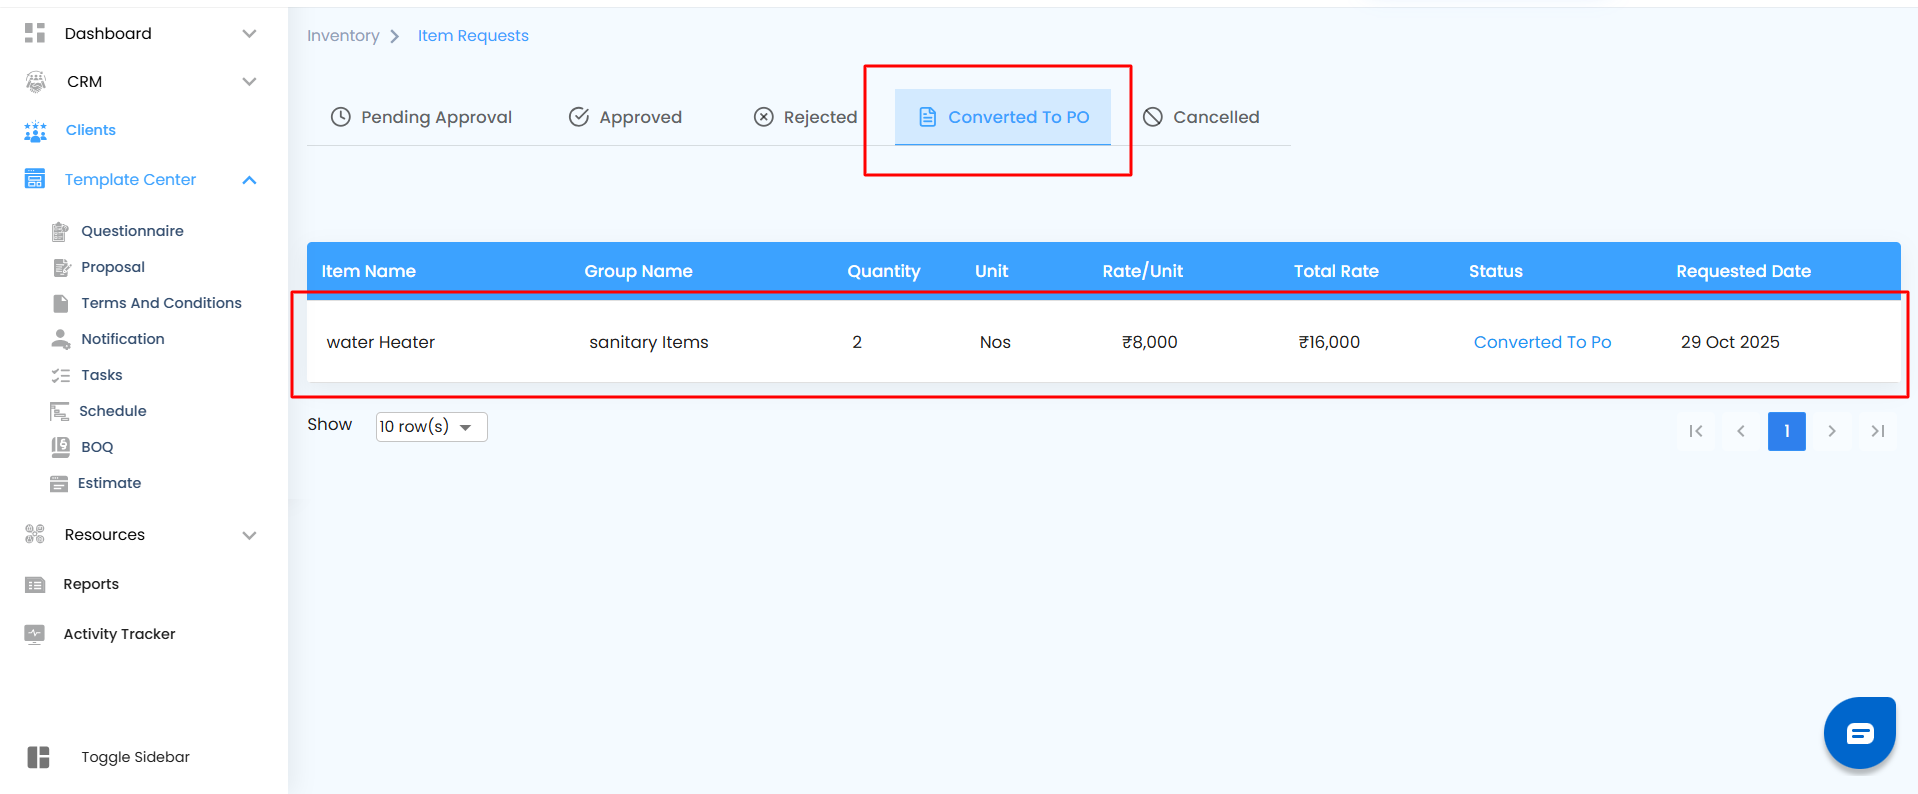
Pro Tip
Keep an eye on this tab to verify that all approved requests have been properly converted and that each Purchase Order aligns with procurement requirements.
Cancelled
Any requests that have been withdrawn or manually cancelled appear in the Cancelled tab. This ensures clear visibility into items that were previously raised but later stopped before approval or conversion.
Cancelled requests remain accessible for records and audits, helping maintain a full trail of all actions taken on item requests.
How to Get There
- Go to Inventory.
- Click on Item Requests.
- Select the Cancelled tab.
What You Can Do Here
This section is view-only and primarily used for historical reference. It helps teams track which requests were cancelled and by whom.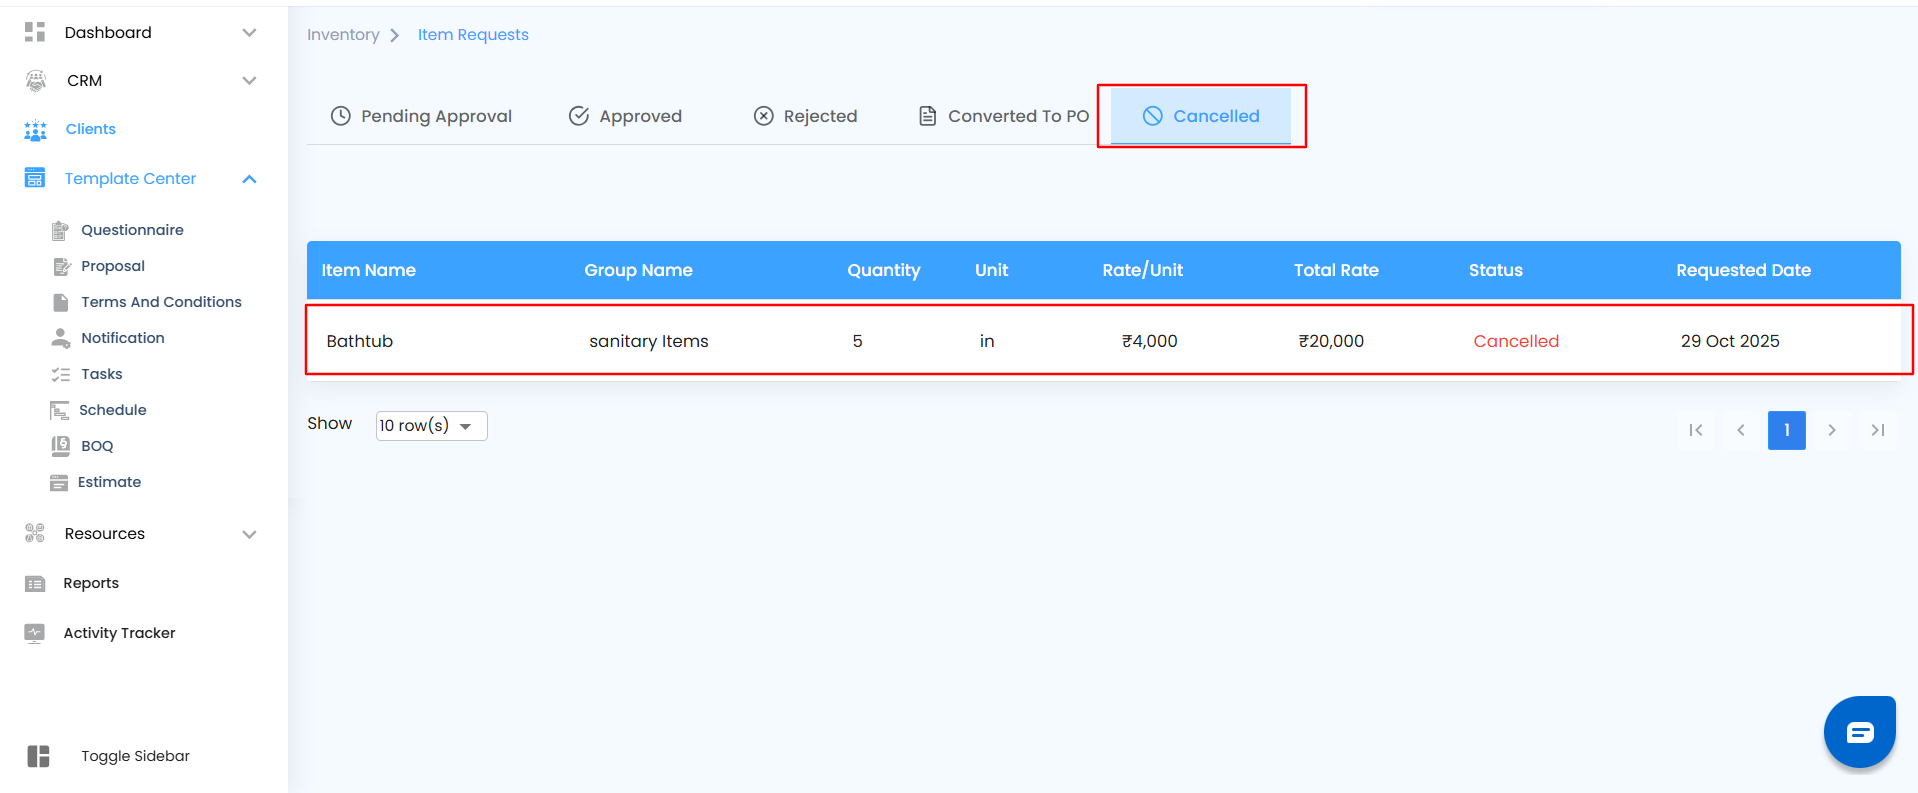
Pro Tip
Review cancelled items periodically to ensure no critical requests were mistakenly stopped or left unresolved
After Adding to a Group – Keeping Everything in Perfect Sync
When an approved item is added to a group, it automatically appears inside the Group Page under Inventory—ready for tracking, cost management, or quick edits. Every update here keeps your inventory organized and your financials accurate without extra steps.
How to Get There
Open the Inventory Page
- Navigate to your project workspace and open the Inventory section and select the group
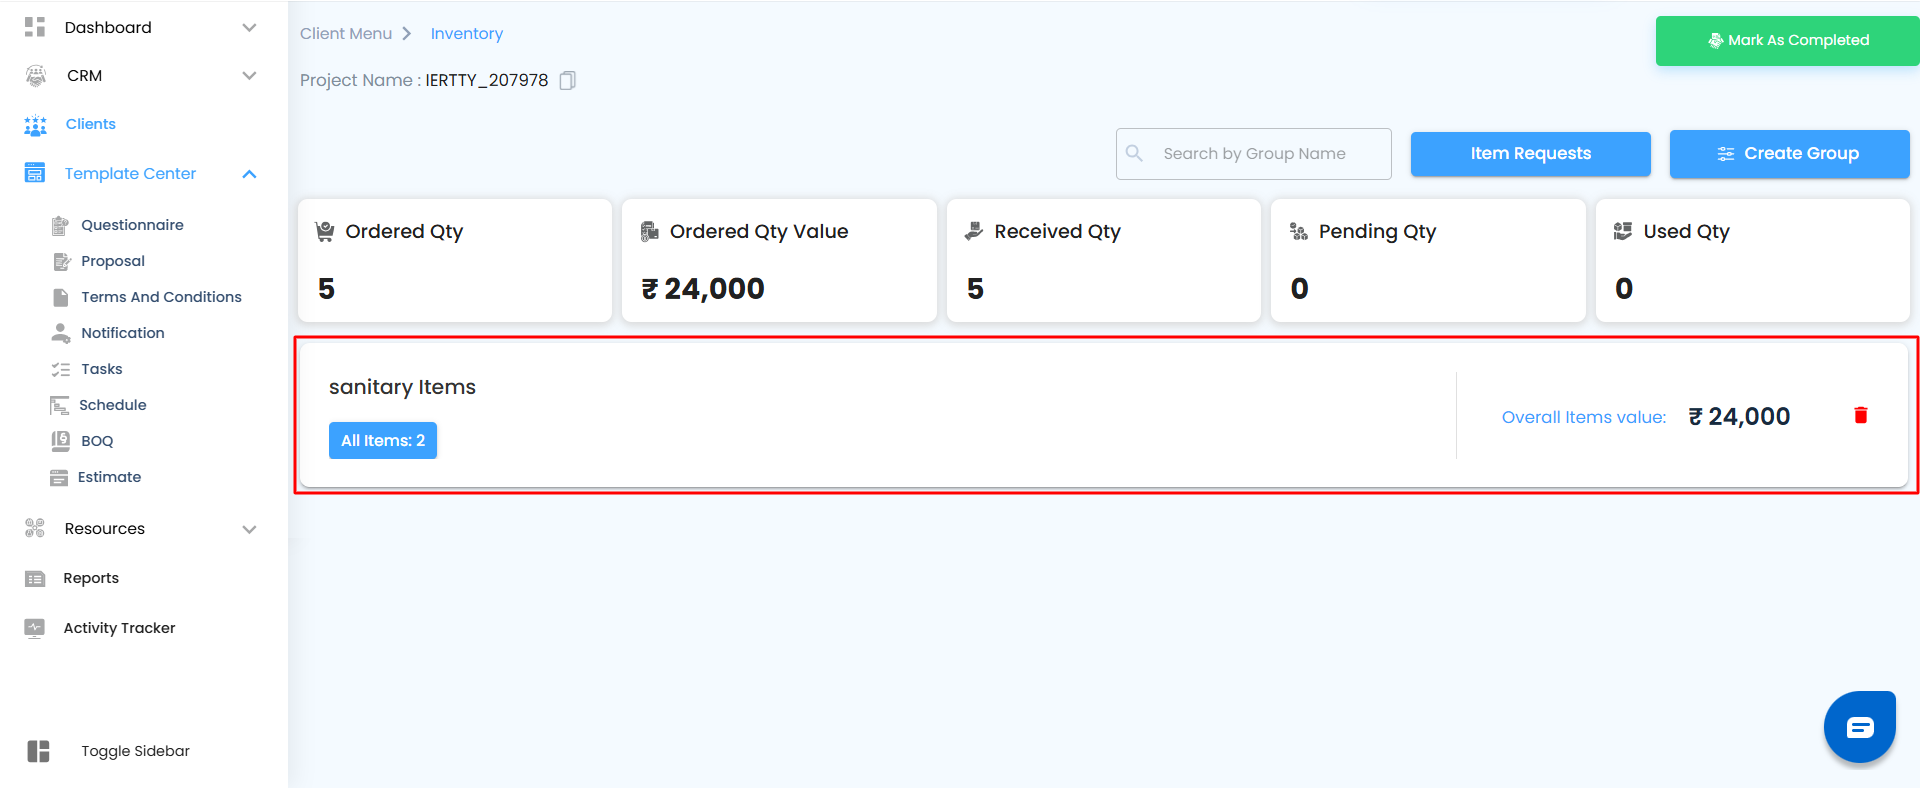
Go to Groups
- Click on Groups and select the group where the approved item was added.
What Happens Here
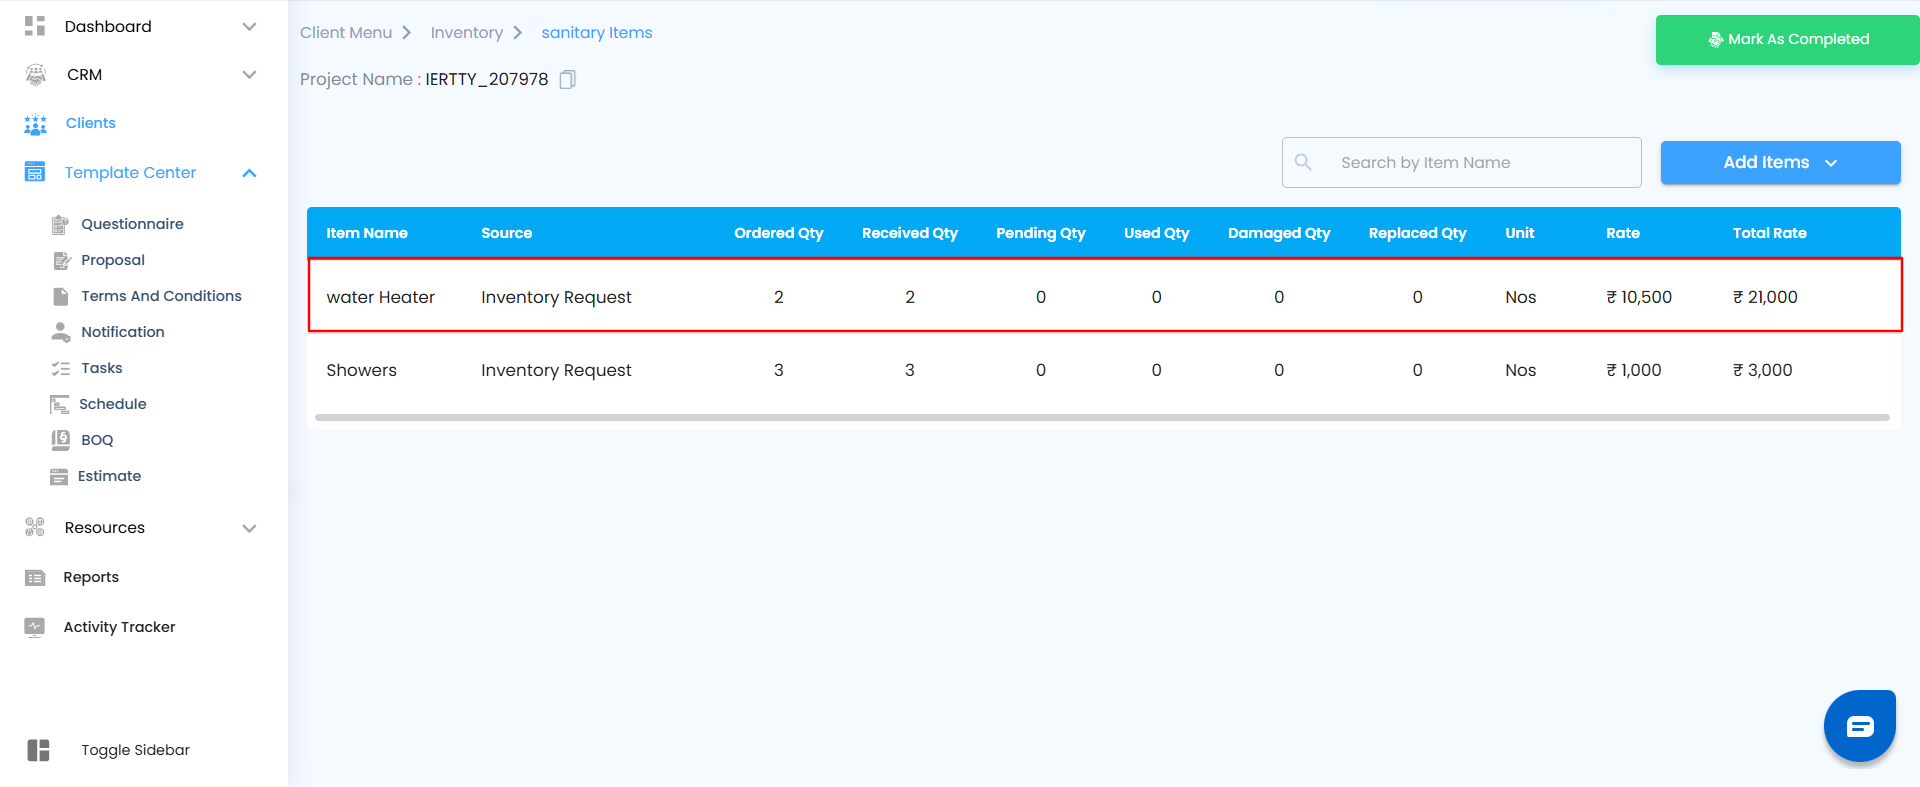
The item you added from the approval page now appears inside the selected group. From this page, you can:
- Manage the item directly as part of your project’s inventory.
- Add the item to Expenses: Click the three dots beside the item and select Add to Expenses.
This instantly converts the item into an expense entry, linking it to your project’s cost tracking.
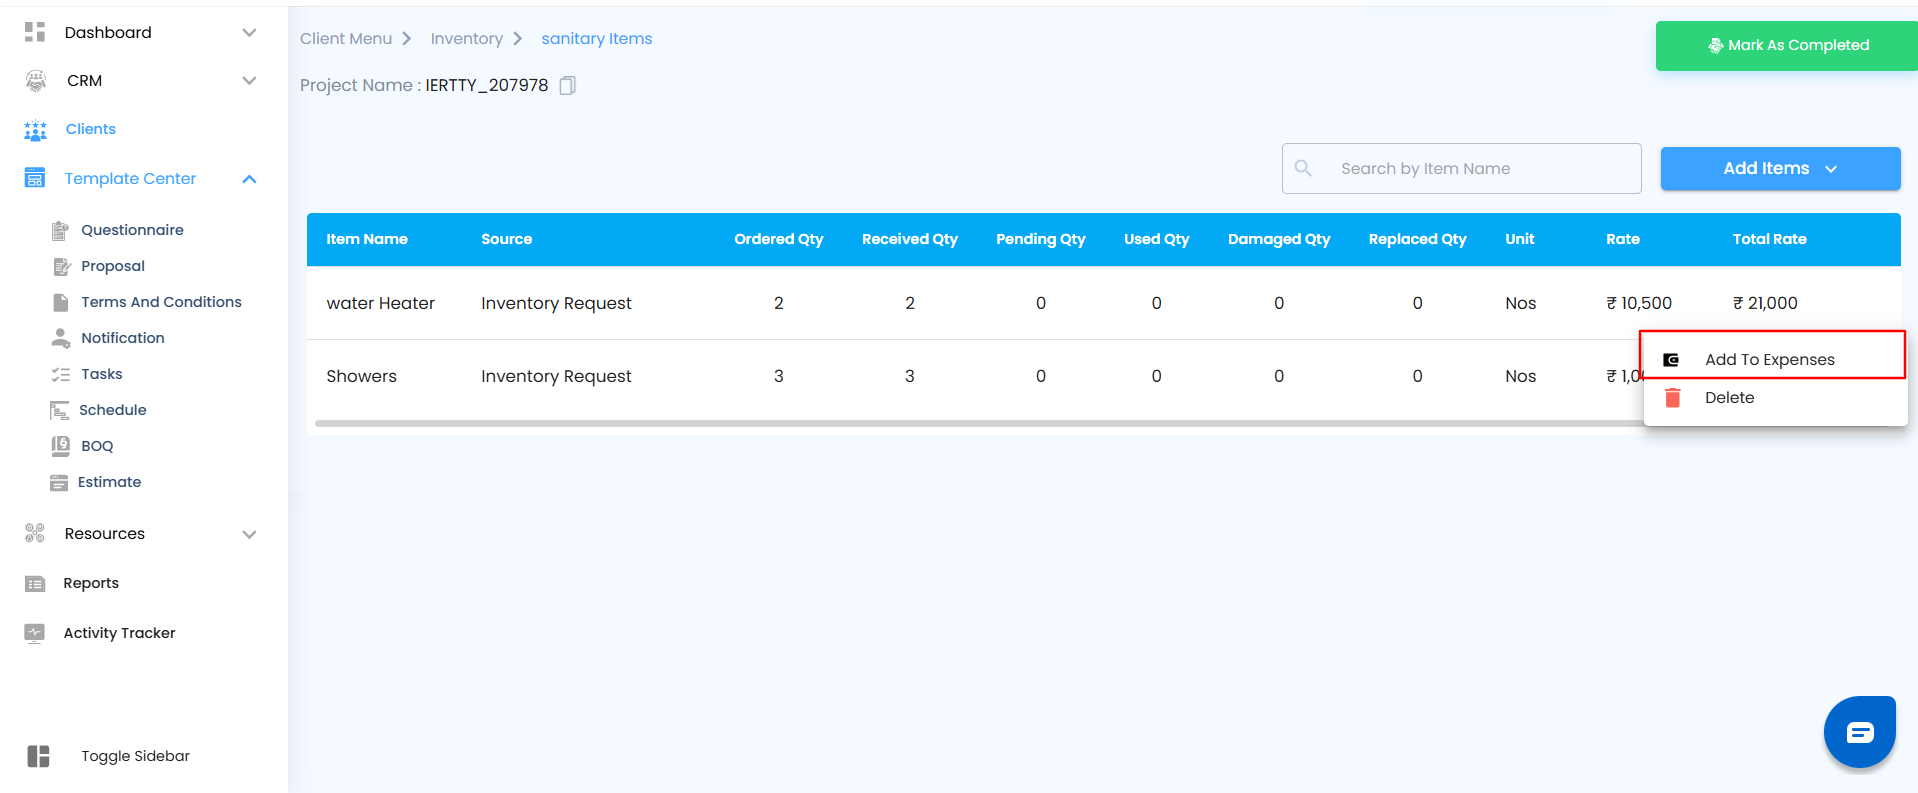
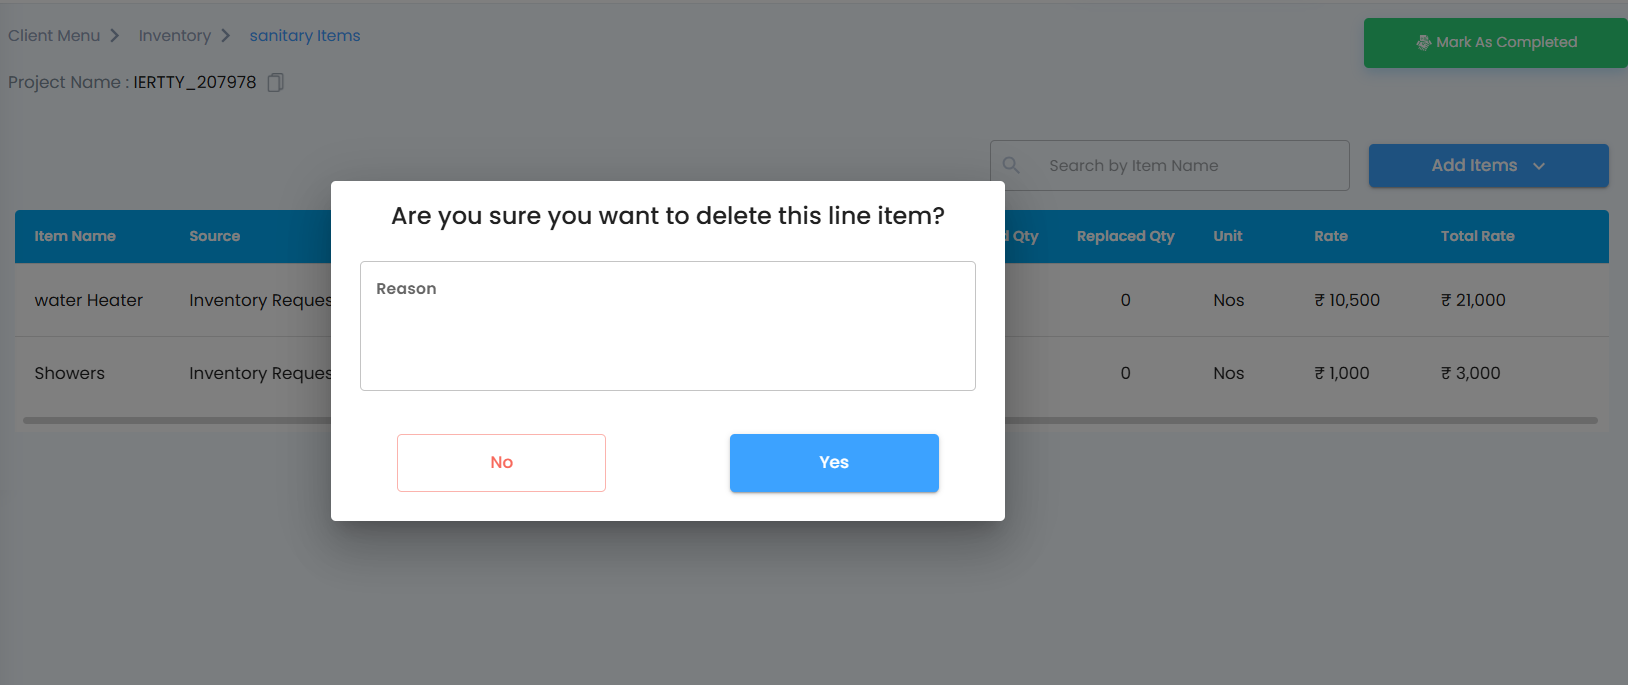
- Delete the item: If it was added by mistake, click the three dots and select the Delete icon.
A pop-up will appear asking, “Are you sure you want to delete this line item?” Confirm to remove it from the group instantly.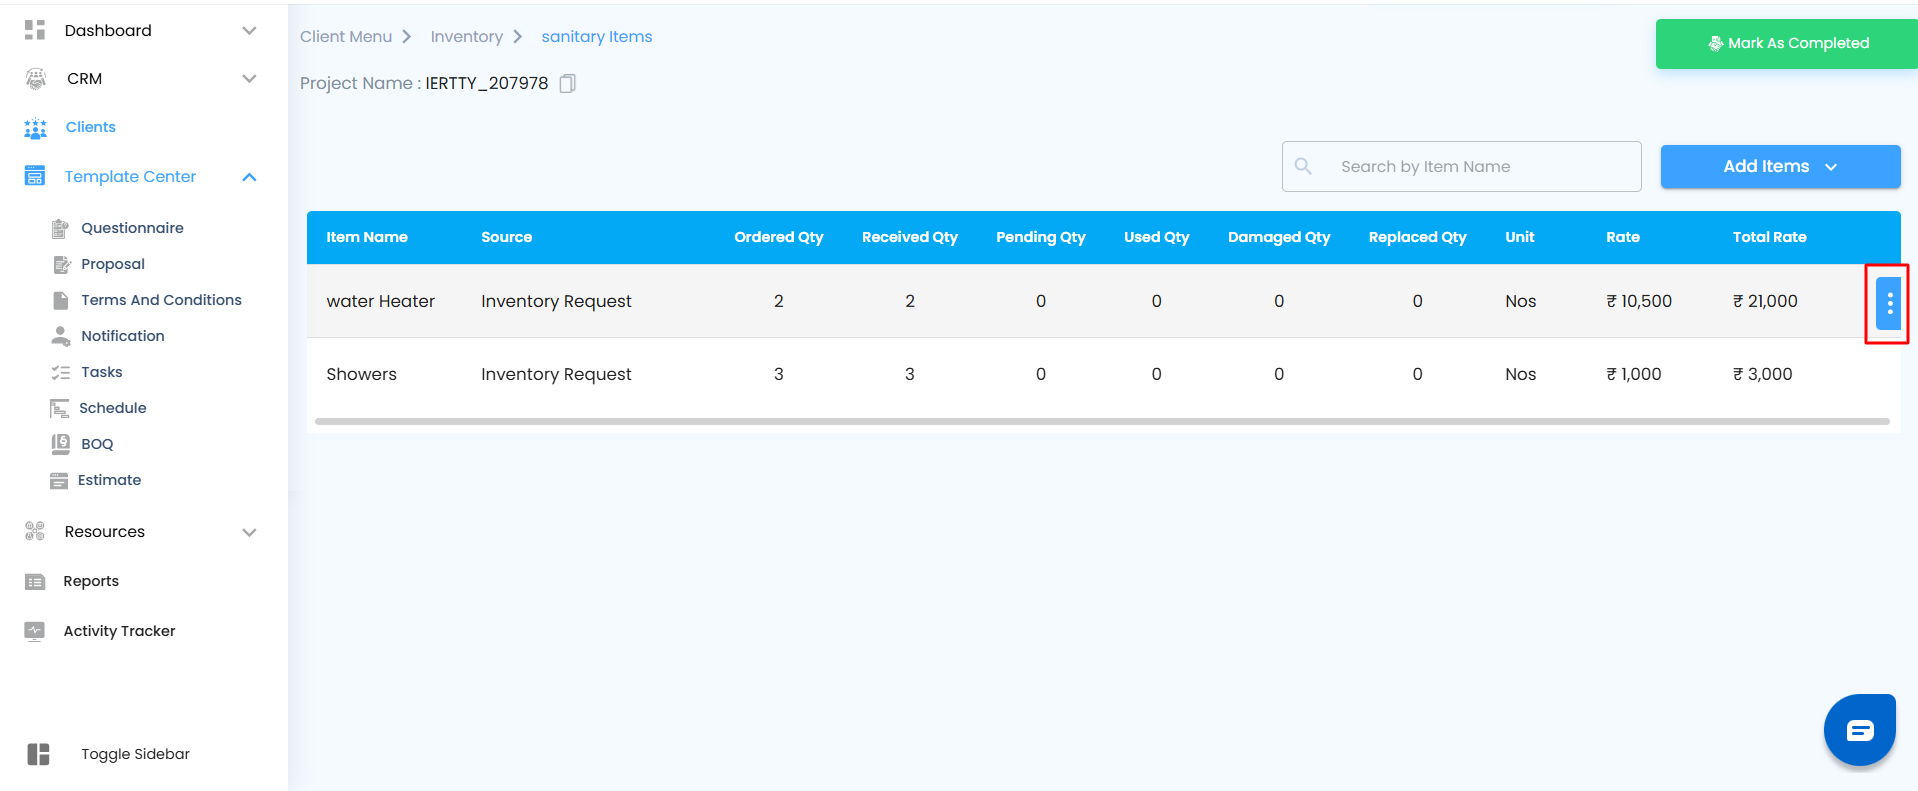
All cost-related actions made here are automatically reflected in your project’s total expense summary, ensuring every number stays up to date and aligned.
Pro Tip
Get into the habit of reviewing your group items regularly. Convert approved items into expenses as soon as they’re used, and clean up any unnecessary entries.
Was this article helpful?
That’s Great!
Thank you for your feedback
Sorry! We couldn't be helpful
Thank you for your feedback
Feedback sent
We appreciate your effort and will try to fix the article