Overview
An RFQ (Request for Quotation) lets you ask vendors for pricing on a list of materials or services. You can send the same RFQ to multiple vendors at once, so you can compare what each one quotes and pick the best option for your project.
Getting There
- Open the Client module from the sidebar and choose the client you're creating the RFQ for.
- Inside the client's workspace, go to Procurement > RFQ.
- Click Create RFQ.
Choosing How to Start
Select Start from Scratch to build a new RFQ without pulling from an existing estimate, then click Proceed.
Filling in RFQ Details
At the top of the form, enter:
- Request for Quotation Title
- S.No - auto-generated, no action needed
- RQD By - the date you need a response by
- Created On
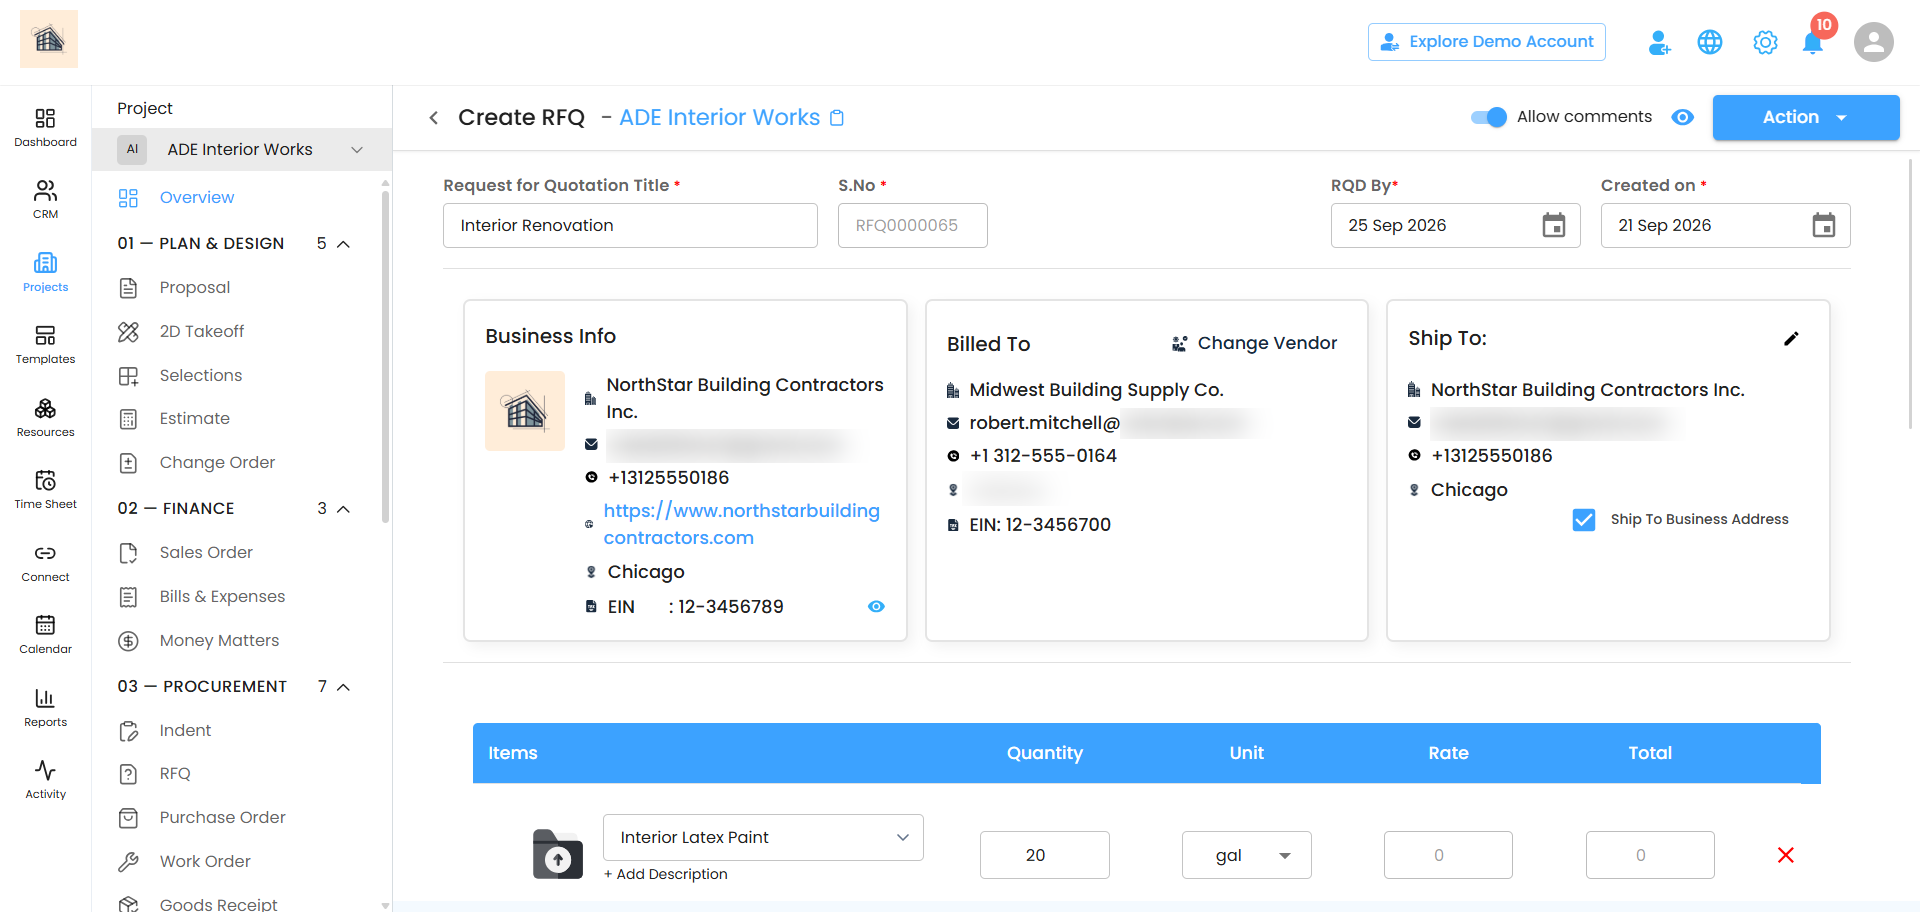
Below that, you'll see three info cards:
- Business Info - your organization's details, pulled in automatically
- Billed To - where you add vendor details (click Add Vendor Details, select a vendor from the list, then click Add)
- Ship To - check Ship To Business Address if items should be delivered there, or leave it unchecked to enter a different delivery address
Adding Items
In the Items table, add what you need using either method:
- Add Item - enter the item name, quantity, unit, and rate manually. Best for new or custom items.
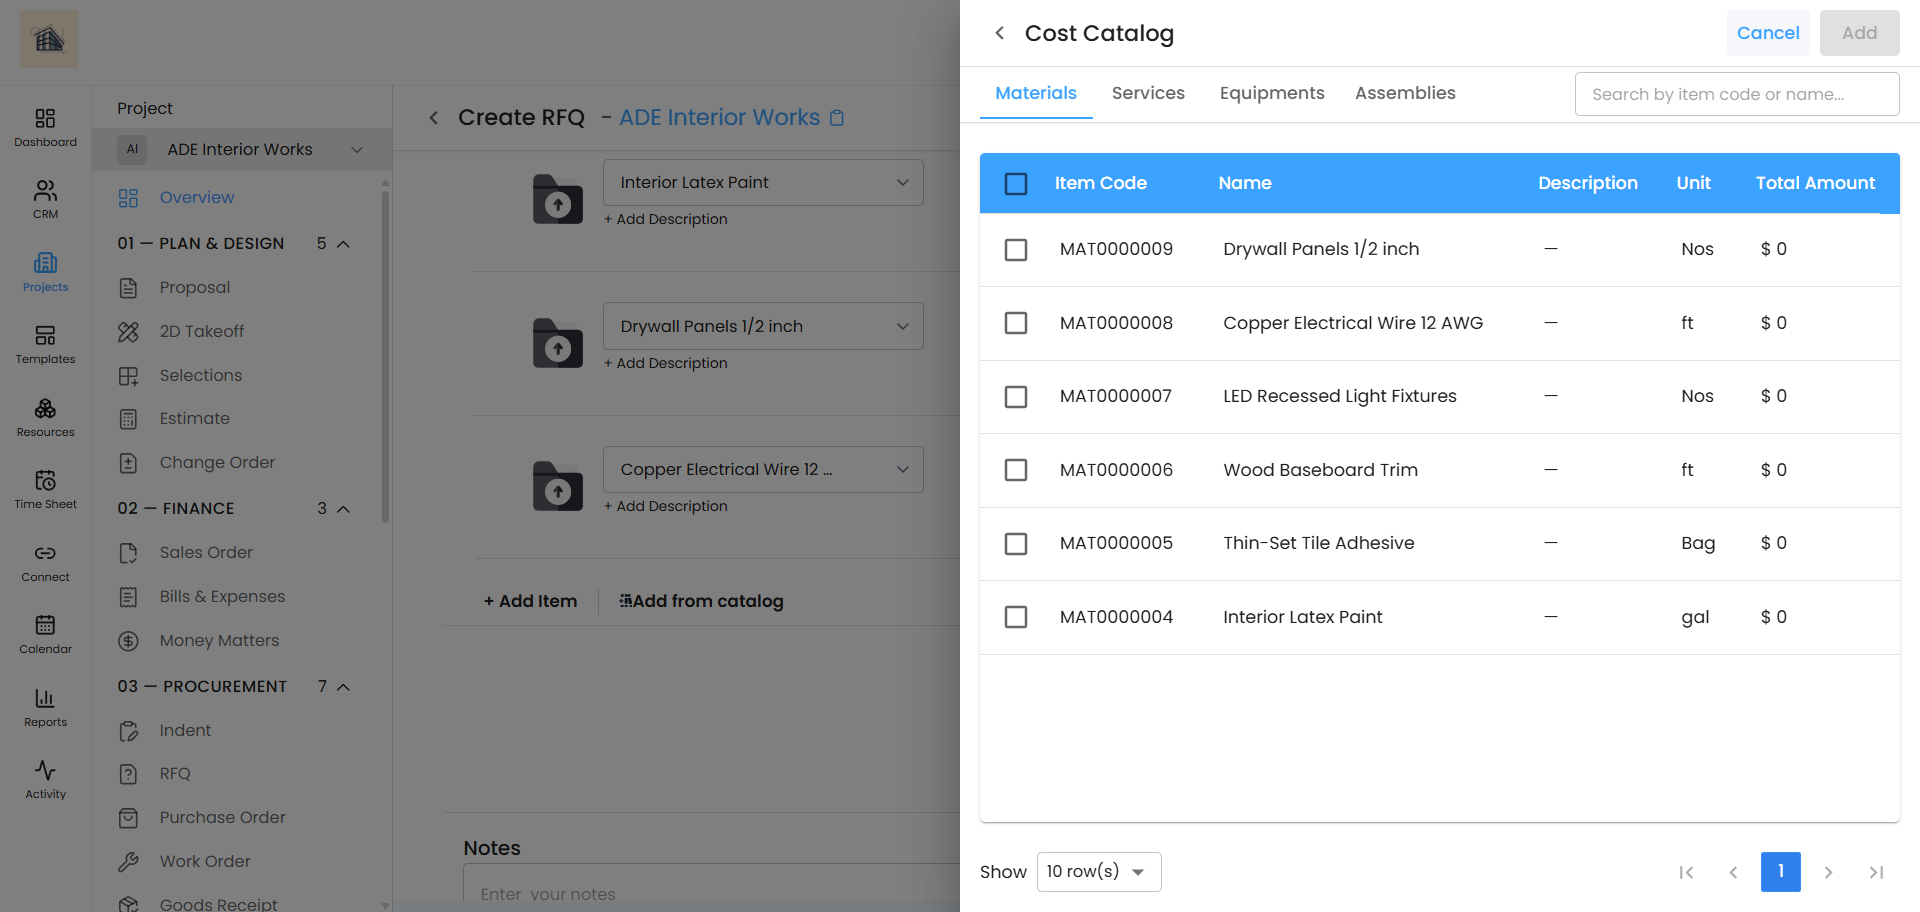
- Add from catalog - opens the Cost Catalog, where you can pick saved items from four tabs: Materials, Services, Equipments, and Assemblies. Search by item code or name, check the items you want, and click Add.
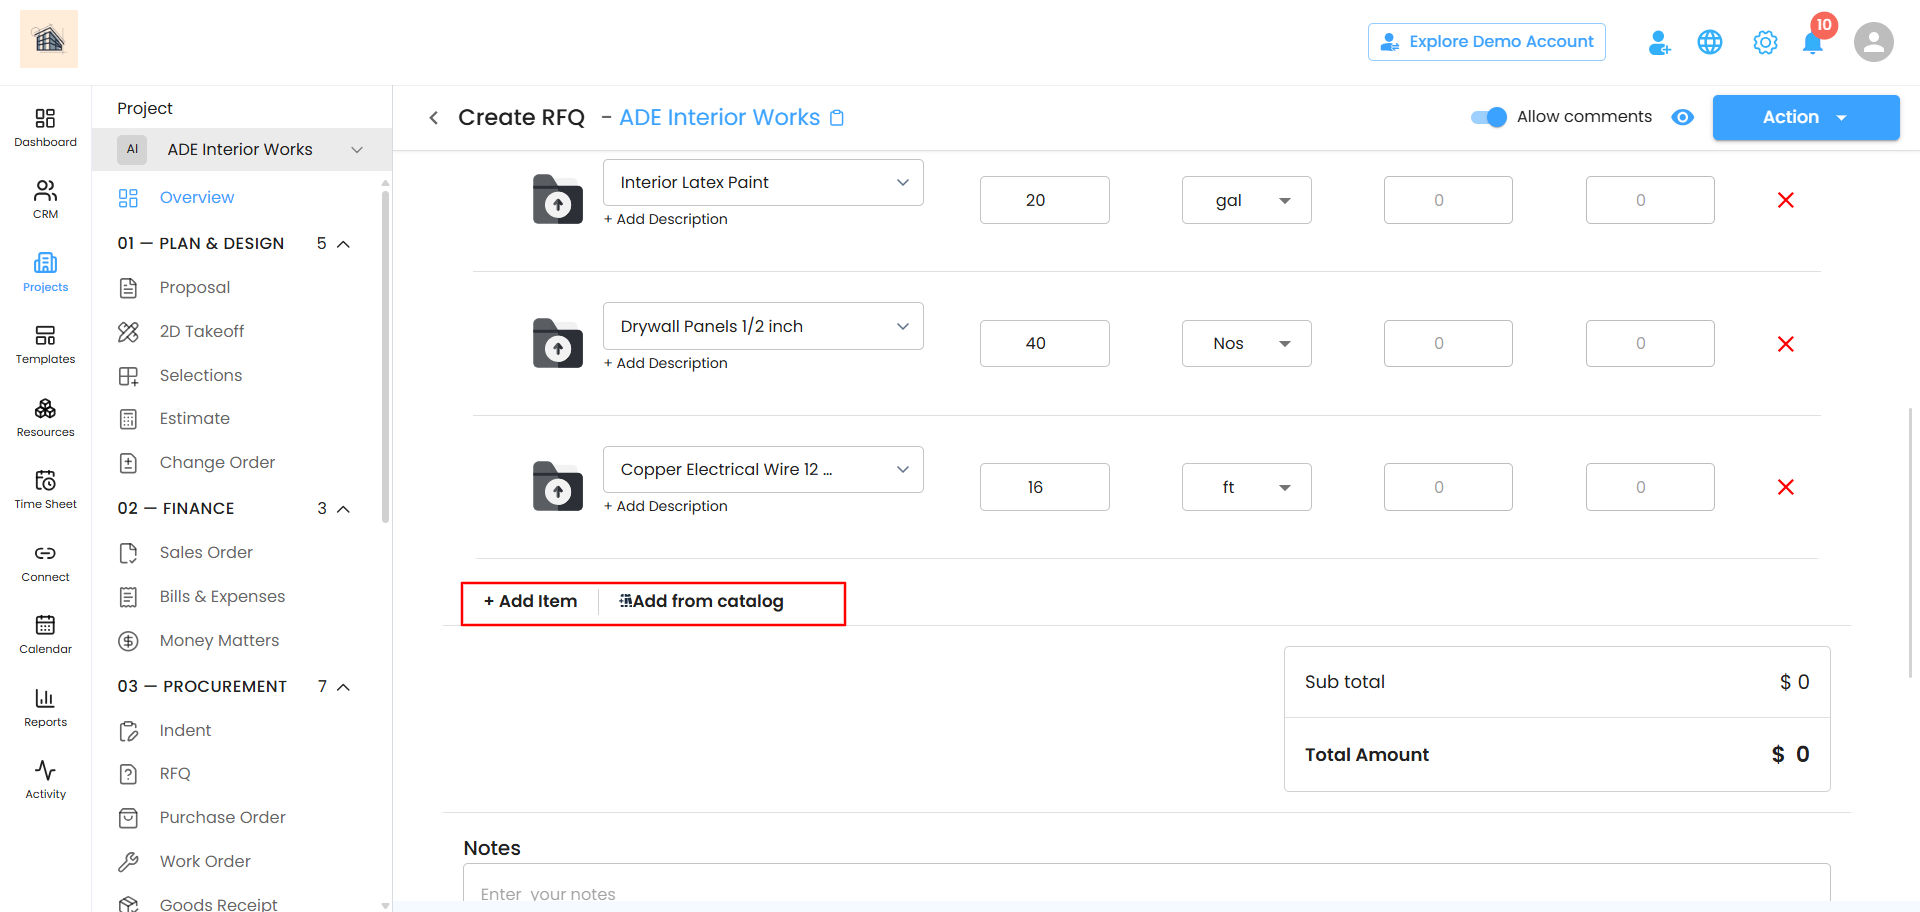
As you add items, the Sub total and Total Amount update automatically at the bottom of the table.
Notes and Attachments
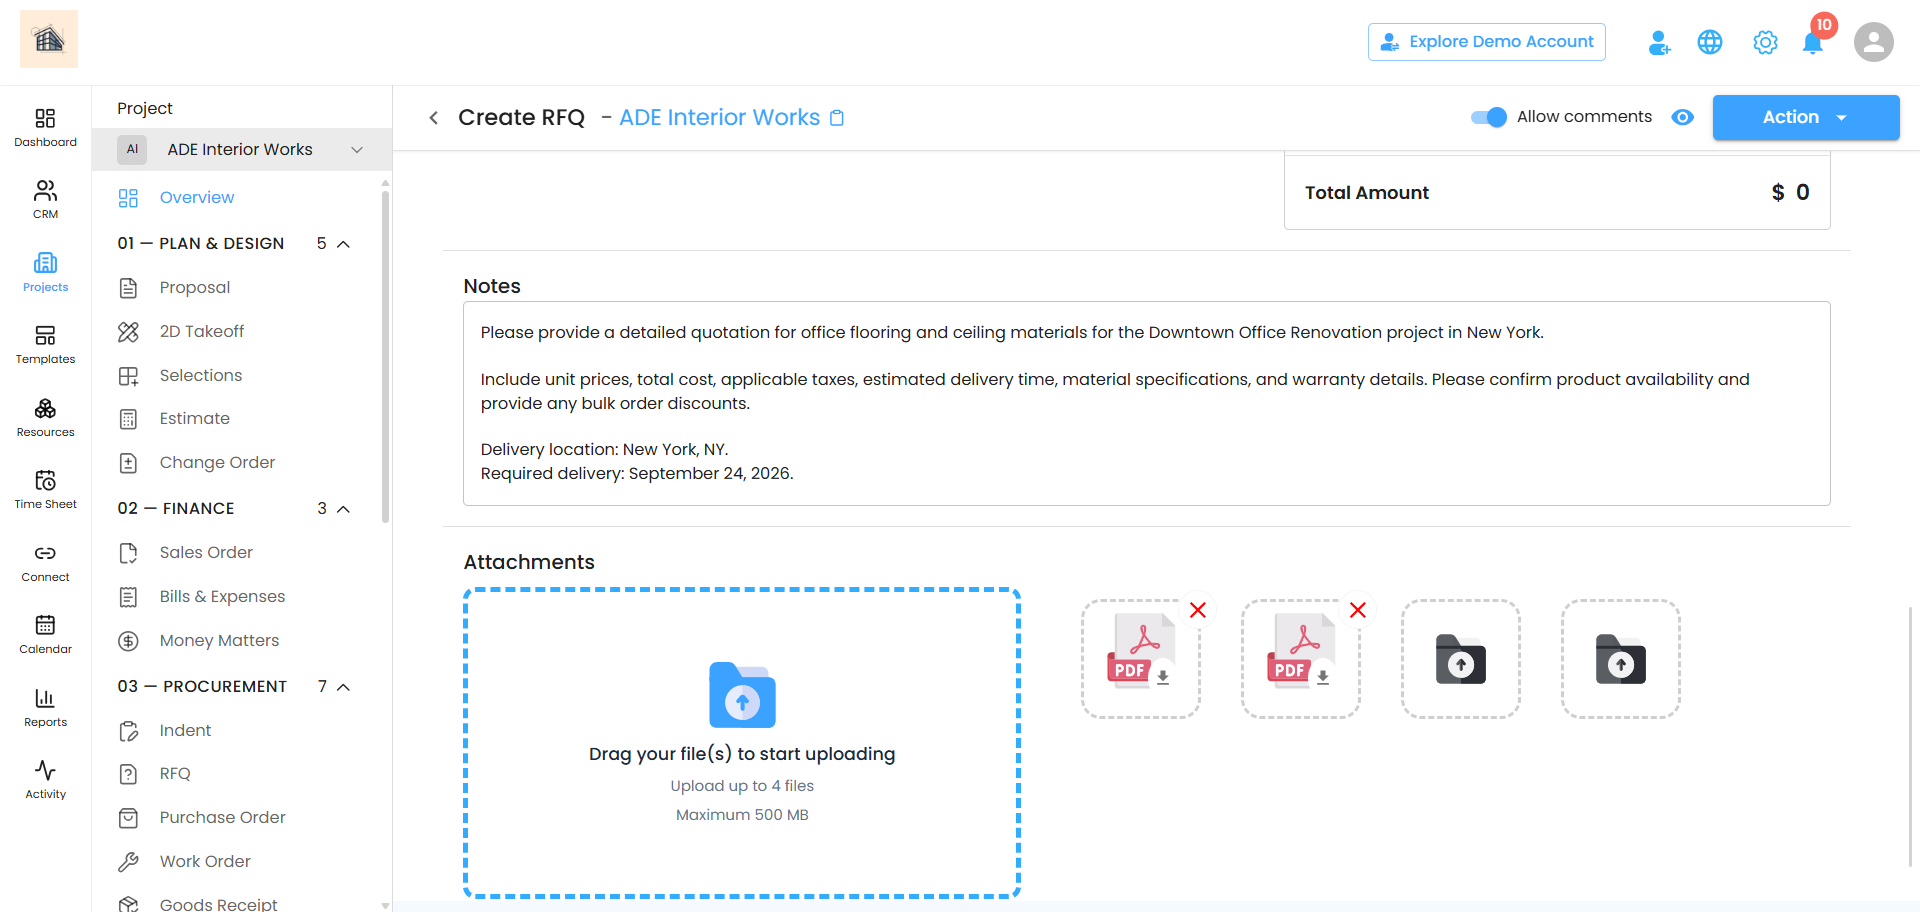
Use the Notes box to add any extra information for the vendor. Under Attachments, you can upload up to 4 files (500 MB max each) by dragging them in or clicking to upload.
 Toggle Allow comments at the top if you want vendors to be able to leave comments on the RFQ.
Creating the RFQ
Once everything's filled in, click Action in the top right, then select Create RFQ.
Your new RFQ will appear in the RFQ section, ready to review, share, or update.
Renaming an RFQ
- Go to the RFQ tab and find the quotation you want to rename.
- Click on the quotation name — it becomes editable.
- Type the new name and click the tick icon to save.
You'll see a "Rename updated successfully" confirmation, and the new name reflects instantly in your list.
Was this article helpful?
That’s Great!
Thank you for your feedback
Sorry! We couldn't be helpful
Thank you for your feedback
Feedback sent
We appreciate your effort and will try to fix the article