Overview
Creating a schedule lets you organize your project into manageable blocks, assign timelines, and track progress. This article walks you through creating a schedule and explains every field in the Add Schedule panel.
Before you begin: Open the required project and click the Schedule tab.
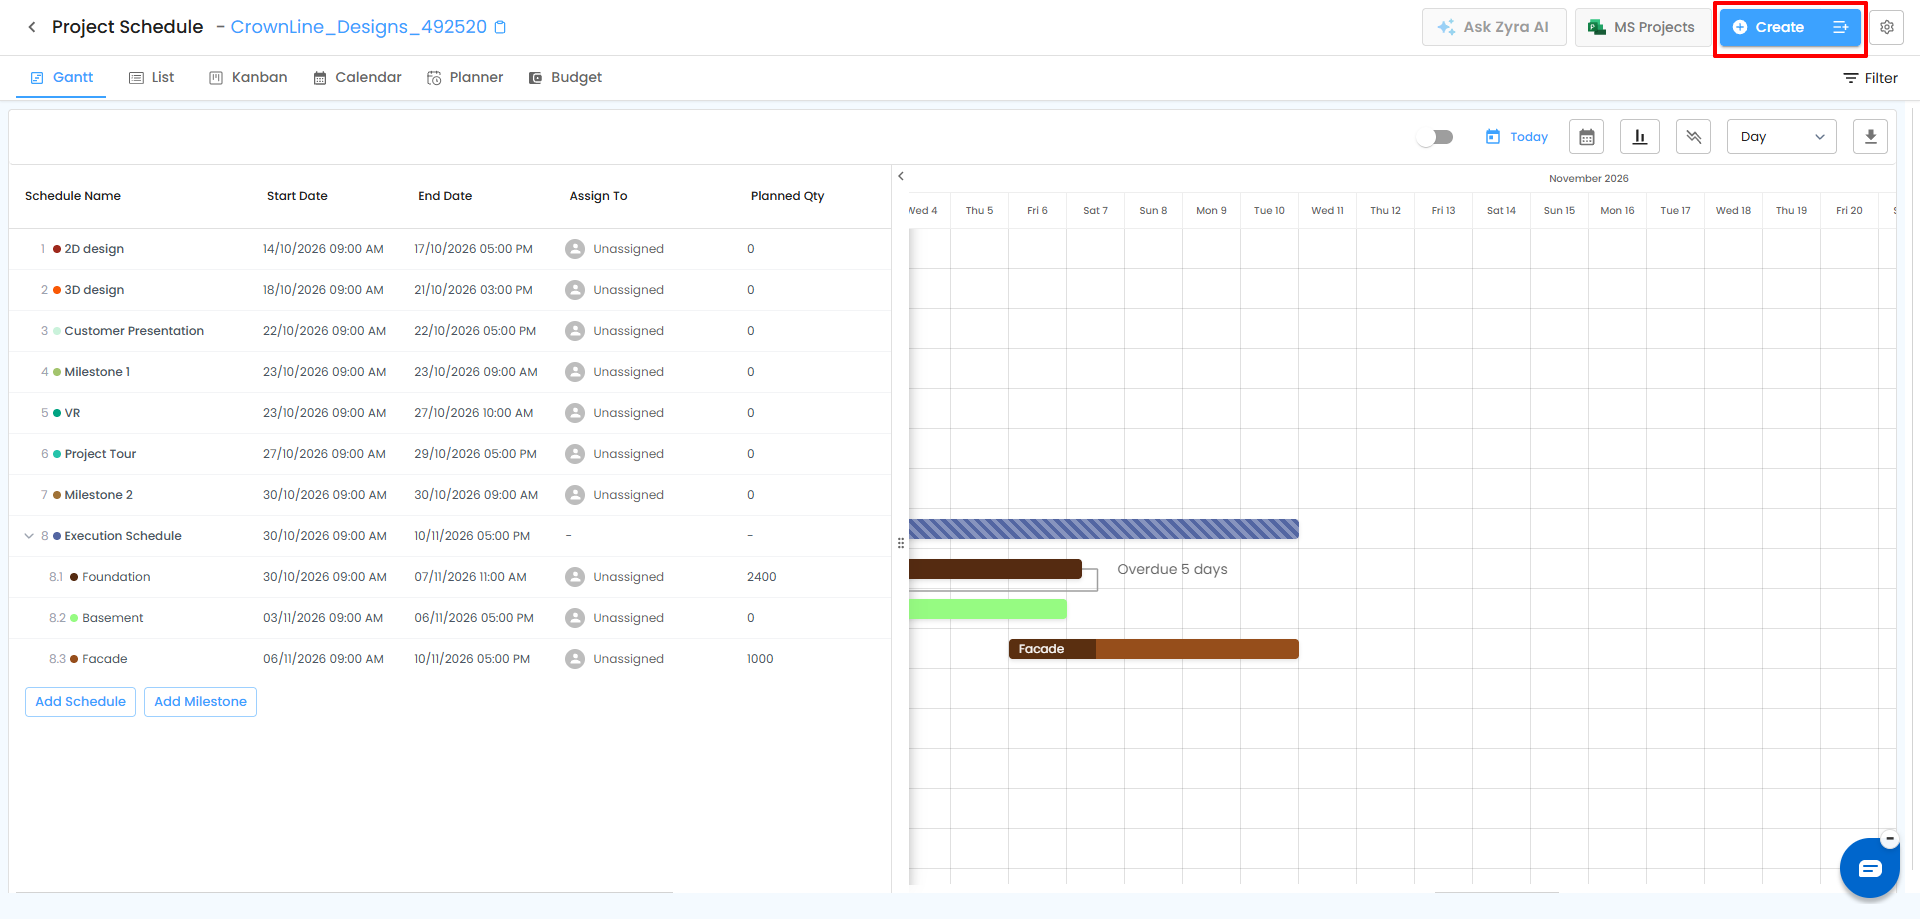
Step 1: Start a New Schedule
- Click + Create.
- The Add Schedule half-canvas panel opens on the right.
Pro Tip: Use clear, descriptive names so you can quickly understand each schedule's purpose when tracking several at once.
Step 2: Fill in the Basic Info Tab
| Field | Description |
|---|---|
| Schedule Name | A meaningful name for the schedule. |
| Phase | Select the relevant phase from the dropdown, if applicable. |
| Status | Select the schedule's status. You can create and manage custom statuses from the Kanban View by adding a new status. |
| Priority | Low, Medium, or High. |
| Assign To | The team member responsible. |
| Schedule Color | Color used to distinguish the schedule on the timeline. |
| Start Date | Pick the start date from the calendar. |
| End Date | Pick the end date, or enter a duration to calculate it automatically. |
| Duration | Shows the duration based on the start and end dates. |
| Deadline | Turn the toggle on to set a specific deadline date. |
| Planned Qty | Total quantity planned for the schedule. |
| Completed Qty | Quantity completed so far. |
| Unit | The unit used to measure planned and completed quantities. |
| Completion % | Shows completion based on quantities. |
| Description | Additional information or instructions. |
Progress tracking: Planned Qty, Completed Qty, and Completion % are interdependent. When you edit the quantity or the completion percentage, the other value recalculates automatically.
Step 3: Configure the Additional Details Tab (Optional)
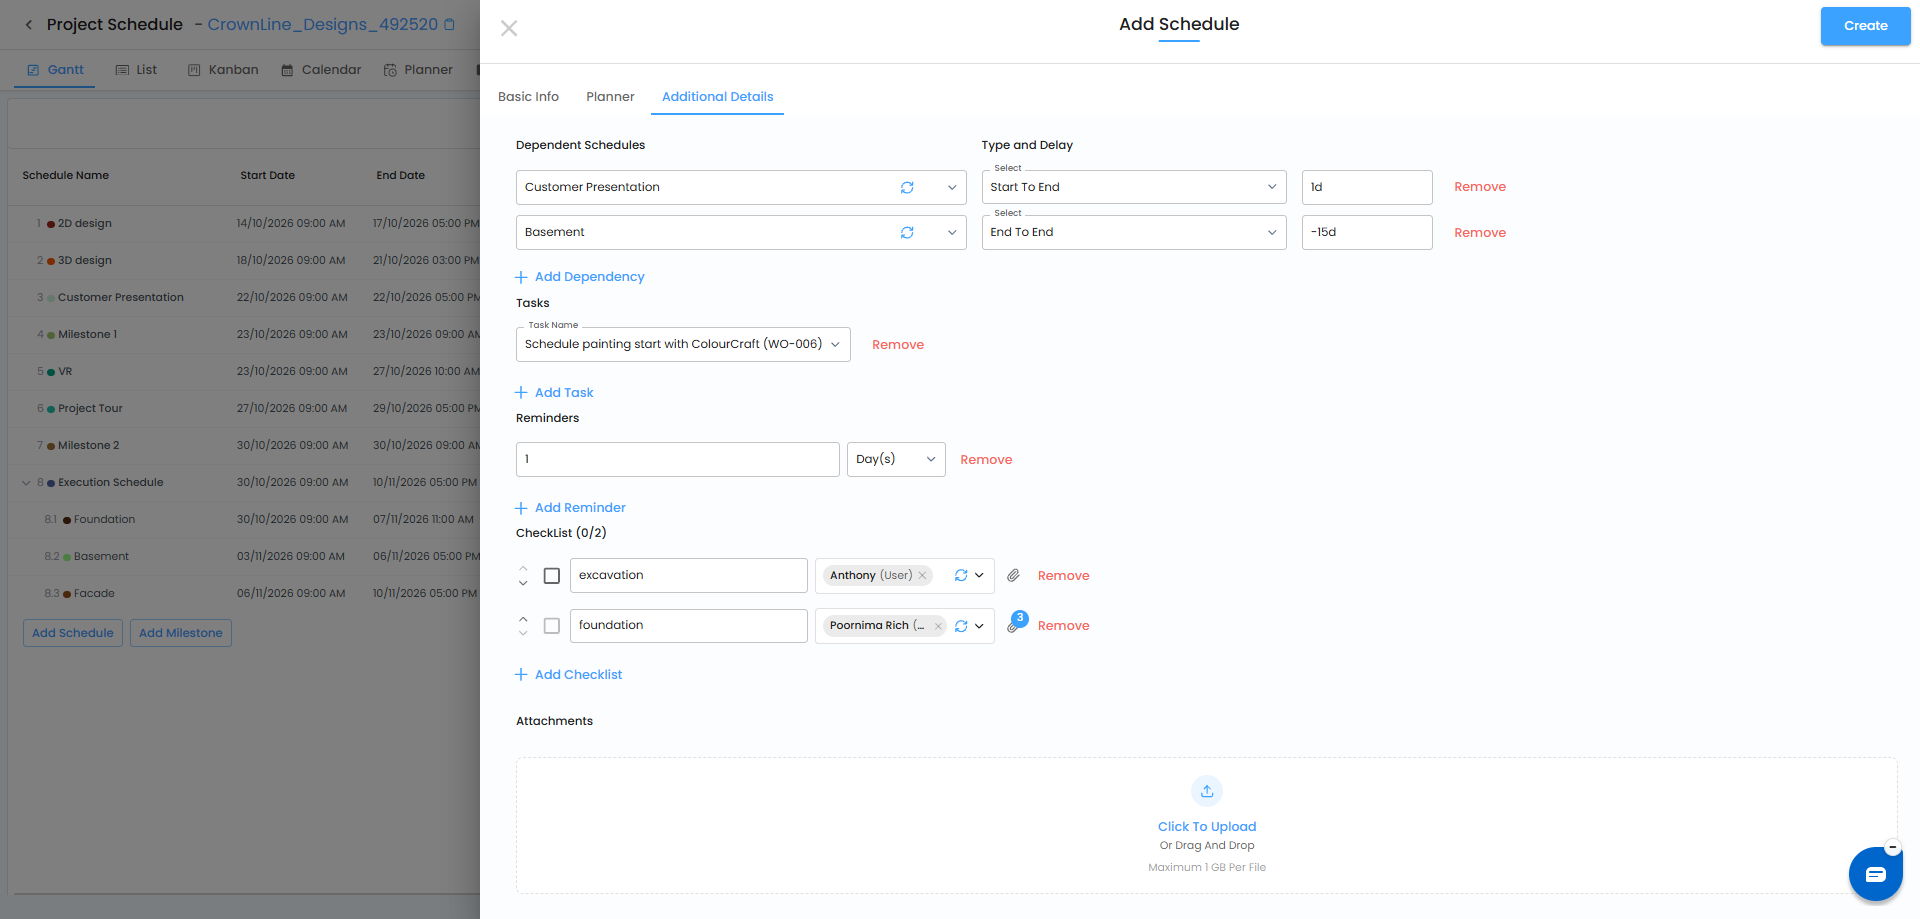
Use this tab to set dependencies, create tasks, add reminders, manage checklists, and upload files.
1. Add Dependency
Set whether this schedule depends on another schedule.
| Type | Meaning |
|---|---|
| Start to Start (SS) | The dependent schedule starts when the main schedule starts. |
| Start to End (SE) | The dependent schedule ends when the main schedule starts. |
| End to End (EE) | The dependent schedule ends when the main schedule ends. |
| End to Start (ES) | The dependent schedule starts when the main schedule ends. |
Delay (in days): the number of days before or after the dependency is triggered.
2. Add Task
Create a task directly from the schedule without going to the Task module.
- Enter the Task Name.
- Click Add New Item below the dropdown.
- Select the task's Status.
- Choose an Assignee.
- Select the task's End Date.
3. Add Reminder
Set reminders to notify the relevant team members before the schedule's due date.
4. Add Checklist
Break the schedule into smaller, trackable activities. For each item you can set:
- Checklist Item – the action to complete
- Assignee – who is responsible
- Attachments – supporting files for that item
- Checkbox – mark it complete when done
You can drag items to reorder them. The completion order (Sequential or Random) is configured in Schedule Settings.
5. Upload Files
Use Attachments to upload supporting documents.
- Drag and drop files into the upload area, or click to select files.
- Upload multiple files as needed.
- Maximum supported file size: 1 GB.
Step 4: Save the Schedule
Click Create to save. The schedule appears in the Gantt View and List View. You can edit it any time.
Pro Tip: Fill in optional fields such as dependencies, tasks, and reminders. This improves tracking, helps avoid conflicts, and keeps the team aligned. Review schedules regularly so they reflect actual progress.
Frequently Asked Questions
Can I change a schedule after creating it?Yes. Open the schedule's menu and click Edit to update any detail.
How do I add a custom status?Add a new status in the Kanban View; it then becomes available in the Status field.
What is the difference between End Date and Deadline?End Date is the planned finish. Deadline is a separate date by which the schedule must be completed, used to flag upcoming or delayed work.
Related Articles
- Gantt View
- List View
- Schedule Settings – Configure Your Project
- Setting Off-Days & Working Hours
Need Further Assistance?
Contact your organization administrator or the IntoAEC support team.
Was this article helpful?
That’s Great!
Thank you for your feedback
Sorry! We couldn't be helpful
Thank you for your feedback
Feedback sent
We appreciate your effort and will try to fix the article