Your accepted estimate already describes the work broken into sections and line items. Converting it to a schedule turns that breakdown into a project plan with dates, without retyping any of it.
Before you start
- The estimate must be accepted. The option does not appear on estimates in any other status.
- Your role determines whether you can do this. Creator and approver permissions apply here in the same way they do on estimates.
How to convert
Step 1 — Open the option
Find the accepted estimate and open its menu. Click Convert to Schedule.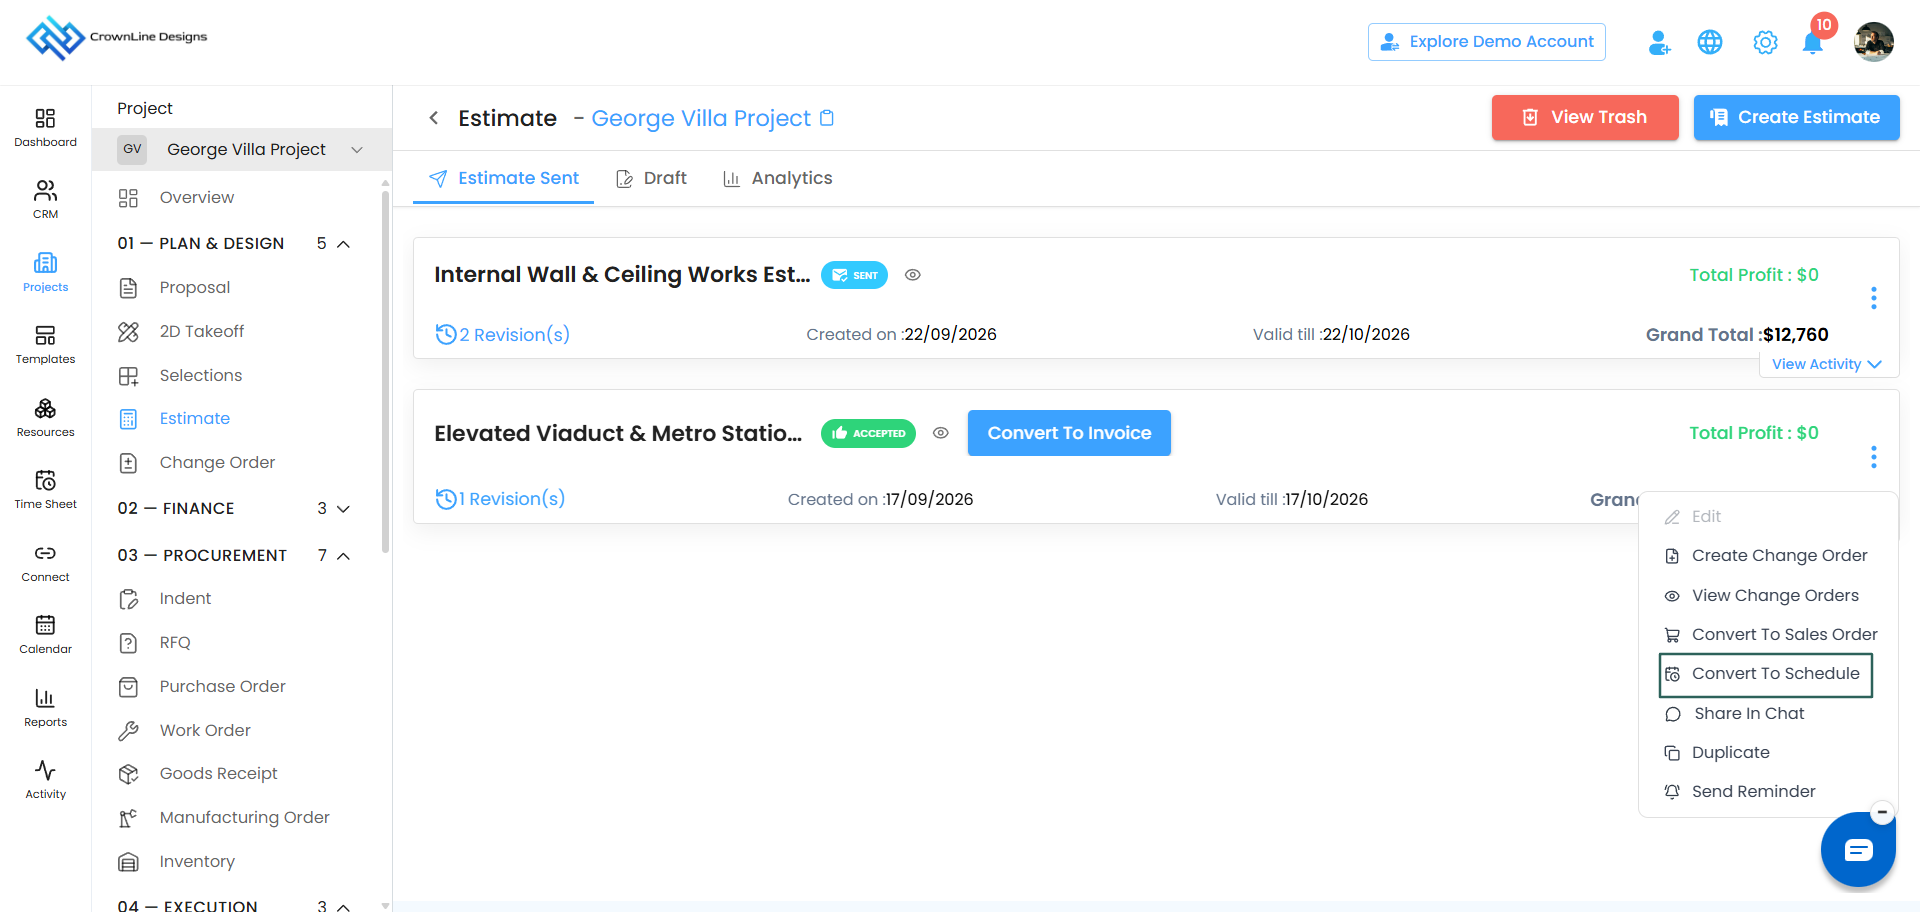
Step 2 — Check what is coming across
A popup shows you what will become your schedule:
- your sections
- the line items under them
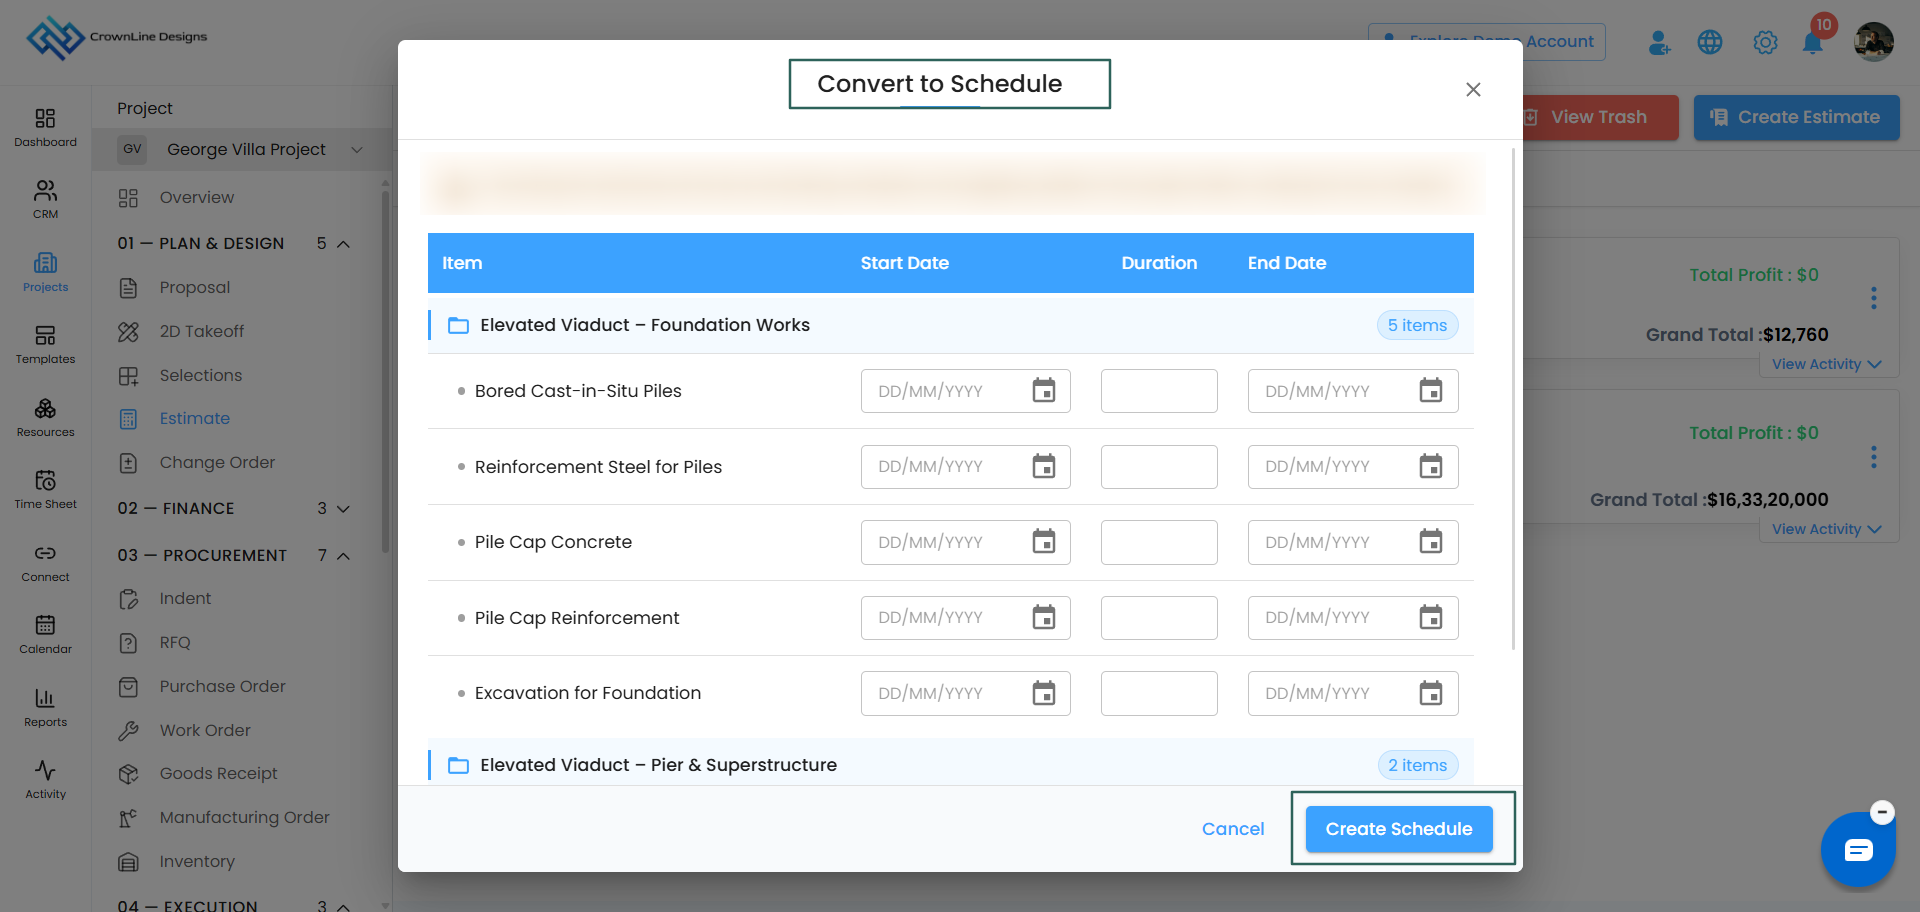
Materials are not included. A schedule is about the work and its timing, not the material breakdown underneath it.
Step 3 — Set your dates
For the schedule, fill in:
- Start Date
- Duration
- End Date
Step 4 — Create it
Click to create the schedule. If you have changed your mind, click Cancel and nothing happens.
What happens after
Your schedule is created and appears in two places:
- Schedule — where you plan and track the work
- Budgeting — where the cost side is tracked against the plan
The option disappears
Once you have converted an estimate to a schedule, Convert to Schedule is removed from that estimate's menu.
This is intentional. One estimate produces one schedule, so there is never any confusion about which plan the job is running to. If you see the option is gone, the schedule already exists — go to the Schedule module to find it.
Good to know
- Converting to a schedule does not affect the estimate itself in any way.
- It does not stop you converting the same estimate to an invoice or a sales order, or raising change orders against it.
Was this article helpful?
That’s Great!
Thank you for your feedback
Sorry! We couldn't be helpful
Thank you for your feedback
Feedback sent
We appreciate your effort and will try to fix the article