Overview
The Schedule module offers several views so you can plan, monitor, and manage a project in the way that suits the task. You can switch views at any time. The Planner tab appears only when Planner mode is enabled in Schedule Settings, and it replaces the Workload tab.
How to Open the Schedule Module
- From the left-side menu, open Clients/Projects.
- Select the required project.
- Click the Schedule feature. The Project Schedule page opens.
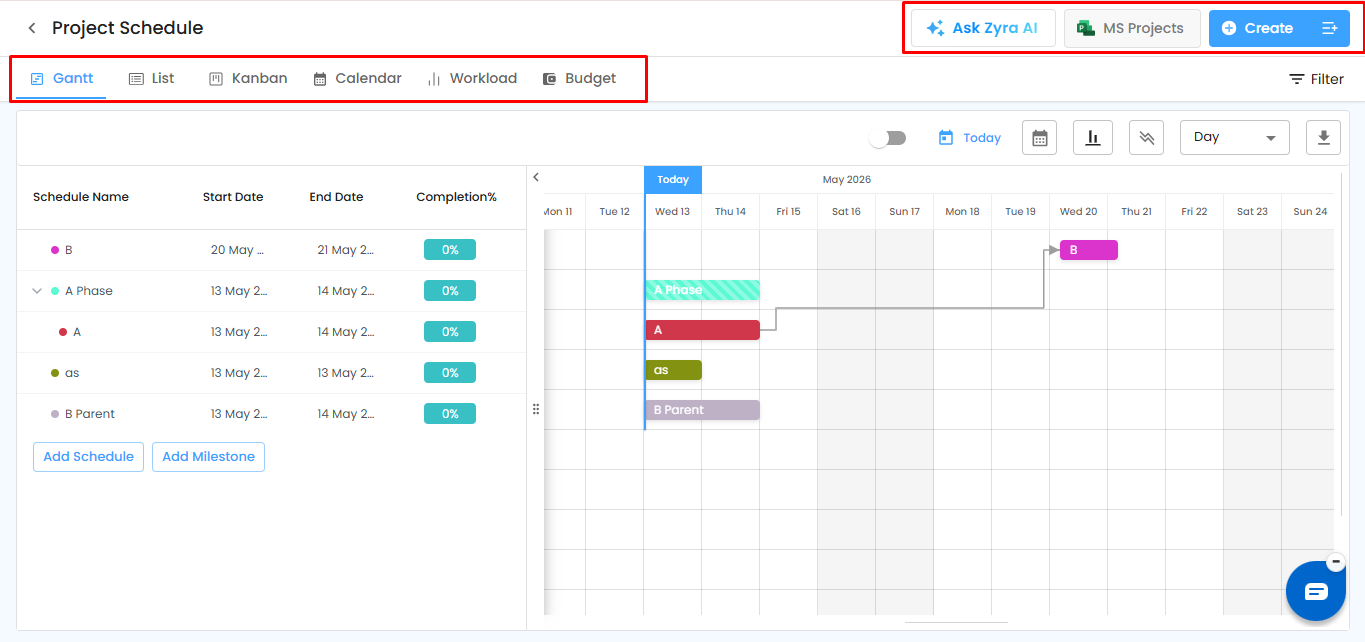
1. Gantt View (Default)
Opens by default when you enter the Schedule module.
- Displays schedules on a timeline
- Shows task duration and dependencies
- Tracks progress with date-wise planning visibility
Best for: timeline management, task sequencing, overall project coordination. See Gantt View for details.
2. List View
Shows all schedules in a table with Schedule Name, Phase, Start Date, Duration, End Date, Completion %, Assigned User, Priority, and Created Date.
Best for: filtering, reviewing details, and administrative tracking. See List View for details.
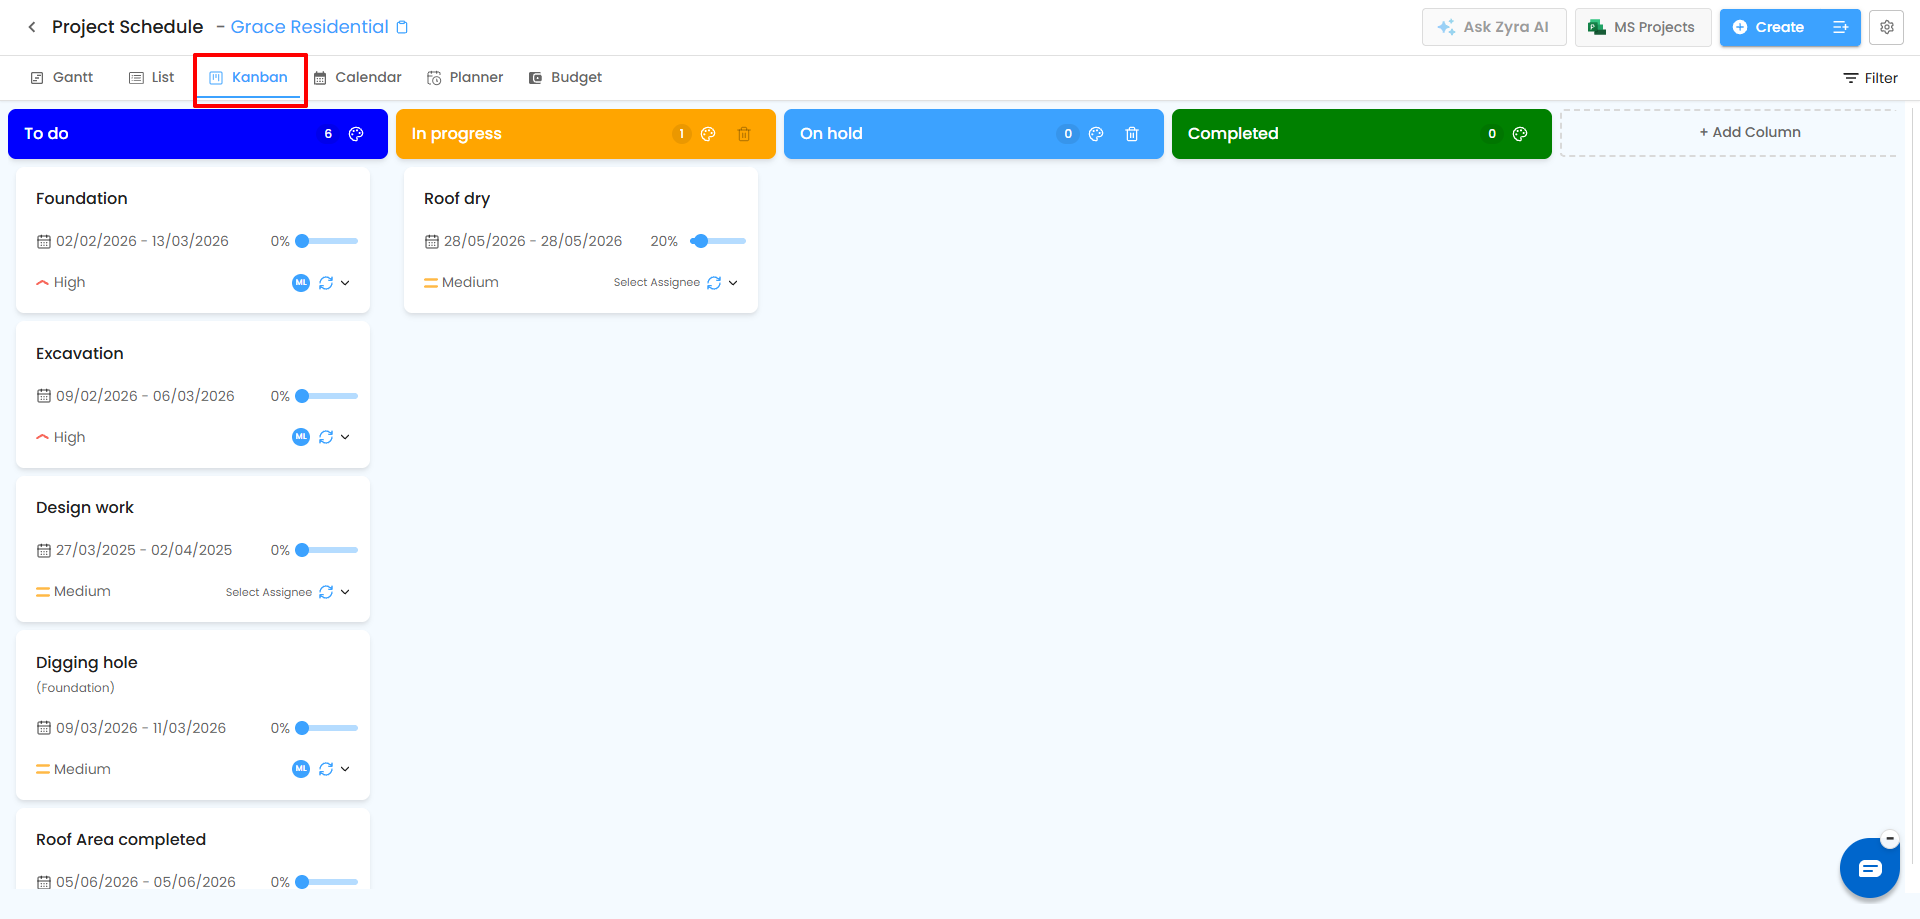
3. Kanban View
Organizes schedules into workflow stages such as To Do, In Progress, and Completed. Schedules appear as cards you can move between stages. You can also add custom statuses here, which then appear in the Status field when creating a schedule.
Best for: workflow management, status visibility, and team collaboration.
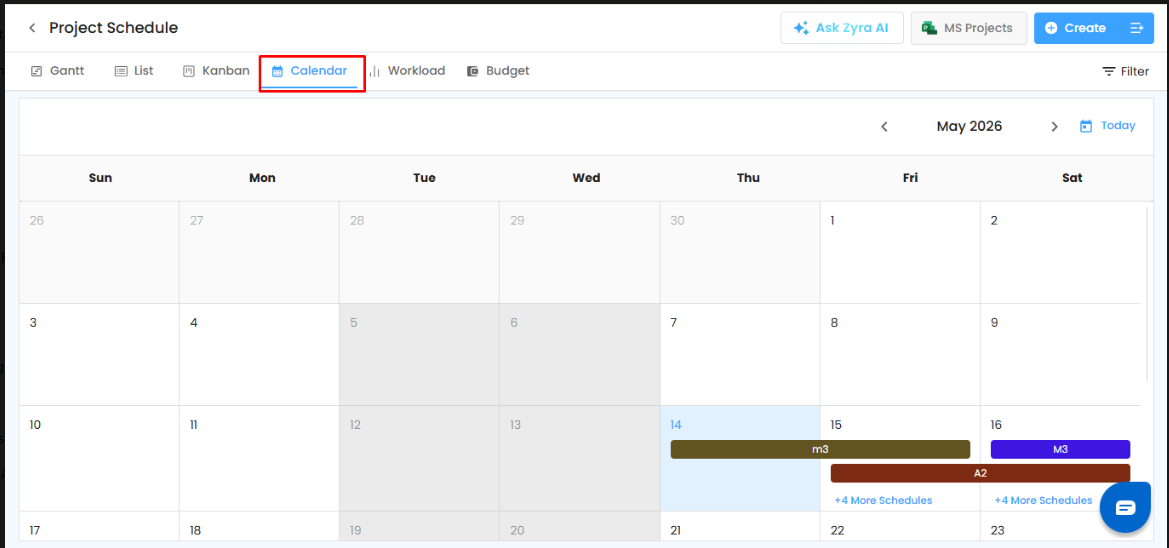
4. Calendar View
Displays schedules by date in a monthly calendar layout, with multiple schedules shown on their dates.
Best for: deadline visibility, monthly planning, and spotting upcoming activities.
5. Workload View
Helps project managers monitor assigned schedules and team capacity.
- Shows workload-related schedule assignments
- Helps identify resource availability
- Tracks assigned schedules per user
Best for: workload balancing and preventing over-allocation.
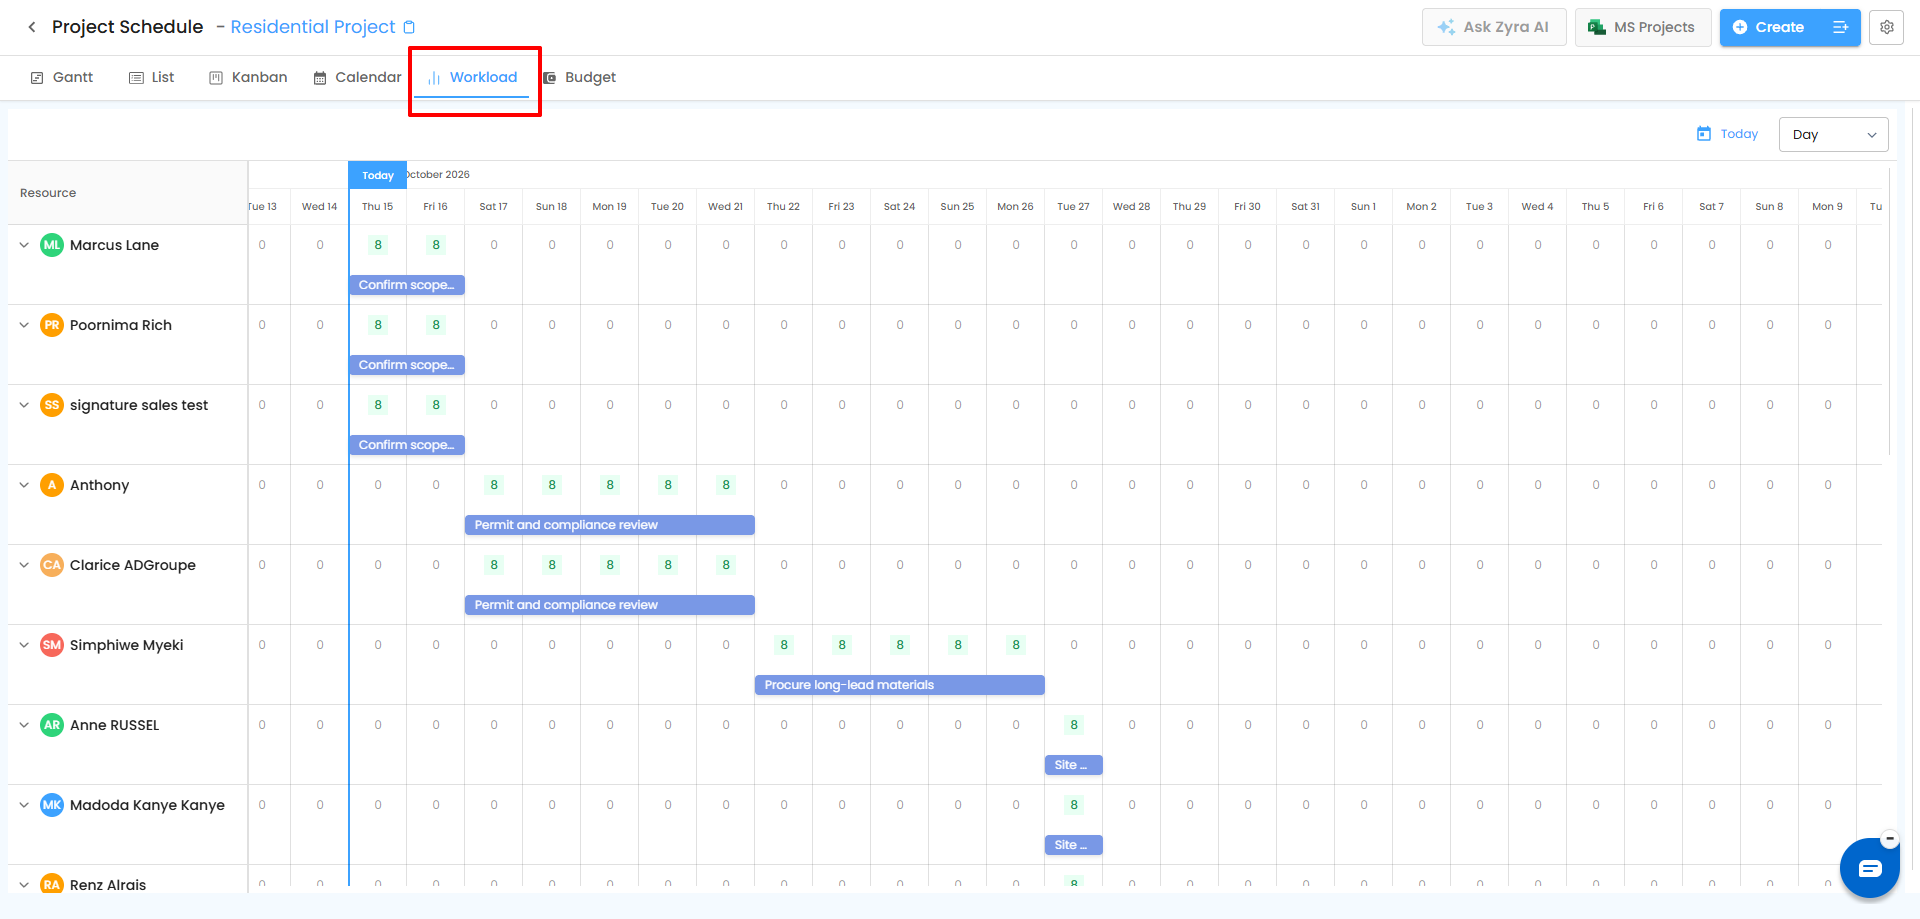
See Workload for details.
6. Planner View
A consolidated view of the materials, resources, quantities, and assets planned across your project's schedules, so you don't have to open each schedule separately.
How to access it
- Open the project and go to the Schedule module.
- Make sure Planner mode is enabled in Schedule Settings.
- Click the Planner tab in the Schedule header.
| Section | What it shows |
|---|---|
| Material Planner | Cumulative material details and planned, received, used, and unused quantities. |
| Resource Planner | Consolidated worker and shift assignments linked to schedules. |
| Quantity Planner | Planned and used quantities across schedules. Daily allocations are reviewed in each schedule's own Quantity Planner. |
| Asset Planner | Add and manage assets at the project level. |
Important: The Planner tab shows consolidated information. To edit schedule-specific planning details, open the relevant schedule and use its Planner tab. Material, Resource, and Quantity Planners are available for individual schedules except milestones.
See Schedule Planner for details.
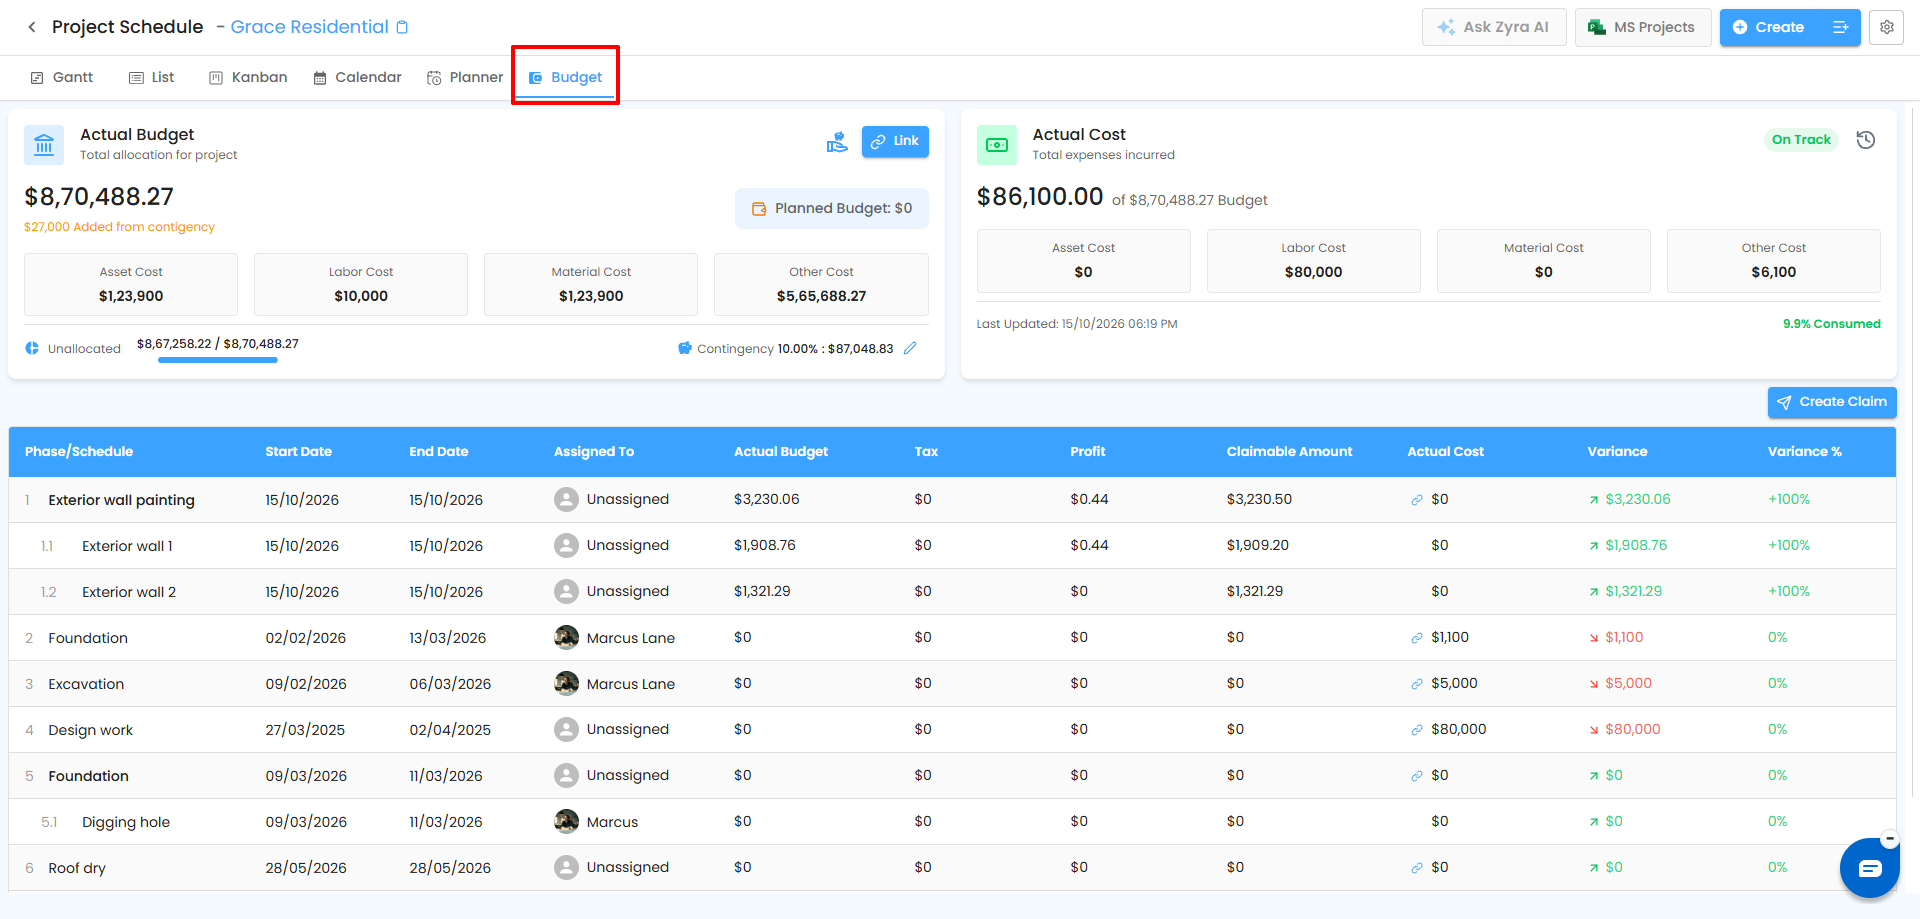
7. Budget View
Provides financial tracking for schedules and phases.
- Shows Actual Budget, Actual Cost, Asset Cost, Labor Cost, Material Cost, and Other Costs
- Tracks variance and budget consumption
- Supports phase-wise budget monitoring
Best for: budget vs. actual tracking and cost control.
Related Articles
- Schedule Overview
- Schedule Settings – Configure Your Project
- Workload
- Schedule Planner – Plan Materials, Resources, Quantities, and Assets
Need Further Assistance?
Contact your organization administrator or the IntoAEC support team.
Was this article helpful?
That’s Great!
Thank you for your feedback
Sorry! We couldn't be helpful
Thank you for your feedback
Feedback sent
We appreciate your effort and will try to fix the article