Managing Schedules in Schedule Templates – Stay on Track
Schedules bring structure to project timelines, making it easier to plan, assign tasks, and track progress.
In the schedule templates, you can streamline planning and ensure consistency across projects.
Steps to Create and Manage a Schedule
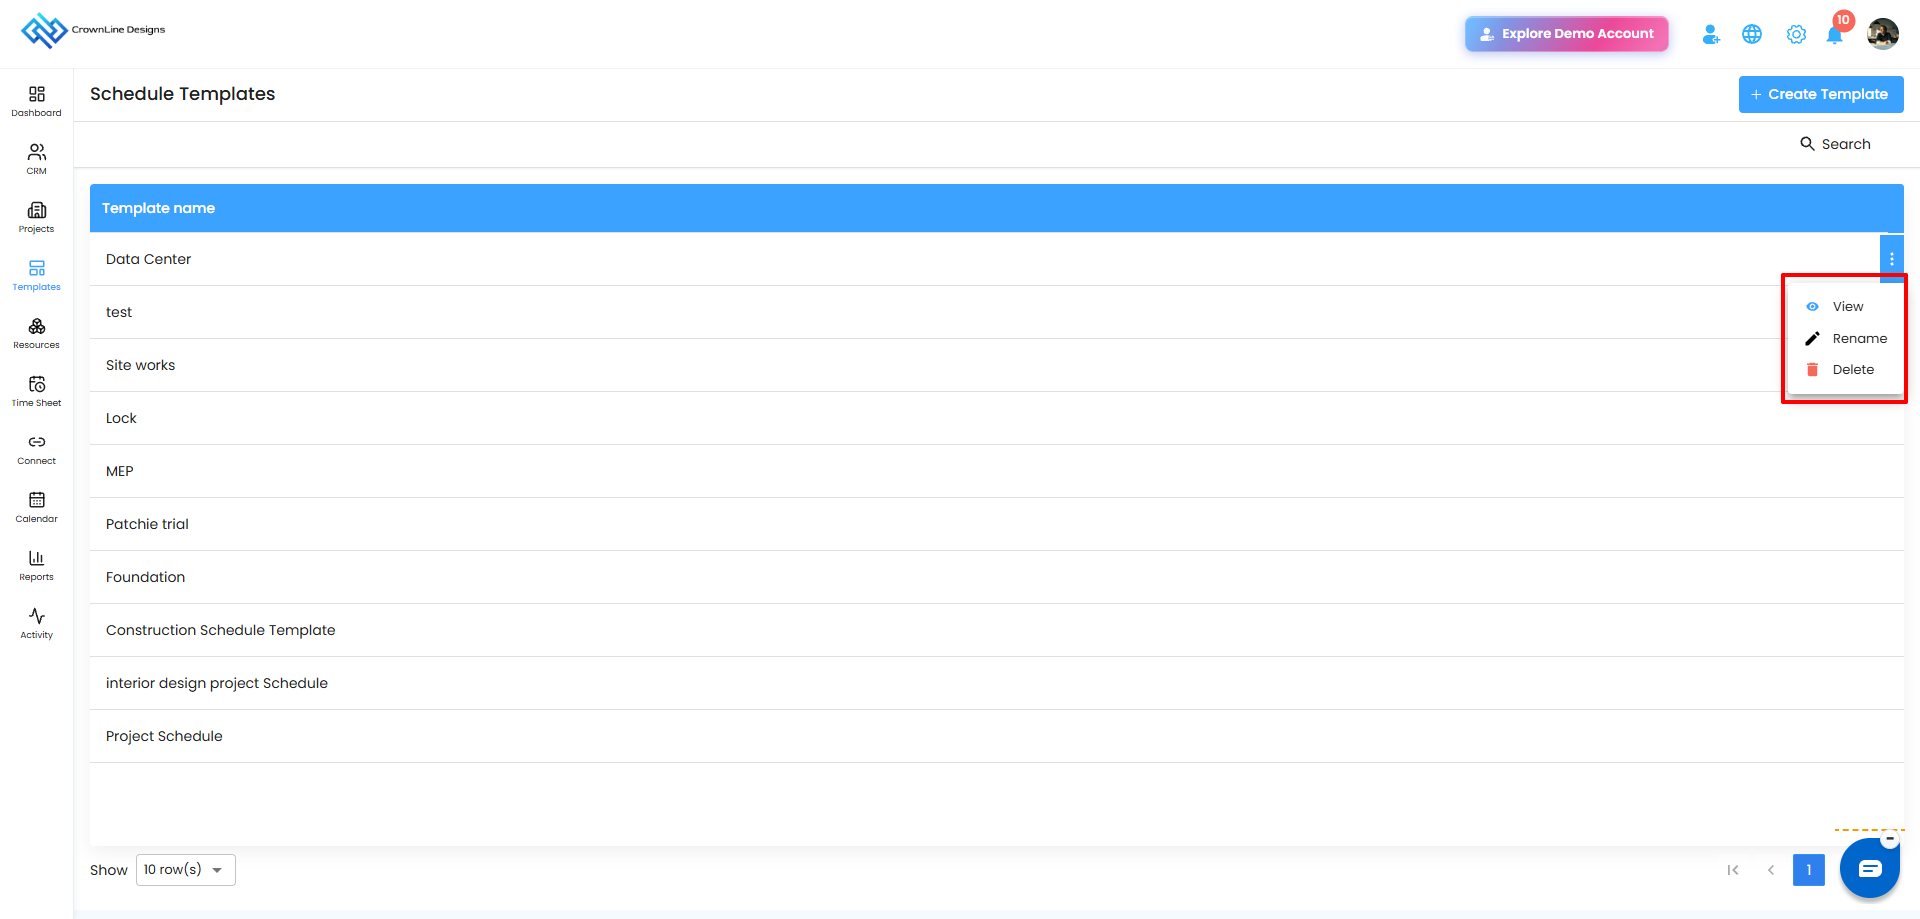
Navigate to the Template Center section.
Click on Schedule to access your schedule templates.
Click the View button next to a template to open its schedule page.
The schedule page includes two views:
List View: Displays schedules in a structured list.
Gantt View: Provides a visual timeline of schedules and milestones.
Pro tip: Always start with a schedule template—it saves setup time and ensures no important steps are missed in your planning.
Creating a New Schedule – Plan with Precision
Adding a schedule inside a template helps structure your project phases and timelines effectively.
You can create schedules from both List View and Gantt View.
List View: Click the Create button to open the Add Schedule side panel.
Gantt View: Use the create option to open the off-canvas panel, where you can create a Schedule or Milestone.
What You Can Do Here
Click the Create Schedule button to begin.
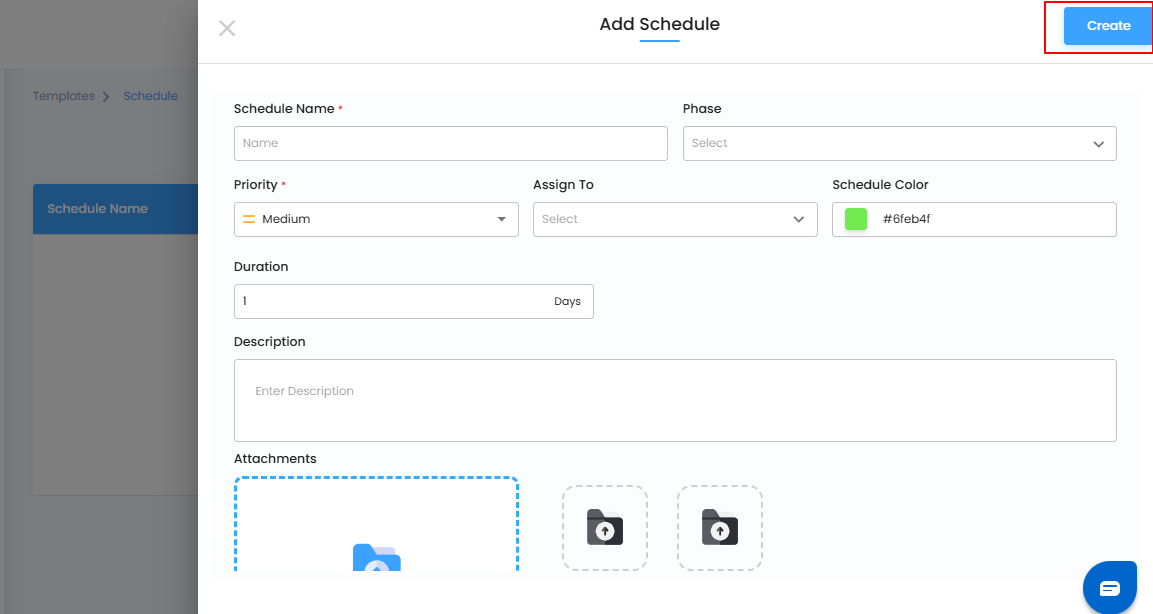
The Add Schedule side panel (off-canvas page) will open.
Enter the schedule details:
Schedule Name (Mandatory): Provide a clear name.
Phase: Select the project phase the schedule belongs to.
Priority: Set the priority level.
Assign To: Choose the responsible assignee.
Schedule Colour: Pick a colour for easy categorization.
Duration: Define the time duration for completion.
Description: Add supporting details.
Attachments: Upload up to 4 images or PDFs (max 25MB each).
Click the Create button to finalize and save the schedule.
Note: When creating a schedule from List View, Task and Reminder details are not included in the creation process.
Pro tip: Use schedule colours to visually separate project phases—it makes tracking faster and easier.
Editing a Schedule – Keep It Up to Date
Schedules can be updated anytime to reflect changes in project timelines or responsibilities.
What You Can Do Here
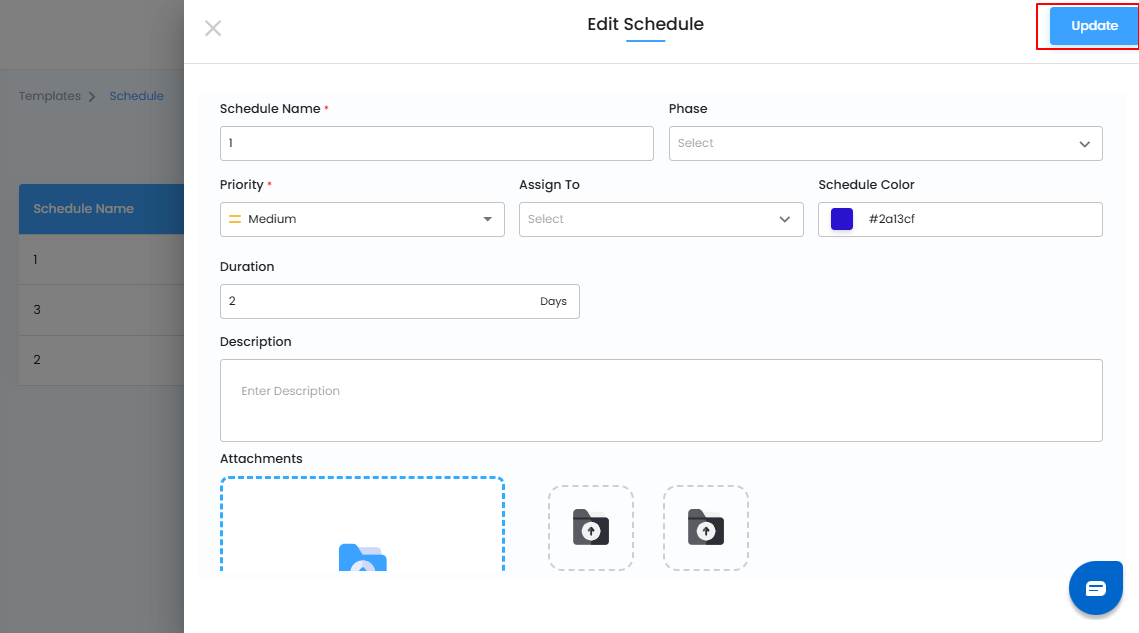
Click the Edit button next to the schedule you want to modify.
Update details such as name, phase, priority, assignee, duration, or description.
Once changes are made, click the Update button to save them.
You can access schedule actions through the Kebab menu (⋮). The available options are:
Edit: Modify the schedule details.
Add Child: Create a child schedule under the selected schedule.
Delete: Remove the schedule from the template.
Pro tip: Review and update schedules regularly—keeping them current ensures smoother execution and avoids confusion down the line.
Creating a Schedule with AI
You can use Create Schedule with AI to generate schedules quickly.
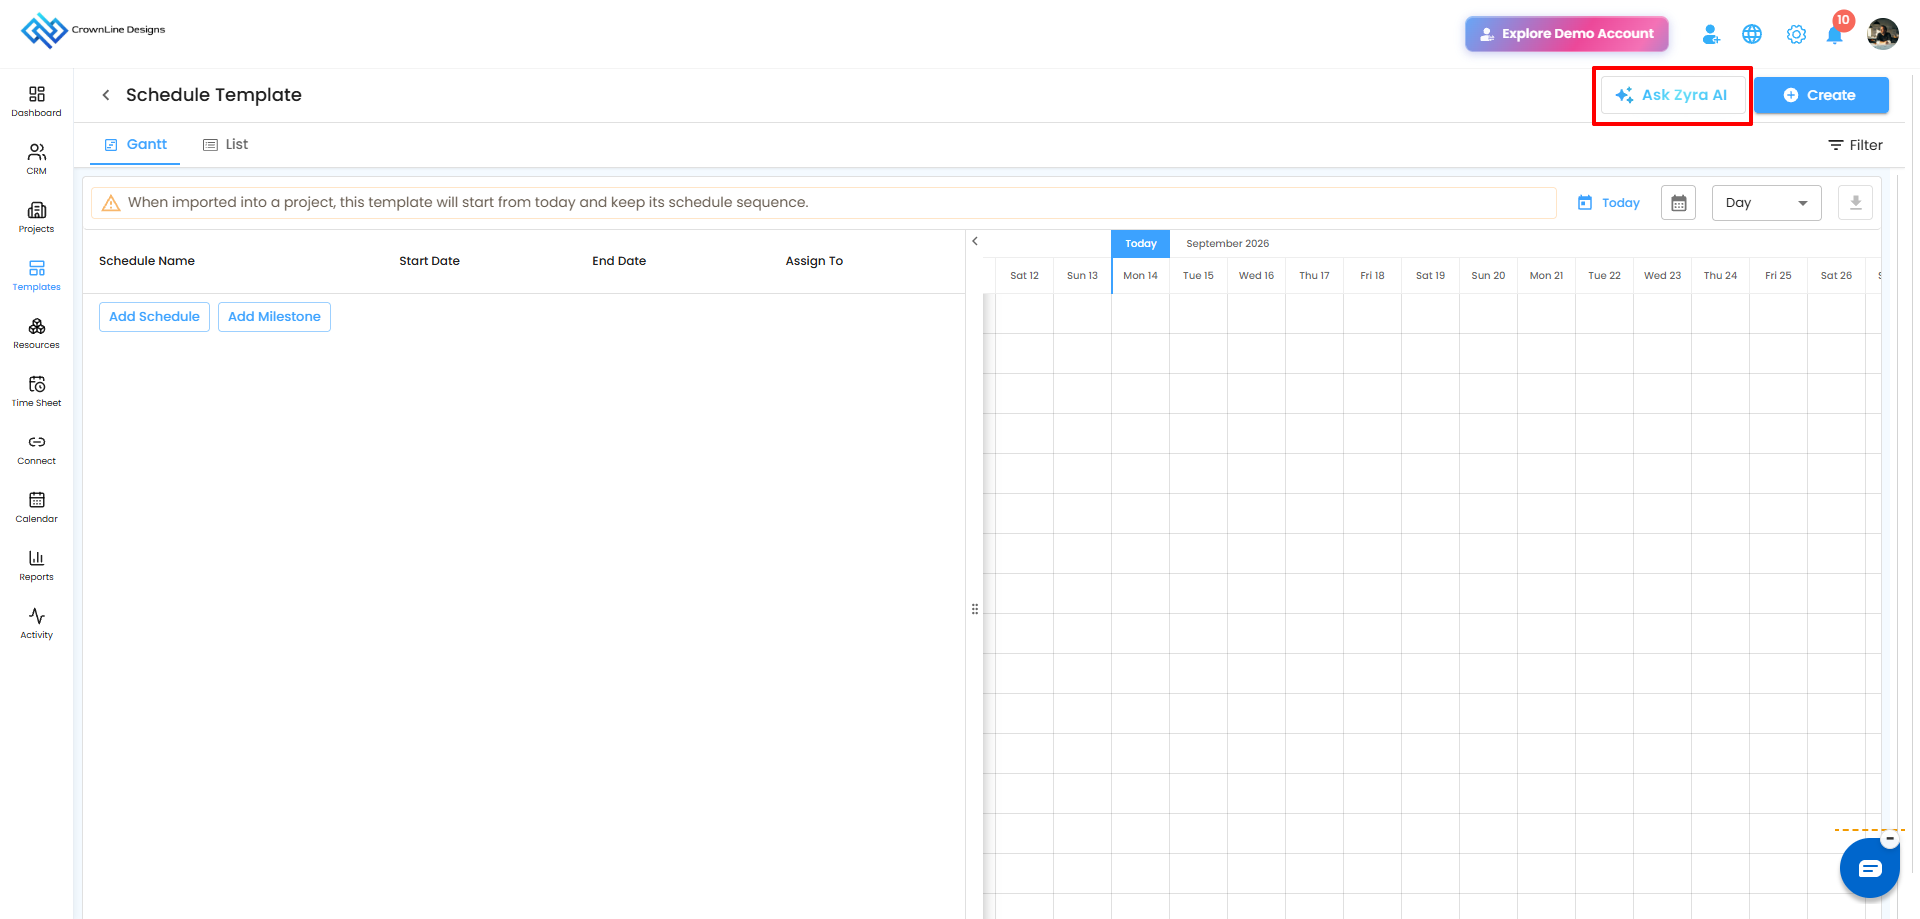
Note: This feature is available only when no schedules exist in the template. Once a schedule is present, AI schedule creation is not available.
Deleting a Schedule – Clear Out What’s Not Needed
If a schedule is no longer relevant, you can easily remove it from the template.
What You Can Do Here
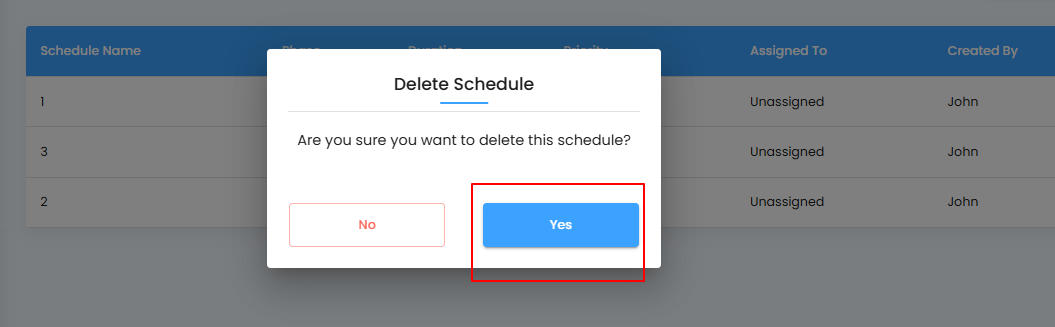
Click the Delete button next to the schedule.
A confirmation pop-up will appear with the message: “Are you sure you want to delete the schedule?”
Click Yes to permanently remove the schedule.
Pro tip: Only delete schedules that are outdated or irrelevant—this keeps your template library clean while preserving important records.
Smarter Scheduling – Stay Organized, Stay On Time
By managing schedules efficiently, you can streamline workflows, ensure tasks are completed on time, and keep projects running smoothly.
Well-organized schedule templates not only save effort but also help maintain a structured and productive project timeline.
Pro tip: Regularly review and refine your schedules to match evolving project needs—this small habit leads to big gains in efficiency.
Was this article helpful?
That’s Great!
Thank you for your feedback
Sorry! We couldn't be helpful
Thank you for your feedback
Feedback sent
We appreciate your effort and will try to fix the article