Time Tracking Reports – Overview
The Time Tracking Reports section gives you a clear view of hours worked, project costs, and user activity—helping you manage resources and budgets more effectively.
What You Can Do Here
- View total hours logged across projects.
- Track costs to stay on top of budgets.
- Monitor individual user activity for accountability.
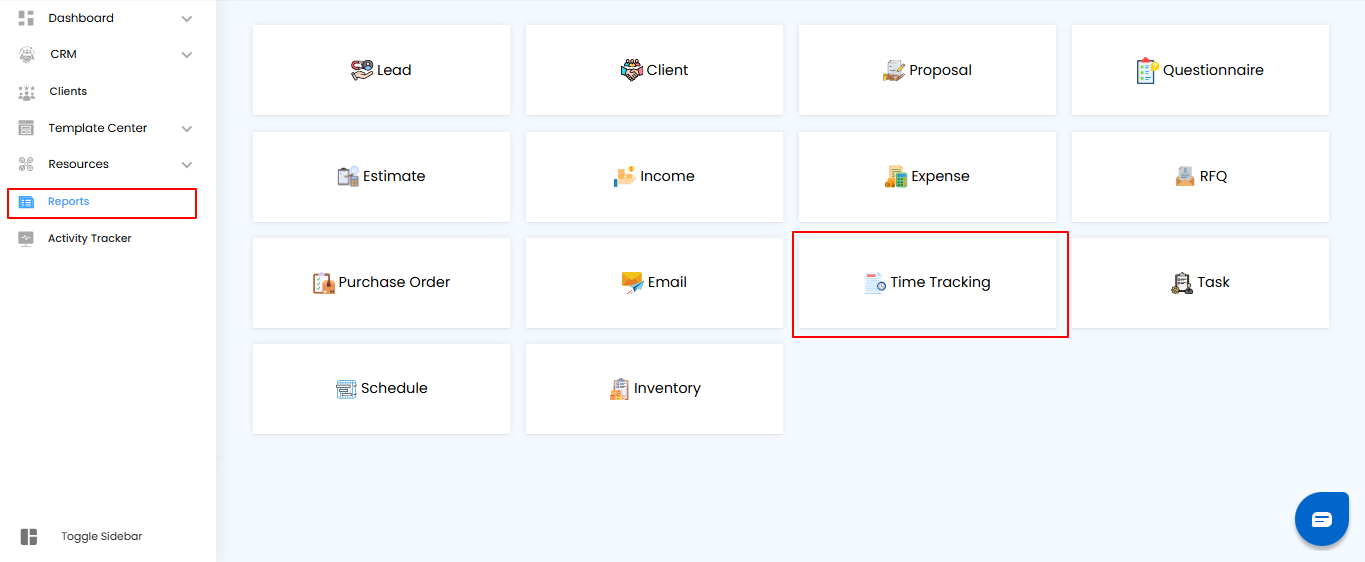
How to Access It
- Go to the Reports section in the main menu.
- Select Time Tracking to open the report.
Pro Tip: Review time tracking regularly to catch cost overruns early and keep projects on schedule.
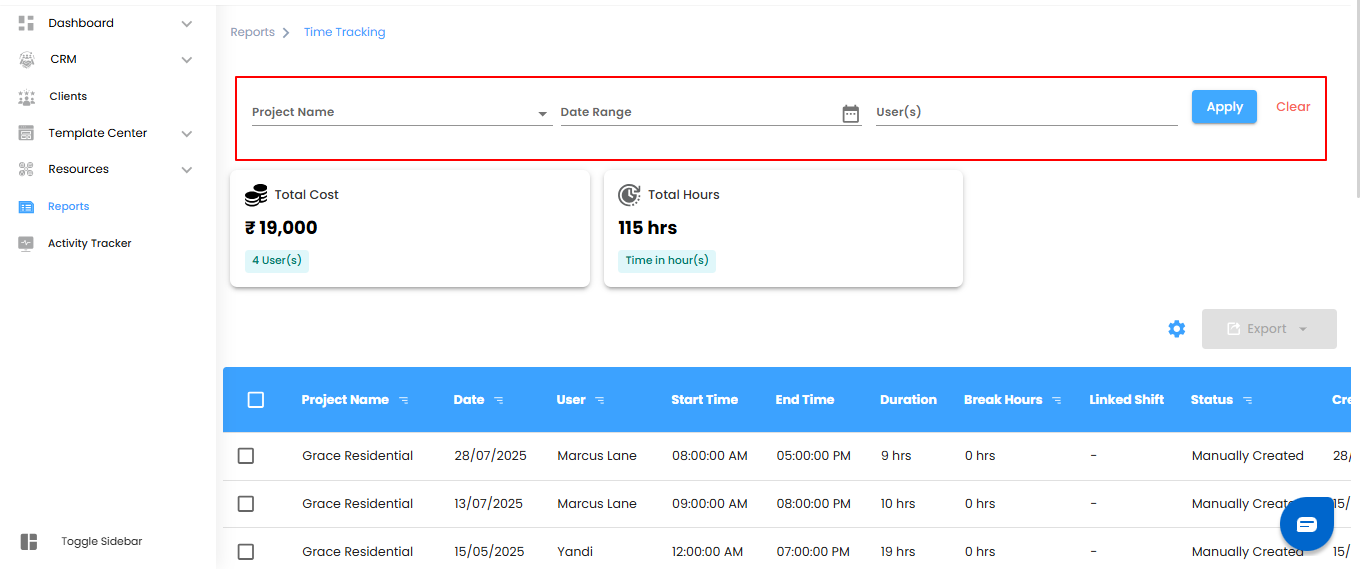
Using Filters to Refine Time Tracking Data
Filters let you focus on the details that matter most—narrowing down hours, costs, and activity to the exact project, user, or timeframe you need.
What You Can Do Here
- Filter by Project Name – View time entries for a specific project.
- Filter by Date Range – Set a start and end date to see only the relevant period.
- Filter by Users – Focus on time entries for selected team members.
- Apply or Reset Filters – Click Apply to update your view, or Clear to reset everything.
Pro Tip: Use a combination of filters (project + user + date range) to create precise snapshots of productivity and costs.
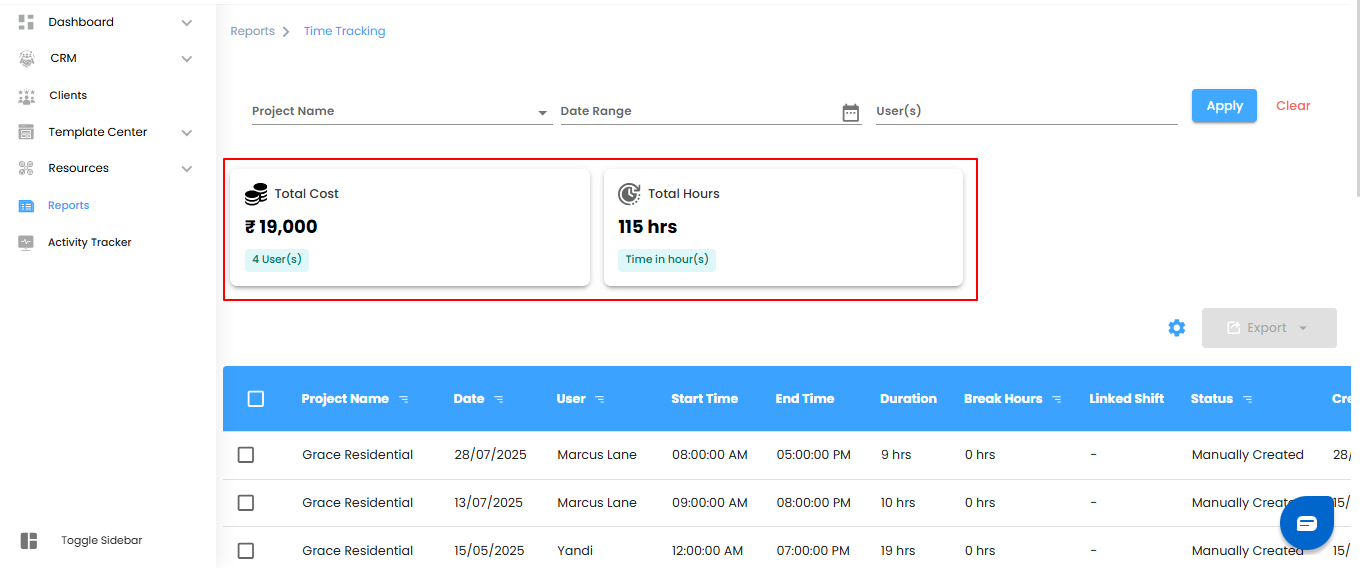
Dashboard Overview
The Dashboard gives you a quick snapshot of your project’s key metrics, so you can track progress and costs at a glance.
What You Can Do Here
- Total Cost – View the overall cost calculated from logged hours and completed work.
- Total Hours – See the total hours worked across the project.
Pro Tip: Use the dashboard as your daily check-in—one glance tells you where time and money are going.
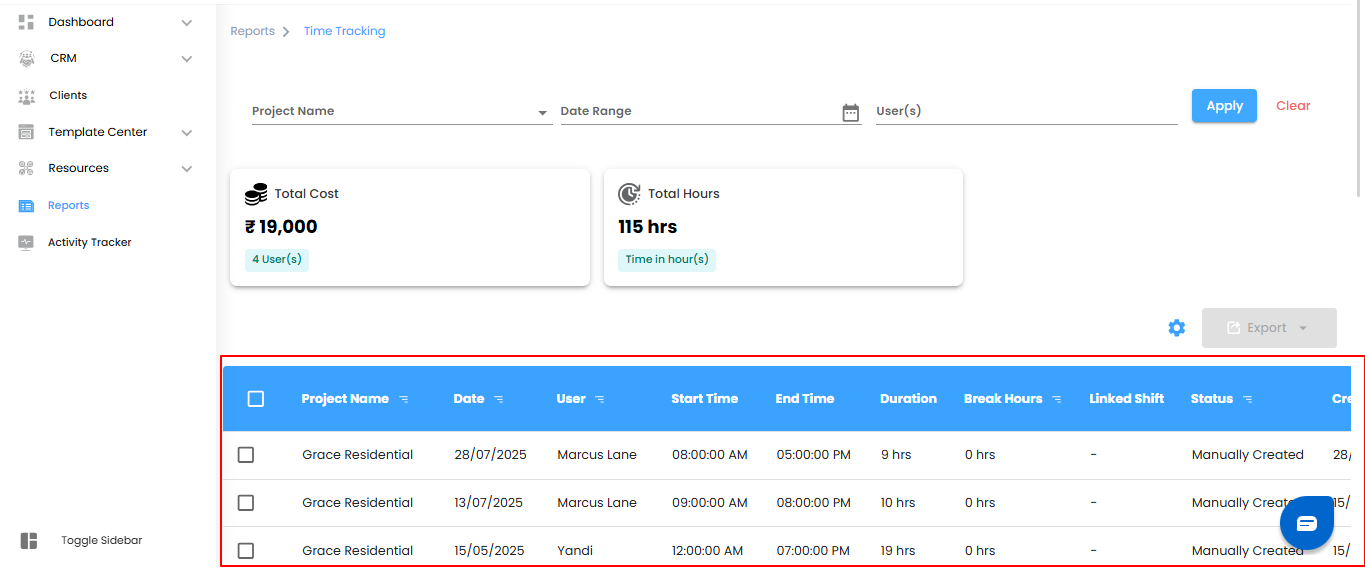
Detailed Time Tracking Table
The table provides a complete breakdown of time entries, giving you visibility into when, how, and by whom work was logged.
What You Can Do Here
- Project Name – Identify the project linked to each time entry.
- Date – See the exact day the work was done.
- User – Track which team member logged the time.
- Start Time – Note when the task began.
- End Time – Check when the task was completed.
- Duration – Review the total hours spent on the task.
- Break Hours – Monitor any break time taken during the task.
Pro Tip: Use the table to spot patterns—like frequent overtime or long breaks—to improve productivity and resource planning.
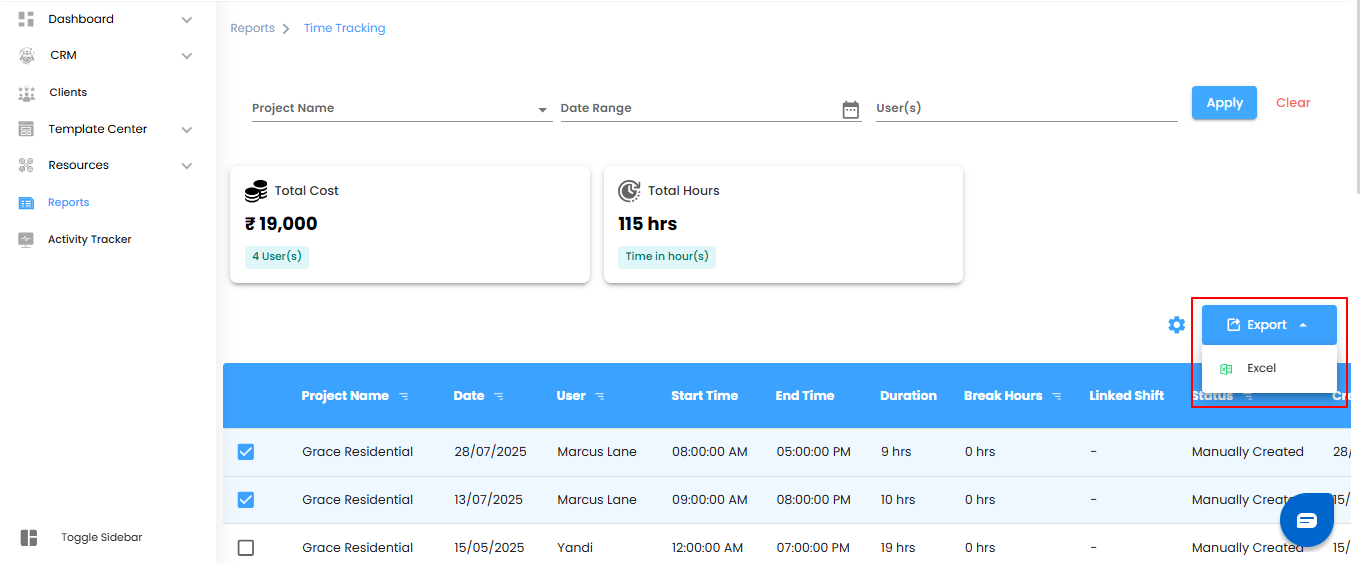
Bulk Actions & Exporting Data
Manage multiple time entries efficiently and export them for analysis or record-keeping.
What You Can Do Here
- Select Entries – Choose individual or multiple time entries at once.
- Export Data – Download the selected entries in Excel format for easy review, reporting, or sharing.
Pro Tip: Use bulk export to save time and maintain organized records for audits or project reporting
.
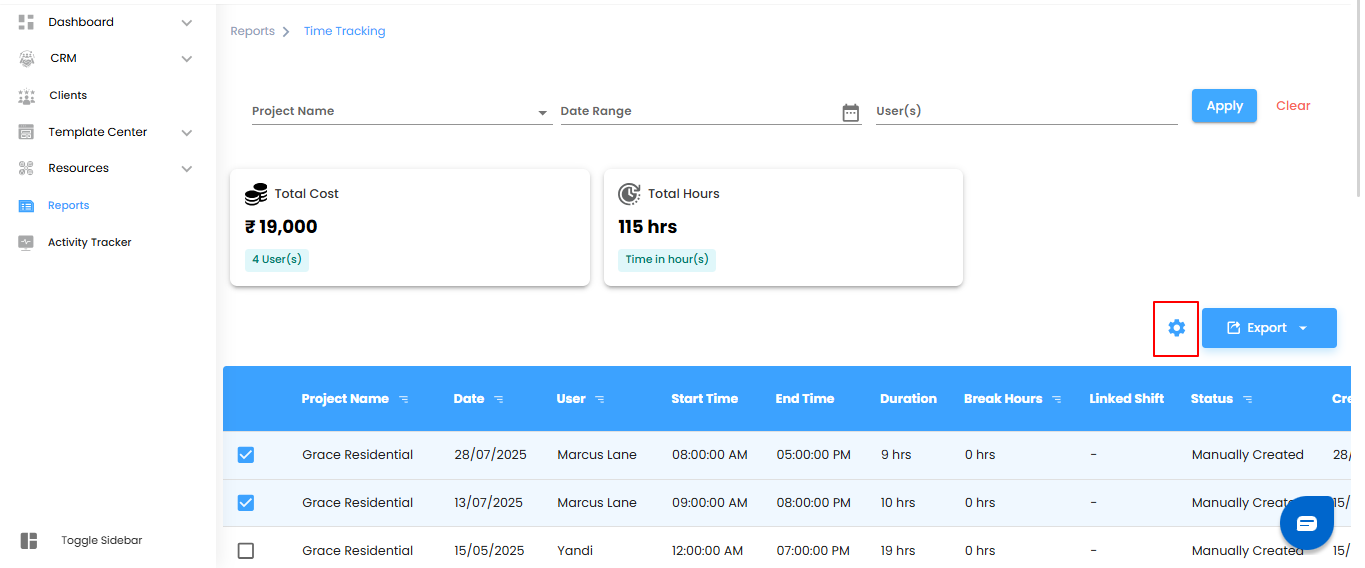
Configuring Time Tracking Report Automation
Automate your time tracking reports to stay updated without manual effort. Set it once, and get insights delivered on schedule.
What You Can Do Here
- Open Automation Setup – Click the Configure Report Automation icon to launch the Time Tracking Report Automation pop-up.
- Set Your Preferences – Define report frequency, recipients, and other settings.
- Save & Activate – Confirm your settings to start automated reporting.
Pro Tip: Schedule automation to match your team’s workflow—daily for quick updates, weekly for progress checks, or monthly for summary reports.
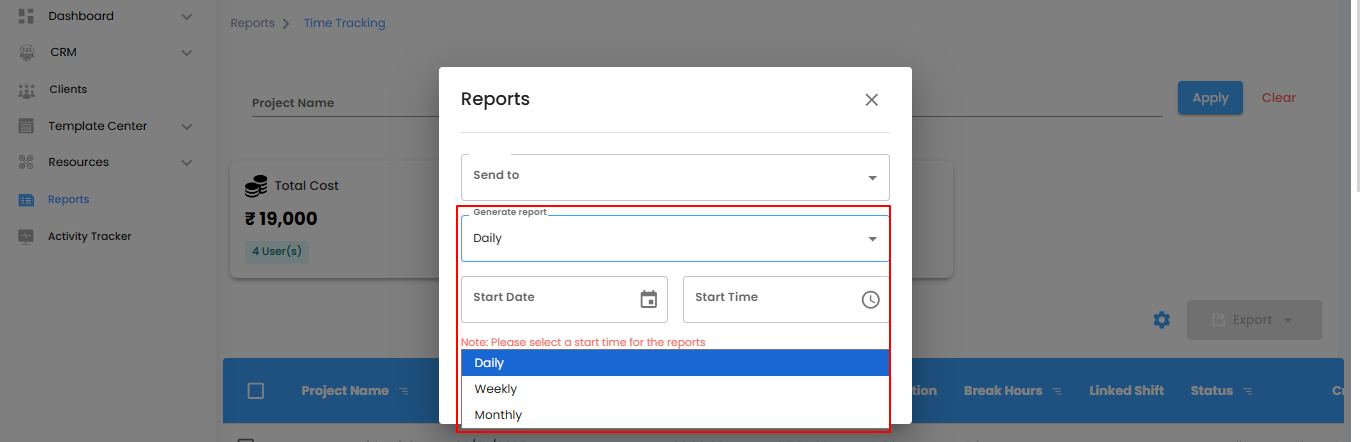
Selecting Recipients & Report Frequency
Decide who receives your automated time tracking reports and how often they are delivered.
What You Can Do Here
Select Recipients – Use the Send To dropdown to choose users who should get the reports.
- Set Delivery Frequency – Define how often reports are sent:
- Daily (Default): Generated within an hour of the chosen time.
- Example: If set to 6:00 PM, the report is ready between 6:00–6:59 PM.
- Weekly: Covers the current week and is sent at the same time and day the following week.
- Monthly: Summarizes the current month and is delivered on the same day and time next month.
Pro Tip: Align report frequency with your team’s review schedule to ensure timely insights and avoid information overload.
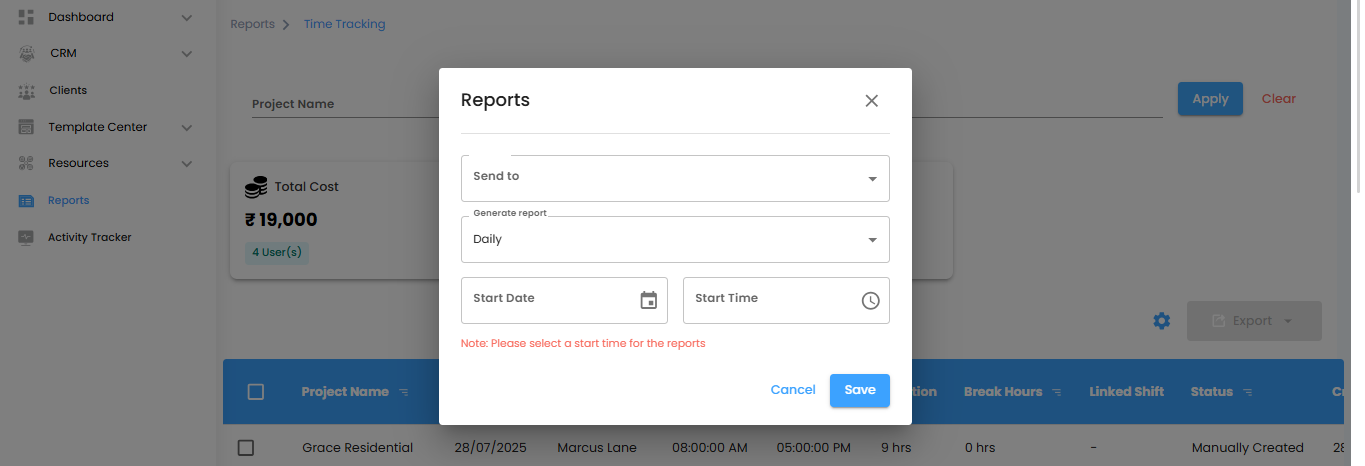
Setting Start Date & Finalizing Automation
Choose when your automated time tracking reports should begin and confirm the setup to start receiving reports on schedule.
What You Can Do Here
- Set Start Date & Time – Specify the date and time for the automation to begin.
- Note: Selecting a start time is essential for enabling automation.
- Save or Cancel – Click Save to activate the automation, or Cancel to exit without saving.
Pro Tip: Double-check the start time to ensure reports begin exactly when you need them.

Why Use Time Tracking Reports
Time Tracking Reports help you manage hours, costs, and user activity efficiently—giving you clear insights for better project oversight.
What You Can Do Here
- Filter Time Entries – Focus on specific projects, users, or date ranges.
- View Detailed Data – Check hours, durations, and break times at a glance.
- Export Reports – Download data for analysis, sharing, or record-keeping.
Pro Tip: Regularly review and export time tracking reports to spot trends, optimize resources, and ensure accurate project reporting.
Was this article helpful?
That’s Great!
Thank you for your feedback
Sorry! We couldn't be helpful
Thank you for your feedback
Feedback sent
We appreciate your effort and will try to fix the article