Overview of the Questionnaire Report in IntoAEC
The Questionnaire Report in IntoAEC provides a clear way to track all sent questionnaires, monitor their statuses, and manage responses efficiently. With filtering options, a summary dashboard, and a detailed table, you can keep everything organized and easy to follow. You can also export questionnaire data for record-keeping or deeper analysis.
Pro Tip: Regularly review the Questionnaire Report to identify pending responses—quick follow-ups can significantly improve client engagement and completion rates.
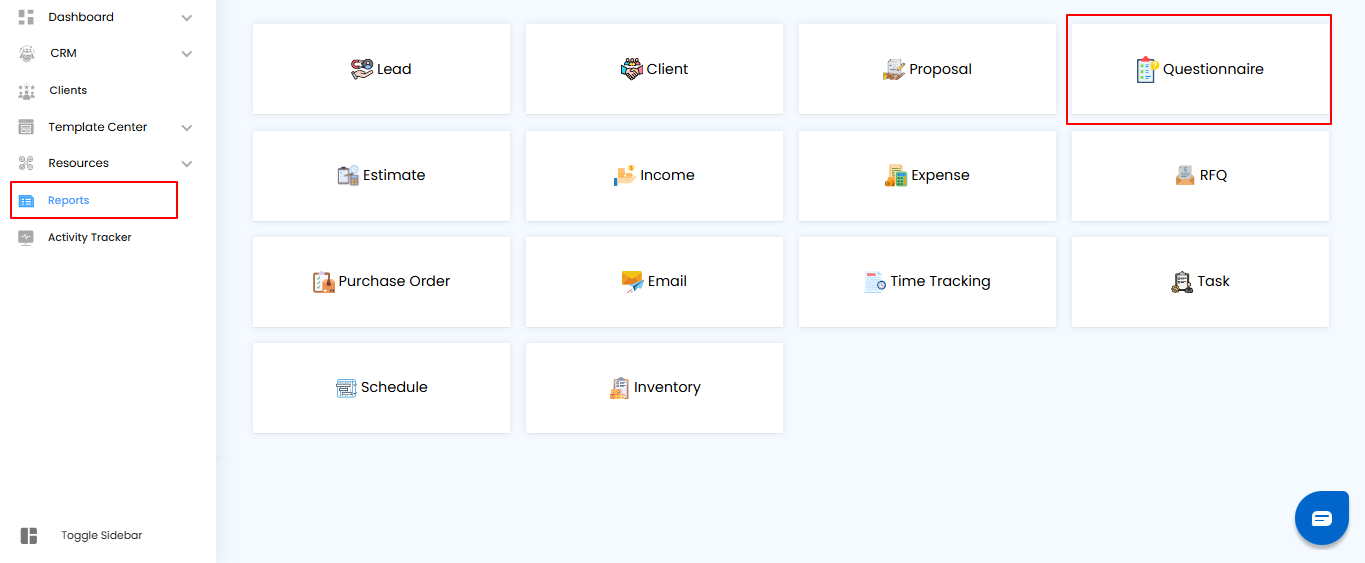
Accessing the Questionnaire Report
- Go to the Reports section from the main menu.
- Select Questionnaire Report to open the questionnaire tracking dashboard.
Pro Tip: Bookmark the Questionnaire Report page if you review responses often—it saves time and keeps key insights just one click away.
 Using Filters to Refine Questionnaire Results
- In the Questionnaire Report, you can apply filters to quickly find what you’re looking for:
- Project Name – Select the project linked to the questionnaire.
- Sent On – Choose a date or date range when the questionnaire was sent.
- Click Apply to view filtered results.
- Click Clear to reset filters and display all questionnaires.
Pro Tip: Use date filters to track recently sent questionnaires—it’s the fastest way to follow up on pending responses.
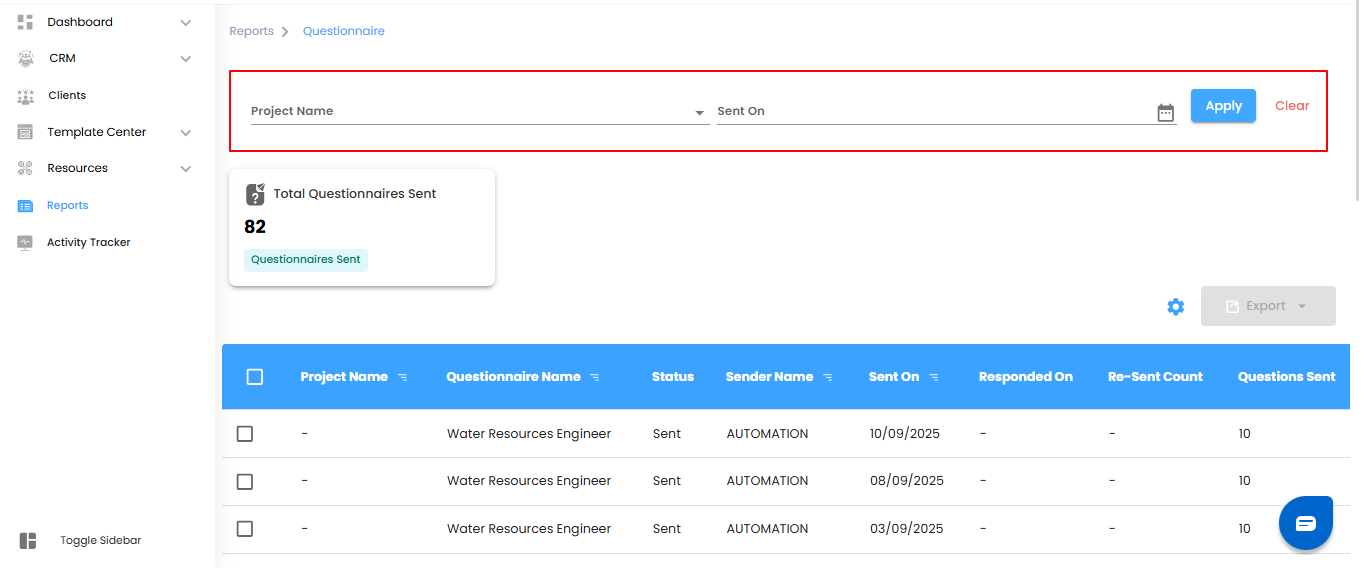
Understanding Dashboard Insights
- At the top of the Questionnaire Report, the dashboard highlights key metrics
- Total Questionnaires Sent – Shows the total number of questionnaires sent from the system.
- These insights give you a quick snapshot of questionnaire activity and help track engagement levels.
Pro Tip: Monitor this metric regularly to measure how actively your team is using questionnaires and ensure consistent client outreach.

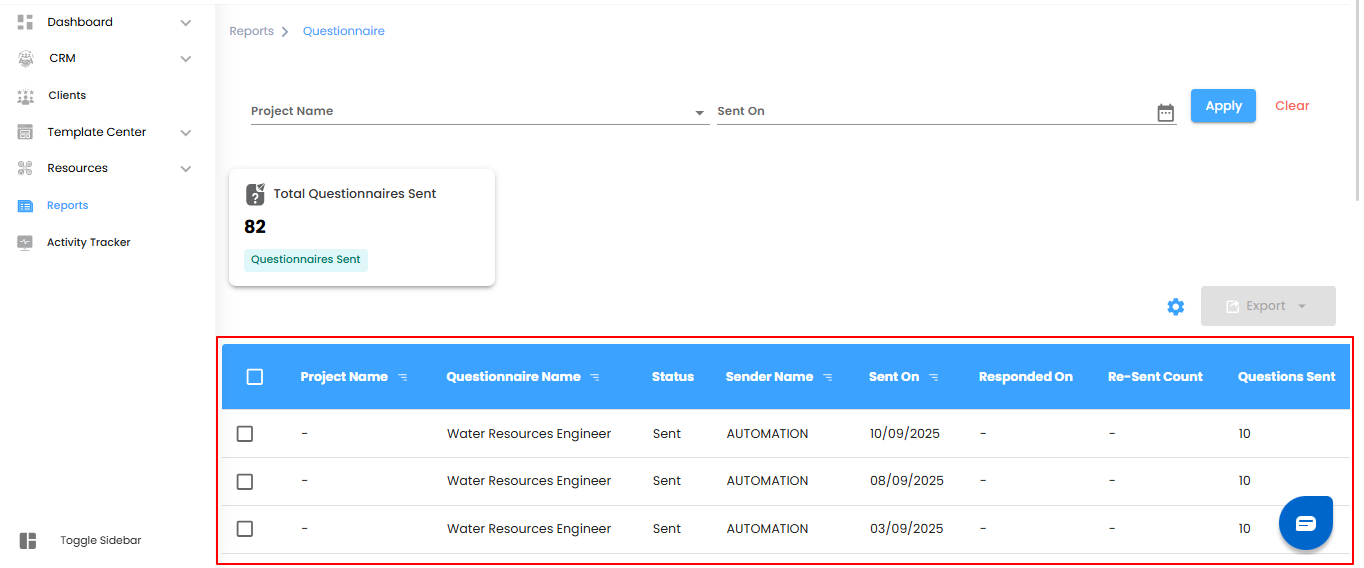
Viewing Questionnaire Details in the Table
The Questionnaire Report Table gives a detailed breakdown of all sent questionnaires.
Each entry includes:
- Project Name – The project linked to the questionnaire.
- Questionnaire Name – The title of the questionnaire.
- Questionnaire Status – Current state (e.g., Sent, Viewed, Responded).
- Sender Name – The user who sent the questionnaire.
- Sent On – Date when the questionnaire was dispatched.
- Viewed On – Date when the recipient opened it.
- Resent Count – Number of times the questionnaire was resent.
- Total Questions – The total number of questions included in the questionnaire.
Pro Tip: Use the table to quickly identify questionnaires that were sent but not yet viewed—these are prime opportunities for timely follow-ups.
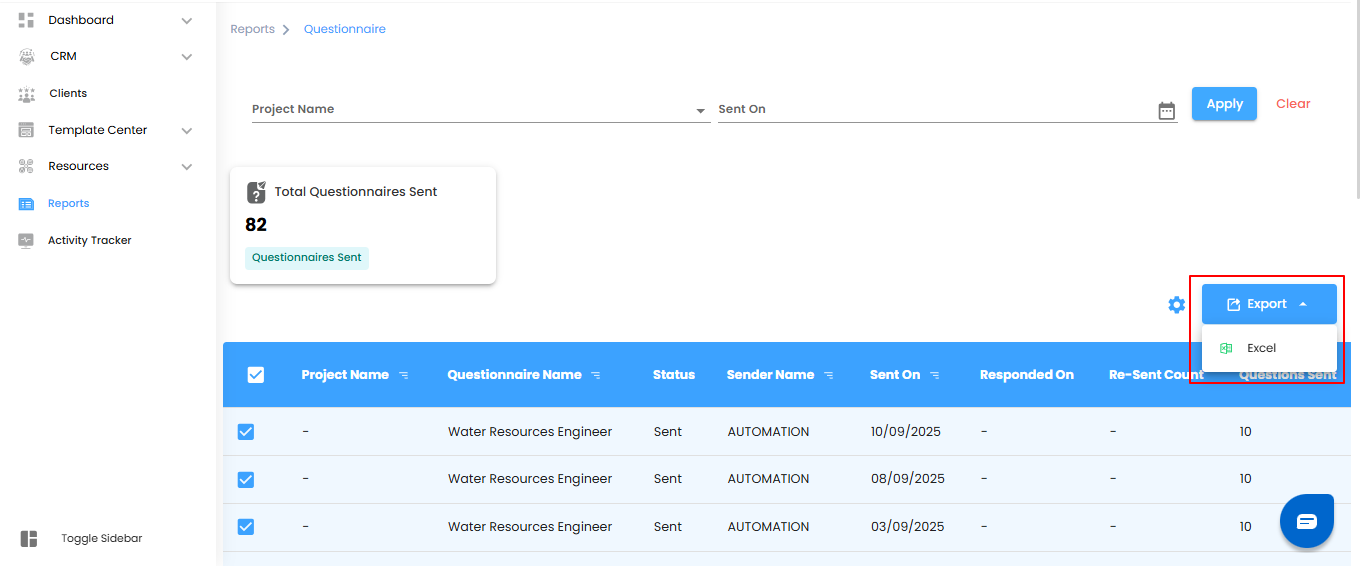
Bulk Selection and Exporting Data
Bulk Selection – Use the checkboxes to select multiple questionnaires at once. Apply bulk actions like exporting in just one go.
Pro Tip: Use the "Select All" option when working with large datasets to save time.
Exporting Data
Click Export to download questionnaire details in Excel format for offline review or deeper analysis.
Pro Tip: Regularly export and back up data to maintain historical records and support reporting needs.
How to Configure Questionnaire Report Automation in IntoAEC
Set it up once and let IntoAEC handle the rest.
- step 1: Click the "Configure Report Automation" Icon
Locate the icon on the Questionnaire Report screen to open the automation popup.
- Step 2: Define the Frequency
Choose how often the report should be generated (daily, weekly, monthly).
Pro Tip: Pick a frequency that matches your reporting cycle to avoid clutter.
- Step 3: Select Recipients
Enter or select the users who should automatically receive the report.
- Step 4: Confirm and Save
Click "Save" to activate the automation. The system will now generate and send the reports as per your configuration.


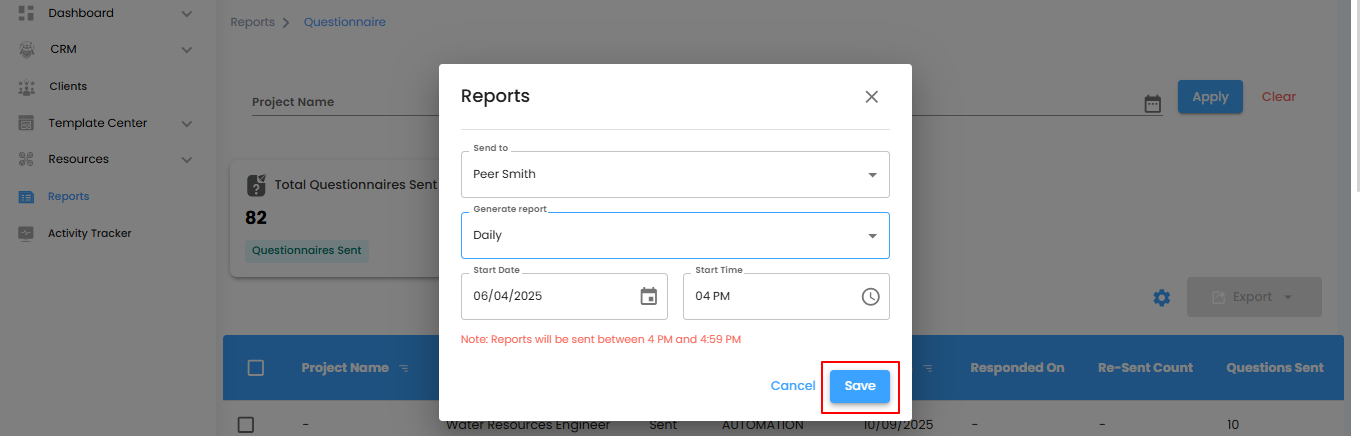
Select Your Recipients
Think of this as sending your questionnaire reports through a smart delivery drone—right to the inboxes of the people who actually need them. Use the “Send To” dropdown to pick your recipients, and rest easy knowing the right eyes are seeing the right data.
Set the Report Delivery – Timing is Everything
- Decide how often your reports should land, so your team gets insights exactly when they need them. Use the “Generate Report” dropdown to pick the rhythm:
- Daily (Default) – Fresh off the press every day. If you set it for 6:00 PM, your report will be in inboxes by 6:59 PM. Perfect for teams that like to stay on top of everything.
- Weekly – Get a week’s worth of insights in one neat package, delivered on the same day and time next week. Great for progress tracking without the daily ping.
- Monthly – A big-picture snapshot of the month’s performance, delivered on the same day and time next month. Ideal for strategy planning and summary reviews.
Pro tip: Treat the delivery schedule like a heartbeat—consistent timing keeps everyone informed, aligned, and ready to act.

Set the Start Date & Time
- Save – Lock in your settings and let your automation take the wheel.
- Cancel – Changed your mind? No worries , discard your changes and start fresh.
Pro tip: Treat the start time like the first beat of a drum—everything else flows smoothly once it begins.
Questionnaire Reports – Your Data, Organized and Actionable
Think of the Questionnaire Report as your project’s personal data assistant—always ready to help you track, filter, and make sense of every response. From monitoring engagement to exporting insights, it turns raw questionnaire data into clear, actionable information.
What You Can Do Here
- Track Responses – Keep an eye on who’s engaged, who’s pending, and who needs a nudge.
- Filter & Sort – No more endless scrolling. Slice and dice data by date, status, or any other filter that matters.
- Export with Ease – Take your insights offline, share with stakeholders, or run deeper analysis just a click away.
- Dashboard Insights – Get a quick, visual snapshot of your questionnaire activity at a glance.
Pro tip: Treat the Questionnaire Report like a control panel—keep it updated and you’ll always know the pulse of your engagement.
Was this article helpful?
That’s Great!
Thank you for your feedback
Sorry! We couldn't be helpful
Thank you for your feedback
Feedback sent
We appreciate your effort and will try to fix the article