Set User Access and Dashboard Preferences During Invitation
- Giving users the right access and dashboard setup from the start ensures smooth onboarding and avoids confusion later.
Steps to Configure Access and Preferences
- Click on the User Invite Icon: Start by selecting the User Invite icon from the main menu.
- Define Project Access: Choose which projects the user can view or contribute to.
- Set Task Visibility: Control whether the user sees all tasks or only those assigned to them.
- Enable or Disable Time Tracking: Decide if the user should log hours for tasks.
- Select Default Dashboard: Assign the dashboard view that best matches their role.
Pro tip: Tailor access based on responsibilities — giving too much visibility can cause clutter, while too little may limit productivity.
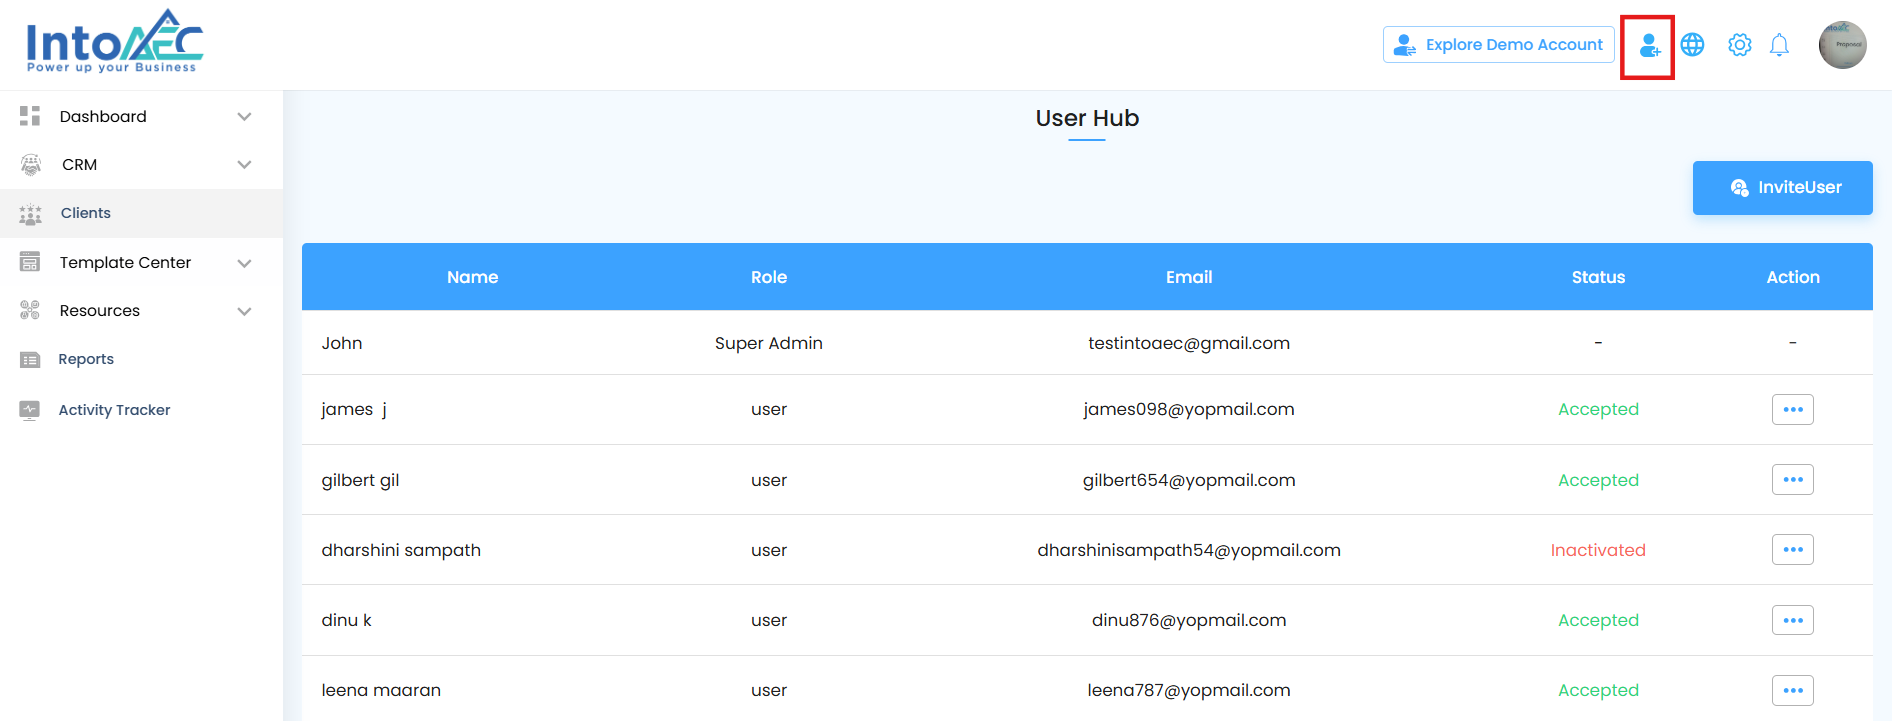
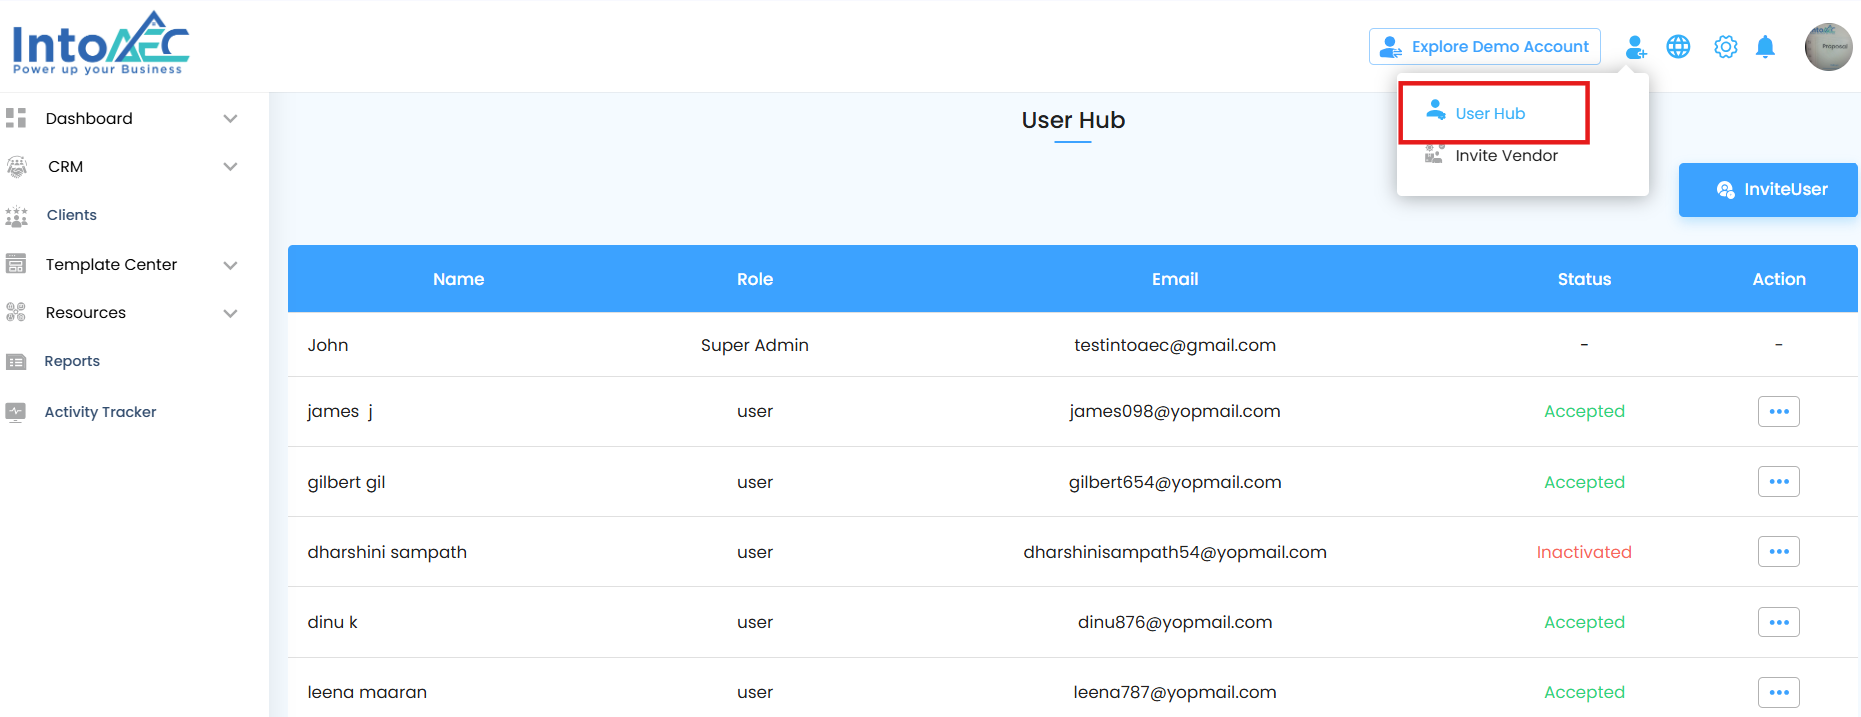
Select User Hub
The User Hub is your central place to manage every aspect of user access and activity.
Steps to Access the User Hub
- Select User Hub: From the options menu, click on User Hub.
- Open User Hub Page: The User Hub page will open, where you can manage all user-related actions such as invitations, permissions, and status updates.
Pro tip: Use the User Hub regularly to keep track of active users, pending invites, and role assignments — it helps maintain a well-organized system.
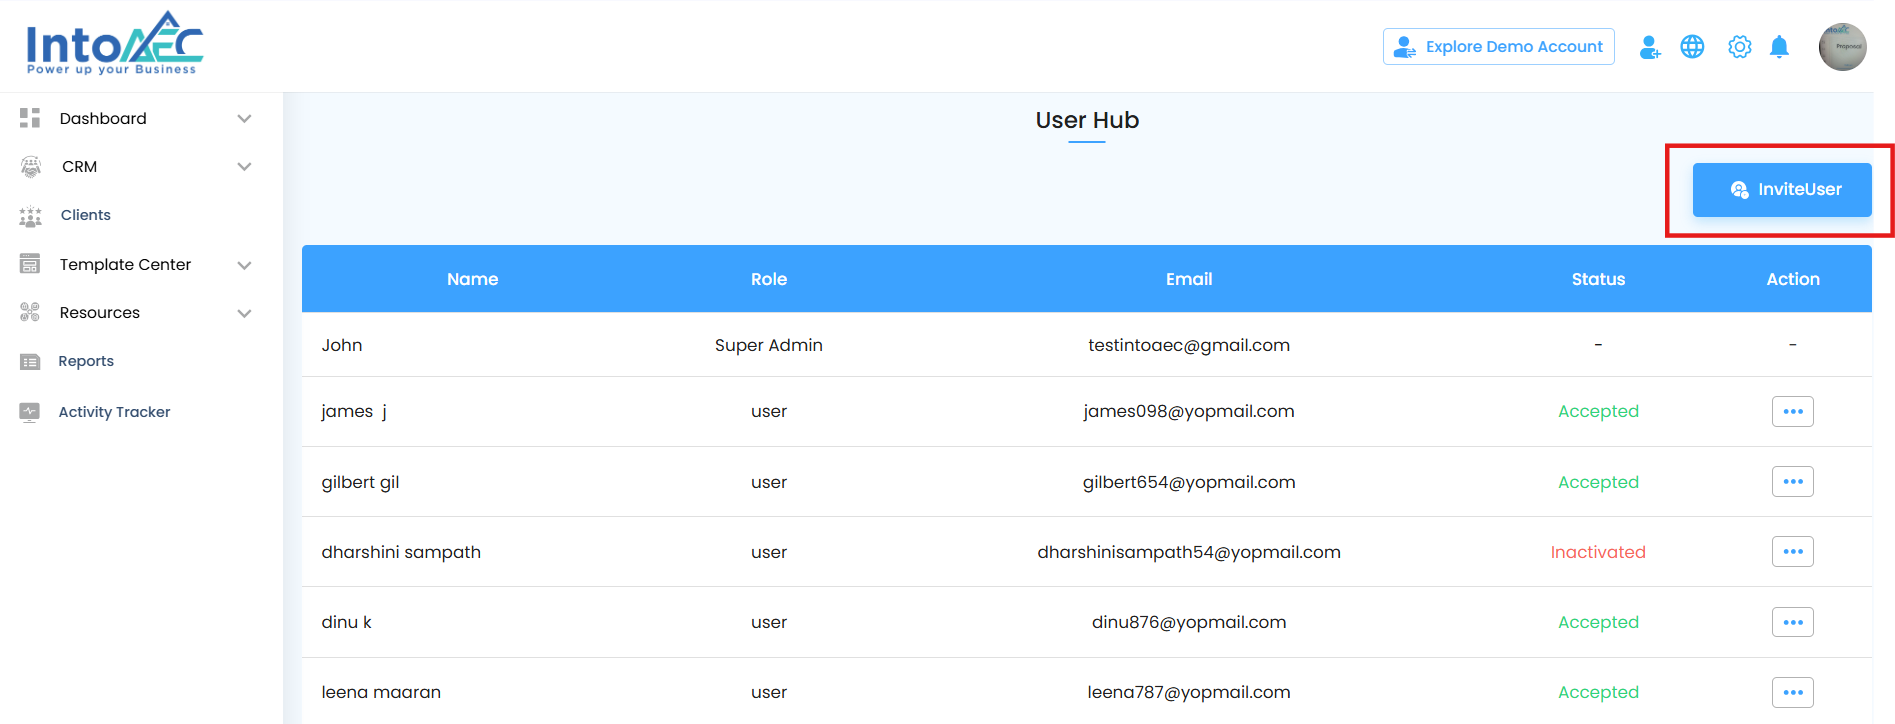
Click on "Invite User"
- Starting a new user invitation is quick and ensures the right details are captured from the beginning.
What Happens Next
- Click Invite User: On the User Hub page, select the Invite User button to launch the process.
- Open User Invite Form: The User Invite Form will appear, where you can enter the user’s details and configure their access preferences.
Pro tip: Prepare the user’s role and access requirements in advance — it makes filling out the form faster and prevents errors.

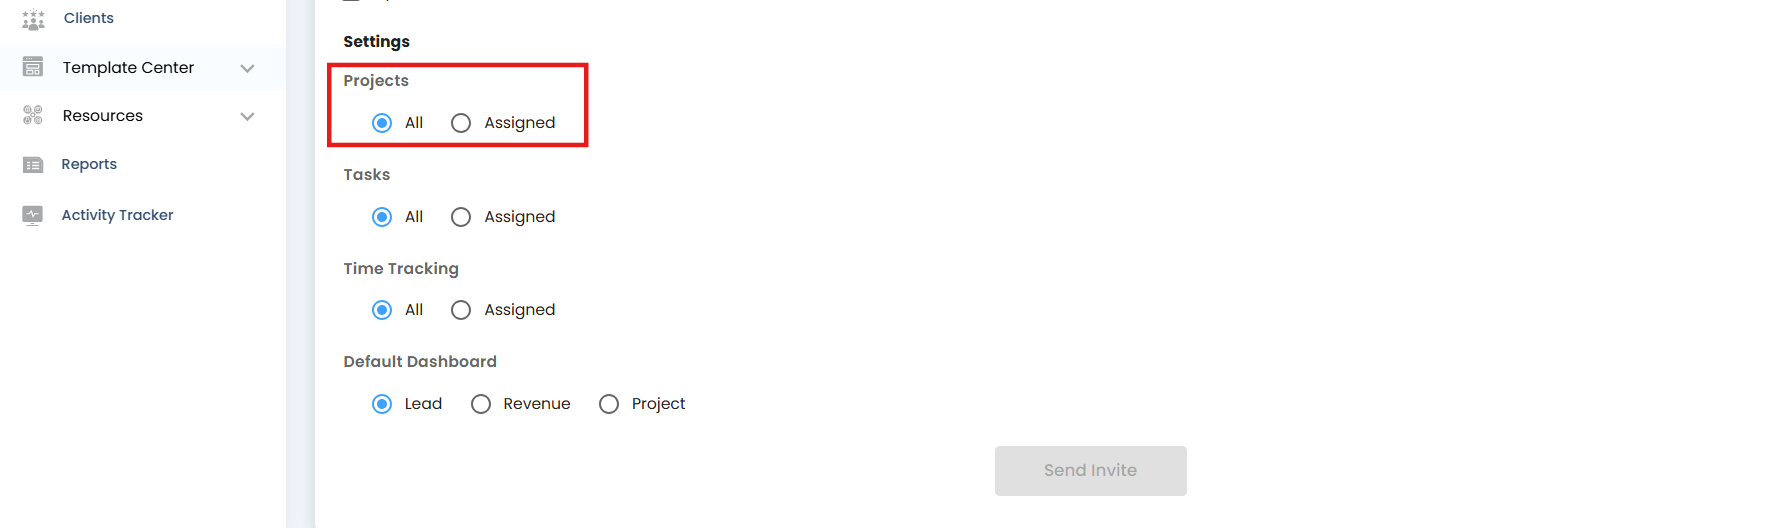
Configure Access and Preferences
- Fine-tuning access during the invitation ensures users only see what’s relevant to them.
Go to the Settings Section
- Scroll to the Settings section within the form to manage access and preferences.
- Set Project Access
Decide how the user should access project data:
- All – Grants access to all projects.
- Assigned – Restricts access to only the projects specifically assigned to the user.
Pro tip: Start with Assigned access for new users — you can always expand permissions later as their responsibilities grow.
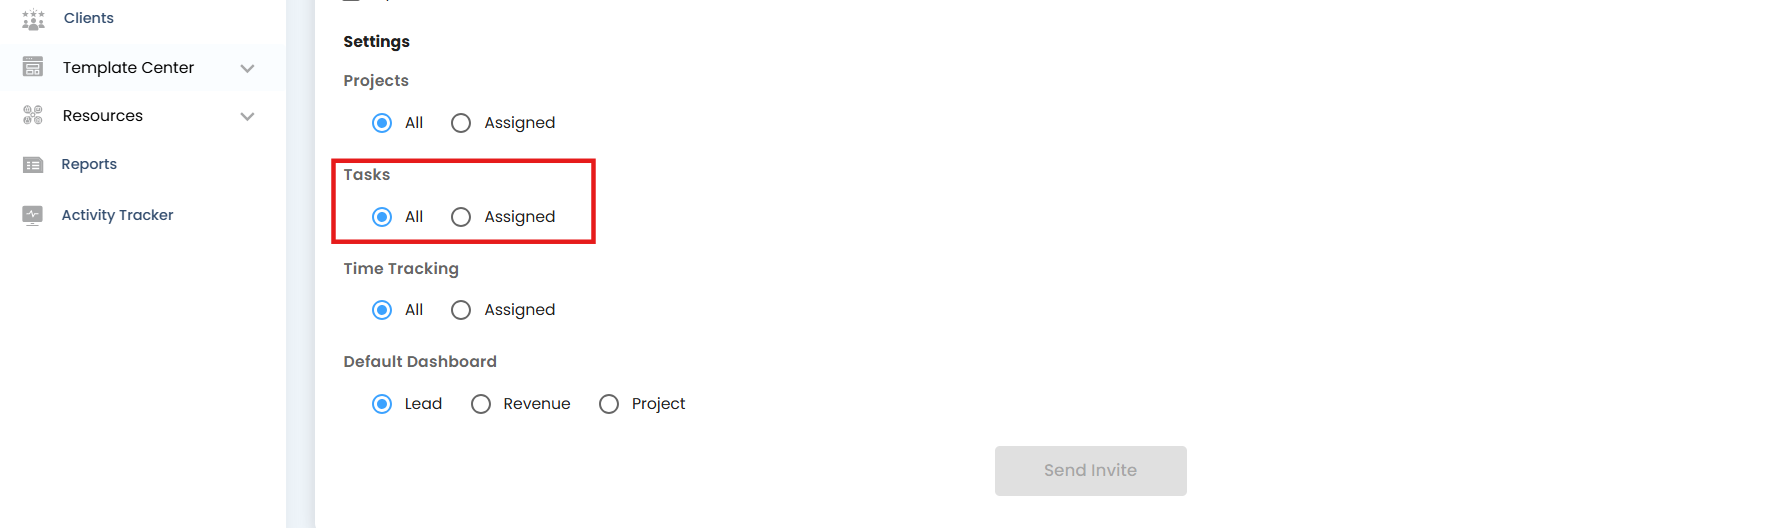
Set Task Access
Controlling task visibility helps users focus on what matters and keeps project data organized.
Define Task Visibility
- All – The user can view and manage all tasks across projects.
- Assigned – The user sees only the tasks assigned to them.
Pro tip: Limiting task visibility for new users helps prevent confusion and ensures they focus on their responsibilities first.
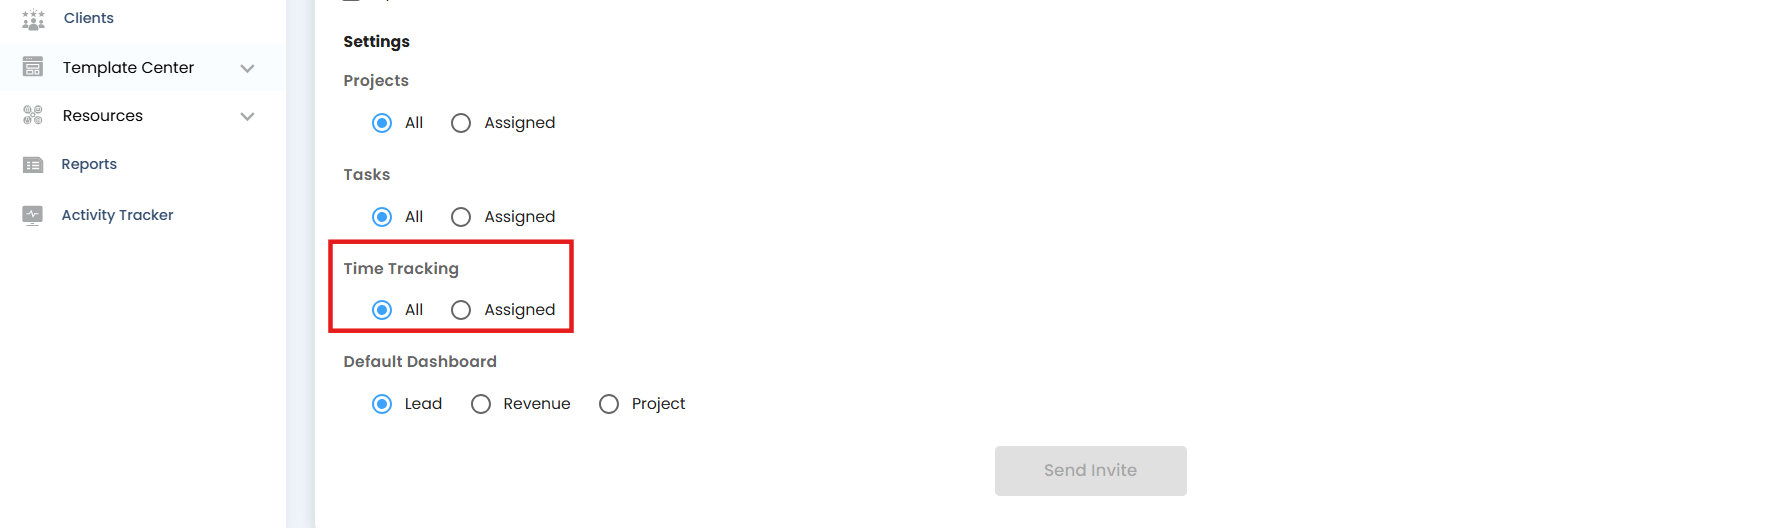
Set Time Tracking Access
Managing timesheet visibility ensures users can track or view only what’s relevant to them.
- Control Timesheet Visibility
- All – The user can view all timesheets.
- Assigned – The user can view only timesheets assigned to them.
Pro tip: Restricting timesheet visibility for new users helps maintain data privacy and keeps reporting clean.
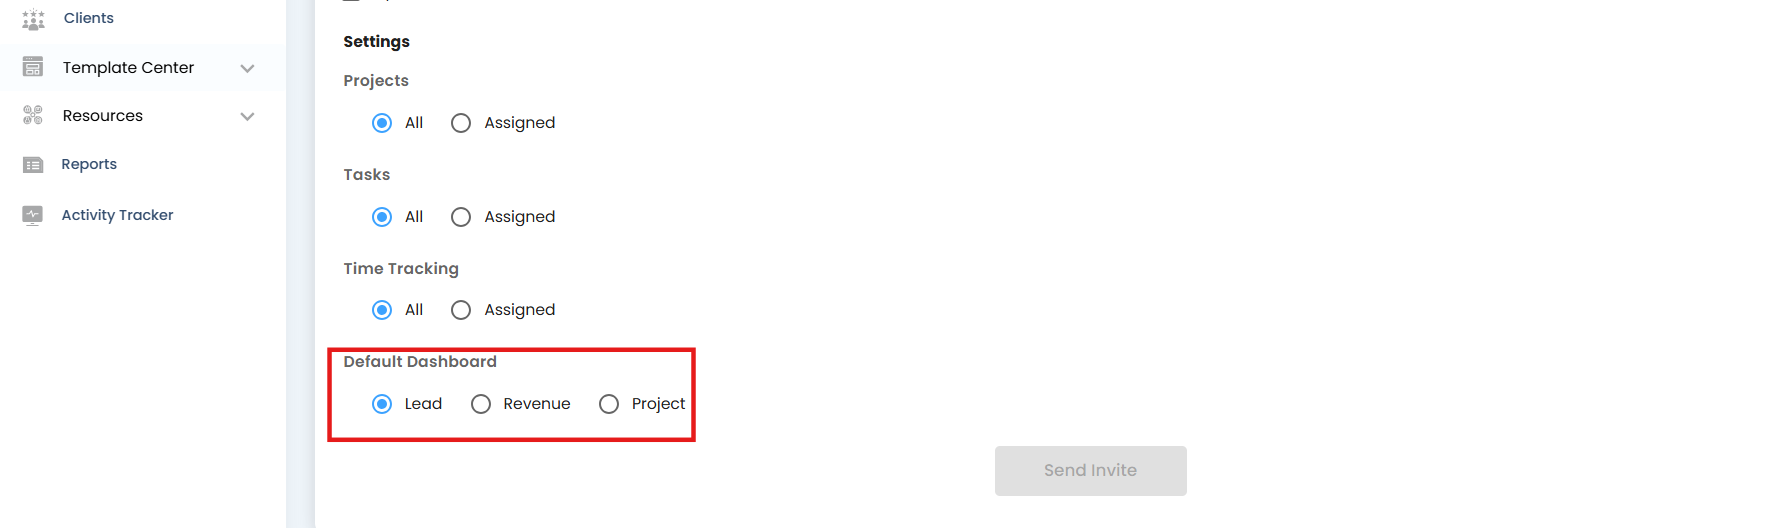
Choose Default Dashboard
Selecting a default dashboard gives users quick access to the most relevant information upon login.
Available Options
- Lead Dashboard – Focuses on leads, prospects, and sales opportunities.
- Revenue Dashboard – Highlights financial metrics and revenue tracking.
- Project Dashboard – Displays project progress, tasks, and timelines.
Pro tip: Assign the dashboard that best matches the user’s role to streamline their workflow and improve efficiency.
Completing the User Invitation
Finalize the invitation to ensure the user can join smoothly with the correct access.
- The selected dashboard will automatically appear when the user logs in.
- After entering all details and configuring access preferences, click Send Invite.
- An invitation email will be sent to the user, granting access based on the permissions you’ve set.
- The user receives a link to complete their account setup and log in to the platform.
Pro tip: Remind the user to check their inbox (and spam folder) for the invitation email to avoid delays in onboarding.
Was this article helpful?
That’s Great!
Thank you for your feedback
Sorry! We couldn't be helpful
Thank you for your feedback
Feedback sent
We appreciate your effort and will try to fix the article