The Multiple Assignee feature allows you to assign more than one user to a Client record
Where This Feature Is Available
You can assign multiple users in the following scenarios:
When creating a new client
When editing an existing client
Assigning Multiple Users While Creating a Client
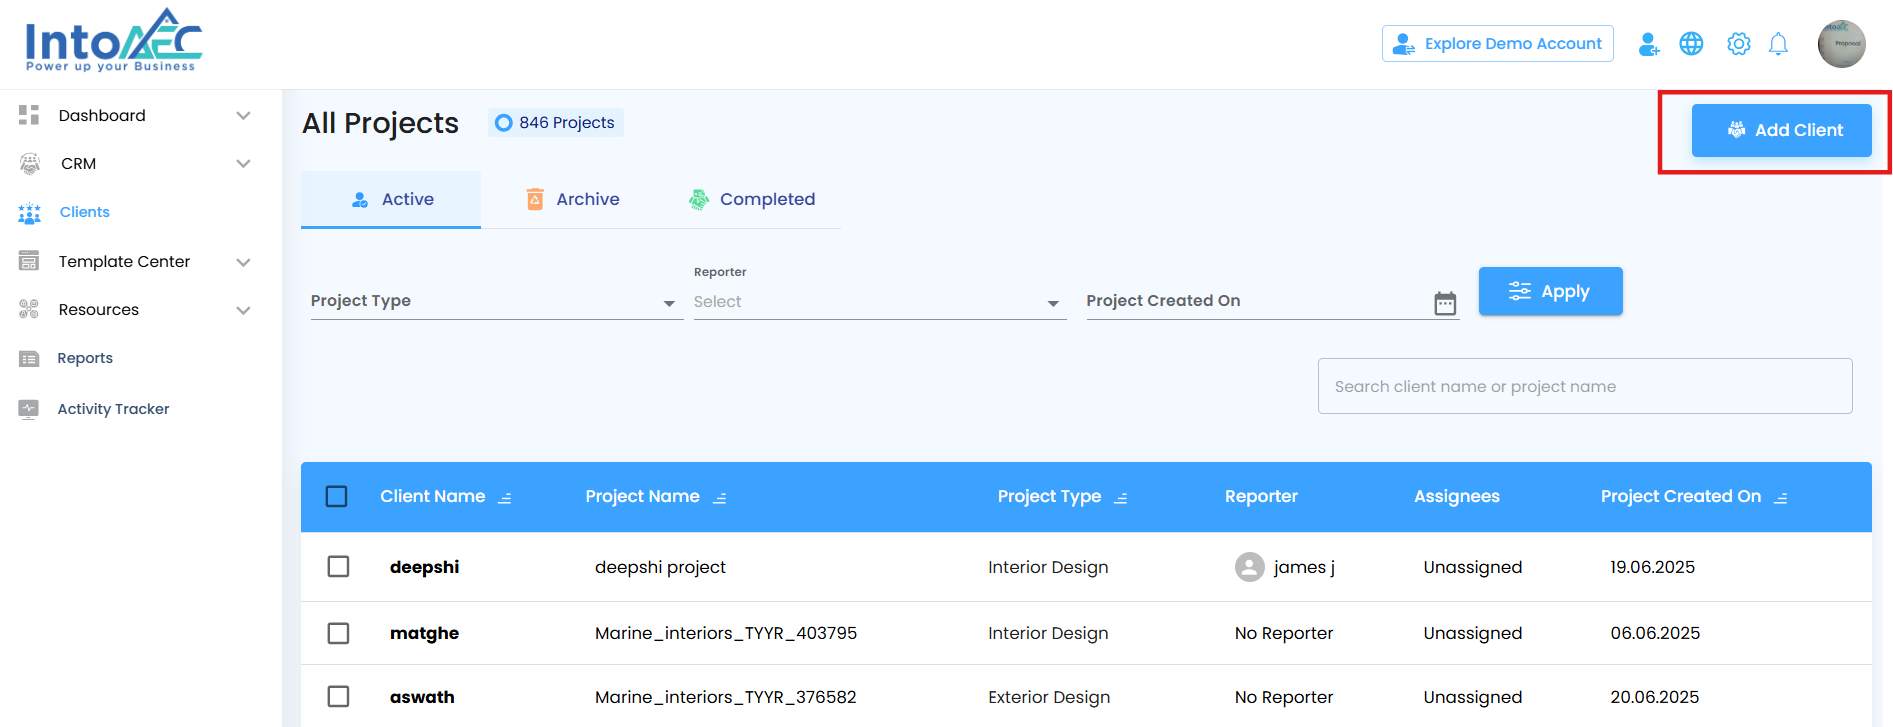
Go to the Clients module from the main menu.
Click on the Create Client button.
You’ll see two options:
Add New
Upload
Click Add New to open the client creation form.
Fill in all the required fields such as name, contact, etc.
In the Assignee field:
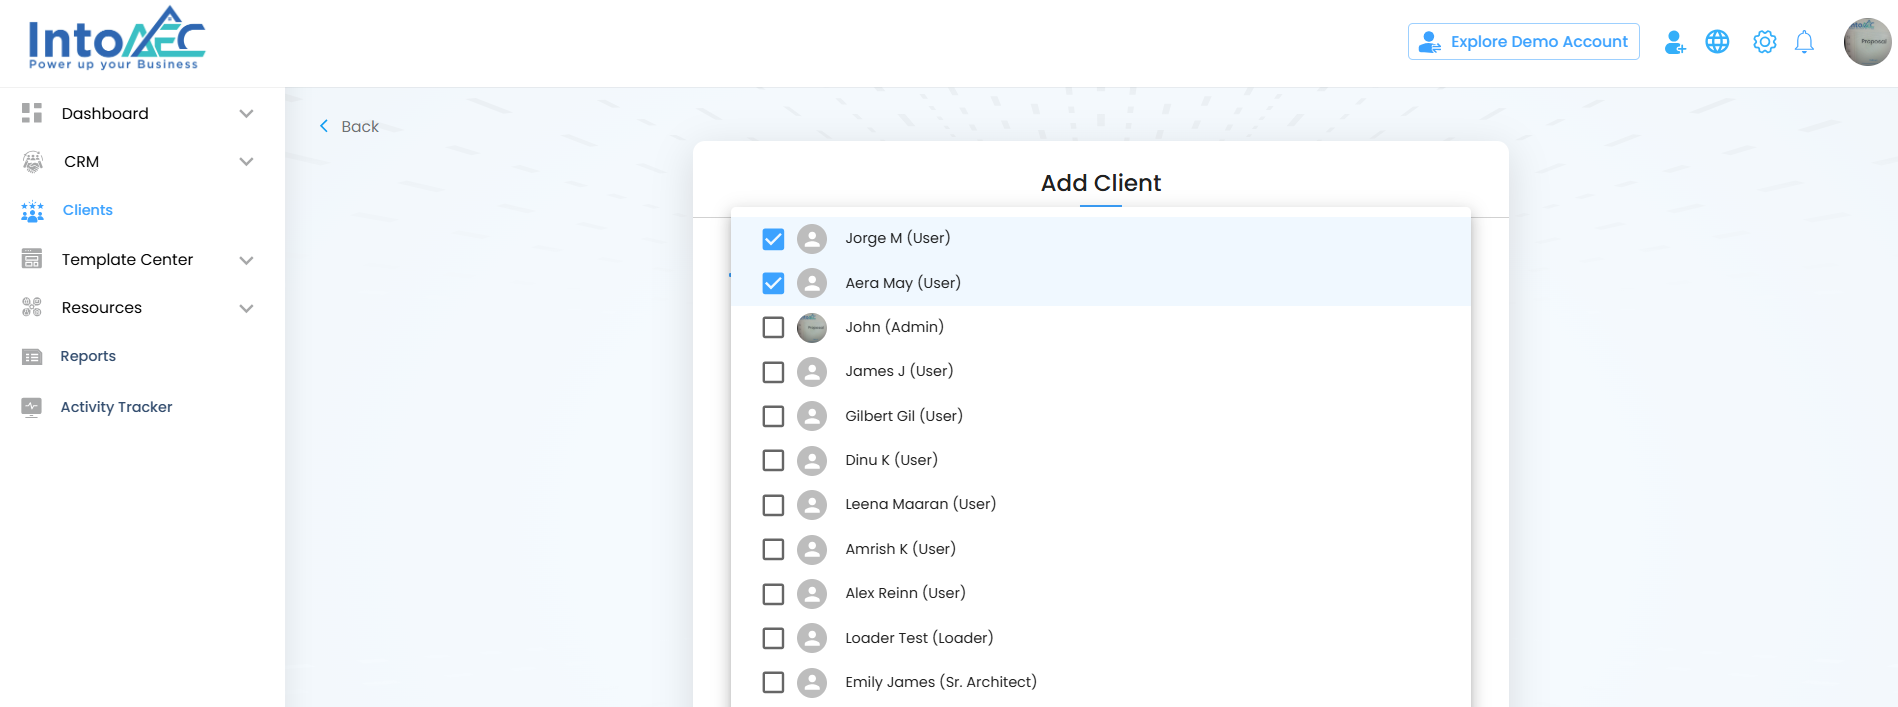
Click to open the dropdown list.
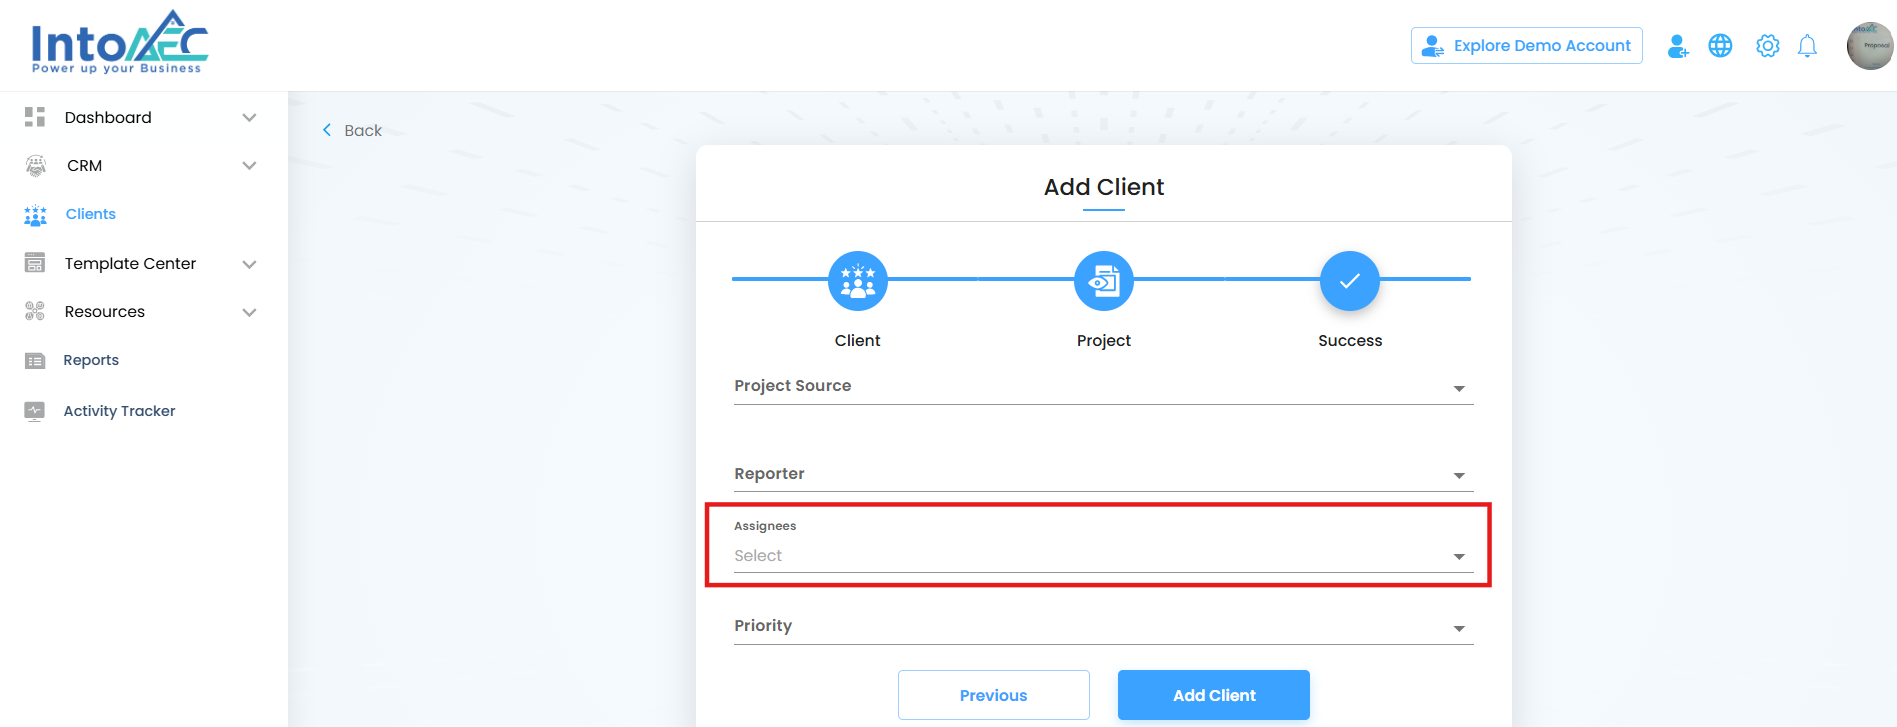
Select one or more users to assign to the client.
Selected users will be highlighted.
After completing the form and selecting assignees, click the Create Client button.
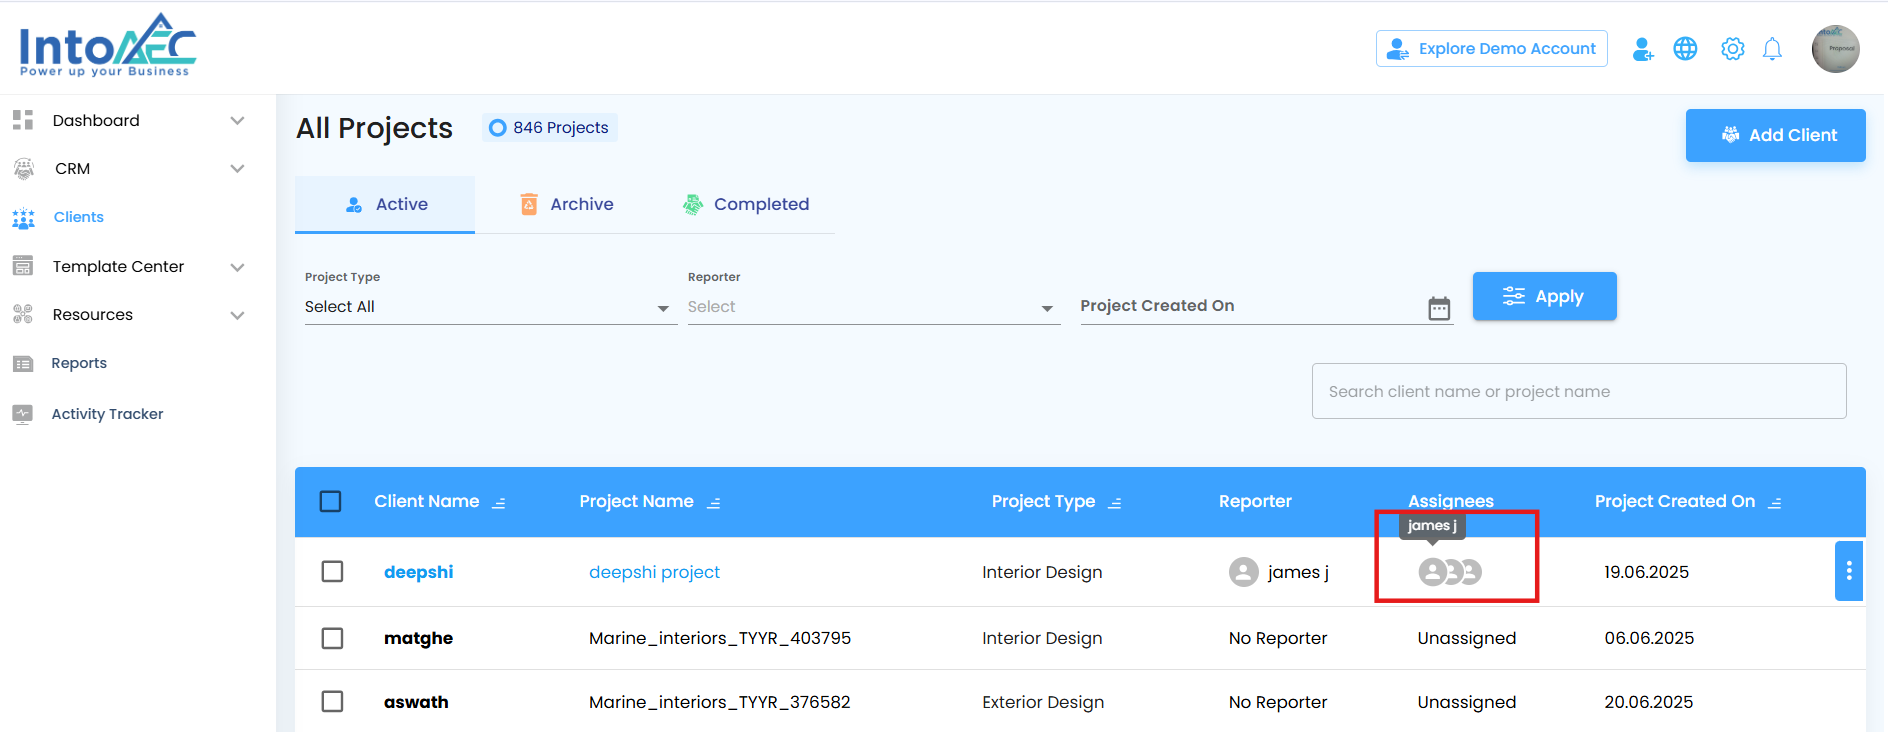
The selected users will now have access to this client and will appear in the Assignee list.
Editing a Client to Add or Remove Assignees
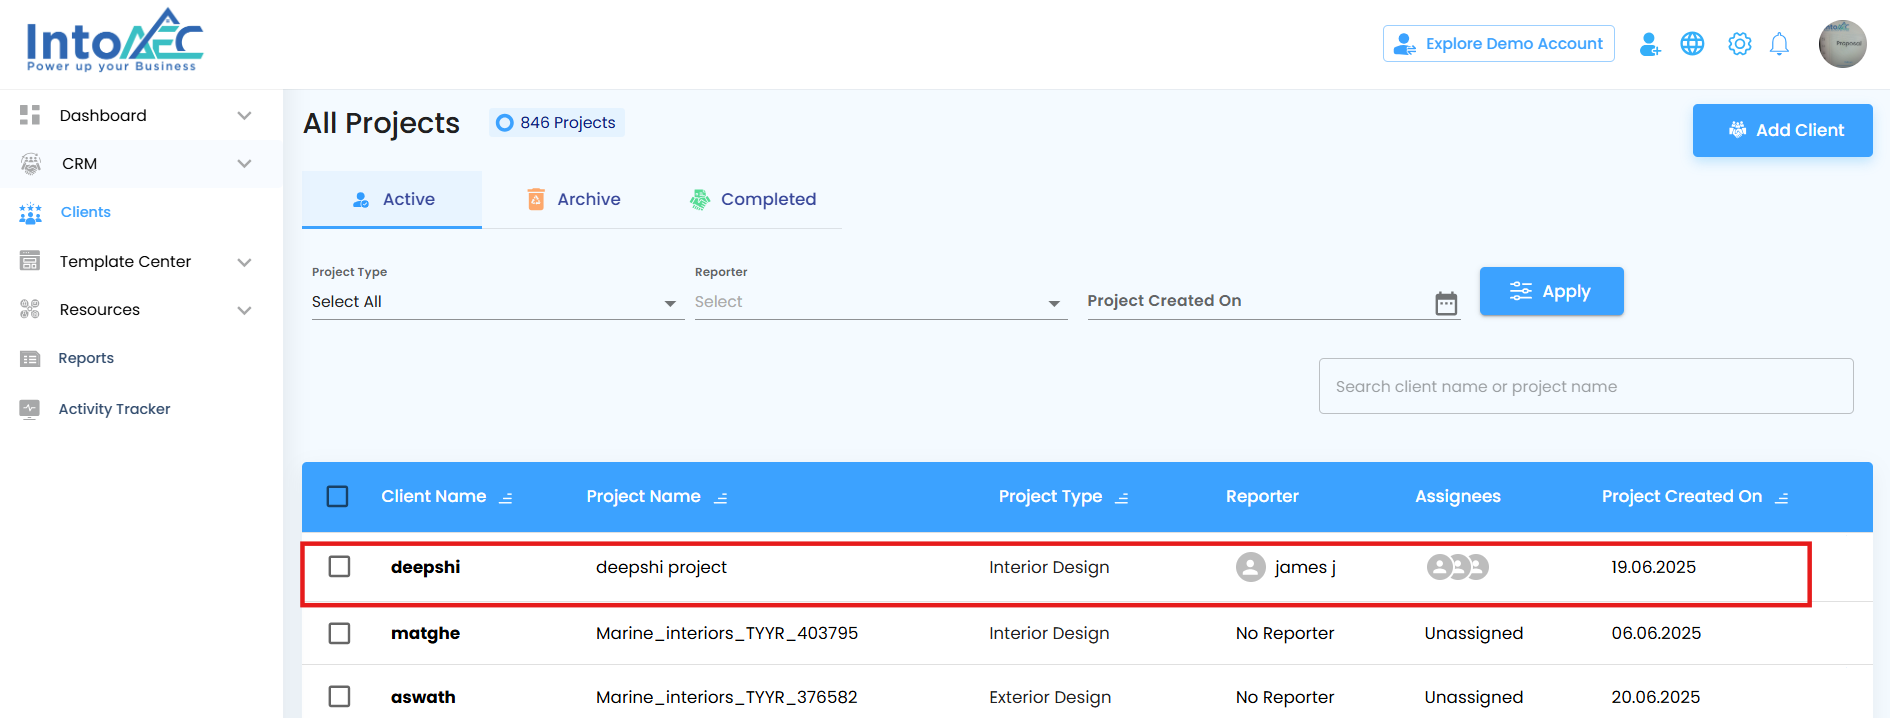
Navigate to the Clients list and search or browse for the client you want to update.
Click on the client name or row to open the detailed view.
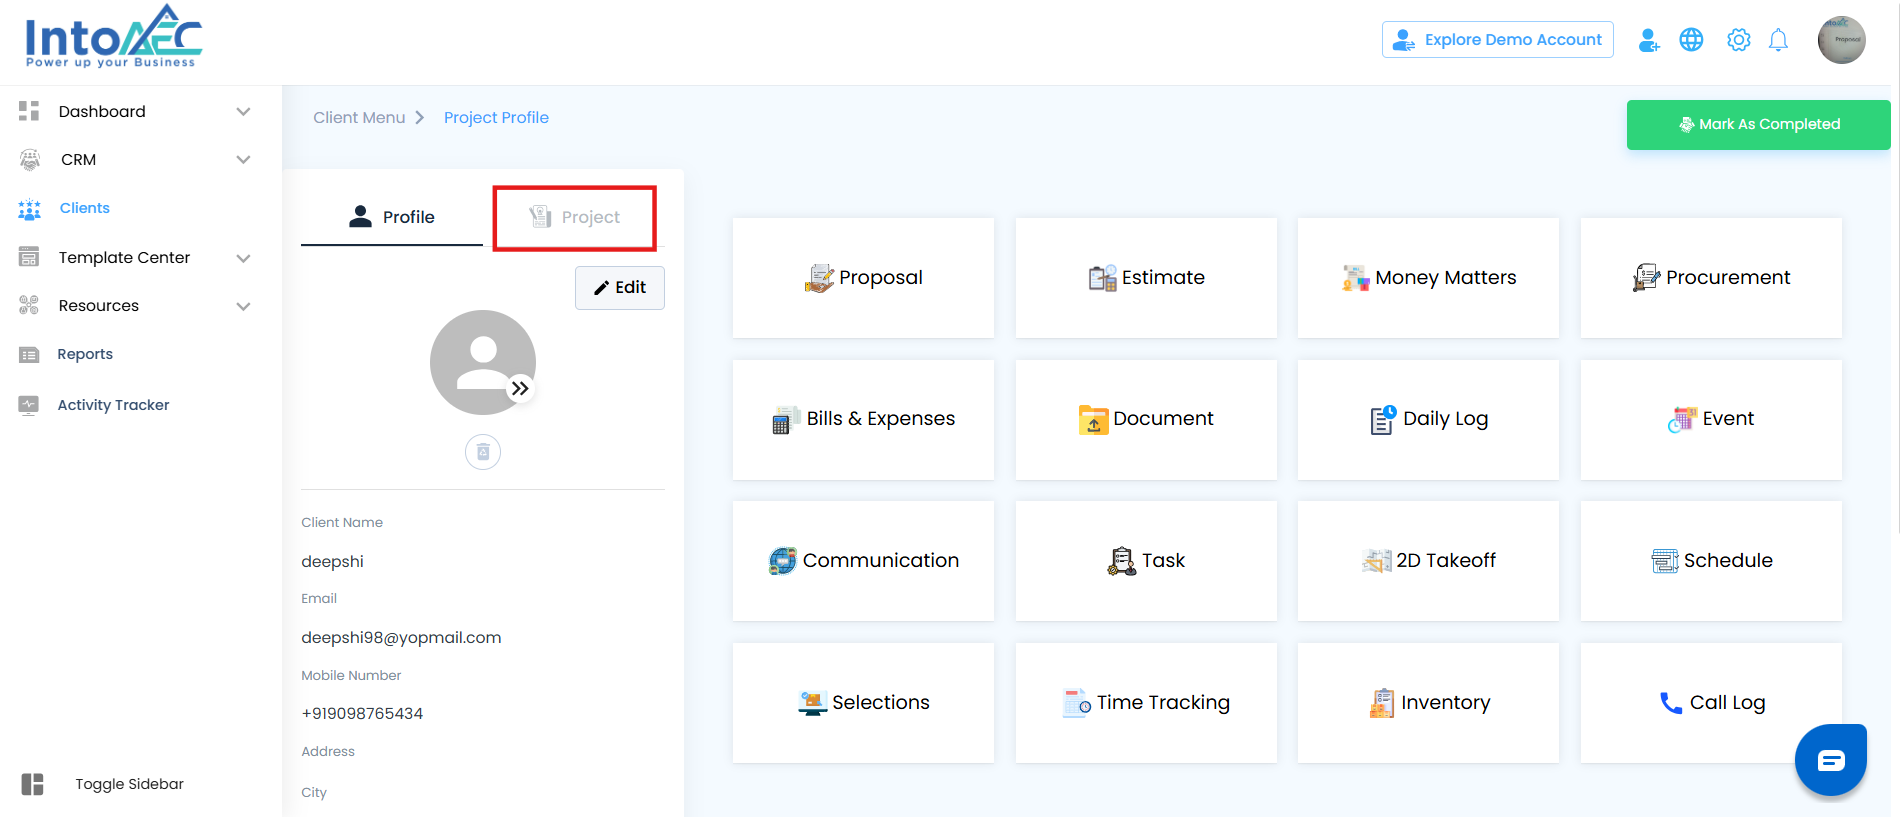
On the client detail page, click the Edit button.
Switch to the Project tab.
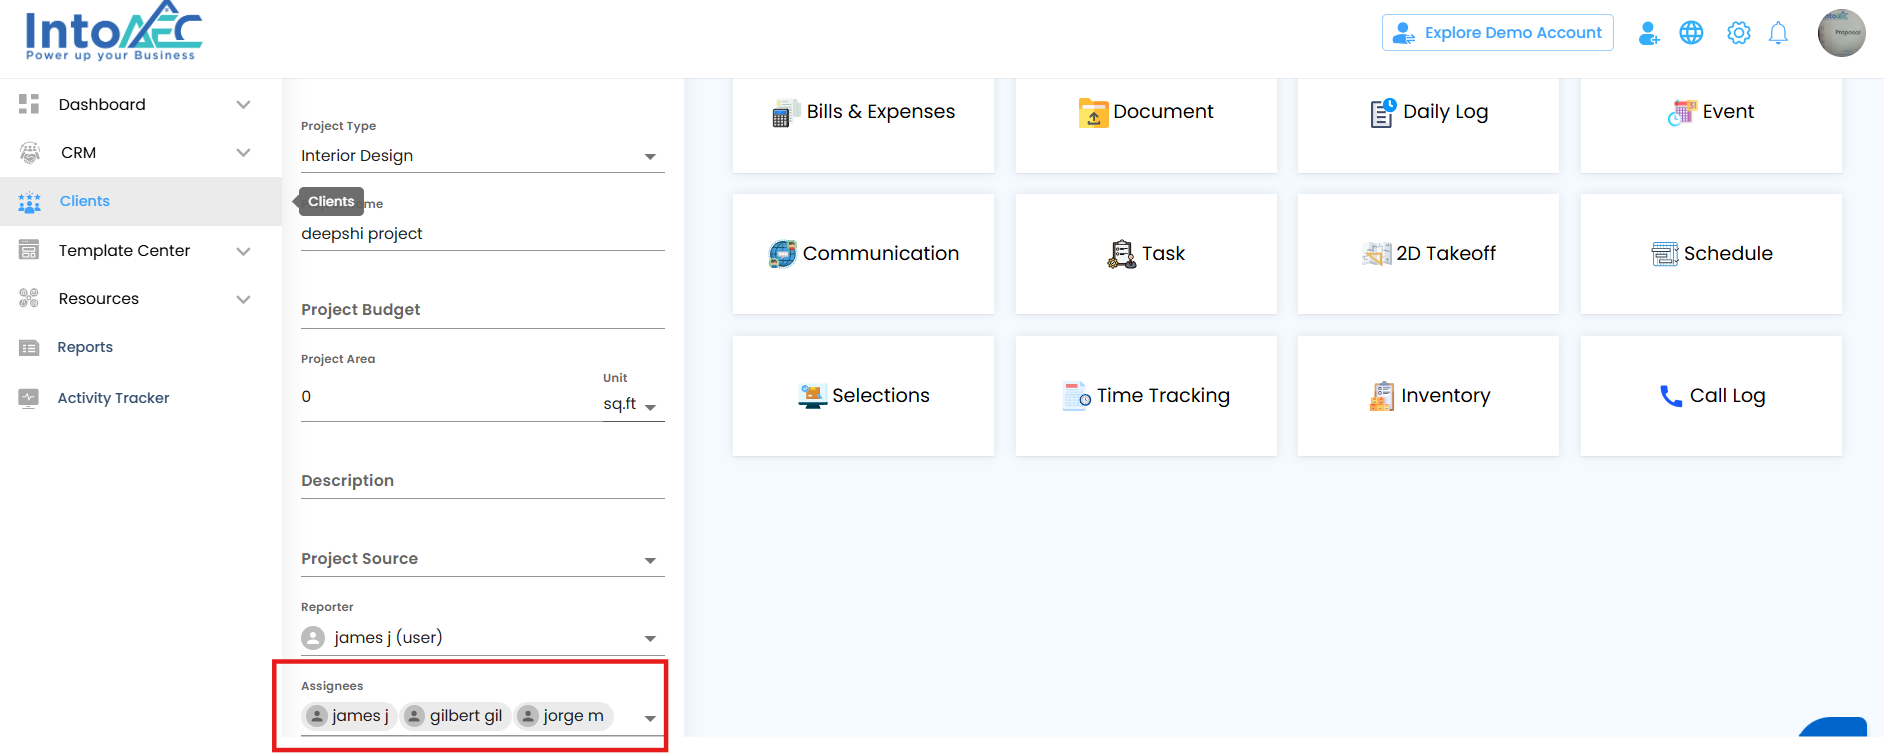
In the Assignee section:
The currently assigned users will be shown.
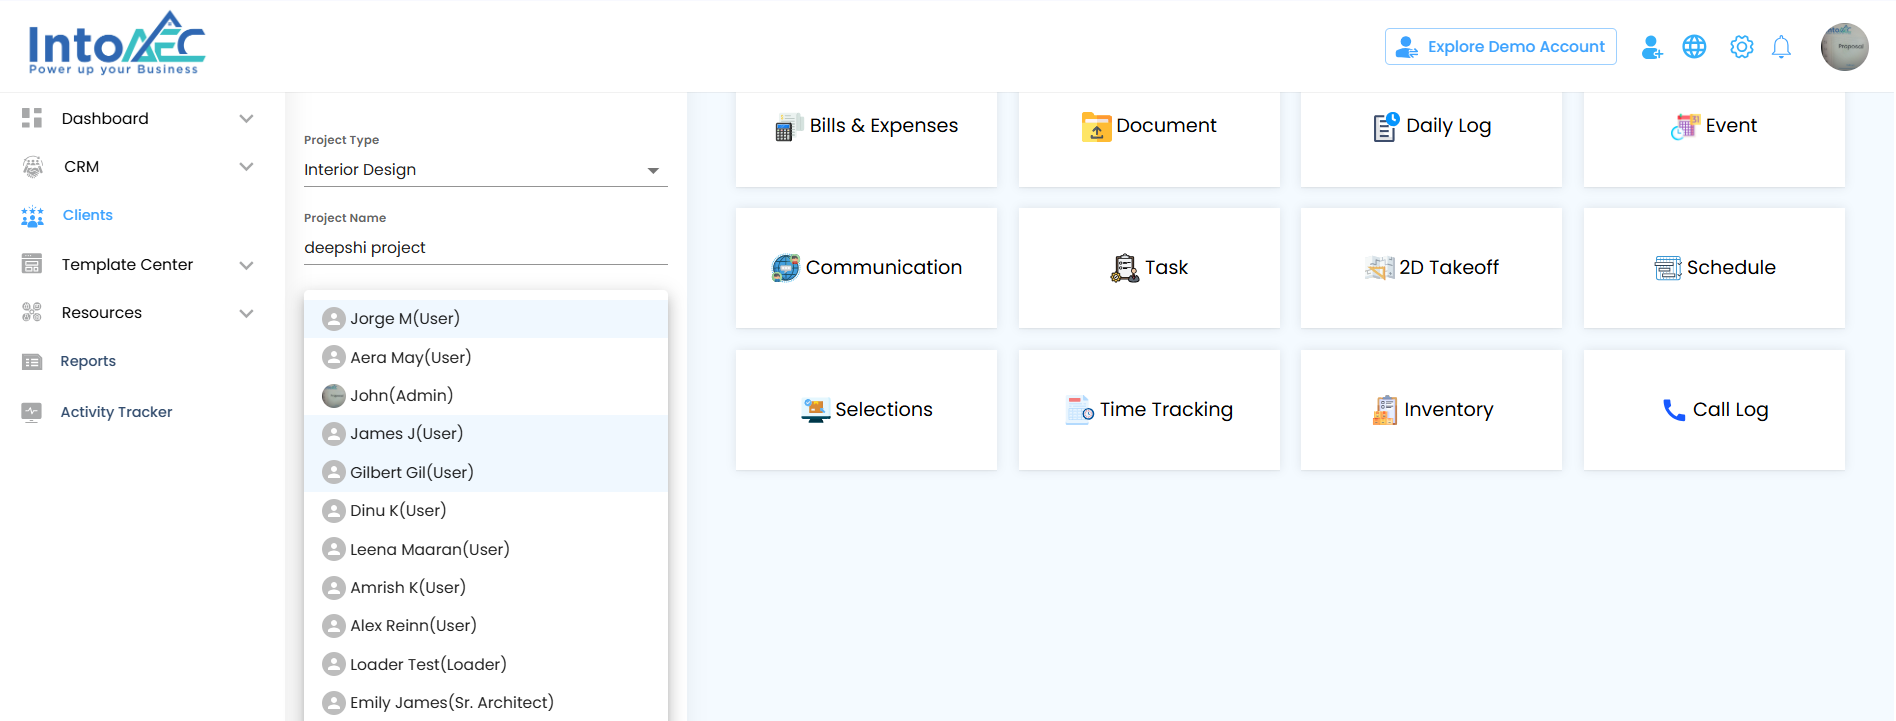
Click the Assignee field to open the dropdown. Selected users will be highlighted.
All users from the organization will be displayed in the dropdown.
To add users, select them from the list.
To remove users, click on the selected user again to unselect them.
Click the Save button to update the changes.
The updated list of assignees will now reflect in the Client table.
Was this article helpful?
That’s Great!
Thank you for your feedback
Sorry! We couldn't be helpful
Thank you for your feedback
Feedback sent
We appreciate your effort and will try to fix the article