Send Estimate – Your Quick Path to Clear Communication
With Send Estimate, you can share precise project costs with clients in just a few clicks. No endless back-and-forth, no clutter — just fast, clear, and professional communication that keeps projects moving forward.
Why It Matters
Sending an estimate isn’t just about numbers — it’s about trust. A clean, accurate estimate tells your client that you’re organized, transparent, and ready to get started. Every well-presented estimate builds confidence and sets the tone for a smooth project ahead.
What You Can Do Here
- Create new estimates from scratch or from existing templates
- Add detailed line items with quantities and unit pricing
- Include taxes and apply discounts directly within the estimate
- Customize terms and conditions for every client
- Instantly send estimates via Email, SMS, or WhatsApp
- Track real-time status — Sent, Viewed, or Accepted — from your dashboard
How to Send an Estimate
Create from Scratch
Start fresh and build a new estimate tailored to your client’s project needs.
Steps:
- Go to the Client Menu in the sidebar.

- Select the specific client you want to work with.

- Open the Estimates Menu card within the project.

- Click Create Estimate.

Creating an Estimate – Your Blueprint for Precision and Clarity
The Estimate page is where planning meets precision. It’s your workspace for shaping every cost detail before the project begins. From pricing and structure to clarity and accuracy, this page helps you create professional, transparent estimates that set every project off to a strong start.
Getting Started
Step 1: Select the Estimate Type
When creating a new estimate, choose how you want to begin.
Select Start from Scratch.
Click Proceed to begin building a new, custom estimate from the ground up.
Step 2: Enter Basic Details
Start at the top of the page by filling in your essential information:
Estimate No. – Auto-generated or editable for easy tracking.
Estimate Title – Give your estimate a clear, descriptive name (for example, Interior Project Estimate).
Created On / Valid Till – Define the estimate’s active period for clear timelines and accountability.

Step 3: Add Business & Client Info
Both sections display key contact and identification details. Confirm that your company logo, name, and contact details appear correctly.
The client’s name, email, and contact number are also auto-filled to ensure consistency and accuracy.
Step 4: Build Your Estimate Items
This section is where you add and organize the detailed breakdown of your estimate. Each item you include—whether it’s materials, labor, or services—contributes to your project’s total cost and profit. The layout is designed to be clear, structured, and easy for both you and your clients to follow.
Adding a Section
Scroll to the Items section.
Click Add Section to begin.
 A new section panel appears, where you can enter a Section Name (for example, Materials, Labor, or Services).
Each section acts as a group for related items, keeping your estimate neatly organized.

Adding Items to a Section
Within each section, you can add items in three ways:
Add Manually – Enter custom item names, descriptions, quantities, and values. Using “Add from Library”
Click Add from Library under your chosen section.

The Library window opens.
In the window, filter or browse using:
Category – The main classification of your item (for example, Industrial or Residential).
Sub-Category – A more specific type (for example, Wall, Partition Wall).
Type of Work – The relevant task or project type.

Select one or more items from the list.
Click Add to insert them into your estimate section.

Your chosen items now appear under the section with all their pre-filled details—description, quantity, unit, rate (incl. tax), profit %, and total cost.
Option 3: Add Product/Service (from Inventory)
Pull items directly from your company’s Inventory, including both Products and Services already tracked in the system.
Steps:
- Click Add Product/Service under your section.

- The Product/Service Selection window appears.

- Choose between two tabs:
- Product – Displays items stored in your inventory, including Category, Sub-Category, Brand, Quantity, Unit Cost, Markup (%), and Selling Price.

- Service – Displays available services from your inventory, showing Service Category, Service Type, Unit, Cost, and Taxable Status.

- Use filters like Category and Sub-Category to narrow your search.
- Select the items or services you need.
- Click Add to include them in your section.

The system automatically imports all pricing and quantity data from the inventory, ensuring consistency across your estimates and stock records.
Each line item allows you to include:
Description (with optional image upload for clarity)
Quantity (Qty) and Unit
Rate per Unit (Incl. Tax)
Profit (%), if applicable
The system calculates totals automatically—showing Sub Total, Overall Profit, and Grand Total in real time as you build your list.
Option 4: Upload Expense (AI-Powered)
You can quickly add estimate items by uploading documents such as Excel, PDF, or image files. This feature is powered by Zyra AI, which automatically analyzes the uploaded file, extracts the relevant cost details, and organizes them into structured groups.
How It Works
Click Upload Expense inside the Items section.
Upload your Excel, PDF, or image file containing expense or cost details.
Zyra AI analyzes the document and extracts the relevant items.
The system automatically groups the extracted items and displays them within the estimate.
Review the generated items and make any necessary edits before saving.
This feature helps you convert documents into structured estimate items instantly, reducing manual entry and saving significant time.
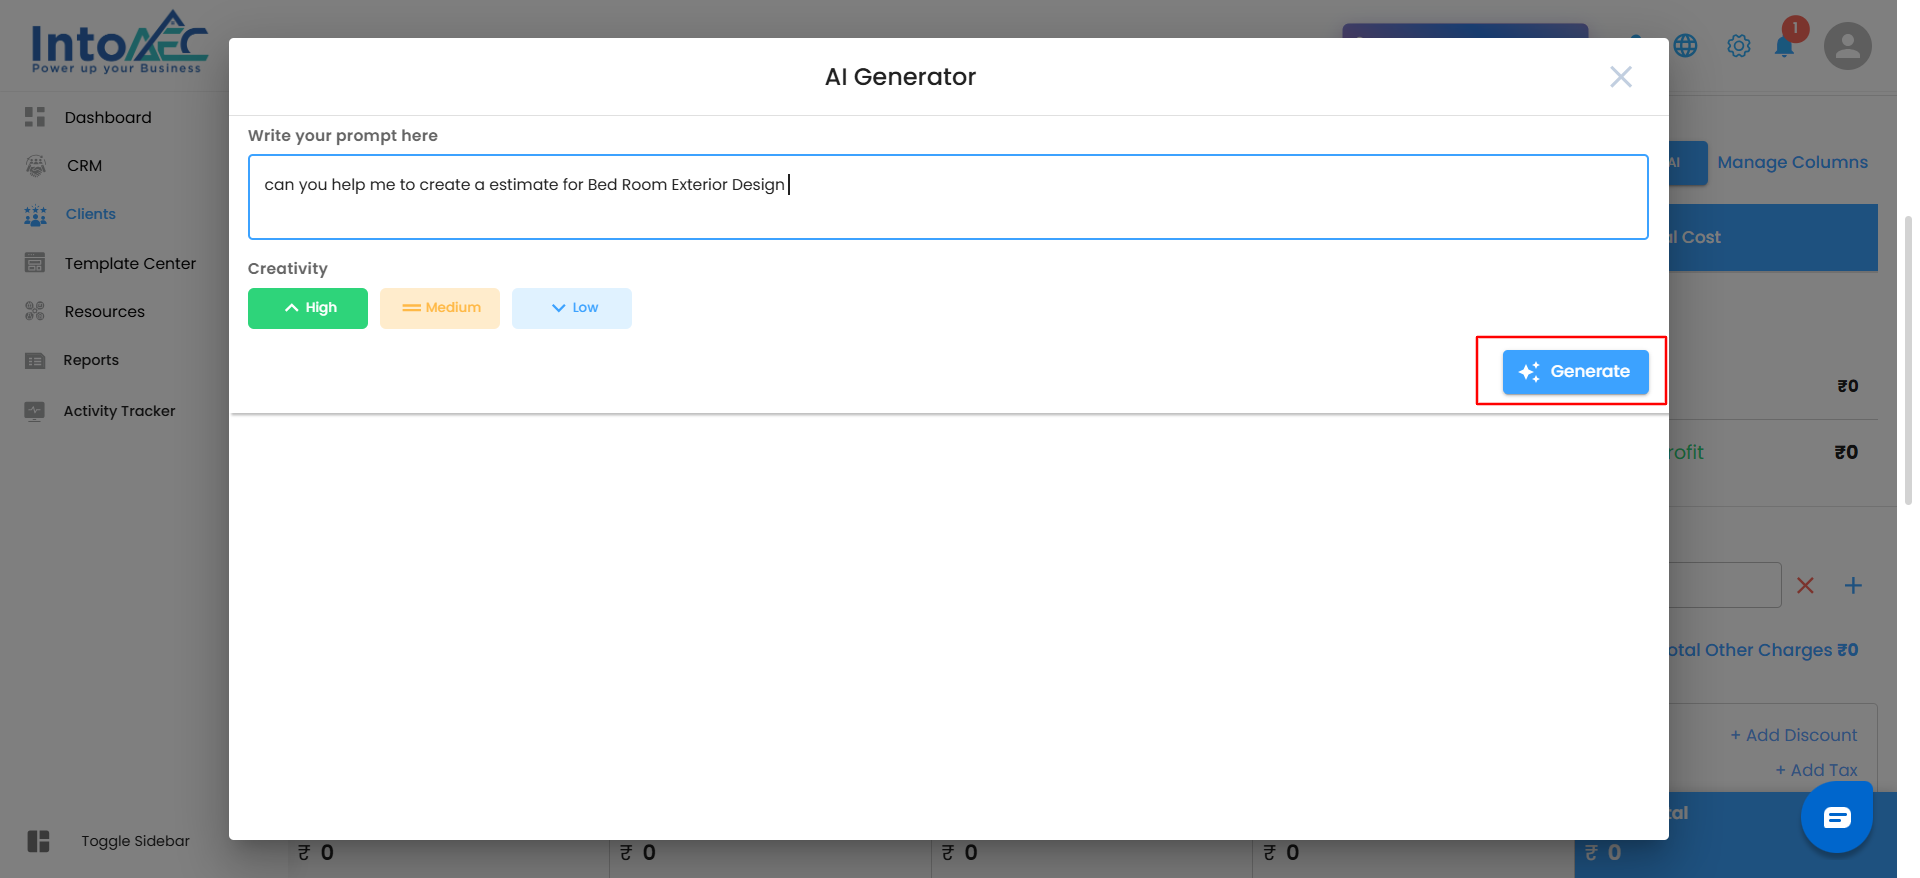
Using Write With AI
The Write With AI feature helps you instantly generate or refine item descriptions.
Click Write With AI from the top-right corner of the Items section.

Enter key details about your item or section.
The system suggests clear, professional descriptions you can review and edit before saving.
This saves time and ensures every estimate you create is detailed, accurate, and client-ready.
Managing Columns
You can easily customize the columns displayed in your item table to focus only on the details you need. This helps you tailor your view—whether you want to simplify your layout or see all pricing details at once.
Steps to Manage Columns:
Navigate to the Items section of your estimate.
Locate the Manage Columns option on the top-right corner, next to the Write With AI button.
Click Manage Columns.

Within the estimate workspace, add section names and item names as needed. Use the Manage Column option to create additional columns for capturing project-specific details.

- Description
- Qty
- Unit
- Rate/Unit (Incl. Tax)
- Profit (%)
- Rate Incl. Profit
- Total Cost
5. Use the toggle switches beside each column to show or hide them as needed.
- Blue toggle = Column visible
- Grey toggle = Column hidden
6. To add a new custom column:
You can add columns using Number, Text, Link, or Date formats based on your requirements. After adding columns, click Apply to display them in the estimate table.

Columns can be reordered easily to match your preferred layout, while the Description and Total Cost fields remain fixed for consistency. You can also add or remove items/materials using the three-dot menu.
Your table layout will refresh instantly, displaying only the columns you’ve enabled.
Pro Tip
Use sections wisely. Grouping related items keeps your estimate easy to read and helps clients understand cost breakdowns at a glance.
Step 5: Apply Taxes and Discounts
Once all your line items are added and calculated, the next step is to review and apply overall taxes and discounts to finalize your estimate. This ensures your total reflects accurate pricing and clear cost breakdowns before you send it to your client.
Applying Taxes
The Add Tax option allows you to apply existing tax rates to your estimate’s total.
Since tax percentages are already defined earlier at the item level, this step is simply about choosing which taxes to include at the final summary level.
How to Apply Taxes:
In the right panel, click +Add Tax.

From the list, select the tax type you want to apply (for example, GST, VAT, or a predefined custom tax) and click on add button

The system automatically applies the selected tax to your total, and the Grand Total updates instantly.

You can review or remove applied taxes at any point before finalizing the estimate.
Pro Tip: Review your tax selections before sending the estimate. Applying only relevant taxes helps maintain accuracy and compliance.
Applying Discounts – Your Smart Way to Save
Use the Add Discount feature to apply final-level discounts—whether it’s for loyal clients, special pricing, or project-based adjustments. The system updates totals automatically, giving you complete accuracy with no manual edits.
How to Apply Discounts:
In the right panel, click +Add Discount.

The Add Discount window appears—your control panel for applying discounts.
Choose the Discount Type (percentage-based or fixed value).
Click Add to Confirm
- Once you have Selected a Discount. No extra steps, no manual edits.
- And that’s it—your discount is live, the Grand Total updates automatically, and everything recalculates behind the scenes. Quick, clean, and ready to go.

Once added, the discount appears below the Grand Total, and all values update instantly.
Pro Tip: Apply discounts thoughtfully. Strategic, transparent discounts not only save your clients money but also build long-term trust and strengthen relationships.
Step 6: Add Terms & Conditions
Use the Terms & Conditions field to include important details like payment terms, project scope, or disclaimers. Clear terms prevent confusion later and give your estimate a professional, polished touch.
Step 7: Add a Digital Signature (Optional)
Toggle Show Digital Signature on Estimate if you want to include an authorized sign-off for validation and authenticity.
Pro Tip
Your estimate is your project’s first impression—keep it clear, accurate, and professional. Review every detail before sending to ensure your clients see the care and precision that define your work.
Step 8: Send or Save Your Estimate
After completing all the previous steps — from adding items to applying taxes and discounts — you’re ready to finalize your estimate. The Action button gives you multiple ways to share or save your estimate based on your workflow and client preferences.
Using the Action Button
Once your estimate is reviewed and ready:
Click the Action button at the top-right corner of the page.

Choose one of the following options based on what you want to do next:

Save as Draft – Store your estimate for future editing or review before sending.
Compose Email – Open the built-in email window to send the estimate directly to your client’s inbox.
Send via WhatsApp – Instantly share the estimate as a message with your client through WhatsApp.
Send via SMS – Send a quick text notification containing your estimate details.
Once you’ve selected your preferred option (e.g., Compose Email), review the message and click Send.


Your client will receive the estimate immediately through the selected channel.
Pro Tip
Always review your estimate one last time before sending. Ensure totals, discounts, and validity dates are correct. A final check guarantees accuracy and reinforces your professionalism.
Type 2 – Creating an Estimate Through Templates
Why start from scratch when you can build faster with ready-made templates?
The Start from Template option lets you create professional estimates in minutes using pre-designed layouts that you can easily adapt to your project needs. It’s like working from a proven blueprint — no rework, just quick customization and clean, consistent results.
How to Get There
Go to the Client Menu in the sidebar.

Select the specific client for whom you want to create the estimate.

Open the Estimate Menu card inside the project workspace.

Click Create Estimate.

Step-by-Step Guide
Step 1: Choose the estimate type as Start from Template and click Proceed.
Step 2: Select your preferred Category, Sub-Category, and Template, then click Proceed again.
Step 3: Review and modify the estimate details to match your project requirements. You can edit line items, update quantities, adjust prices, or apply discounts as needed.
Step 4: Click the Action button at the top-right corner to choose how you’d like to send or save your estimate:
Save as Draft – Keep it for future editing or internal review.
Compose Email – Send the estimate directly to your client’s inbox.
Send via WhatsApp – Share it instantly as a message.
Send via SMS – Notify your client quickly with a link or summary.

Step 5: If you select Compose Email, review the message and click Send. The estimate will be instantly shared with your client, and a confirmation will appear on your screen.
What You’ll See
With templates: You’ll get a structured, ready-to-use estimate prefilled with standard sections just customize and send.
Without templates: You can always switch back to Start from Scratch for complete control and flexibility.
Pro Tip
Use templates for recurring project types — it saves time, keeps your estimates consistent, and ensures you never overlook important details. With templates, you spend less time formatting and more time focusing on what matters: your client.
Was this article helpful?
That’s Great!
Thank you for your feedback
Sorry! We couldn't be helpful
Thank you for your feedback
Feedback sent
We appreciate your effort and will try to fix the article