The Estimate Approval Flow ensures that all estimates sent to clients go through a proper review and authorization process. This helps maintain accuracy, prevents errors, and ensures estimates follow your company’s pricing, policies, and approval standards. The workflow also provides transparency and control by allowing only approved estimates to be shared with clients.
This article explains how users can request approval for an estimate, how super admins can approve or send the estimate, and how to edit an estimate that is in Pending Approval status.
When Is Approval Required?
If you are the creator of the estimate, you must send it for approval to the Super Admin before you can send it to the client.
As a User (Creator): How to Request Approval
1. Navigate to the Client
Go to Clients → Select the specific client → Estimate.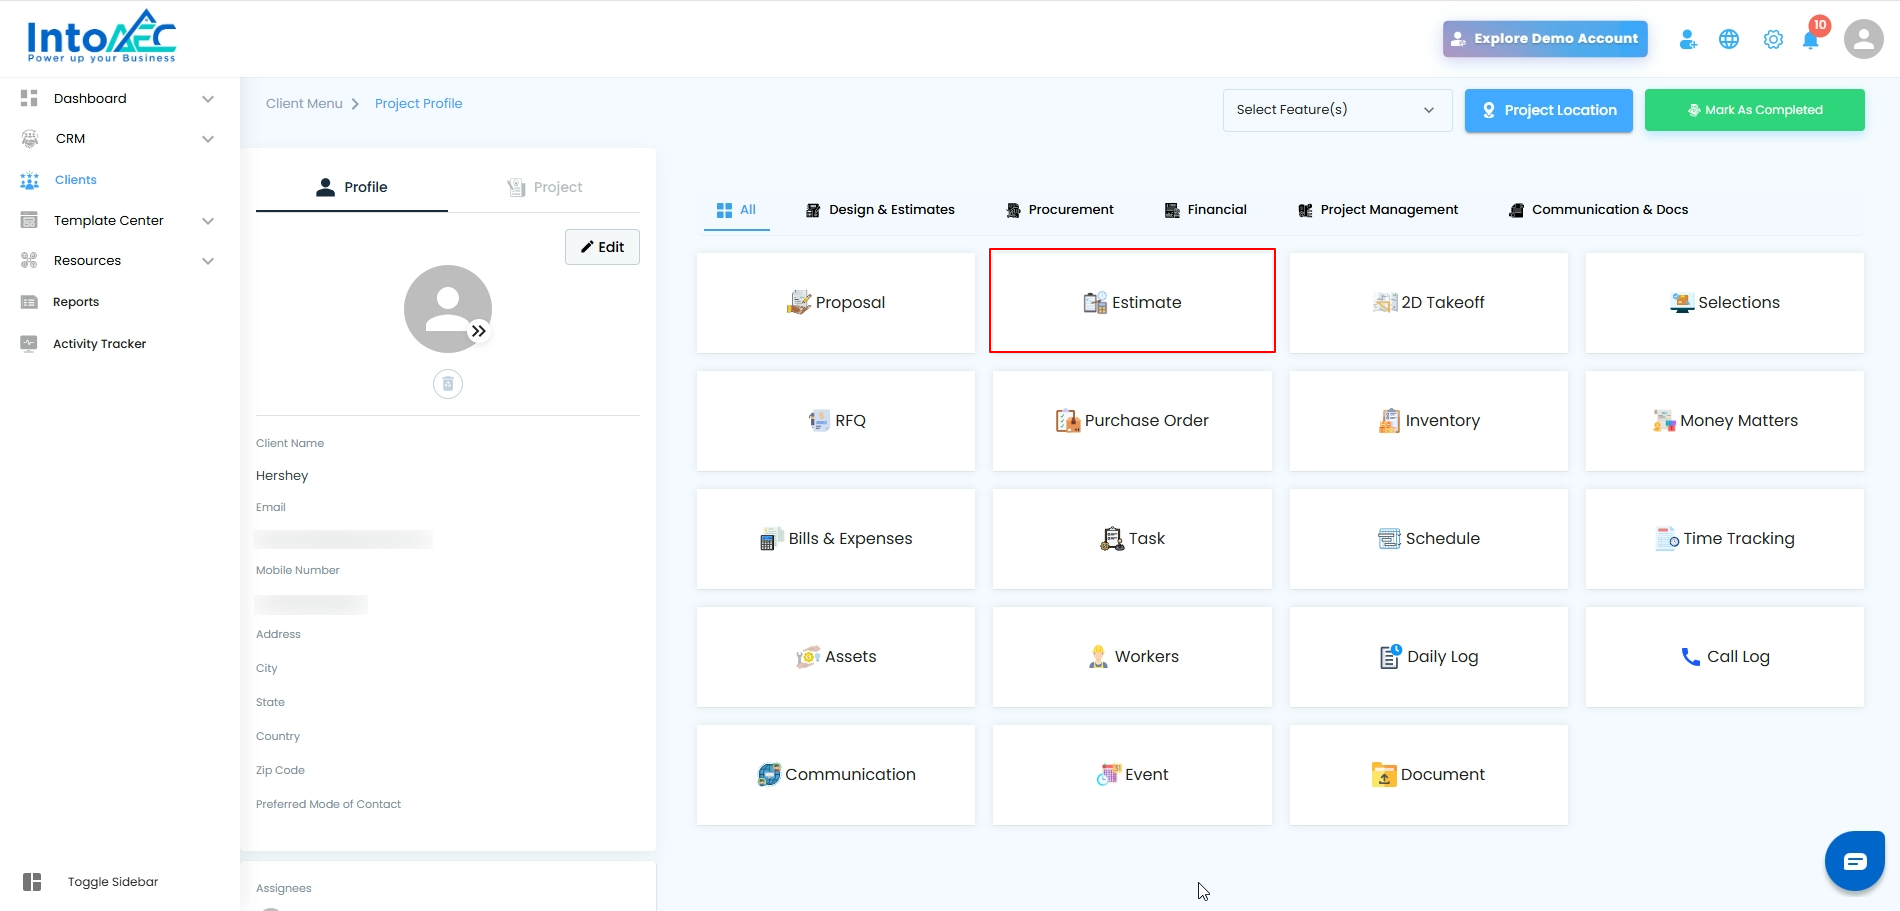
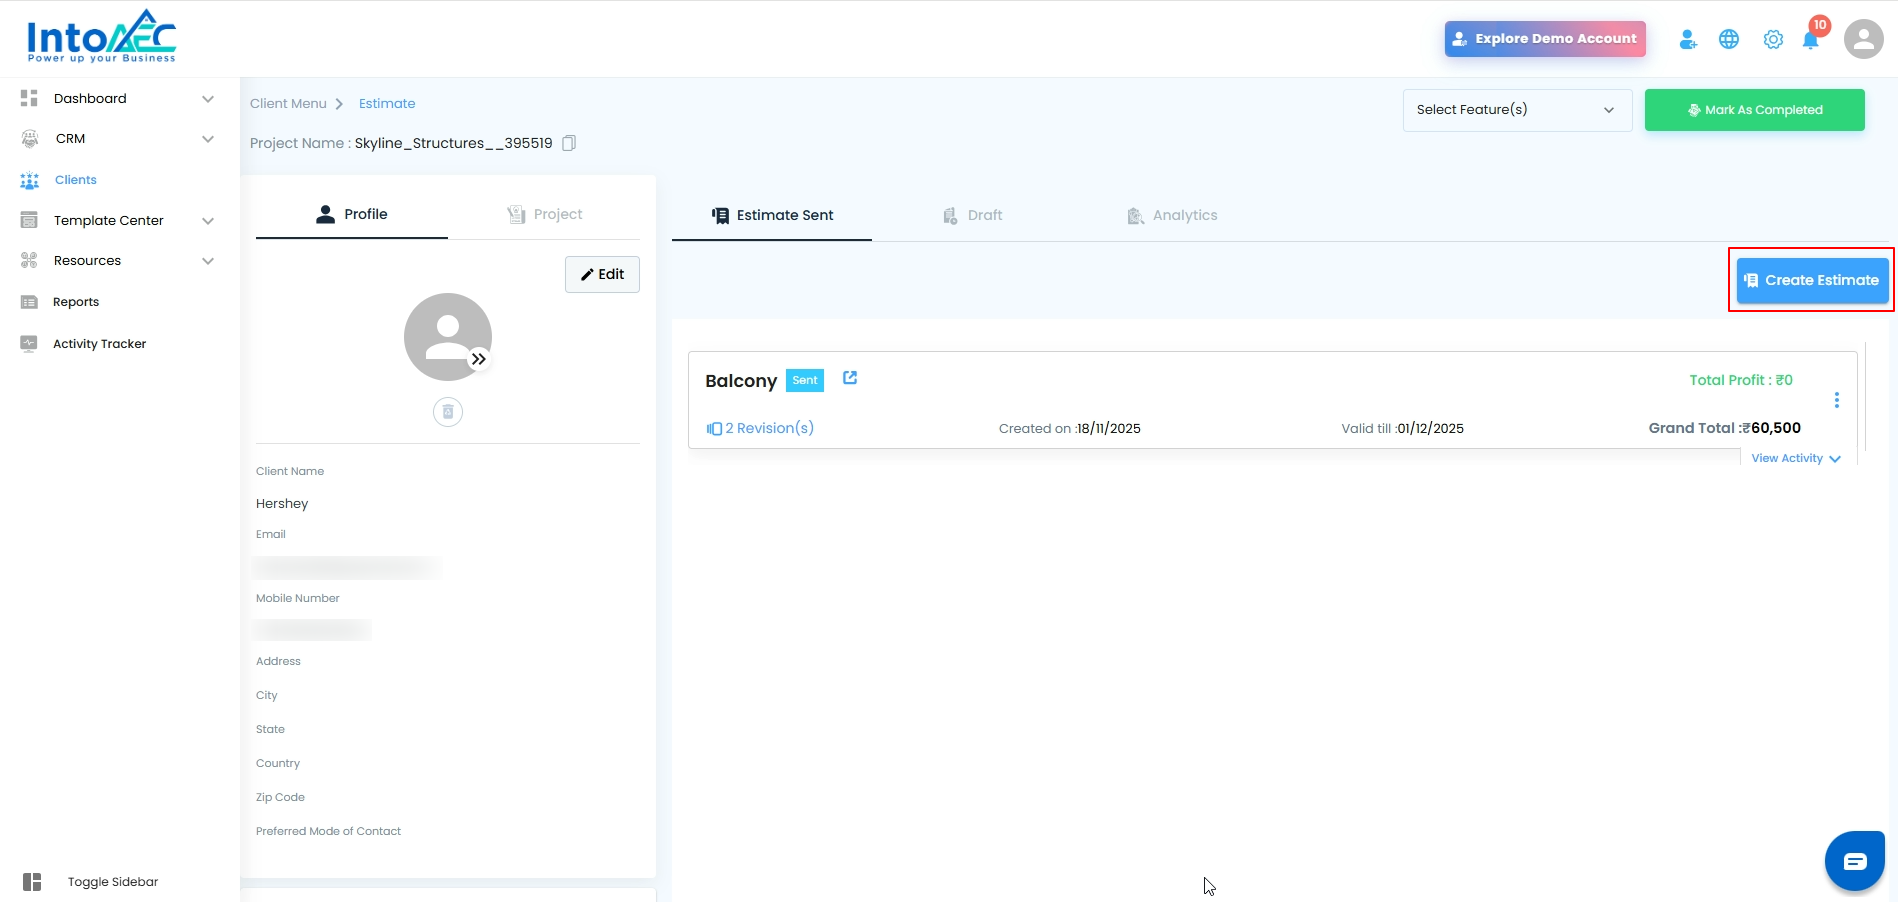
2. Create a New Estimate
Click on Create Estimate.
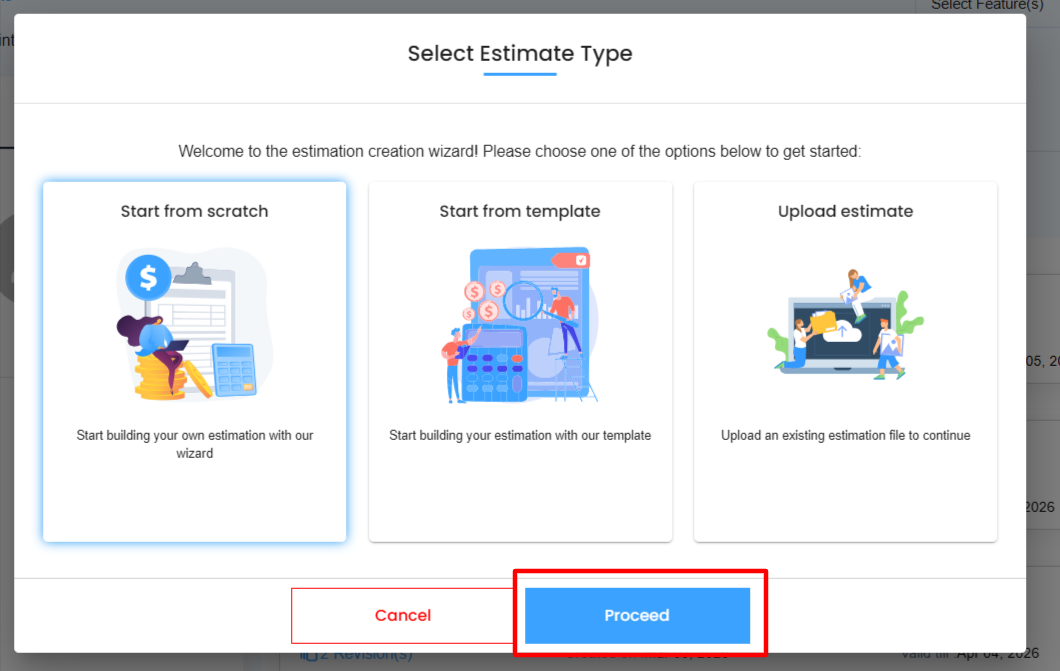
Select the estimate type and click Proceed.
3. Enter Estimate Details
Fill in all the mandatory fields.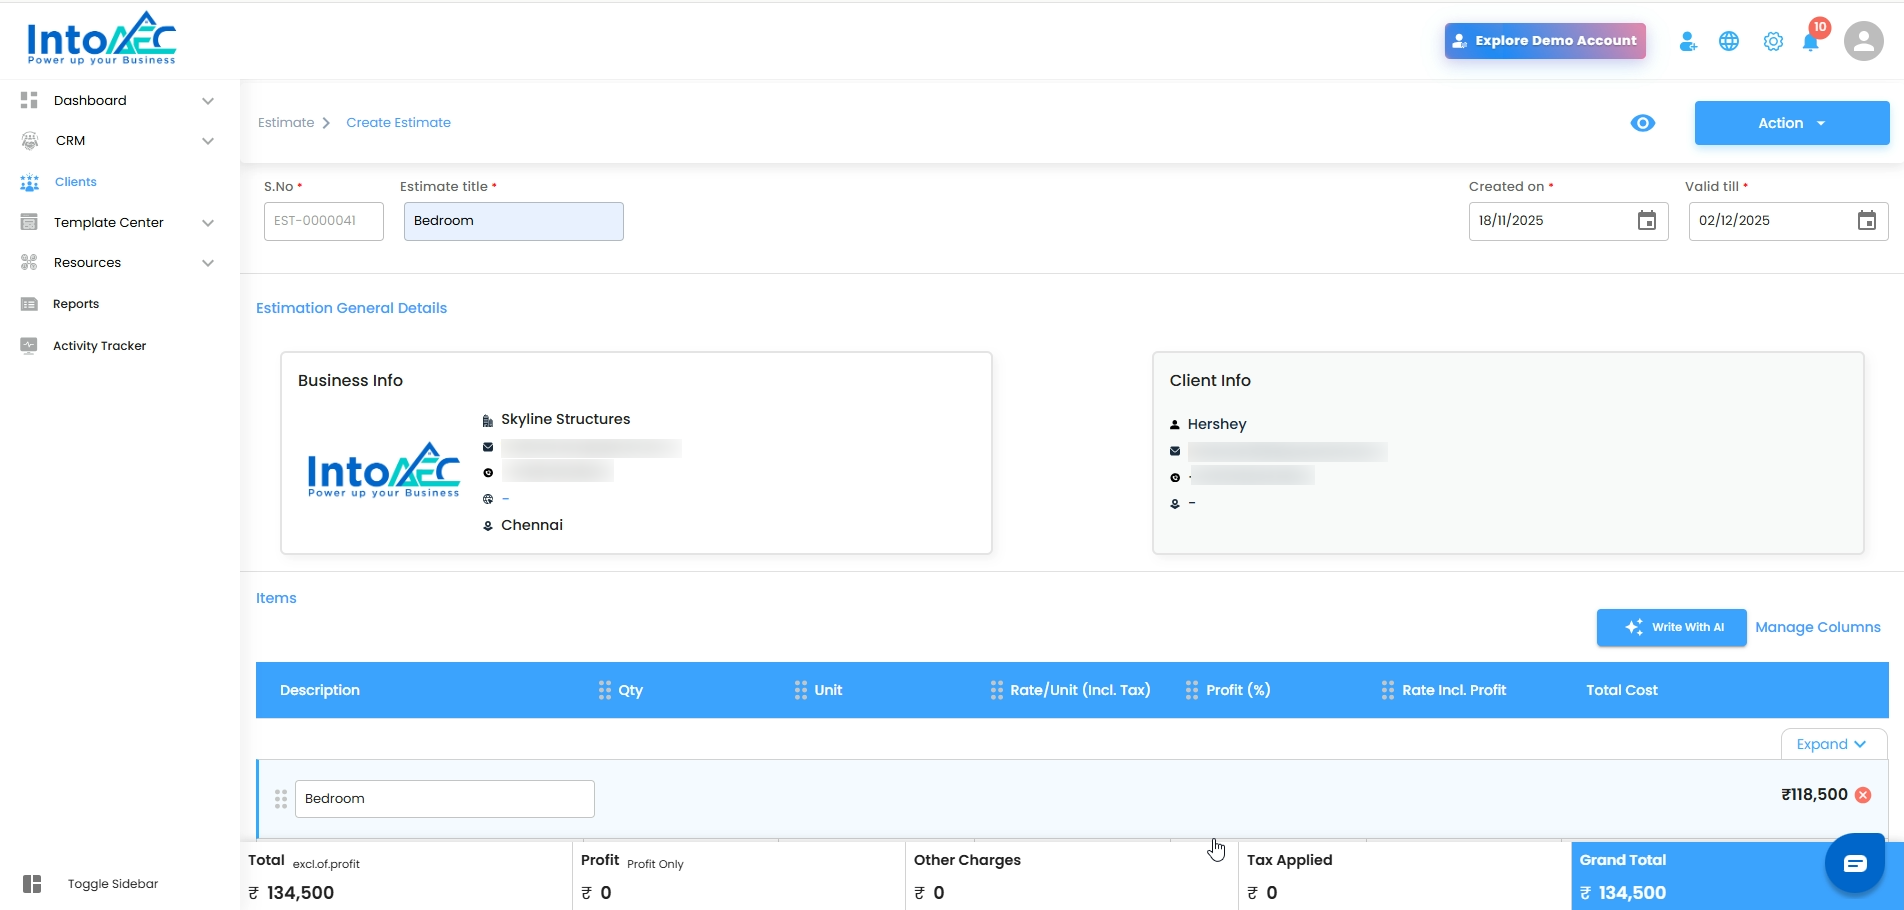
4. Submit for Approval
Click Action → Request for Approval.
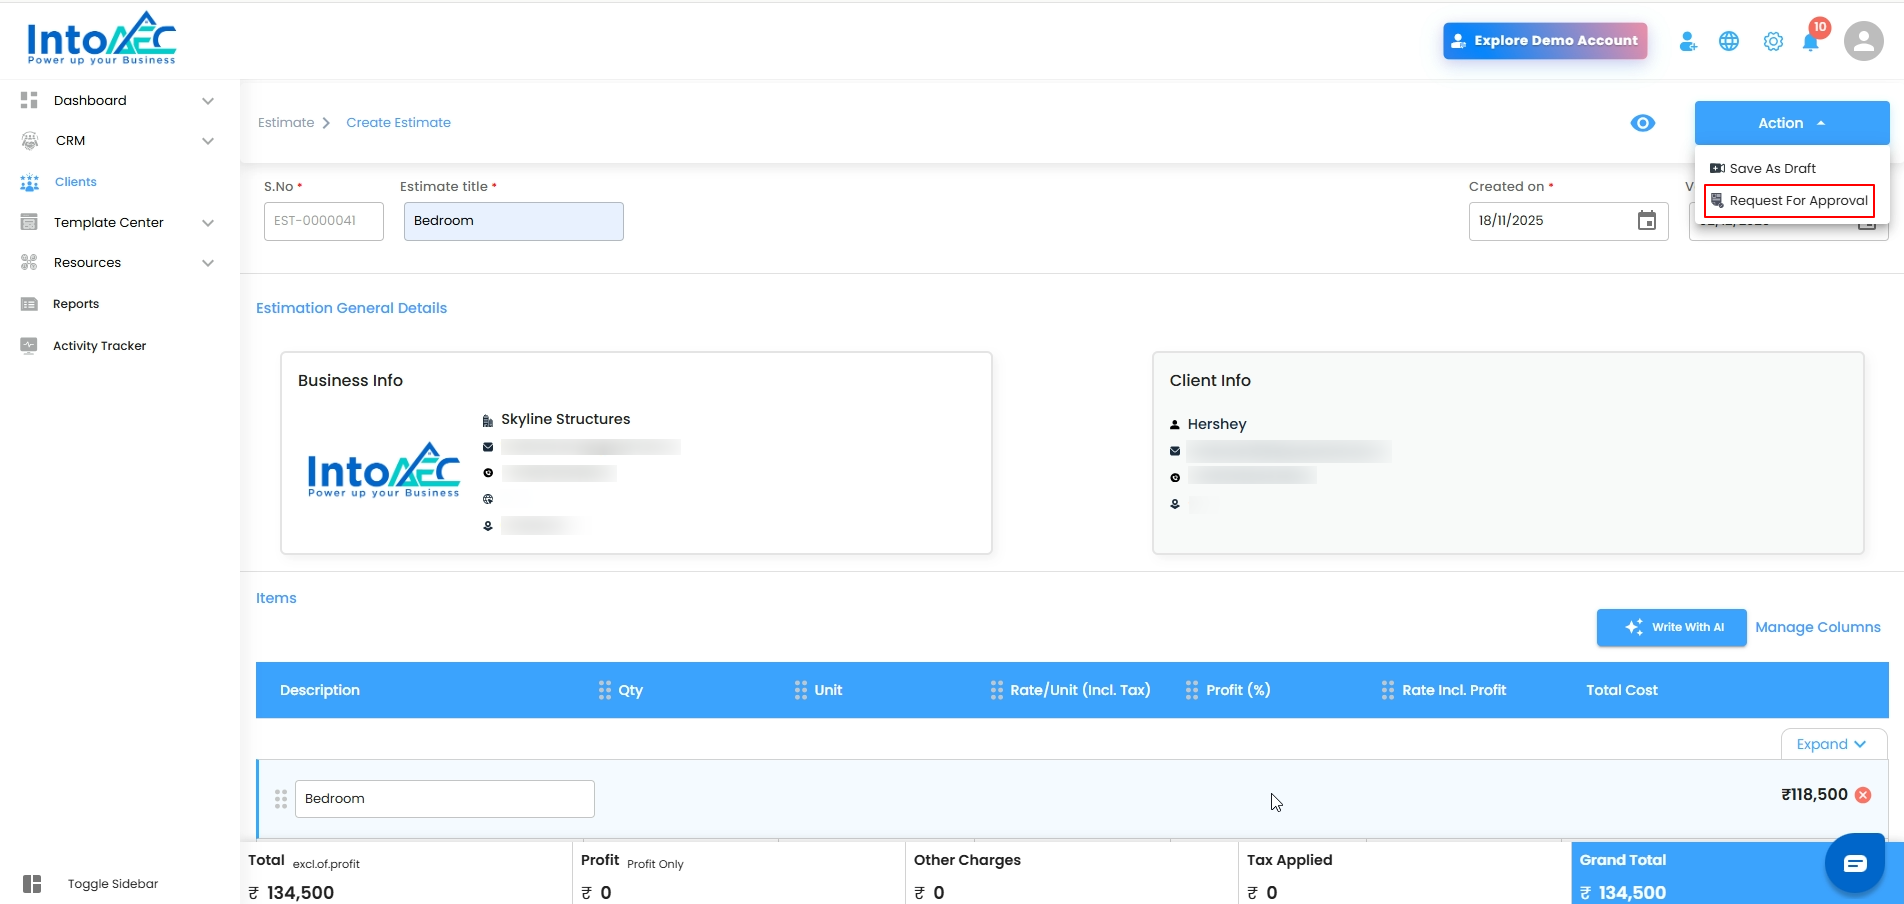
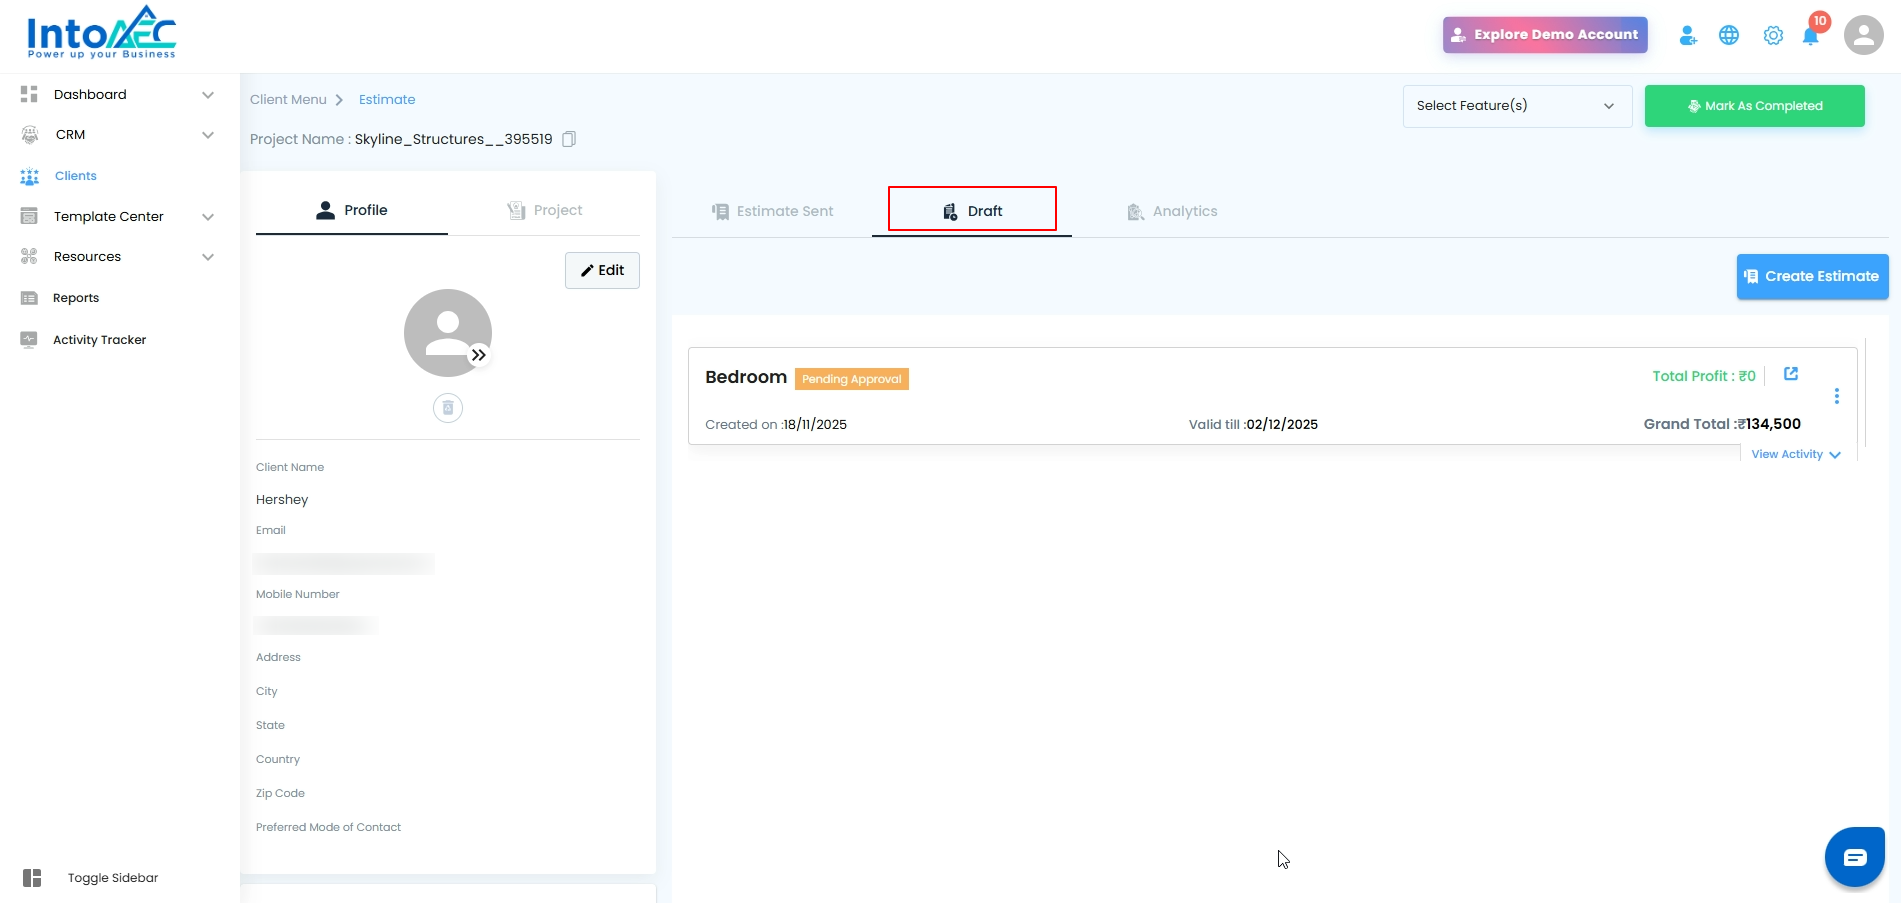
The estimate will now appear under Draft with the status Request for Approval.
As a Super Admin: Approve or Send the Estimate
The super admin has two options:
1. Approve the Estimate
Open the estimate from the Draft section.
Click Mark as Approved.
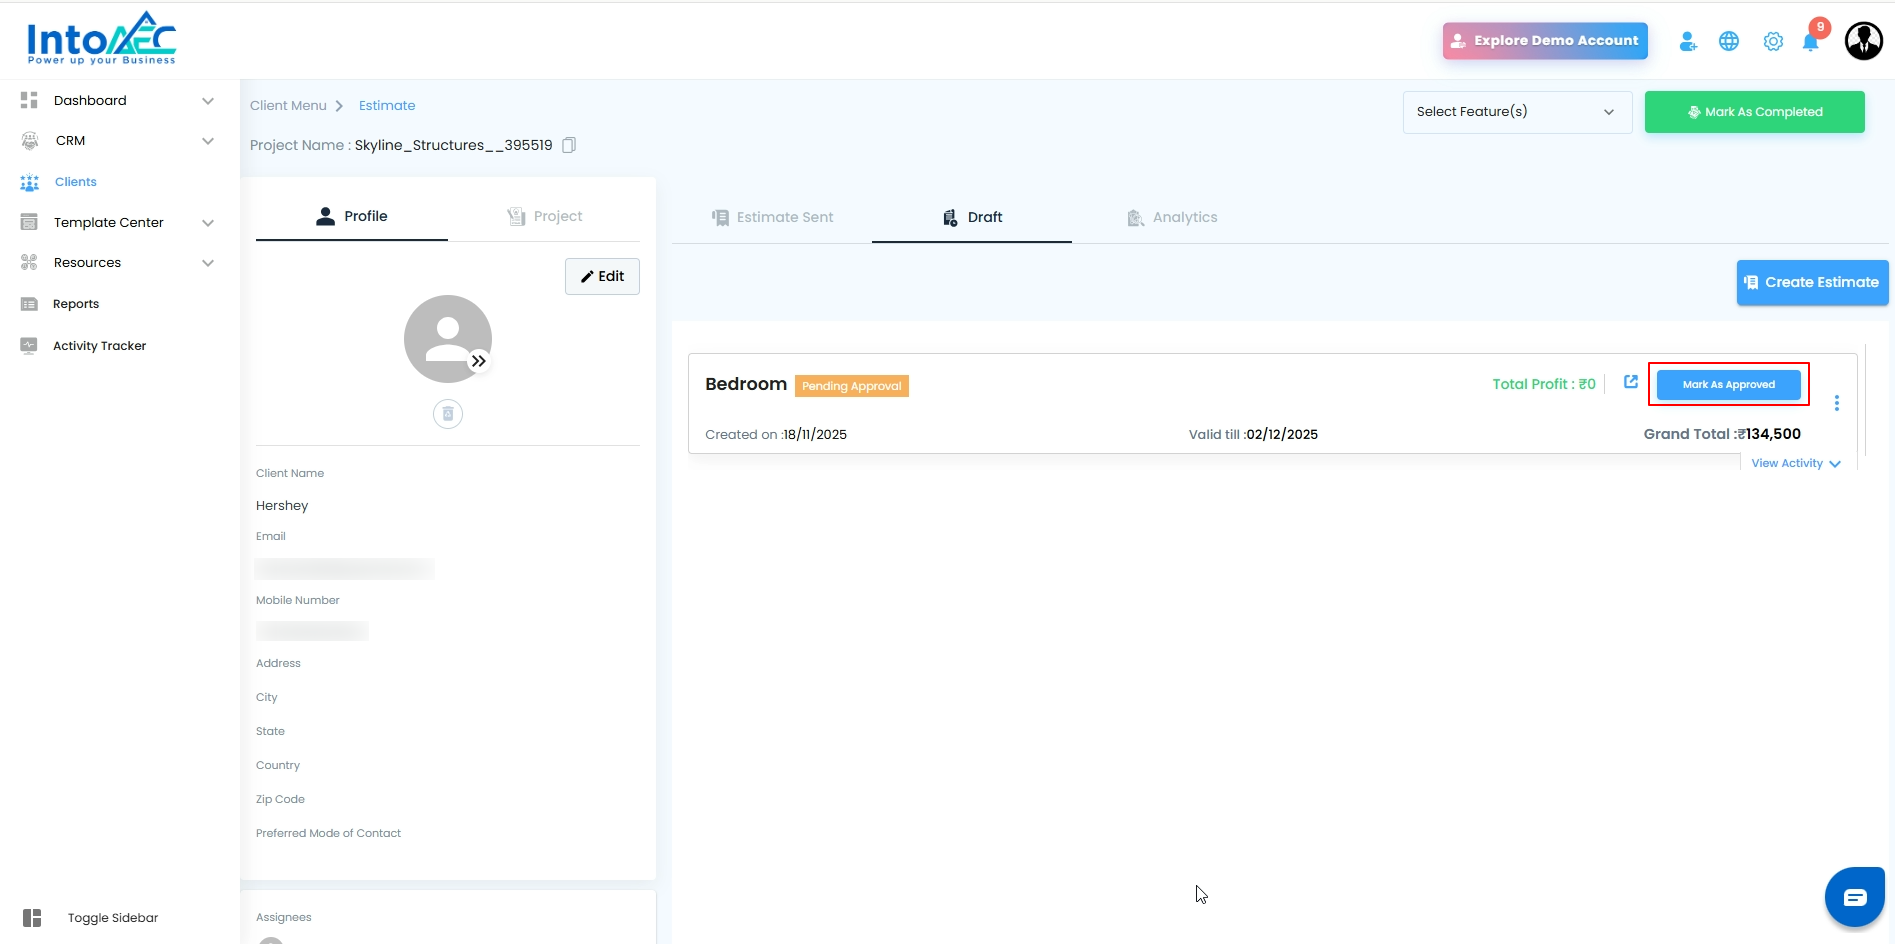
In the pop-up, click Yes to mark the estimate as approved.
2. Send the Estimate Directly
Super admin can directly send the estimate to the client if needed.
After Approval: Sending the Estimate to the Client
Once the super admin approves:
The user can open the estimate.
Click Send.
Choose the preferred sending method: Email, SMS, or WhatsApp.
Once sent, the estimate will appear under Estimate Sent.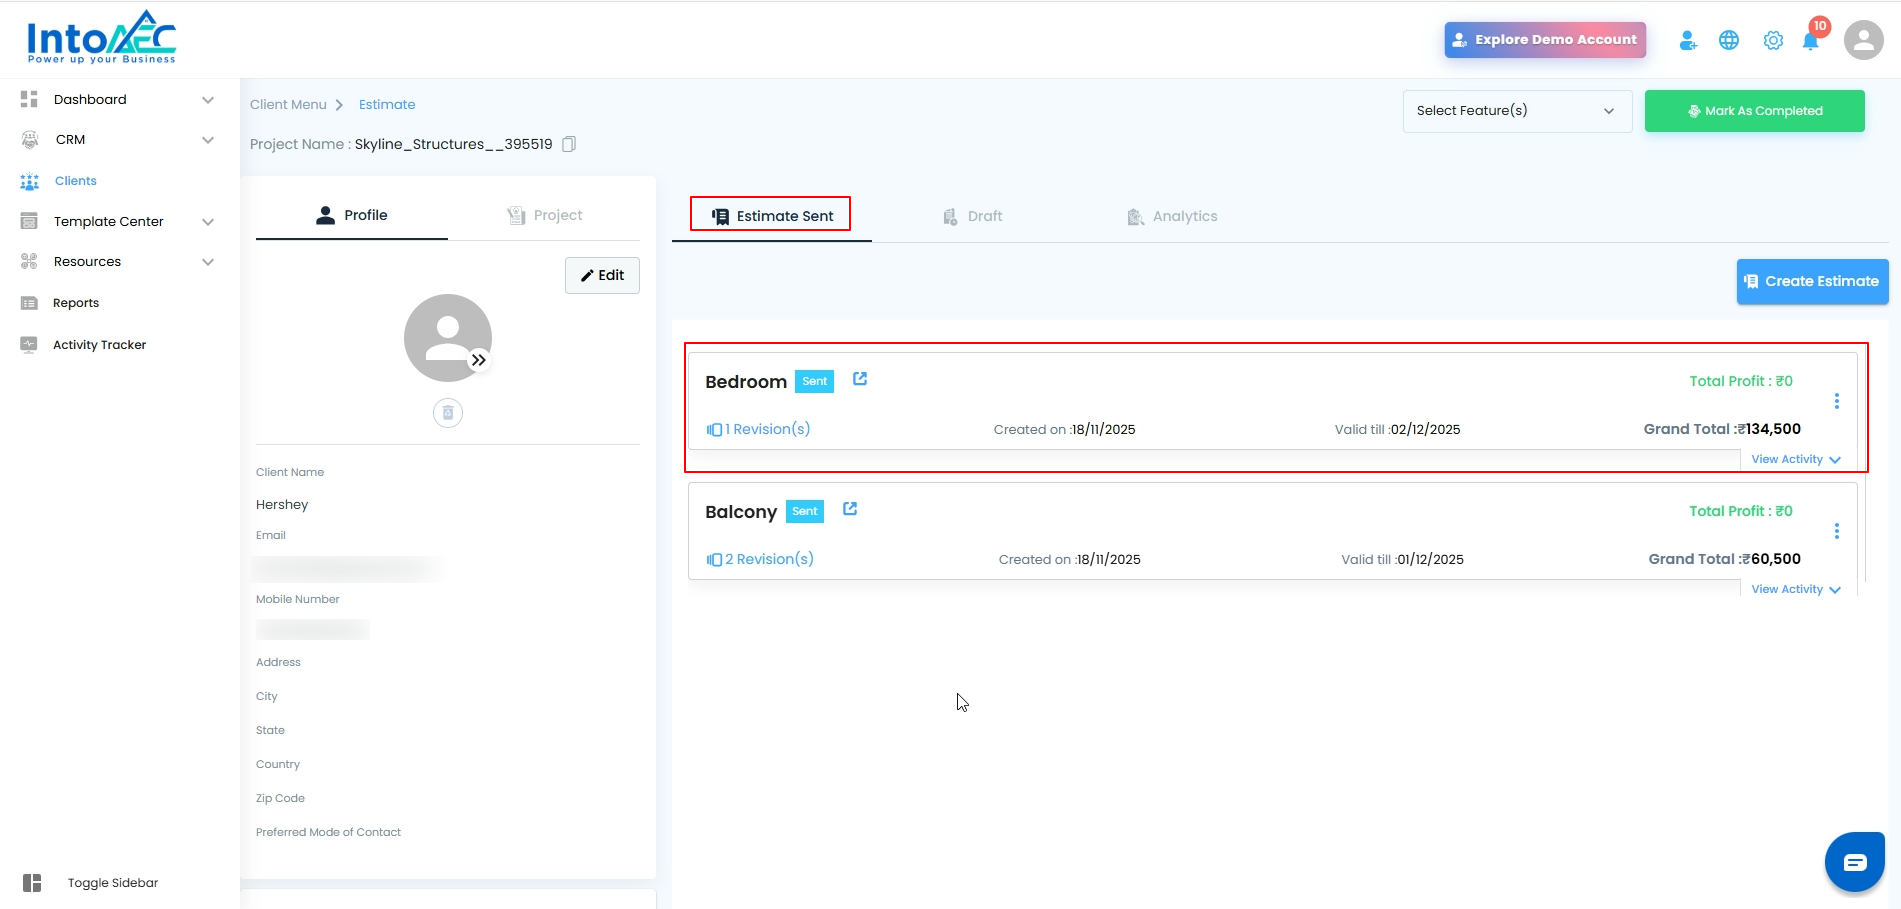
How to Edit a Pending Approval Estimate
If you have already submitted an estimate for approval but want to make changes, follow the steps below:
1. Navigate to the Draft Estimate
Go to:
Clients → Select Client → Estimate → Draft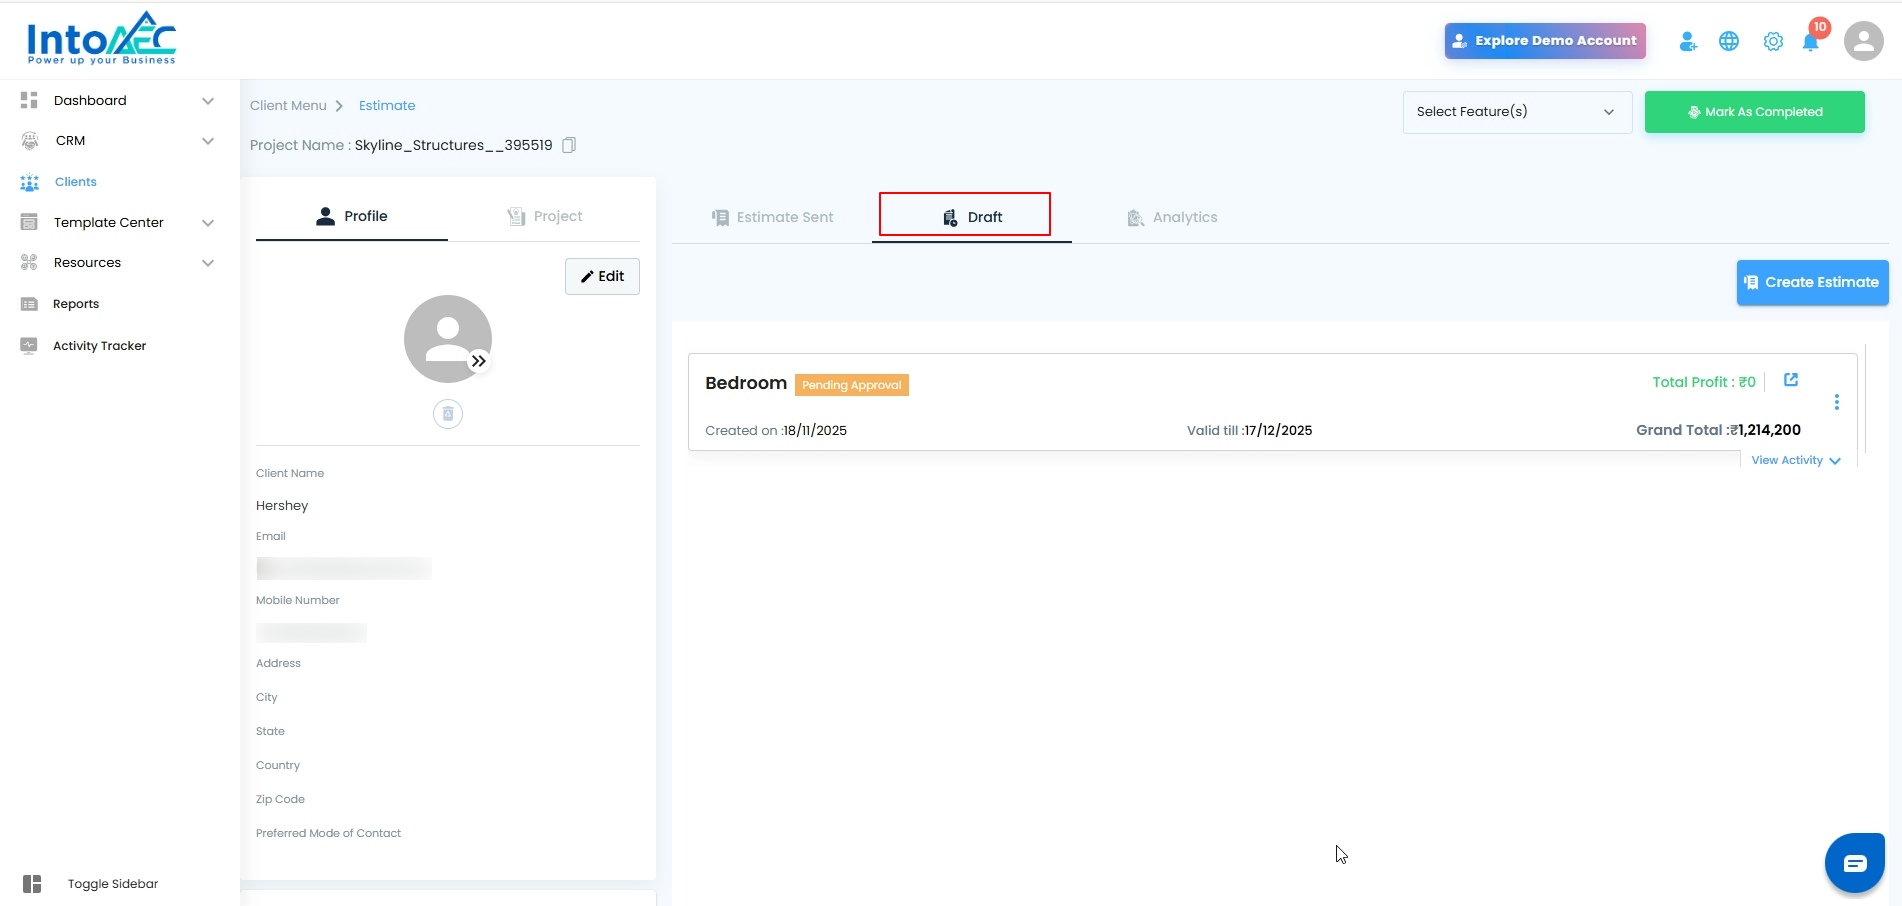
2. Edit the Estimate
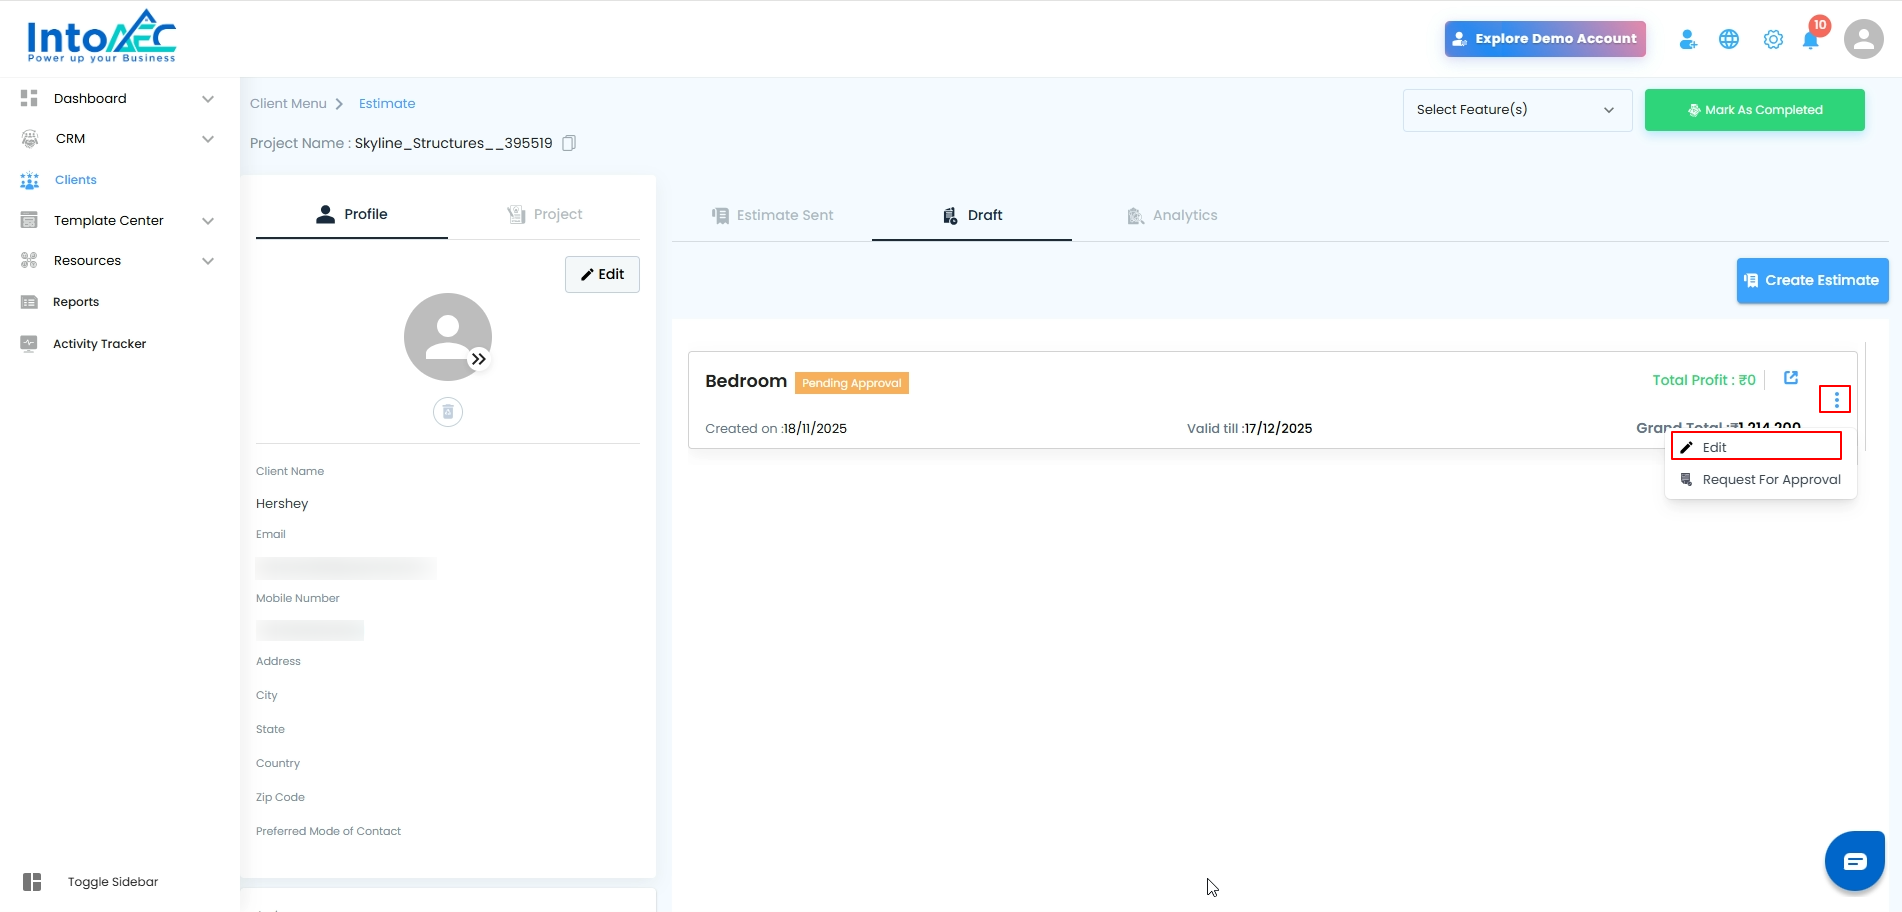
Click on the estimate you want to edit.
Click the three dots (⋮) and select Edit.
Make the required changes.
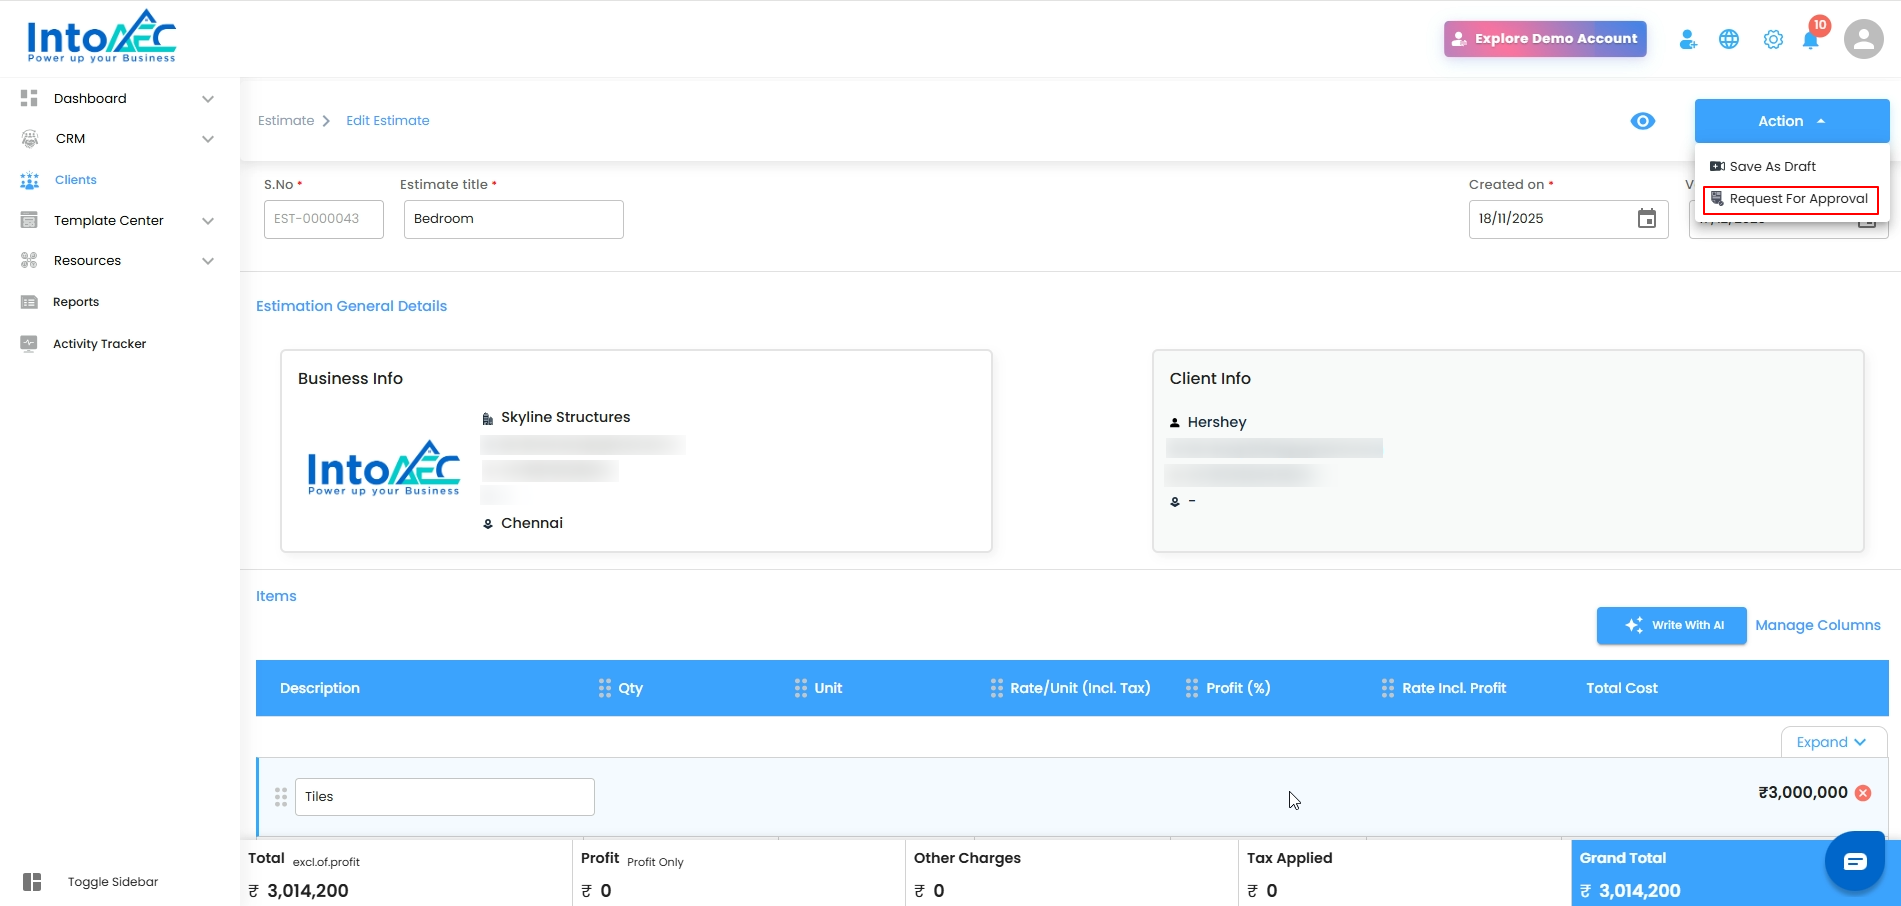
3. Resubmit for Approval
Click Action → Request for Approval again.
The updated estimate will appear, still in Request for Approval status.
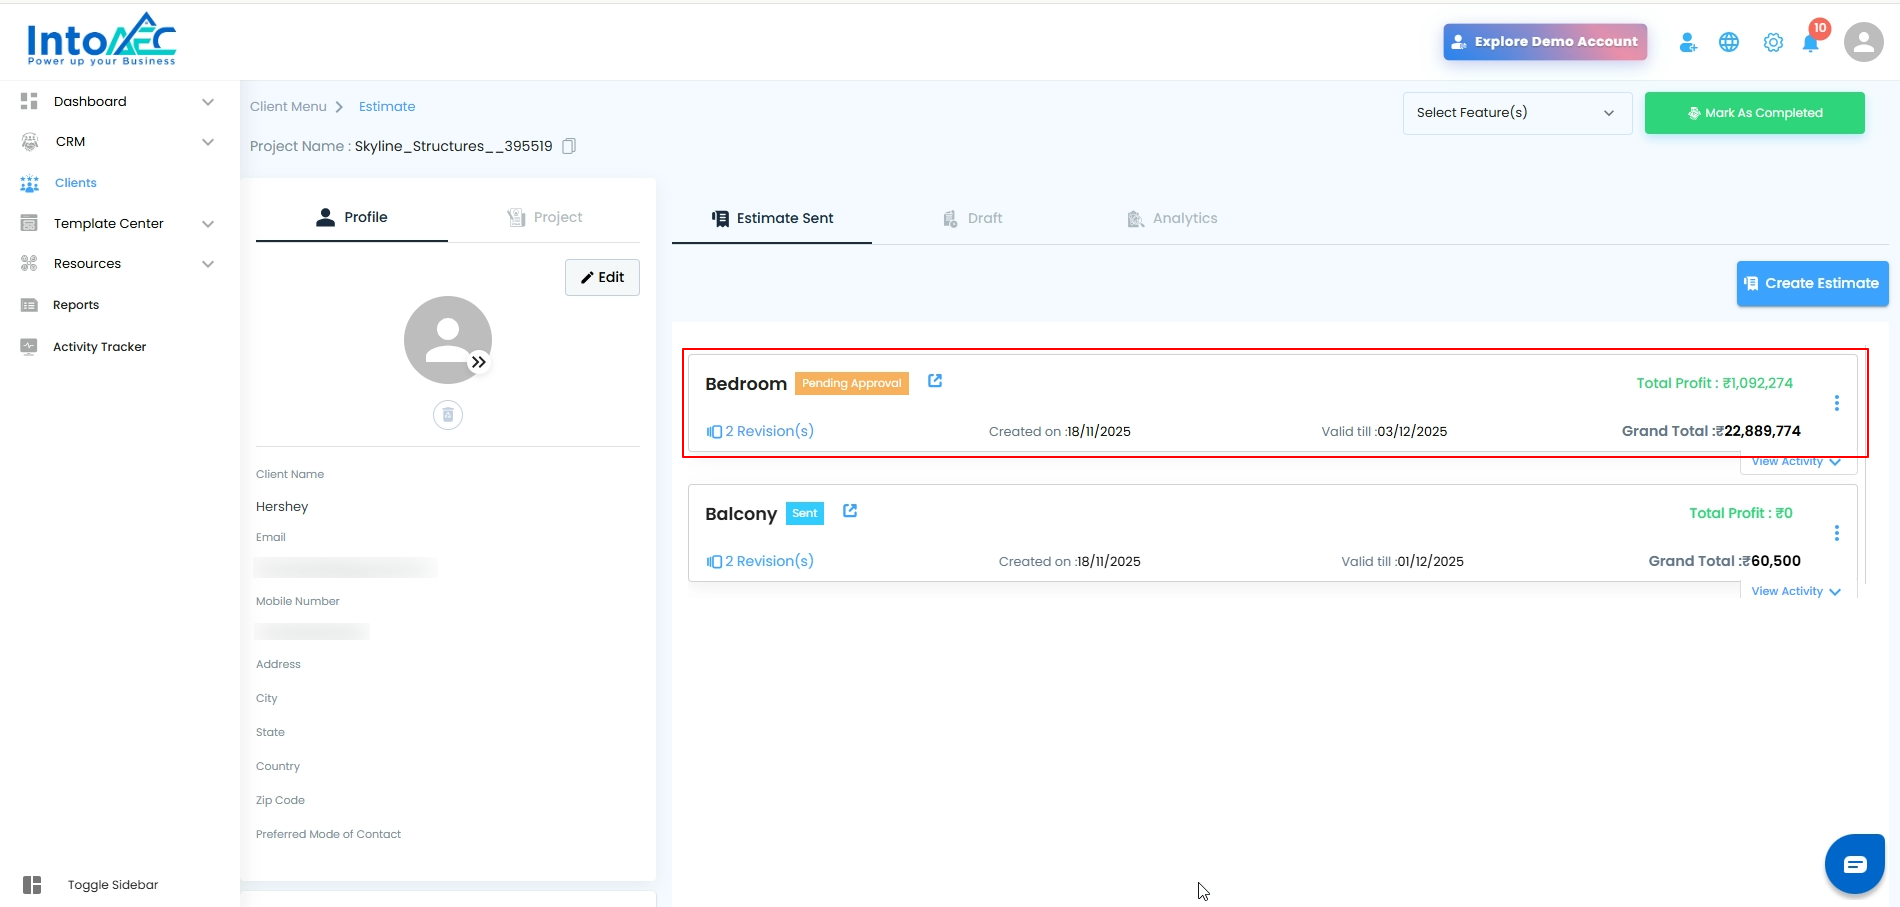
4. Approval Required Again
The super admin must approve the edited estimate before it can be sent.
(Super admin can also send it directly.)
Comments for Estimate
A comment option has been added for Proposal, Estimate, RFQ, Purchase Order, and Work Order documents. Users can now add comments directly on these documents to support better discussion, clarification, and internal coordination.
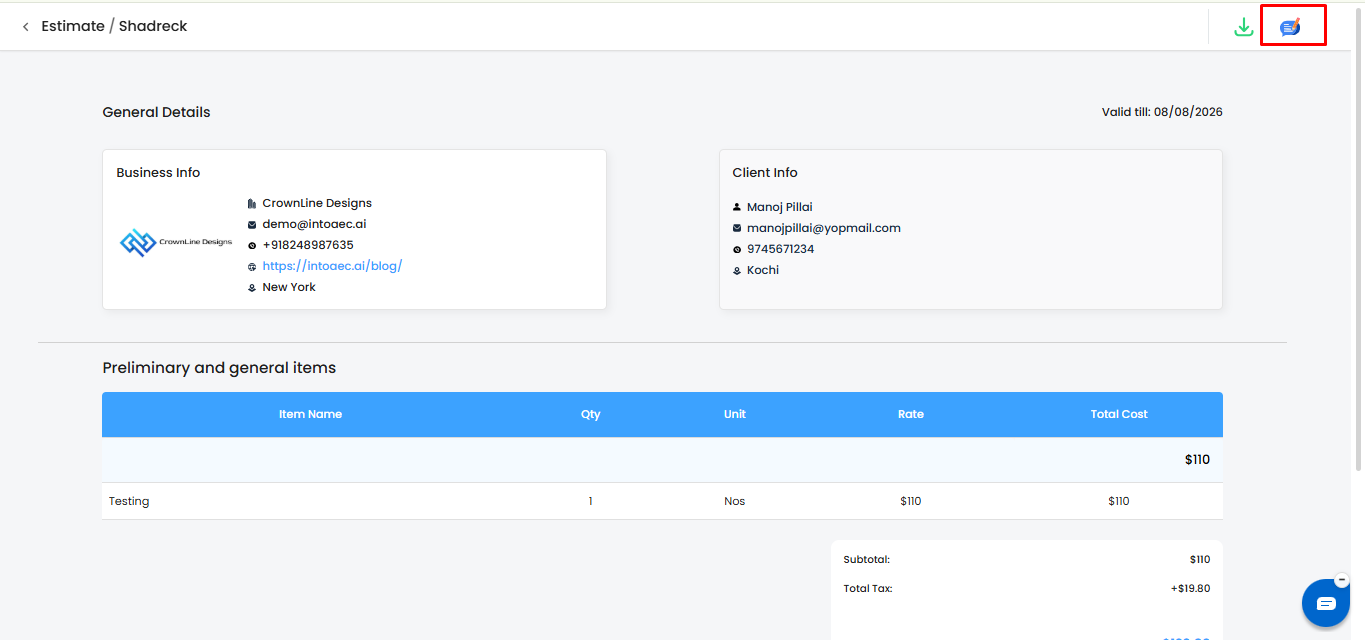 Description Field in Estimate
A description field is now available in the estimate creation page. Users can add additional details, scope notes, or project-specific explanations along with the estimate.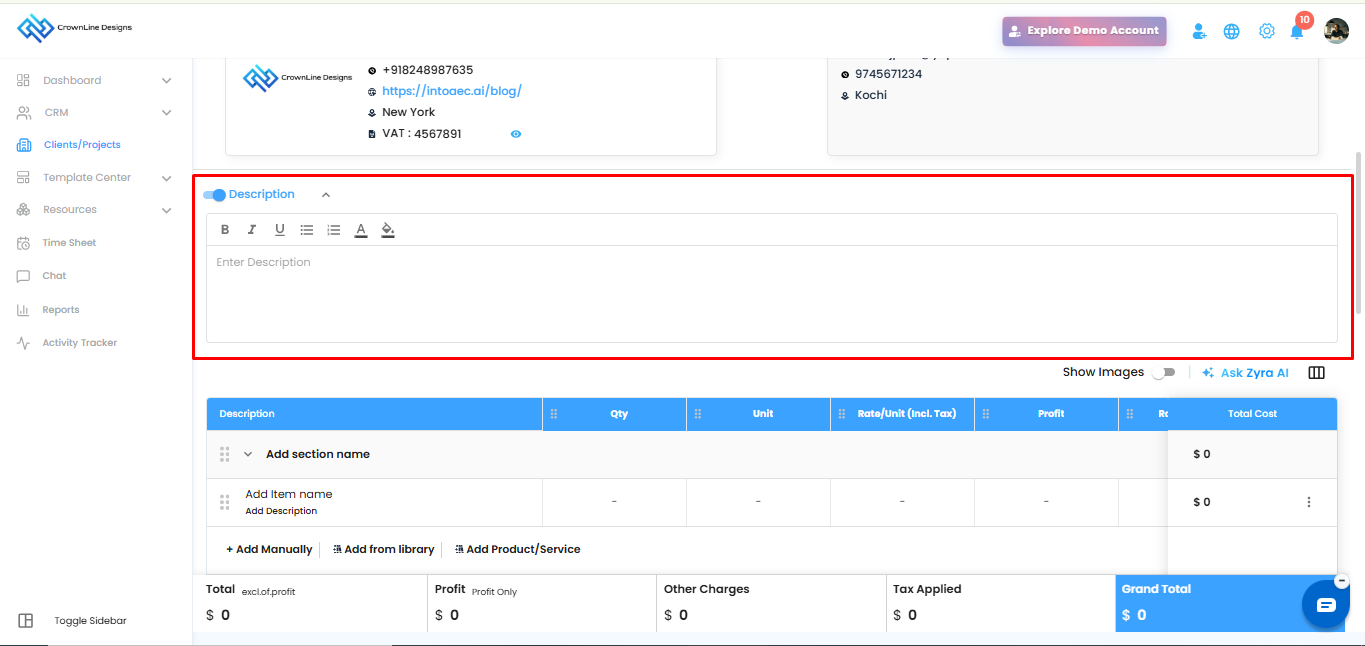
Camera Verification Before Signing Proposal and Estimate
Before signing a Proposal or Estimate, users will now be asked to capture a verification image. This adds an extra layer of confirmation before completing the signature process

Was this article helpful?
That’s Great!
Thank you for your feedback
Sorry! We couldn't be helpful
Thank you for your feedback
Feedback sent
We appreciate your effort and will try to fix the article