Revisions allow you to update an estimate after it has already been created or submitted for approval. This ensures that any changes—such as updated quantities, revised pricing, scope updates, or client-requested modifications—can be tracked with full transparency.
Each revision automatically increases the Revision Count, helping teams maintain clear version control and avoid miscommunication.
When Do You Use Revisions?
You may need to revise an estimate or proposal when:
The client requests changes before approval
Scope of work or quantities are updated
Pricing or tax rates are modified
Internal teams want to correct mistakes or add missing details
A super admin rejects the approval request and asks for corrections
Revisions ensure accuracy and maintain a clean approval workflow.
How to Revise an Estimate?
Follow the steps below to edit and resubmit an estimate that is in Pending Approval or Draft status.
As a User: Creating an Estimate & Requesting Approval
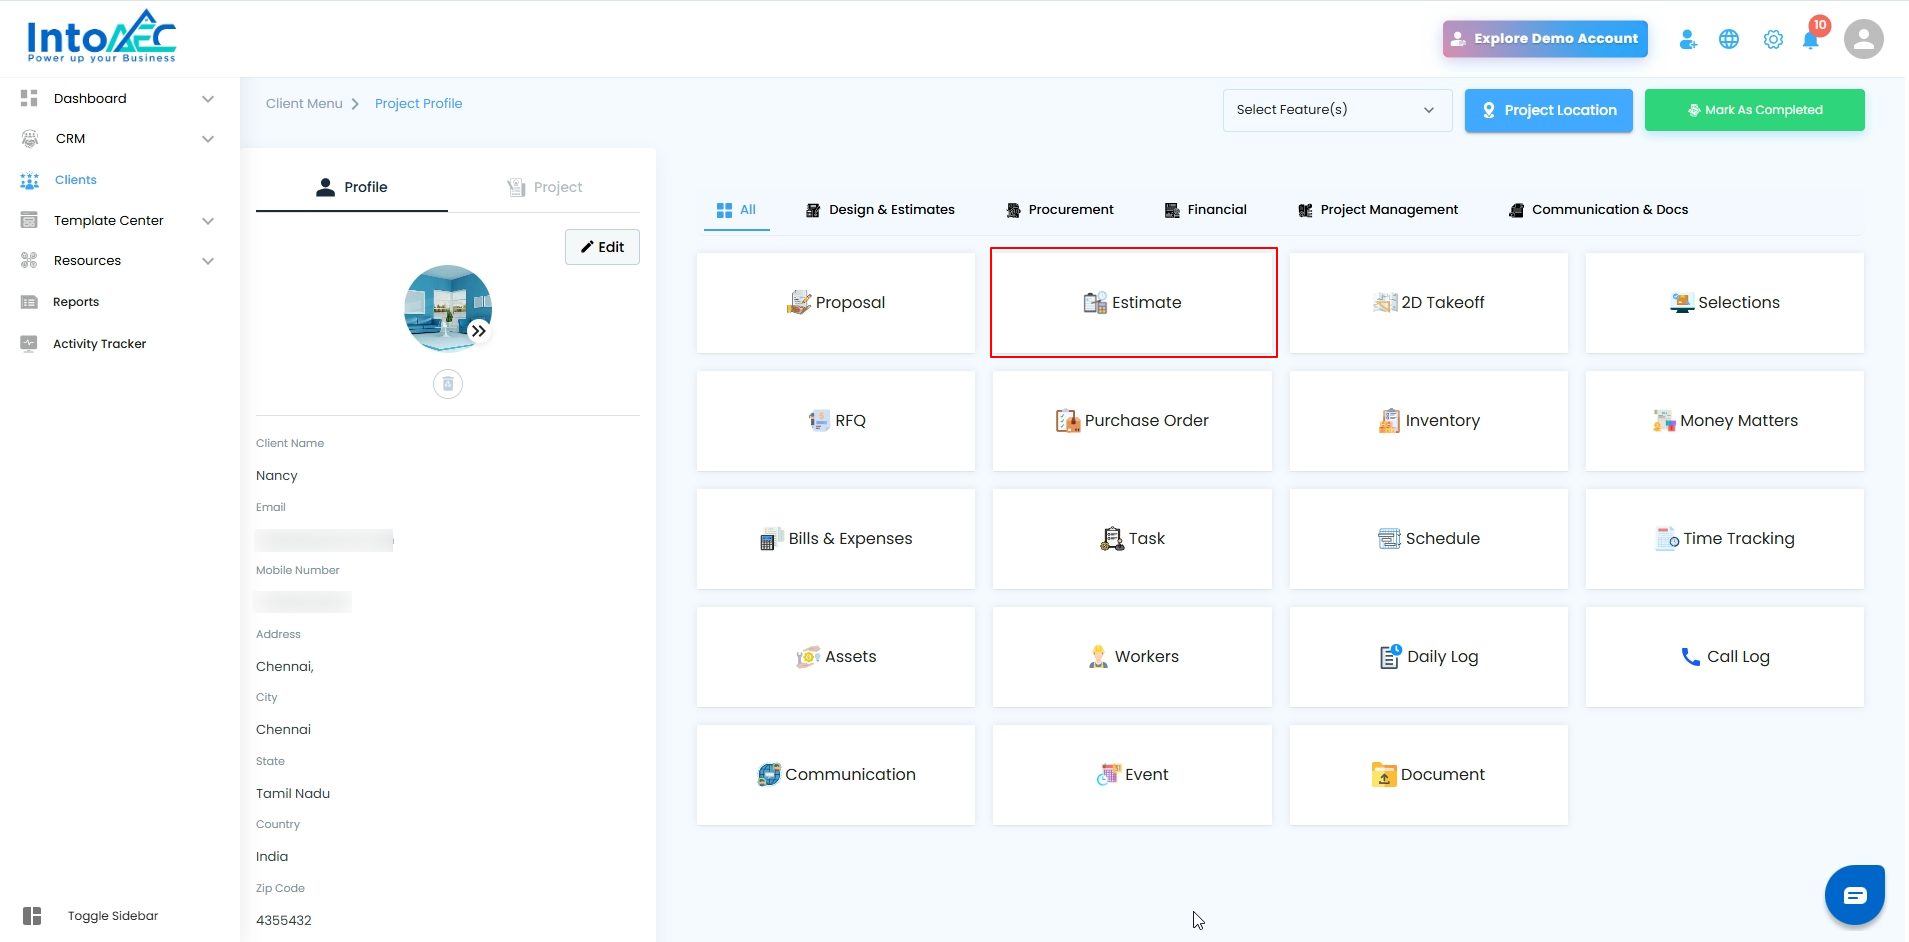
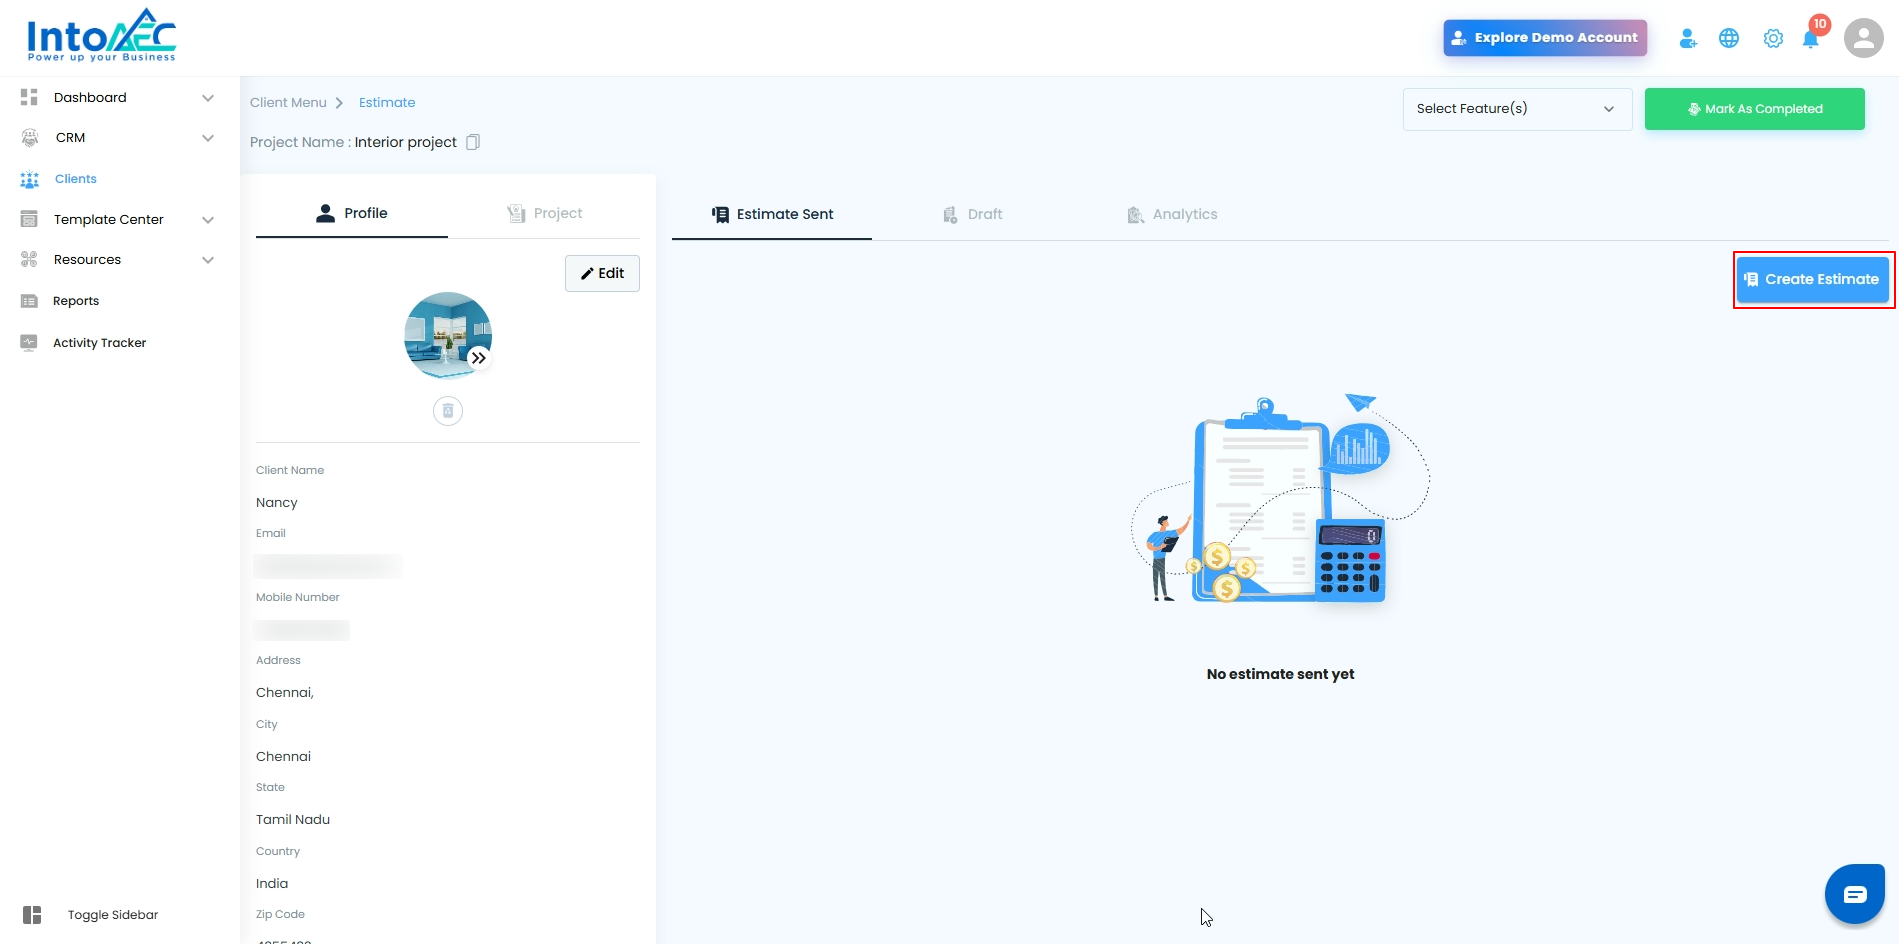
Navigate to: Clients → Select a Client → Estimates
Click Create Estimate, choose the estimate type, and click Proceed.

Enter all required details and create the estimate.
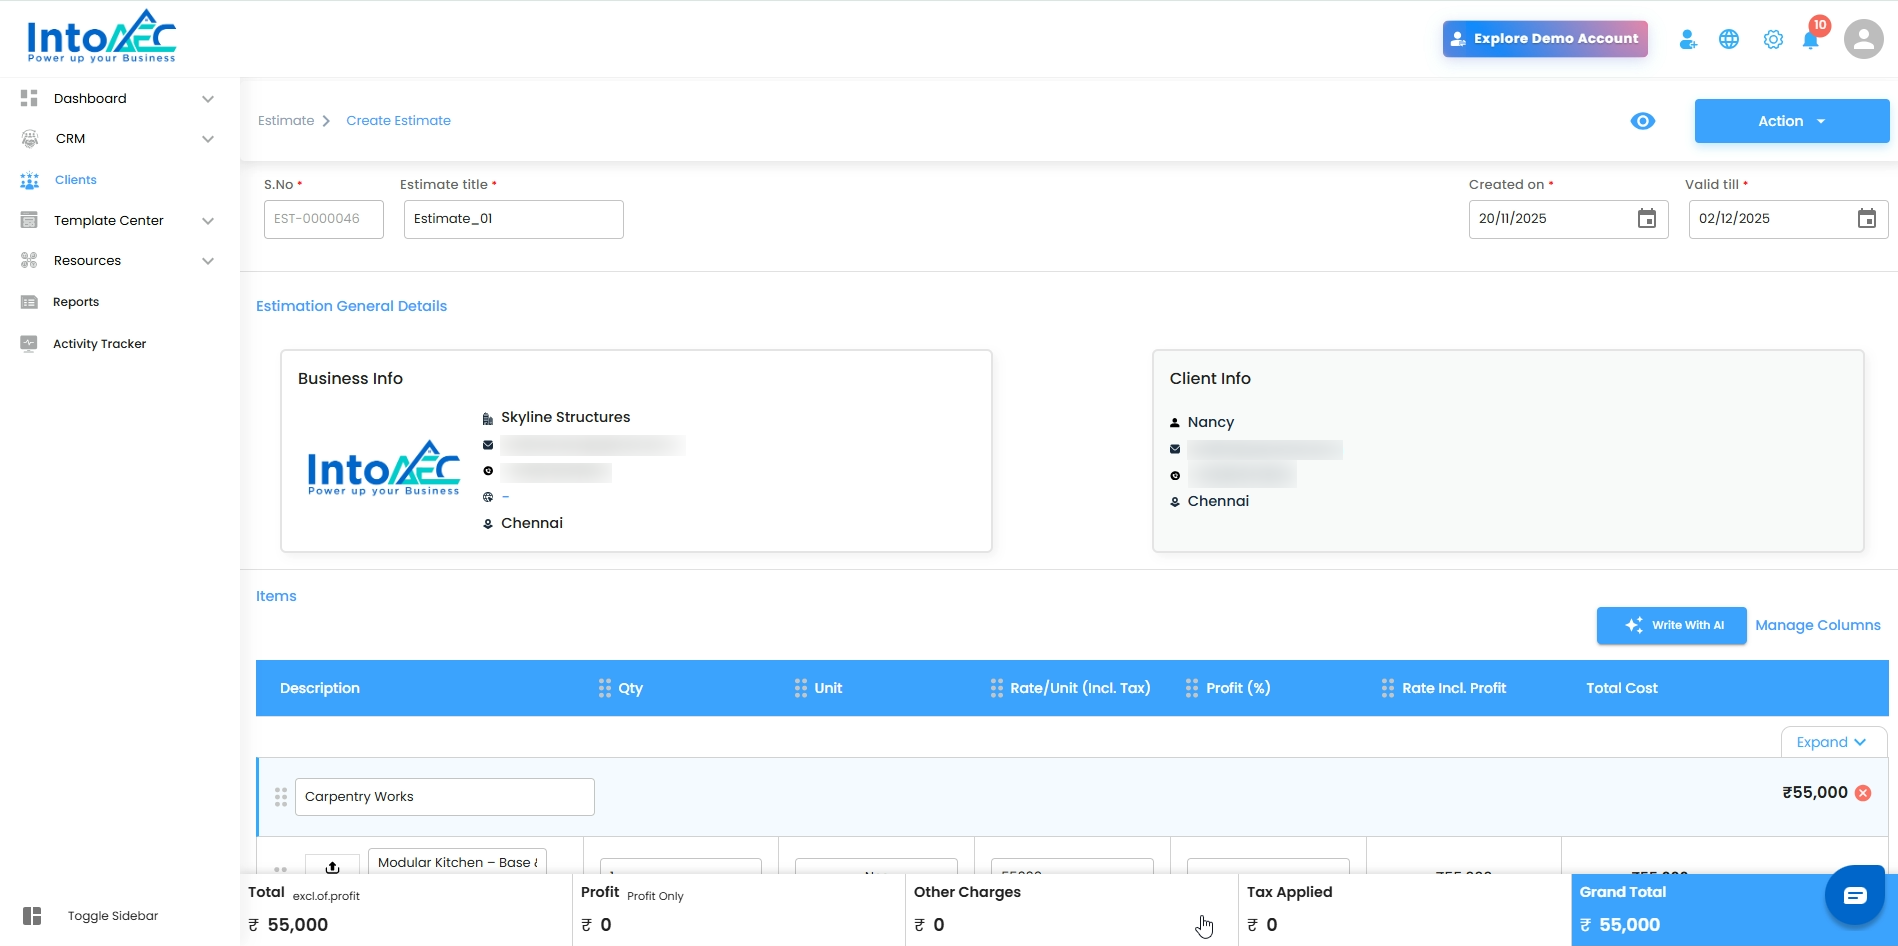
Click Action → Request for Approval.
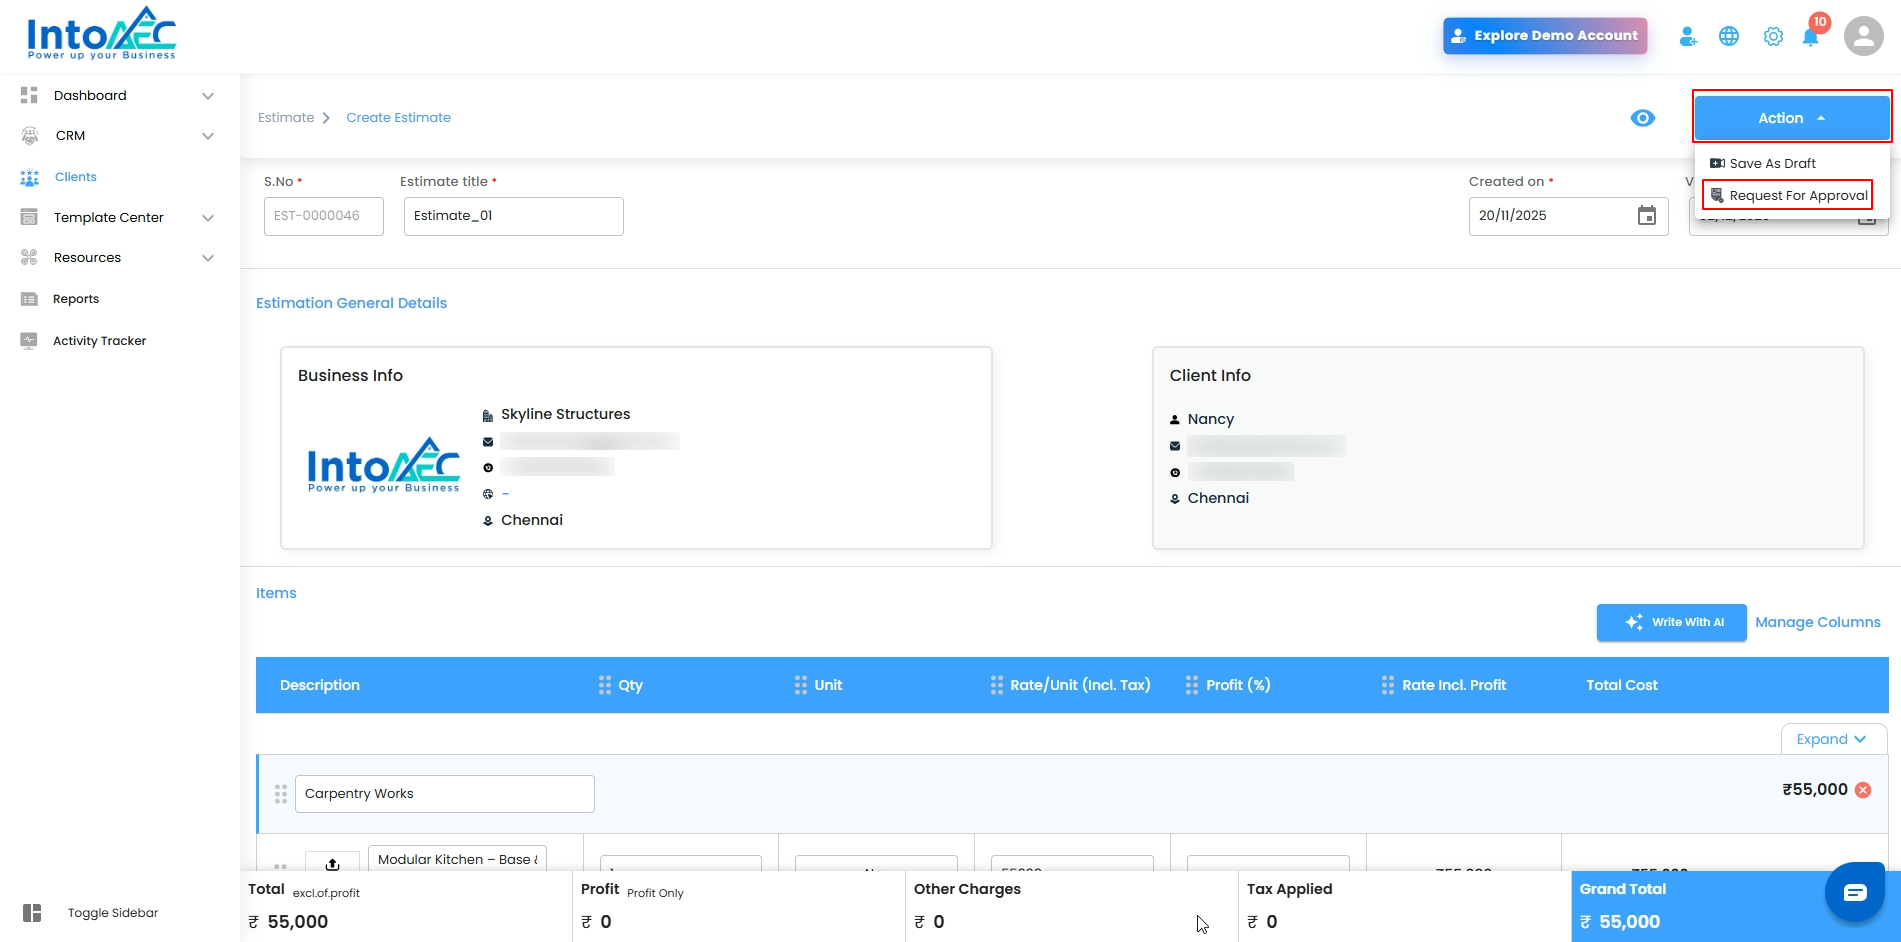
Once submitted, the estimate will appear in the Draft section with the status Pending Approval.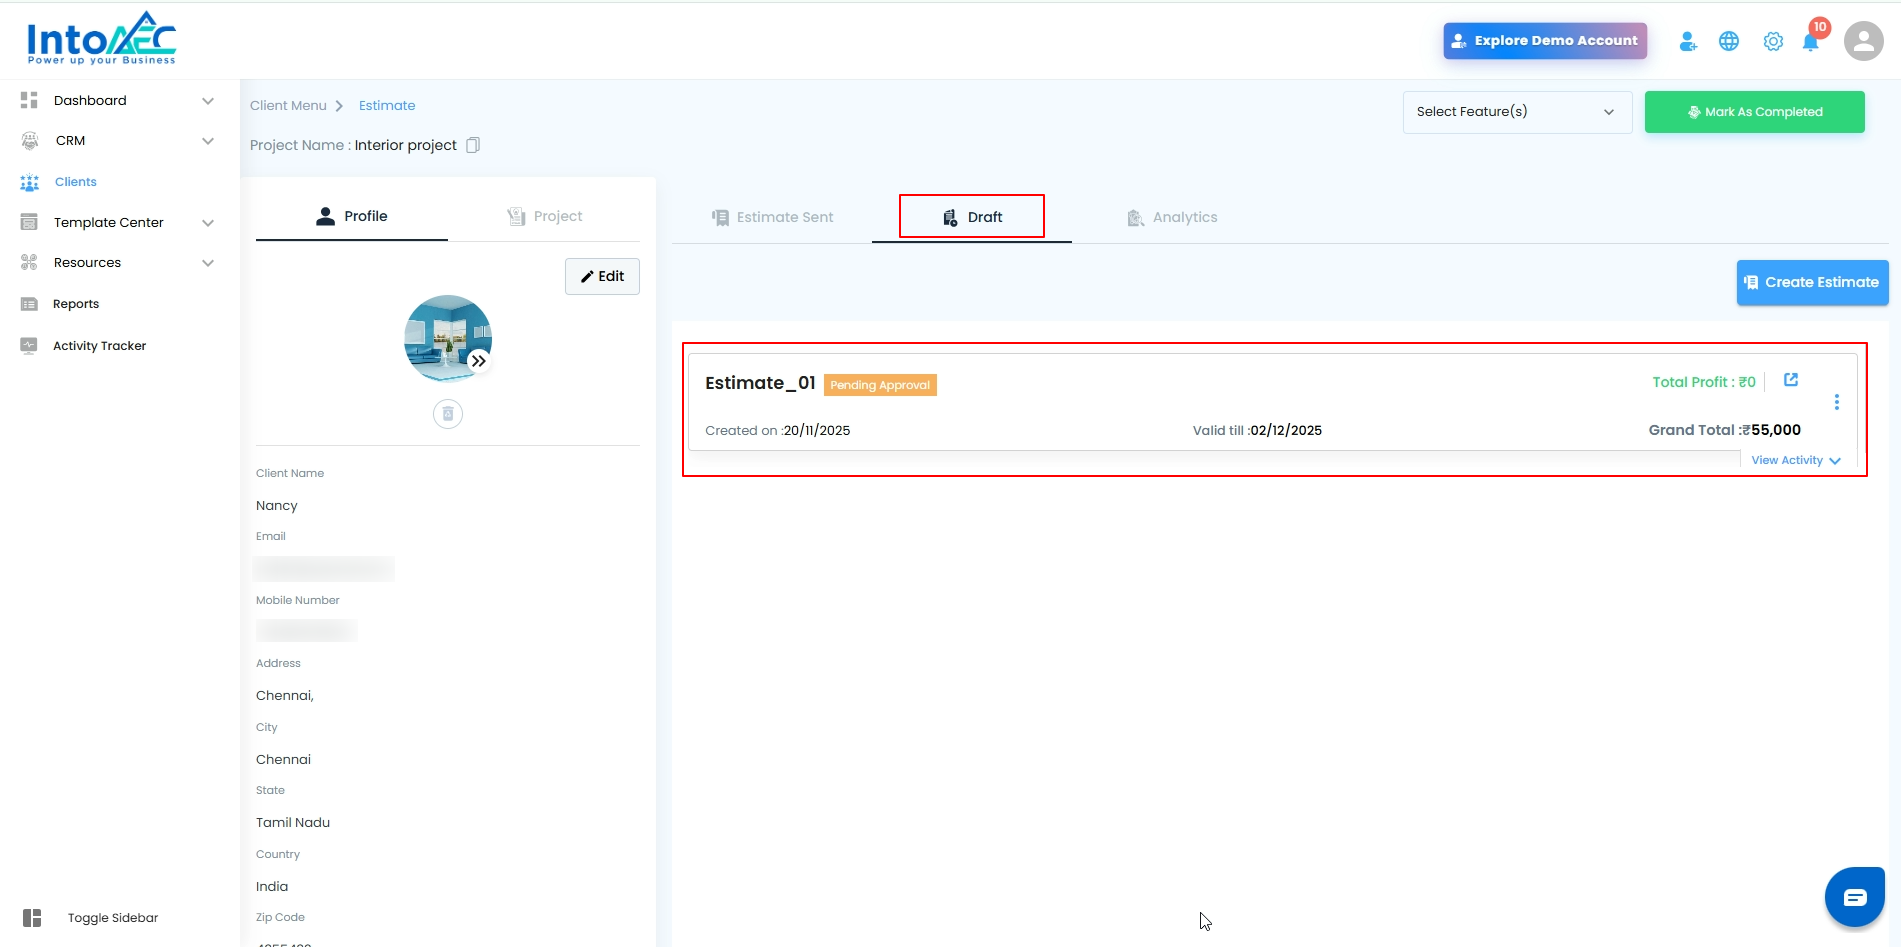
As the Super Admin: Approving the Estimate
Open the estimate that is in Pending Approval status.
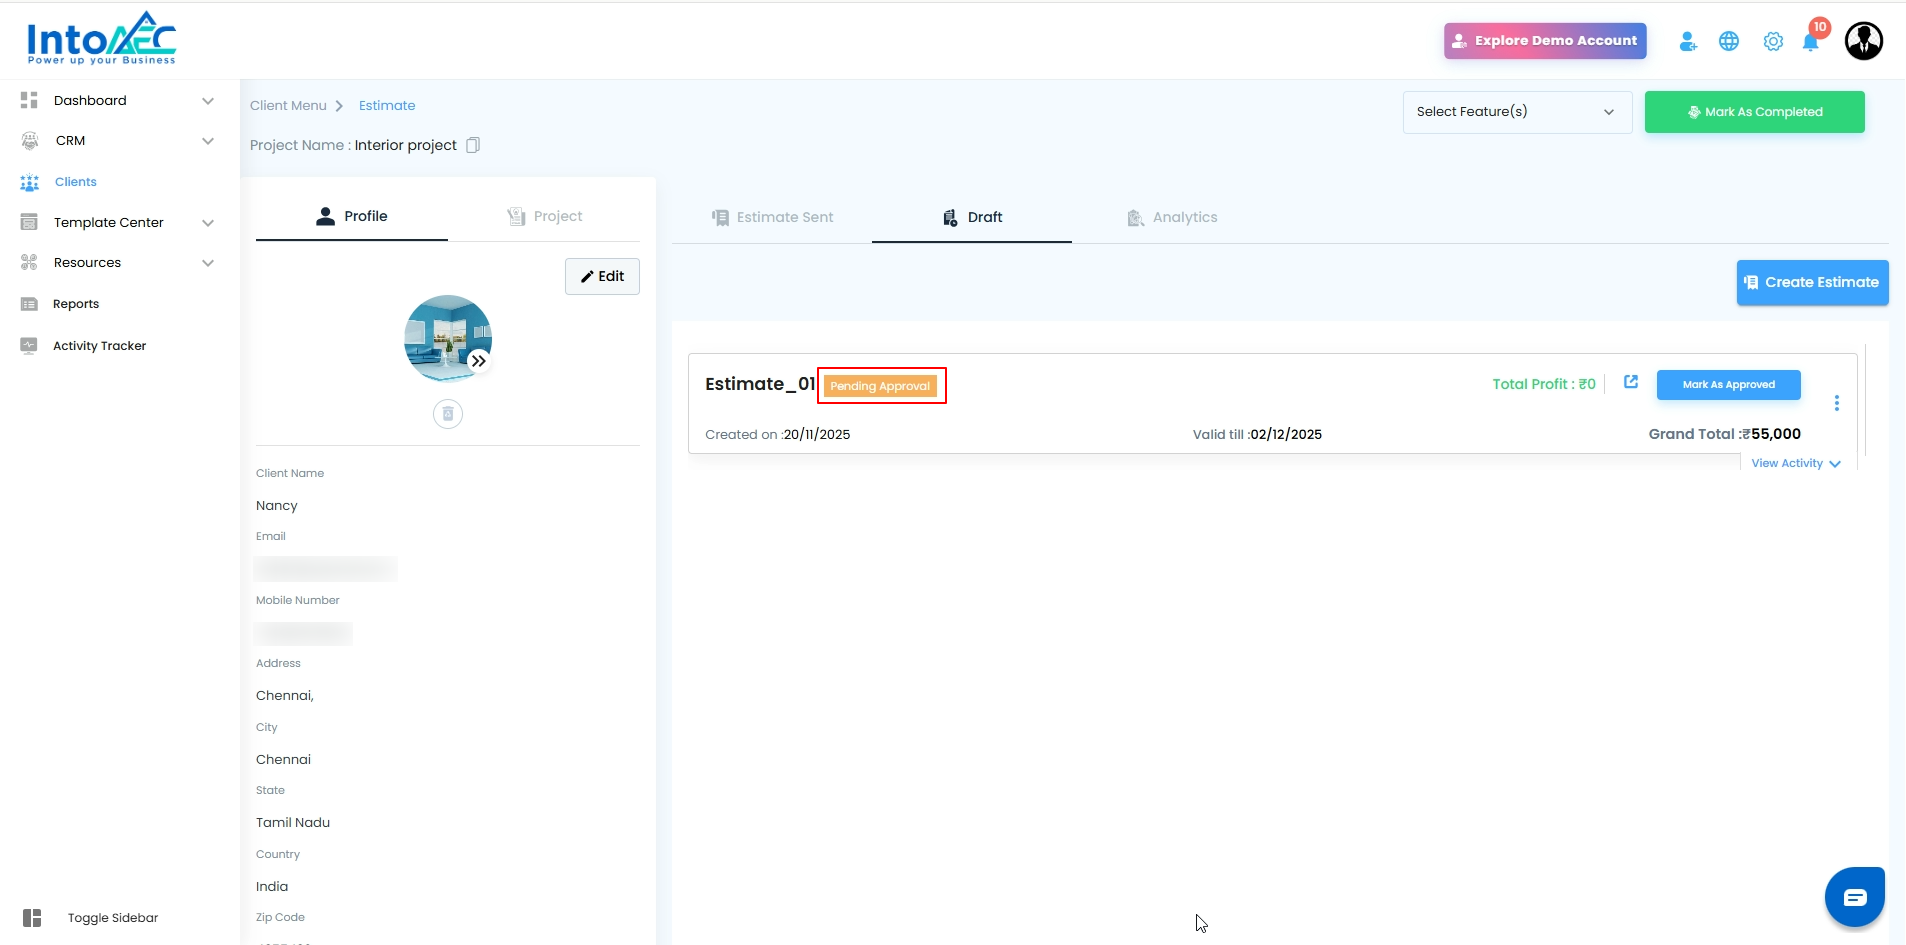
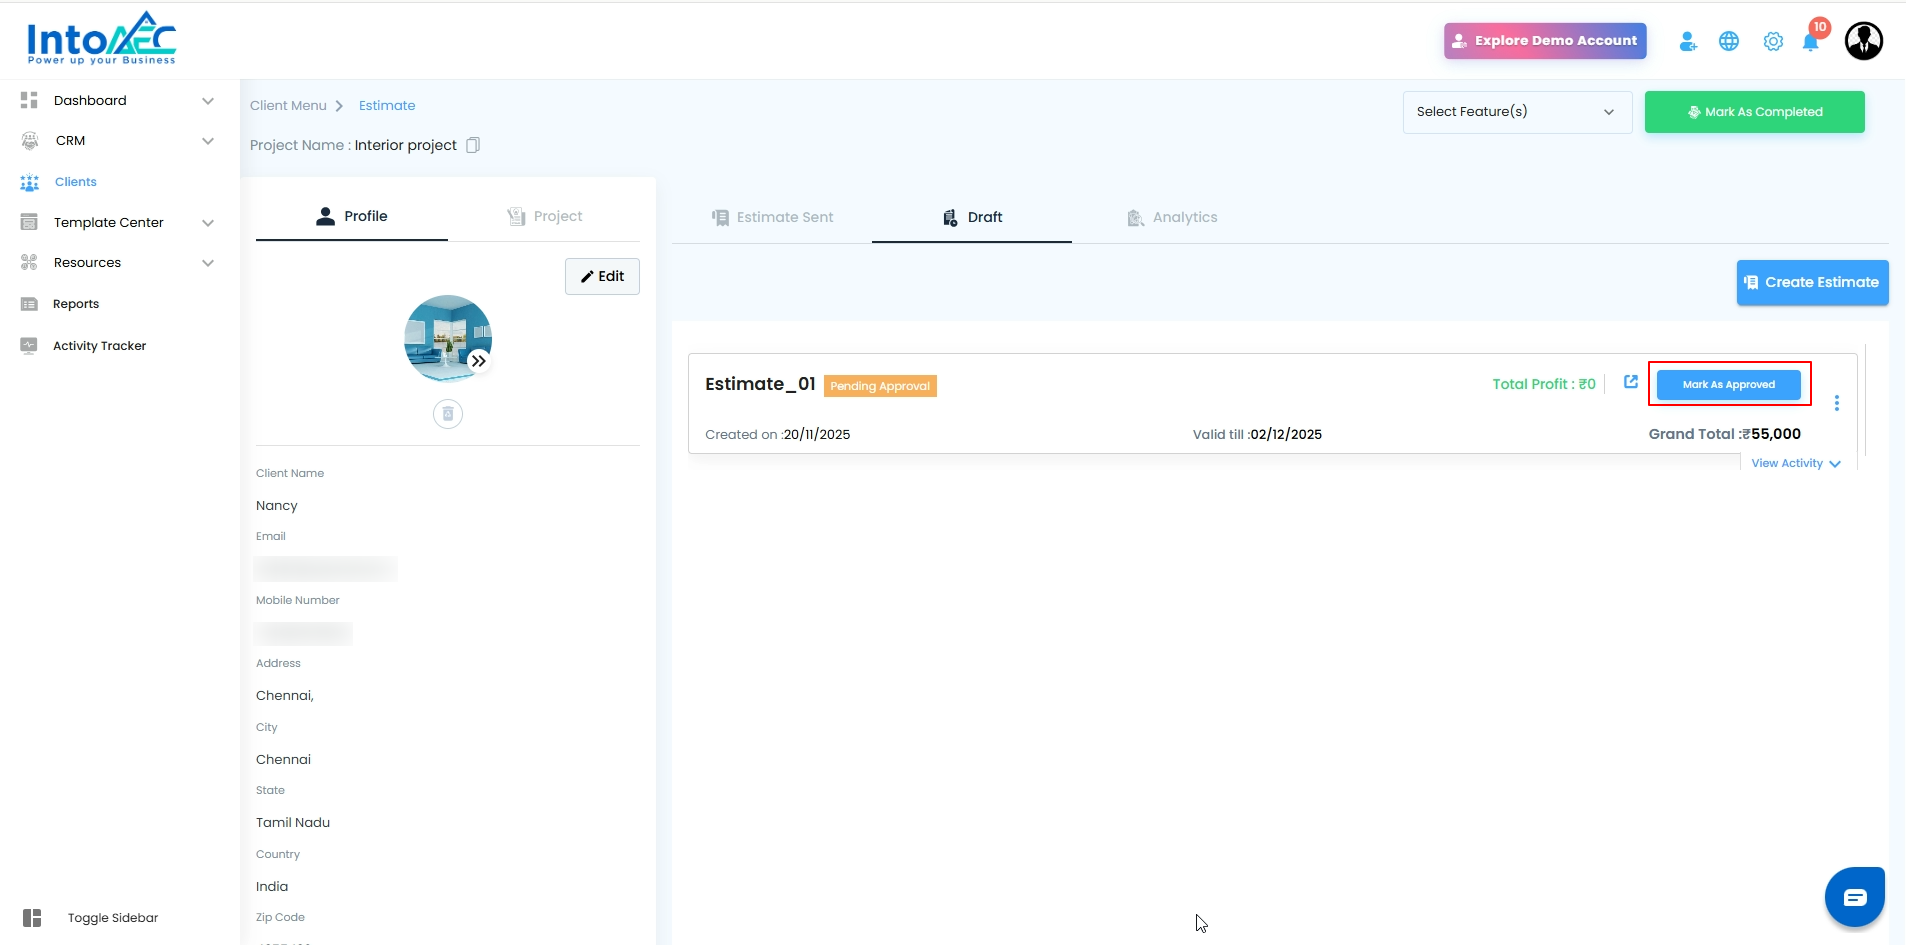
Click Mark as Approved.
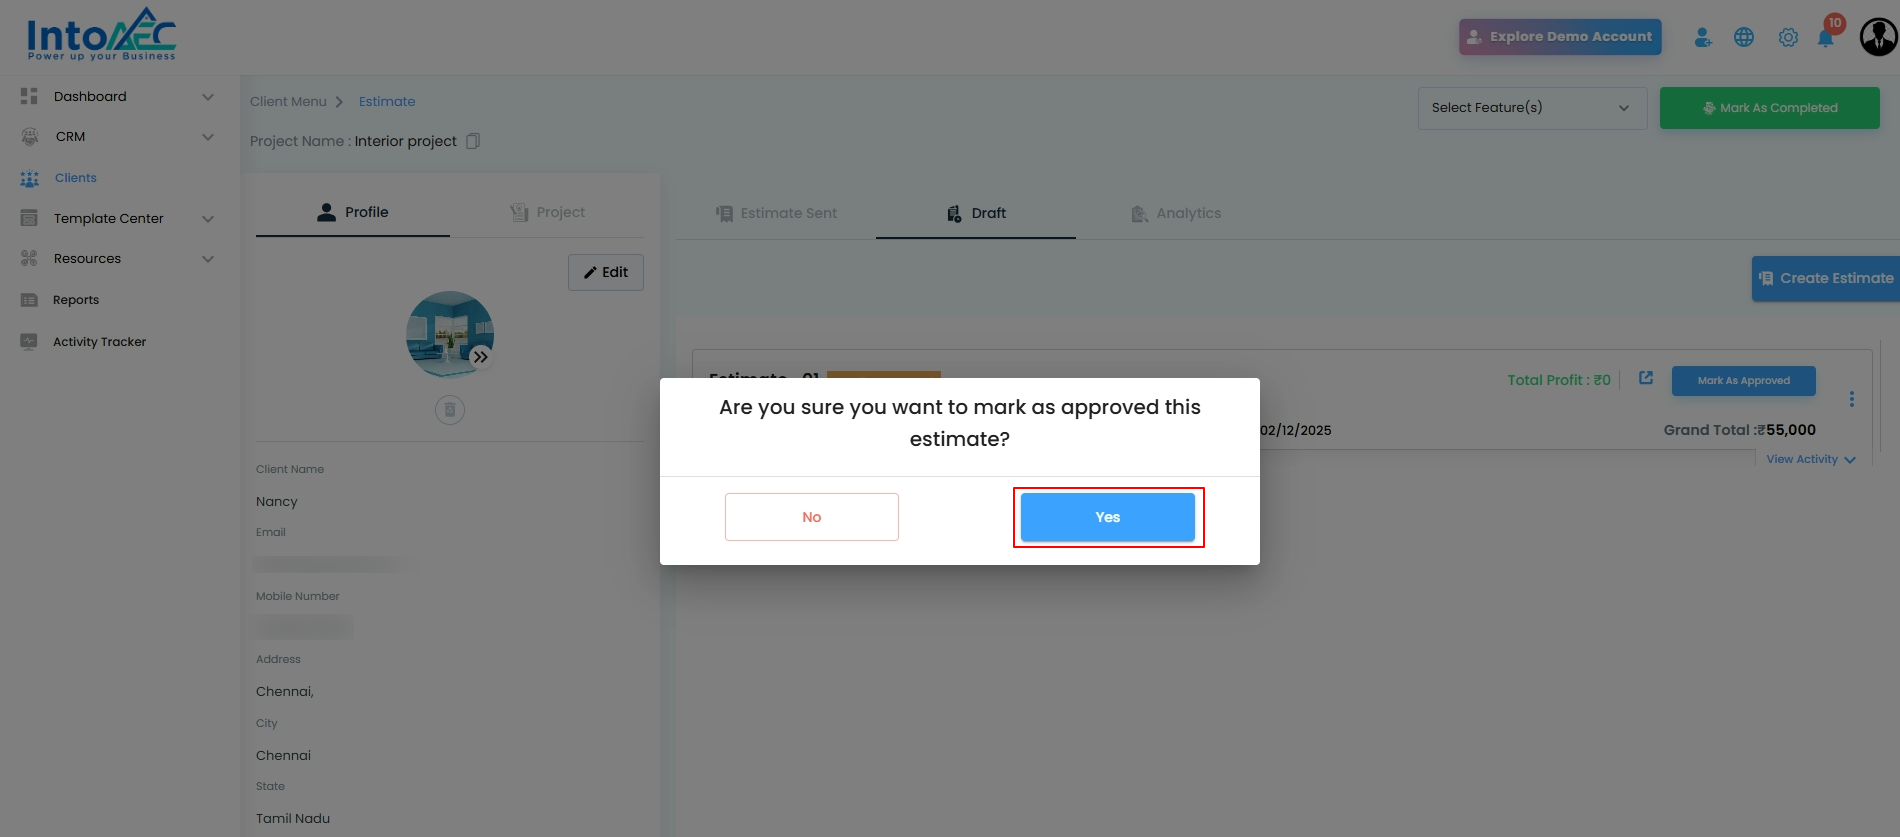
In the confirmation popup, click Yes to proceed.
The estimate status will change to Approved within the Draft section.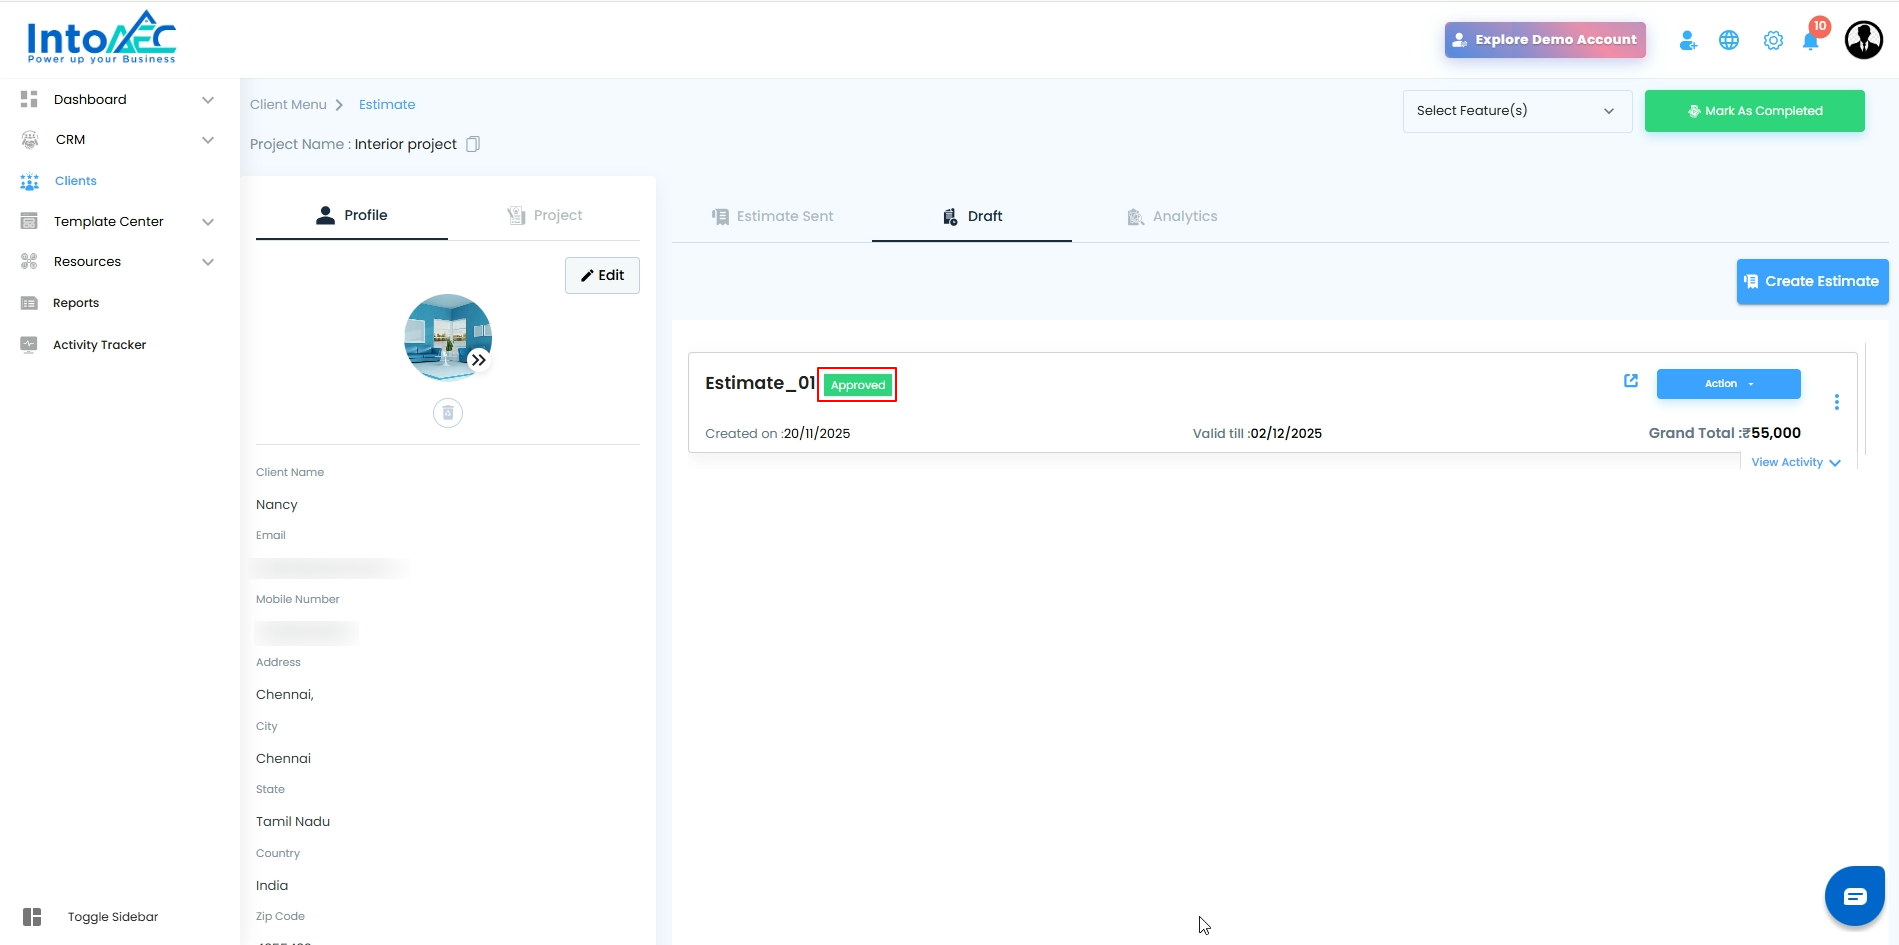
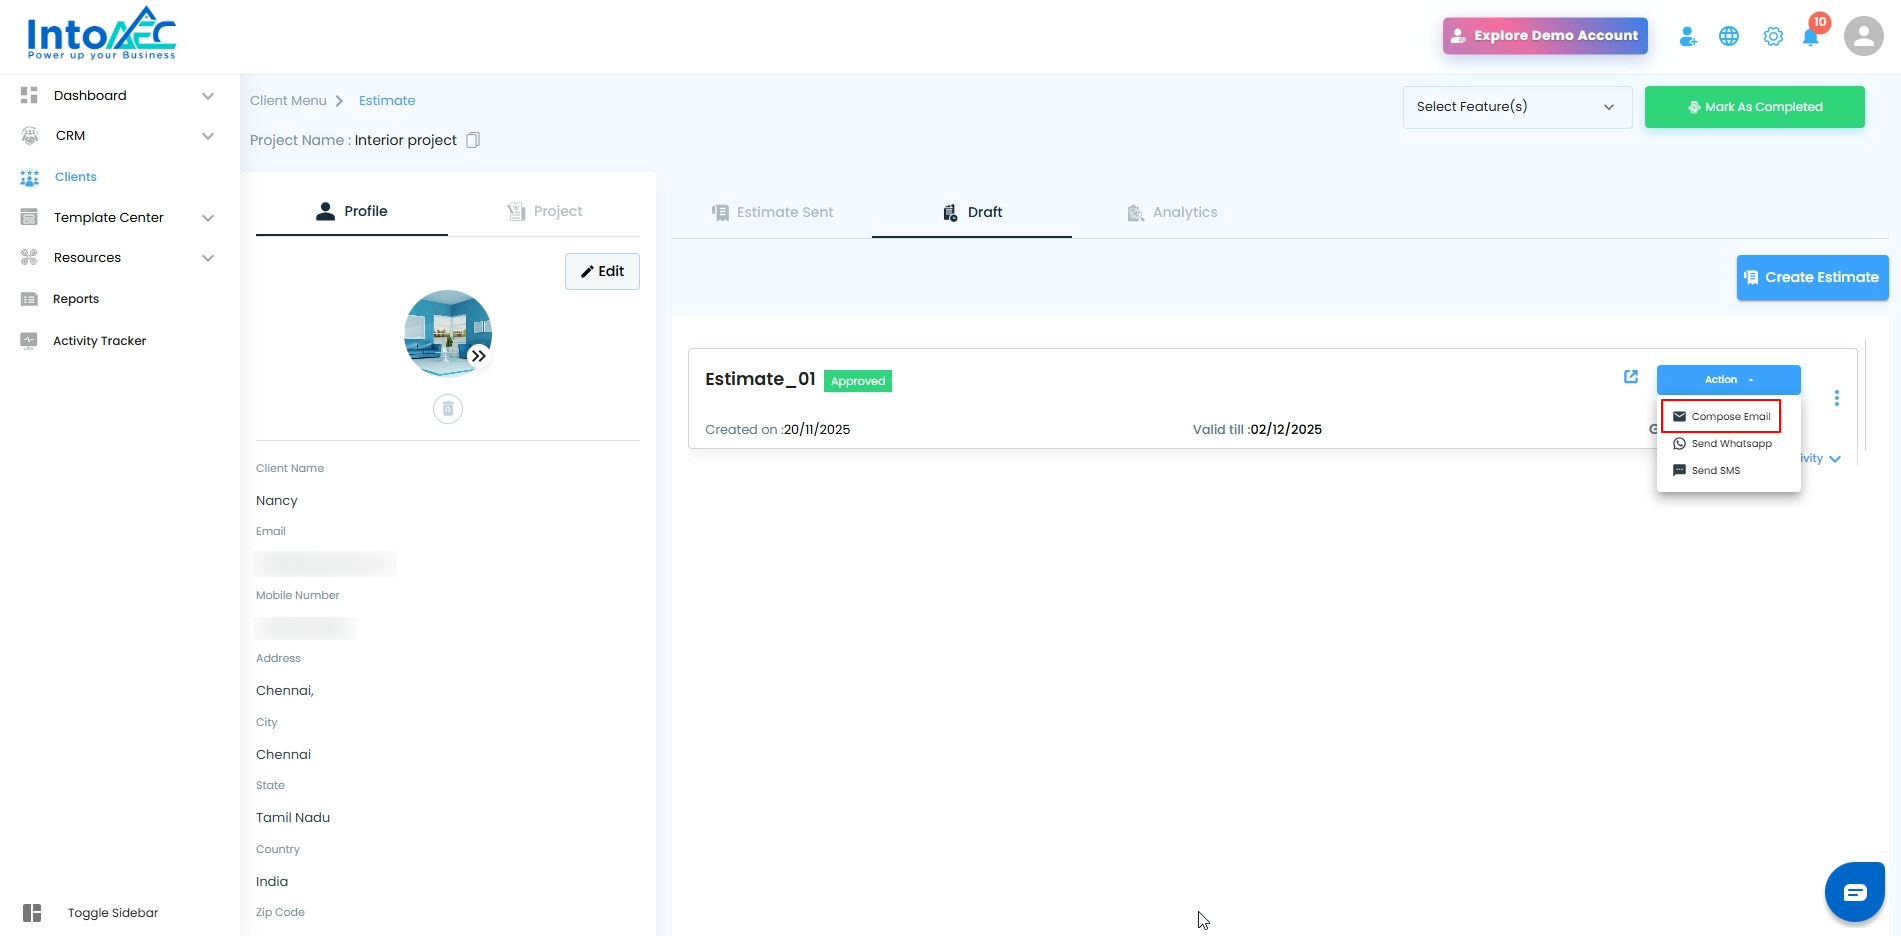
As a User: Sending the Approved Estimate to the Client
After the Super Admin approves the estimate, open it from the Draft section.
Click Action, then choose the preferred method to send the estimate (Email, SMS, or WhatsApp).
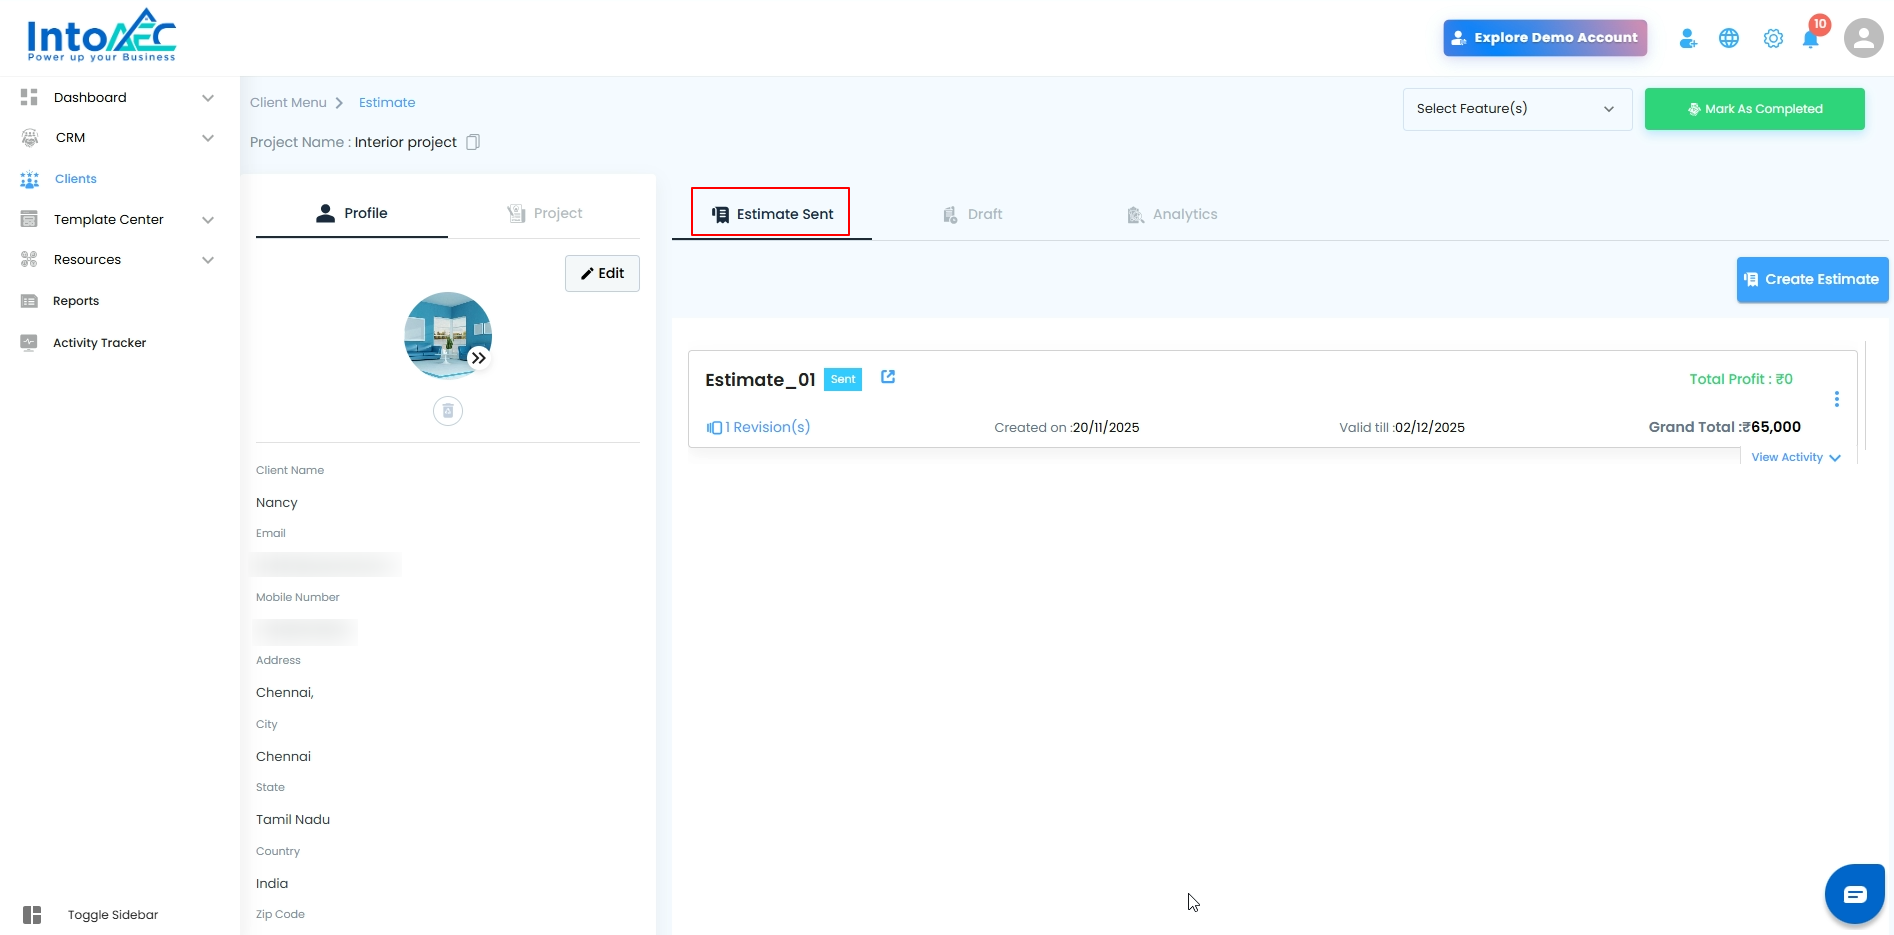
Once sent, the estimate will move to the Estimate Sent section.
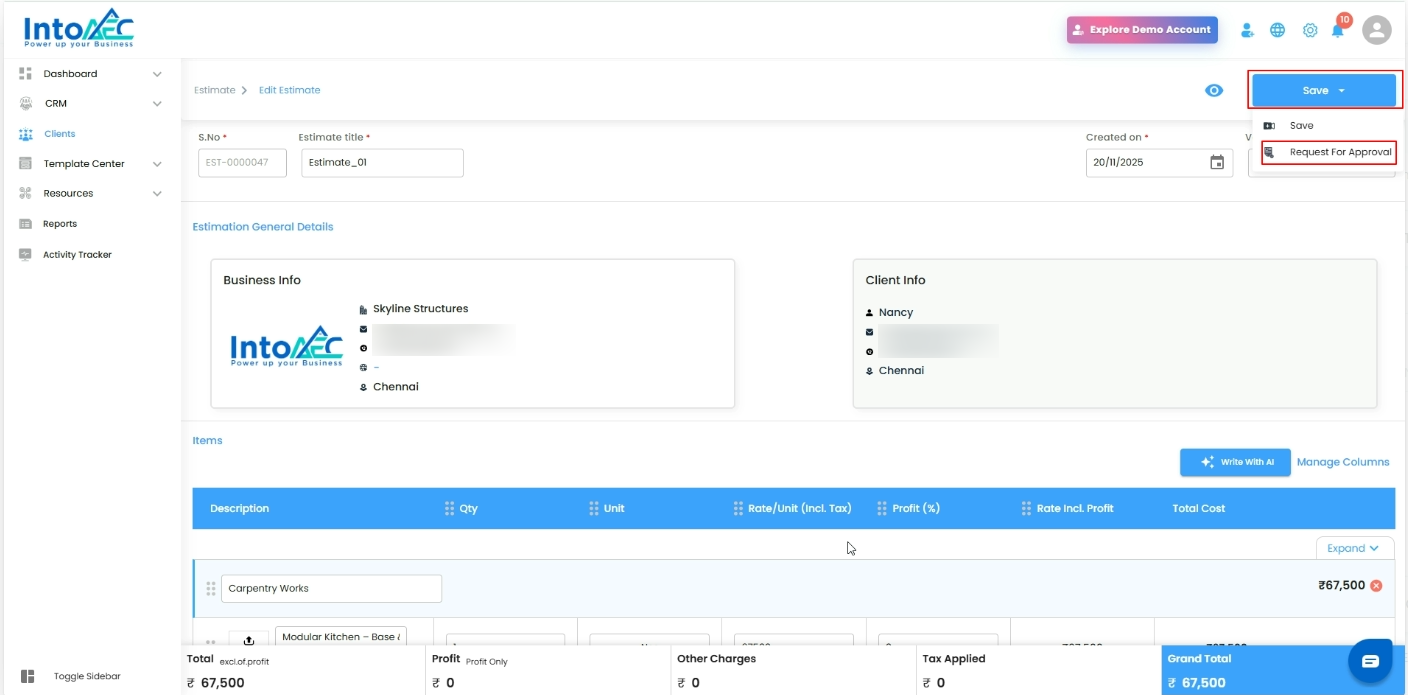
Editing a Sent Estimate (Creating a Revision)
If you need to revise a previously sent estimate:
Click the three dots (⋮) next to the estimate and select Edit.
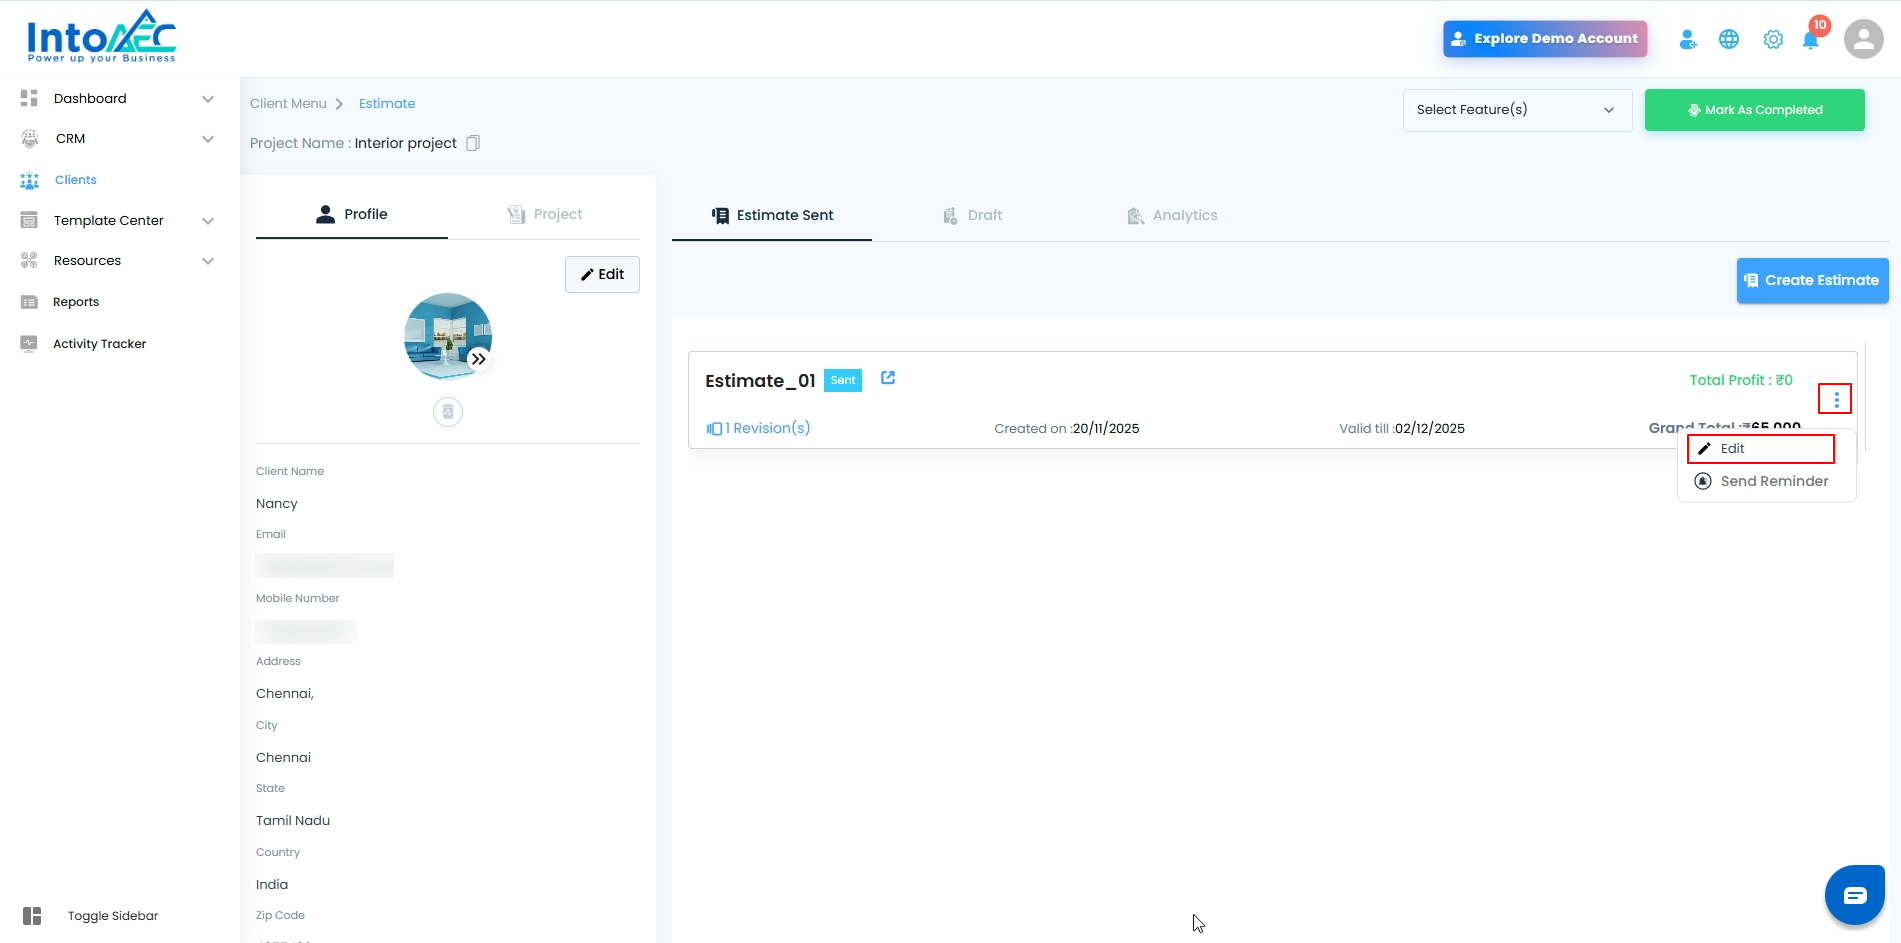
Make the necessary changes and click Save → Request for Approval.
After editing:
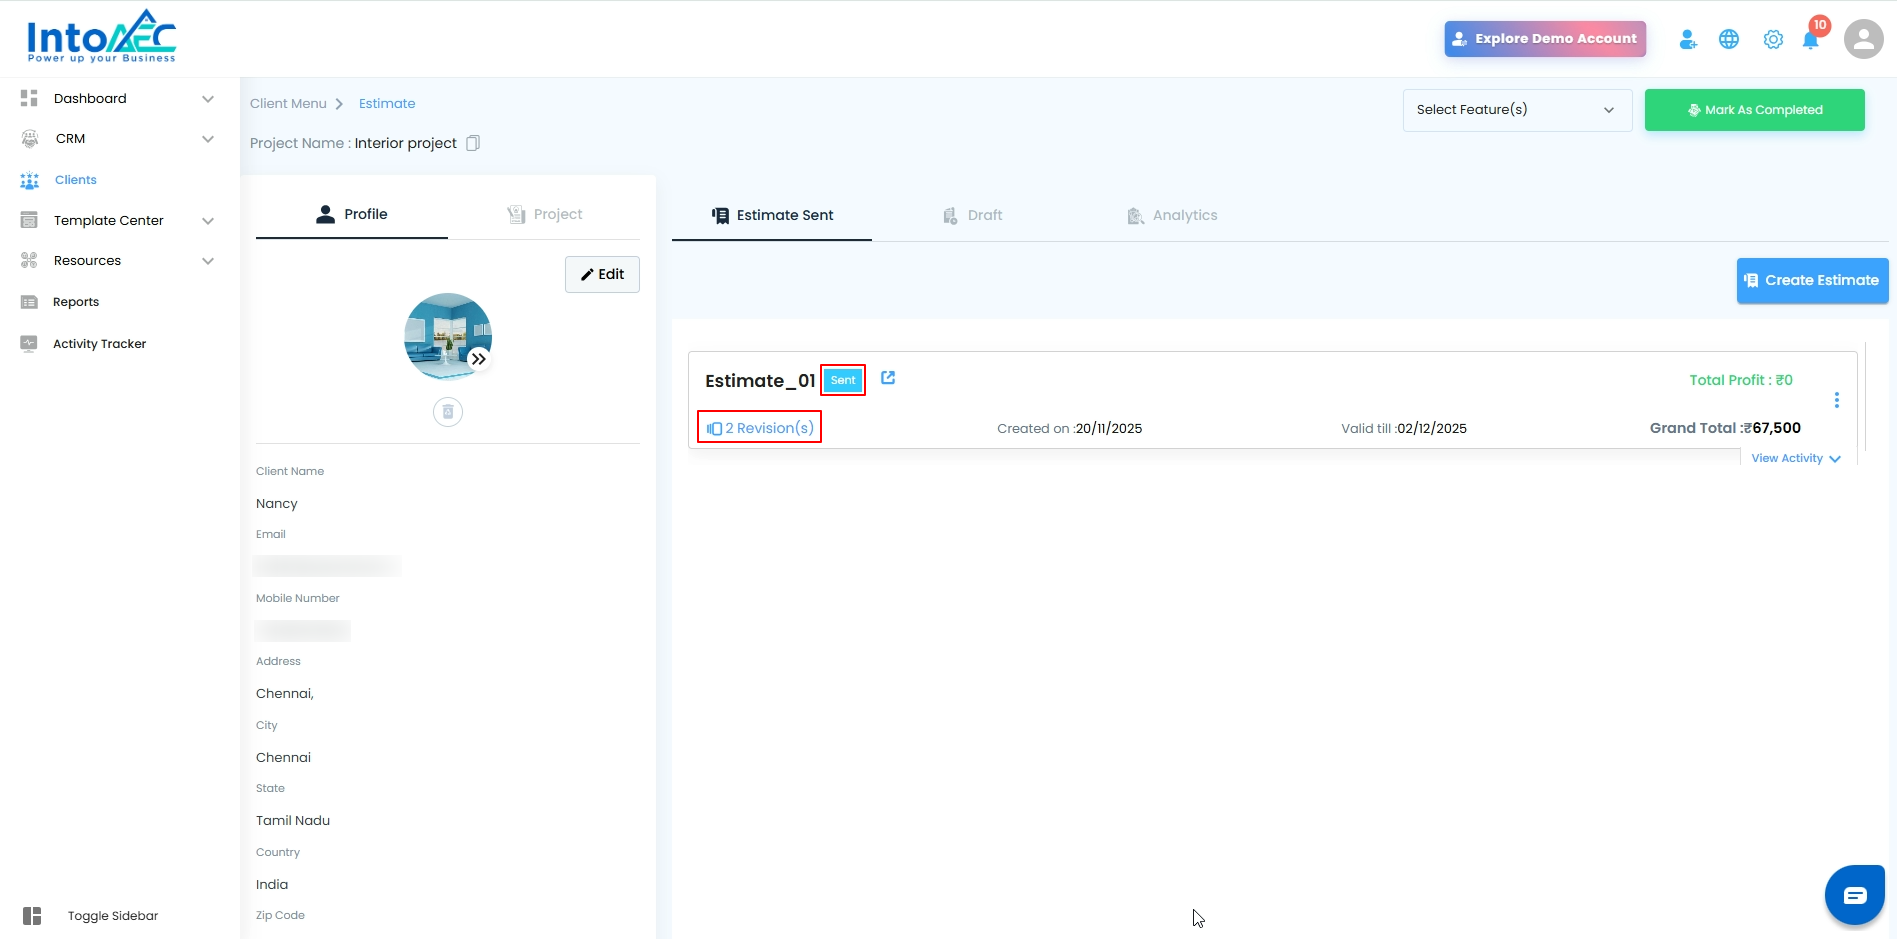
A revision count will be displayed on the estimate.

Clicking the revision count opens a half-screen panel showing the complete revision history.
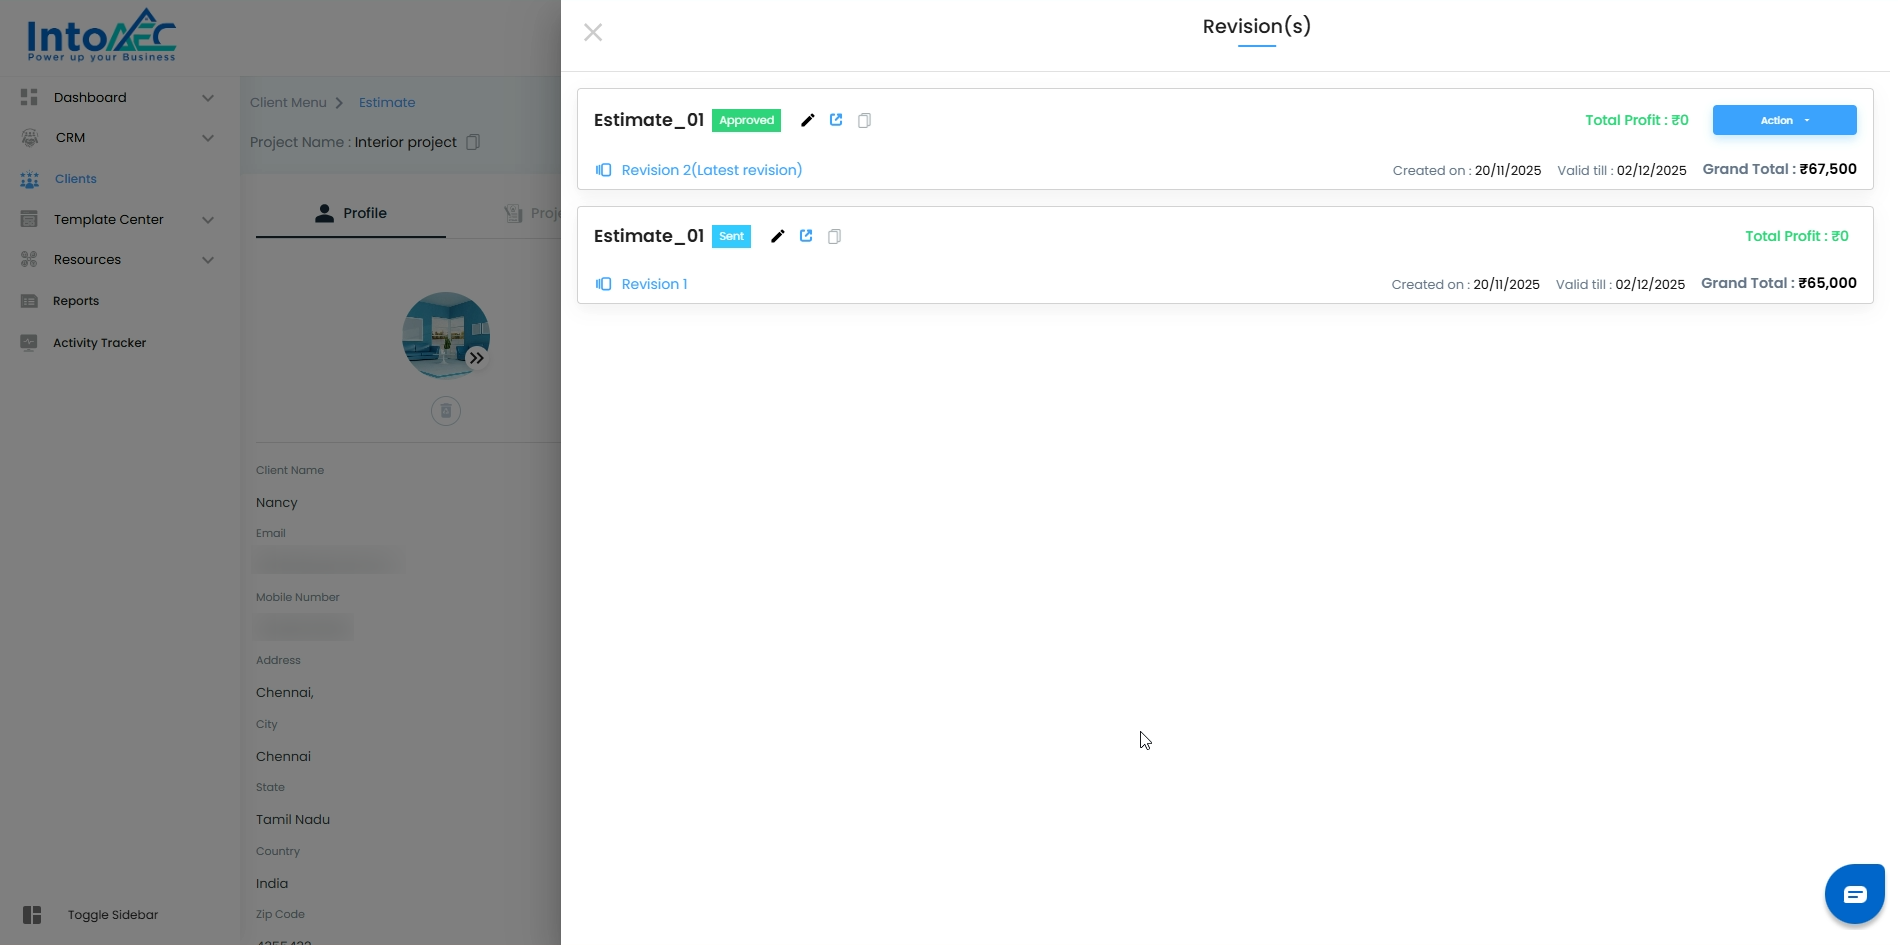
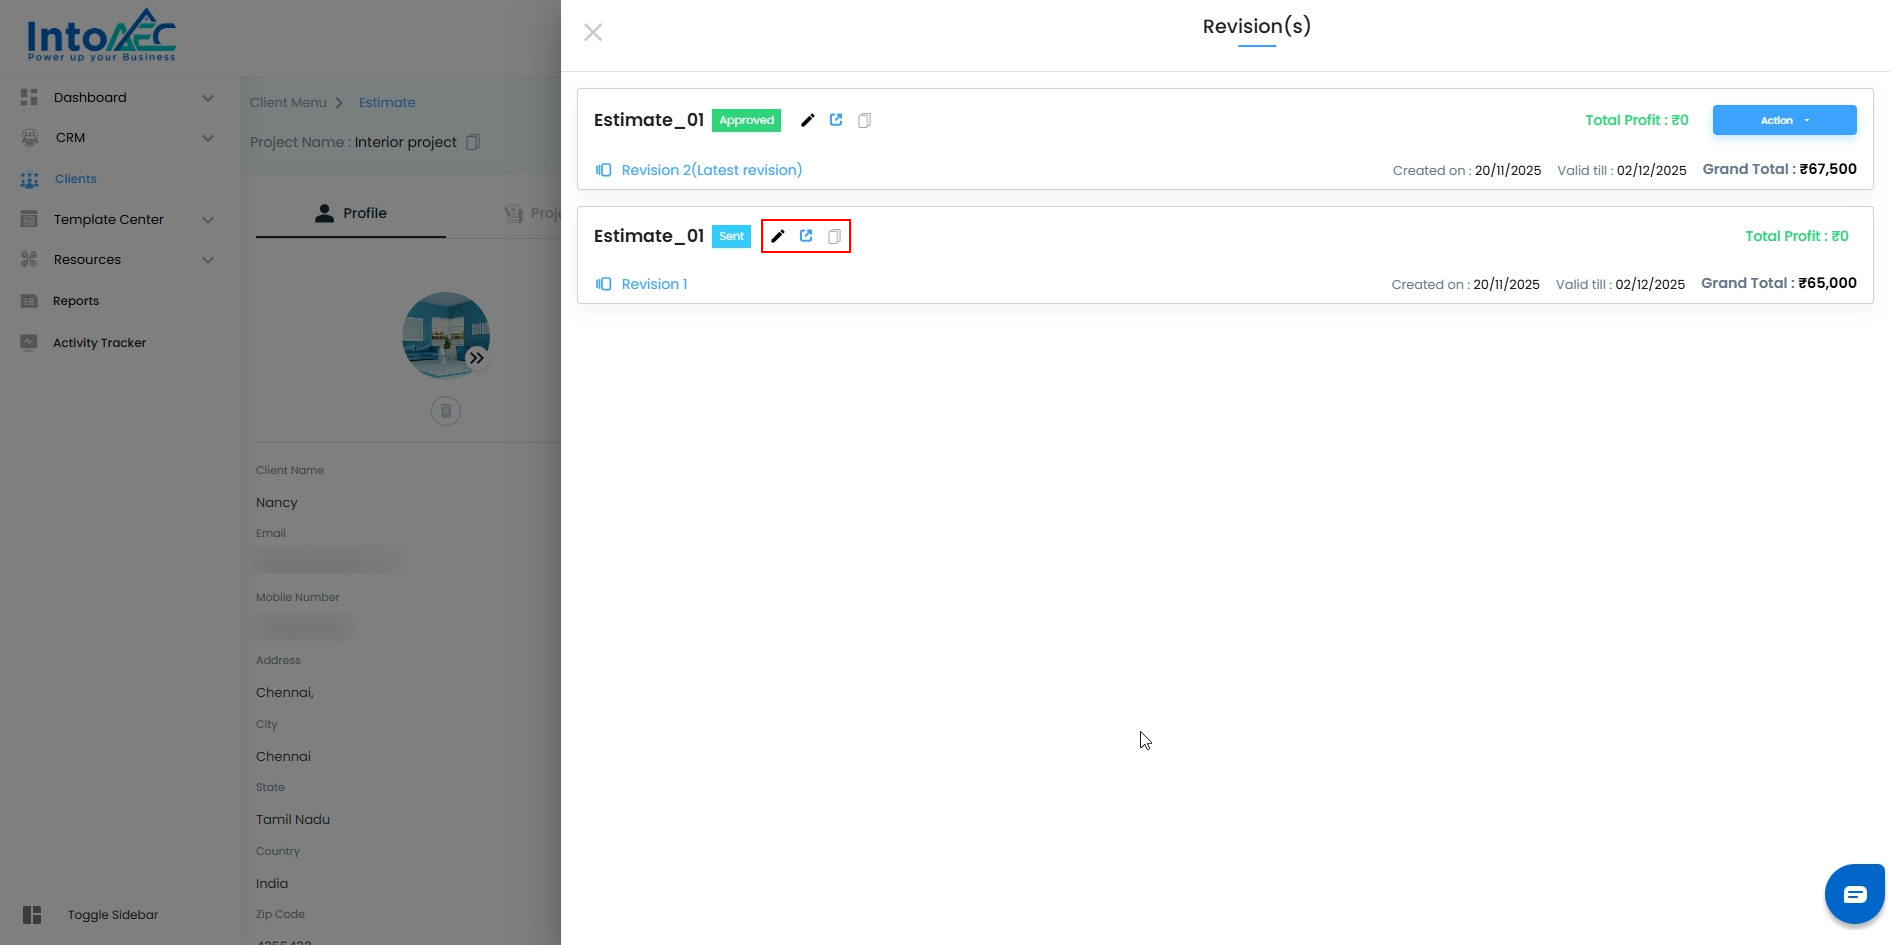
In the revision history panel, you can access:
Preview
Edit
Copy Estimate Link
Sending the Revised Estimate
Once approved again by the Super Admin, click Action.
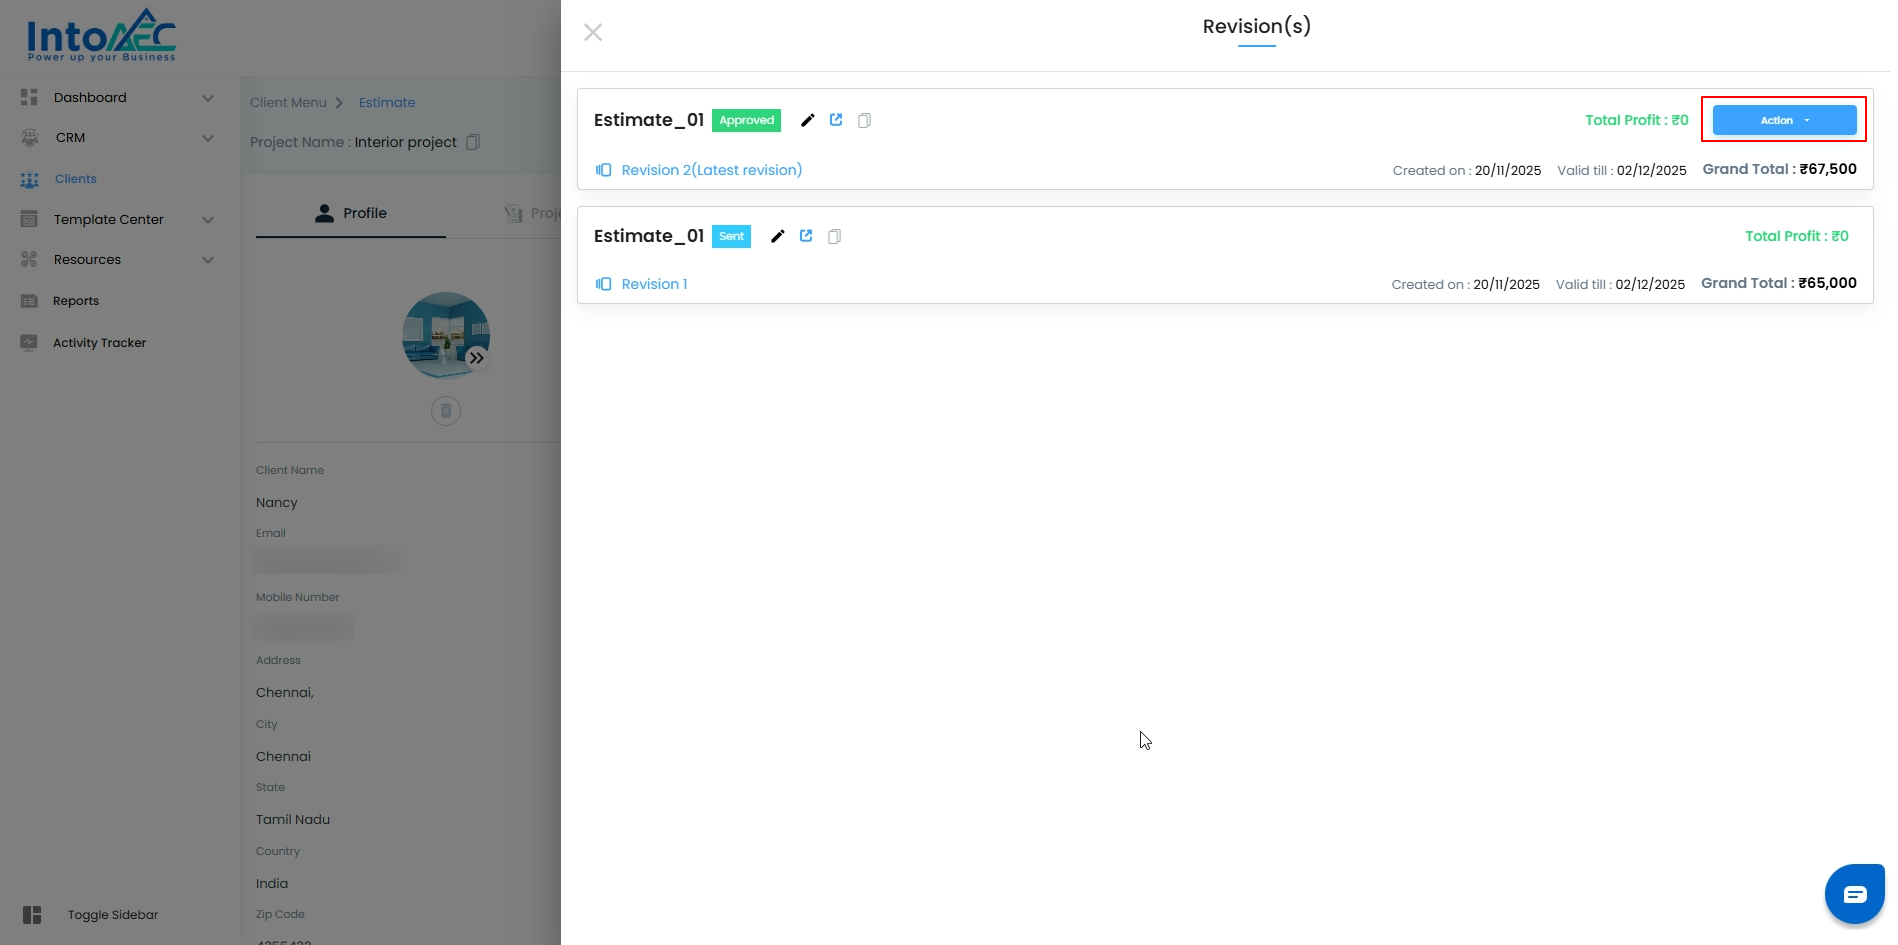
Select the sending method to send the revised estimate to the client.
After sending, the estimate will show:
Status: Sent
An updated revision count
Revision History & Tracking
Every time a revision is submitted:
The Revision Count increases
Previous versions remain stored for accountability
The status stays as Pending Approval until approved
Users and admins can track what changed and when
This ensures a transparent workflow and clean documentation trail.
Pro Tips
Use revisions instead of recreating estimates/proposals—this maintains a clean audit trail.
Add clear comments in the internal notes section to explain why the revision was made.
Ensure all required fields are updated before resubmitting to avoid repeated approval cycles.
Was this article helpful?
That’s Great!
Thank you for your feedback
Sorry! We couldn't be helpful
Thank you for your feedback
Feedback sent
We appreciate your effort and will try to fix the article