Managing Estimate Templates – Build, Organize, and Simplify
Creating and organizing your estimate templates keeps your projects consistent and efficient. By setting up categories, you ensure that every estimate is easy to find, use, and adapt for future work—no more searching through scattered files or repetitive setups.
What You Can Do Here
- Add new template categories to neatly organize your estimates.
- View, create, and manage all estimate templates in one place.
- Quickly load templates for any project type.
How to Get There
- From the main menu, open the Template Center.
- Click Estimate to enter the Estimate Templates section.

- Start managing or creating templates directly from the workspace.
Choosing the Right Template
Once categories are created, selecting the right template is simple:
- Pick the Category and Sub-Category from the dropdown menus.
- Click Choose Template to load it.
- Enter the type of work and provide a suitable title for the estimate.

Pro Tip
Clicking Estimate takes you straight to your templates—no extra steps, just faster setup and smoother management every time.
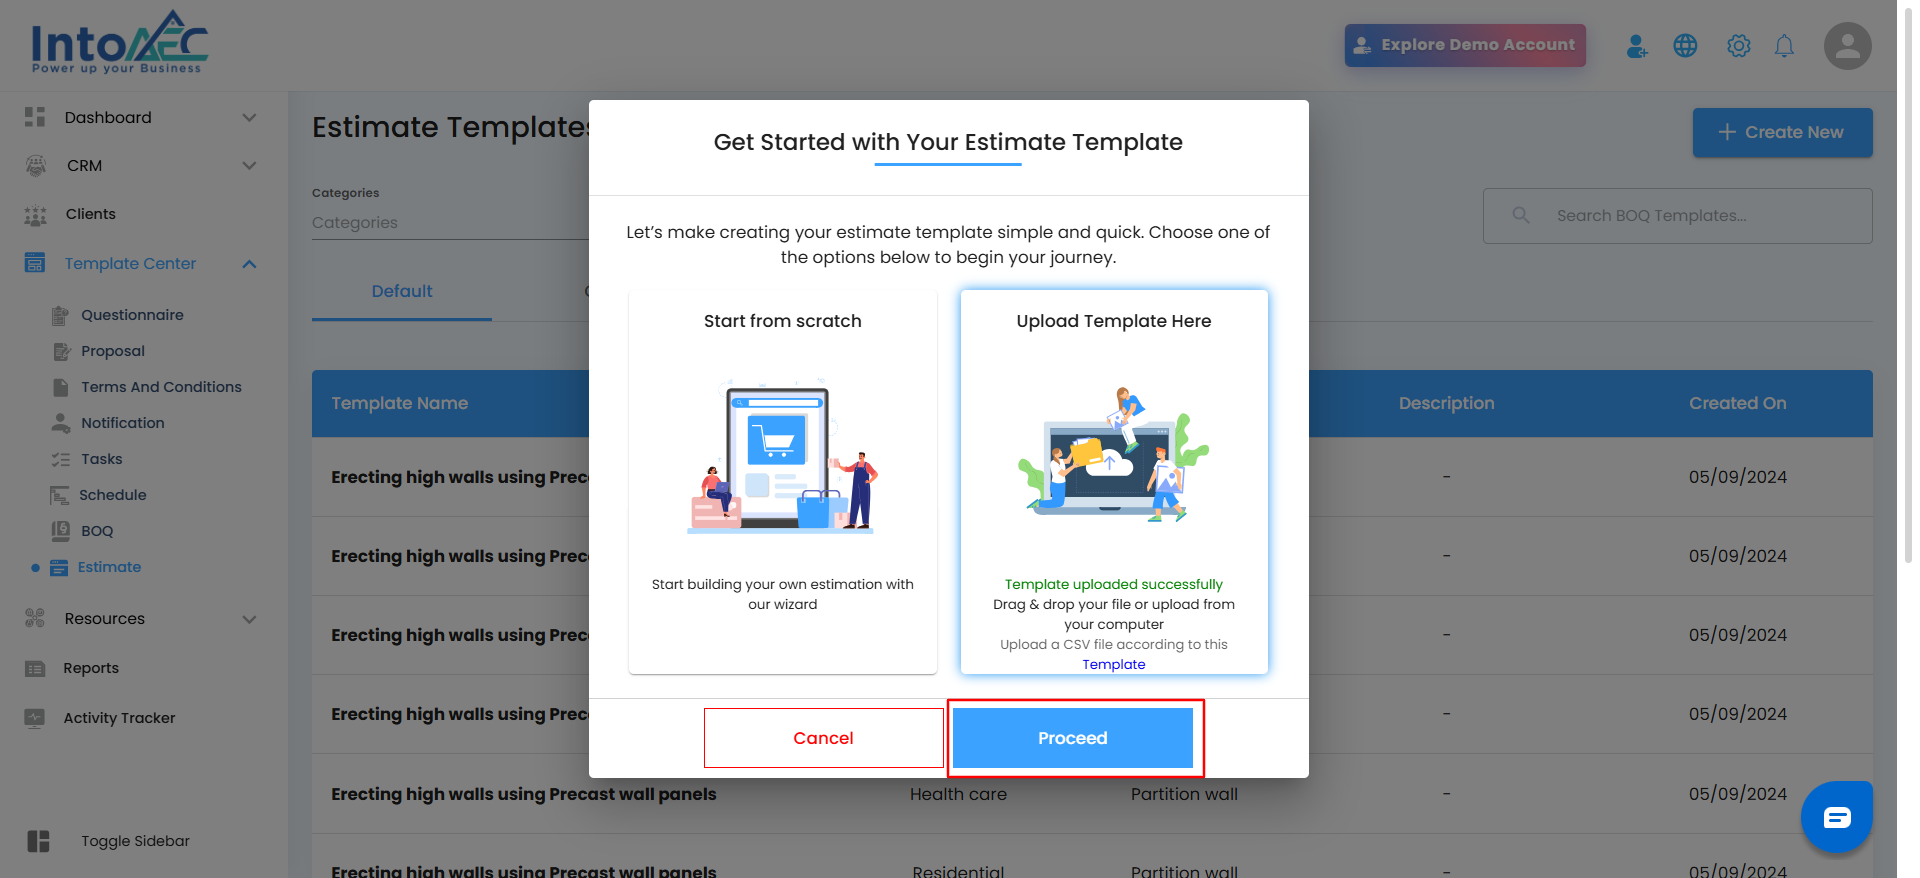
Starting Your Estimate Template
After selecting Estimate Template Setup, the “Get Started with Your Estimate Template” window appears to help you begin creating your template quickly. You can choose to start from scratch or upload an existing file — whichever suits your workflow best.

What You Can Do Here
- Create a new estimate template using the guided setup wizard.
- Upload an existing template directly from your computer.
- Choose the method that best fits your estimating process.
Inside the Page
- You’ll see two clear options to begin your setup:
- Start from Scratch – Build your estimate template step by step using the in-app wizard.
- Upload Template Here – Drag and drop a CSV file or upload one from your system using the provided template format.
- Once you’ve made your selection, click Proceed to start creating your estimate.
Pro Tip
If you already have a pre-designed estimate format, upload it as a CSV file to save time and keep your project estimates standardized.
Building Your Estimate Template from Scratch
After clicking Proceed, the estimate creation page opens — this is where you start shaping your new estimate template. Every field and section here is designed to help you structure your work clearly, from general details to detailed cost breakdowns.
What You Can Do Here
- Enter a title and description for your estimate template.
- Define the Category, Sub-category, and Type of Work for better organization.
- Add items manually, pick them from your library, or select products and services directly.
- Create and name multiple sections to organize your estimate efficiently.
- Add quantities, units, and rates — the system automatically calculates profit and total cost.
Inside the Page
At the top, you’ll set your estimate’s basic details like title, description, and work type.
Below that, the main table allows you to:
- Add items one by one or pull them from the library.
- Specify unit, rate (including tax), and profit percentage.
- Instantly view totals and profit values as you build.
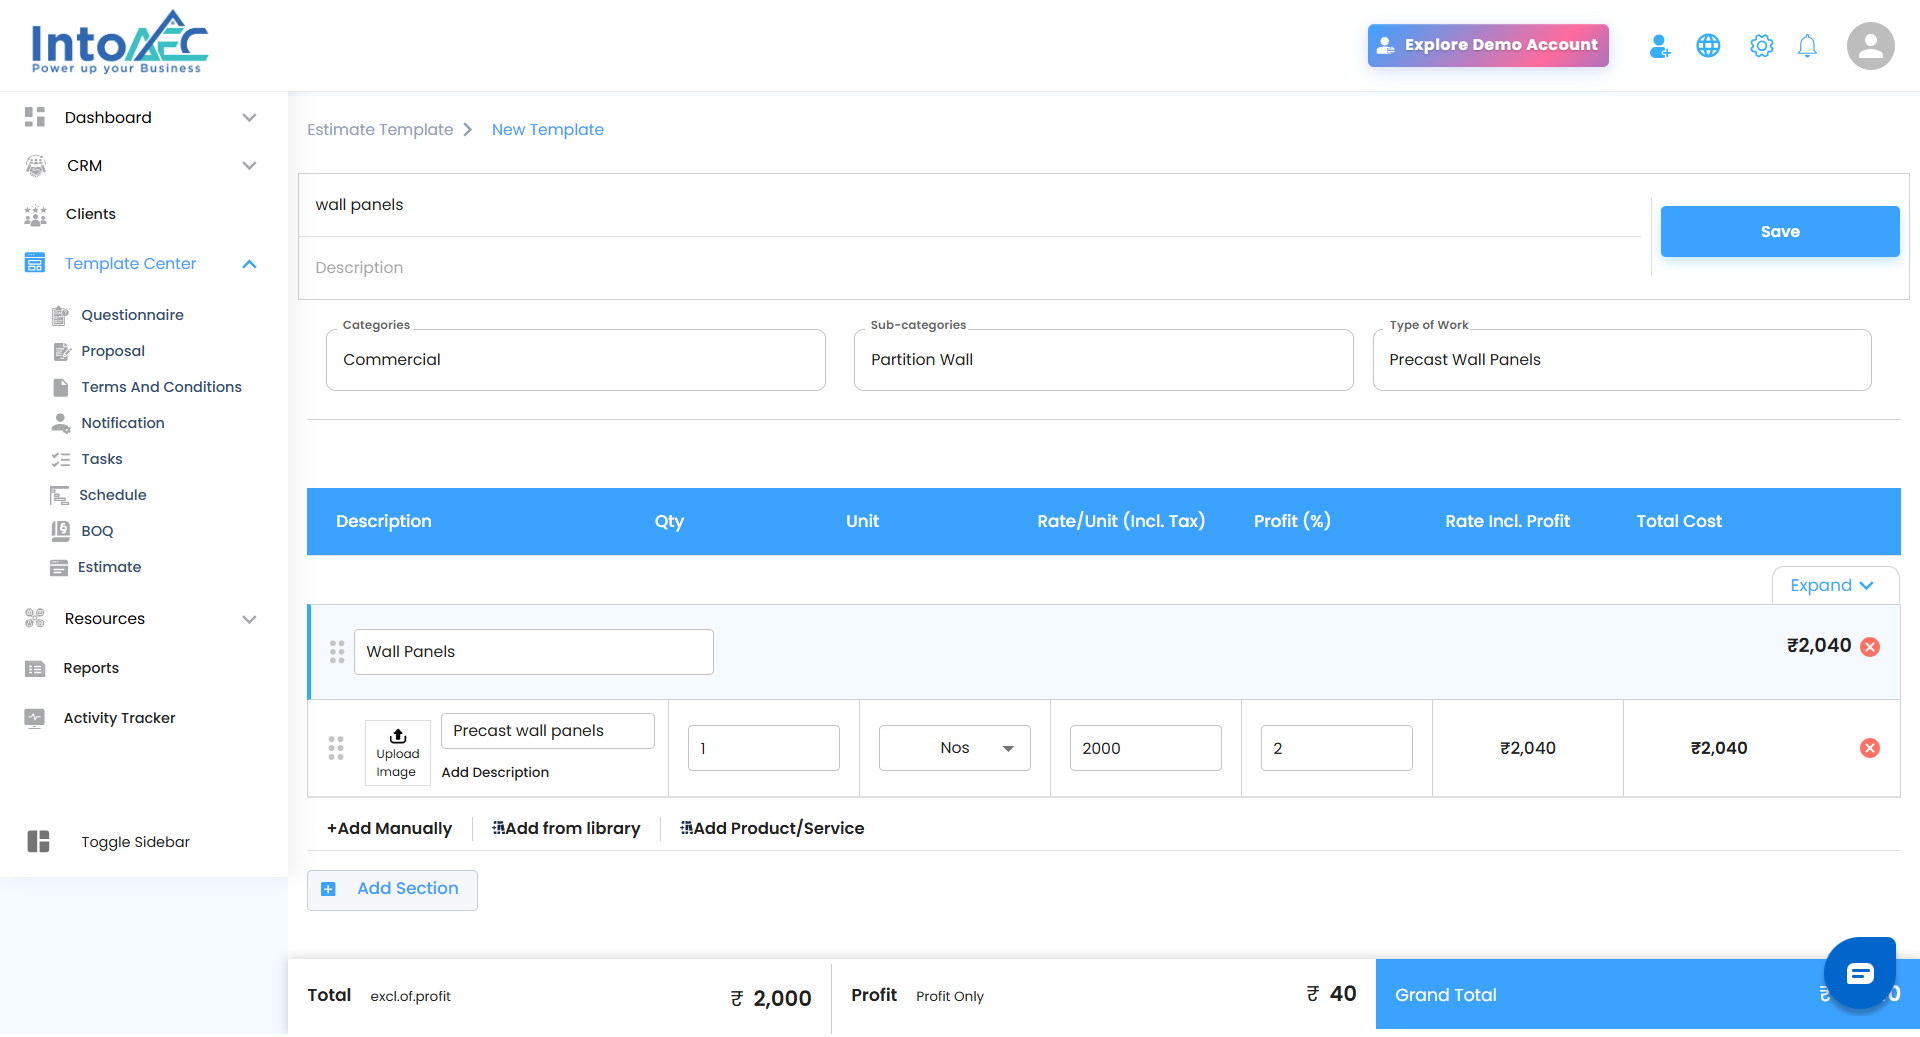
You can also upload images for each line item, helping make your estimates visually clear and easy to understand.
Pro Tip
Use sections to group related tasks or materials — this keeps large estimates structured and easy to review later.
Uploading and Previewing Your Estimate Template
Your estimate template is the foundation for building accurate project BOQs. Setting it up correctly ensures every value, quantity, and rate flows seamlessly into your project estimate. Follow these simple steps to get it right from the start.
Download the Template
Download the provided BOQ upload template from the system. This sheet helps structure all your estimate data correctly before uploading.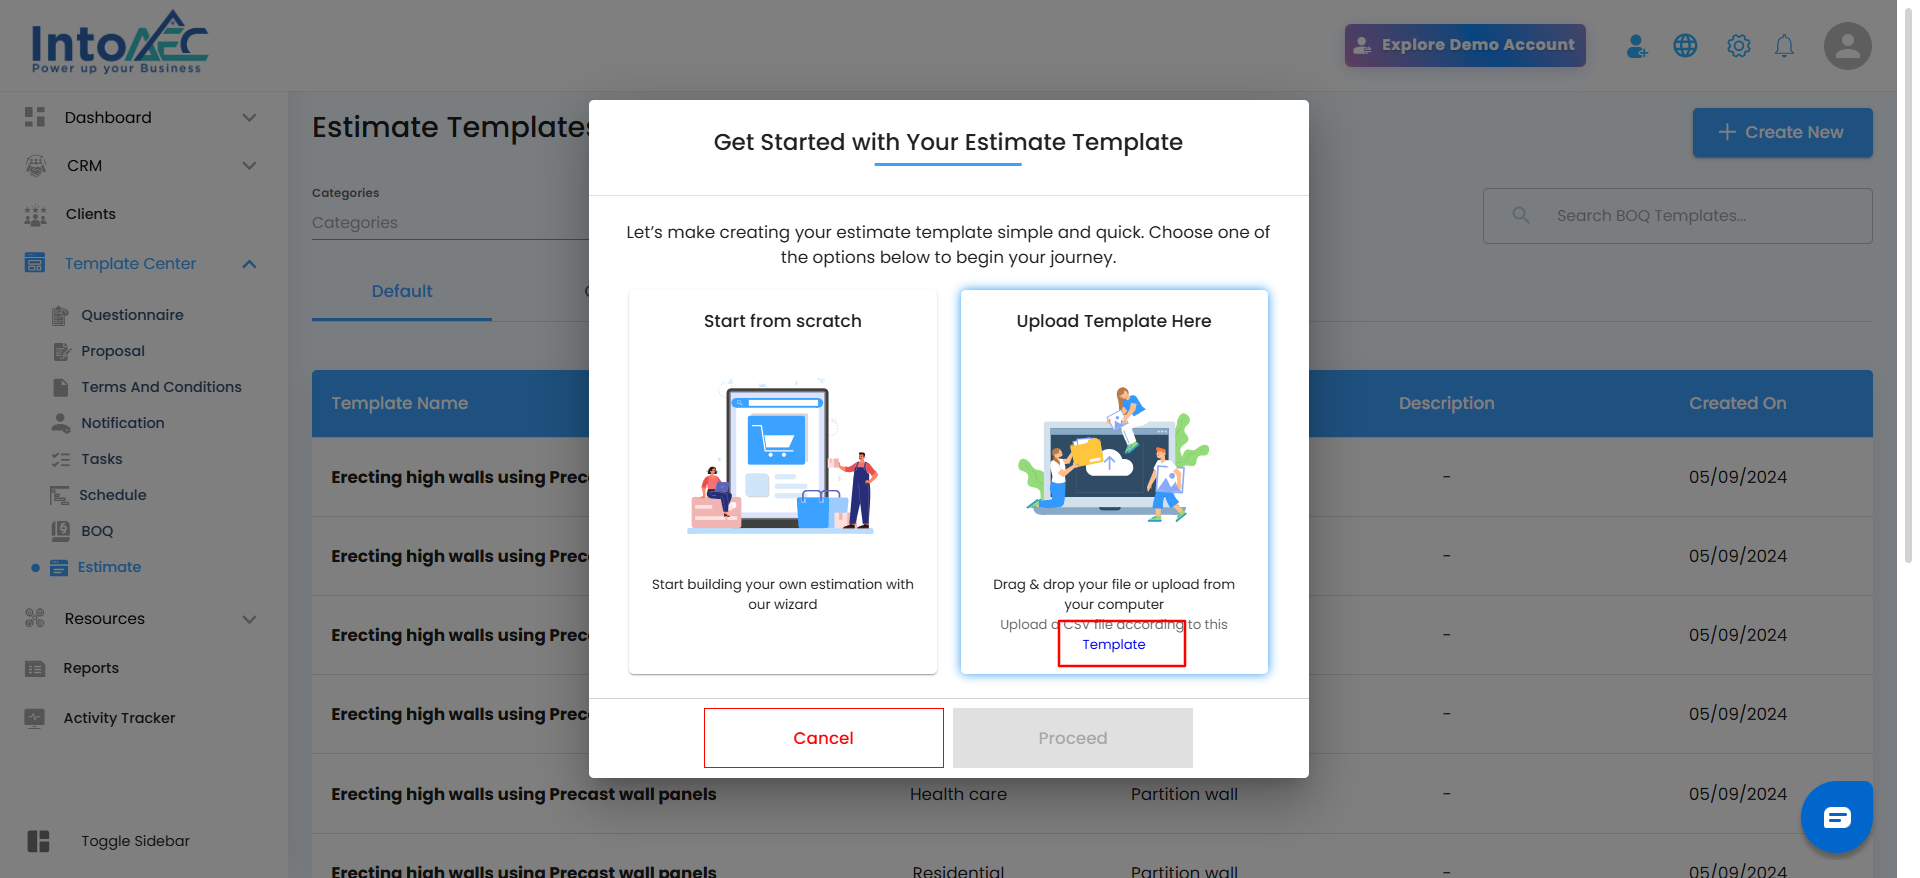
Fill the Required Fields
Open the downloaded sheet and enter the necessary details under each column.
Include information such as:
- Type (Section, BOQ Item, Line Item)
- Name
- Description
- Unit, Quantity, Rate, and Amount
Uploading an Estimate – Template & Instructions
You can upload your estimate using the provided template. Follow the steps below carefully to ensure your data is entered correctly:
Step 1: Add Section Details
In the Type field, select Section Name and enter your section title (for example, Master Bedroom).
Optionally, you can add a Description for clarity.
Set Quantity to None.
Step 2: Add BOQ Items
- Under the section you created, add the BOQ items (for example, Side Table).
- Fill in all relevant details such as Description, Rate, and Unit.
Step 3: Add BOQ Line Items
- Under each BOQ item, include the BOQ Line Items — the materials or components required for that item. Example: Plywood, Drawers, Hinges, etc.
Step 4: Add Individual Items
- Add any individual items directly under the section that need to be part of the estimate. Example: Labour Charges, Transportation, etc.
Step 5: Verify Required Fields
- Ensure every BOQ or individual item includes the following mandatory detail
- Item Name, Quantity (Qty), Unit, Rate
Upload the Template
- If your template is already filled, it will appear under the From Your Computer section. You can either select the file directly or drag and drop it from your system to upload.
After
Review Uploaded BOQ Items
- Once uploaded, the “Uploaded BOQ Items” window will appear.
- Here you can verify the details such as Name, Description, Quantity, Unit, Rate, and Amount before proceeding.
- Click Continue to confirm and complete the upload process.
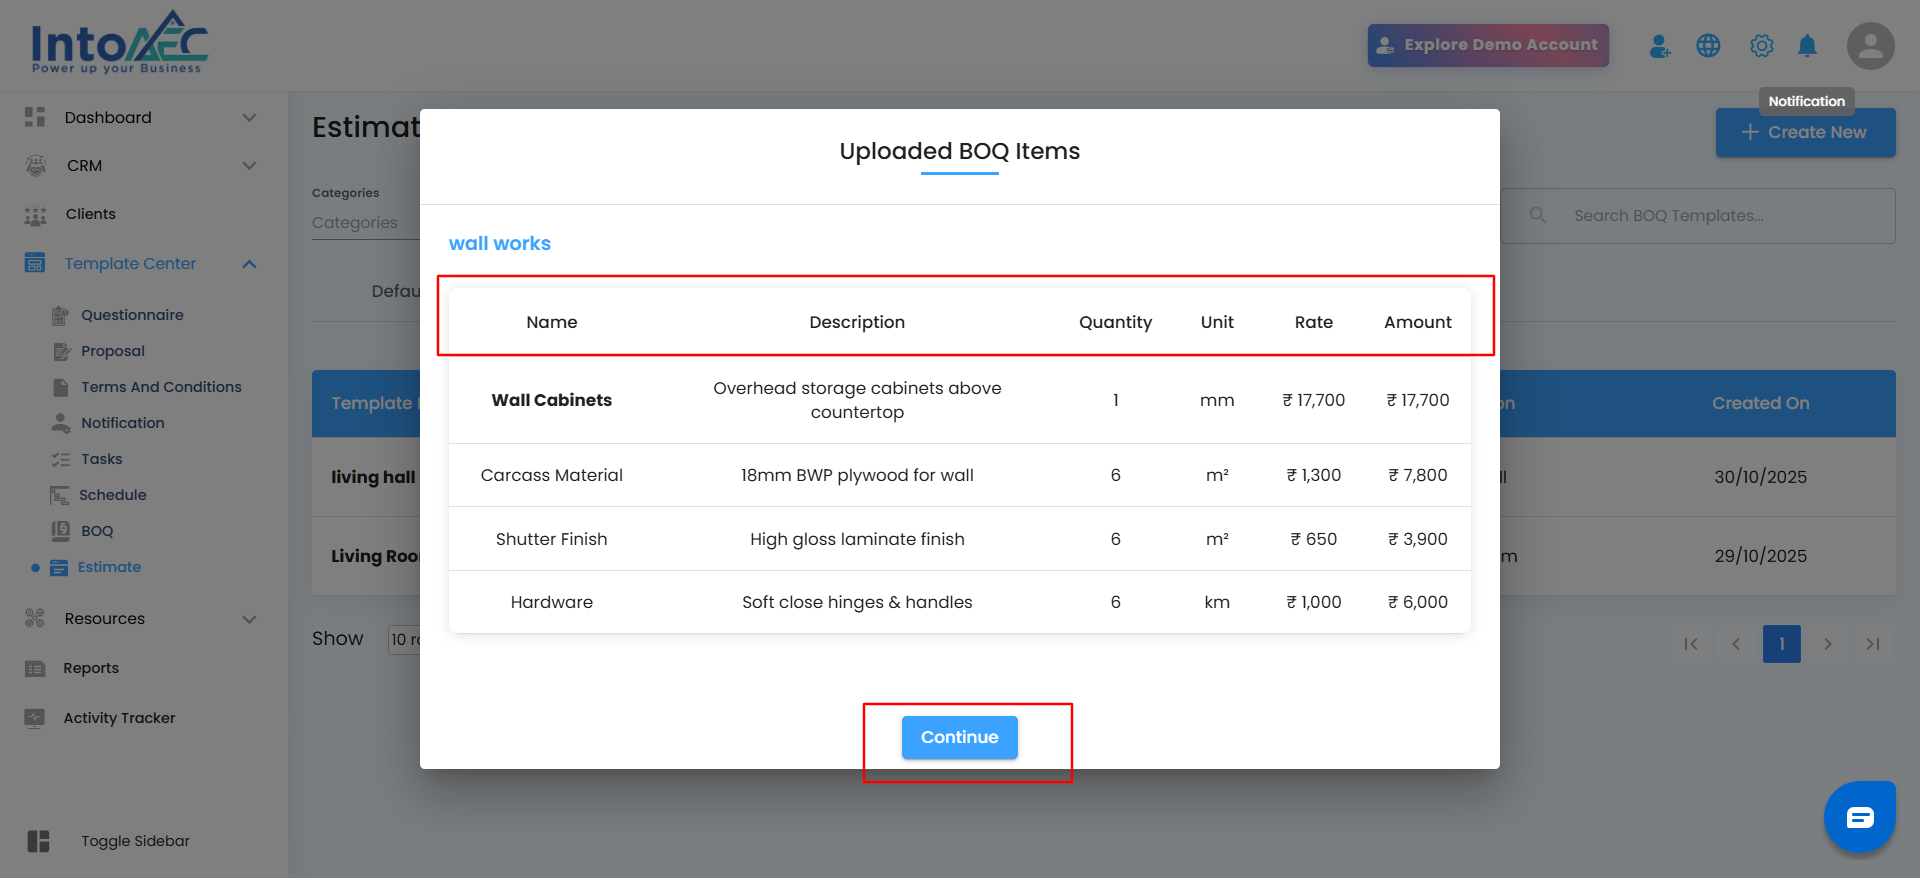
Pro Tip: Review all quantities and rates carefully before confirming to ensure your estimates are accurate and ready for use.
View Uploaded BOQ in Estimate Templates
Once your BOQ template is uploaded successfully, it will appear under the Custom tab in the Estimate Templates list.
You’ll see each record with details such as Template Name, Category, Sub-category, Description, and Created On date — just like in the example below.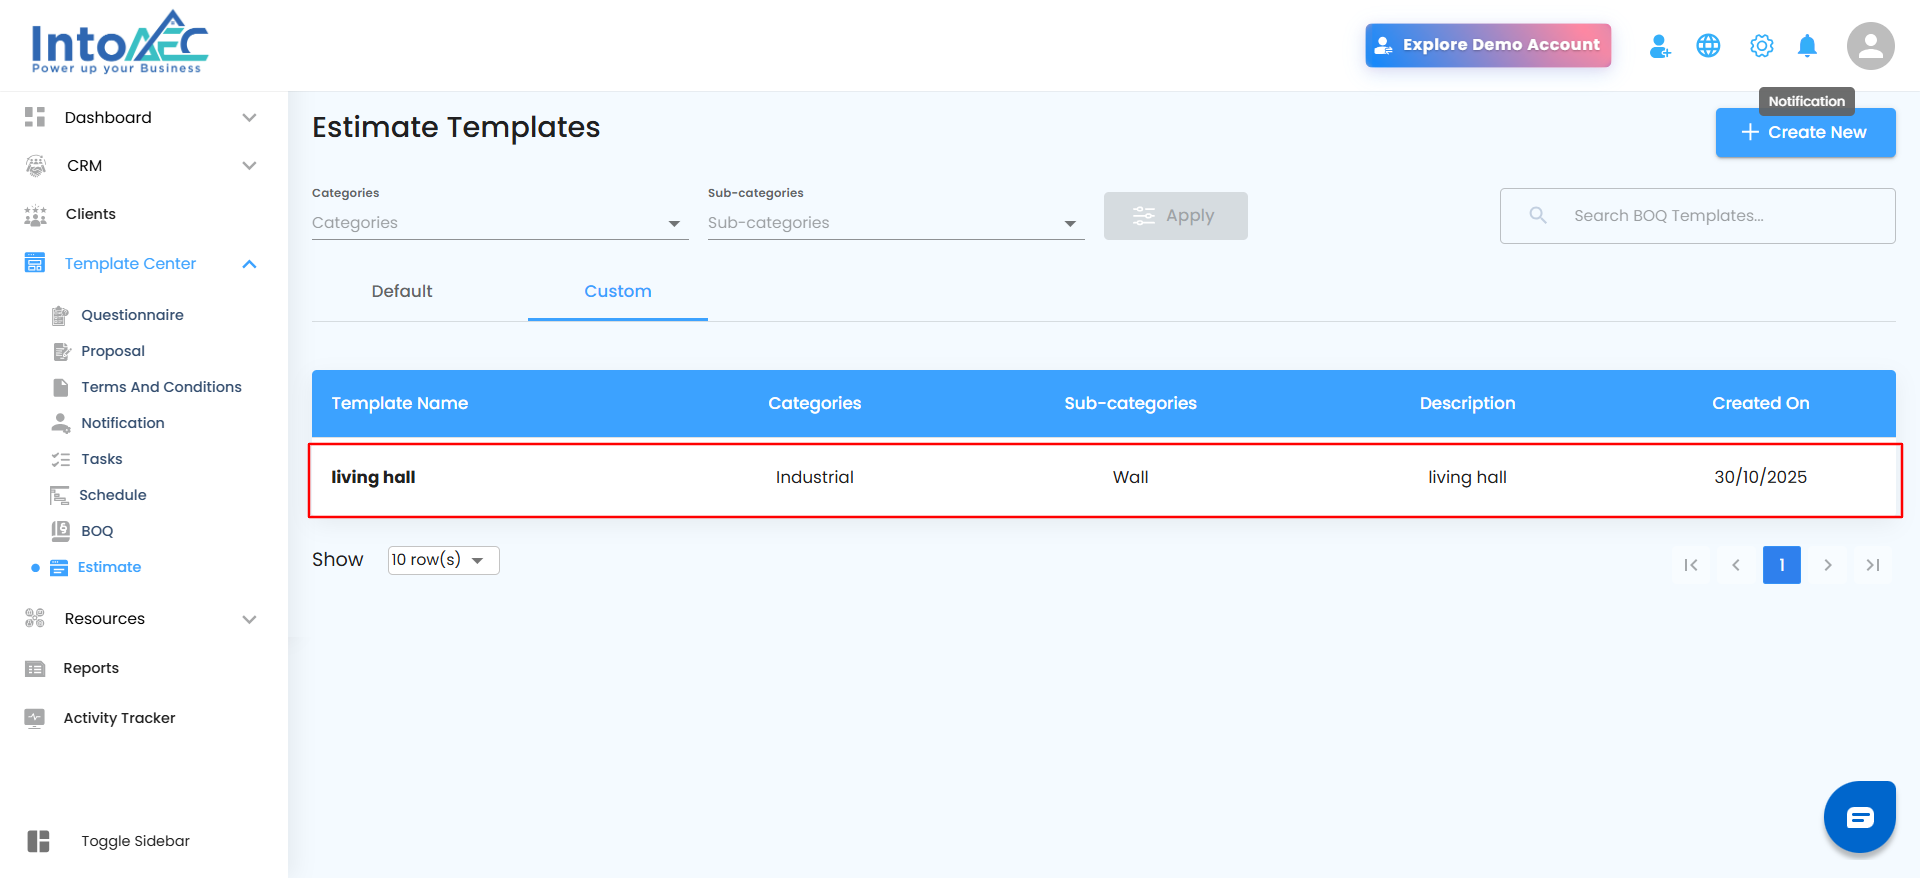
Each uploaded template includes a three-dots action menu beside it, giving you quick options to manage your templates easily:
Edit: Click Edit to open and update template details like name, category, or description.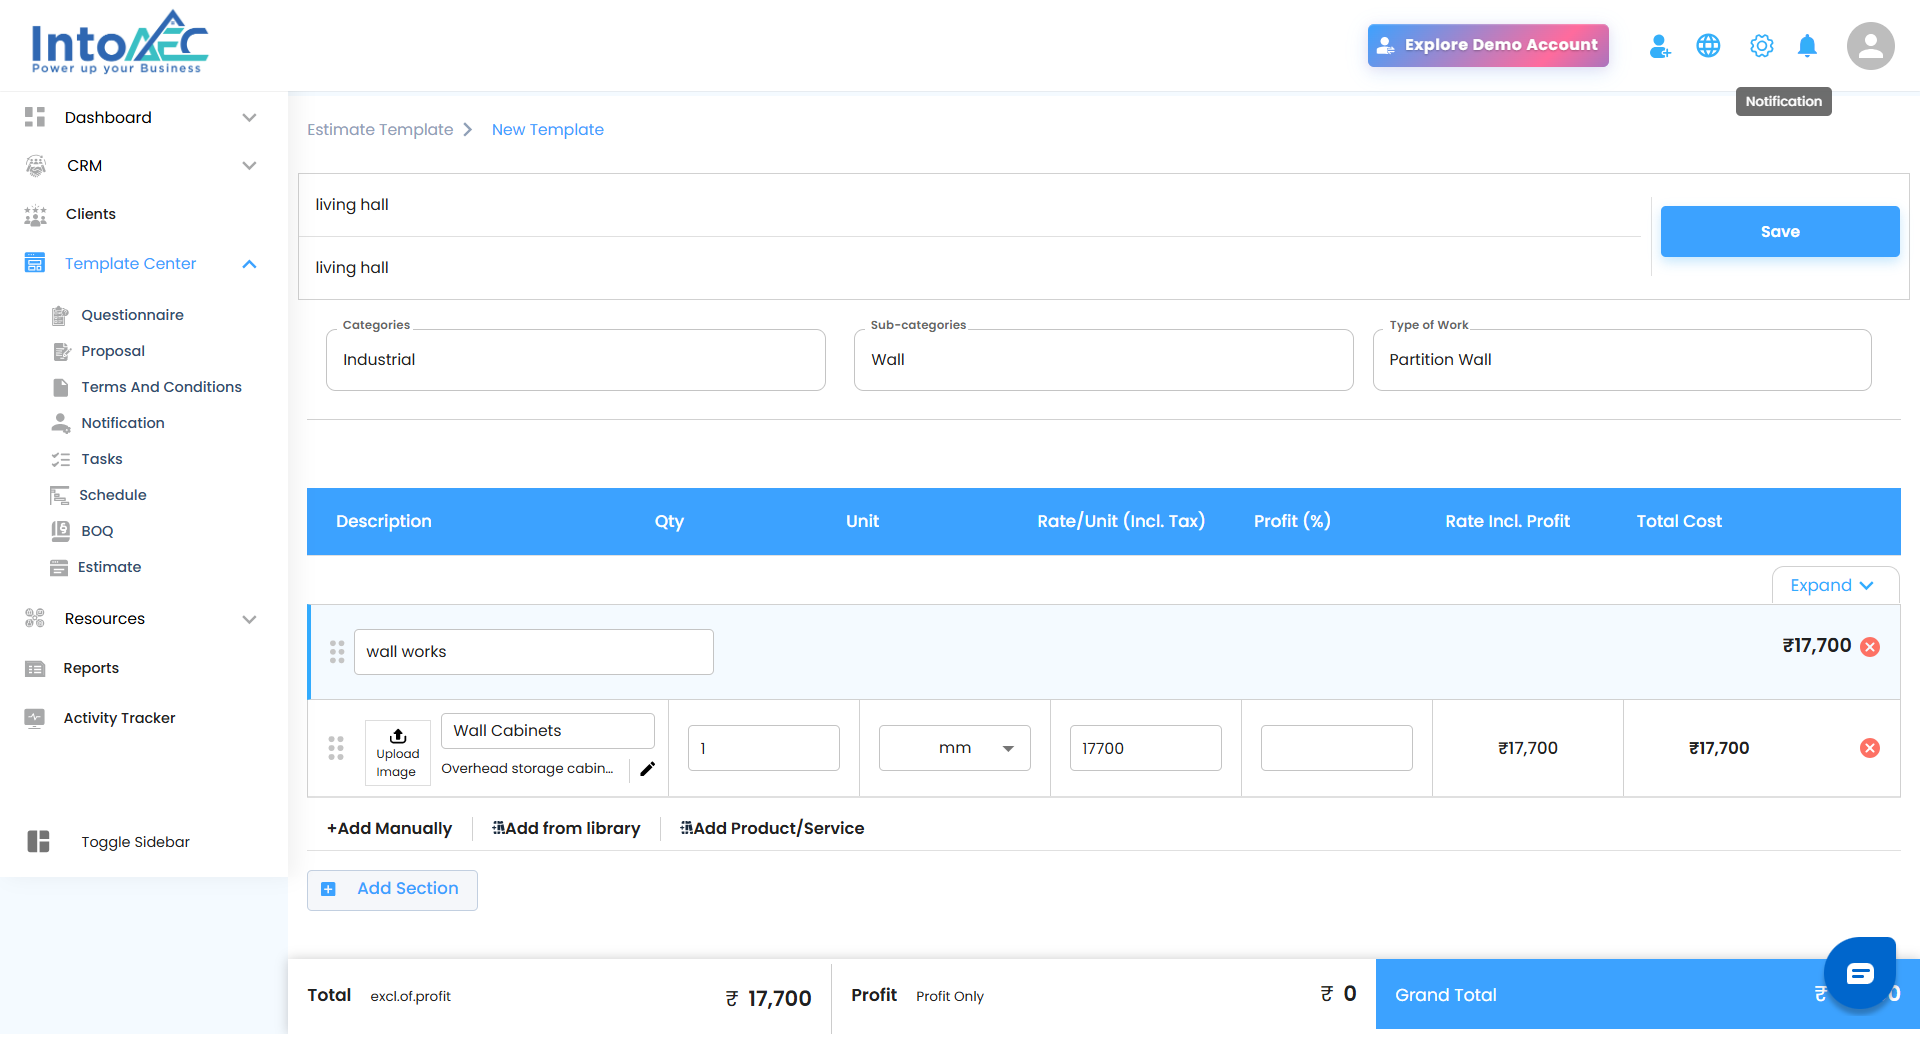
Delete:Select Delete to remove a template permanently. When you do, a confirmation popup will appear with the message:
“Are you sure you want to delete this item?”
Click Yes to confirm, or Cancel to go back without deleting.


This step ensures that no template is removed accidentally, keeping your records accurate and under control.
Pro Tip:
After uploading, always verify that your template appears in the list. Use the three-dots menu to make edits or delete outdated templates as needed — a clean list means faster access and better organization.
Was this article helpful?
That’s Great!
Thank you for your feedback
Sorry! We couldn't be helpful
Thank you for your feedback
Feedback sent
We appreciate your effort and will try to fix the article