Start with the Proposal Builder
The proposal builder lets you create and customize a proposal using templates, pages, content blocks, variables, pricing tables, and organization details.
You can create a proposal from a lead, select a template, add the required content, preview the proposal, and proceed to send it.
What You Can Do
Start from a template – Choose a default proposal template or a custom template created by your team.
Add pages – Add cover pages, blank pages, or upload an existing PDF.
Add blocks – Add text, images, tables, pricing tables, signatures, your organization logo, and terms and conditions.
Use variables – Automatically populate organization, user, lead, and other details in your proposal.
Allow comments – Let clients provide feedback directly on the proposal.
Capture an image – Capture a photo when the client signs the proposal.
Preview the proposal – Review the proposal as your client will see it before sending.
Where to Start
You can create a proposal from a lead.
From a Lead
Open Lead Manager – From the side navigation menu, go to CRM → Lead Manager.
Select the lead – Select the lead for whom you want to create the proposal.
Open the Proposal tab – On the lead's page, click Proposal.
The proposal page opens. Click Create Proposal to start creating your proposal.
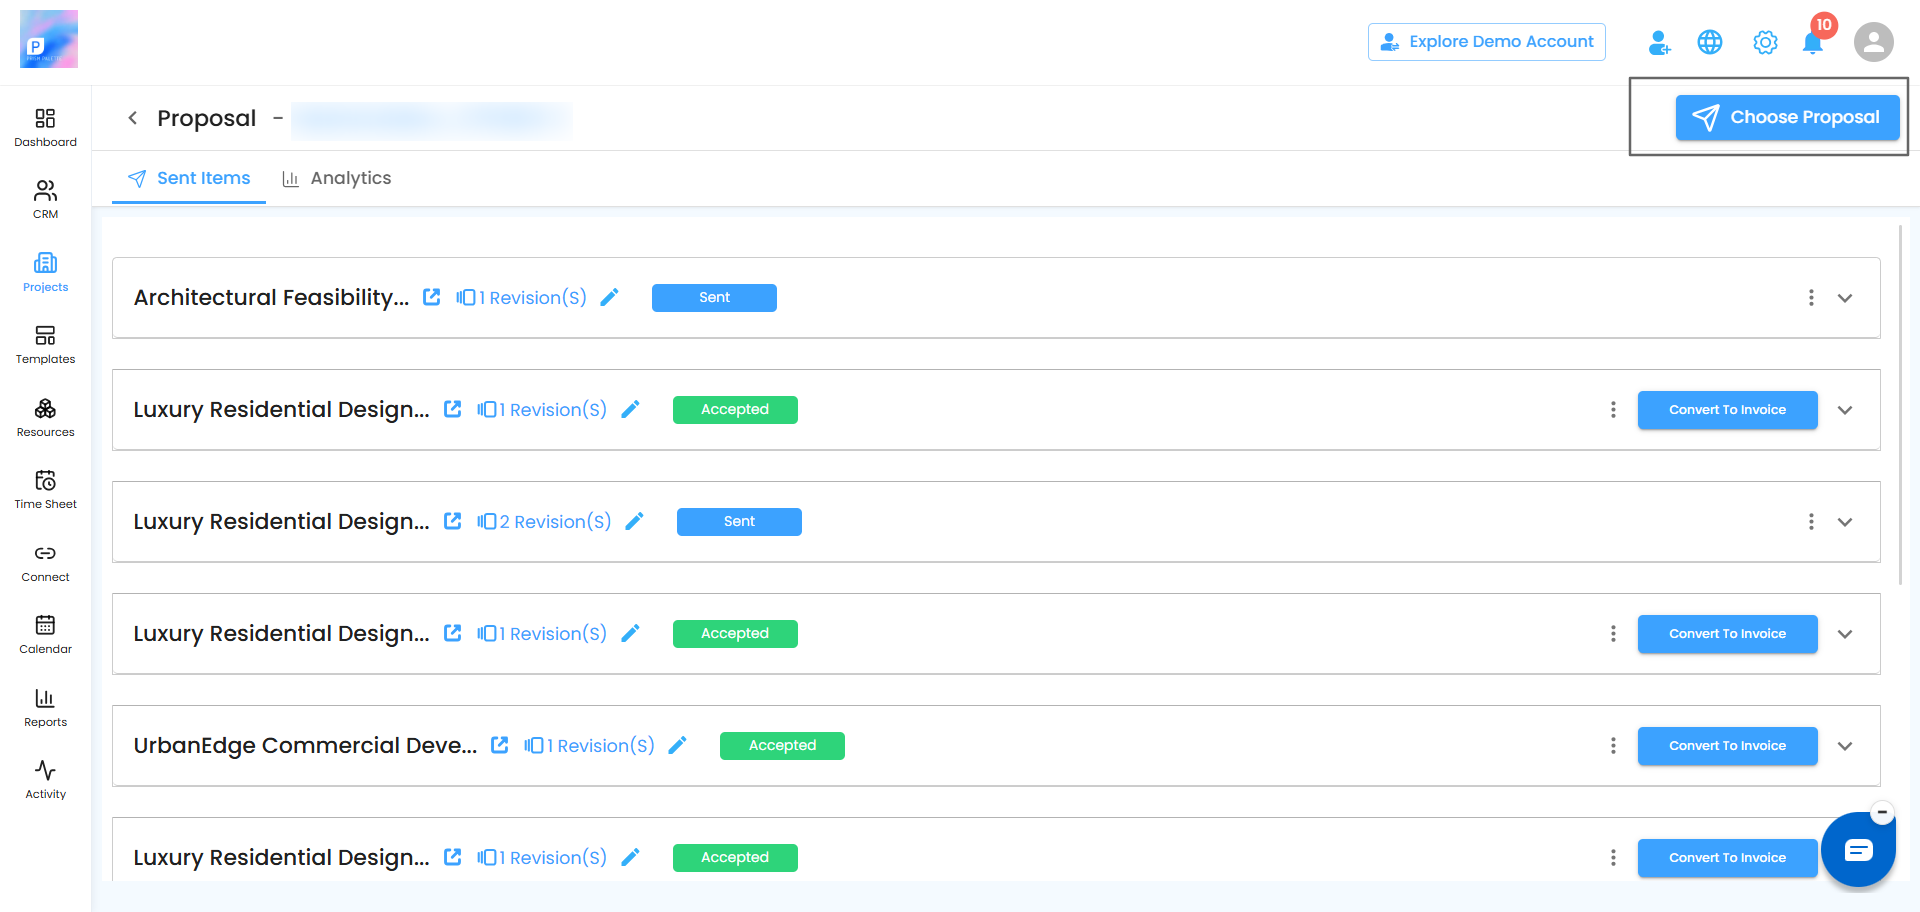
Choosing Your Template
When you click Create Proposal, the Select Proposal Template popup opens. It includes two tabs:
Default – Ready-made proposal templates provided with IntoAEC.
Custom – Proposal templates created by your team in Template Center.
Select the template you want to use and click Proceed. The proposal builder opens with the selected template.
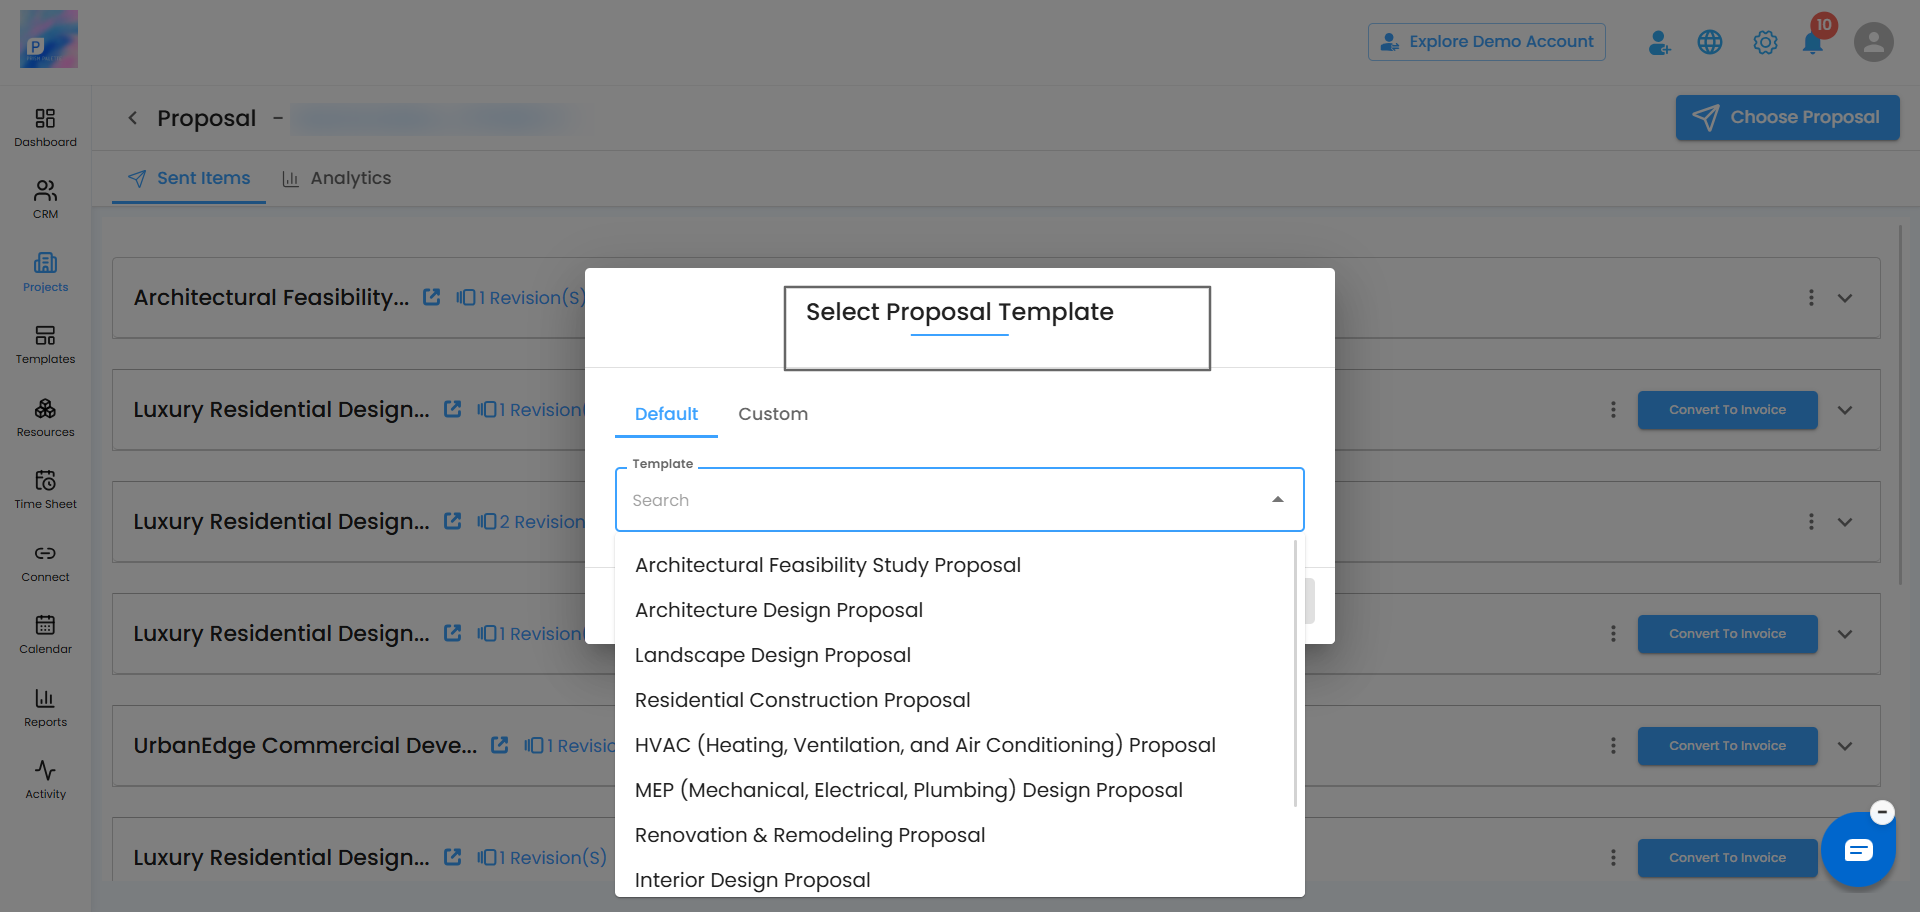
Note: If you cannot find a custom template, go to Template Center → Proposal and make sure the template is set to visible. If the template was deleted, check View Trash and restore it if necessary.
Inside the Proposal Builder
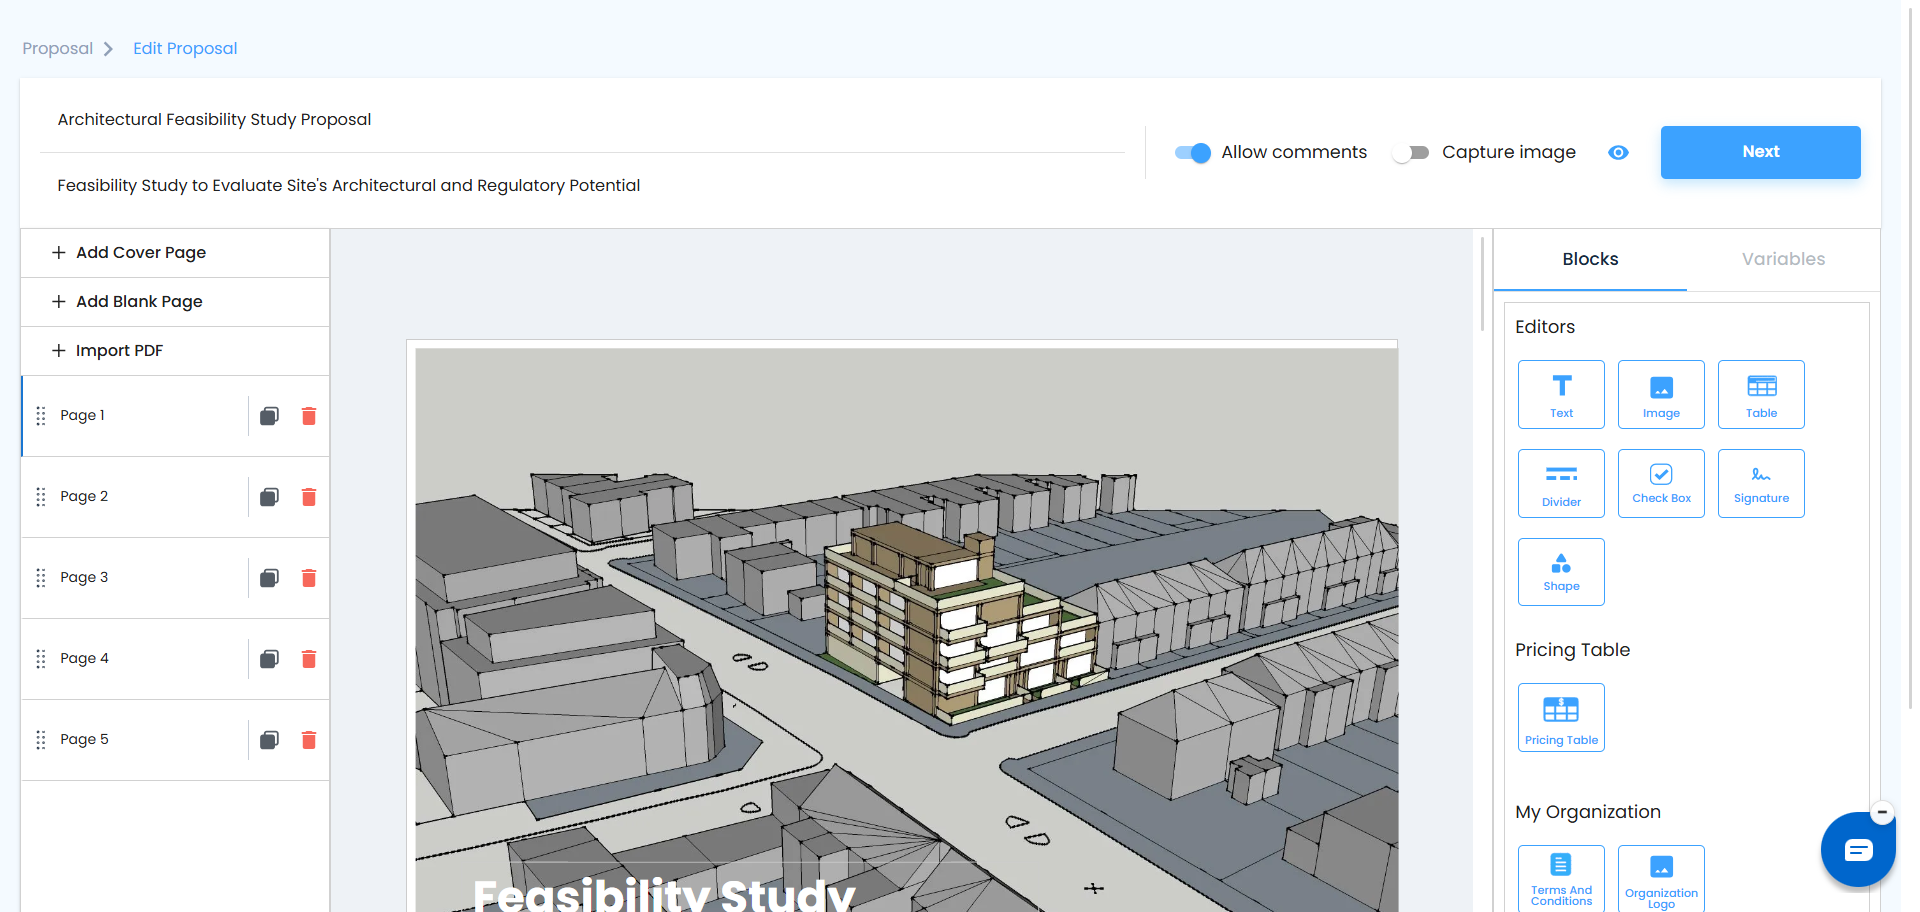
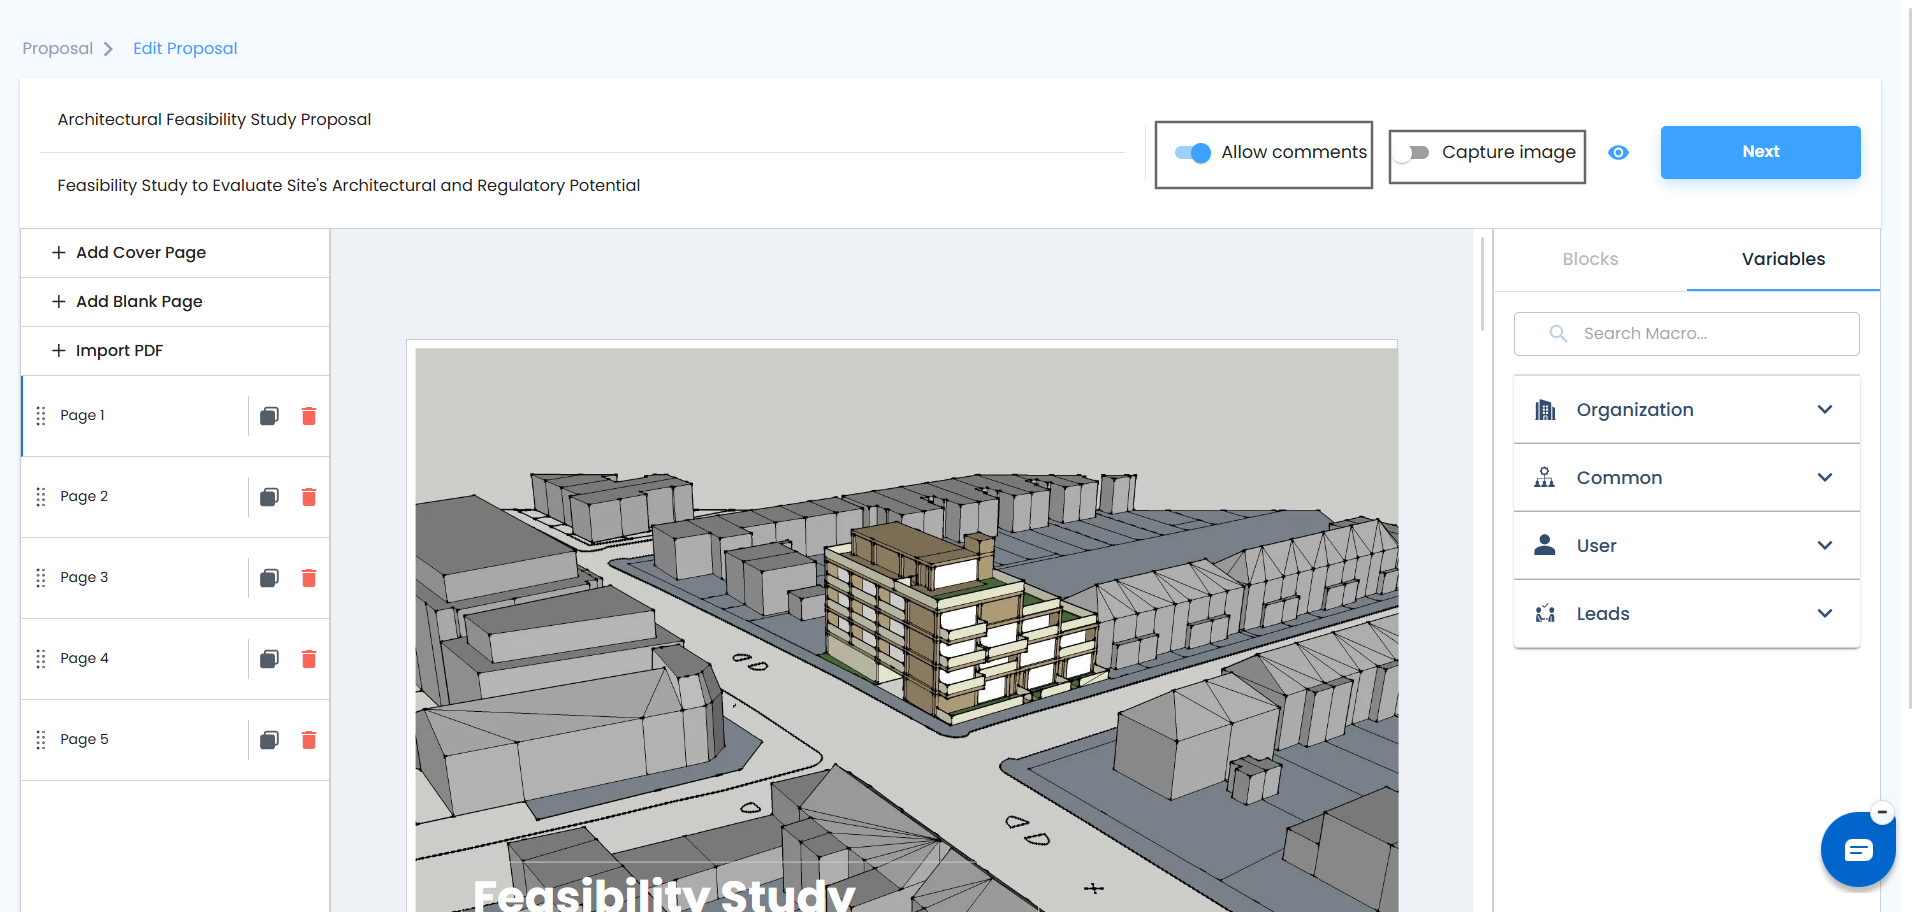
The proposal builder includes the following areas:
Title & Subject – Enter the title and subject of the proposal.
Pages Panel (left) – View, add, copy, and delete proposal pages.
Canvas (centre) – Edit the page currently selected.
Blocks & Variables (right) – Add content blocks and variables to the proposal.
Allow Comments & Capture Image (top) – Configure how clients interact with the proposal.
Preview – Review the proposal before sending it.
Adding Pages
Use the Pages panel on the left side of the builder to manage the pages in your proposal.
Add Cover Page
Click Add Cover Page to add a cover page to the beginning of your proposal. You can use the cover page for the proposal title, organization logo, and client name.
Add Blank Page
Click Add Blank Page to add an empty page. You can then add content using the Blocks and Variables panels.
Add PDF
You can include an existing PDF as part of your proposal.
Click Add PDF – The upload option opens.
Upload your file – Select the PDF from your computer.
Add the PDF to the proposal – The uploaded PDF becomes part of the proposal.
The PDF is included in the proposal instead of being sent as a separate attachment.
Managing Your Pages
You can manage proposal pages from the Pages panel:
Add a page – Insert a new page into the proposal.
Copy a page – Duplicate an existing page.
Delete a page – Remove a page you no longer need.
Using Blocks
Open the Blocks tab in the right-hand panel to view the available content blocks.
Editors
The Editors group includes the following blocks:
Text – Add headings, paragraphs, and other text.
Image – Add renders, photographs, drawings, or diagrams.
Table – Add structured information such as schedules, specifications, or comparisons.
Divider – Add a divider between sections.
Checkbox – Add selectable options, inclusions, or exclusions.
Signature – Add a signature field for the client.
Note: Add a Signature block when you want the client to sign and accept the proposal.
Pricing Table
Use the Pricing Table block to add line items, quantities, and rates to your proposal. You can edit the pricing information directly on the page.
My Organization
The My Organization group contains organization information that you can add to the proposal:
Terms & Conditions – Add your organization's standard terms and conditions.
Organization Logo – Add your organization logo.
Pro Tip: Use the Terms & Conditions block instead of manually pasting your terms. Updating the block allows the latest terms to be used consistently across proposals.
Using Variables
Variables let you automatically populate proposal information instead of entering the same details manually.
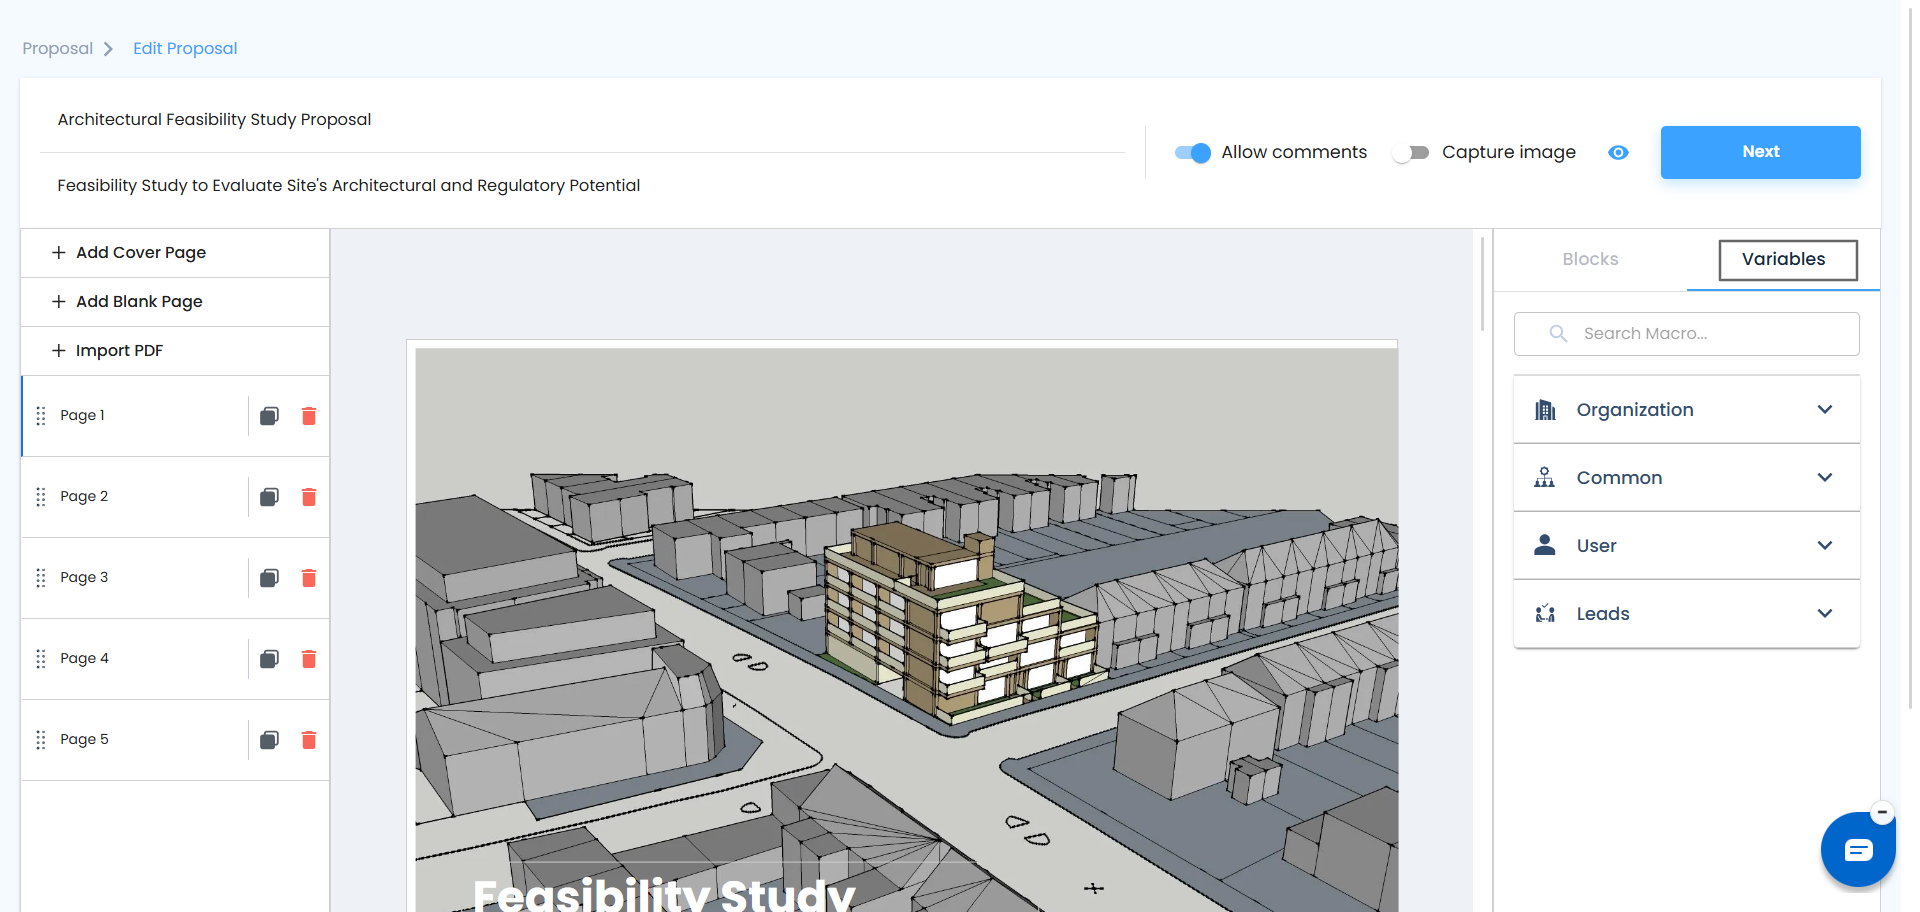
Open the Variables tab to view the available variables. They are grouped into four categories:
Organization – Information about your organization, such as name, address, registration details, and contact information.
Common – Shared information such as dates and reference numbers.
User – Information about the user creating or sending the proposal.
Lead – Information about the lead associated with the proposal.
Select the appropriate variable and add it to the page. The variable automatically populates with the corresponding information.
Pro Tip: Use variables when creating templates so the same template can be reused for different leads and proposals.
Allow Comments
Use Allow Comments to let clients provide feedback directly on the proposal.
Toggle ON – Clients can leave comments on the proposal from the external proposal page or customer portal. You receive a notification and can reply to the comment.
Toggle OFF – The proposal is read-only. Clients can view, download, and sign the proposal but cannot add comments.
What Your Client Sees
They open the proposal – The proposal opens normally.
They select the chat icon – The chat icon appears in the top-right corner.
They leave a comment – They can enter their feedback directly on the proposal.
You receive a notification and reply – You receive an email notification and can respond to the comment.
Note: Depending on your version, this setting may be labelled Allow Comments or Allow Suggestions.
Capture Image
Use Capture Image to capture a photo when the client signs the proposal.
Toggle ON – A webcam popup opens before the client signs. The client takes a photo and then signs the proposal. The photo is stored with the signature.
Toggle OFF – The client signs the proposal without capturing a photo.
What Your Client Experiences
They open the proposal – The proposal opens normally.
They go to sign – A webcam popup opens.
They take a photo – The client captures a photo.
They sign – The signature is recorded with the photo.
After the proposal is accepted, the photo is stored with the signature and appears with the Accepted status in Proposal Tracking.
Note: The client needs a working camera and must allow camera access in their browser.
Preview Before Sending
Use Preview to review the proposal as the client will see it.
Before sending the proposal, check the following:
Variables have populated – Make sure all variables display the expected information.
The pricing table displays correctly – Check the alignment and page breaks.
Images display correctly – Make sure images are positioned and sized correctly.
The signature block is present – Confirm that the client has a signature field if required.
Page order is correct – Make sure the pages appear in the intended order.
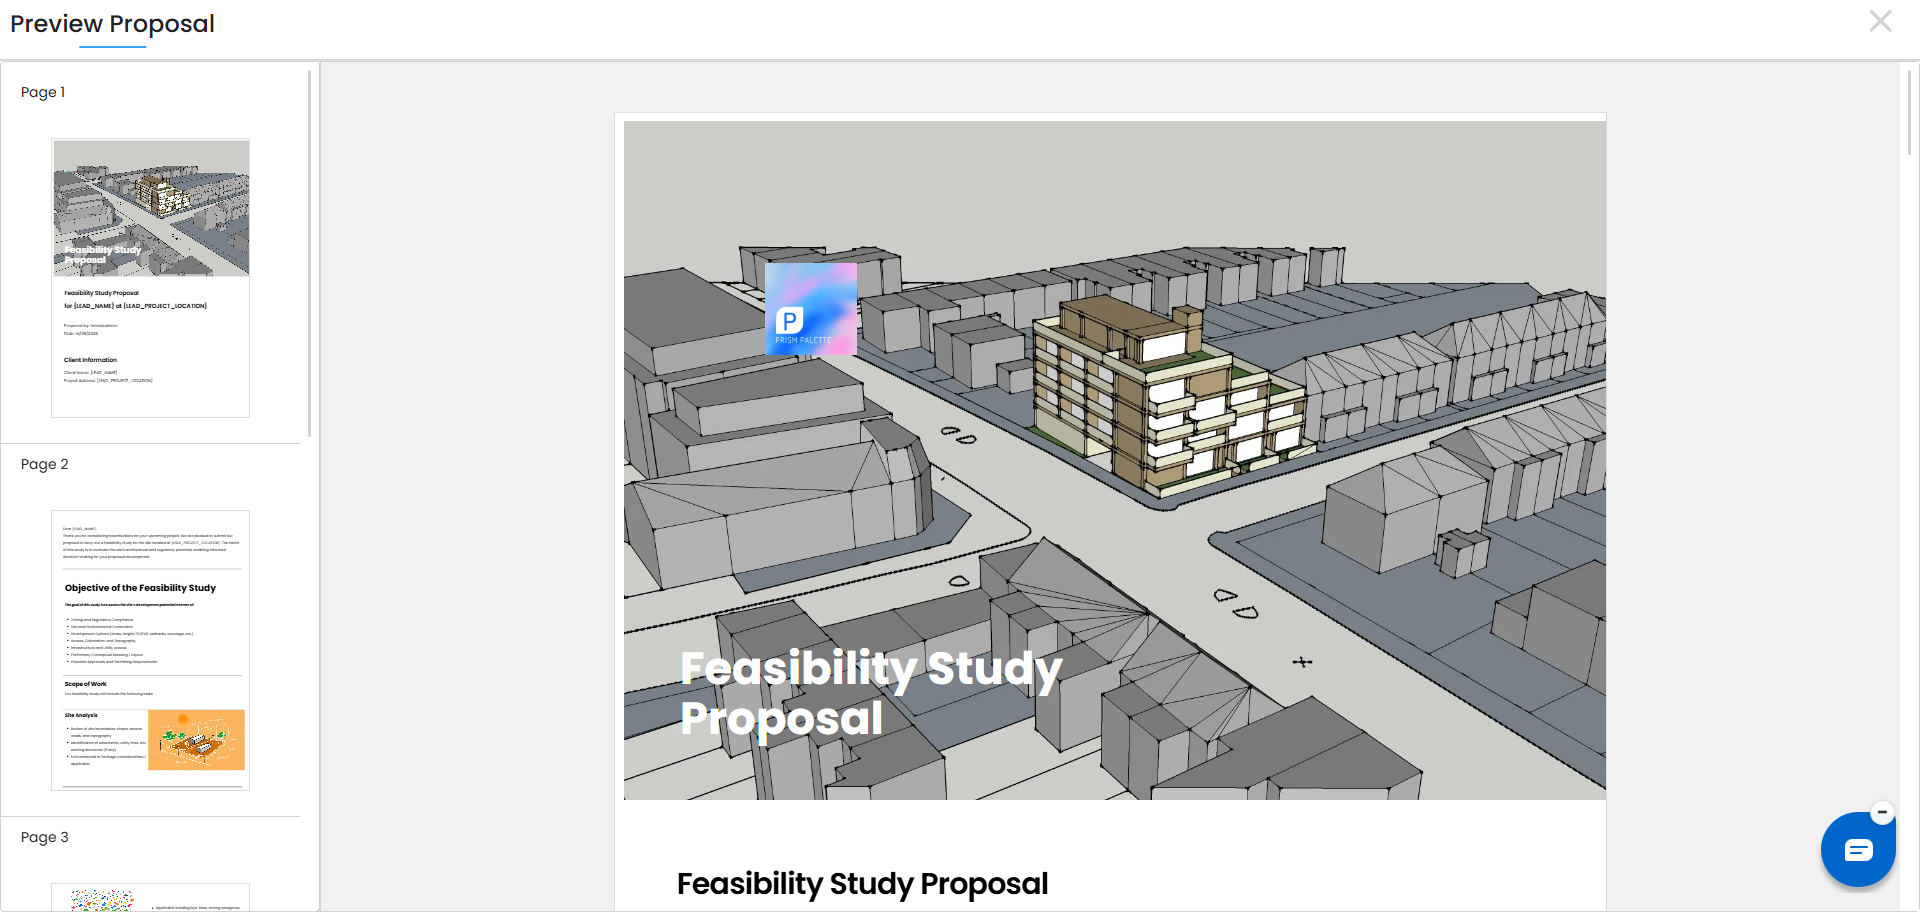
You can also download the proposal as a PDF from the preview page after it has been sent.
Saving and Moving On
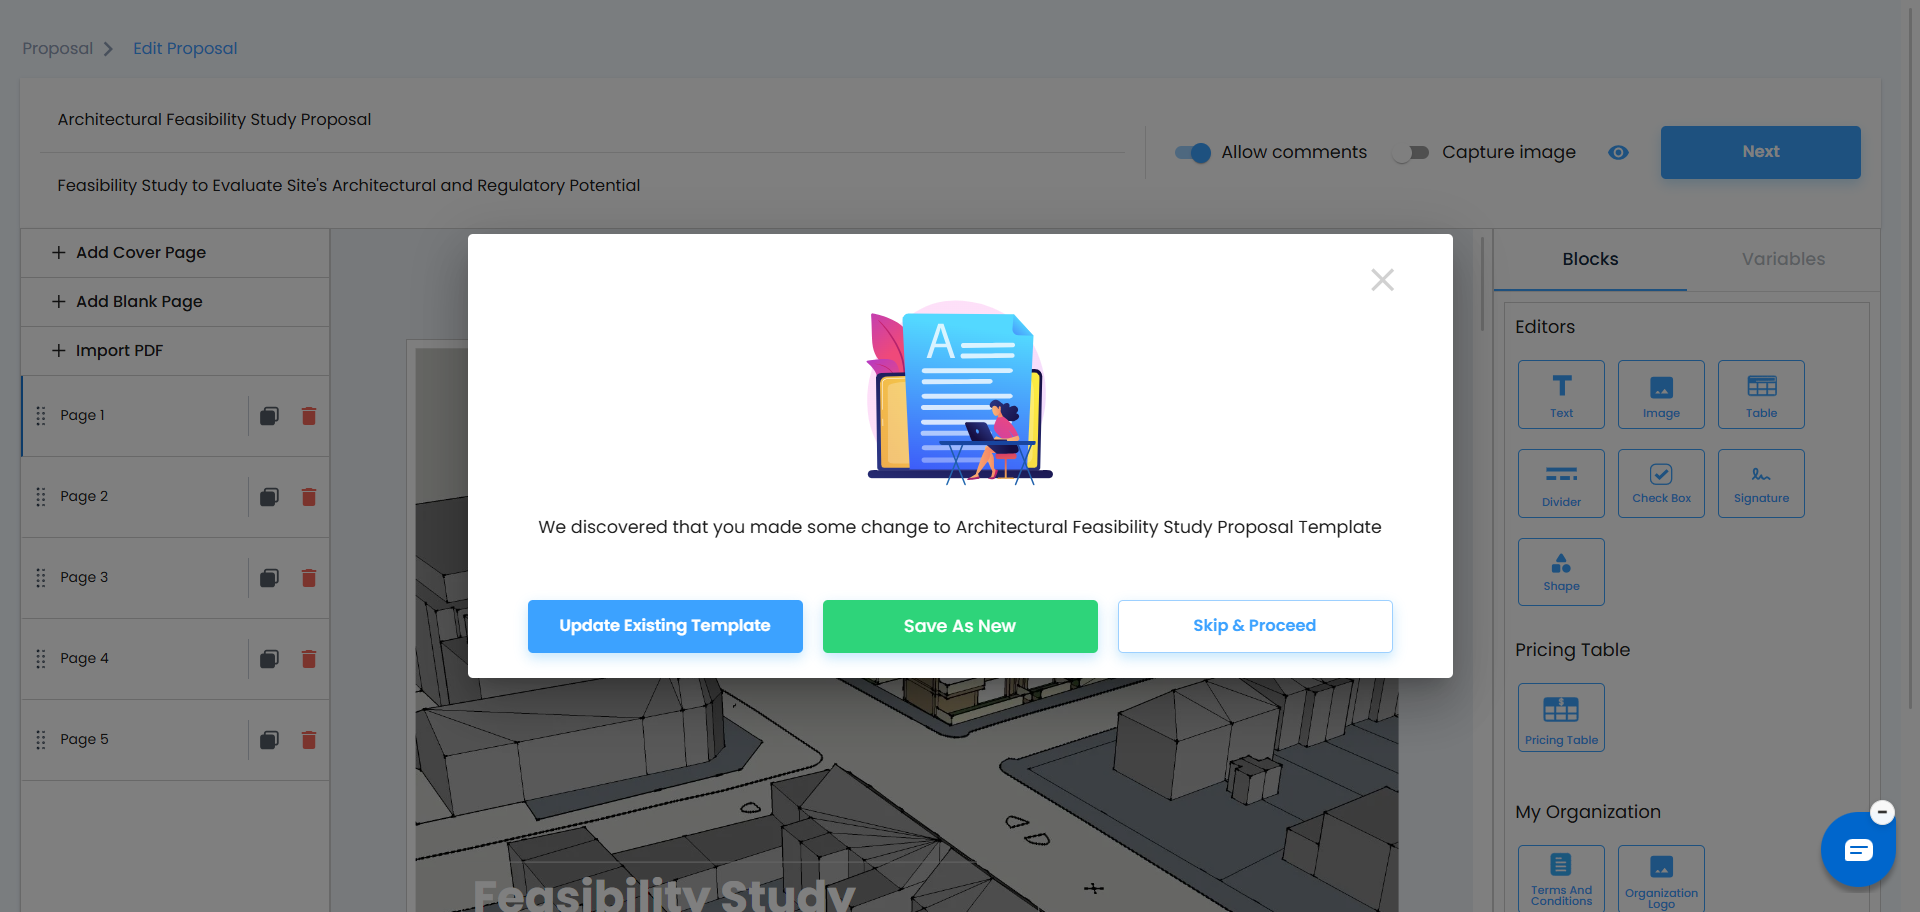
When you finish editing the proposal, click Next. A popup appears with three options:
Update Existing Template – Save the changes to the template used to create the proposal.
Save as New Template – Save the proposal as a new template while keeping the original template unchanged.
Keep & Proceed – Keep the changes only for the current proposal without changing the template.
Select the appropriate option. You will then be taken to the Send page, where you can send the proposal to the client.
Send the Proposal
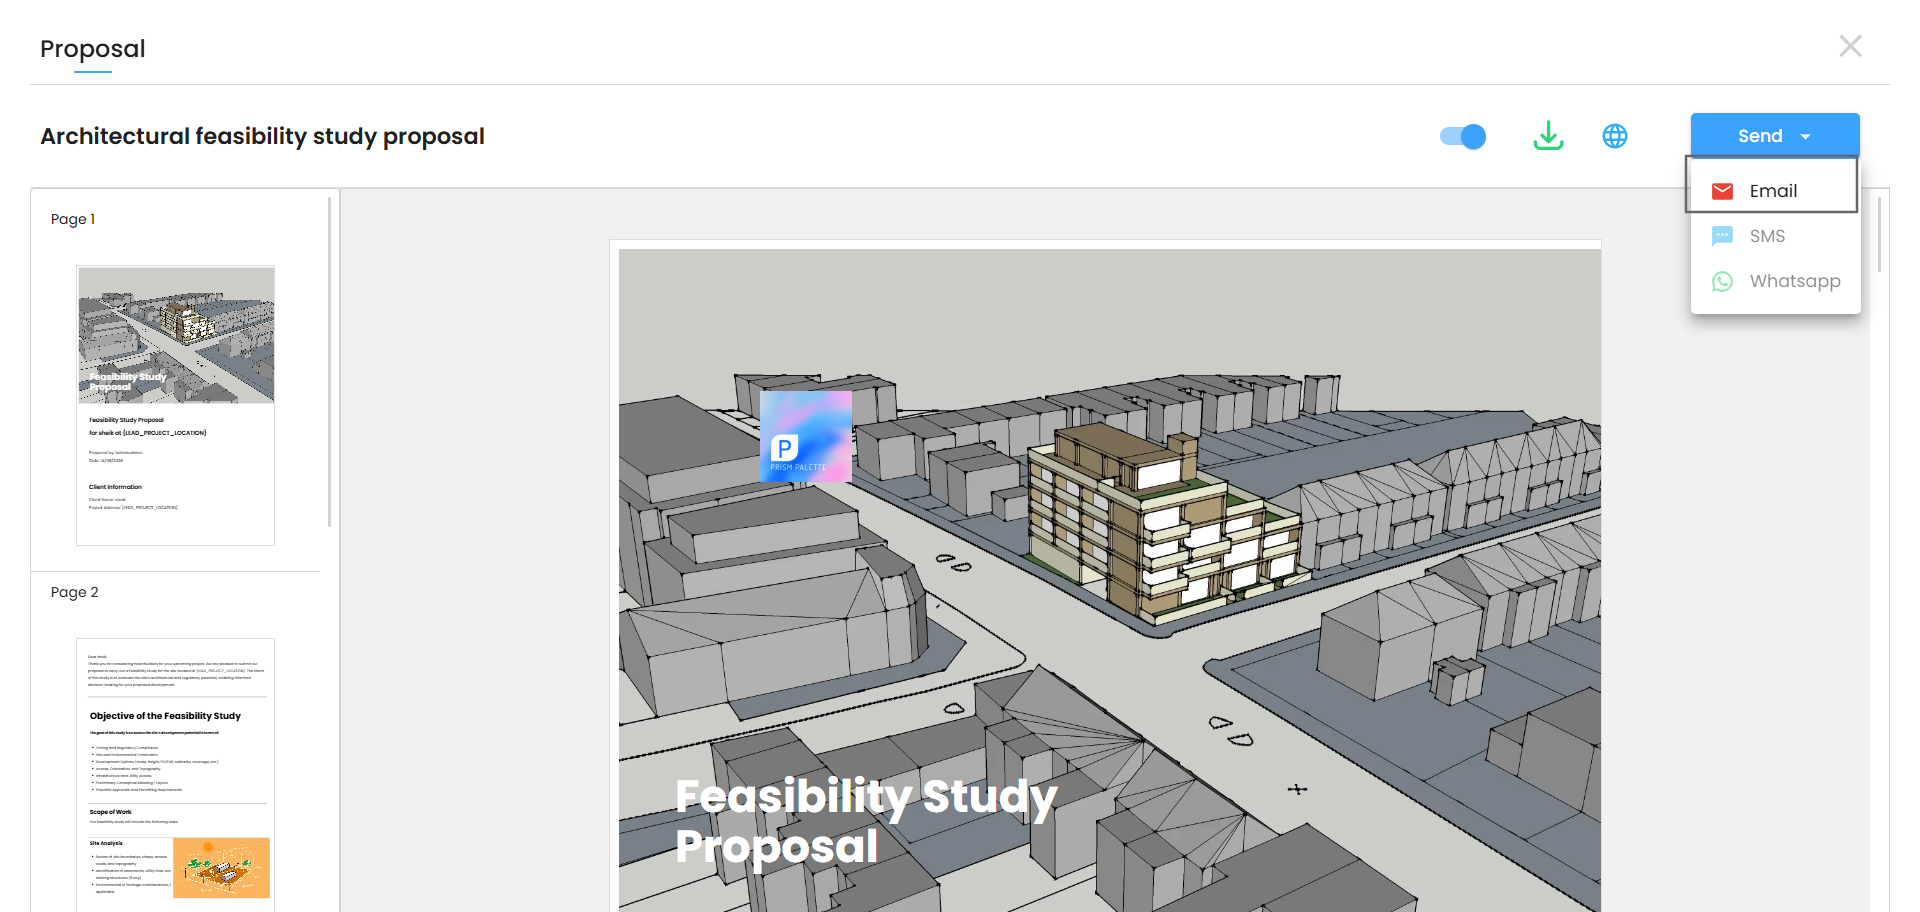
Once you have reviewed the proposal, click Send in the top-right corner to choose how you want to deliver it to the client.
Choose a Delivery Method
The Send menu provides the following options:
Email — Send the proposal to the client by email.
SMS — Send the proposal by text message.
WhatsApp — Send the proposal through WhatsApp.
Select the available delivery method and follow the prompts to send the proposal to the client.
Note: Some delivery options may be unavailable depending on the client information or account configuration.
Was this article helpful?
That’s Great!
Thank you for your feedback
Sorry! We couldn't be helpful
Thank you for your feedback
Feedback sent
We appreciate your effort and will try to fix the article