Overview
A Lead Capture Form collects information from prospects and automatically creates a new lead in your CRM — no manual entry needed. It's the fastest way to turn a website visitor or social media click into a tracked lead.
Getting Started
From the Forms dashboard, click Create, then select Lead Capture.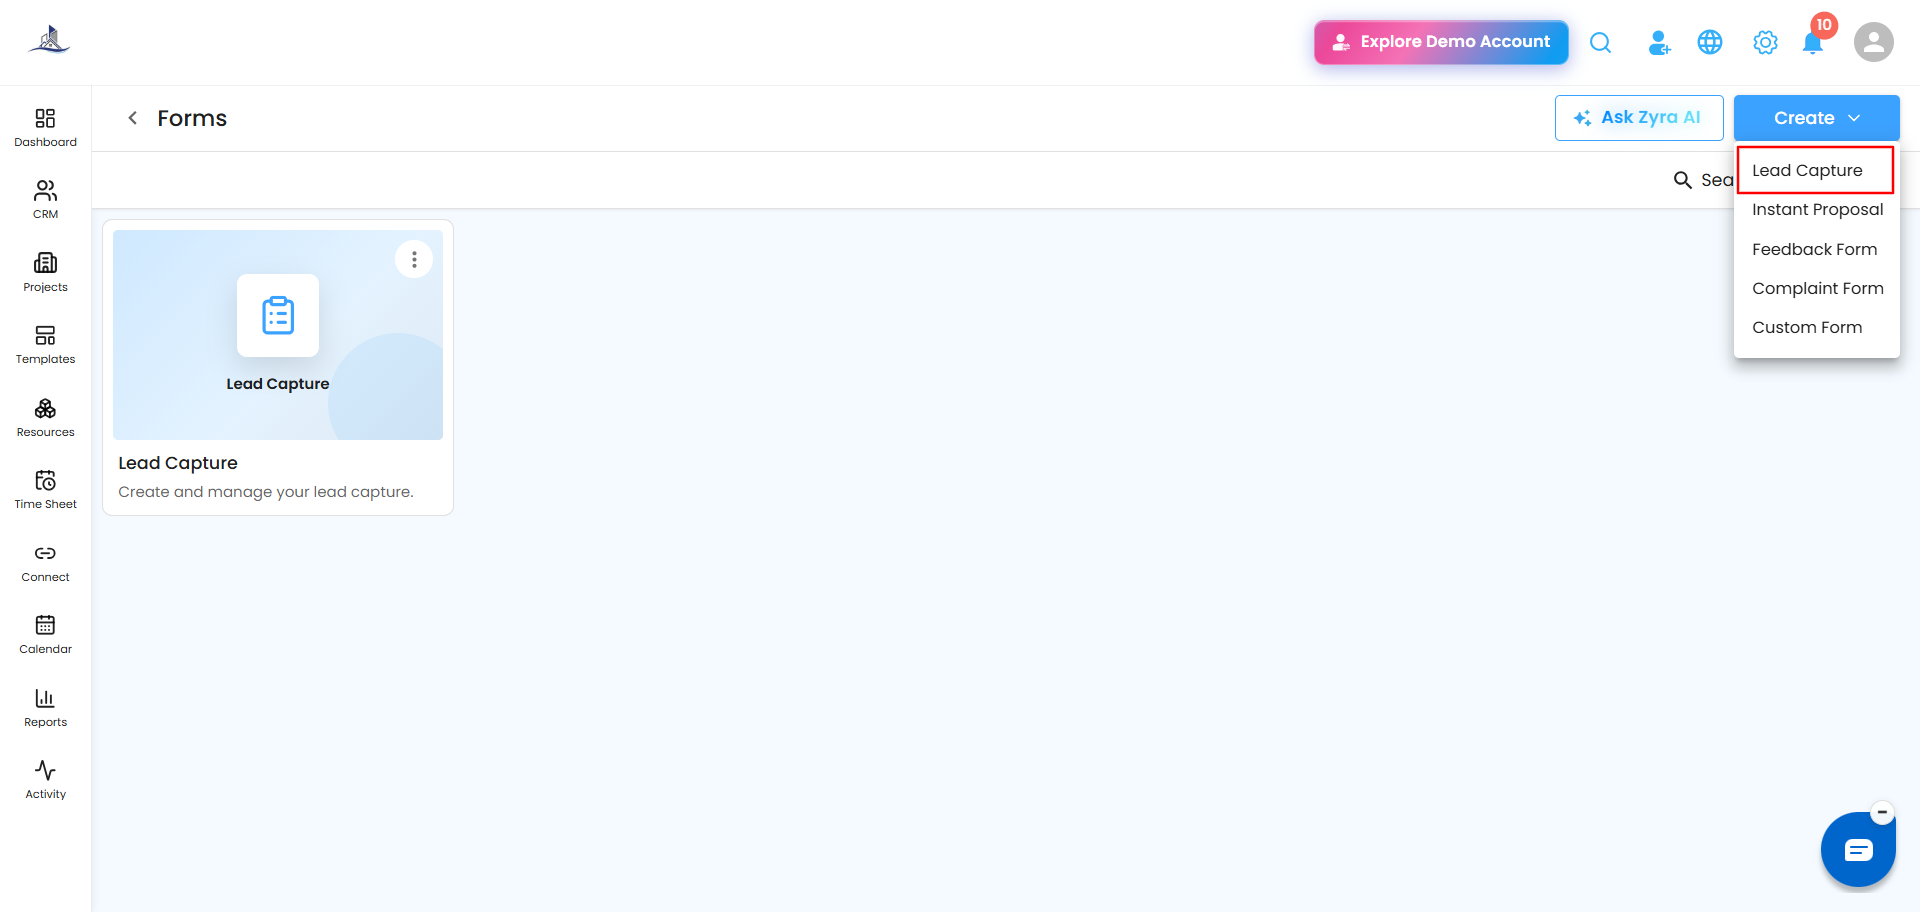
Step 1: Welcome
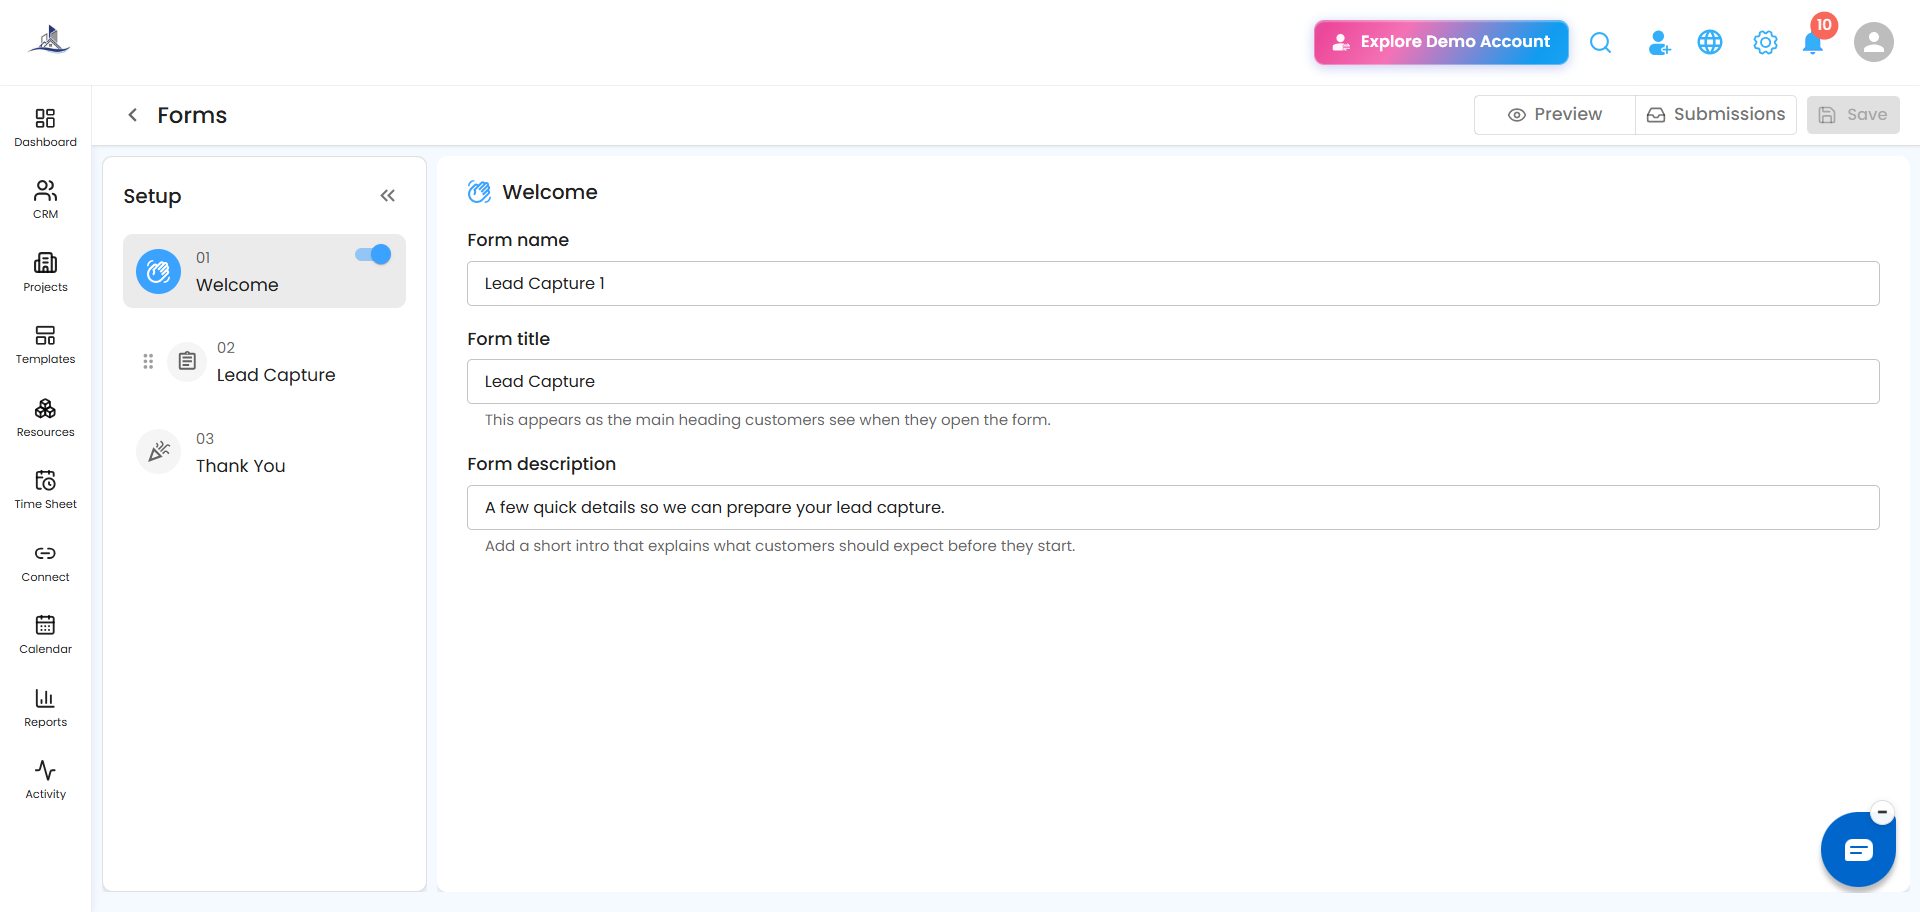
Set up how the form introduces itself to visitors:
- Form Name - internal name for your own reference
- Form Title - the heading visitors see
- Form Description - a short explanation of what the form is for
Step 2: Lead Capture
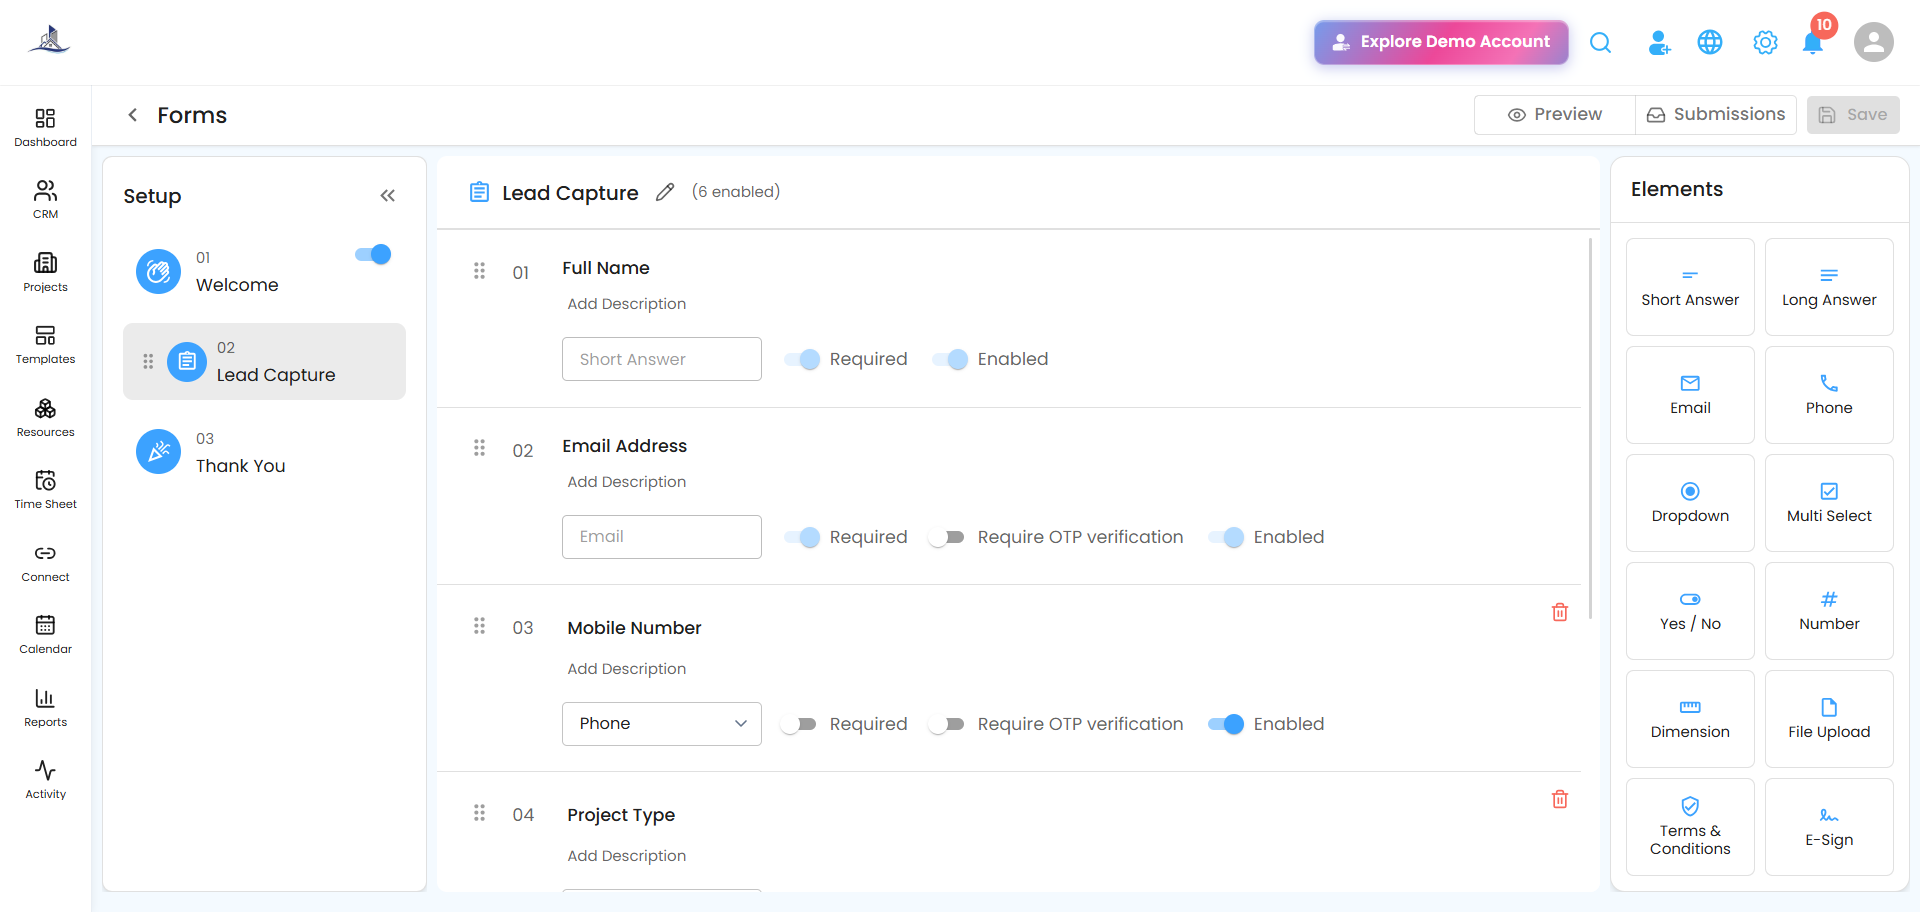
Choose which fields to include for collecting lead details:
- Full Name
- Email Address
- Mobile Number
- Company Name
- Service Requirements
- Additional Information
Step 3: Thank You
Write the confirmation message shown after someone submits the form.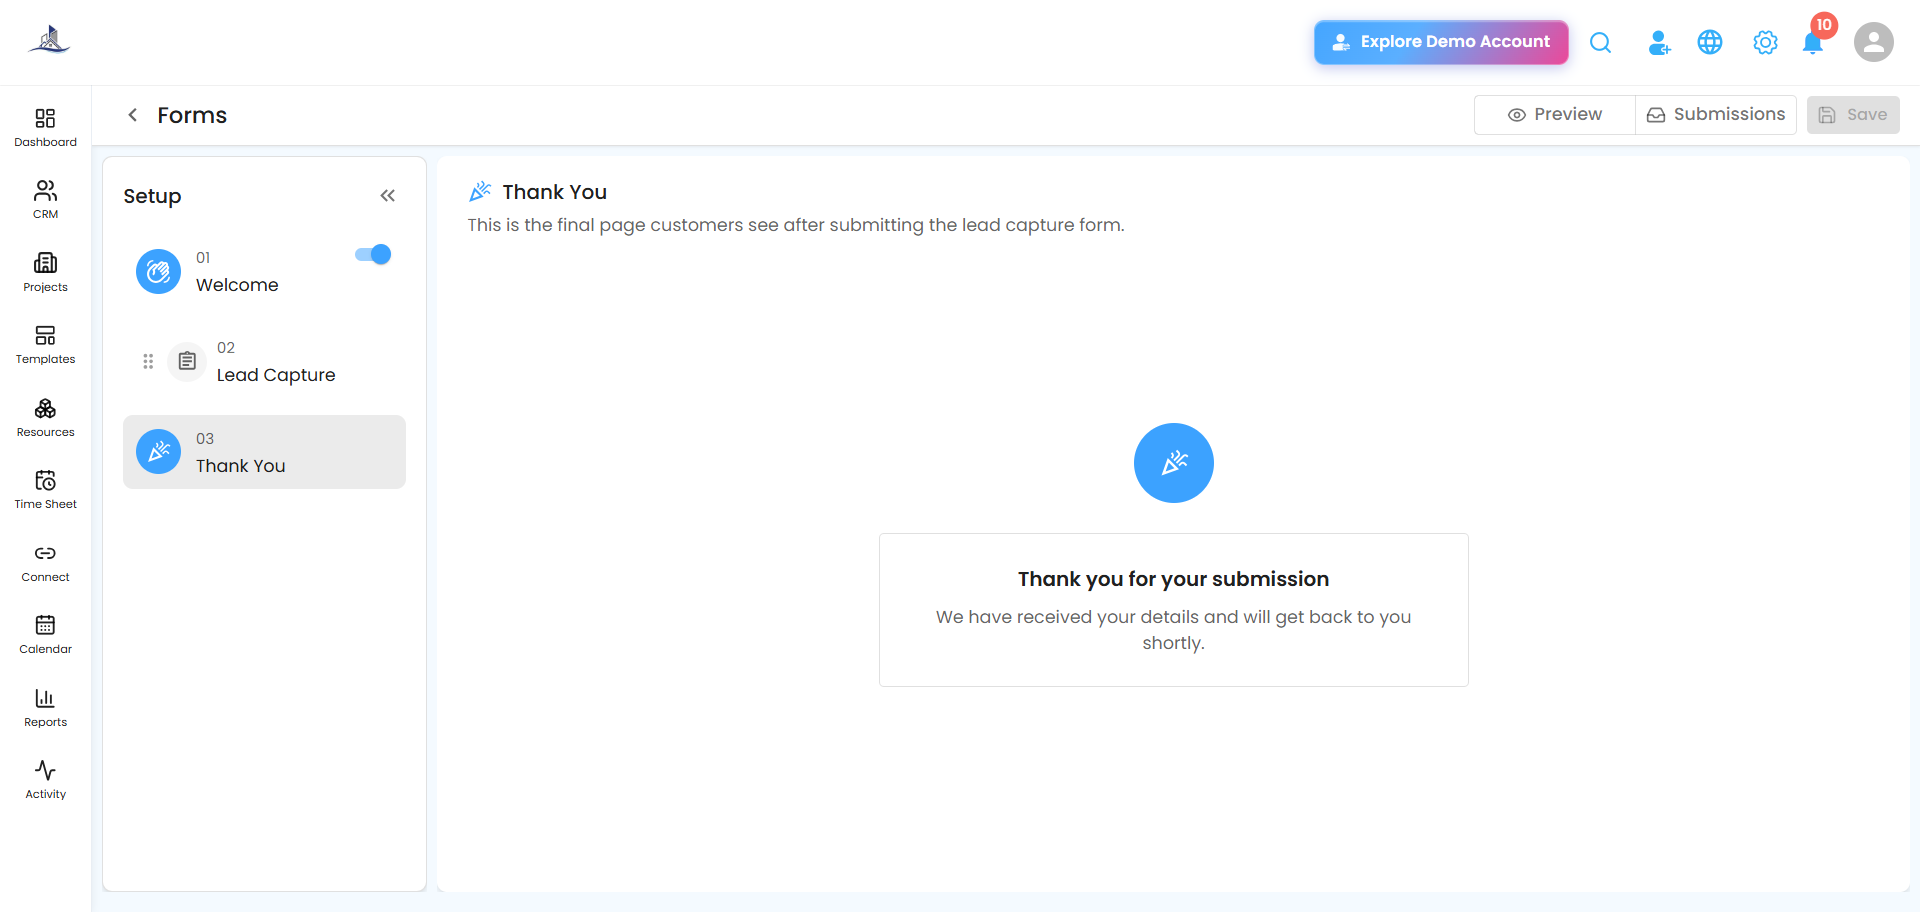
Publishing and Sharing
Use Preview to check the form before it goes live, then Save to publish it. Share it using Copy Link or grab a platform-specific link from Channel Links.
Was this article helpful?
That’s Great!
Thank you for your feedback
Sorry! We couldn't be helpful
Thank you for your feedback
Feedback sent
We appreciate your effort and will try to fix the article