Creating a New Item – Expand Your BoQ Effortlessly
Adding new items to your list ensures your BoQ stays comprehensive and aligned with your project needs. Follow these simple steps to create an item quickly and efficiently.
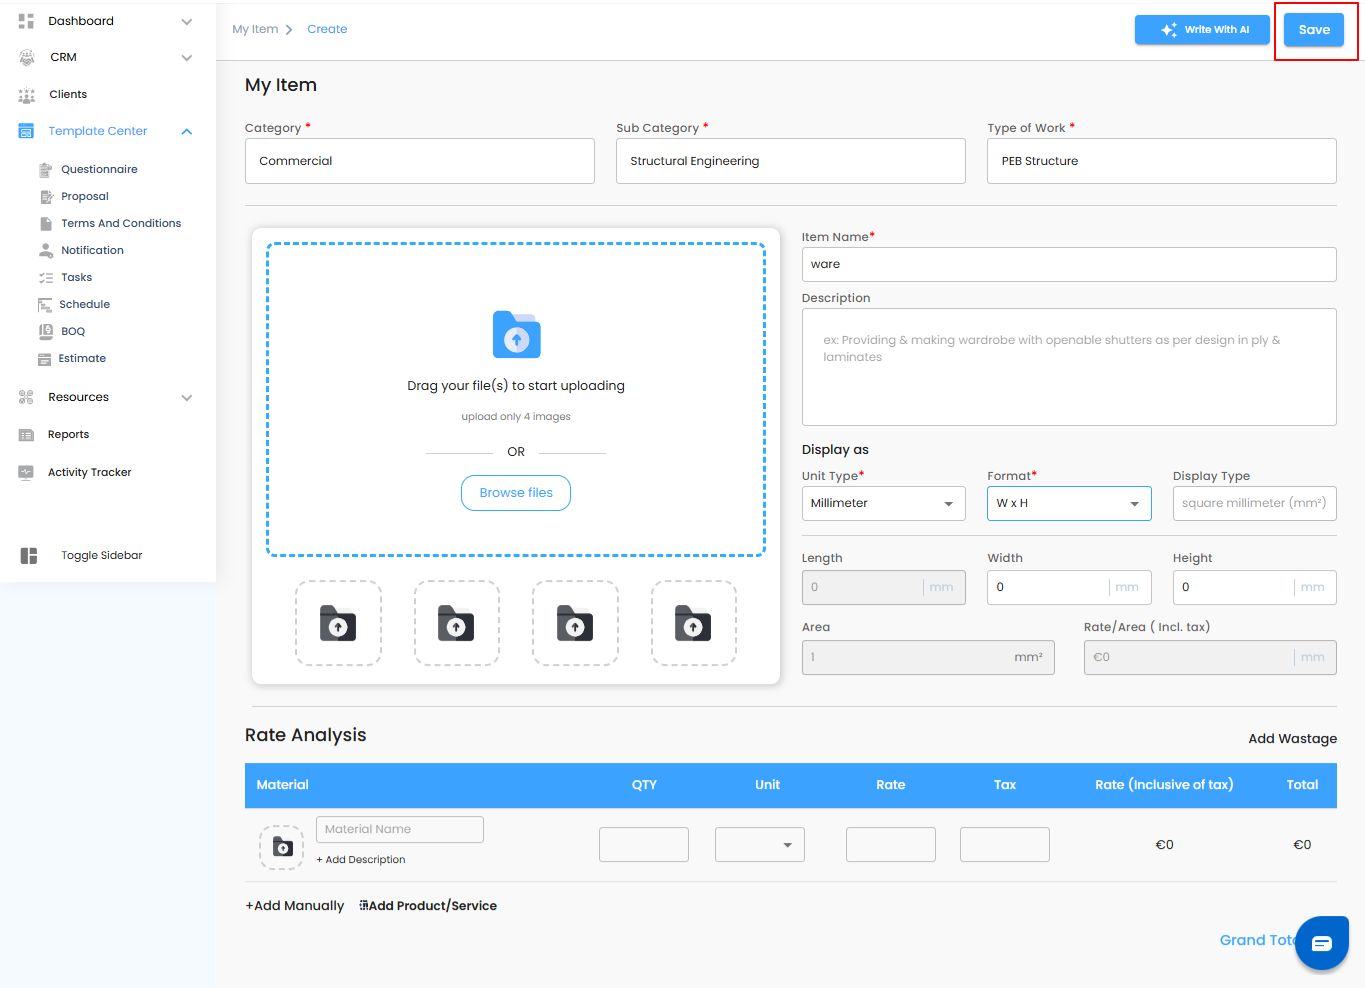
Steps to Create a New Item
Click “Create New”
- Begin by selecting the Create New button. This opens the item creation form, where you can define all the necessary details for your new item.
Enter Item Details
- Item Name: Provide a clear and descriptive name for the item.
- Category & Sub-Category: Select the appropriate categories to organize the item for easy filtering and retrieval.
- Unit: Specify the unit of measurement (e.g., pieces, kg, m²).
- Rate/Price: Enter the cost per unit if applicable.
- Description: Add relevant details or specifications to avoid ambiguity.
Attachments (Optional)
- Upload supporting documents or images (e.g., product images, PDFs) to provide further context or references.
Save the Item
- Click the Save button to add the new item to your Library or My Items list. It will now be available for inclusion in your BoQ.
Pro tip: Always double-check the details before saving—accurate item information ensures smooth project planning and avoids costly mistakes later.

Entering and Saving Item Details – Finalize Your Entry
After opening the Create New item form, it’s time to fill in all the necessary information to ensure the item is complete and ready for use.
What You Can Do Here
- Input Required Details – Enter the Item Name, Category, Sub-Category, Unit, Rate/Price, and Description as needed.
- Add Attachments (Optional) – Include images or PDFs to provide additional context.
- Save the Item – Click the Save button to finalize and add the item to your BoQ.
Pro tip: Review all entered details carefully before saving to maintain accuracy and consistency in your BoQ.
Was this article helpful?
That’s Great!
Thank you for your feedback
Sorry! We couldn't be helpful
Thank you for your feedback
Feedback sent
We appreciate your effort and will try to fix the article