Overview
Connect your Xero account to IntoAEC to sync your accounting records and keep your financial data aligned across both platforms. Once connected, your contacts, invoices, credit notes, payments, and refunds are brought into IntoAEC and stay up to date automatically.
The integration works in two stages:
- Initial Sync (one-time) - imports your existing historical data from Xero.
- Automatic Sync - keeps all future updates synced without any manual work.
Connecting Your Xero Account
- Go to Settings > Integrations > Accounting and find Xero Integration.
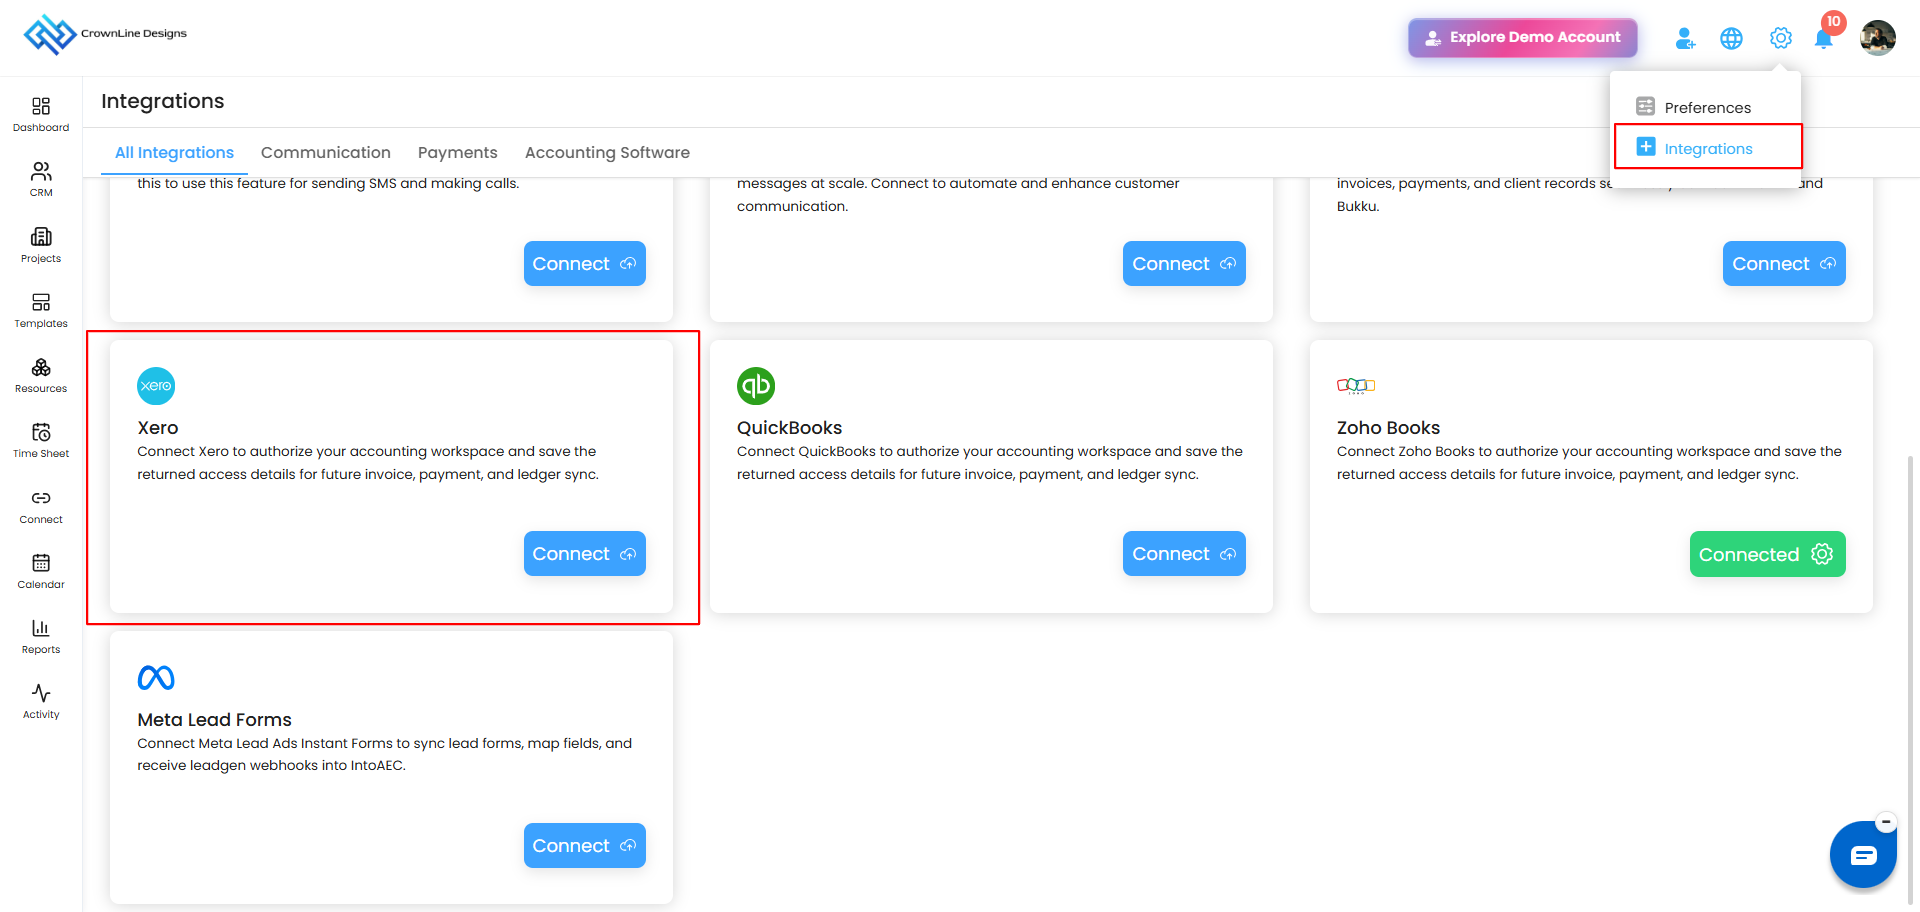
- Click Configure.
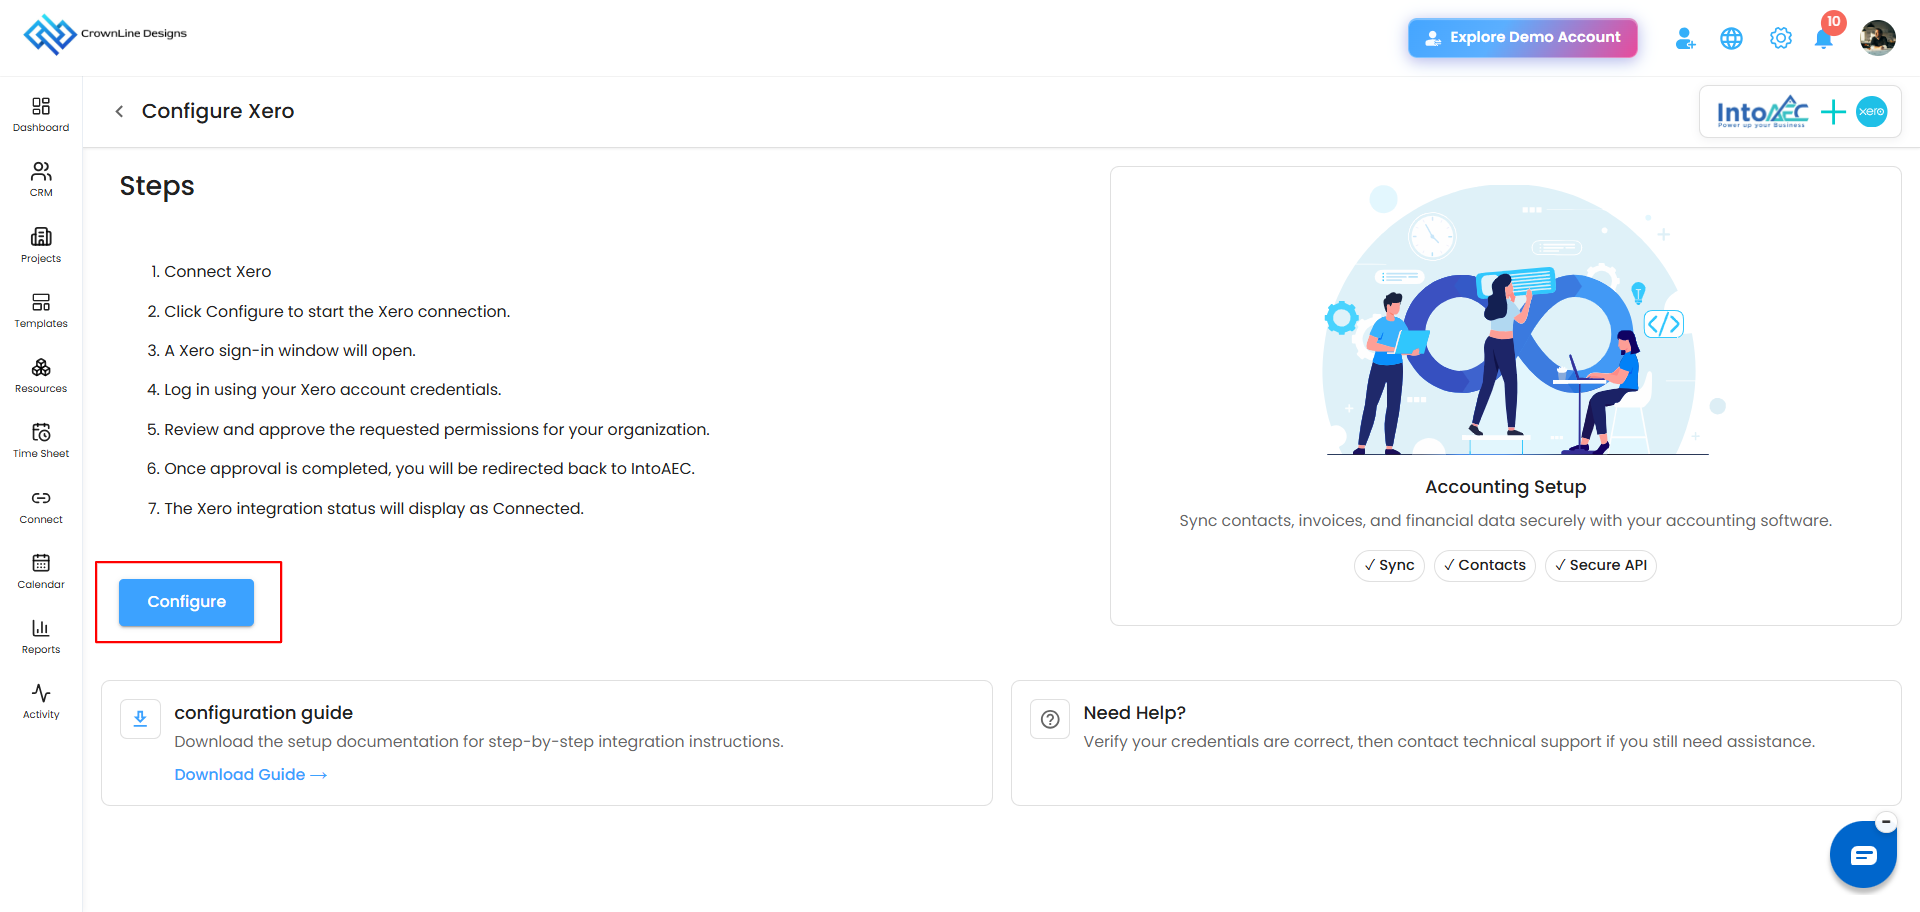
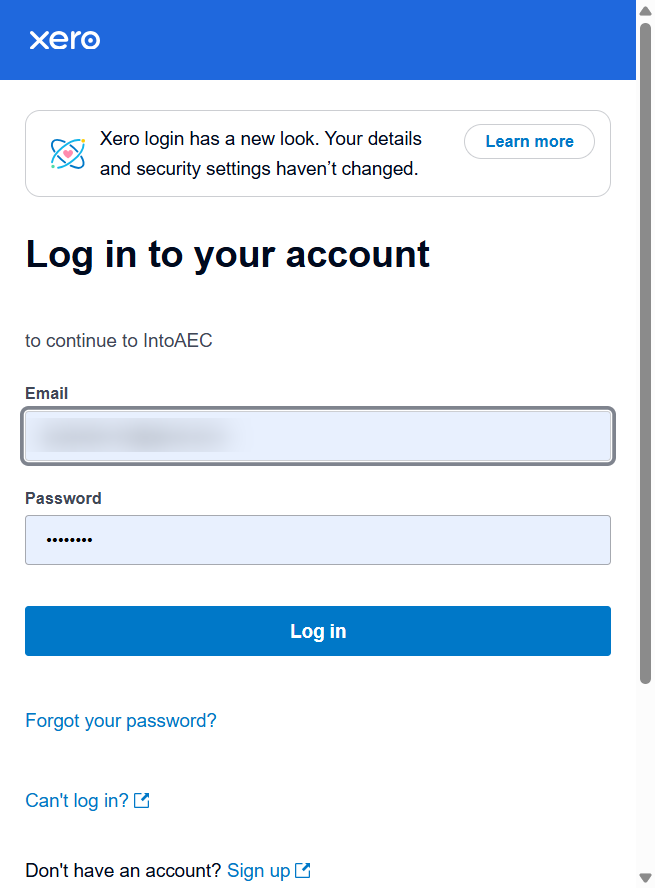
- You are redirected to the Xero login page. Sign in with your Xero credentials.
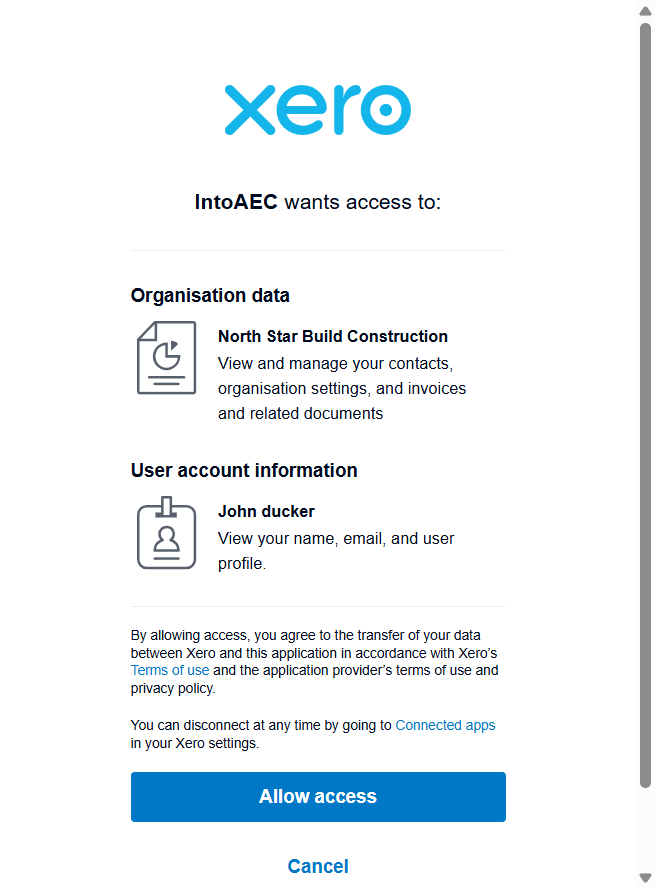
- If you have more than one organization, select the one you want to connect to IntoAEC.
- Review the permissions being requested.
- Click Allow Access to authorize the integration.
Once authorization is complete, you are redirected back to IntoAEC and the Xero integration status shows Connected.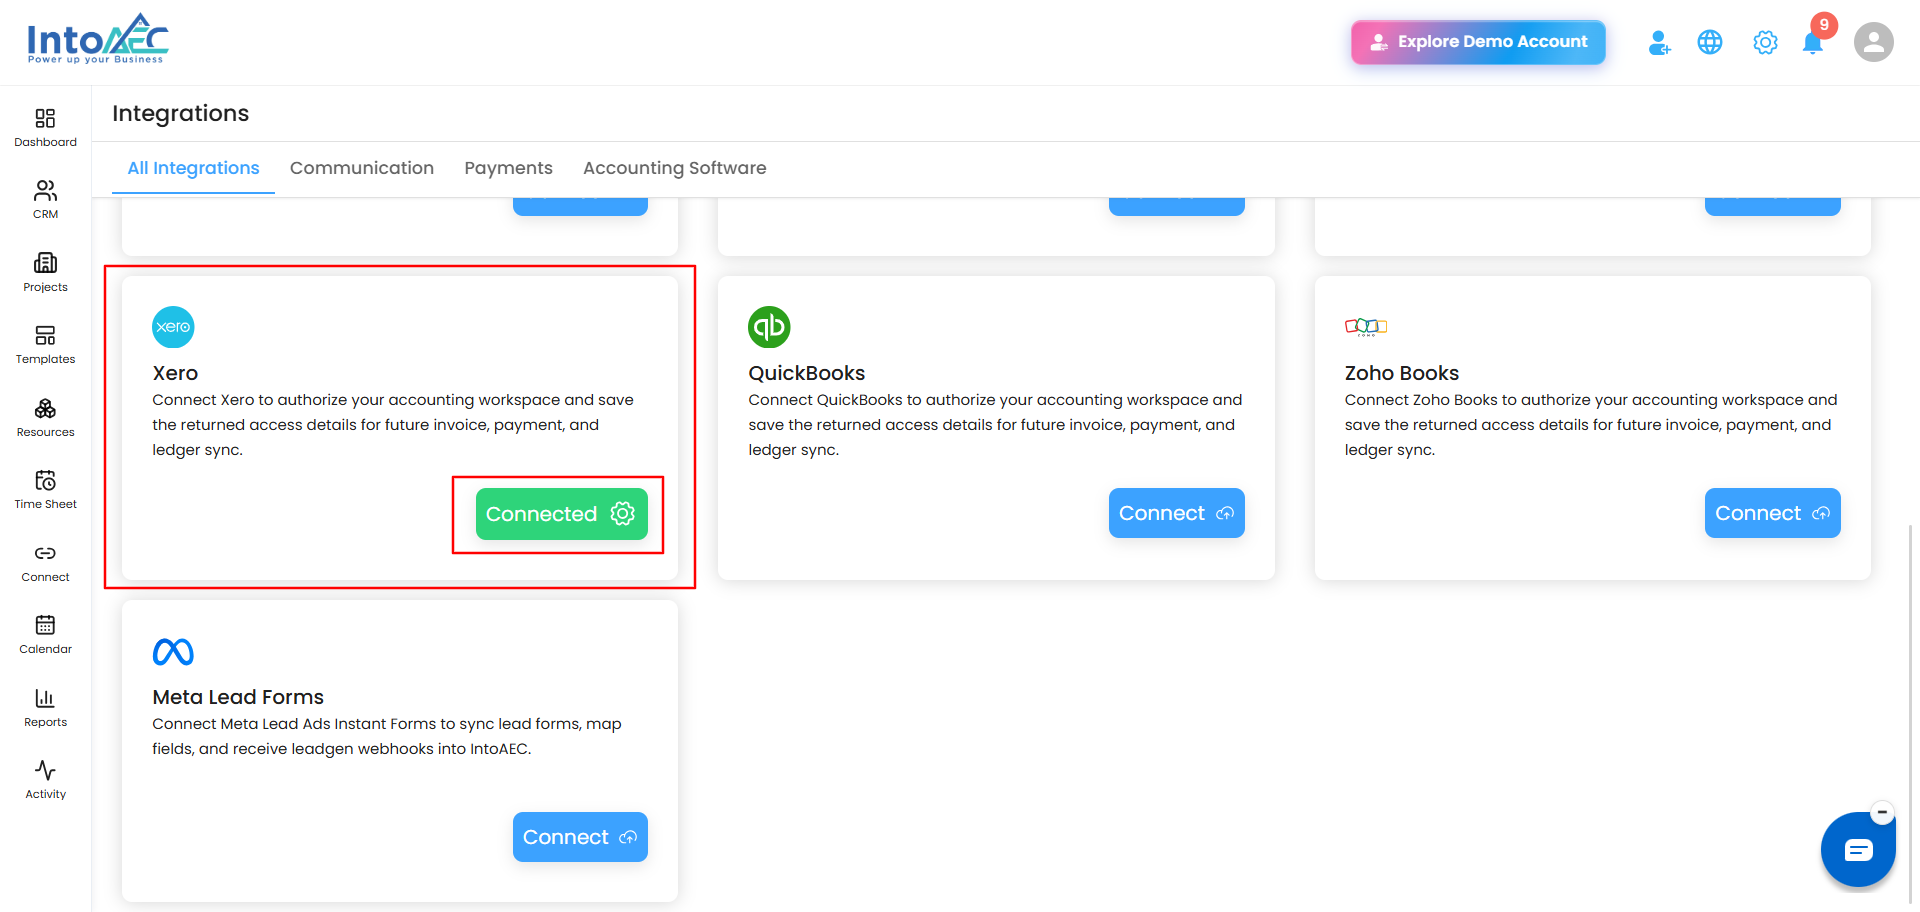
Completing the Initial Sync (One-Time)
Before automatic syncing becomes active, a one-time historical sync must be completed. This imports your existing accounting data from Xero into IntoAEC, including contacts, invoices, credit notes, payments, and refunds.
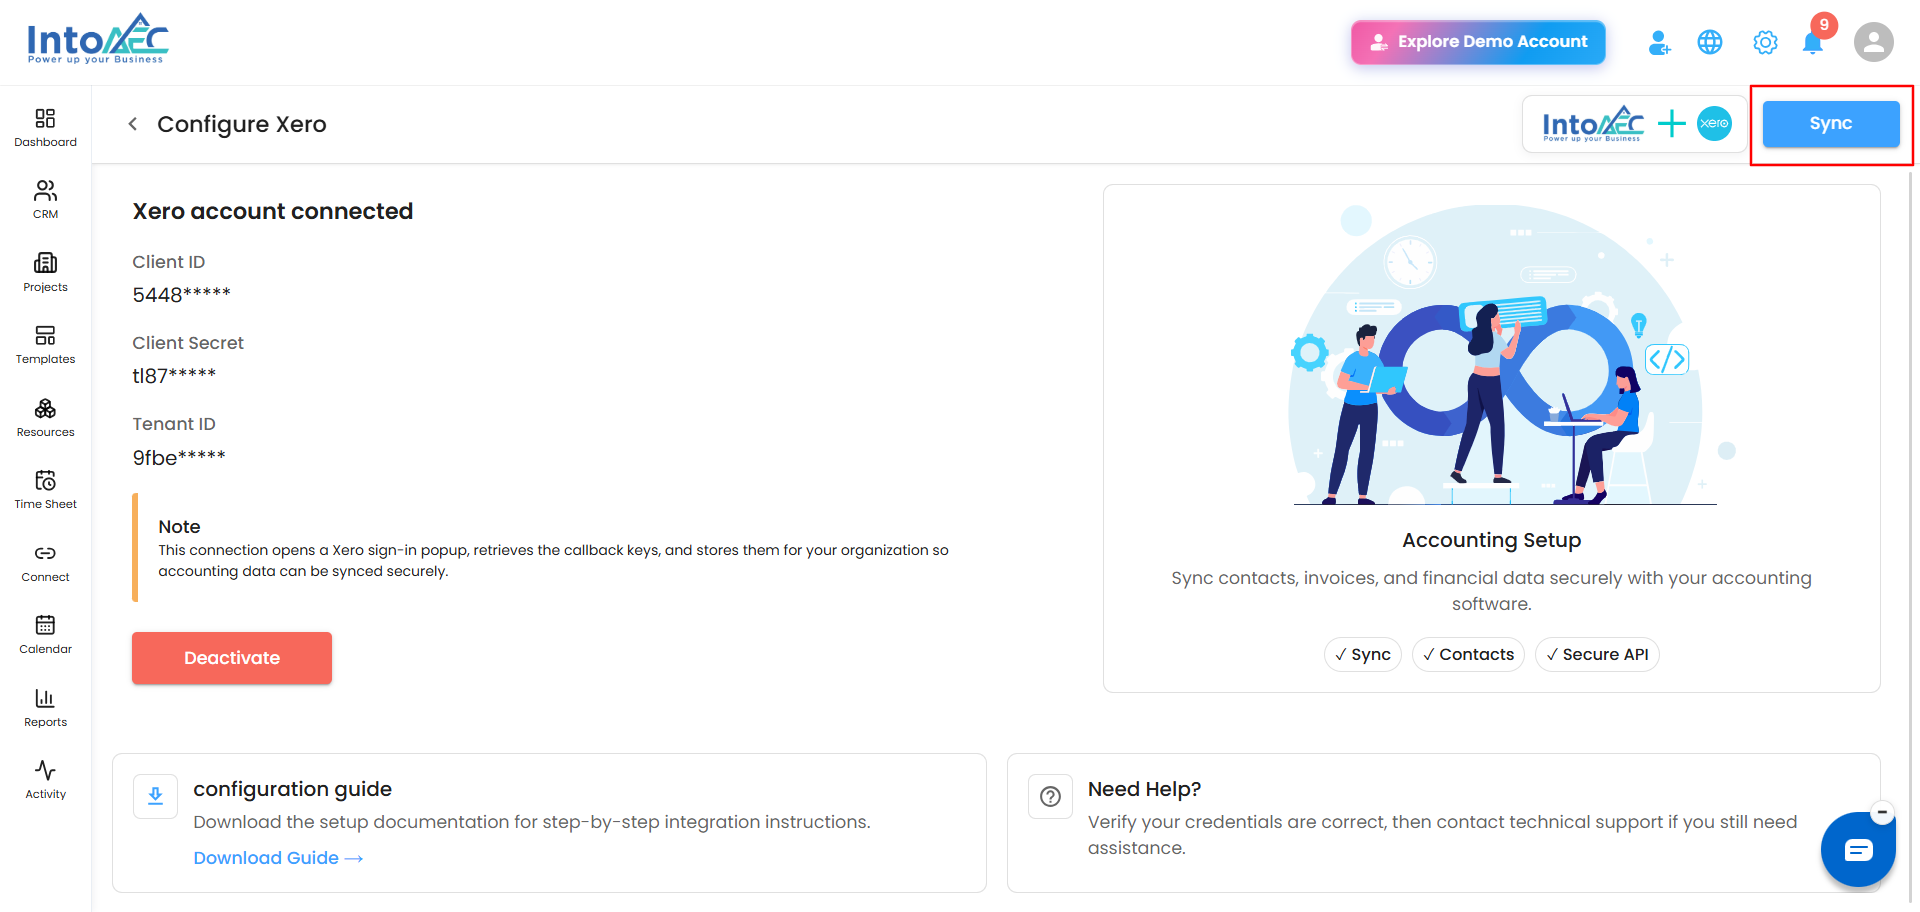
- After the connection is established, click Sync.
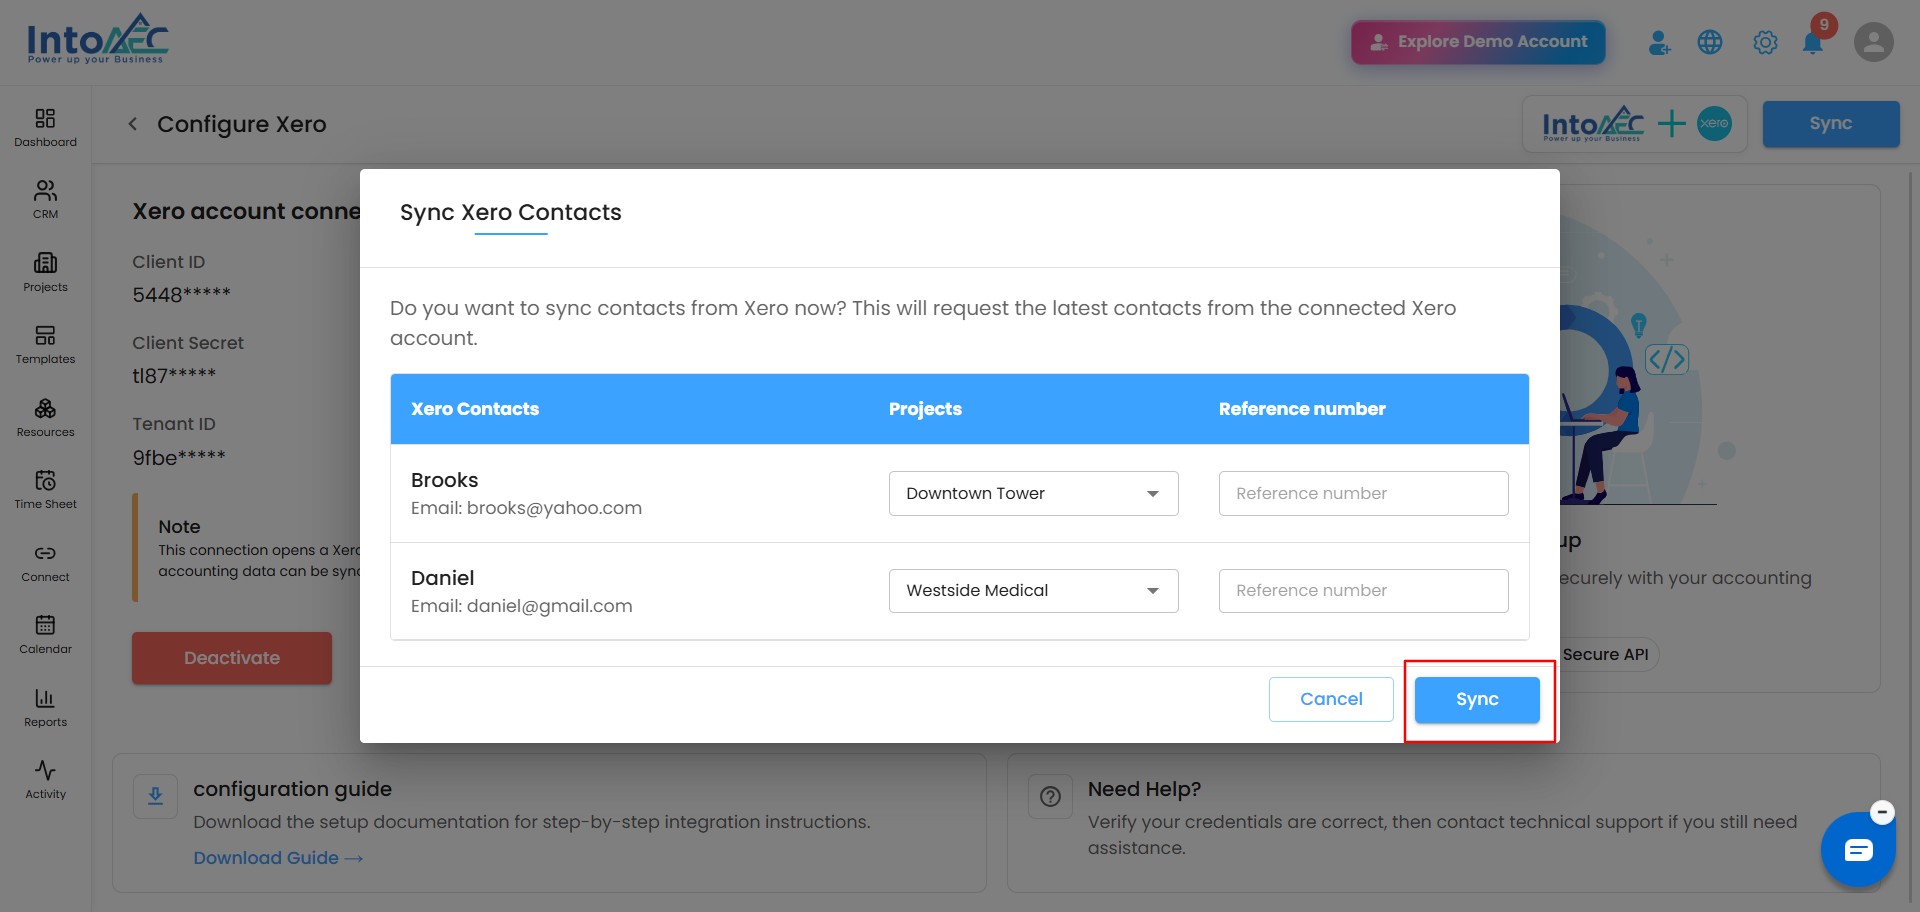
- The Sync Contacts popup appears. For each contact, select a Project (mandatory).
- Enter a Reference Number (optional, but recommended).
- Click Sync to start the import.
How Automatic Sync Works
Once the initial sync is done, you do not need to click Sync or import anything again. Whenever something changes in Xero, IntoAEC is updated automatically, so both systems always show the same information.
These changes in Xero are picked up automatically:
- You create or update an invoice
- You record a payment
- You create a credit note
- You process a refund
- You update a contact
Just keep working in Xero as usual. There is nothing extra to set up or maintain.
Matching Xero Records to Projects
To make sure records sync to the correct project, enter your IntoAEC Project ID in the Reference Number field in Xero. This mapping helps IntoAEC associate each Xero record with the right project.
Need Help?
If the integration is not completed successfully or you notice syncing issues, please contact the IntoAEC Support Team and we will be happy to help.
Was this article helpful?
That’s Great!
Thank you for your feedback
Sorry! We couldn't be helpful
Thank you for your feedback
Feedback sent
We appreciate your effort and will try to fix the article