Overview
Running ads on Facebook or Instagram to find new clients? When someone fills in your Meta lead form, you want that enquiry in front of your team straight away, not sitting in Meta waiting to be downloaded.
Connecting Meta Lead Forms to IntoAEC brings your forms and the leads they collect into IntoAEC automatically, so your team can follow up while the lead is still warm. Setup takes three values from Meta:
- Auth Token a secure key that lets IntoAEC read your lead forms and leads.
- Facebook Page ID - the ID of the Facebook Page your lead ads run from.
- Webhook Verify Token - a secret word that you choose. It lets Meta confirm it is sending new leads to the right place.
Before You Begin
- You can log in to Meta with the account linked to your business.
- You have a Facebook Page that your lead ads run from, and at least one Meta Lead Ads Instant Form created for it.
- An app for the integration has already been created in Meta for Developers.
Part 1: Find Your Facebook Page ID
- Go to business.facebook.com (Meta Business Suite) and make sure the correct business portfolio is selected.
- Click Settings in the left menu.
- Under Accounts, click Pages.
- Select the Page your lead forms belong to and copy its Page ID.
Part 2: Choose Your Verify Token and Set Up the Webhook
A webhook is how Meta tells IntoAEC that a new lead has come in. Think of it as a doorbell: when a lead is submitted, Meta rings, and IntoAEC answers. Here you tell Meta where the doorbell is.
- Go to developers.facebook.com and click My Apps.
- Select the app created for the integration to open the App Dashboard.
- In the left menu, click Webhooks.
- Select the Page product.
- In the Callback URL field, enter the address provided by IntoAEC: [ADD CALLBACK URL]
- In the Verify Token field, type a secret word or phrase of your choice, for example my-leadforms-webhook-token-123.
- Click Verify and Save.
- Under the webhook fields, find leadgen and click Subscribe.
Part 3: Create Your Auth Token
The Auth Token is a permanent key that lets IntoAEC access your lead forms. You create it by adding a "system user" in Meta Business Suite and giving it access to your Page and app.
- In Meta Business Suite, go to Settings > Users > System users.
- Click Add, give the system user a name you will recognise (for example, "IntoAEC Lead Forms"), and choose the Admin role.
- With the system user selected, click Assign Assets. Select your app and your Facebook Page, give full control permissions, and save.
- Click Generate Token.
- Select your app and set the token expiration to Never.
- Select the permissions for lead access: [ADD REQUIRED PERMISSIONS]
- Click Generate Token, then copy the token immediately and paste it into your notepad.
Part 4: Enter Your Details in IntoAEC
You now have all three values. Time to connect them.
- Log in to IntoAEC.
- Go to Integration and find Meta Lead Forms.
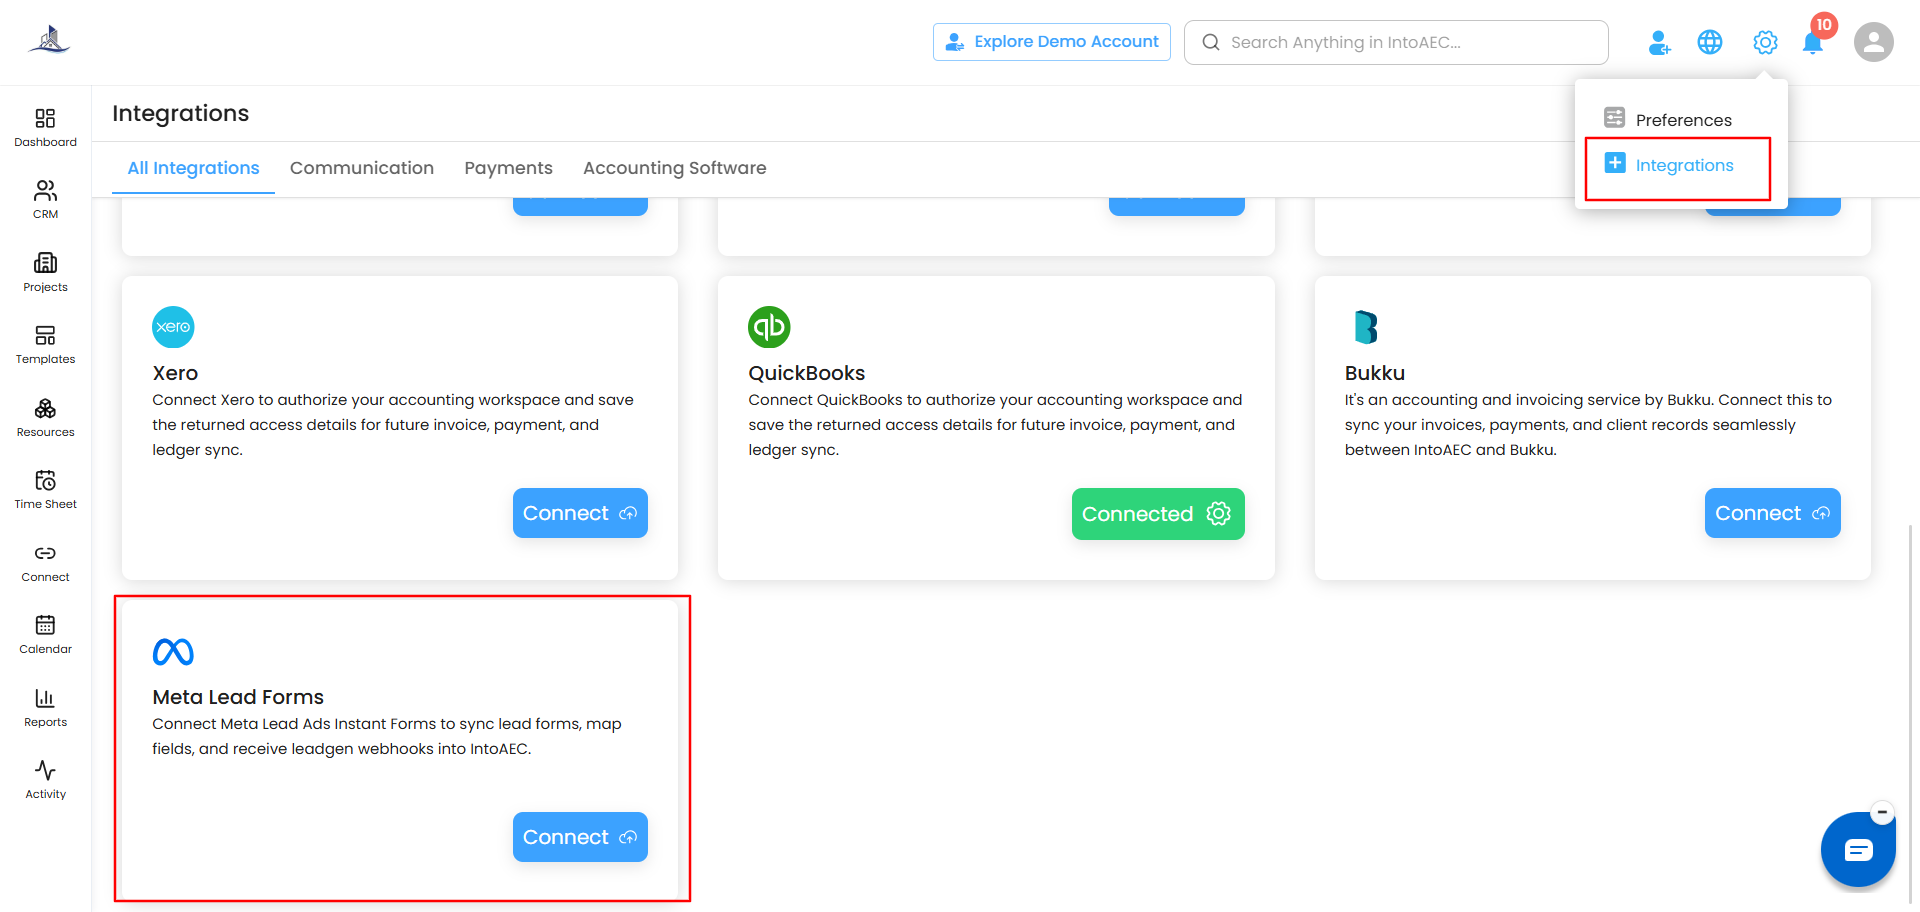
- Click Connect to open the Configure Meta Lead Forms Settings page.
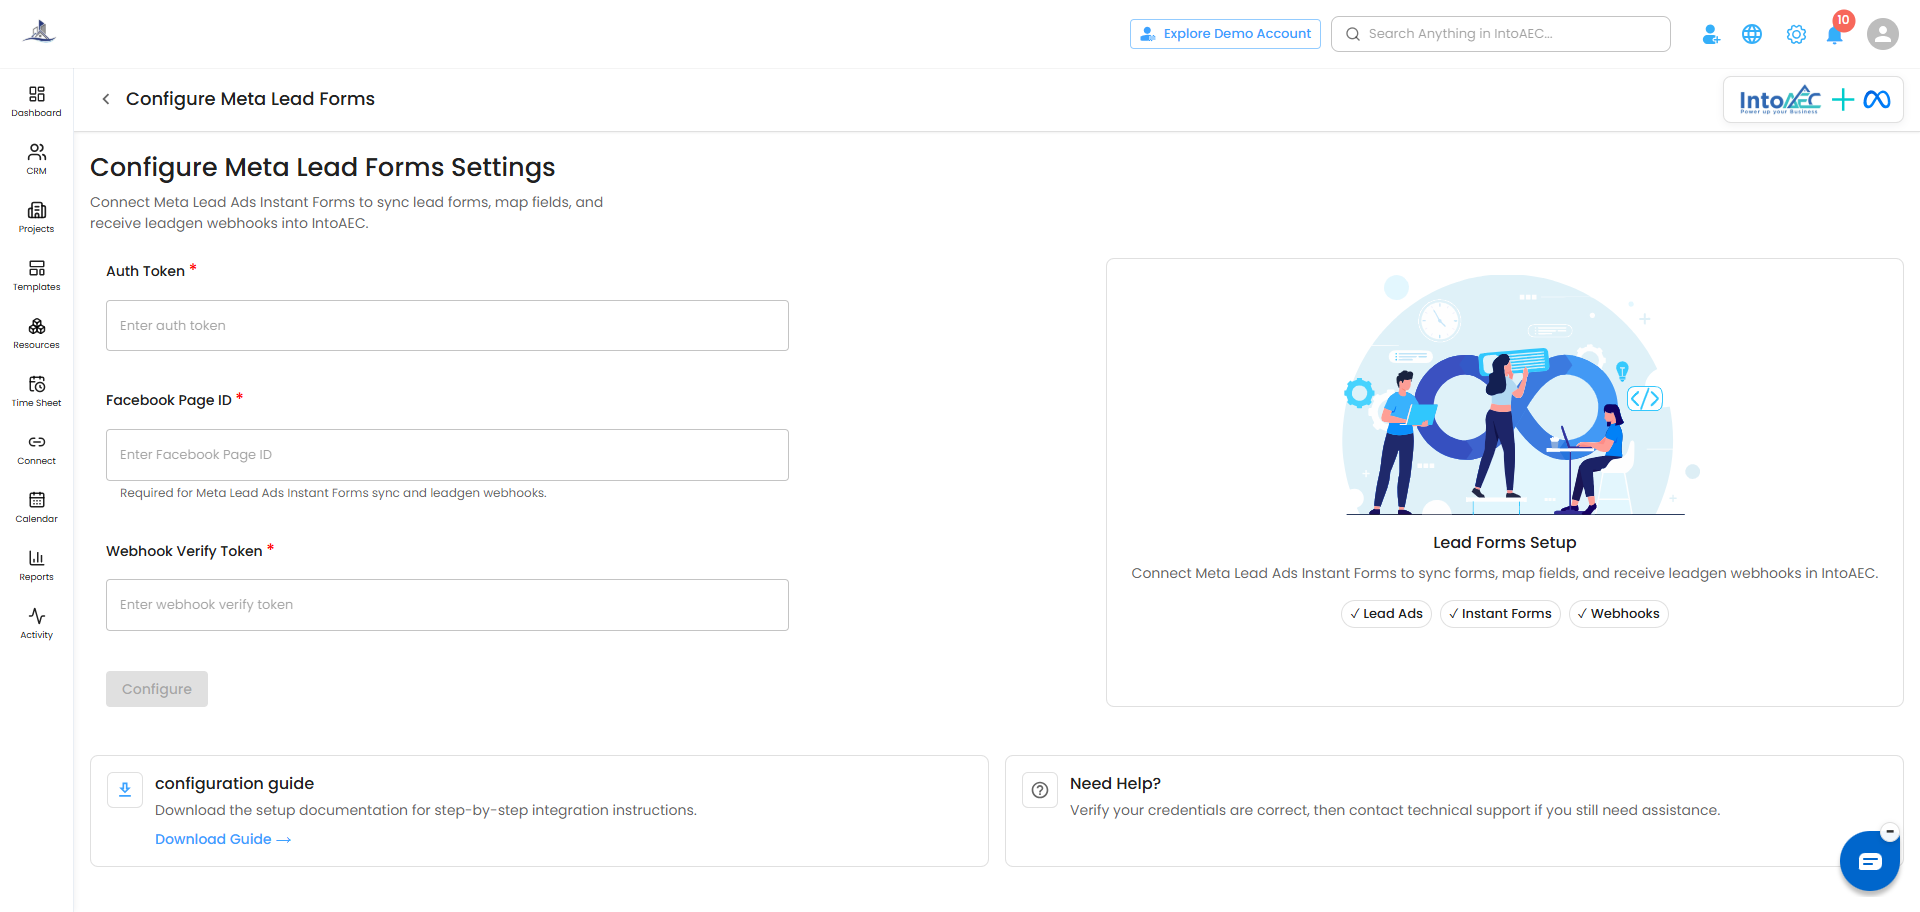
- Fill in the three required fields:
- Auth Token - the token you generated in Part 3.
- Facebook Page ID - the Page ID you copied in Part 1.
- Webhook Verify Token - the same secret word you chose in Part 2.
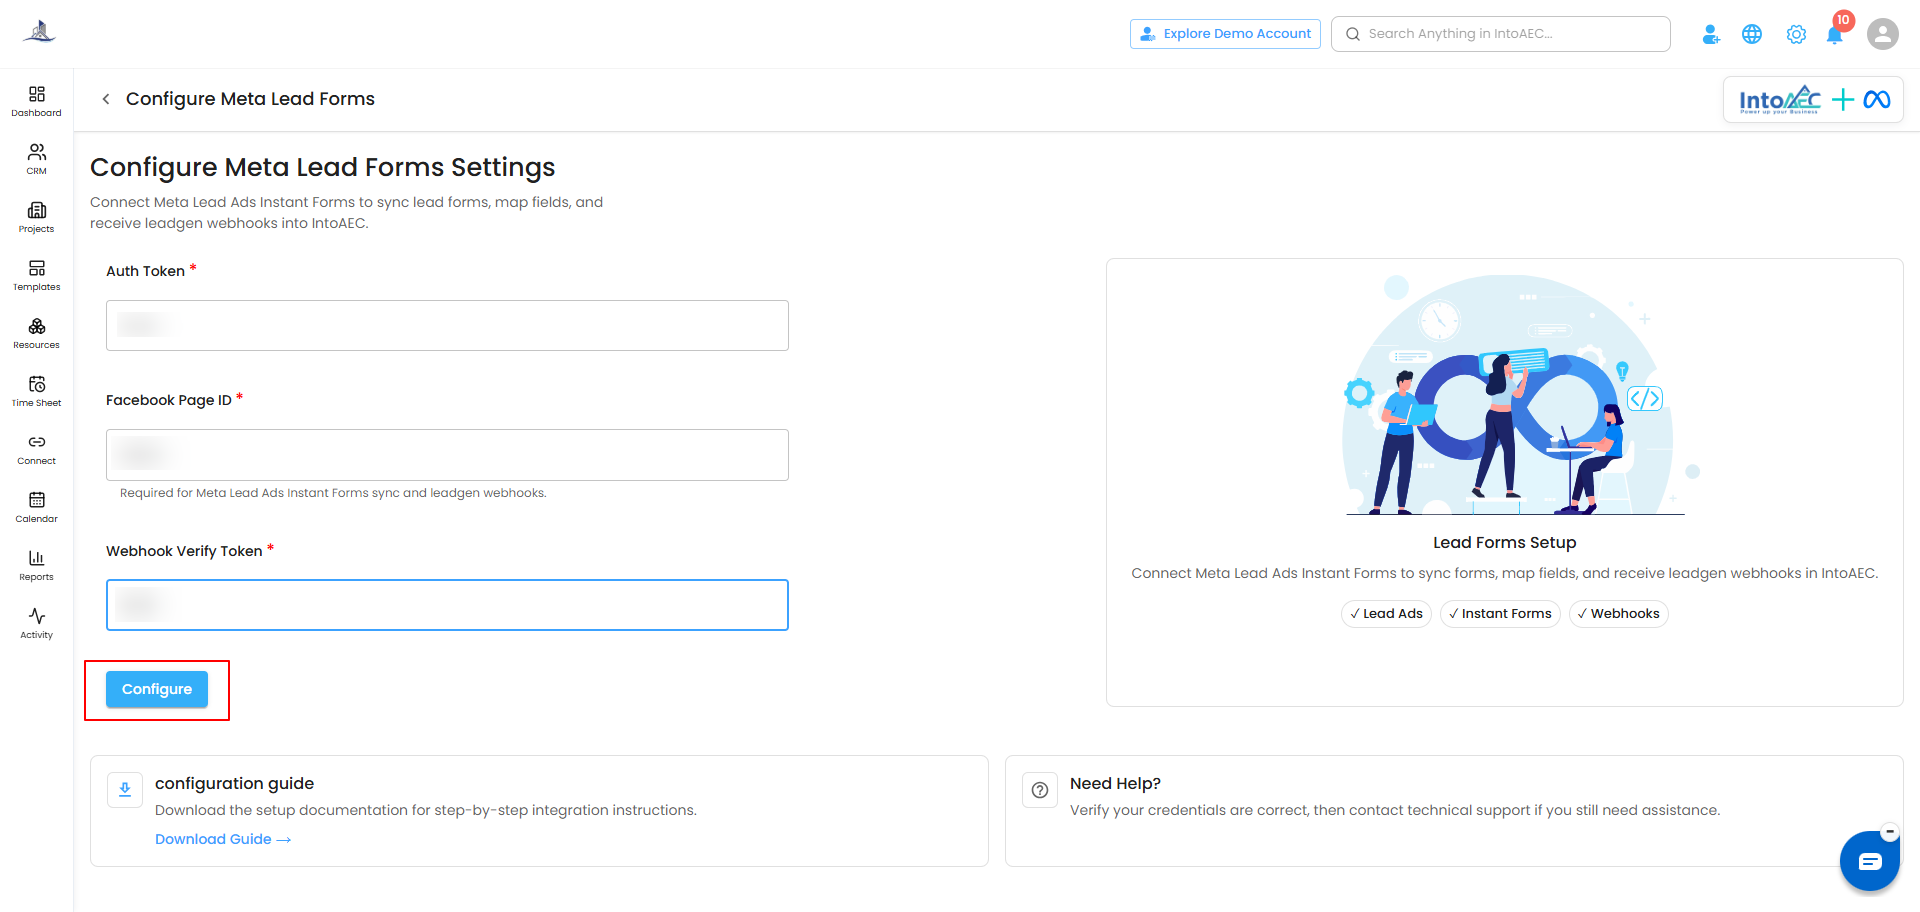
- Click Configure.
Part 5: Select Your Lead Forms
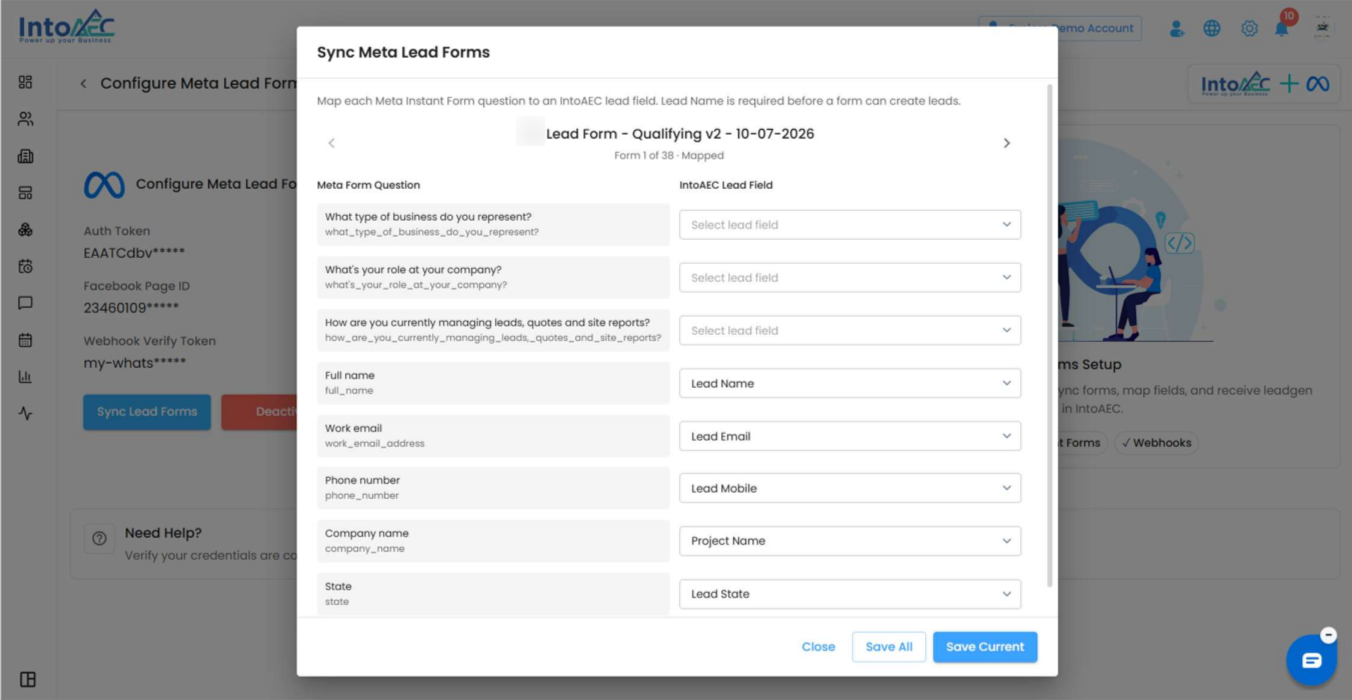
Once your details are accepted, IntoAEC lists all the lead forms from your Facebook Page. You choose which ones to bring into IntoAEC.
- Review the list of your Meta lead forms.
- Tick the checkbox next to each form you want to connect.
- Click Save.
That's it. From now on, new leads submitted through your selected forms are sent to IntoAEC automatically.
Need Help?
If something still does not work, please contact the IntoAEC Support Team and we will be happy to help.
Was this article helpful?
That’s Great!
Thank you for your feedback
Sorry! We couldn't be helpful
Thank you for your feedback
Feedback sent
We appreciate your effort and will try to fix the article