Overview
The Project Forms module lets you send forms directly to clients and track their responses from one place. You can select forms already created in your organization, share them with clients through Email or WhatsApp, and monitor the sharing status and responses from the Project Forms page.
Once a client submits a response, you can view the submitted information directly from the Responses section.
Getting to Project Forms
- Open the required project.
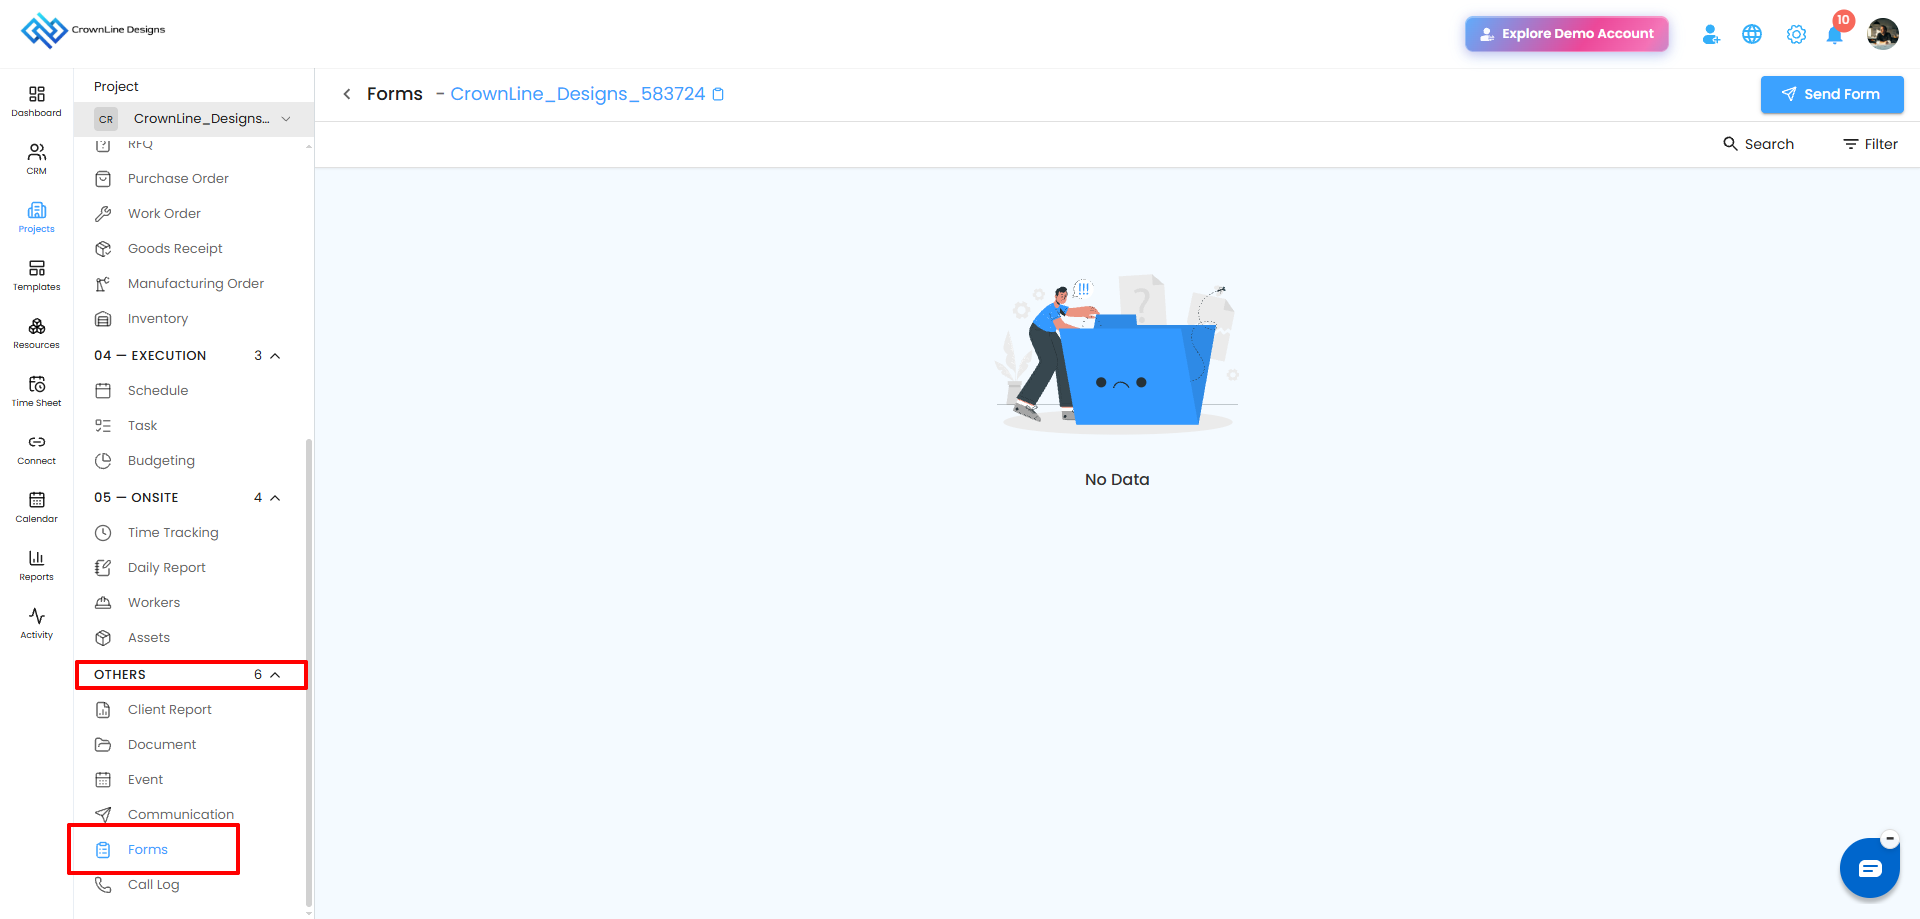
- Navigate to the Forms module.
- The Project Forms page displays the forms shared with clients and their current response status.
Sending a Form to a Client
To send a form to a client:
- Open the Forms module inside the project.
- Click Sent Form.
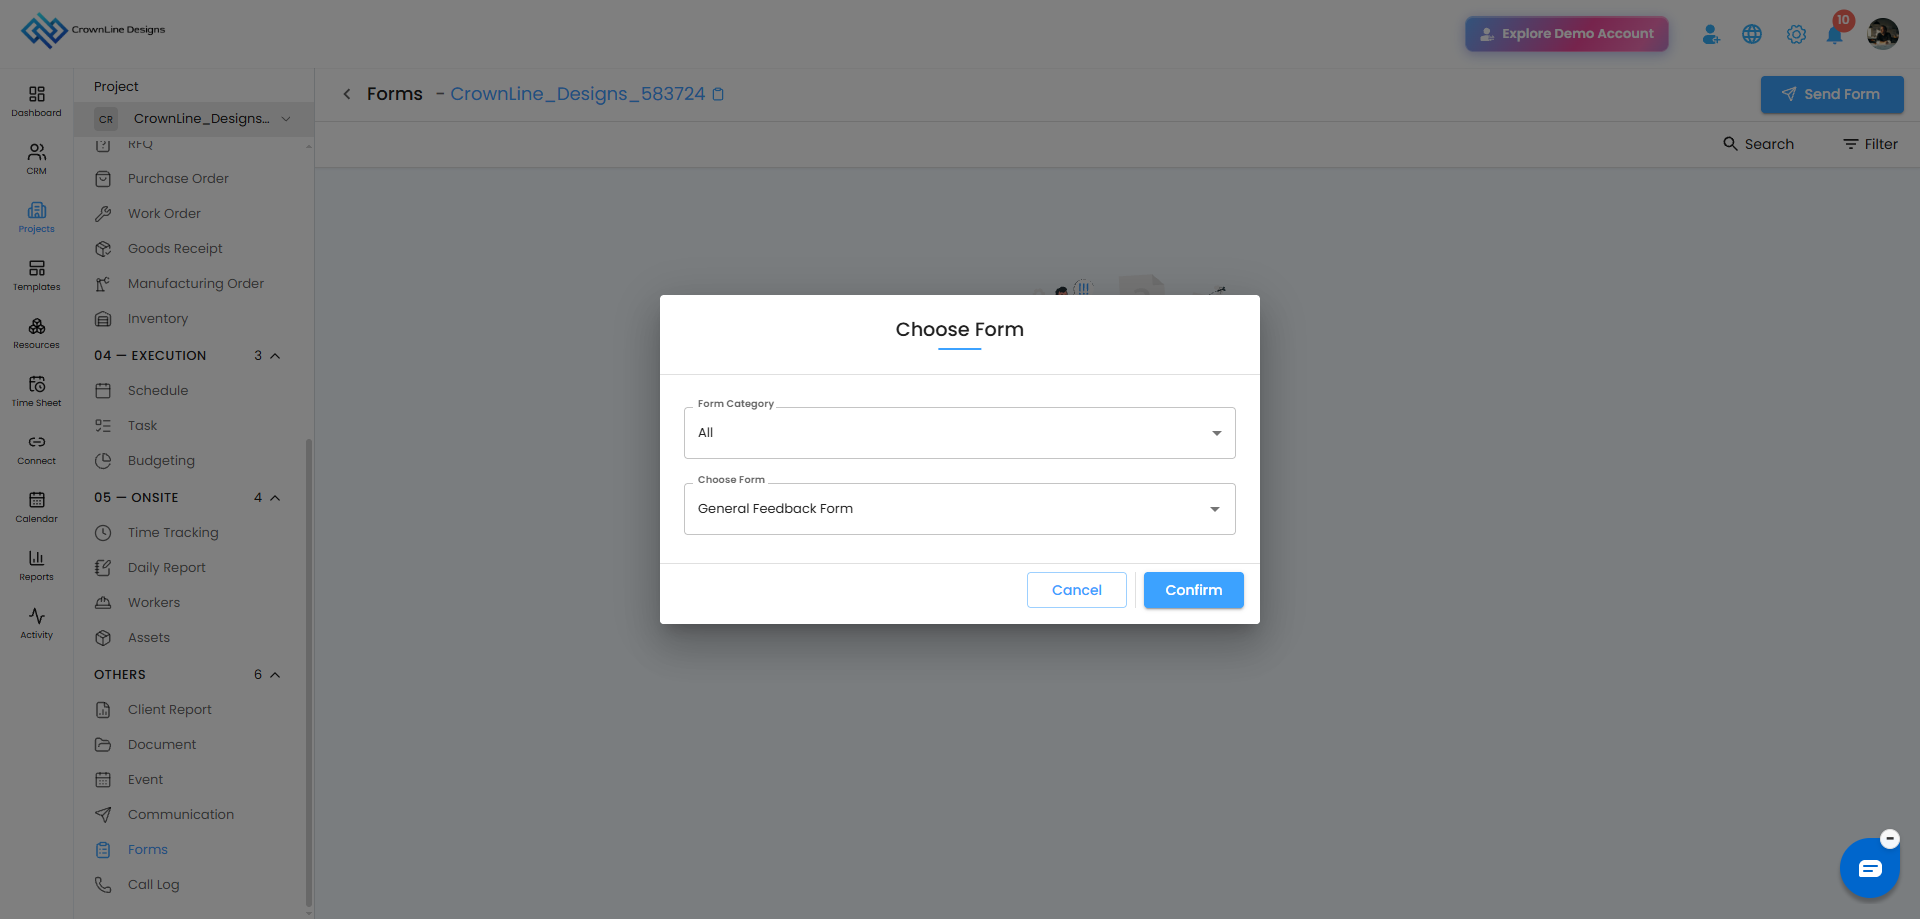
- A Choose Form popup opens.
- Select the required form category.
The available categories are:
- All
- Feedback Form
- Complaint Form
- Custom Form
Select a Form
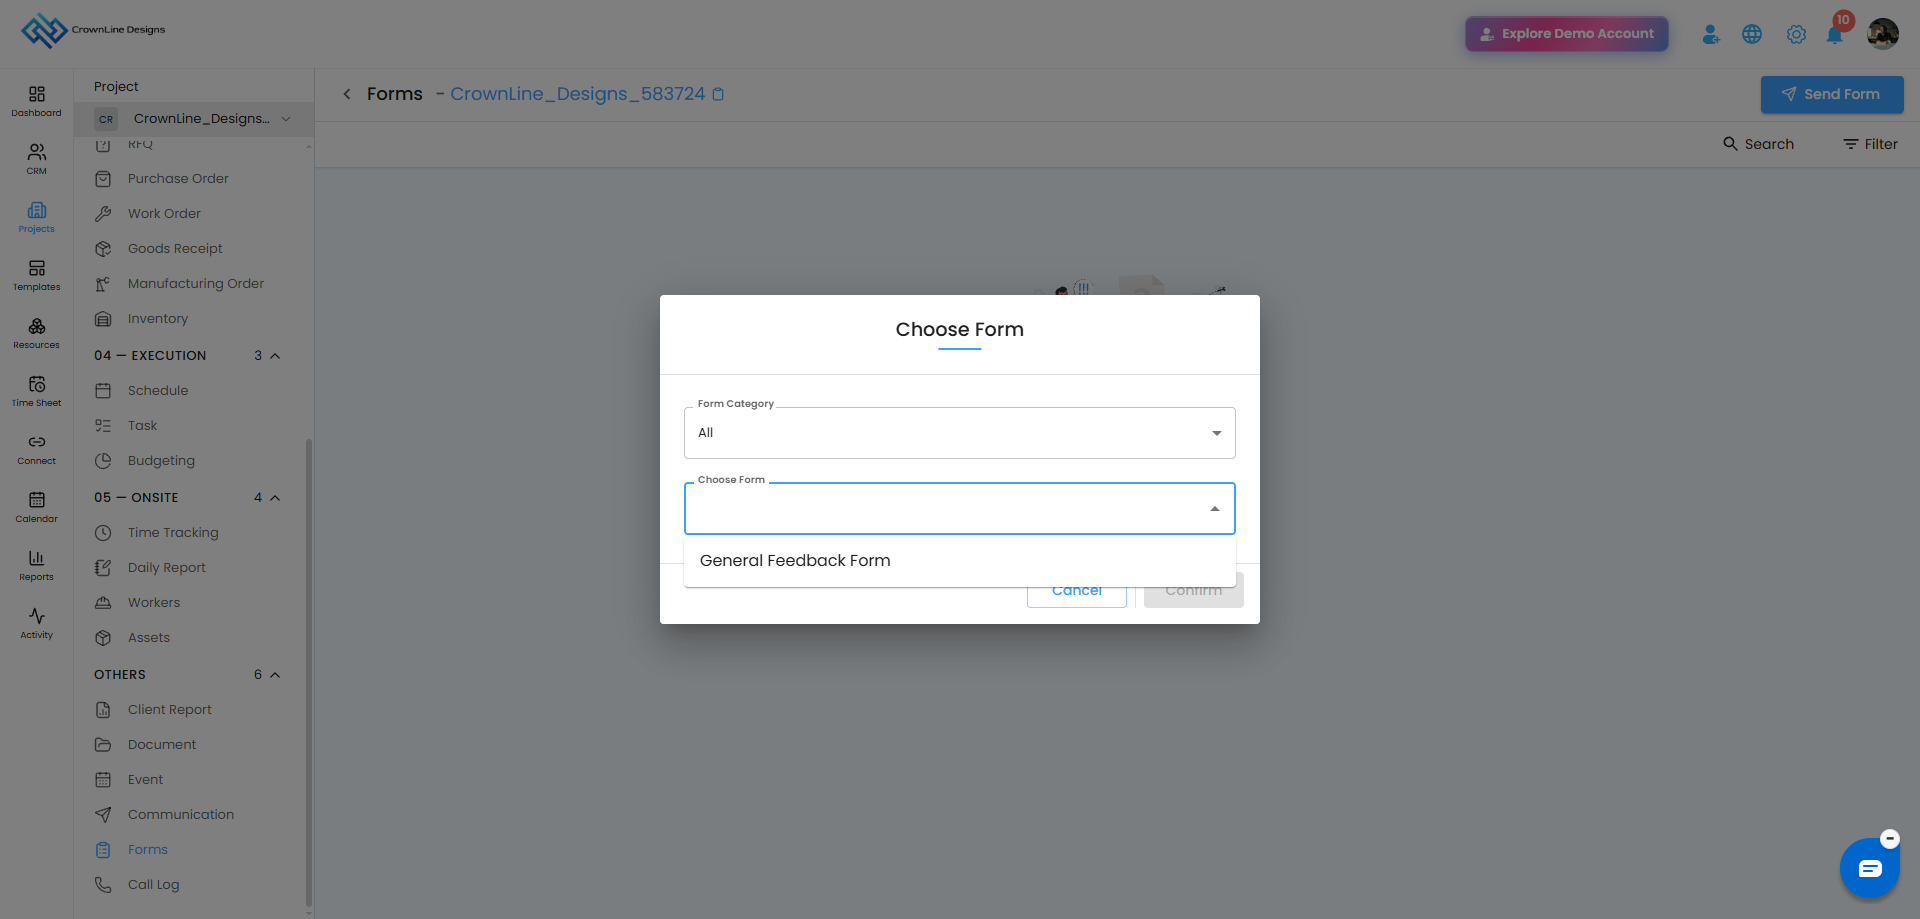
After selecting a category, the forms already created in Settings → Preferences → Forms will be listed.
- Select the required category.
- Open the Choose Form dropdown.
- Select the form you want to send.
- Click Confirm.
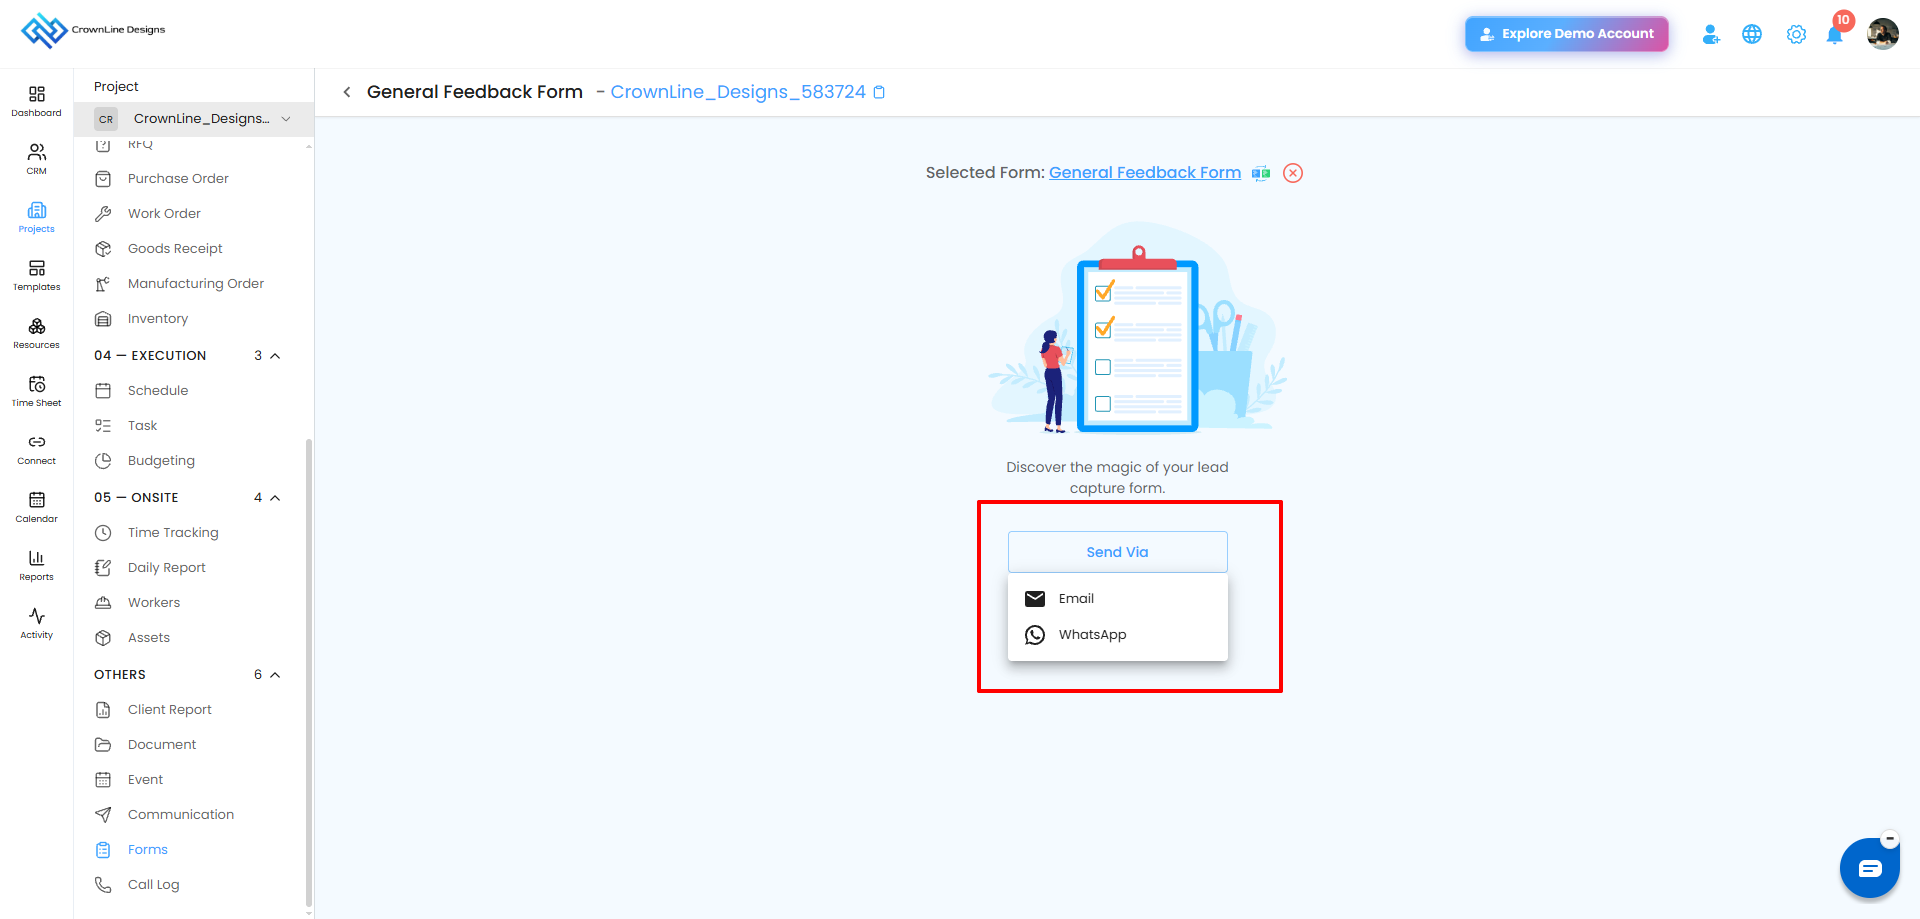
After confirmation, you will be taken to the form sharing page.
Share the Form with the Client
On the sharing page, click Send Via to choose how you want to share the form.
Available options:
Send via Email
- Click Send Via.
- Select Email.
- Send the form to the required recipient.
- Once successfully sent, a Form sent successfully message is displayed.
Send via WhatsApp
- Click Send Via.
- Select WhatsApp.
- The form is shared with the client through WhatsApp
Track Sent Forms
After sending a form, the Project Forms table provides an overview of each shared form.
The table includes:
- Form Name – Name of the form shared with the client.
- Sent Via – Shows the channel used to share the form.
- Recipient – Client or recipient who received the form.
- Sent By – User who shared the form.
- Date of Shared – Date on which the form was sent.
- Status – Current status of the form.
- Responses – Option to view the submitted response when available.
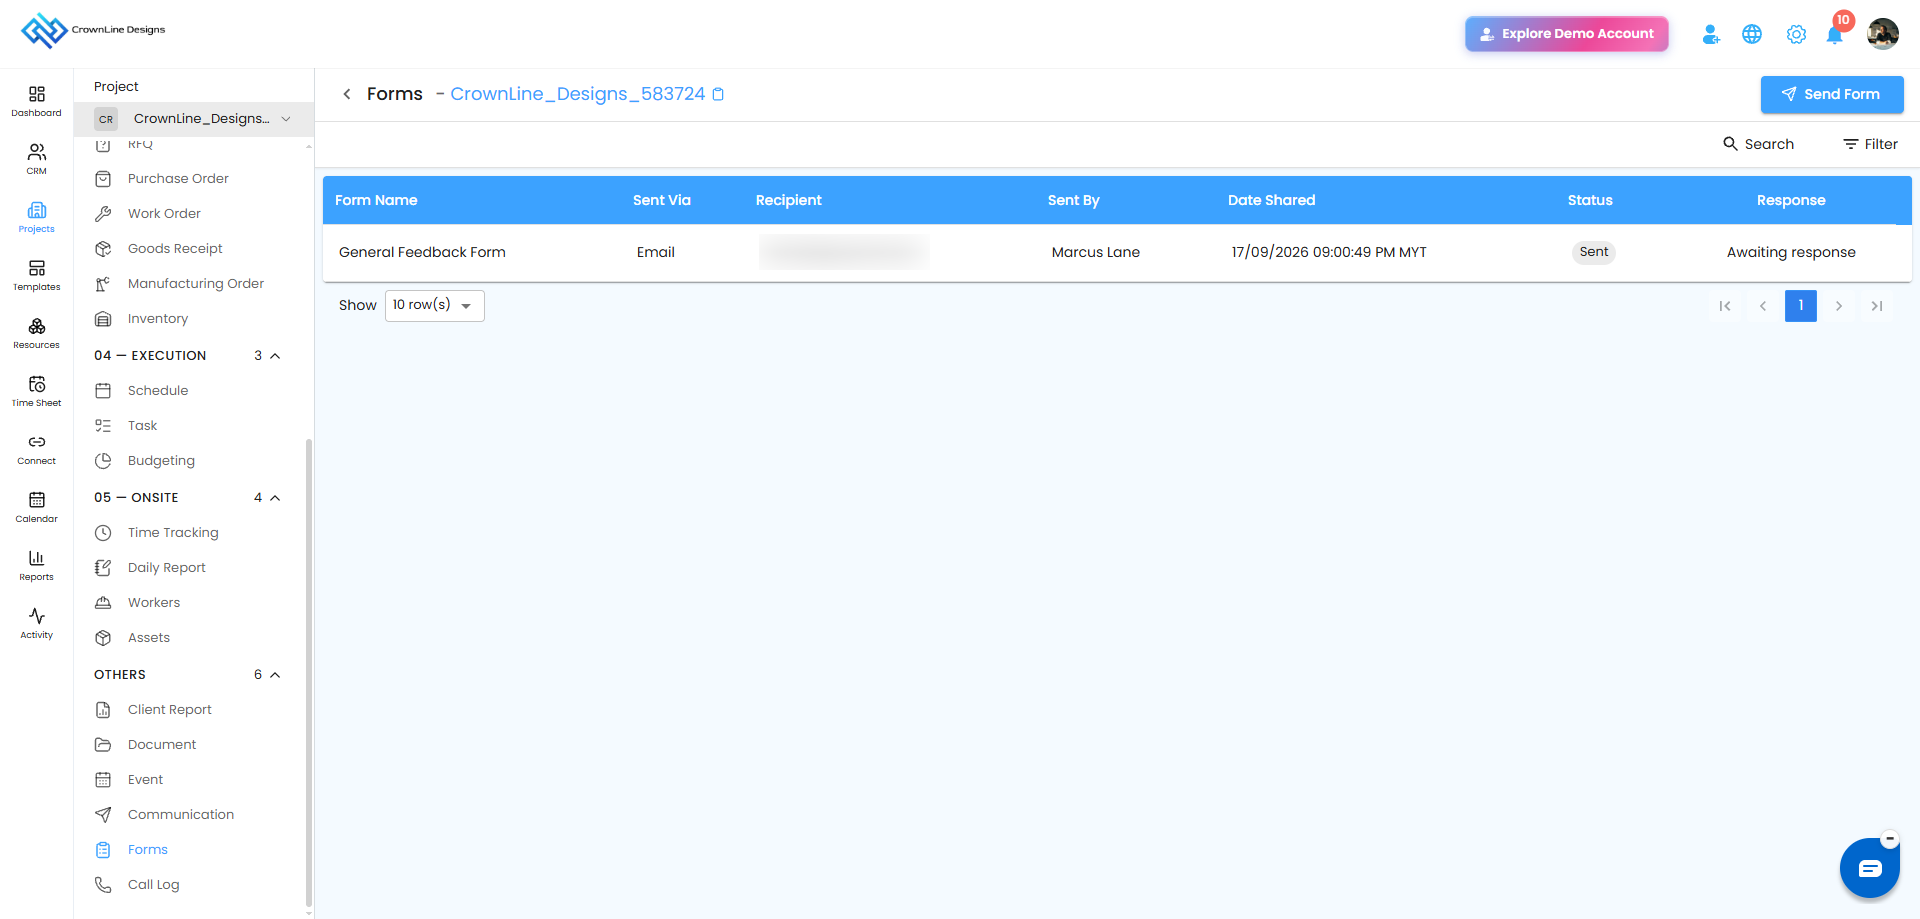
Track Form Status
The Status column helps you identify whether the client has responded.
After the form is sent, the status shows the current state. Once the client submits the form, the status changes to Responded.
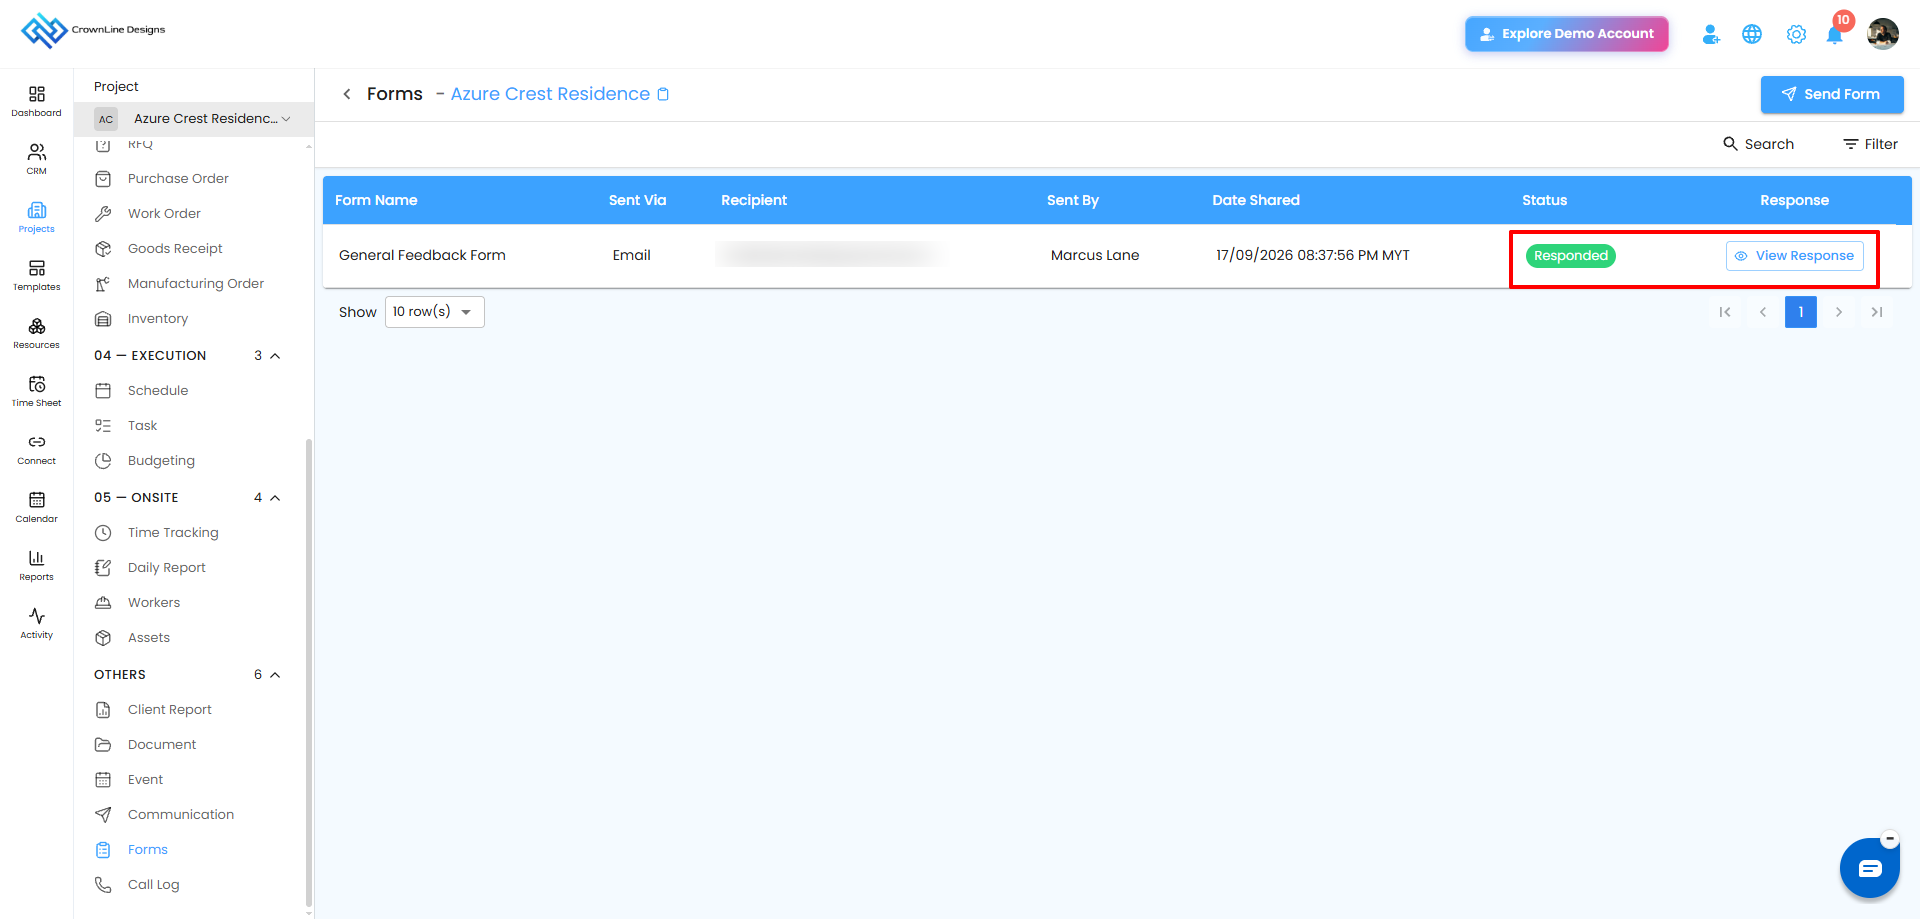
View Client Responses
Once a client has submitted the form, the Responses column displays a View Response button.
To view the response:
- Locate the responded form in the table.
- Click View Response.
- The submitted form response opens for review.
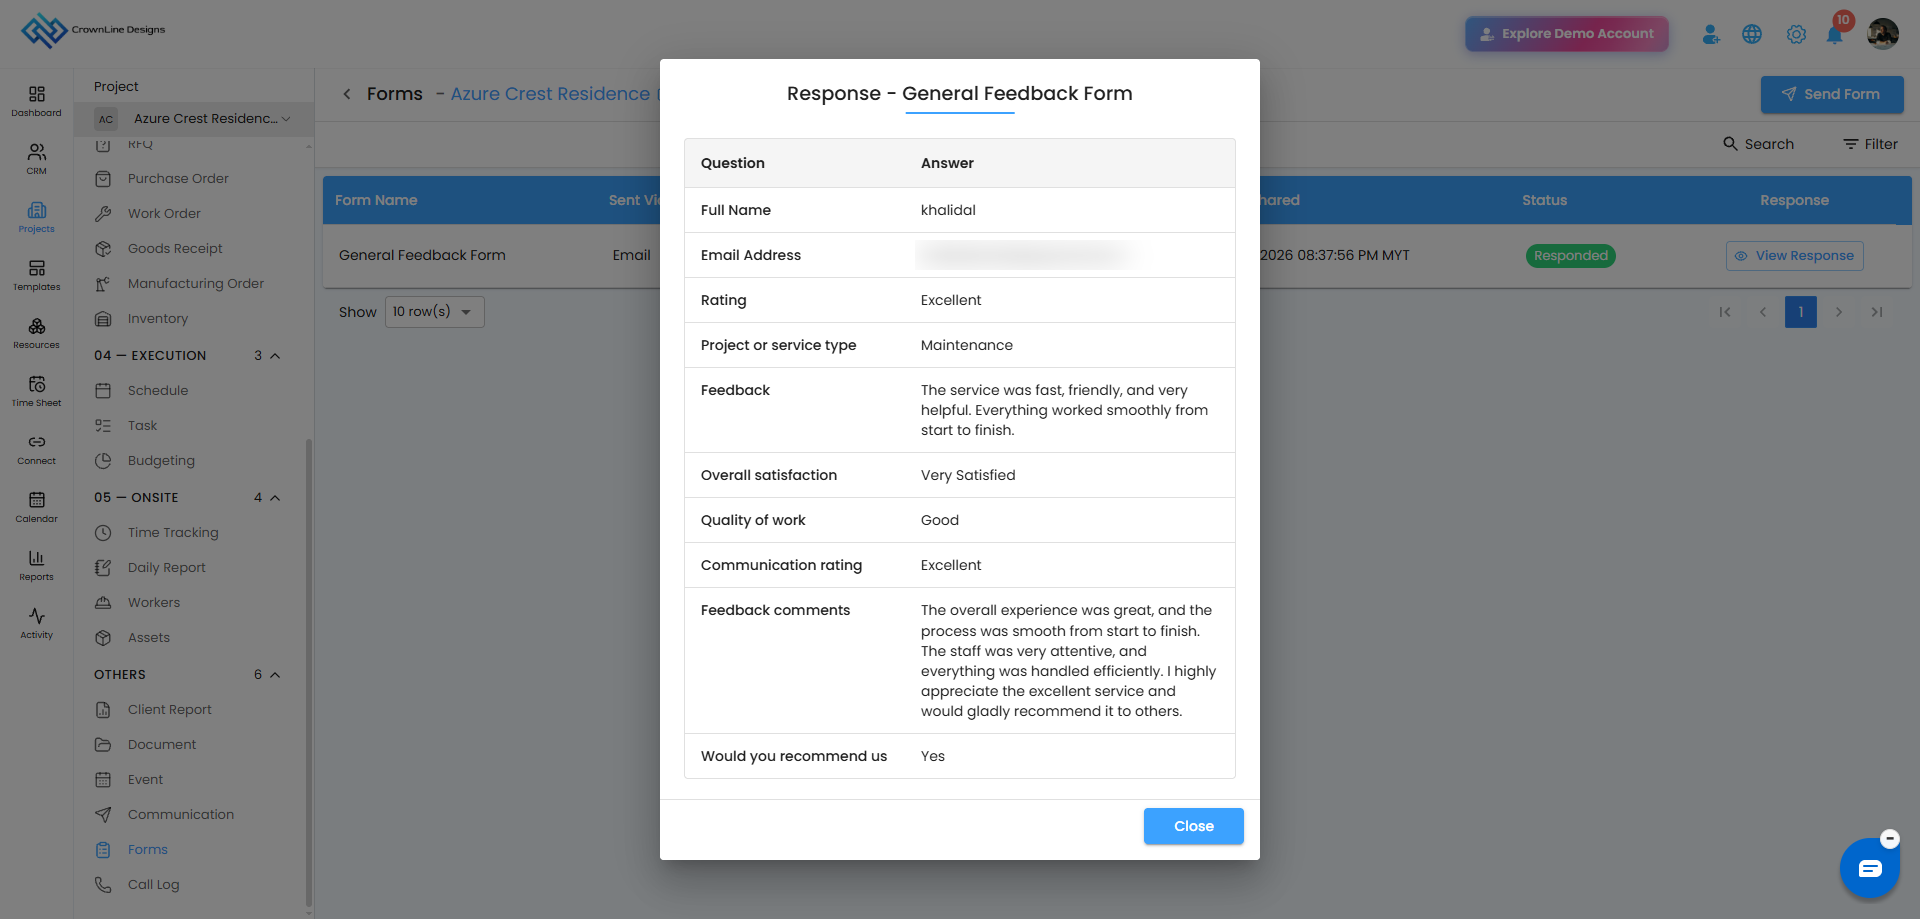
This allows you to review the information provided by the client without leaving the Project Forms module.
Search and Filter Sent Forms
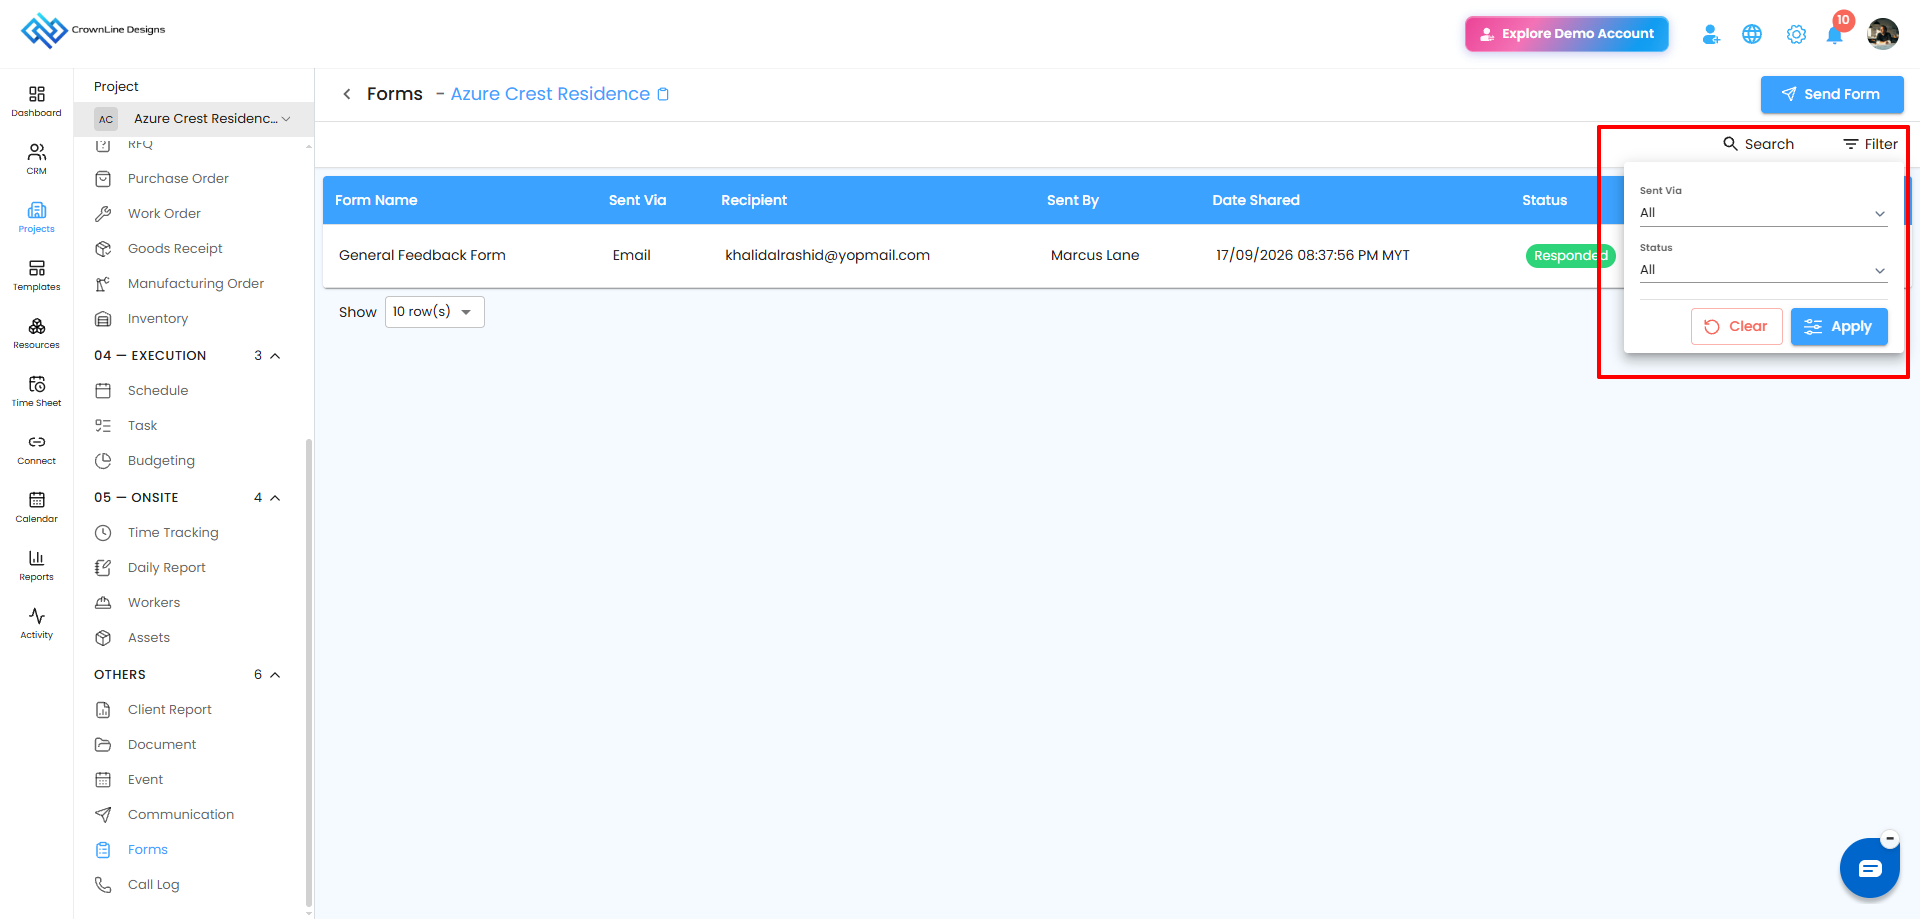
The Project Forms page provides Search and Filter options to help you find specific sent forms.
Search
Use the Search option to quickly find a form from the list.
Filter
The filter allows you to narrow down the list based on:
- Sent Via
- Status
Quick Flow
Project → Forms → Sent Form → Choose Form → Select Category → Select Form → Confirm → Send Via → Email / WhatsApp → Track Status → View Response
Pro Tip
Use the Status and Responses columns regularly to identify which clients have completed their forms and quickly follow up on pending responses.
Was this article helpful?
That’s Great!
Thank you for your feedback
Sorry! We couldn't be helpful
Thank you for your feedback
Feedback sent
We appreciate your effort and will try to fix the article