If you already have an estimate or a bill of quantities in a file, you do not need to retype it. Upload the file and the system reads it into a create page for you to check and send.
Before you start
Have your file ready in one of these formats:
- Image
- Excel
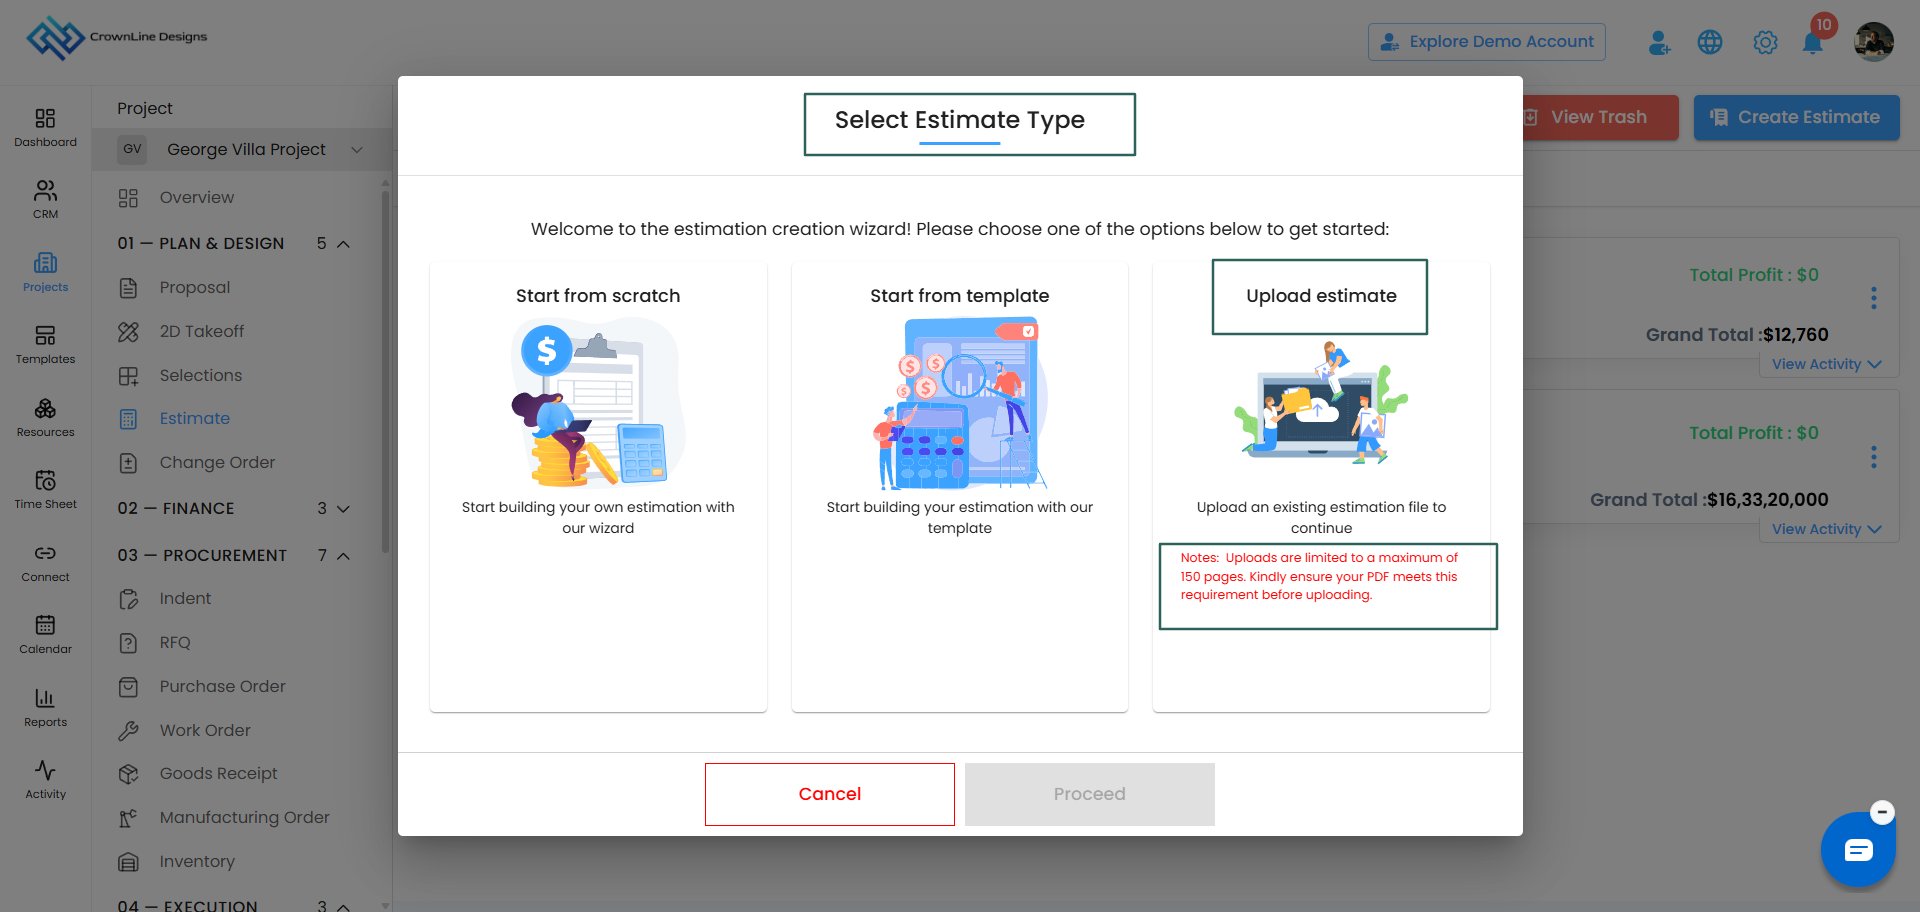
The upload limit
Uploads are limited to a maximum of 150 pages.
If your document is longer, split it and upload it in parts.
How to upload an estimate
Step 1 — Open the create flow
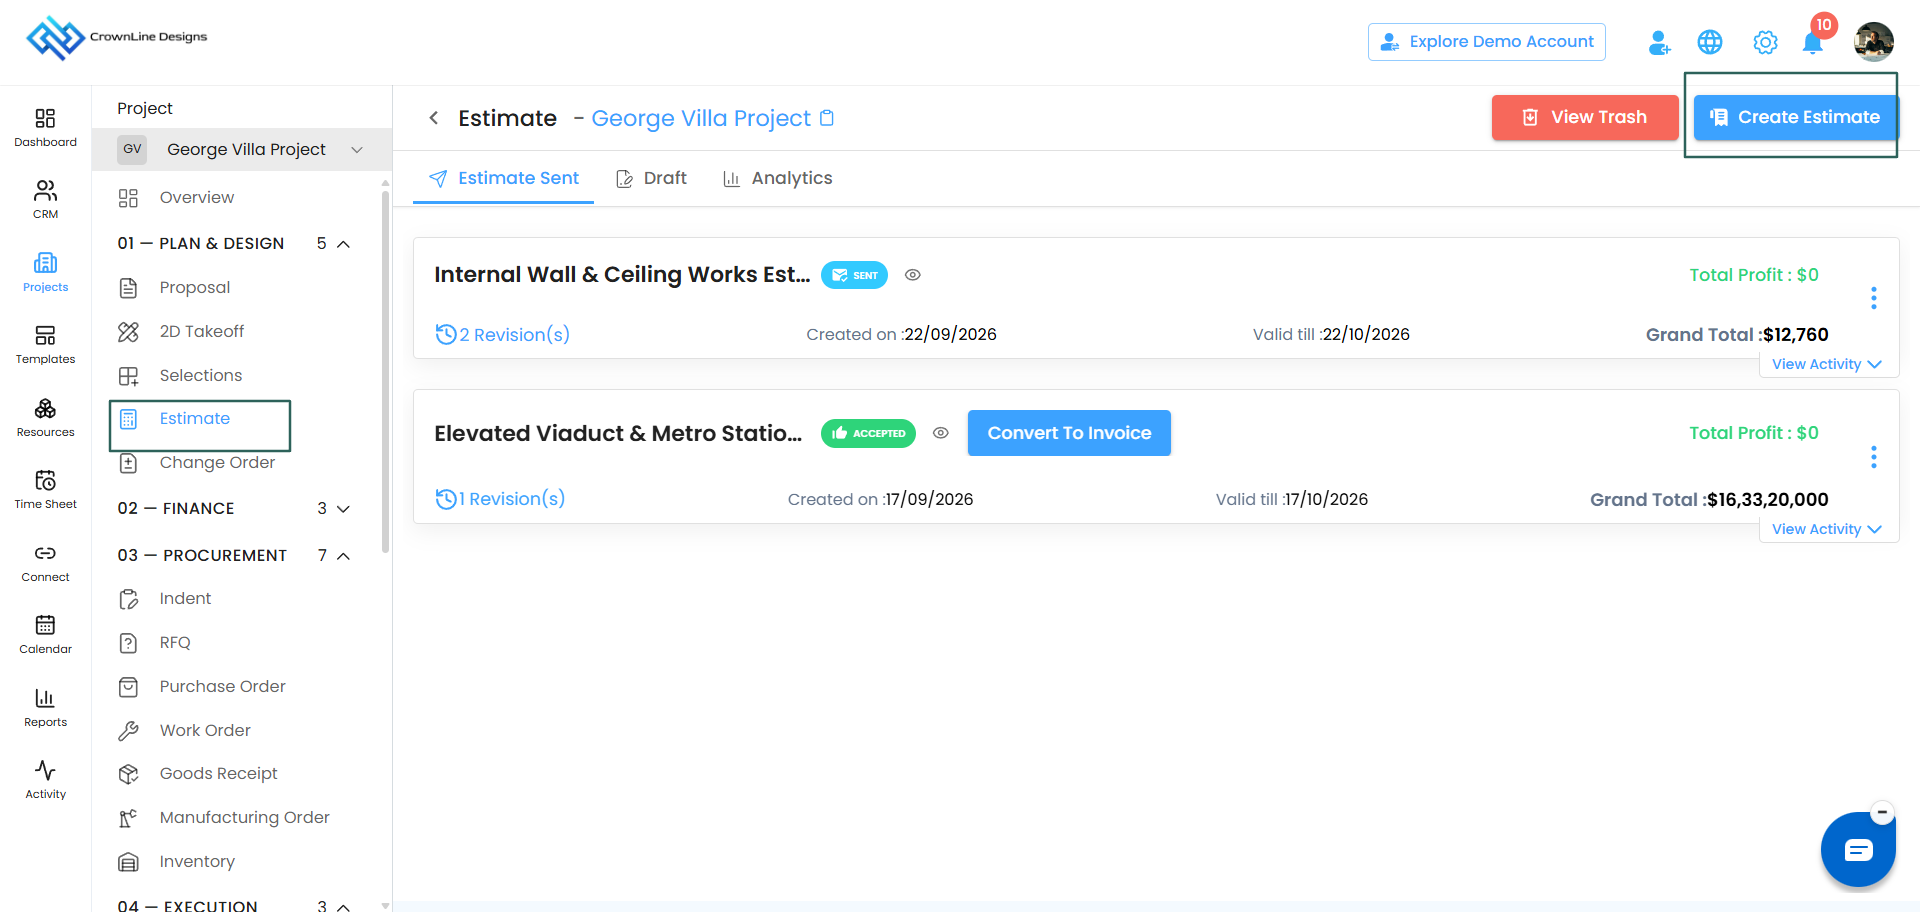
- Go to Clients, select your client, and open the Estimate card.
- Click Create Estimate.
- In the Select Estimate Type popup, choose Upload Estimate.
- Click Proceed.
Step 2 — Upload your file
Select your PDF, image or Excel file and upload it.
Step 3 — Review what came through
You are taken to the estimate create page with the contents of your file transferred into it — the sections, line items and figures that were in your document.
Always check this page before you send. Read through and confirm that:
- every line item made it across
- quantities and units are correct
- rates are sitting in the right columns
- nothing has been merged or split incorrectly
The cleaner and more consistent your source file, the cleaner the result.
Step 4 — Finish the estimate
Once the imported content is correct, complete the estimate as normal:
- Set the title, created on and valid till dates
- Add or remove sections and line items — Add Manually or Add from Catalog
- Add materials under line items using the three-dot menu
- Set your profit, other charges, discount and tax
- Set up your payment terms
- Add attachments and terms and conditions
- Set up signatures and Capture Image
Step 5 — Send it
- Approvers — Compose Email, Send via WhatsApp or Send via SMS
- Creators — Request for Approval
When composing the email, choose Send as Estimate for line items only, or Send as BOQ to include the materials.
Tips for a clean upload
- Use a consistent table layout in your source file. One row per line item, with headers at the top.
- Avoid merged cells in Excel files.
- Make sure scanned documents are clear. Faint or skewed scans are harder to read accurately.
Was this article helpful?
That’s Great!
Thank you for your feedback
Sorry! We couldn't be helpful
Thank you for your feedback
Feedback sent
We appreciate your effort and will try to fix the article