How to Create a Schedule
Creating a schedule in IntoAEC allows you to organize your project into manageable blocks, assign timelines, and track progress effectively. Follow these steps to set up a new schedule:
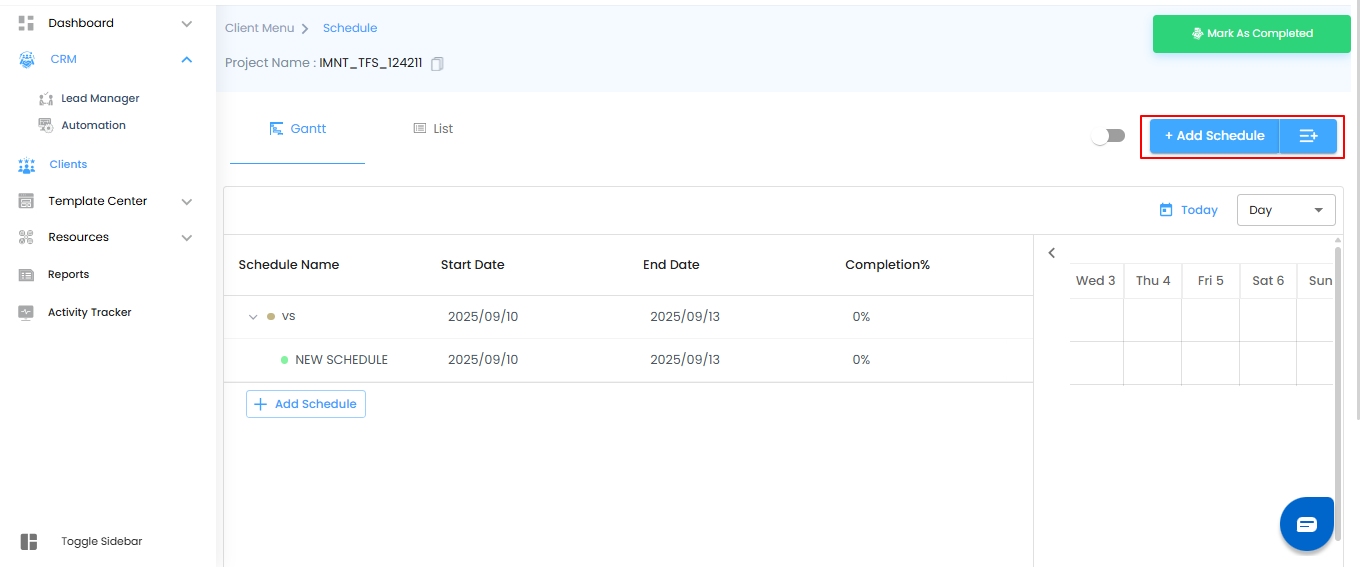
Step 1: Add a New Schedule
- Click the “+ Add Schedule” button to create a new schedule.
- Enter a name for the schedule and define its start and end dates.
Pro Tip:
Use clear and descriptive names for each schedule to make it easier to track multiple schedules and quickly understand their purpose in the project timeline.
Step 2: Enter Schedule Details
- After clicking “+ Add Schedule”, a pop-up window titled “Add Schedule” will appear.
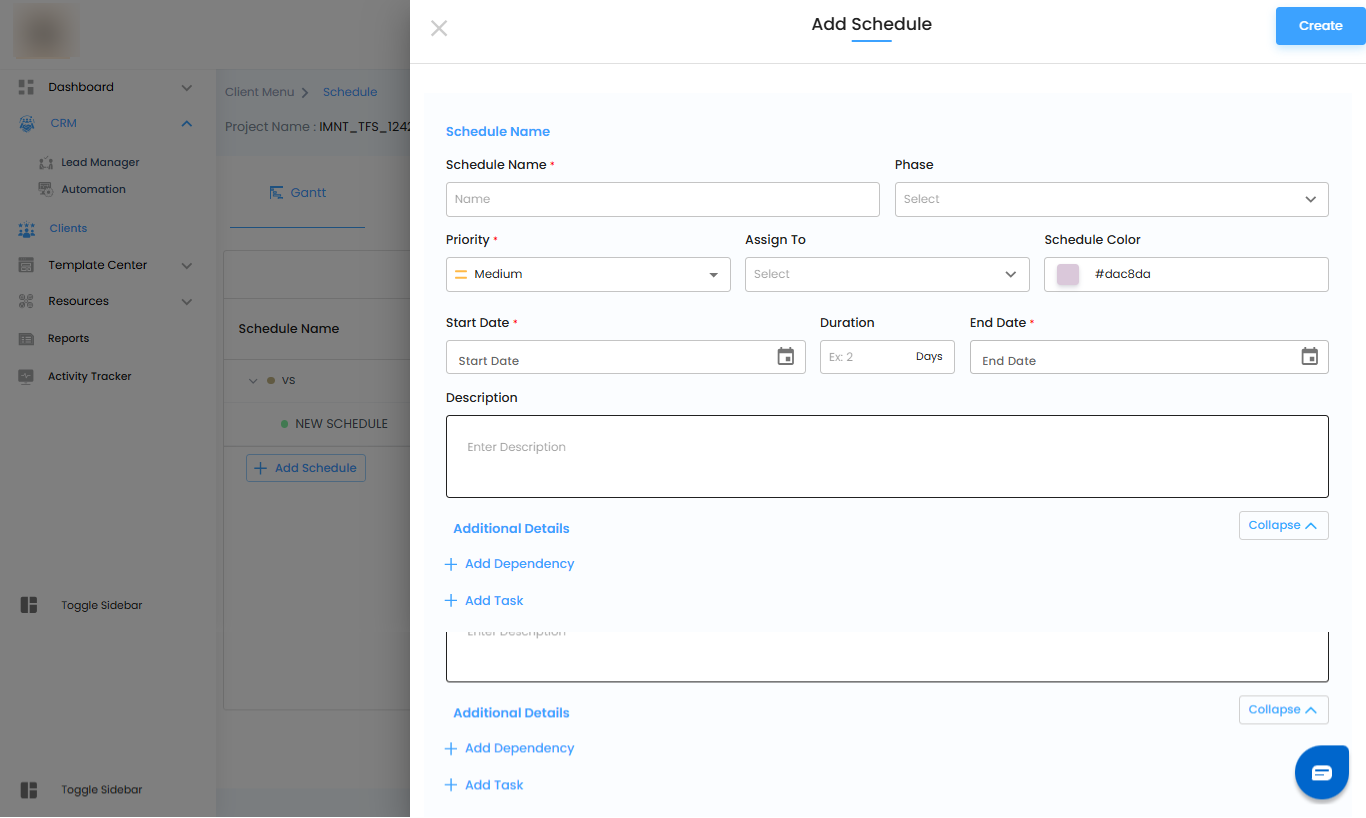
Step 3: Fill in Schedule Details
After the “Add Schedule” pop-up appears, complete the following fields to create a comprehensive schedule:
- Schedule Name: Enter a meaningful name to clearly identify the schedule.
- Phase: Select the relevant phase from the dropdown (if applicable).
- Priority: Choose the priority level (Low, Medium, or High).
- Assign To: Select the team member responsible for this schedule.
- Schedule Color: Pick a color to categorize or highlight the schedule for easy visualization.
- Start Date: Select the schedule’s start date using the calendar picker.
- End Date: Select the end date, or input a duration to auto-calculate it.
- Duration: Automatically calculated based on the start and end dates.
- Description: Add any necessary details about the schedule.
Optional Settings
- Add Dependency: Specify if this schedule depends on another.
- Type and Delay: Choose the relationship type between schedules:
- Start to Start (SS): Dependent schedule starts when the main schedule starts.
- Start to End (SE): Dependent schedule ends when the main schedule starts.
- End to End (EE): Dependent schedule ends when the main schedule ends.
- End to Start (ES): Dependent schedule starts when the main schedule ends.
- Delay (in days): Set the number of days before or after the dependent schedule triggers.
- Add Task: Define specific tasks associated with this schedule.
- Add Reminder: Set notifications before the schedule’s due date.
- Upload Files: Drag and drop files or click to upload (supports up to 4 images or PDFs).
Once all details are filled, click the “Create” button to save the schedule.
Pro Tip:
Fill in as many optional fields as possible, such as dependencies, tasks, and reminders. This helps in better tracking, avoiding conflicts, and keeping the team aligned.

Proper scheduling ensures smooth project execution and allows teams to track progress efficiently. Users can edit schedules at any time if changes or updates are required, keeping the project timeline accurate and aligned with goals.
Pro Tip:
Regularly review and update schedules to reflect actual progress and any changes in priorities—this helps prevent delays and keeps the project on track.
Was this article helpful?
That’s Great!
Thank you for your feedback
Sorry! We couldn't be helpful
Thank you for your feedback
Feedback sent
We appreciate your effort and will try to fix the article