Email Reports – Your Communication Performance Dashboard
Think of the Email Reports section as your project’s communication tracker—keeping tabs on every email sent, its status, and overall performance. Stay informed, optimize follow-ups, and ensure your messages are reaching the right audience.
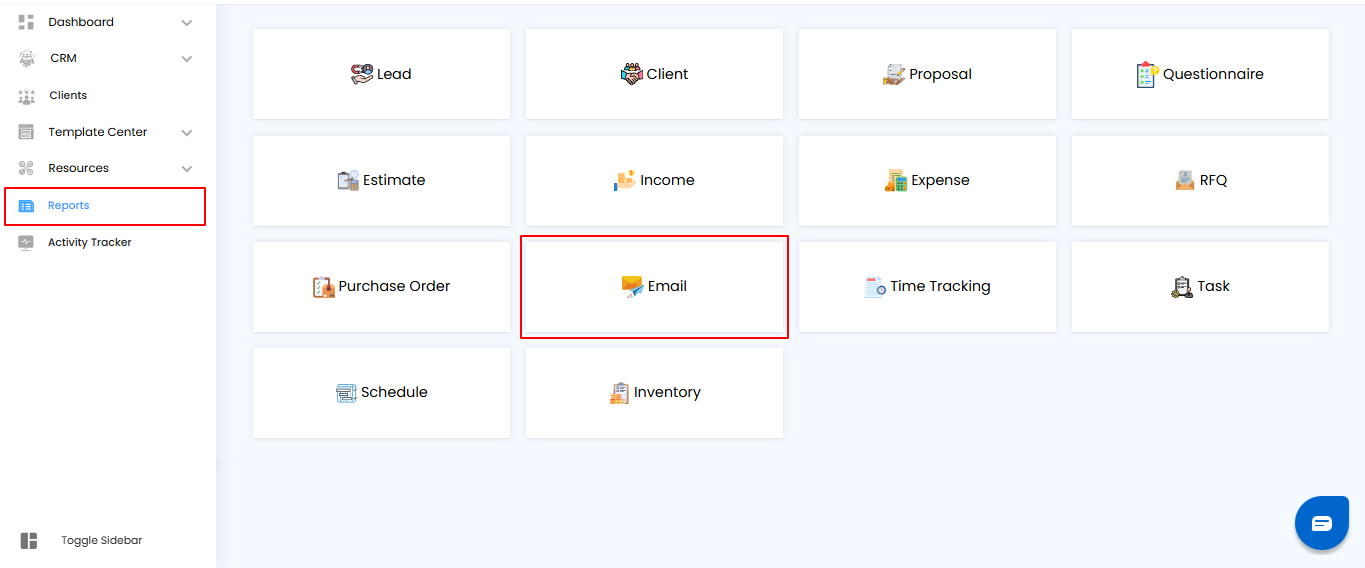
Accessing the Email Reports Section
- Navigate to Reports – From the main menu, go to the Reports section.
- Select Email – Click on Email to open the Email Report dashboard and view all email performance details.
Pro tip: Treat this section as your communication pulse—regularly check it to monitor email delivery, engagement, and follow-up effectiveness.
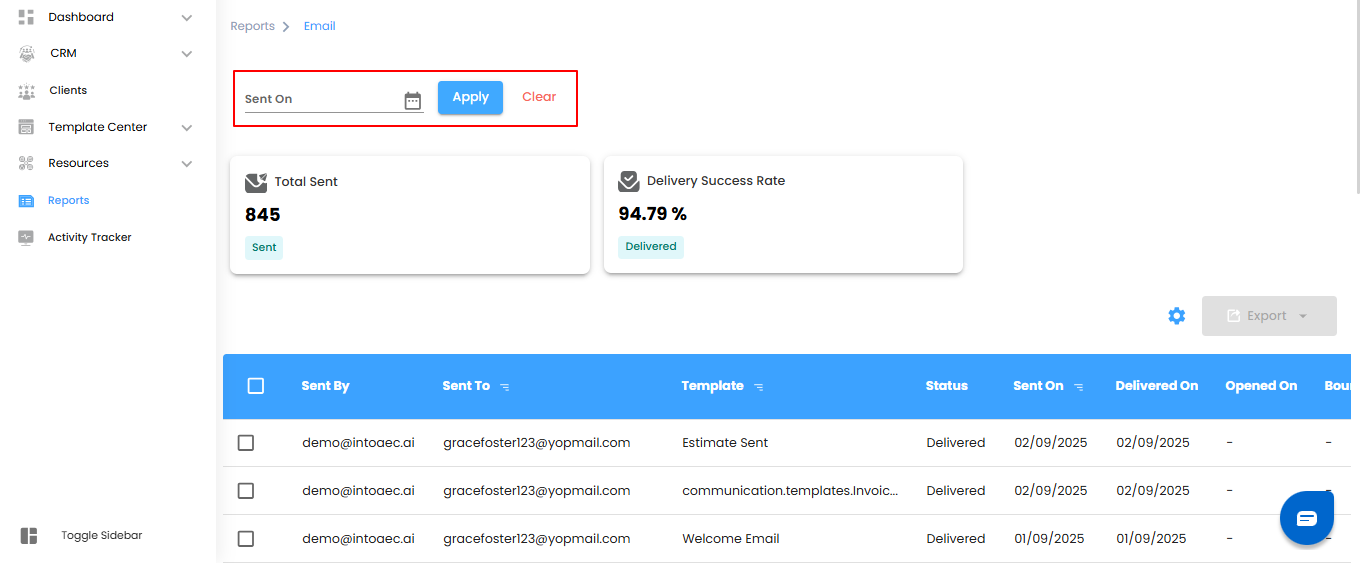
Filtering Email Data – Focus on the Messages That Matter
Think of filters as your project’s magnifying glass for email reports—quickly find the emails you need without scrolling endlessly.
How to Refine Your Email Records:
- Sent On – View emails sent on a specific date or within a chosen date range.
- Once your filters are set, click Apply to update the results, or click Clear to reset and view all emails.
Pro tip: Use filters regularly to track email performance for specific campaigns, follow-ups, or important communications—it helps you stay organized and responsive.
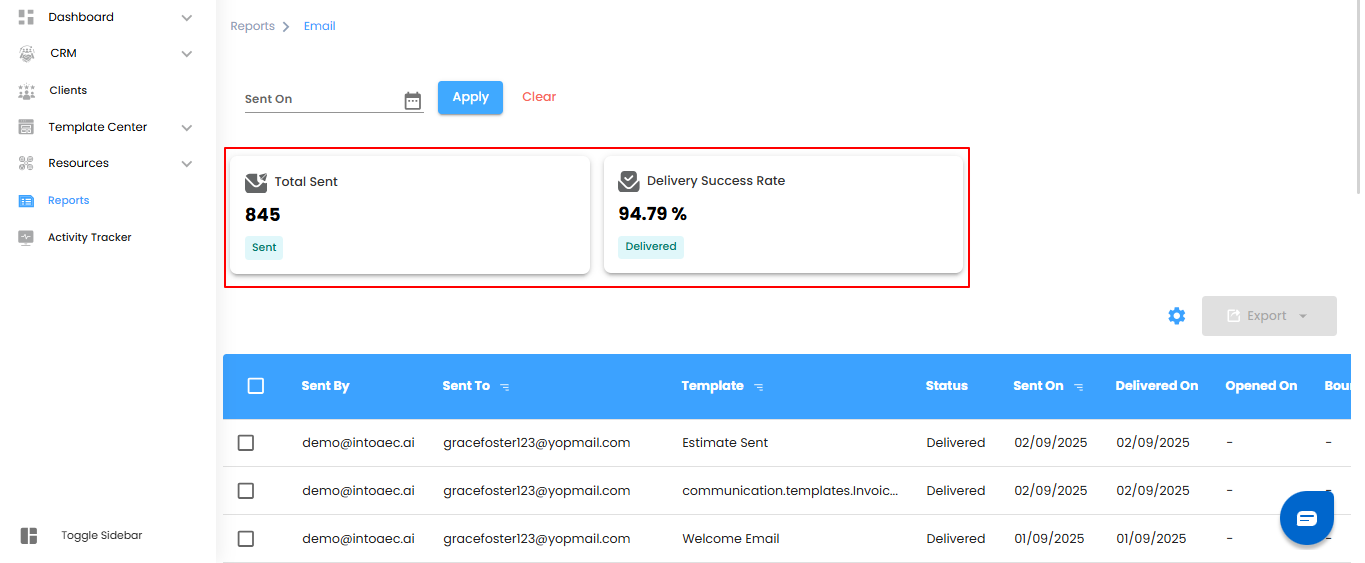
Email Dashboard Overview – Your Communication Snapshot
Think of the dashboard as your project’s email command center—giving you a quick view of overall performance and delivery efficiency.
Key Metrics You’ll Find:
- Total Emails Sent – The total number of emails dispatched through the system.
- Delivery Success Rate – The percentage of emails successfully delivered to recipients.
Pro tip: Monitor these metrics regularly—they provide instant insight into email performance and help you catch any delivery issues early.
Email Reports – Your Communication Tracker
The Email Report gives you complete visibility into every message sent from your project. From the sender and recipient to delivery and open status, everything is tracked in one place for full transparency.
What You Can Do Here
- Track Senders & Recipients
See exactly who sent the email and who received it.
- Check Templates
Identify which template (if any) was used for the email.
- Monitor Status
Follow the journey—Sent → Delivered → Opened → Bounced.
- View Key Dates
Get clear timestamps for when the email was sent, delivered, opened, or bounced.
Pro Tip: Use the Email Report to catch delivery issues early and measure engagement at a glance.
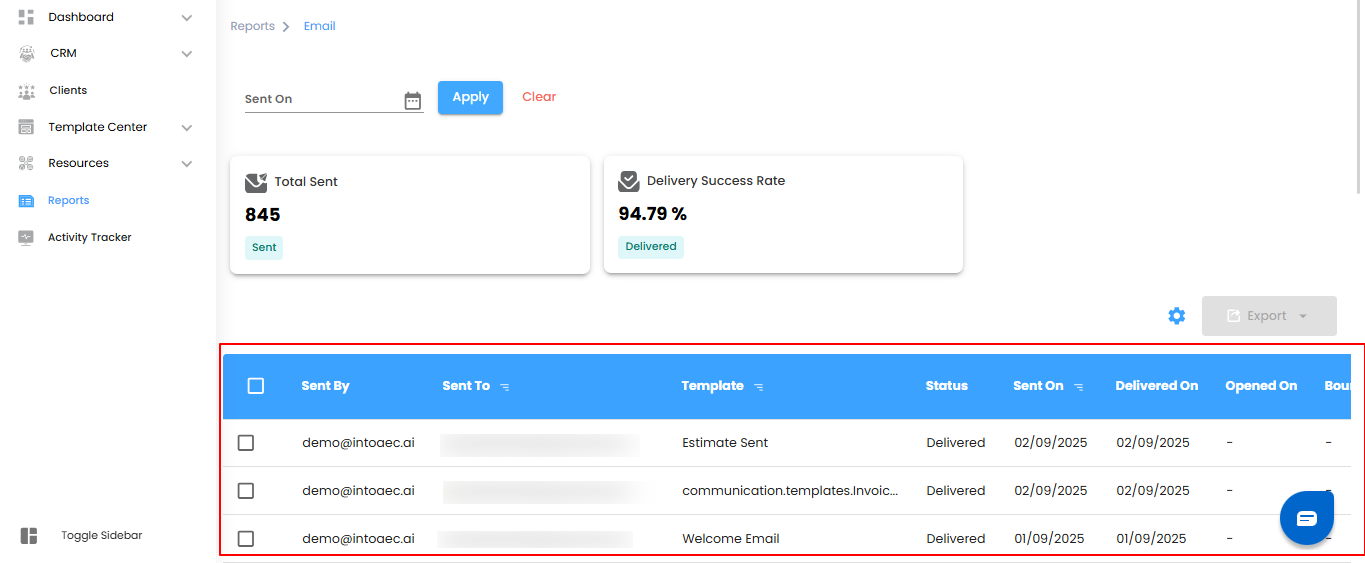
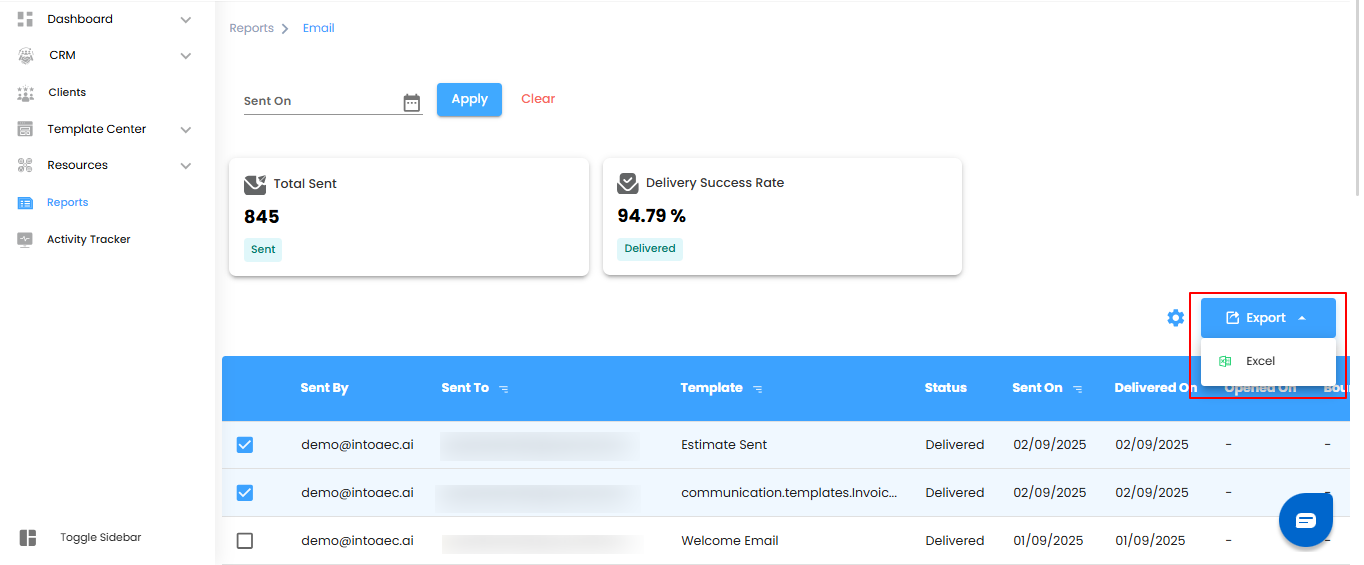
Bulk Selection & Export Options
Easily manage multiple emails at once with bulk selection. Whether you need just one email or a whole batch, exporting is simple and quick.
What You Can Do Here
- Select Single or Multiple Emails
- Choose exactly what you want—one email or many at a time.
- Export with Ease
- Download the selected data in Excel format for reviews, reports, or record-keeping.
Pro Tip: Use bulk export to save time and keep a clean, organized record of all your email activities.
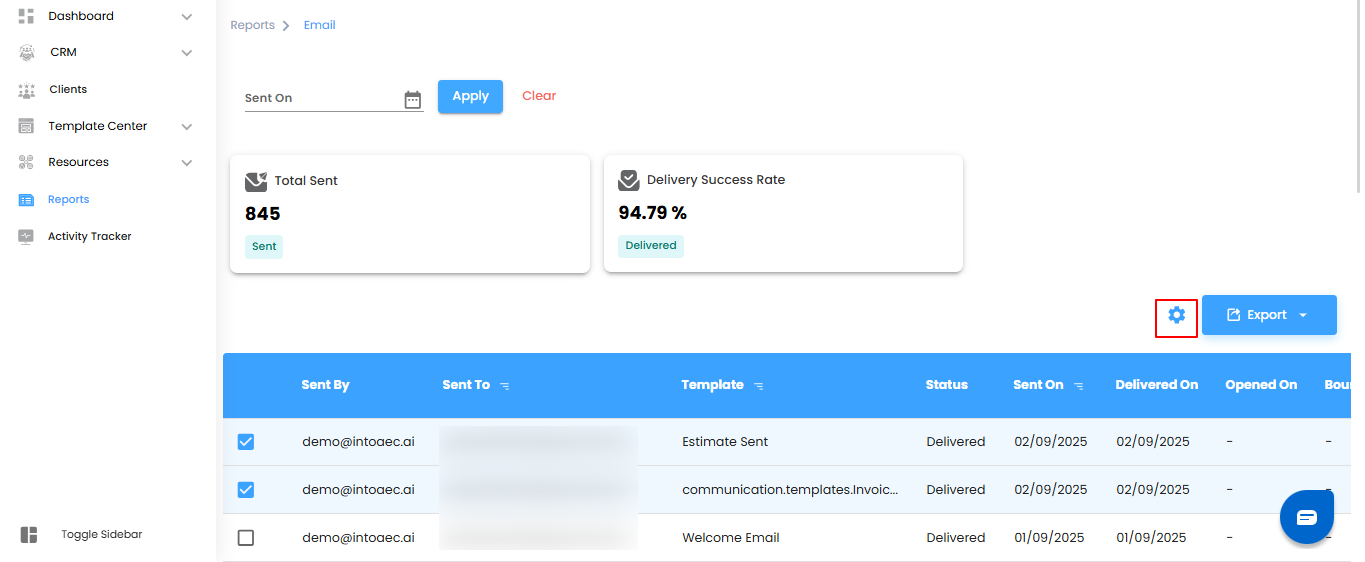
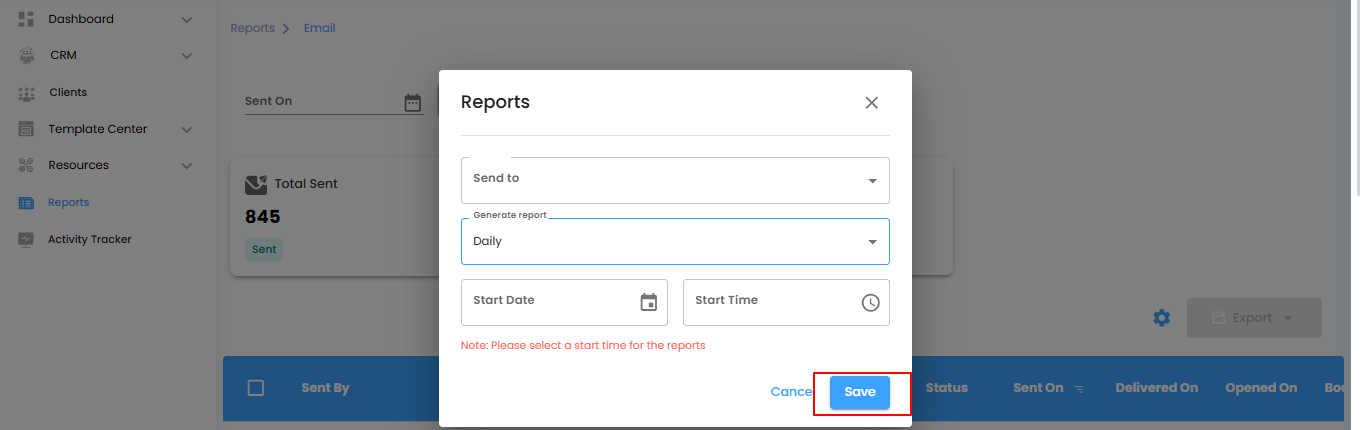
Configuring Email Report Automation
Automated email reports keep you updated without the hassle of manual checks. Set it up once, and let the system handle the rest.
What You Can Do Here
- Open the Automation Setup
- Click the Configure Report Automation icon to launch the setup popup.
- Set Your Preferences
- Define how and when you’d like reports delivered—tailored to your workflow.
- Save & Automate
- Confirm your settings, and reports will start arriving automatically.
Pro Tip: Configure automation to align with your team’s schedule—daily, weekly, or monthly—so everyone stays in sync without lifting a finger.
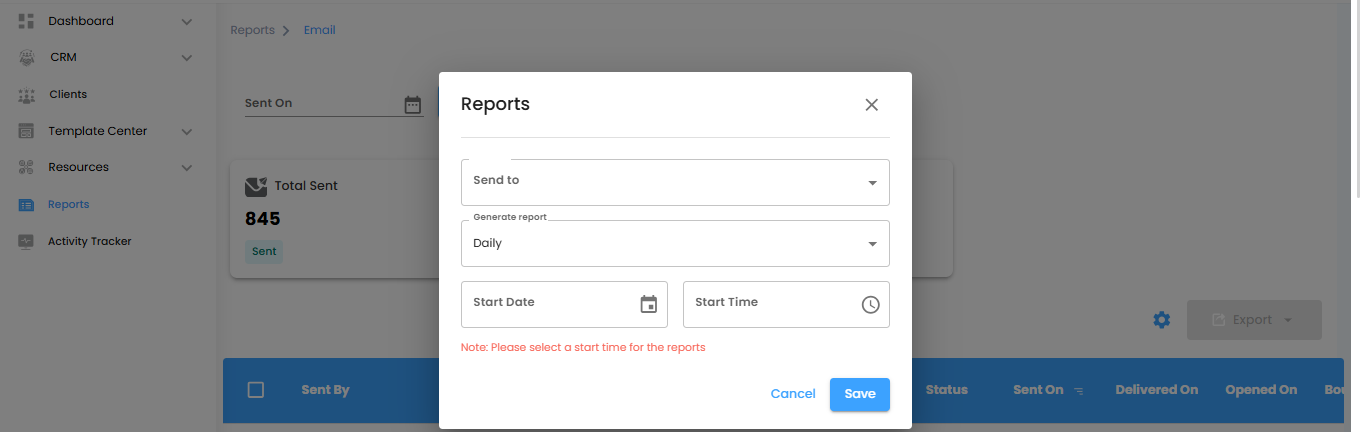
Choosing Recipients & Report Frequency
Decide who should receive your automated reports and how often they should be delivered. With flexible scheduling, you’ll never miss an update.
What You Can Do Here
Select Recipients
Use the Send To dropdown to pick the users who will receive the reports.
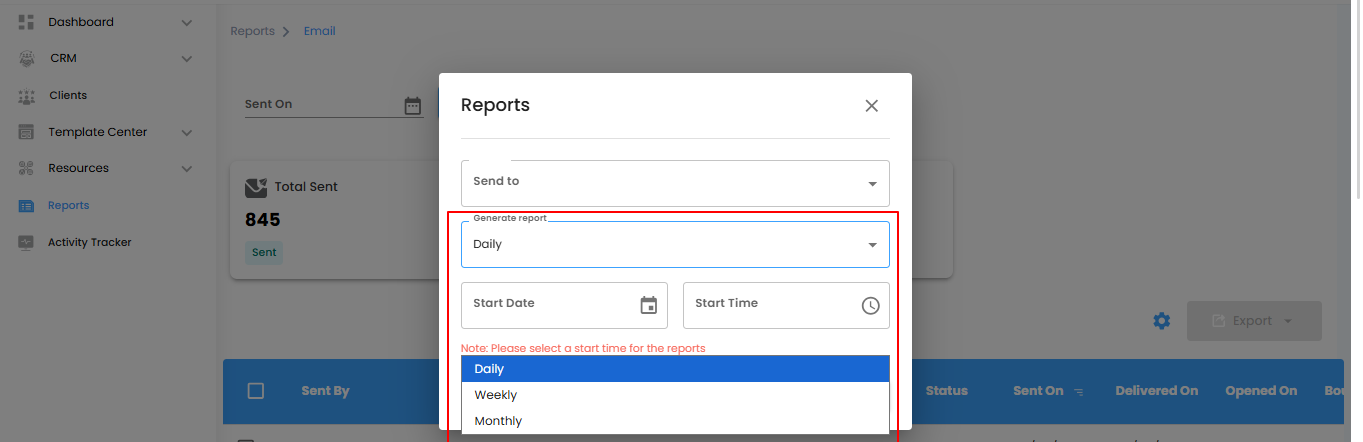
Set Report Frequency
Control how often reports are generated and delivered:
- Daily (Default): Generated within an hour of your chosen time.
- Example: If you set 6:00 PM, the report will be created between 6:00–6:59 PM.
- Weekly: A weekly summary sent at the same time and day in the following week.
- Monthly: A monthly overview delivered on the same day and time the next month.
Pro Tip: Align report schedules with your team’s review cycles—daily for quick insights, weekly for progress checks, and monthly for big-picture analysis.
Setting Start Date & Finalizing Automation
Decide when your automation should begin and confirm the setup to get reports delivered on schedule.
What You Can Do Here
- Choose Start Date & Time
- Pick the exact date and time for your automation to start.
- Note: Without a start time, reports won’t generate.
Save or Cancel
- Click Save to confirm and activate report automation.
- Click Cancel if you don’t want to proceed.
Pro Tip: Always set the start time carefully—this ensures your reports begin exactly when you need them.
Email Reports – Stay Informed
The Email Reports section helps you keep a close eye on every communication—delivery, performance, and engagement, all tracked in real time.
What You Can Do Here
- Check which emails were sent, delivered, or bounced.
- Measure delivery rates to review performance.
- Track when recipients open and engage with emails.
Pro Tip: Regularly review your reports to spot trends and improve your email success rate.
Was this article helpful?
That’s Great!
Thank you for your feedback
Sorry! We couldn't be helpful
Thank you for your feedback
Feedback sent
We appreciate your effort and will try to fix the article