Overview
The Purchase Order Report is your procurement command center - every PO you've issued, every vendor's response to it, and every dollar committed, all tracked in one place. No more piecing together spending across separate vendor threads.
What You Can Do Here
- Track issued POs - see every purchase order sent to vendors
- Monitor vendor responses - spot who's acknowledged or updated a PO, and who hasn't
- Analyze purchase amounts - understand total costs and spending trends across projects
Getting There
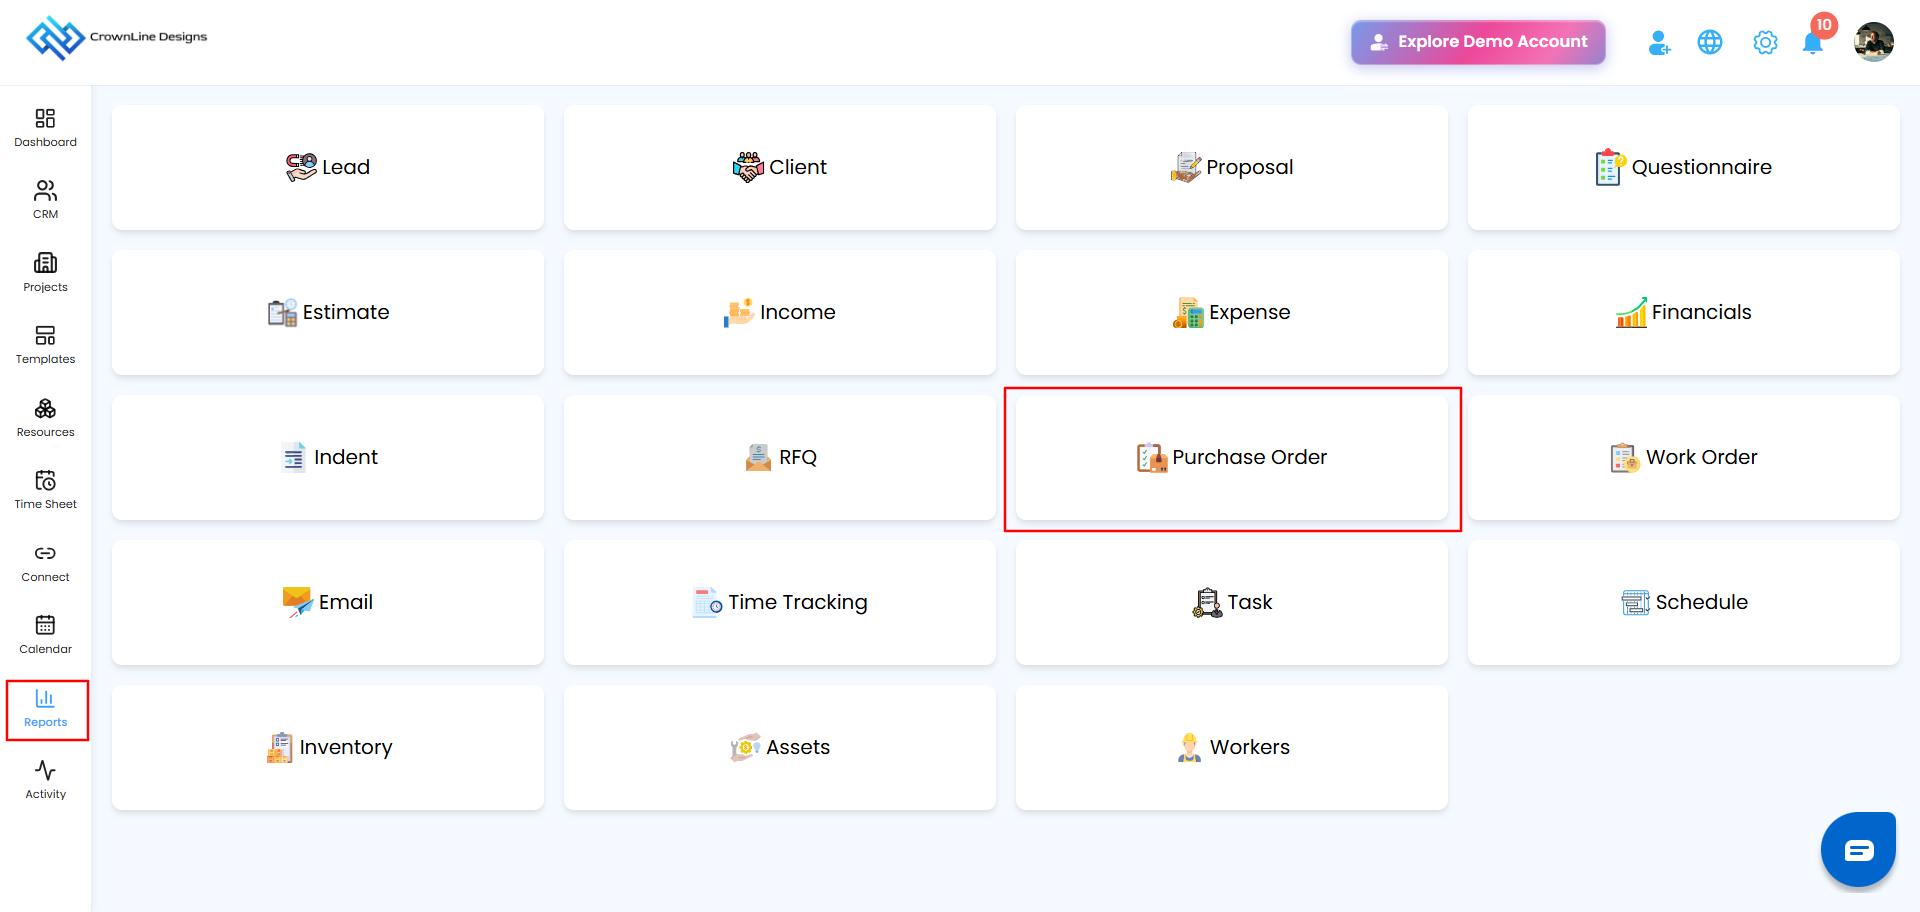
- Go to Reports from the main menu.
- Select Purchase Order to open the dashboard.
Dashboard at a Glance
Three numbers give you the full shape of your procurement activity:
- Total Purchase Orders - how many POs have been issued
- Total Accepted Purchase Orders - how many vendors have accepted
- Total Purchase Order Amount - the combined value of everything issued
Filtering Your Results
Skip the scrolling and go straight to what you need:
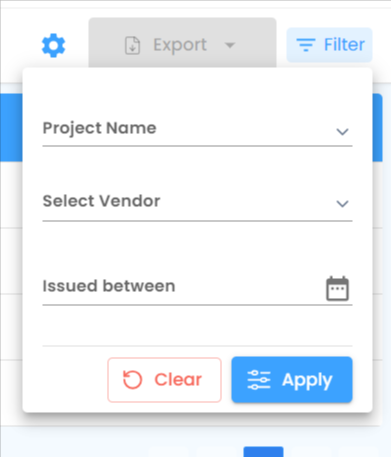
- Project Name - POs for one specific project
- Select Vendor - POs tied to a specific vendor organization
- Issued Between - POs issued within a date range
Click Apply to update the dashboard, or Clear to reset.
The Purchase Order Table
Each row is a snapshot of where that commitment stands:
| Column | What It Tells You |
|---|---|
| Project Name | The project associated with the PO |
| Vendor Organization | Who the PO was issued to |
| Vendor Amount | The vendor's quoted price |
| PO ID | The purchase order's unique identifier |
| Organization Status | Your side's update - Sent or Price Updation Received |
| Vendor Status | The vendor's side - Received or Price Updated |
| Issued On | The date the PO was issued |

Bulk Selection and Exporting
Select multiple purchase orders to manage them together instead of one at a time. Click Export to download the data as an Excel file - including project names, vendor details, status, issued dates, and total amounts - ready for audits, analysis, or sharing with your team.

Automating Your Reports
Set it up once, and let your Purchase Order insights land in the right inbox on their own.
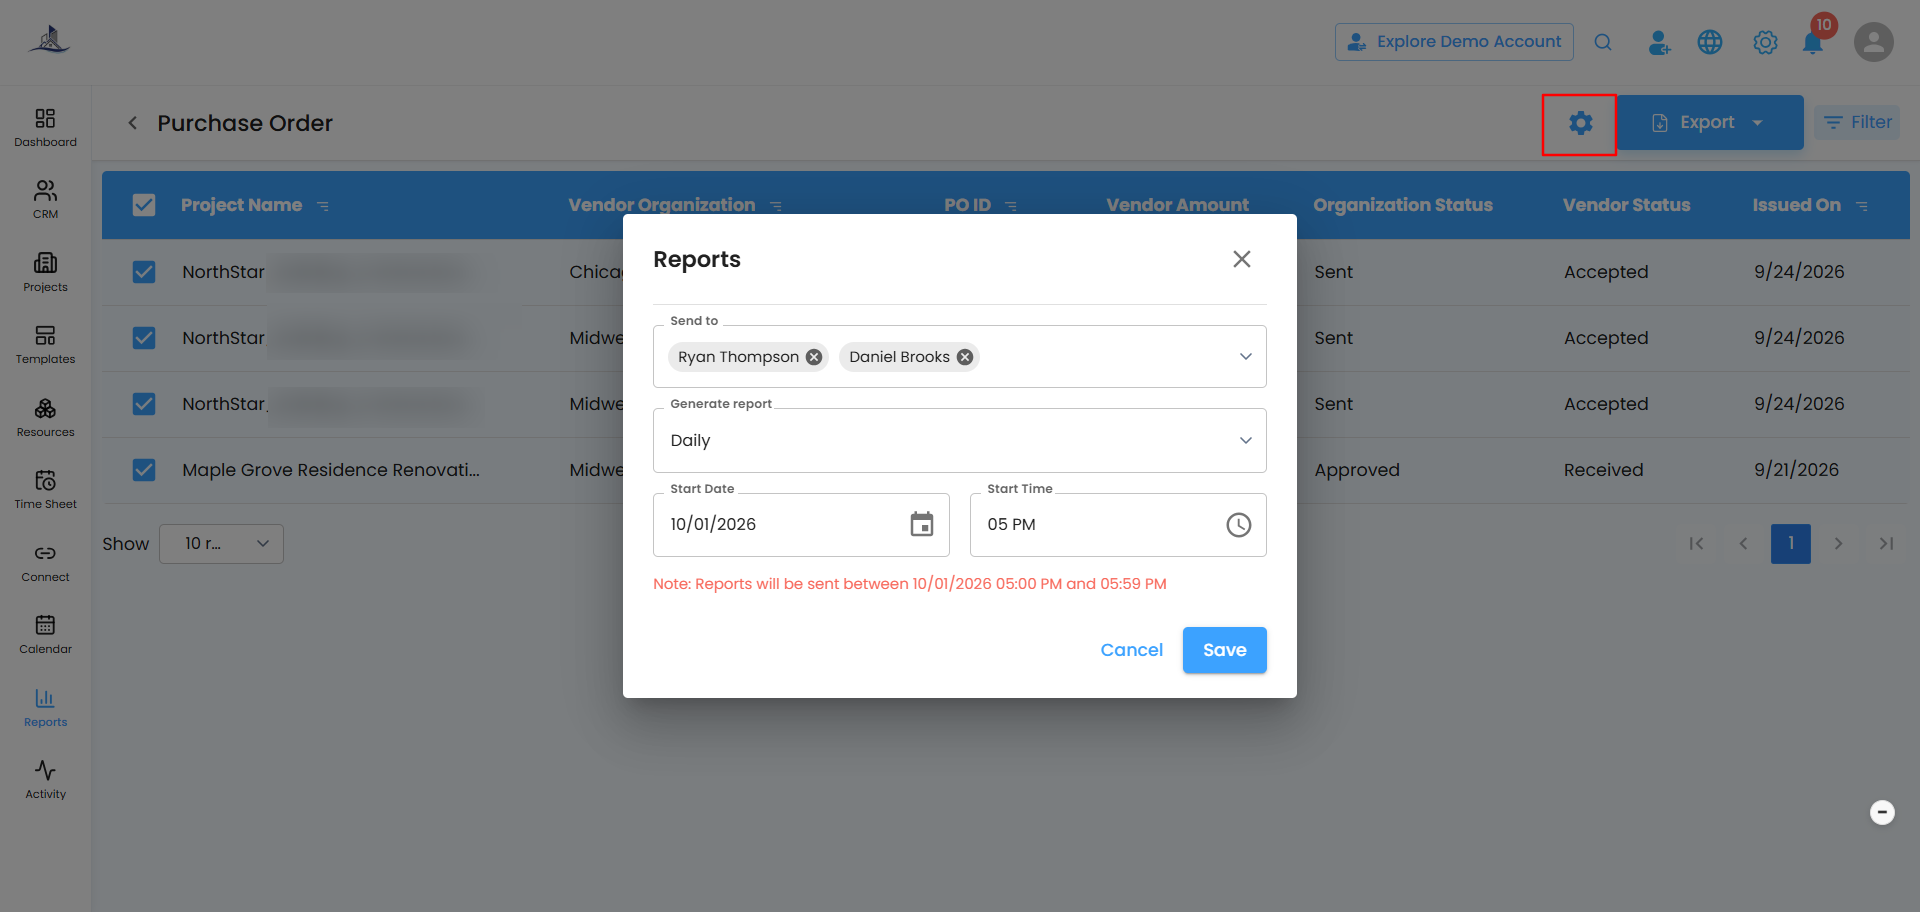
- Click the Configure Report Automation icon to open the popup.
- Choose your schedule under Generate Report:
- Daily (default) - generated within an hour of your chosen time (set 6:00 PM, and it lands between 6:00–6:59 PM)
- Weekly - a week's summary, same day and time each week
- Monthly - a monthly overview, same day and time each month
- Set the Start Date and Start Time, then click Save - or Cancel to back out.
Editing Vendor Details on the Fly
Need to fix a vendor's details mid-PO? No need to leave the screen - vendor details can be edited directly from the Add Vendor panel in RFQ, Purchase Order, and Work Order workflows alike, so a quick correction doesn't interrupt what you're working on.
Related Articles
Was this article helpful?
That’s Great!
Thank you for your feedback
Sorry! We couldn't be helpful
Thank you for your feedback
Feedback sent
We appreciate your effort and will try to fix the article