Schedule Reports – Overview
The Schedule Reports section lets you track scheduled tasks, monitor durations, and identify deviations from planned timelines—helping you manage project schedules efficiently.
What You Can Do Here
- Track Scheduled Tasks – Monitor progress of all planned tasks.
- Monitor Durations – Check how long scheduled tasks take compared to estimates.
- Identify Deviations – Spot tasks that are ahead or behind schedule.
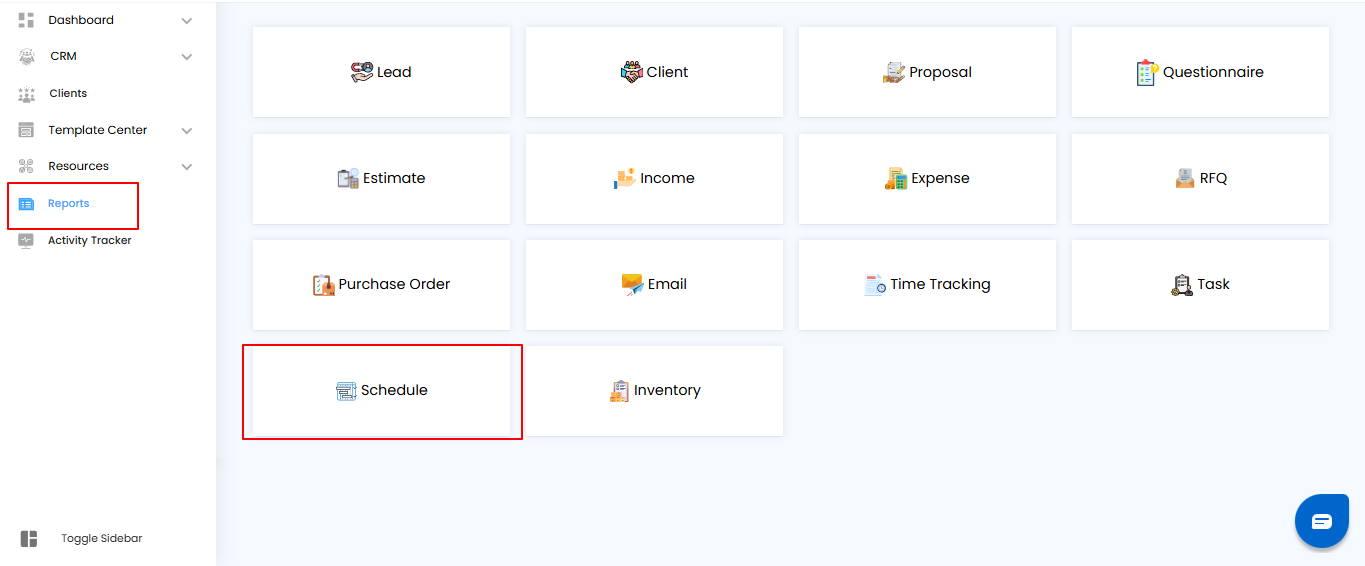
How to Access Schedule Reports
- Go to Reports in the main menu.
- Select Schedule to open the report.
Pro Tip: Use Schedule Reports regularly to keep projects on track and prevent timeline delays.
Using Filters in Schedule Reports
Filters help you focus on the schedules that matter most, making it easier to track progress and manage resources efficiently.
What You Can Do Here
- Project Name – View schedules for a specific project
- Start Between – Set a date range to filter schedules by their start date.
- Select Assignee – Focus on schedules assigned to specific team members.
- Apply or Clear Filters – Click Apply to activate filters, or Clear to reset your view.
Pro Tip: Combine multiple filters to quickly identify delayed tasks, high-priority schedules, or resource allocation across projects.

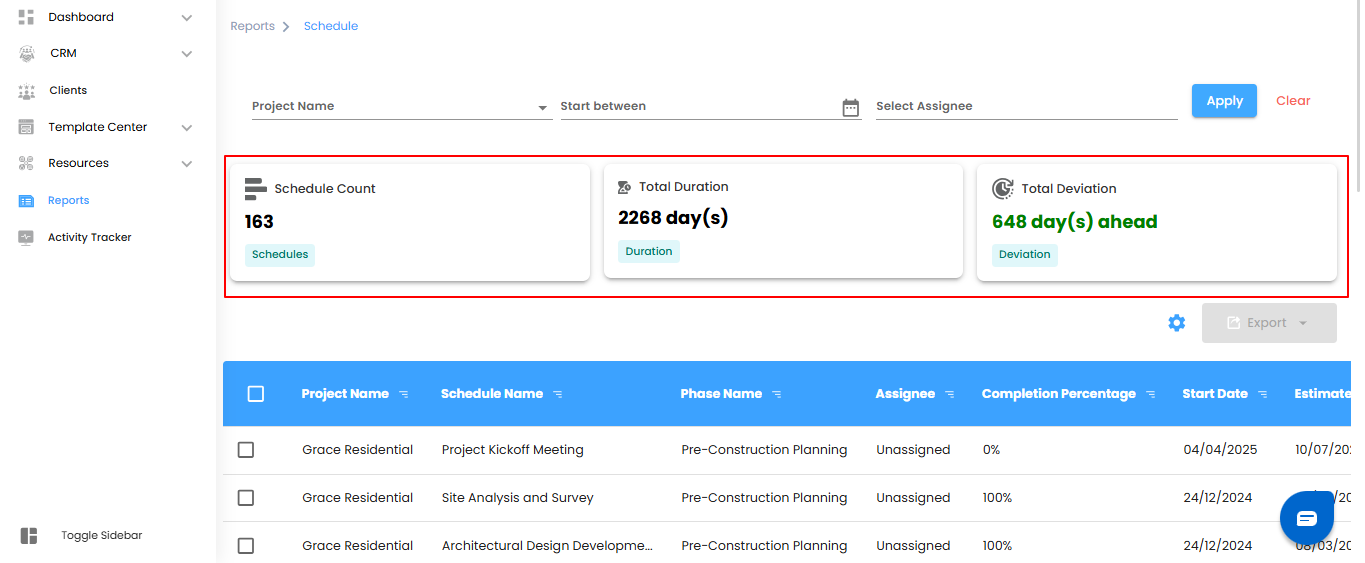
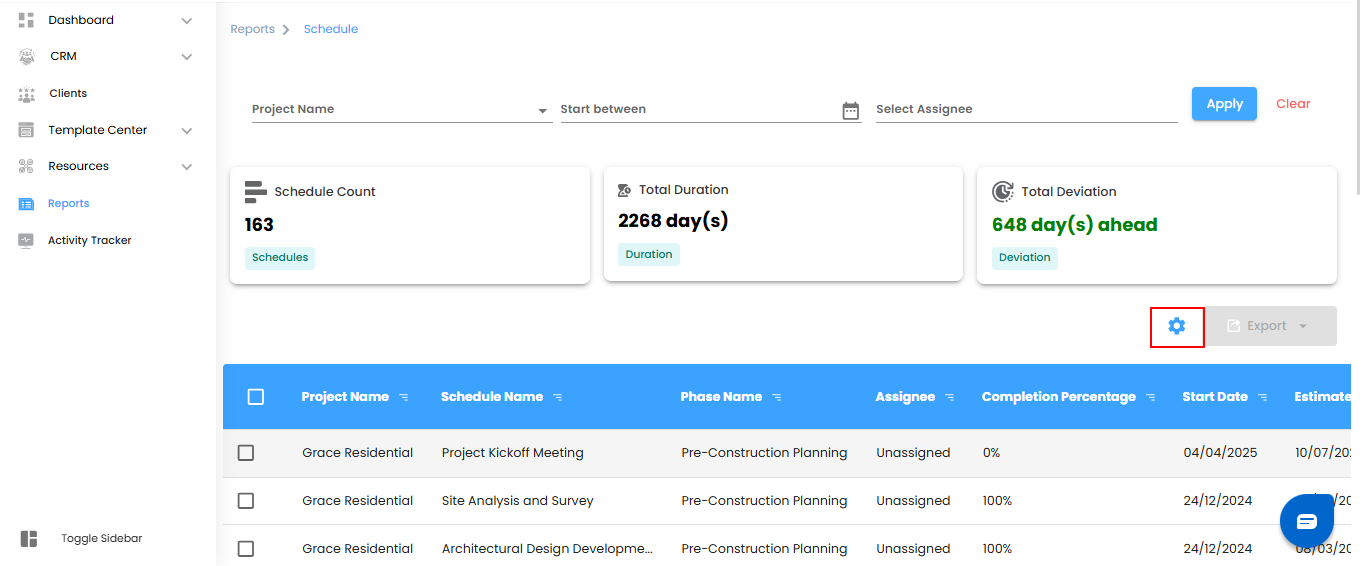
Schedule Dashboard – Overview
The dashboard provides a quick snapshot of scheduled tasks, helping you monitor progress, time spent, and deviations from planned timelines.
What You Can Do Here
- Schedule Count – See the total number of schedules based on applied filters.
- Total Duration – Review the cumulative time for all scheduled tasks.
- Total Deviation – Track differences between estimated and actual completion times.
Pro Tip: Use the dashboard to quickly identify schedule delays and adjust resources to keep projects on track.
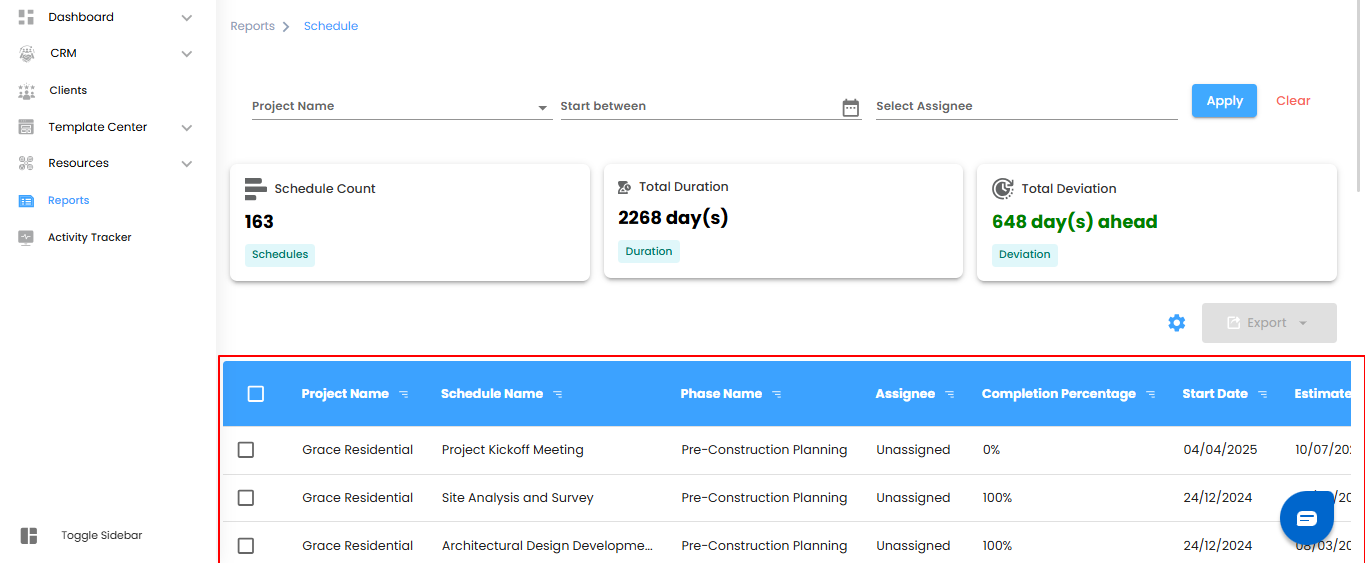
Schedule Table – Detailed View
The scheule table provides a complete overview of each schedule, giving you visibility into assignments, timelines, and deviations.
What You Can Do Here
- Project Name – Identify the project linked to each schedule.
- Schedule Name – View the name of the schedule
- Phase Name – See which project phase the schedule belongs to.
- Assignee – Check who is responsible for the schedule.
- Completion Percentage – Track how much of the schedule is completed.
- Start Date – See when the schedule began.
- Estimated Completion Date – Review the expected completion date.
- Actual Completion Date – Check when the schedule was actually completed.
- Total Duration – Monitor the total time spent on the schedule.
- Deviation – Track differences between estimated and actual completion times.
- Created On – Know when the schedule was created.
Pro Tip: Use the table to spot delays, manage workloads, and improve schedule planning across projects.
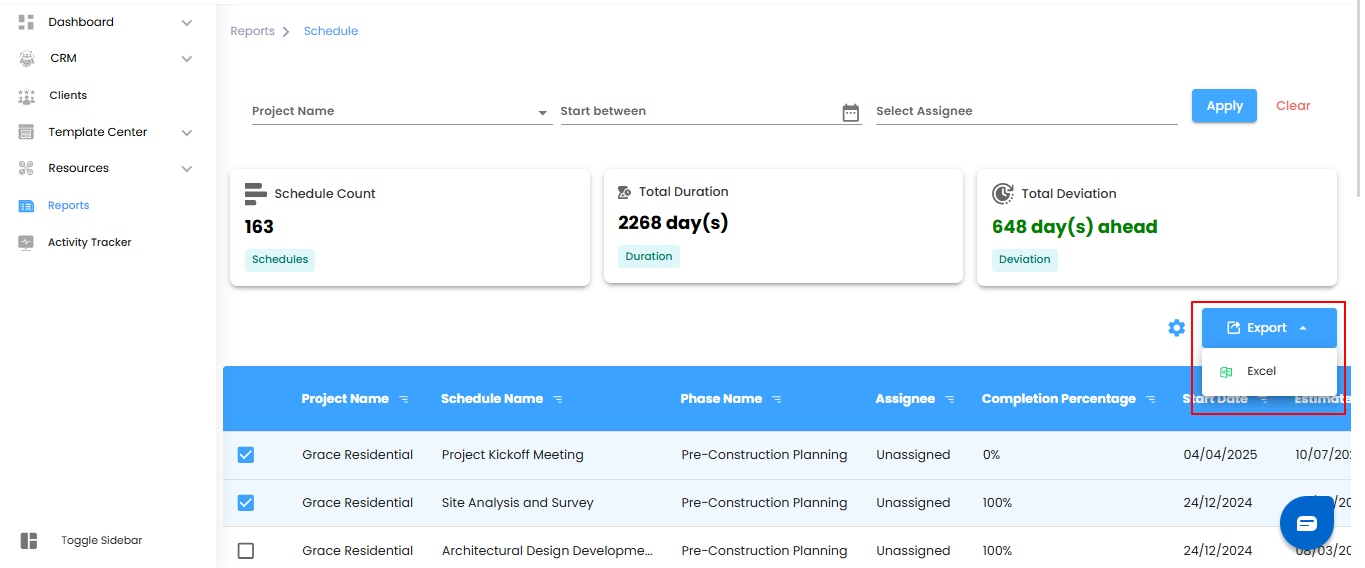
Bulk Actions & Exporting Data
Manage multiple schedules efficiently and export them for reporting or analysis.
What You Can Do Here
- Bulk Selection – Select multiple schedules at once to perform actions.
- Export to Excel – Download selected schedule details in Excel format for easy review or sharing.
Pro Tip: Use bulk selection and export to save time and maintain organized records for audits or project tracking.
Configuring Schedule Report Automation
Automate schedule reports to get regular updates on progress and timelines without manual effort.
What You Can Do Here
- Open Automation Setup – Click the Configure Report Automation icon to launch the Schedule Report Automation pop-up.
- Set Preferences – Define report frequency, recipients, and other settings.
- Save & Activate – Confirm your settings to start automated schedule reporting.
Pro Tip: Schedule automation to match your team’s workflow—daily for quick updates, weekly for progress summaries, or monthly for overall schedule reviews.
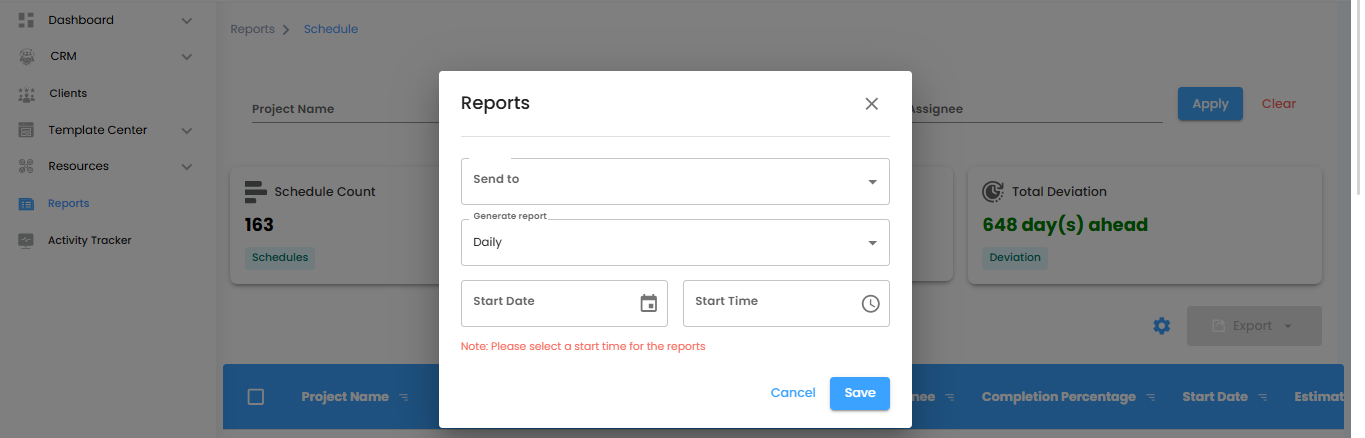
Selecting Recipients & Report Frequency
Set up who receives automated schedule reports and how often they are delivered.
What You Can Do Here
- Select Recipients – Use the Send To dropdown to pick the users who should receive the reports.
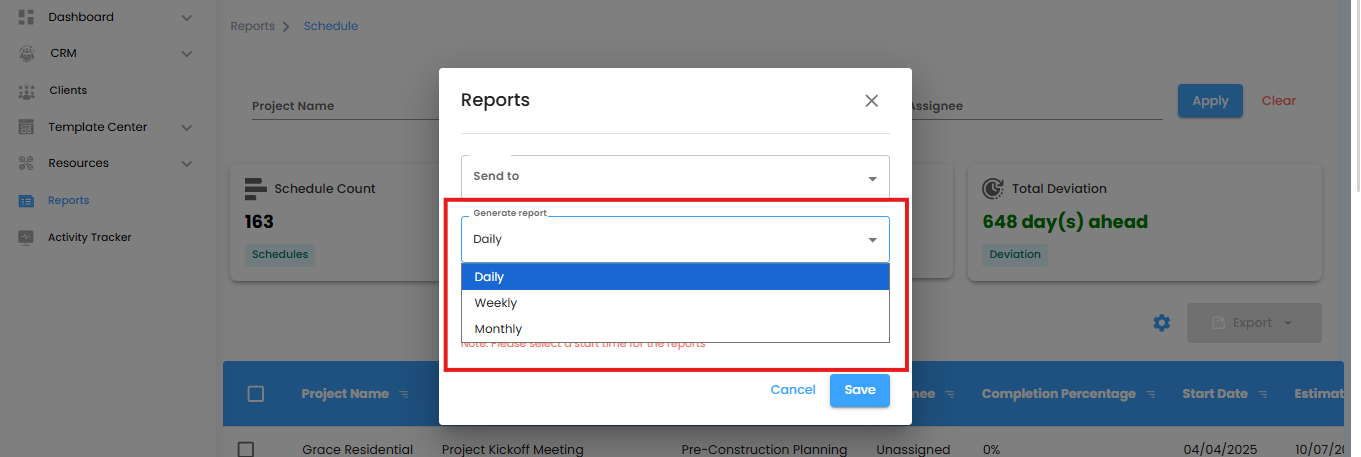
- Set Report Frequency – Choose how often reports are sent:
- Daily (Default): Generated within an hour of your selected time
- Example: If set to 6:00 PM, the report will be ready between 6:00–6:59 PM.
- Weekly: Sends a summary of the current week at the same time and day the following week.
- Monthly: Delivers a report for the current month on the same day and time next month.
Pro Tip: Schedule reports to align with your team’s workflow for timely updates without cluttering inboxes.
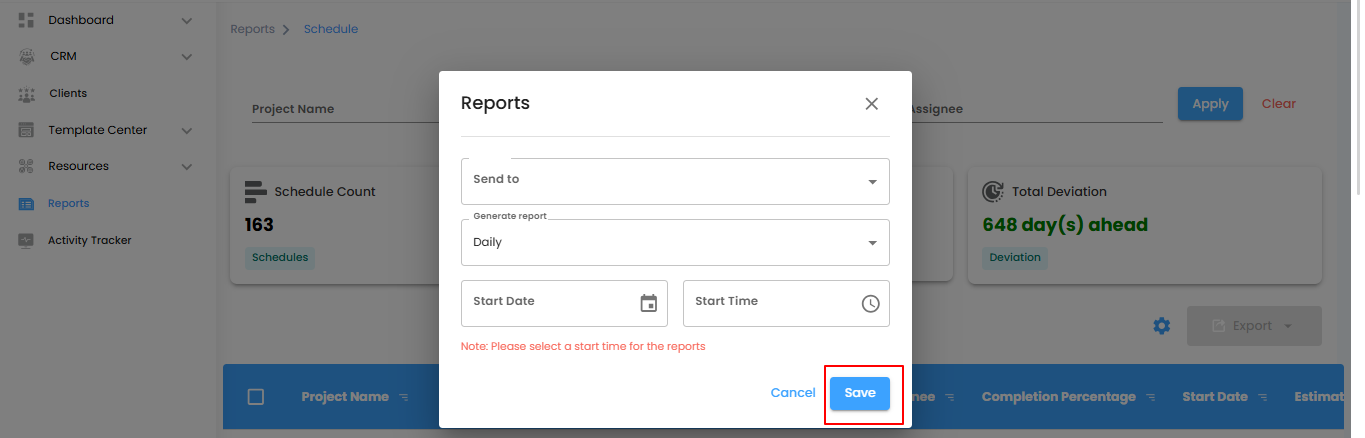
Setting Start Date & Finalizing Automation
Specify when your automated schedule reports should begin and confirm the setup to start receiving updates on time.
What You Can Do Here
- Set Start Date & Time – Choose the date and time for the automation to start.
- Note: Selecting a start time is required to activate automated reports.
- Save or Cancel – Click Save to enable automation, or Cancel to exit without saving changes.
Pro Tip: Double-check the start time to ensure reports are delivered exactly when needed.
Why Use Schedule Reports
Schedule Reports give you a clear view of project timelines, task completion, and deviations—helping you manage schedules efficiently.
What You Can Do Here
- Monitor Project Timelines – Track progress and identify delays.
- Filter Schedules – Focus on specific projects, assignees, or date ranges.
- Export Data – Download schedule details for analysis, reporting, or sharing.
Pro Tip: Regularly review and export schedule reports to maintain control over project timelines and ensure on-time delivery.
Was this article helpful?
That’s Great!
Thank you for your feedback
Sorry! We couldn't be helpful
Thank you for your feedback
Feedback sent
We appreciate your effort and will try to fix the article