Inventory Report – Track Every Item with Precision
The Inventory Report provides a complete view of inventory across projects, consolidating ordered, received, and used items into a single, filterable, and exportable dashboard. Stay on top of material flow and ensure transparency in procurement and usage.
What You Can Do Here
- View Inventory Status – Track ordered, received, and utilized items across projects.
- Analyze Material Flow – Monitor inventory movement from procurement to usage.
- Filter & Export Data – Focus on specific projects, items, or date ranges and export reports for analysis or record-keeping.
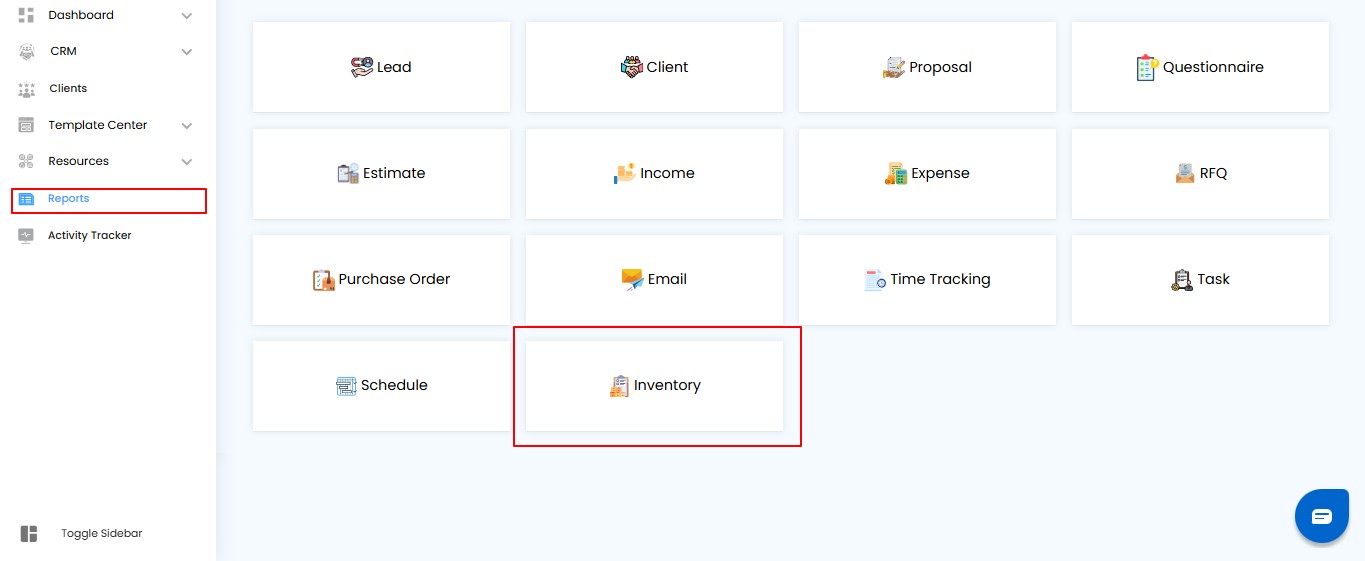
How to Access Inventory Reports
- Go to Reports in the main menu.
- Select Inventory Report to open the detailed dashboard.
Pro Tip: Regularly review inventory reports to prevent shortages, track usage patterns, and maintain transparency in project procurement.
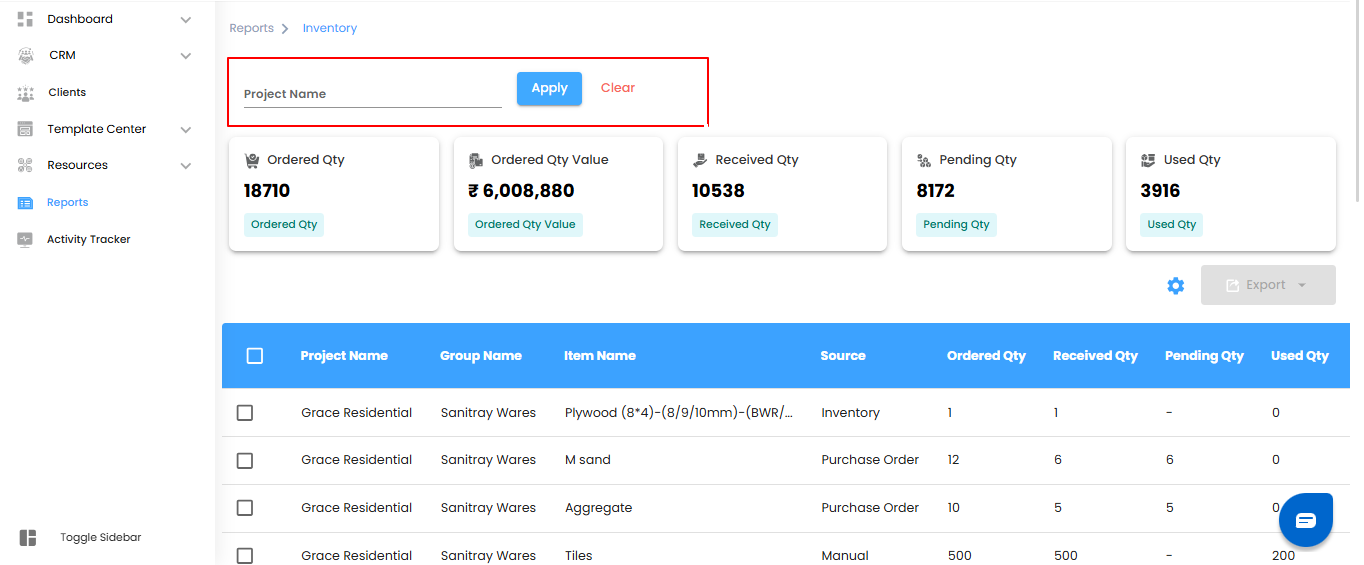
Using Filters to Refine Inventory Data
Filters help you focus on the inventory details that matter most, making it easier to track material flow and manage stock efficiently.
What You Can Do Here
- Project Name – Use the searchable dropdown to select a specific project.
- Apply Filters – Click Apply to update the inventory view based on your selections.
- Clear Filters – Click Clear to remove filters and display all inventory entries.
Pro Tip: Combine filters to quickly identify project-specific inventory usage, monitor stock levels, and spot discrepancies.
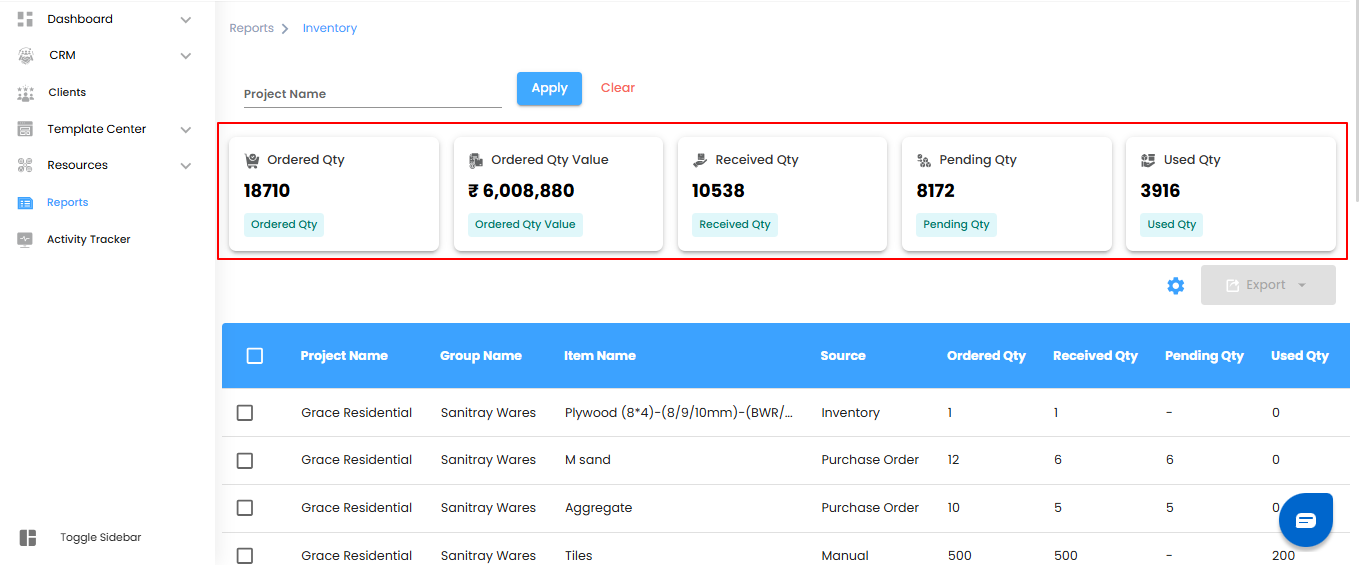
Inventory Dashboard – Overview
The dashboard cards provide a quick snapshot of inventory activity, giving you insights at a glance
What You Can Do Here
- Ordered Qty – View the total quantity of materials ordered across all projects.
- Ordered Qty Value – See the total value of ordered items based on unit price.
- Received Qty – Track the quantity of materials received from orders.
- Pending Qty – Check the remaining quantity yet to be delivered.
- Used Qty – Monitor the quantity of materials consumed in project activities.
Pro Tip: Use these cards to quickly spot supply gaps, track order fulfillment, and ensure efficient material usage across projects.
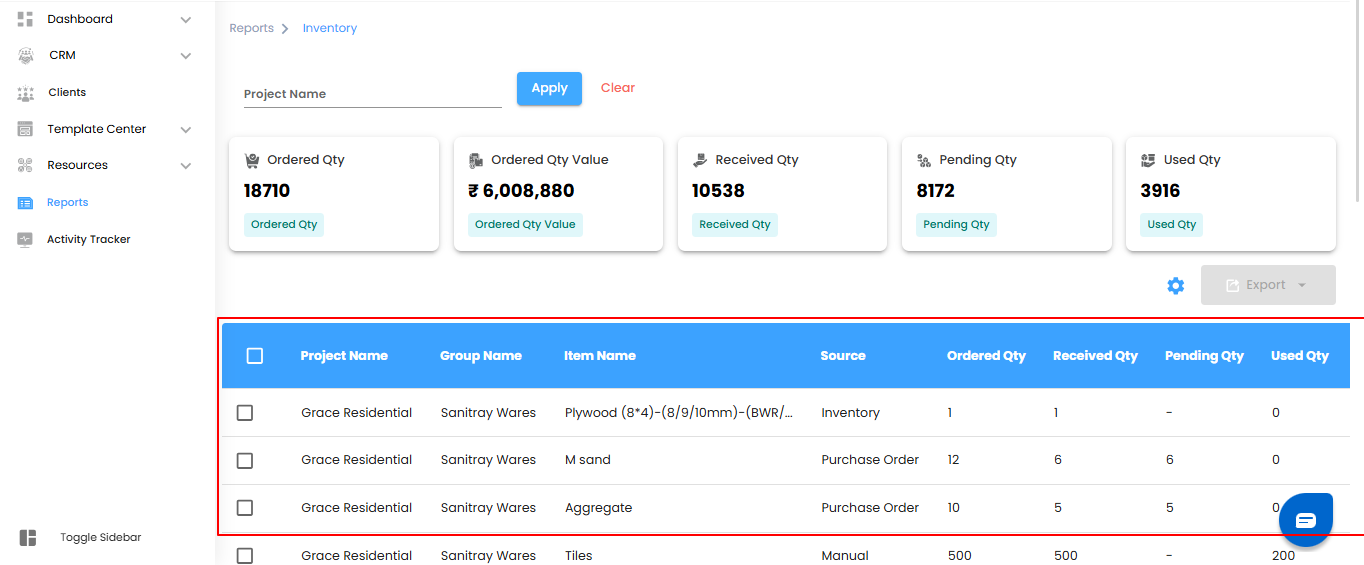
Inventory Report Table – Detailed View
The table provides a comprehensive view of inventory movement, helping you track procurement, usage, and stock status for every item.
What You Can Do Here
- Project Name – Identify the project associated with each inventory item
- Group Name – See the inventory group to which the item belongs for easier categorization.
- Item Name – View the name of the inventory item (e.g., Cement, Tiles, Paint).
- Source – Track how the item was added (e.g., Purchase Order, Inventory, Manually Added).
- Ordered Qty – Check the total number of units ordered.
- Received Qty – Monitor the number of units physically received and logged.
- Pending Qty – See how many units are still pending delivery
- Used Qty – Track the quantity of received items already consumed at the site.
- Damaged Qty – Identify items reported as damaged during delivery or usage.
- Replaced Qty – Monitor the quantity of damaged or faulty items replaced by the vendor.
- Unit – Check the measurement unit of the item.
- Item Rate – View the price per unit of the item.
- Total Rate – Calculate the total cost by multiplying unit rate with ordered quantity.
Pro Tip: Use the table to monitor stock levels, spot discrepancies, and ensure efficient procurement and usage across all projects.
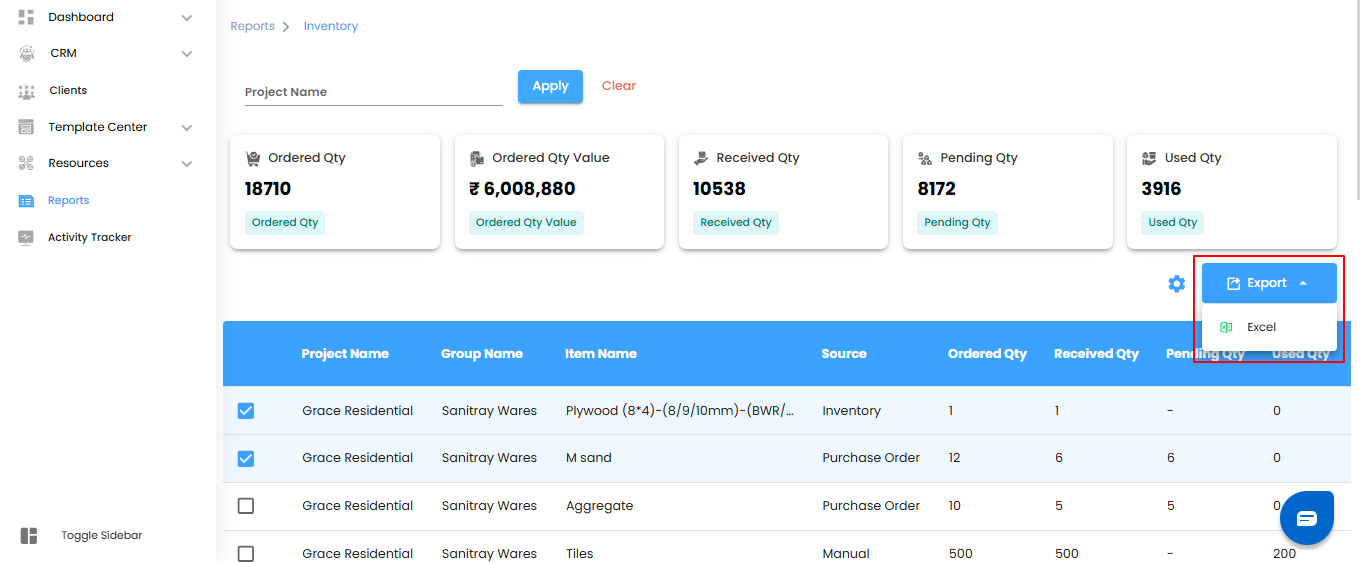
Bulk Actions & Exporting Data
Manage multiple inventory entries efficiently and export them for reporting or analysis.
What You Can Do Here
- Bulk Selection – Select multiple inventory entries using the checkboxes on the left.
- Export to Excel – Download the selected entries in Excel format for offline review, reporting, or sharing.
Pro Tip: Use bulk export to maintain organized records, simplify audits, and track material usage across projects.
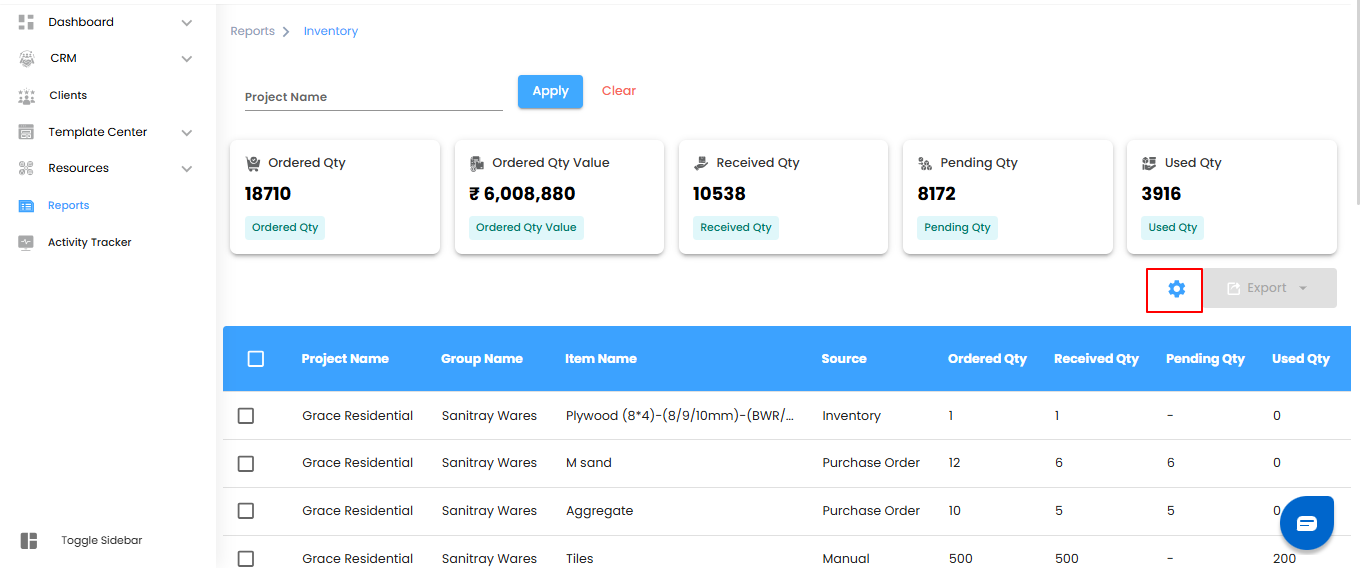
Configuring Inventory Report Automation
Automate inventory reports to receive regular updates without manual effort. Set it once, and the system delivers reports on schedule.
What You Can Do Here
- Open Automation Setup – Click the Configure Report Automation icon in the Reports module to launch the inventory report automation pop-up.
- Set Preferences – Define report frequency, recipients, and other settings.
- Save & Activate – Confirm your settings to start automated inventory reporting.
Pro Tip: Schedule automation to match your review workflow—daily for frequent updates, weekly for summary checks, or monthly for consolidated reporting.
.
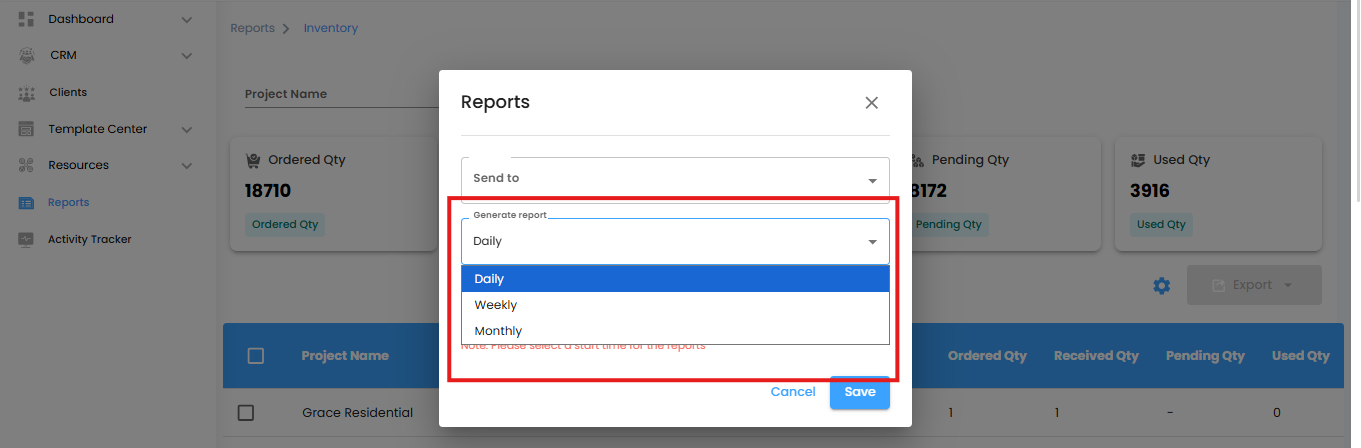
Selecting Recipients & Report Frequency
Choose who receives automated inventory reports and how often they are delivered.
What You Can Do Here
- Select Recipients – Use the Send To dropdown to pick team members or users for the reports.
- Set Report Frequency – Choose how often reports are sent:
- Daily (Default): Generated within an hour of your selected time.
- Example: If set to 6:00 PM, the report will be sent between 6:00 and 6:59 PM.
- Weekly: Sends a summary of the current week on the same day and time the following week.
- Monthly: Delivers a monthly overview on the same day and time next month.
Pro Tip: Align report frequency with your team’s workflow to ensure timely updates without cluttering inboxes.
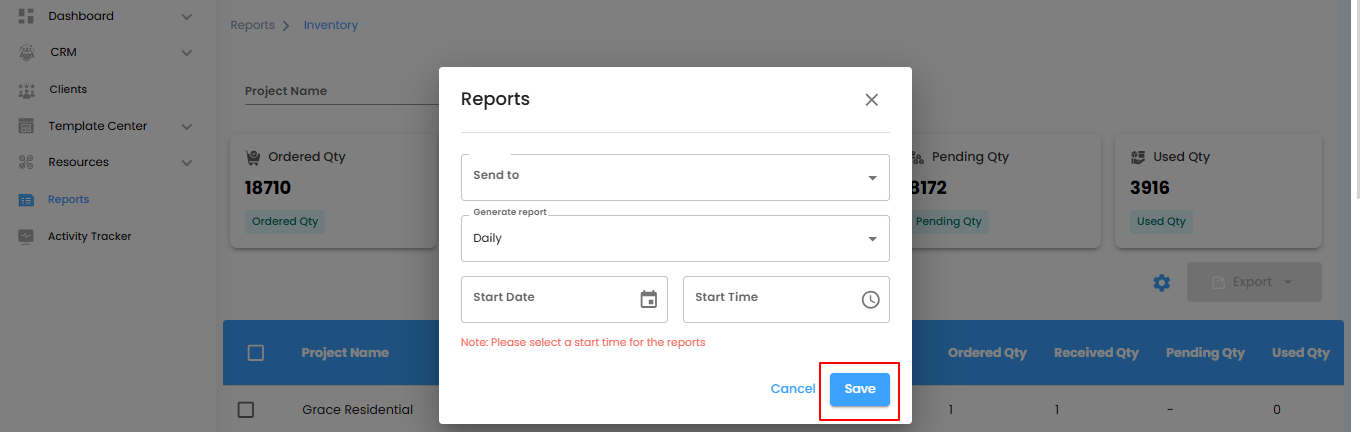
Setting Start Date & Finalizing Automation
Specify when your automated inventory reports should begin and confirm the setup to start receiving updates on schedule.
What You Can Do Here
- Set Start Date & Time – Choose the date and time for the automation to begin.
- Note: Selecting a start time is mandatory—reports are generated based on this setting.
- Save or Cancel – Click Save to activate the automation, or Cancel to discard the configuration.
Pro Tip: Double-check the start time to ensure reports are delivered exactly when needed.
Was this article helpful?
That’s Great!
Thank you for your feedback
Sorry! We couldn't be helpful
Thank you for your feedback
Feedback sent
We appreciate your effort and will try to fix the article